
Rocket Software Integration
The following article describes how to integrate Ataccama and Rocket Software scanners.
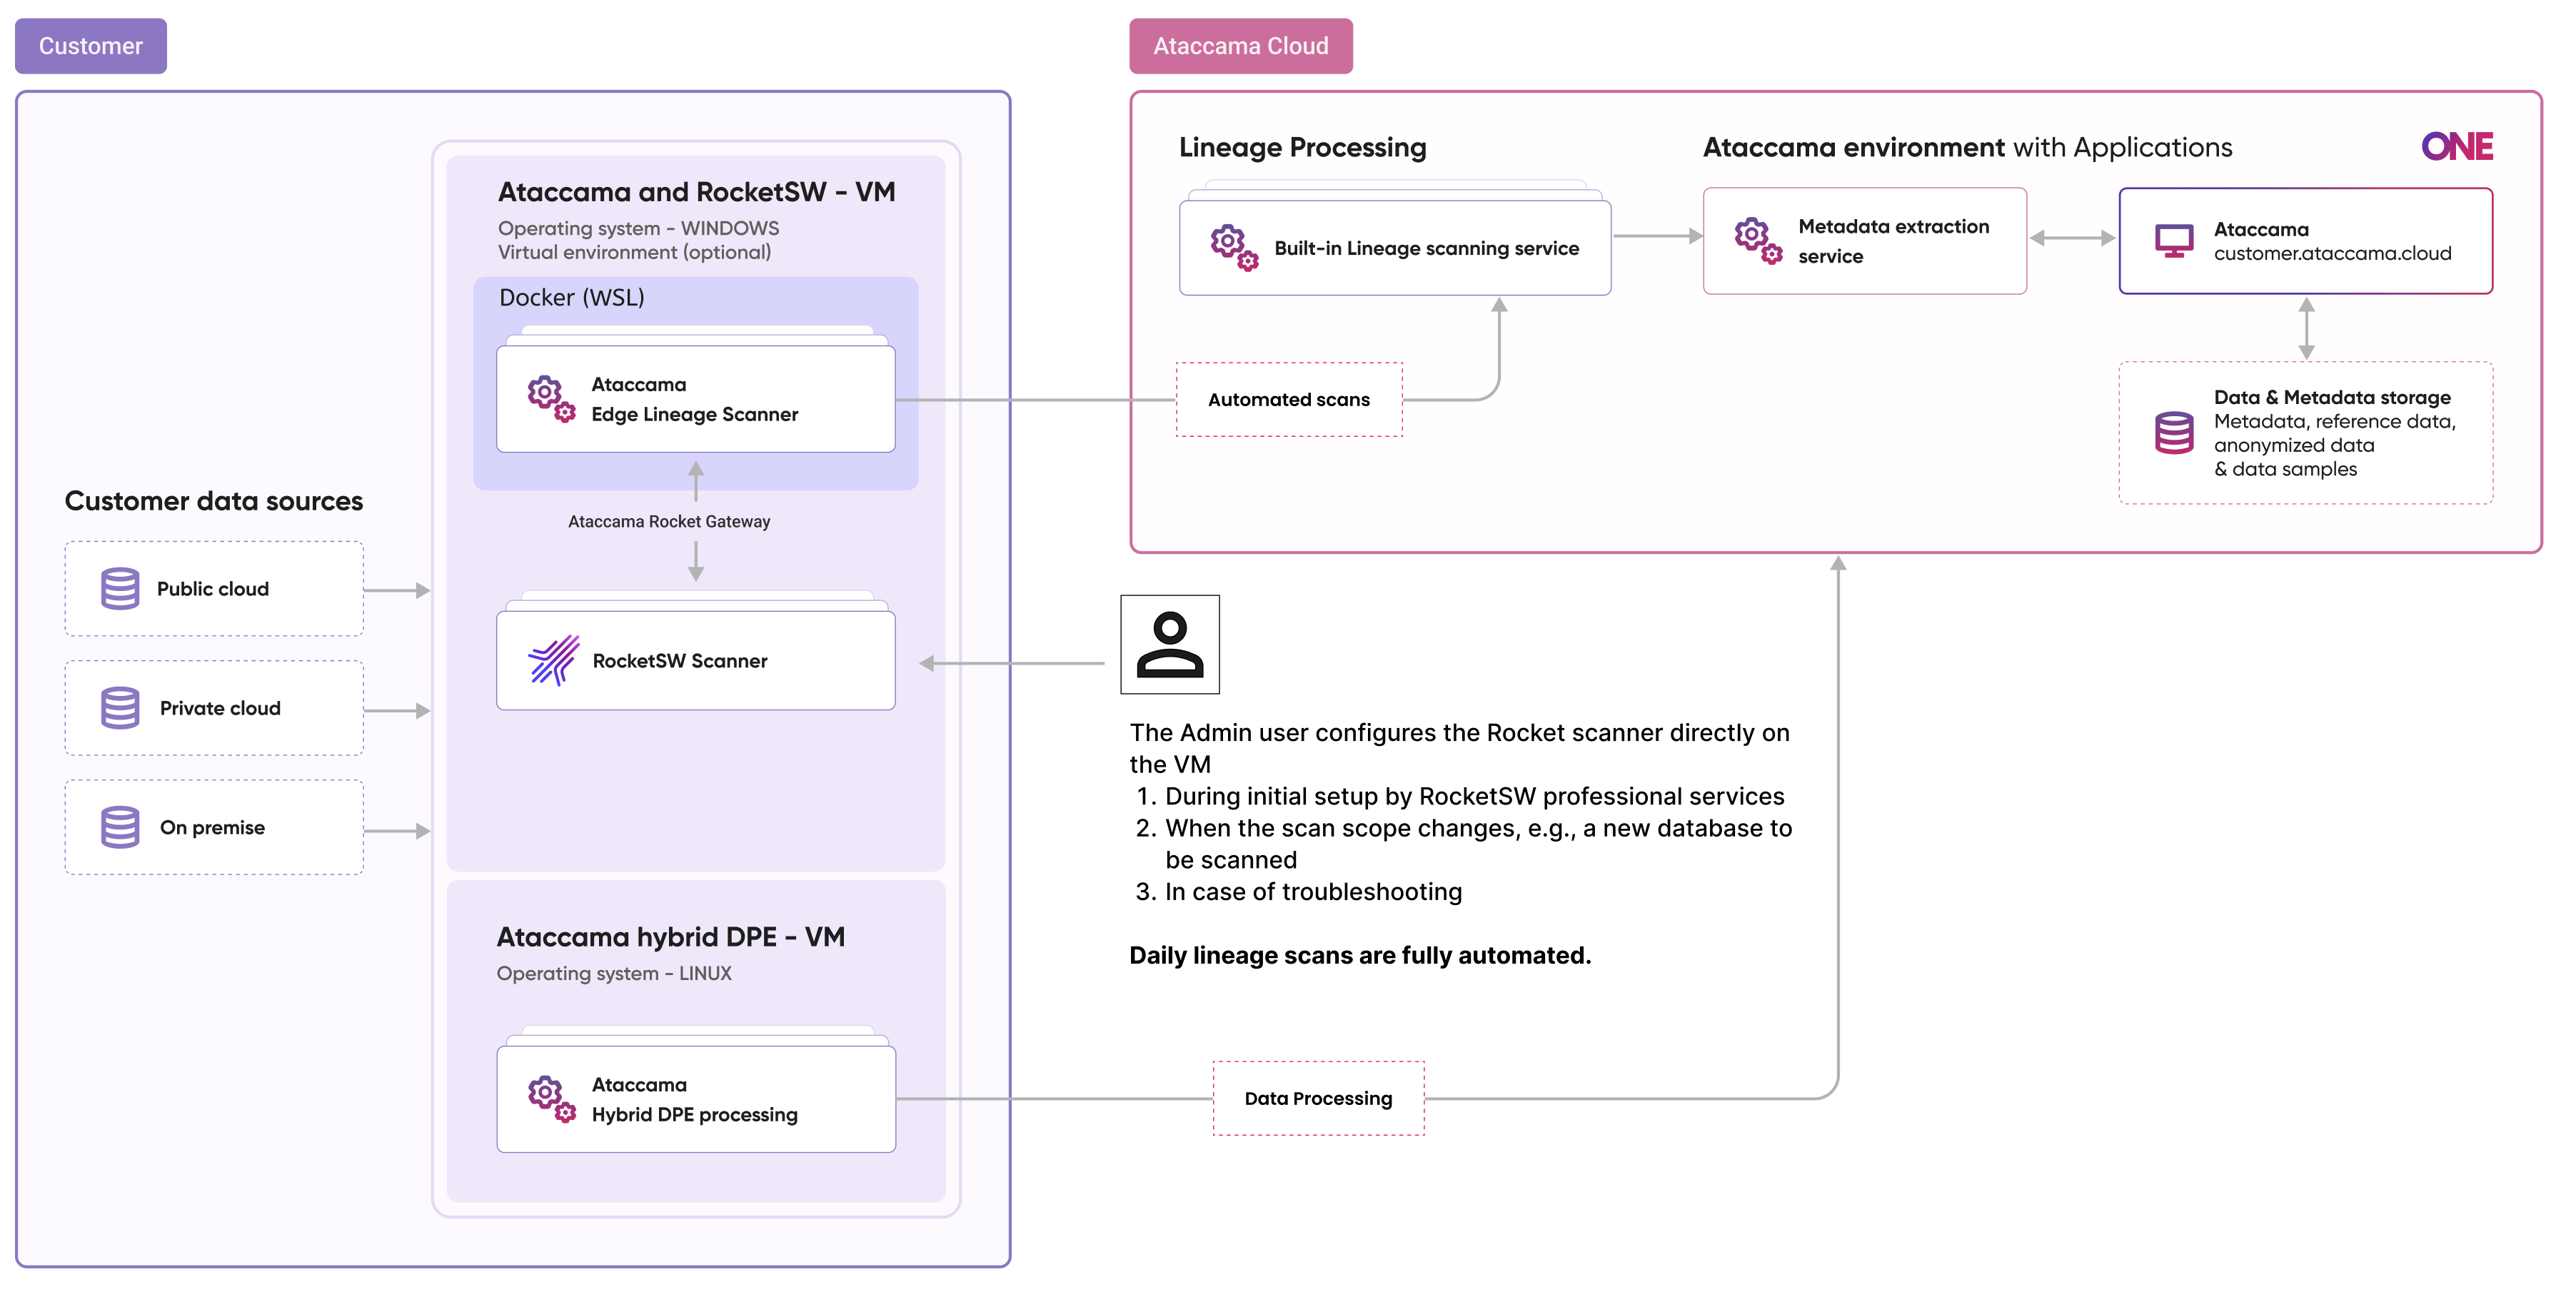
Integration architecture
Ataccama lineage scanners with the Rocket Software integration are supported only on Windows OS, with WSL and a Linux-capable container manager (Docker or Podman). This setup is required as Rocket Software is available only on Windows while Ataccama lineage scanners run on Linux.
We recommend using WSL to run Docker Desktop which is otherwise not available on Windows Server installations. Alternatively, you can use some other tool to run Linux containers on Windows, however, this variant is not tested.
The integration consists of three components:
-
Ataccama standalone lineage scanners: Installed with Rocket integration enabled.
-
Ataccama Rocket gateway: Facilitates communication between Ataccama and Rocket Software scanners.
-
Rocket Software scanners: Configured with Rocket.
Installation
Infrastructure prerequisites
Before proceeding with the installation, make sure the following prerequisites are in place.
Nested virtualization on VMs
When installing WSL on a VM (such as AWS EC2), nested virtualization must be enabled.
Note that nested virtualization is supported only on specific instance types, such as AWS EC2 m8i instances.
Make sure your specific environment supports this.
Networking between Windows and WSL – firewall configuration
Enable networking between WSL and the Windows machine. Create a firewall rule allowing inbound communication on the vEthernet adapter used by WSL.
To find out the address of the adapter, run the ipconfig command in PowerShell and look for vEthernet (WSL) adapter.
Ethernet adapter vEthernet (WSL):

   Connection-specific DNS Suffix  . :
   Link-local IPv6 Address . . . . . : fe80::4d75:776:363c:5c05%12
   IPv4 Address. . . . . . . . . . . : 172.25.128.1
   Subnet Mask . . . . . . . . . . . : 255.255.240.0
   Default Gateway . . . . . . . . . :
Create a firewall rule for the network using the following command:
New-NetFirewallRule -DisplayName "WSL Inbound 8085" -Direction Inbound -Action Allow -Protocol TCP -LocalPort 8085 -RemoteAddress 172.25.128.0/20 -Profile AnyThe RemoteAddress parameter is calculated using the address and subnet mask of the adapter identified earlier.
The default port used for communication in the gateway is 8085.
If you configure a different port for the gateway manually, update the LocalPort (and DisplayName) parameters as well.
Install Ataccama standalone lineage scanners
Install Ataccama lineage scanners in WSL as described in Standalone Lineage Scanner
During installation, enable the Rocket Software integration and pass the address for the gateway (if different from default).
In the previous firewall example, the argument would be:
--rocket-software-gateway-url=http://172.25.128.1:8085Start Ataccama gateway
The gateway is distributed as a ZIP archive containing the rocket-software-gateway folder.
To start the gateway, start a PowerShell terminal session as an Administrator, navigate to the extracted folder, and run the included .bat script.
.\rocket-software-gateway.bat
The gateway runs on port 8085.
It uses the environment variable ROCKETSW_SCAN_CMD as the path to the Rocket script, and the C:\DI\AtaccamaServer\output folder as intermediary storage for scan results.
README.md file contains instructions for changing the default configuration.
Install Rocket Software
Rocket Software is installed by Rocket Software Professional Services. For more information about the installation, see the official Rocket Software documentation.
Run a scan
After installation, create a scan plan with the following definition:
{
  "scannerConfigs": [
    {
      "name": "Rocket scan",
      "sourceType": "ROCKETSW",
      "description": "RocketSW scan plan"
    }
  ]
}
For details, see Built-In Lineage Scanner.
Was this page useful?