
Groups
Groups are a hierarchical representation of data teams. By data teams, we refer to teams of users working with the same data objects. For example, all users who need access to financial data, whether they are from your financial department or sales team, can form one group called Finance.
Each user in a group can have a specific role that represents the responsibilities of the user within this group. One user can be a member of several groups with different roles within those groups.
To manage groups in ONE, you need the ONE Administrator governance role.
| When you start the platform for the first time, a number of preconfigured groups is available by default. |
Overview
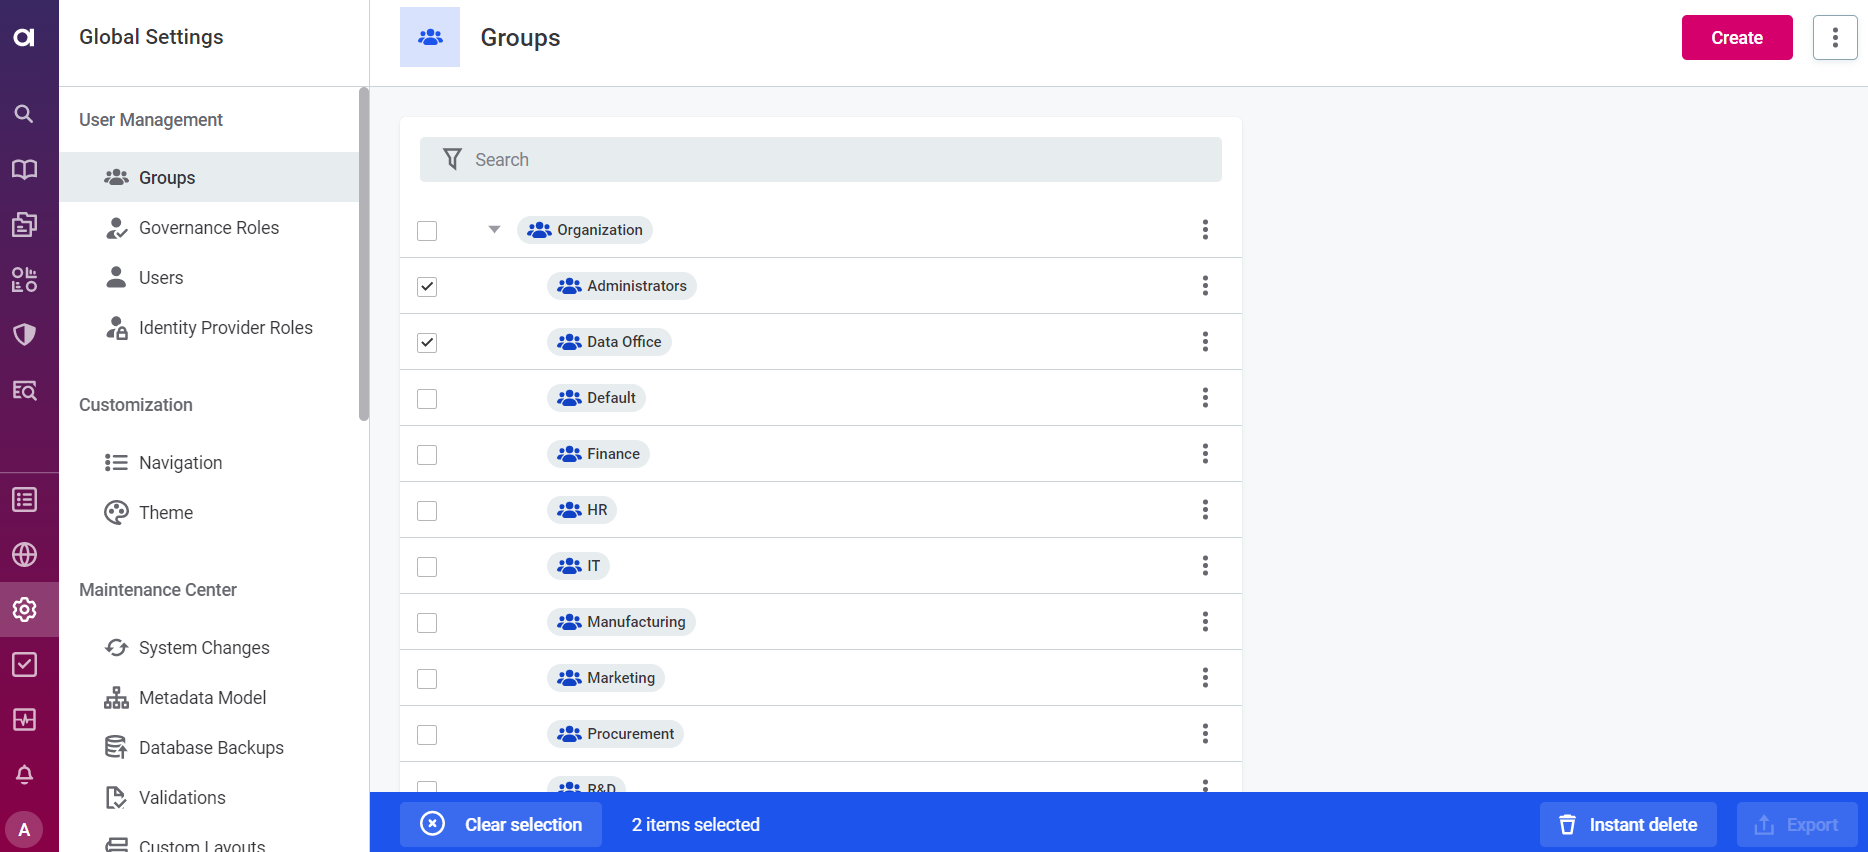
To view the existing groups and the group hierarchy, go to Global Settings > Groups.
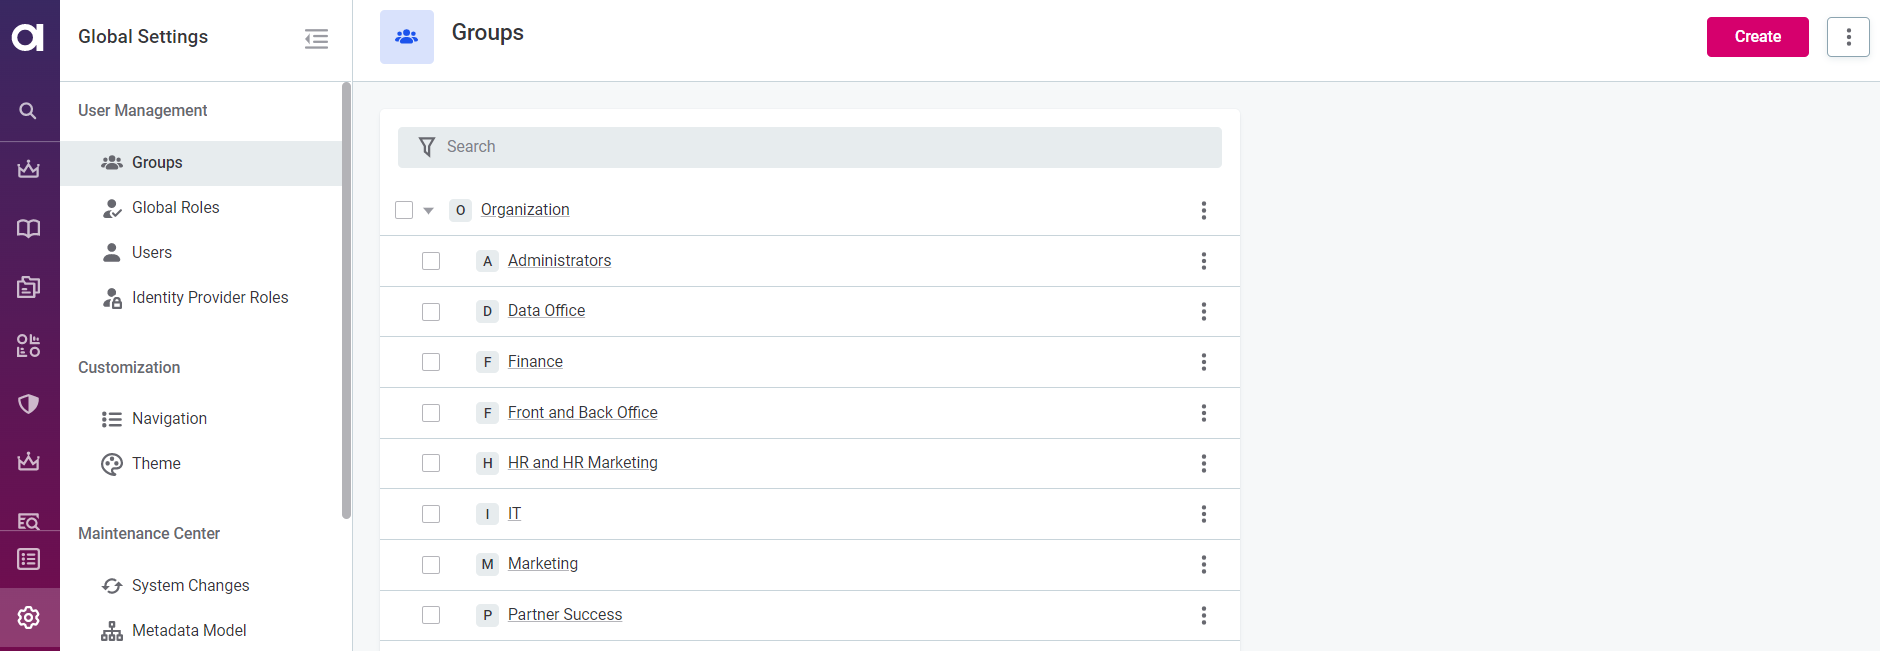
To view the full configuration of a group, select the group name.
On the group details screen, the following tabs are available for each group:
-
Overview: Provides the description, group hierarchy details (parent and child groups, group isolation), and the configuration of roles within the group.
In Child Groups, you can only see the direct descendants of that parent group. If the hierarchy is nested (that is, a child group also has its own child groups), you can view these either by expanding the entire hierarchy tree from the Groups tab or by opening that particular group. -
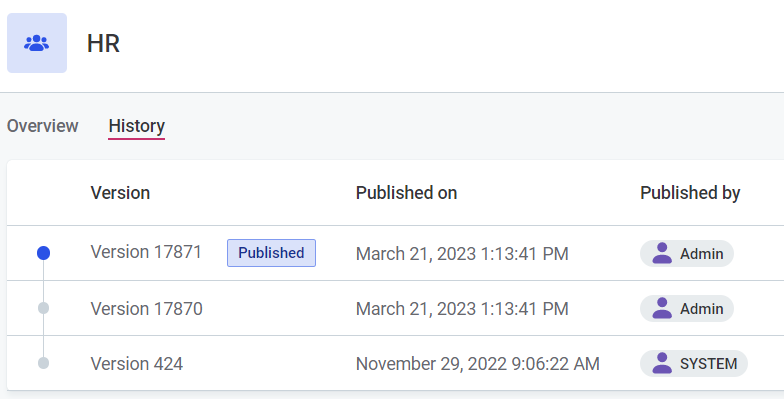
History: Lists all changes made to the group.
To view an earlier version of the group configuration, select the version from the History tab. This opens the group Overview tab showing the configuration for that particular version.
Manage groups
Before you start
Take note of the following before you make any changes to groups:
-
Initially, only admins have access to the data in ONE. Therefore, the access to data needs to be provided to (that is, shared with) a group or specific users.
In other words, after you create an entity in ONE, you need to share it manually with the relevant group (typically, the one you’re a member of). Without sharing, your group won’t see any new entities.
-
Avoid adding users to the top
Organizationparent group. Due to how sharing works (specifically the oversight and inheritance mechanisms), these users would automatically get access to all entities shared with any child groups. To prevent this, we recommend managing individual users in groups under theOrganizationparent group.You can use the
Organizationparent group if you need to share assets with the entire organization regardless of whether it contains any users as the access rights will be inherited.
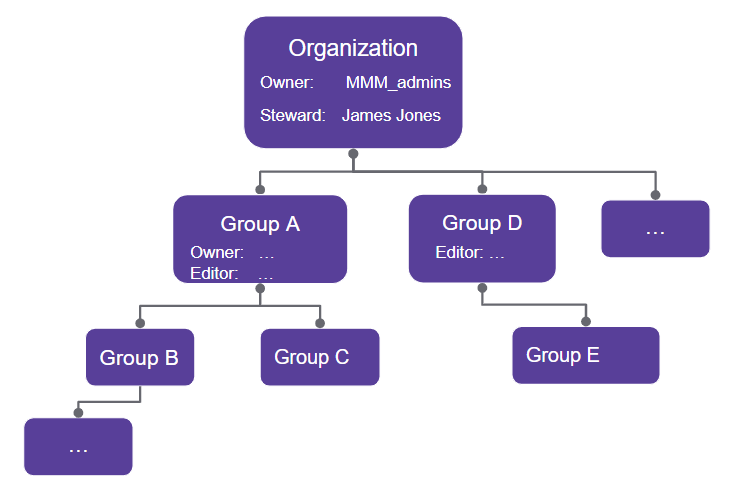
Group hierarchies
You can form a group hierarchy depending on your security needs. A hierarchy can be formed with a tree structure that better reflects teams relationships or relationships within a team:
-
A group can have multiple child groups.
-
A group can have only one parent group.
However, keep in mind that the groups do not necessarily represent the organizational structure. Rather, a group should include the users who interact with the same data.
|
Group hierarchy settings have a big impact on sharing. Therefore, consider how your assets should be shared when creating the group structure. For example, in case you need to share a data asset, such as a monitoring project, with all the senior stakeholders but not with all members of a group, we recommend creating a corresponding child group based on the level of responsibility over data for any group you create. 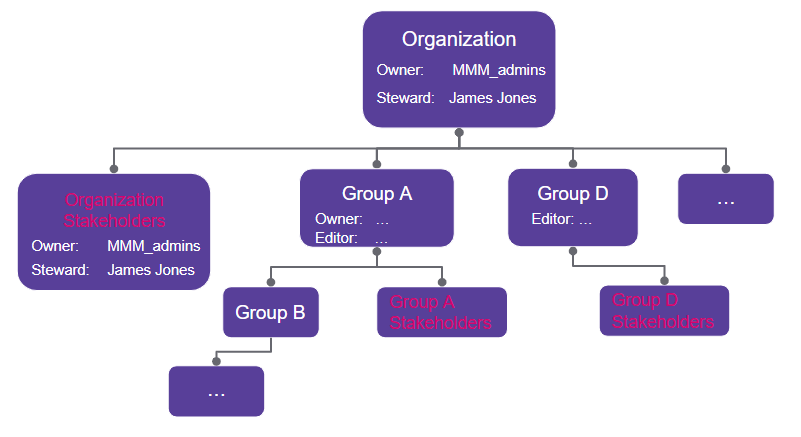
|
Currently, there is no limitation on the number of hierarchical levels.
| A group can be added as a parent or child to other groups when creating it or at any later point. To do this, assign a parent group from the group details screen as needed (Global Settings > Groups). |
Group isolation
Groups or branches (an isolated group with child groups) can also be isolated. In this case, members of the group or branch are restricted from sharing assets and assigning stewardship to assets outside of their group or branch.
When configuring group isolation, take note of the following:
-
If a user is a member of two isolated branches, they can share any asset within both unless stewardship is already assigned to one of the branches.
-
Due to the oversight mechanism, sharing to individual users that are members of parent groups of the isolated branch is allowed. However, this does not apply to stewardship assignment or sharing with the entire group because it would result in passing access to groups outside of the hierarchy of the isolated group.
-
If assets were shared with users outside of a branch before the branch became isolated, these settings remain unaffected. Revoke access manually as needed.
-
Sharing and assigning stewardship by users from parent groups and groups outside of the isolated branch is not affected.
| You can change the isolation settings at any point by selecting or clearing the Isolated field from the group details screen (Global Settings > Groups). |
Create or edit groups
To create a new group or edit an existing one:
-
Go to Global Settings > Groups and continue with one of the options:
-
To create a new group, select Create.
-
To create a child group for an existing group, find the parent group and in the three dots menu select Create child group.
-
To edit an existing group, select a group from the list and then Edit.
Alternatively, you can access the same option from the three dots menu of the group.
-
-
Fill in or modify the following information:
-
Name: A unique name for the group.
-
Description (optional): Description of the group purpose.
-
Parent group: If applicable, select the parent group from the list. This field is automatically filled in if you chose to create a child group in the previous step.
-
Isolated: Select this to create an isolated group or branch. For more information, see Group isolation.

-
-
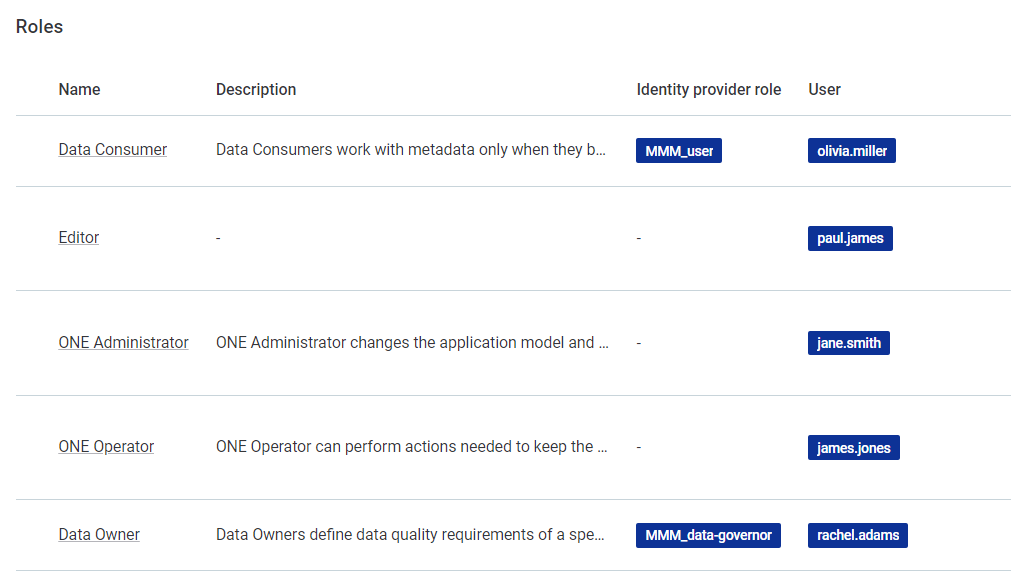
Manage group roles. Group roles are a combination of governance roles that are assigned to the identity provider roles and/or users.
-
To add a new group role to the list, select Assign governance roles.
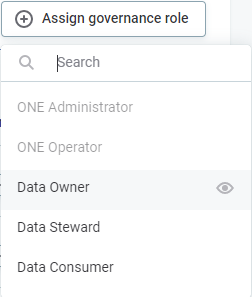
To view more information about a role and the access level to entities, select the eye icon. -
For each governance role specify one or more:
-
Identity provider roles: Use this to assign the governance role to all users with a particular Keycloak role.
Under Identity provider role, select Add and choose a role from the list. As a result, this Keycloak role receives the permissions of the given governance role.
-
Users: Use this if you want to assign the governance role to one or more individual users.
Under User, select Add and choose a user from the list. As a result, this user receives the governance role permissions.
Start typing the name of the identity provider role or a user in the search bar to narrow down the list.
-
-
-
Select Save and Publish. The group is now ready for use.
Delete groups
If you delete a group, this also removes all the child groups it contains. To avoid this, you can first move the child groups to a different parent group so that the group you want to delete has no descendants.
To delete a group:
-
Go to Global Settings > Groups.
-
Do one of the following:
-
Select one or more groups and then Delete.
-
Open the group details and in the three dots menu select Instant delete.
-
Was this page useful?