
MDM and RDM Connection
To use another Ataccama module as a data source, you first need to configure the connection between the module and the rest of the platform (specifically, Data Processing Module (DPM) and Data Processing Engine (DPE)) and provide the necessary JWT tokens that allow them to identify each other and communicate securely.
| To use ONE Glossary in your MDM Web Application, the MDM data source must be defined here. |
| You can connect to ONE MDM or ONE RDM only when that component and Ataccama ONE are both visible on the same network and SSO is set up. In other words, you cannot use ONE MDM or ONE RDM as a data source if only hybrid Data Processing Engine (DPE) is deployed. |
The following features do not support this connection type: lineage, data observability, data reconcilliation, and data stories.
Prerequisites
The following steps are required for self-managed deployments. Skip this section if you are using an Ataccama Cloud environment.
MDM
-
Stop all MDM and ONE services.
-
In the DPM configuration file (
/opt/ataccama/one/dpm/etc/application.properties), add or edit the propertyplugin.mdm-datasource.ataccama.one.server.grpc.port.The port provided here must match the value specified in the MDM property
ataccama.server.grpc.port. Make sure to update the default port number accordingly.dpm/etc/application.propertiesplugin.mdm-datasource.ataccama.one.server.grpc.port=8551 -
Provide the public keys for DPM and DPE to the MDM configuration file.
-
In the DPM configuration file (
/opt/ataccama/dpm/etc/application.properties), find the following set of properties for the public DPE key. The deployment (dpe) and key (key) names are arbitrary and the values might differ in your instance.dpm/etc/application.propertiesataccama.one.platform.deployments.dpe.uri=http://localhost:8034 ataccama.one.platform.deployments.dpe.name=DPE ataccama.one.platform.deployments.dpe.module=dpe ataccama.one.platform.deployments.dpe.environment=dev ataccama.one.platform.deployments.dpe.security.jwt-keys.key.name=DPE ataccama.one.platform.deployments.dpe.security.jwt-keys.key.fingerprint=OIIVv7h3InJdZ0UngDWk9yuwU2cANjdjN_5spoeY984 ataccama.one.platform.deployments.dpe.security.jwt-keys.key.content=eyJrdHkiOiJFQyIsImNydiI6IlAtMjU2Iiwia2lkIjoiT0lJVnY3aDNJbkpkWjBVbmdEV2s5eXV3VTJjQU5qZGpOXzVzcG9lWTk4NCIsIngiOiJ6Mm5hRjFOUldPOGMzMHJLX09xVURNTHRwVFdpNEc4bVBYemhCWGRYUEY4IiwieSI6Ilh2bXFaWXFqQ0dxVzI0OTVFUmlUMU9YNDB4cUdOMVJ1akJVU0NsR1VRX28iLCJhbGciOiJFUzI1NiJ9 ataccama.one.platform.deployments.dpe.security.jwt-keys.key.isRevoked=false ataccama.one.platform.deployments.dpe.security.roles=IMPERSONATIONIn case you prefer to generate new JWT keys instead of using the previously configured ones, you need to update them in all affected modules. For more information about how JWT keys are used and configured, see How to Generate JWT Keys. -
In the DPE configuration file (
/opt/ataccama/dpe/etc/application.properties), find the following set of properties for the public DPM key. The deployment (dpm) and key (key1) names are arbitrary and the values might differ in your instance.dpe/etc/application.propertiesataccama.one.platform.deployments.dpm.uri=http://localhost:8031 ataccama.one.platform.deployments.dpm.name=DPM ataccama.one.platform.deployments.dpm.module=dpm ataccama.one.platform.deployments.dpm.environment=dev ataccama.one.platform.deployments.dpm.security.jwt-keys.key1.name=DPM ataccama.one.platform.deployments.dpm.security.jwt-keys.key1.fingerprint=OIIVv7h3InJdZ0UngDWk9yuwU2cANjdjN_5spoeY984 ataccama.one.platform.deployments.dpm.security.jwt-keys.key1.content=eyJrdHkiOiJFQyIsImNydiI6IlAtMjU2Iiwia2lkIjoiT0lJVnY3aDNJbkpkWjBVbmdEV2s5eXV3VTJjQU5qZGpOXzVzcG9lWTk4NCIsIngiOiJ6Mm5hRjFOUldPOGMzMHJLX09xVURNTHRwVFdpNEc4bVBYemhCWGRYUEY4IiwieSI6Ilh2bXFaWXFqQ0dxVzI0OTVFUmlUMU9YNDB4cUdOMVJ1akJVU0NsR1VRX28iLCJhbGciOiJFUzI1NiJ9 ataccama.one.platform.deployments.dpm.security.jwt-keys.key1.isRevoked=false ataccama.one.platform.deployments.dpm.security.roles=IMPERSONATION -
Copy and paste the properties from the previous step to the MDM Server configuration file (
/opt/ataccama/mdm-server/etc/application.properties). -
Save your changes.
-
-
Restart MDM and ONE. Once the applications are running again, you can proceed with step Create a source.
RDM
-
Stop all RDM and ONE services.
-
Provide the public keys for DPM and DPE to the RDM configuration file.
-
In the DPM configuration file (
/opt/ataccama/dpm/etc/application.properties), find the following set of properties for the public DPE key. The deployment (dpe) and key (key) names are arbitrary and the values might differ in your instance.dpm/etc/application.propertiesataccama.one.platform.deployments.dpe.uri=http://localhost:8034 ataccama.one.platform.deployments.dpe.name=DPE ataccama.one.platform.deployments.dpe.module=dpe ataccama.one.platform.deployments.dpe.environment=dev ataccama.one.platform.deployments.dpe.security.jwt-keys.key.name=DPE ataccama.one.platform.deployments.dpe.security.jwt-keys.key.fingerprint=OIIVv7h3InJdZ0UngDWk9yuwU2cANjdjN_5spoeY984 ataccama.one.platform.deployments.dpe.security.jwt-keys.key.content=eyJrdHkiOiJFQyIsImNydiI6IlAtMjU2Iiwia2lkIjoiT0lJVnY3aDNJbkpkWjBVbmdEV2s5eXV3VTJjQU5qZGpOXzVzcG9lWTk4NCIsIngiOiJ6Mm5hRjFOUldPOGMzMHJLX09xVURNTHRwVFdpNEc4bVBYemhCWGRYUEY4IiwieSI6Ilh2bXFaWXFqQ0dxVzI0OTVFUmlUMU9YNDB4cUdOMVJ1akJVU0NsR1VRX28iLCJhbGciOiJFUzI1NiJ9 ataccama.one.platform.deployments.dpe.security.jwt-keys.key.isRevoked=false ataccama.one.platform.deployments.dpe.security.roles=IMPERSONATIONIn case you prefer to generate new JWT keys instead of using the previously configured ones, you need to update them in all affected modules. For more information about how JWT keys are used and configured, see How to Generate JWT Keys. -
In the DPE configuration file (
/opt/ataccama/dpe/etc/application.properties), find the following set of properties for the public DPM key. The deployment (dpm) and key (key1) names are arbitrary and the values might differ in your instance.dpe/etc/application.propertiesataccama.one.platform.deployments.dpm.uri=http://localhost:8031 ataccama.one.platform.deployments.dpm.name=DPM ataccama.one.platform.deployments.dpm.module=dpm ataccama.one.platform.deployments.dpm.environment=dev ataccama.one.platform.deployments.dpm.security.jwt-keys.key1.name=DPM ataccama.one.platform.deployments.dpm.security.jwt-keys.key1.fingerprint=OIIVv7h3InJdZ0UngDWk9yuwU2cANjdjN_5spoeY984 ataccama.one.platform.deployments.dpm.security.jwt-keys.key1.content=eyJrdHkiOiJFQyIsImNydiI6IlAtMjU2Iiwia2lkIjoiT0lJVnY3aDNJbkpkWjBVbmdEV2s5eXV3VTJjQU5qZGpOXzVzcG9lWTk4NCIsIngiOiJ6Mm5hRjFOUldPOGMzMHJLX09xVURNTHRwVFdpNEc4bVBYemhCWGRYUEY4IiwieSI6Ilh2bXFaWXFqQ0dxVzI0OTVFUmlUMU9YNDB4cUdOMVJ1akJVU0NsR1VRX28iLCJhbGciOiJFUzI1NiJ9 ataccama.one.platform.deployments.dpm.security.jwt-keys.key1.isRevoked=false ataccama.one.platform.deployments.dpm.security.roles=IMPERSONATION -
Copy and paste the properties from the previous two steps to the RDM configuration file (
/opt/ataccama/rdm/etc/application.properties). -
Save your changes.
-
-
Restart RDM and ONE. Once the applications are running again, you can proceed with step Create a source.
Create a source
To connect to MDM or RDM:
-
Navigate to Knowledge Catalog > Sources.
-
Select Create.
-
Provide the following:
-
Name: The source name.
-
Description: A description of the source.
-
Deployment (Optional): Choose the deployment type.
You can add new values if needed. See Lists of Values. -
Stewardship: The source owner and roles. For more information, see Stewardship.
-
Add a connection
-
Select Add Connection.
-
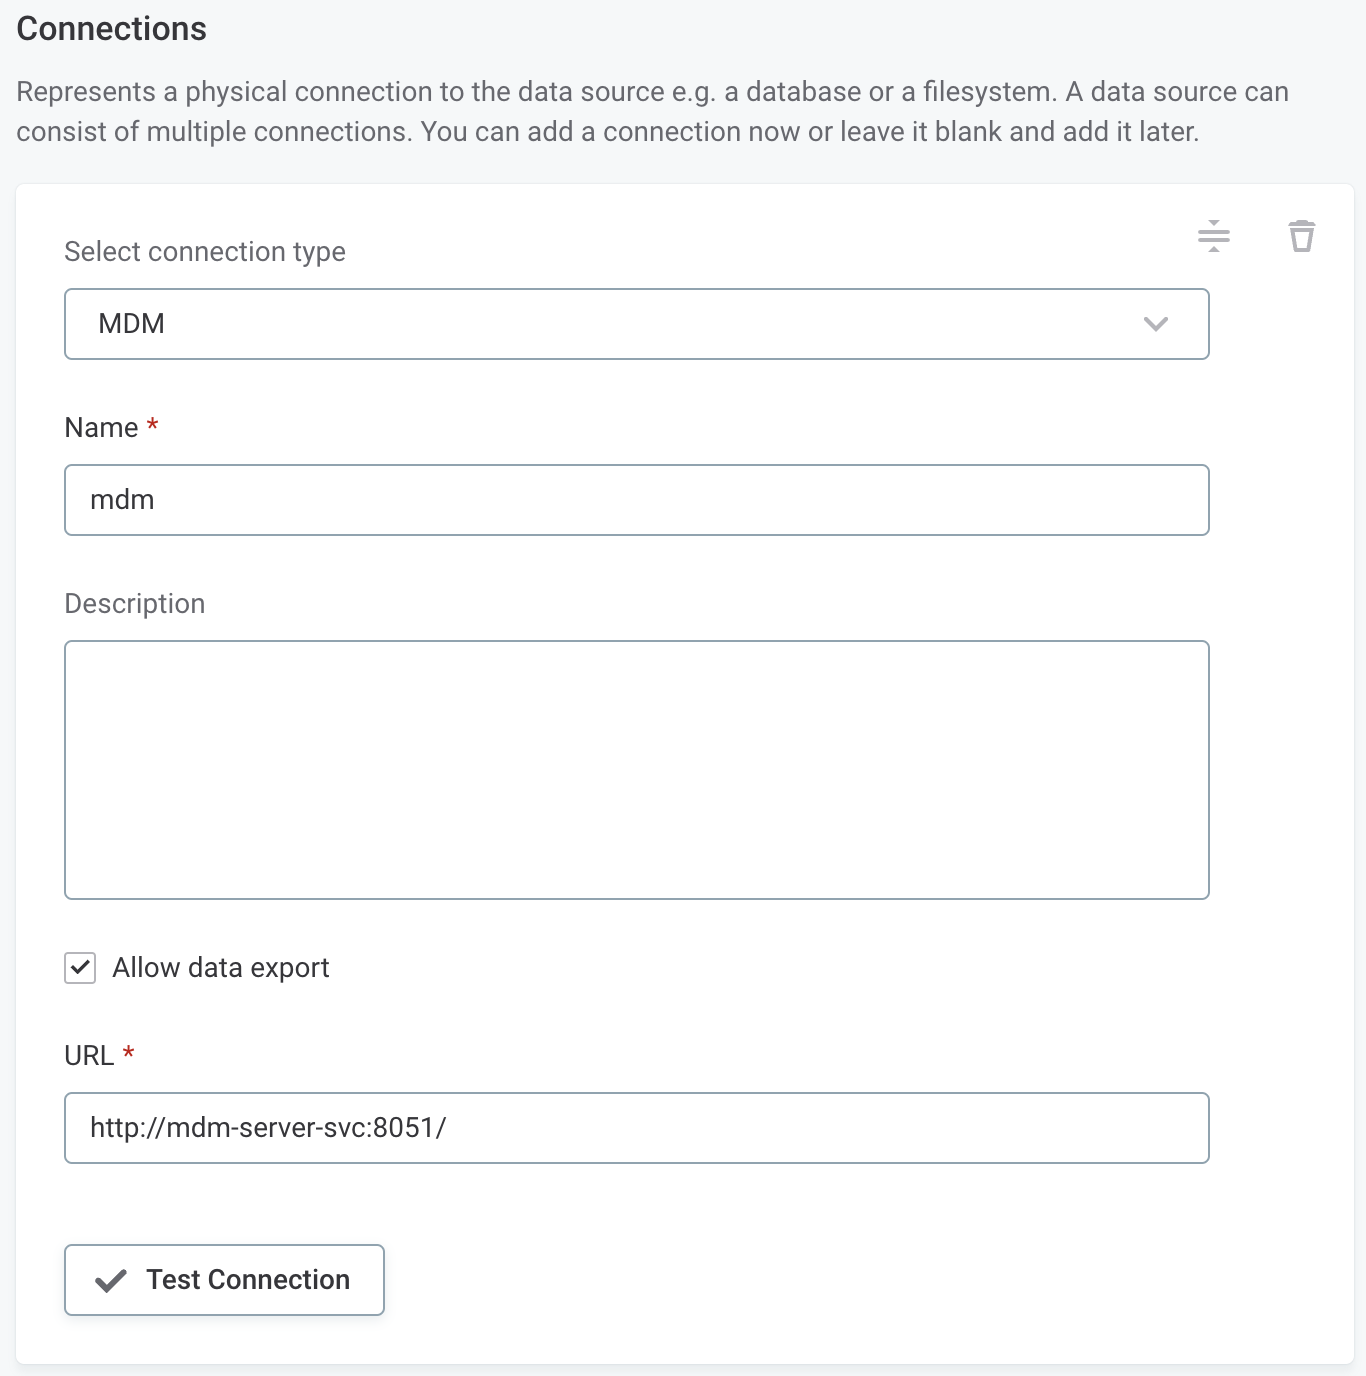
In Select connection type, choose either:
-
Ataccama Platform Integration > MDM
-
Ataccama Platform Integration > RDM
-
-
Provide the following:
-
Name: A meaningful name for your connection. This is used to indicate the location of catalog items.
-
Description (Optional): A short description of the connection.
-
Dpe label (Optional): Assign the processing of a data source to a particular data processing engine (DPE) by entering the DPE label assigned to the engine. For more information, see DPM and DPE Configuration in DPM Admin Console.
If your environment includes both a cloud DPE and a hybrid DPE, enter the label of the cloud DPE. Otherwise, the connection might be routed to the hybrid DPE and fail, as hybrid DPEs cannot process MDM and RDM connections. -
Override catalog item name: Select this option if you want metadata imports to overwrite the names of existing catalog items with the latest names from the data source.
If the option is not selected, catalog item names you set in ONE are preserved when metadata is reimported. See Edit catalog item metadata.
-
URL: The URL where the application is running, for example,
http://<host>:<port>orhttp://<host>:<port>.Make sure to use the internal URL, not the URL where you access the MDM server or RDM.
For example, for cloud deployments, this is typically the application service name (by default:
mdm-server-svcorrdm-svc) and the corresponding port (8051or8060respectively), so the value for this property would be:http://mdm-server-svc:8051/orhttp://rdm-svc:8060/.For on-premise deployments, the host is the internal URL of the server where the MDM server or RDM are running, which is different for each instance of ONE.
-
-
In Additional settings, select Enable exporting and loading of data if you want to export data from this connection and use it in ONE Data or outside of ONE.
Consider the security and privacy risks of allowing the export of data to other locations.
Test the connection
To test and verify whether the data source connection has been correctly configured, select Test Connection.
If the connection is successful, continue with the following step. Otherwise, verify that your configuration is correct and that the data source is running.
Save and publish
Once you have configured your connection, save and publish your changes. If you provided all the required information, the connection is now available for other users in the application.
In case your configuration is missing required fields, you can view a list of detected errors instead. Review your configuration and resolve the issues before continuing.
Next steps
You can now start using MDM and RDM: * To learn how to consolidate data and perform master data management tasks using MDM, see Welcome to MDM. * To learn how to manage reference data using RDM, see Welcome to RDM.
Was this page useful?