
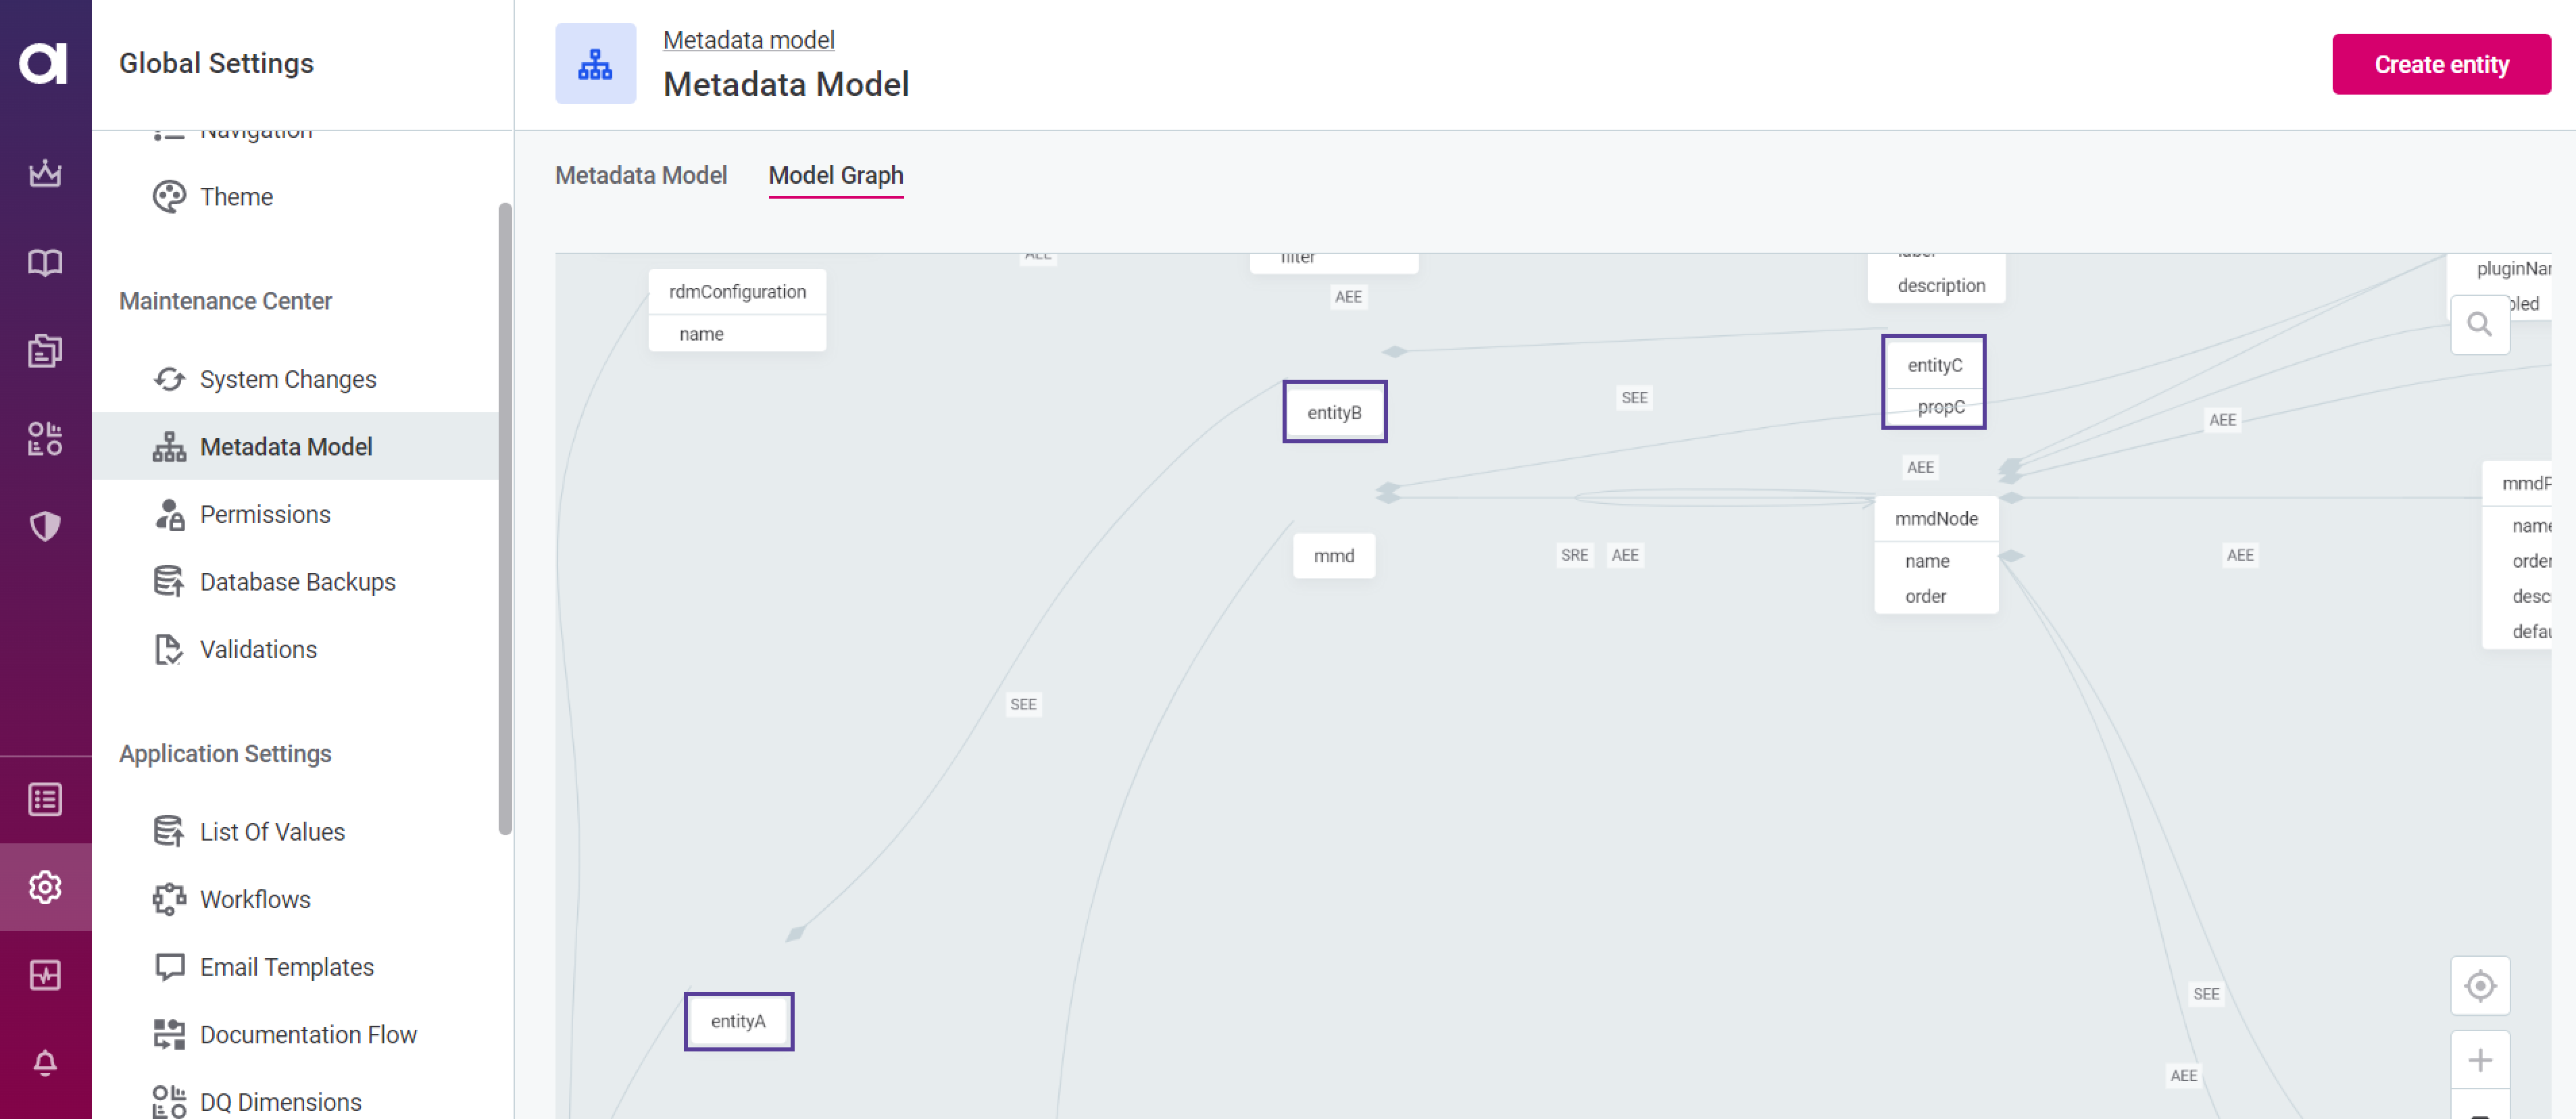
Metadata Model Graph
The metadata graph shows the detailed schema of entity connections. To add an entity and its connections to the graph, you must first add it as an embedded object array entity in the metadata model. For more information about how to do this, see ONE Metadata Model Tutorial and Lists of Values.
Overview
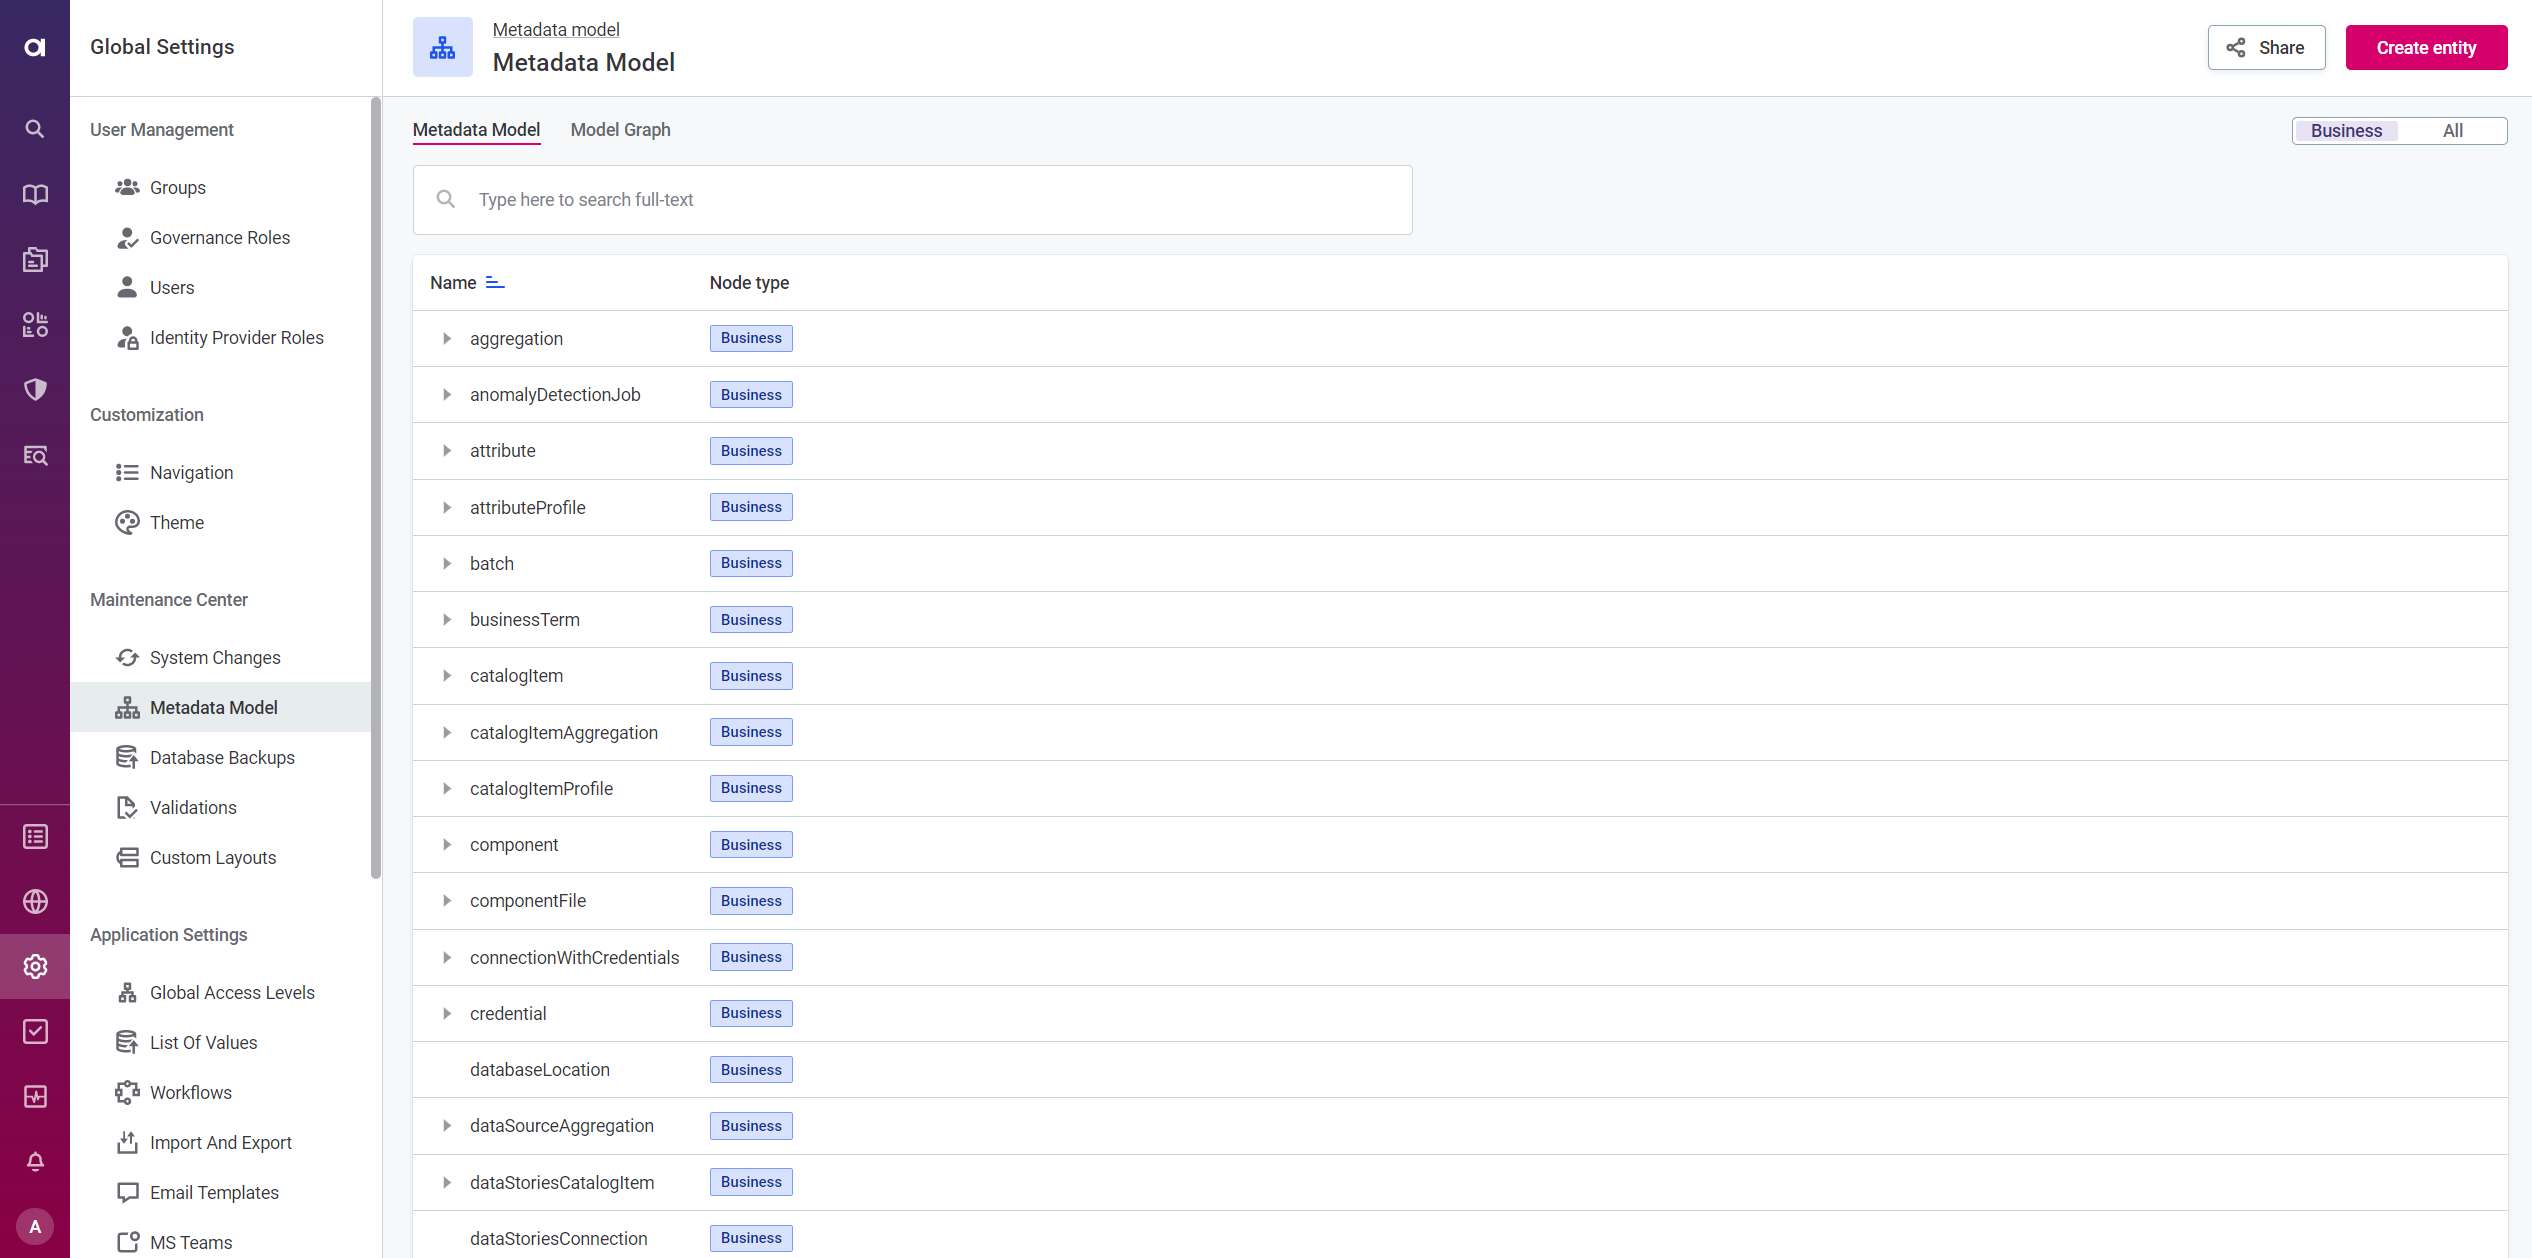
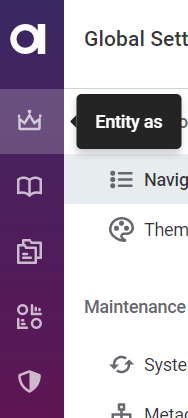
To view the metadata graph, go to Global Settings > Metadata Model > Model Graph:
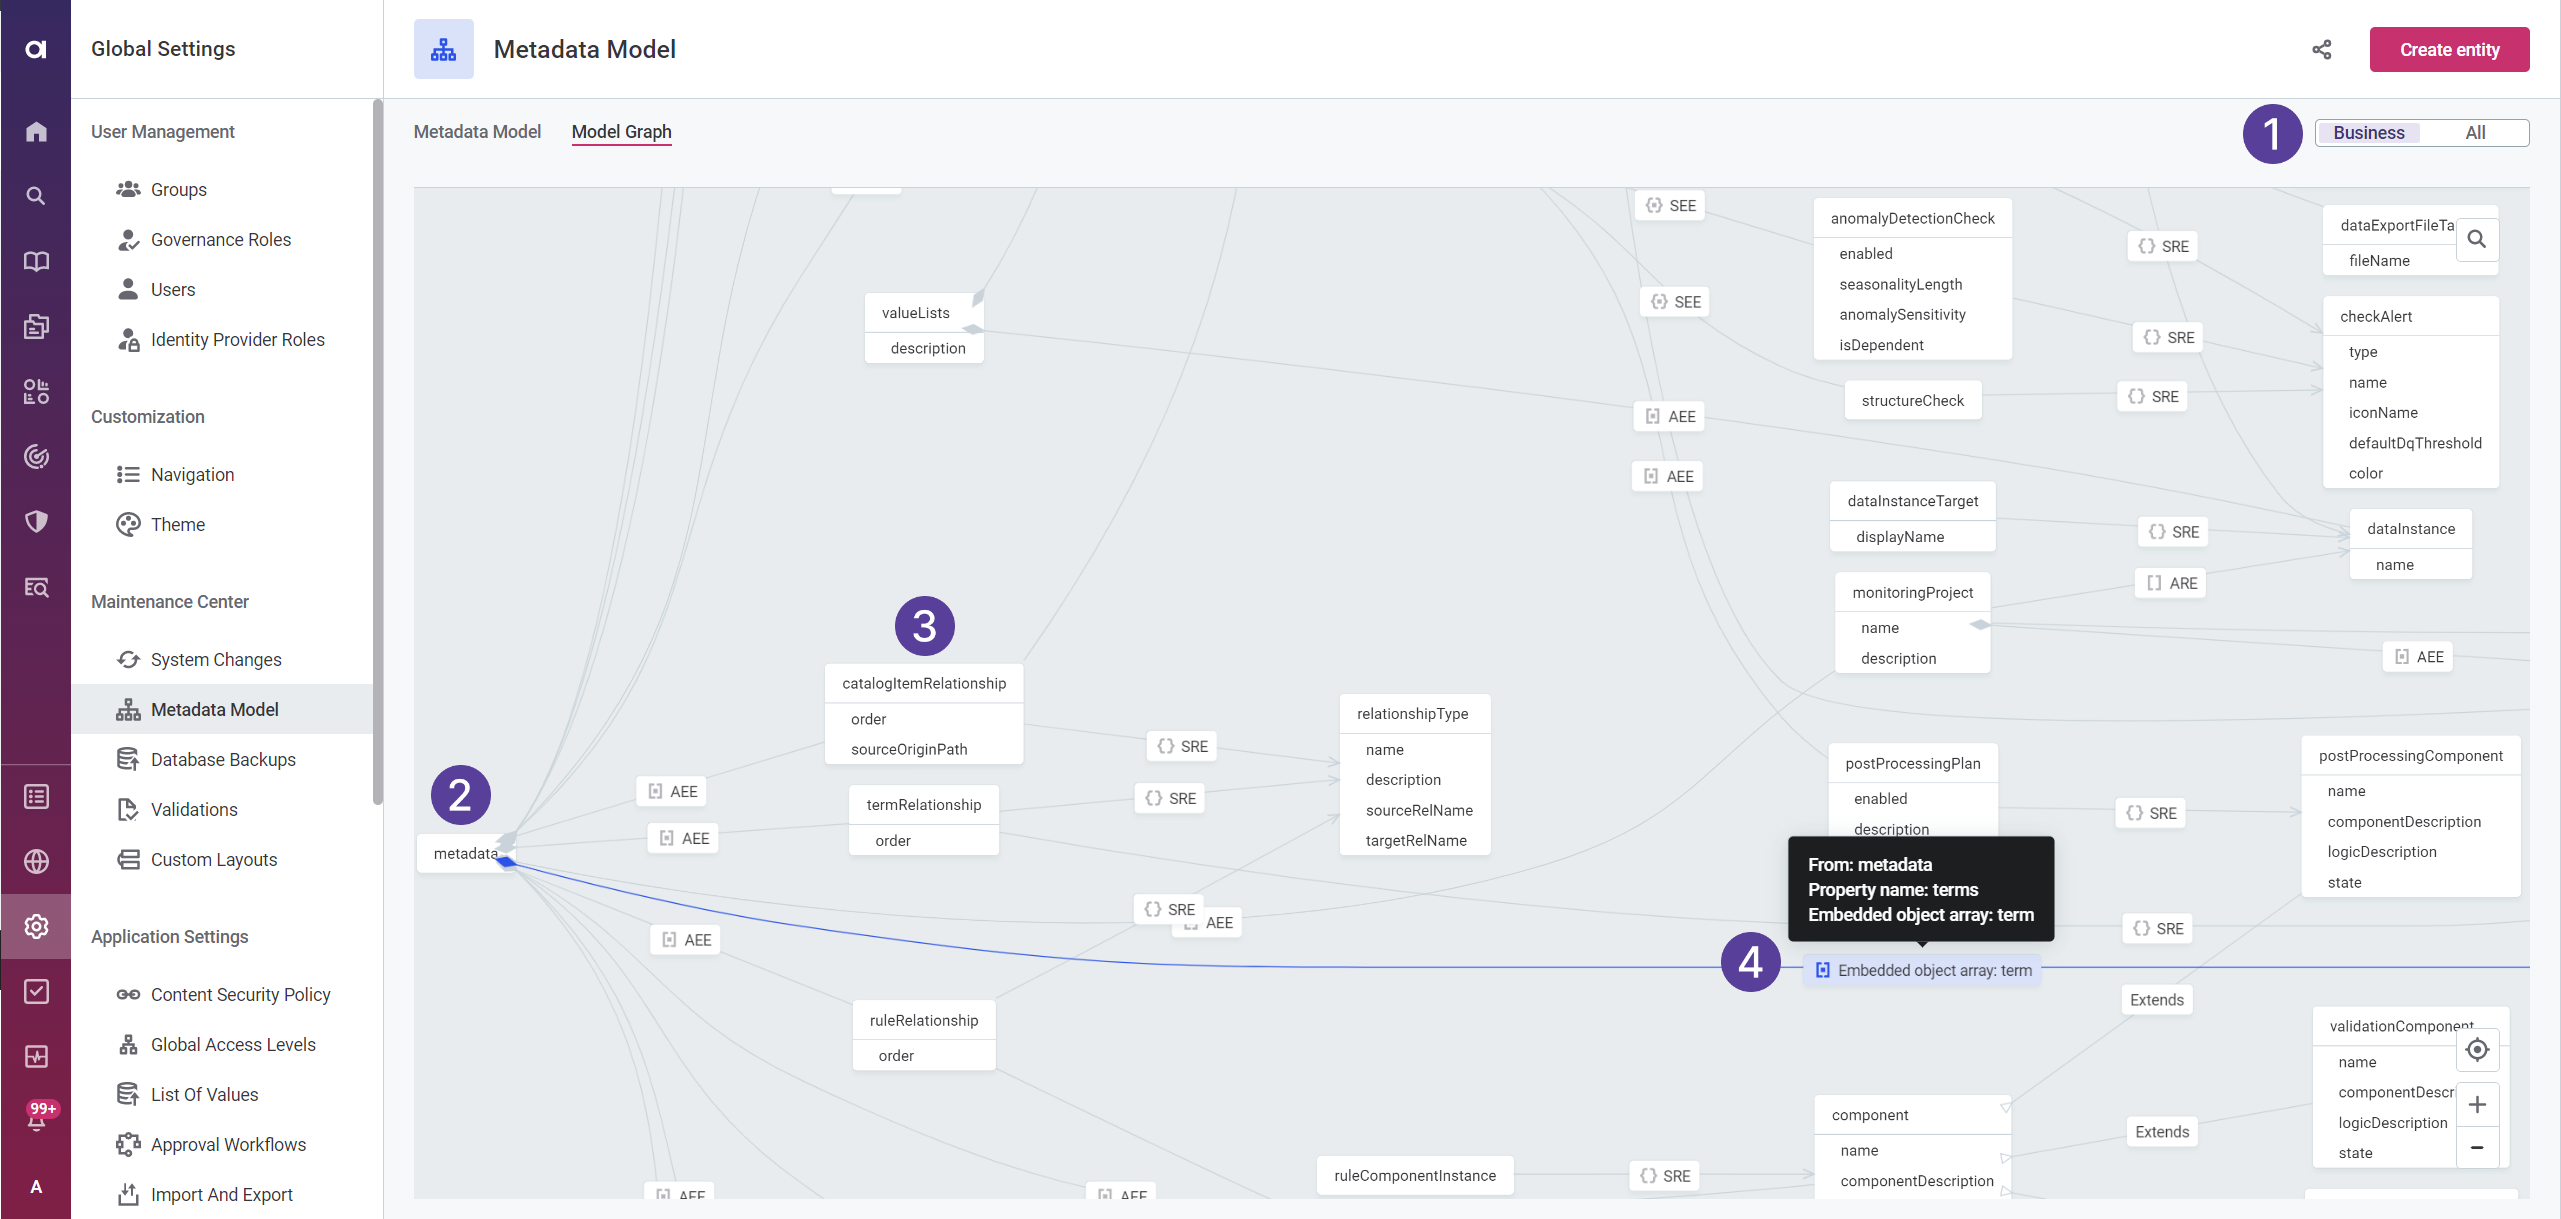
In the metadata graph, you can view the following:
-
(1) Entity type filter: Metadata model entities are categorized into two types.
By default, the metadata model is filtered to only show business entities. To show all types of entities and their connections, select the All filter.
-
System - Used internally by the application. Their instances and subtypes describe the configuration of the system layer.
-
Business - This type of entity is governed by your organization. They represent metadata that is important in a business sense.
-
-
(2) Metadata box: Connects to other entities with lines. To find these connections, hover over the line. This highlights the connection.
-
(3) Entities: Shown as boxes, with their properties listed inside.
-
(4) The connection type: Appears above the connections, for example, AEE, SRE, SEE, and so on.
| You can click any connection to expand the full name of the connection type and the entity it connects to. To see even more information, hover over the connection. |
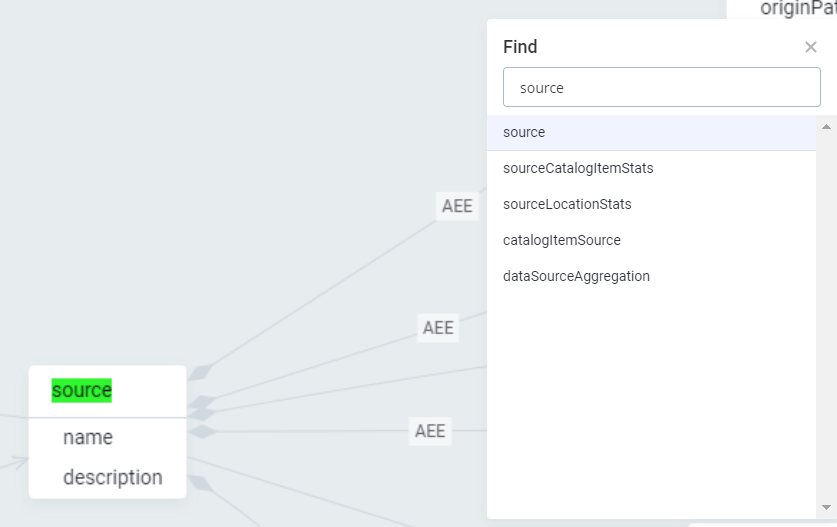
Search for an entity
To look for a specific entity, select the search icon in the upper-right corner and type the entity name. The entity you are looking for is shown and highlighted in green:
Manage the graph size
The icons in the lower-right corner can help with orienting and managing the graph size.
-
To zoom in, select the minus icon.
-
To zoom out, select the plus icon.
-
To center back in on the metadata box at the root of the graph, select the target icon.

Add an object to the graph
To add an object to the metadata graph:
-
Navigate to Global Settings > Metadata Model.
-
Select Create entity.
-
Provide the following information:
-
Name of the node that you are adding, for example,
entityC.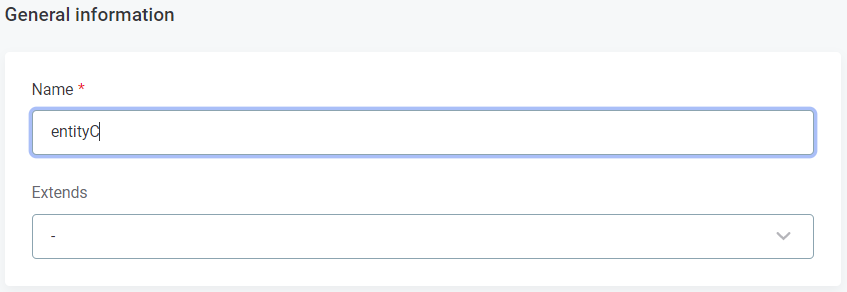
-
Property names and types. For the purpose of this tutorial, we are adding a property
nameof typeString.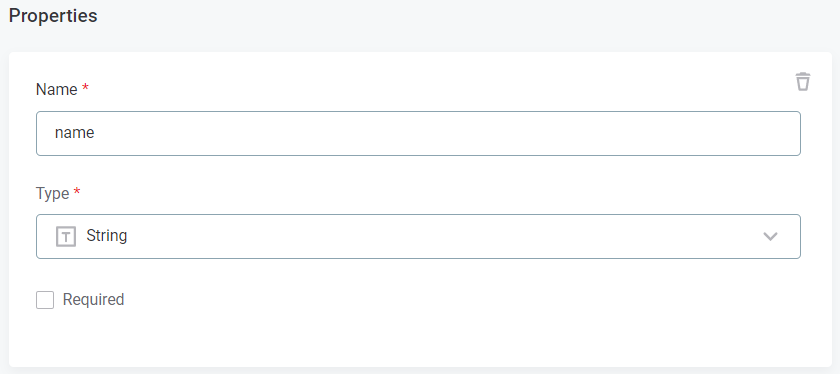
-
-
Select Save.
-
To be able to link to this entity from another entity, add the property of type Embedded object, aiming for the Object that was created in steps 1-4.
-
Go back to the Metadata Model and select Create entity. Alternatively, you can edit an existing entity.
-
Provide the following information:
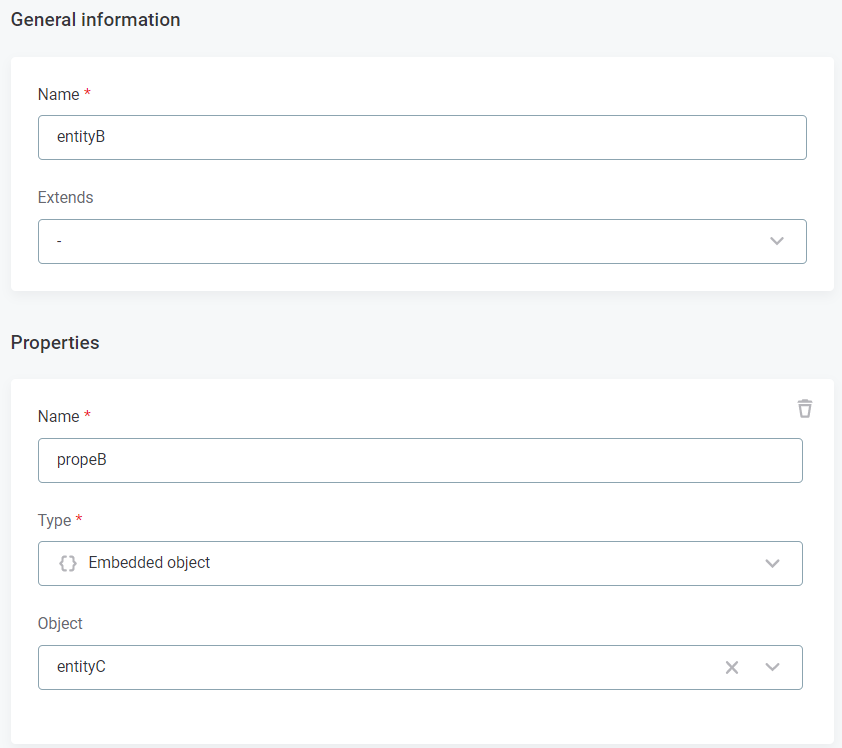
-
Select Save.
You can repeat this step as many times as needed by referencing the entities in the same way. For the purpose of this tutorial, we are adding another entity
entityAthat is linked toentityBvia the embedded object propertypropB: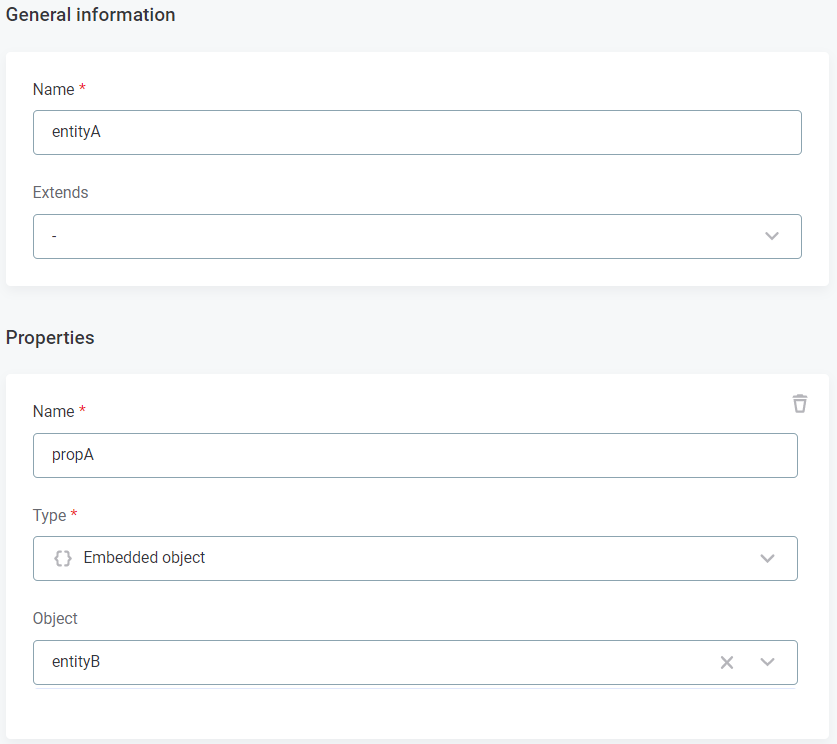
-
-
Go back to the Metadata Model and open the
metadataentity. -
In the properties list, select Add property and provide the following information:
-
Name: A name for the property.
-
Type:
Embedded object array. -
Object: Reference the object that you have created earlier. In this case, we are referencing the last entity created (
entityA).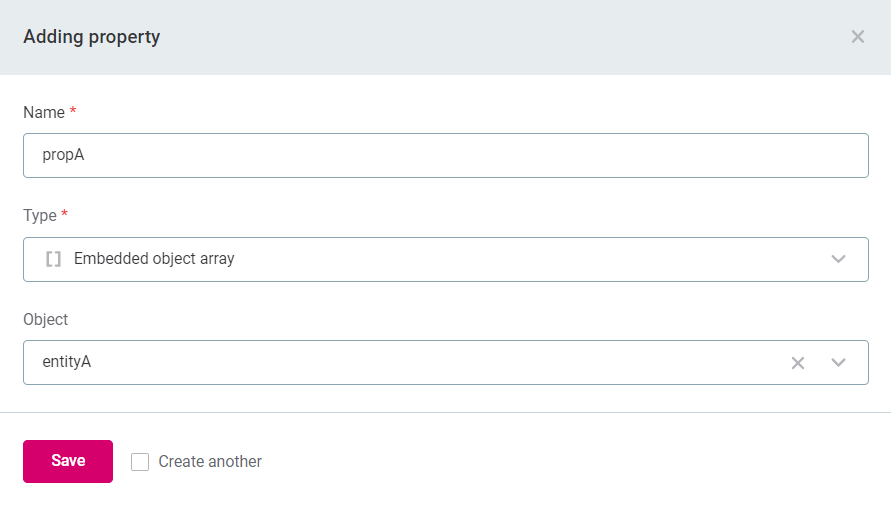
-
-
Select Save.
-
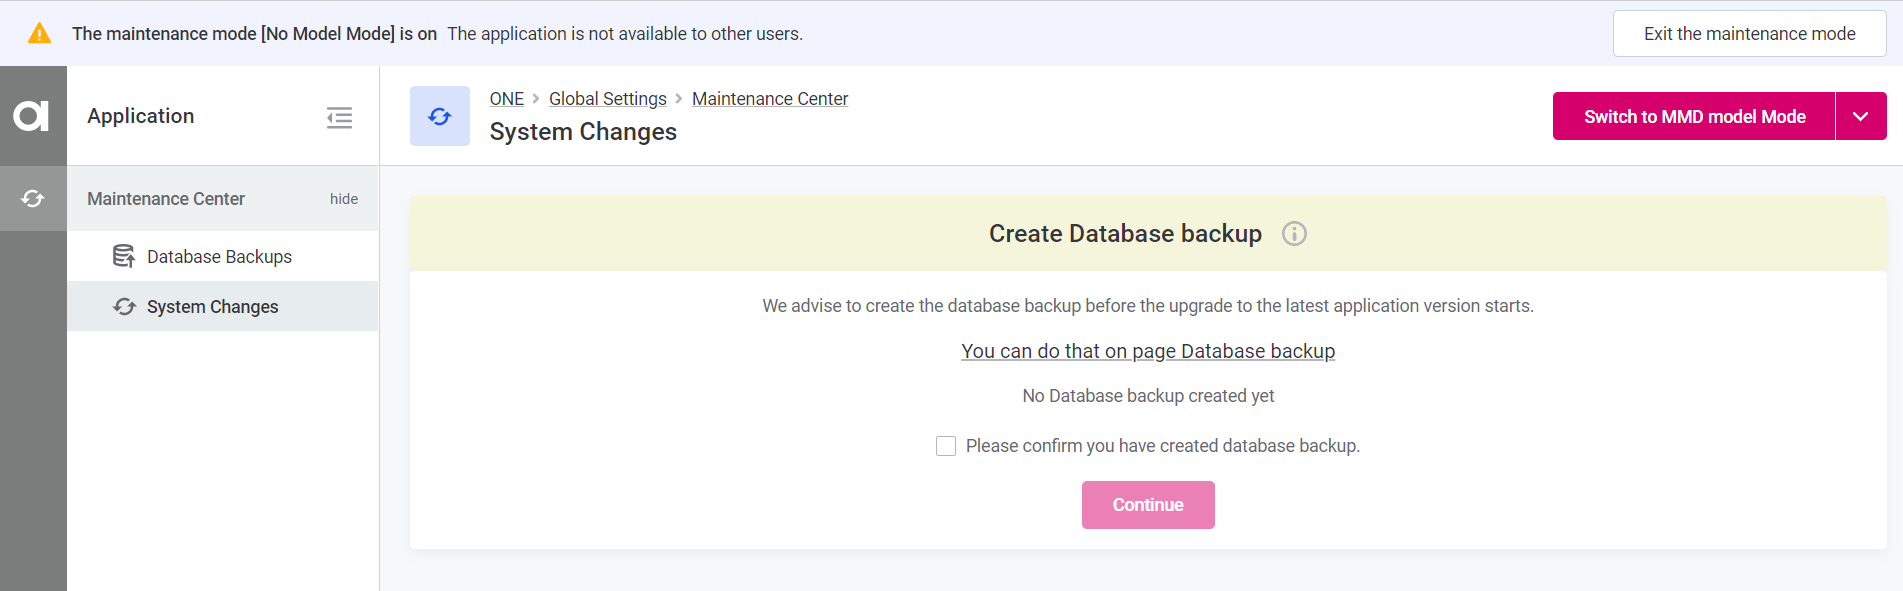
To publish the changes, select Apply changes. The following screen appears:
-
The application switches to the maintenance mode (No Model Mode) and you are prompted to back up your database before continuing.
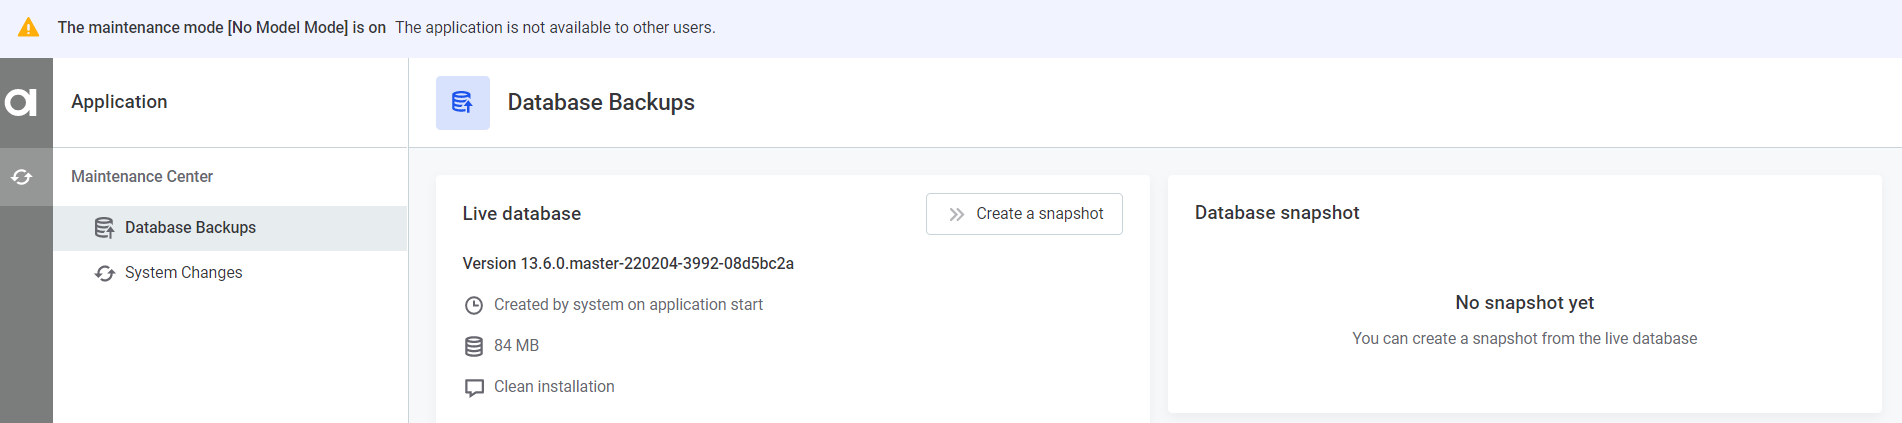
To do this, navigate to the Database backup tab and create a database snapshot by selecting Create a snapshot. For more information, see Metadata Backup.
-
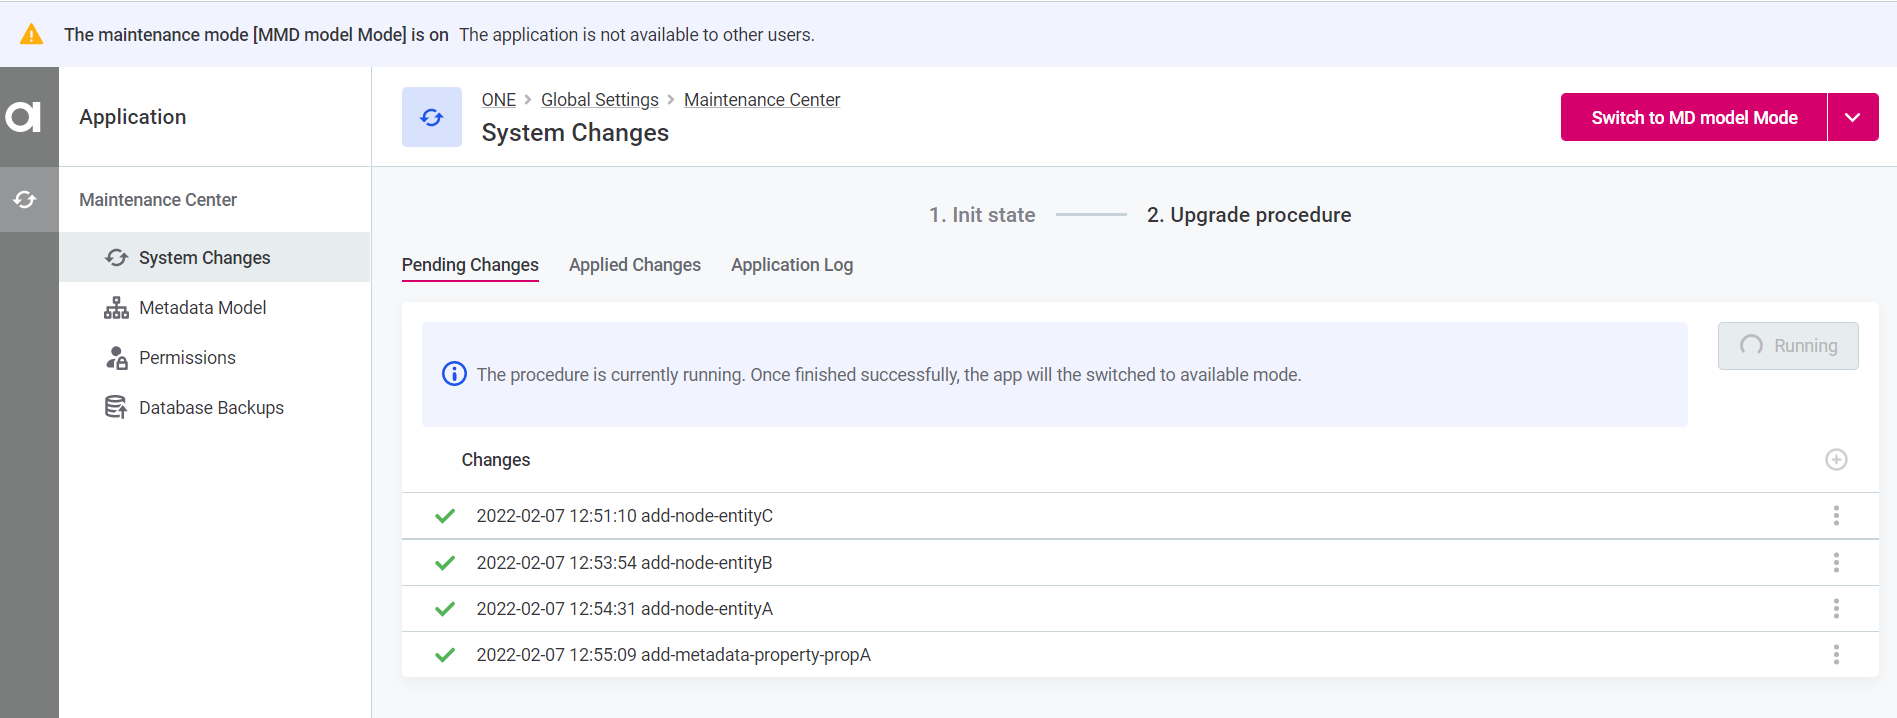
Return to the System Changes and confirm that you have created a database backup, then select Continue.
-
Wait for the application to finish applying the changes. Once this is done, the application automatically switches to the application mode.
For more information about running the upgrade, see System Changes. -
Go to the Metadata Model > Model Graph and search for the new entity:
The new entity added to the metadata appears in the main navigation menu of the application:
To hide it or move it, alter the menu configuration. For more information, see Left Navigation Menu.
Was this page useful?