
Get Started with Catalog and Glossary
Welcome to Ataccama ONE Data Catalog. Here we’ll help you discover the key features of Ataccama ONE Data Catalog and Business Glossary and gain a basic understanding of the application.
Once you learn your way around the platform, start using it for your own projects or explore other topics in more depth.
|
How to use the guide?
You can follow the steps one by one, in the order in which they’re given, or choose the topic you’re most interested in and revisit other sections later. Don’t hesitate to make adjustments to the steps along the way. This will give you a better idea of the actual workflow as the process is often not linear and consists of multiple iterations. This guide assumes some initial data (Demo content pack) is already available in the application. |
Before you start
Throughout this guide, you’ll mainly be working with the following areas of the application: Knowledge Catalog and Business Glossary:
-
Knowledge Catalog is where you’ll find the key tools for data management, including importing metadata from data sources, viewing, discovering, and profiling data. It consists of two sections: Catalog Items and Sources.
-
Business Glossary is the centralized storage for business terms.
Next, let’s define what we understand by catalog items and business terms.
-
Catalog items contain your actual data and are structured into attributes. You can think of attributes as columns in a table.
Catalog items are imported into the platform from various sources, which represent different storage types.
-
Business terms are labels applied to your data that help you understand and organize your data. You can also create hierarchical structures between terms to better visualize the relationships among different data elements, systems, and processes.
In addition, business terms are the basis for DQ evaluation. To identify which DQ rule should be applied to what data and automate the validation process, we use terms to label catalog item attributes.
|
Recommended resources
|
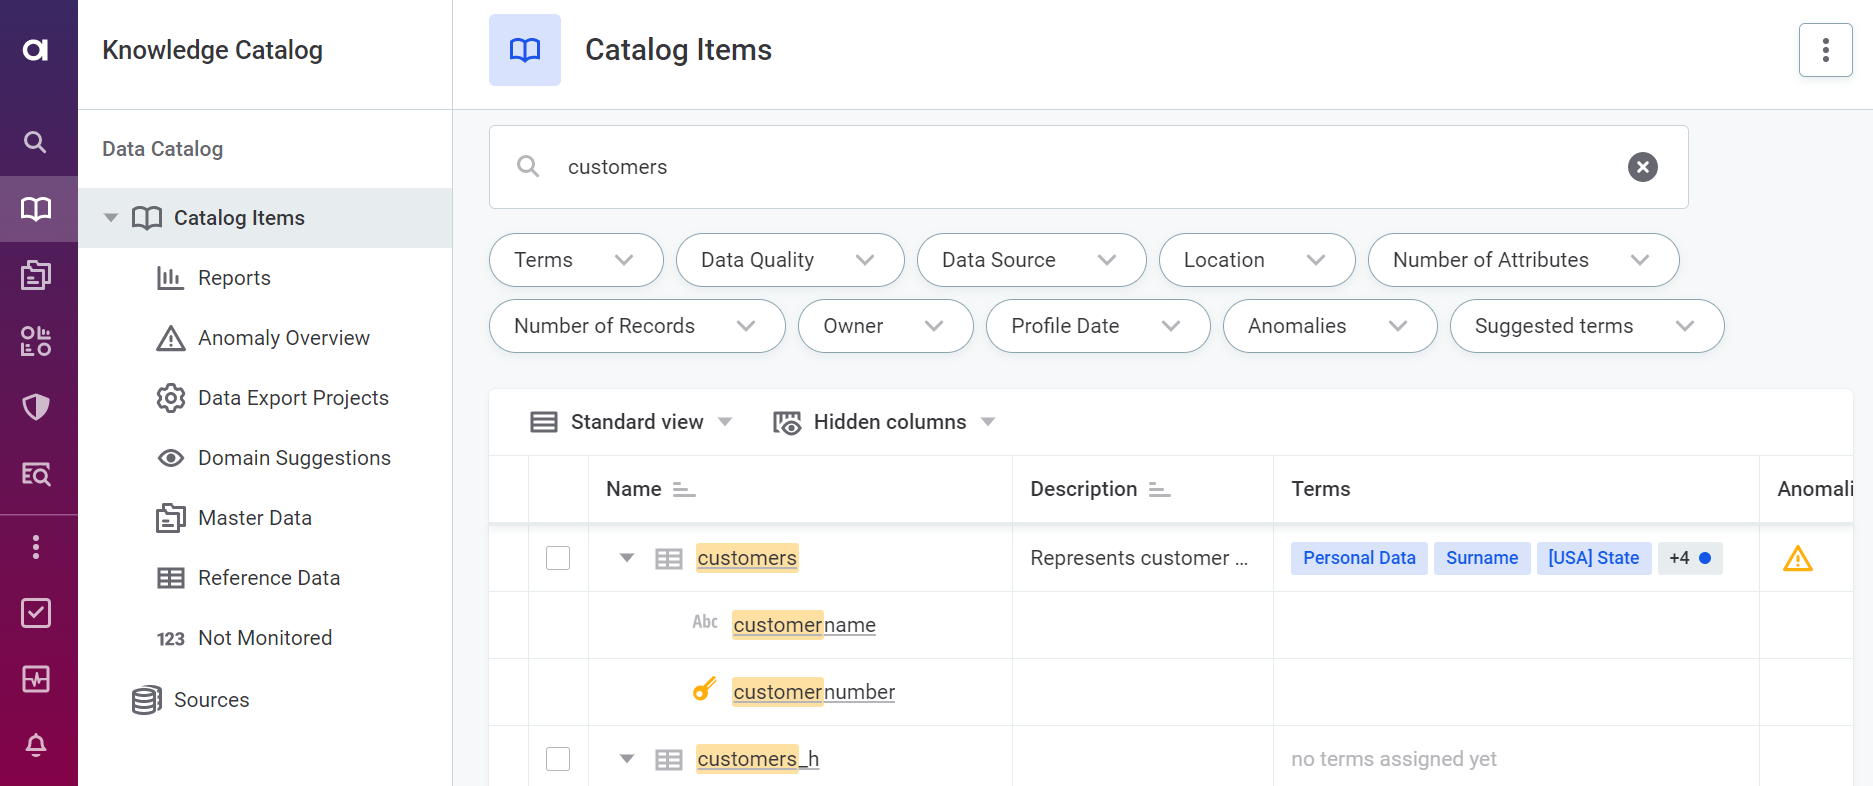
Search for data assets
To find the data asset you want to work with, use the full-text search, filters, or a combination of both.
Let’s see how this works in Data Catalog. Suppose we want to find a catalog item called customers that contains information about our clients, such as contact details, the assigned salesperson, and so on.
-
Try searching for it using the full-text search. Enter your keywords and press Enter.
-
Filter by terms. Since we know the catalog item contains personal data, try using terms such as
E-mail,Surname, orPersonal data. -
Filter by owner or data source. Check the data assets owned by Jane Smith or located in
pgs_testdatadata source.
|
Use Global search to search across all data assets at once. 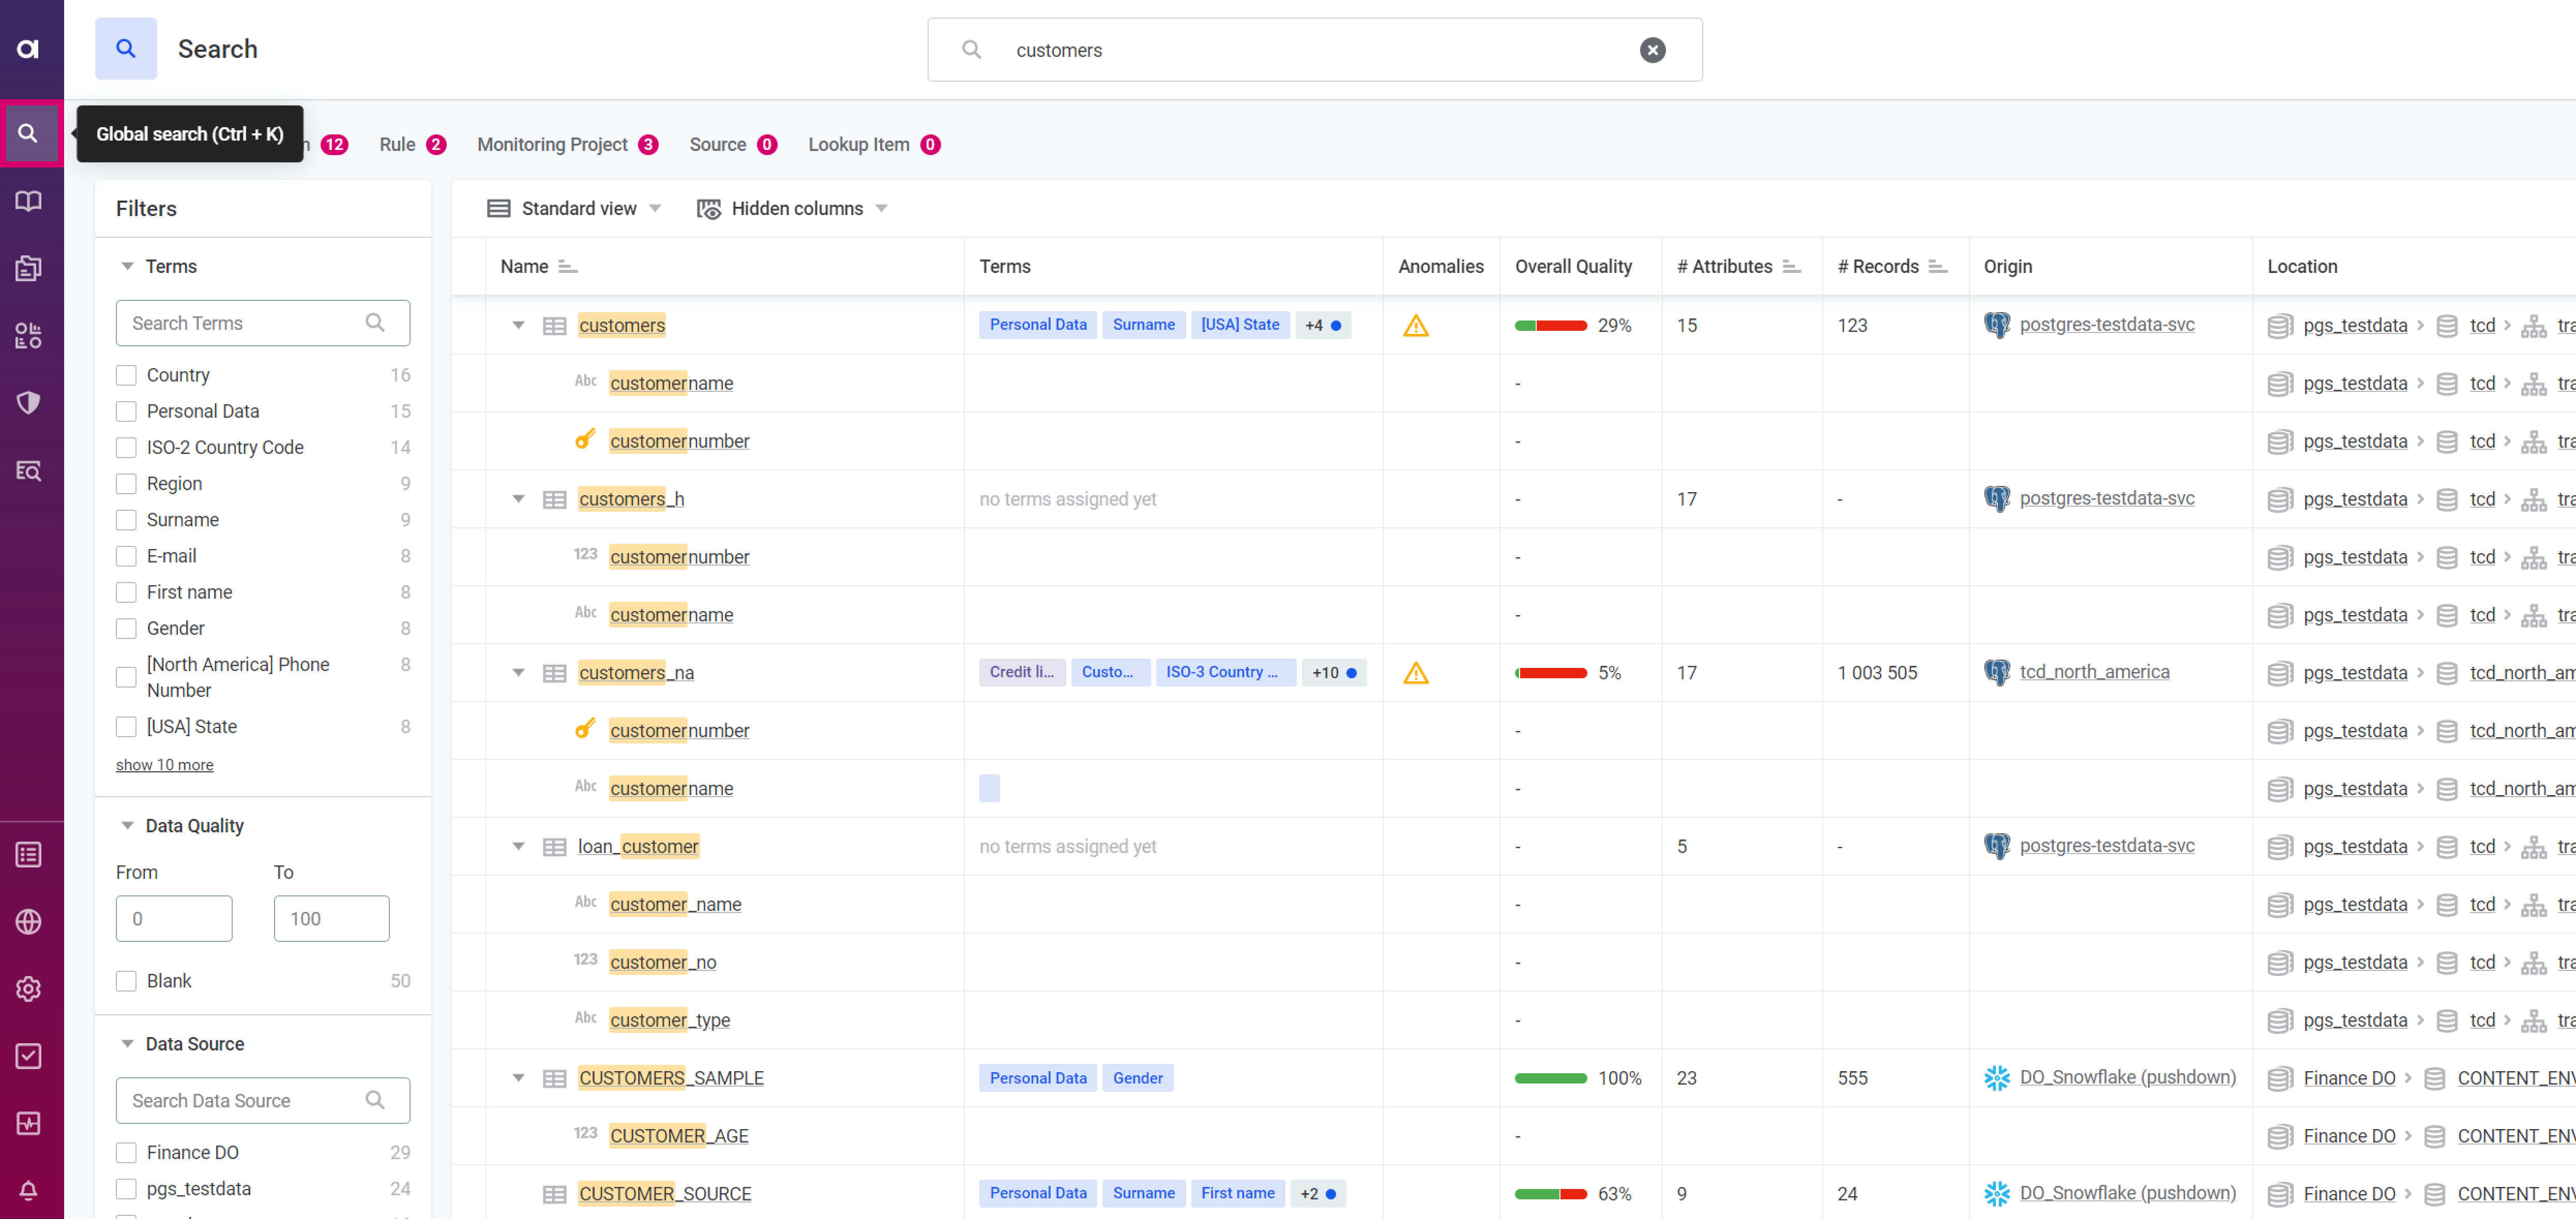
|
|
Recommended resources
|
Explore catalog items
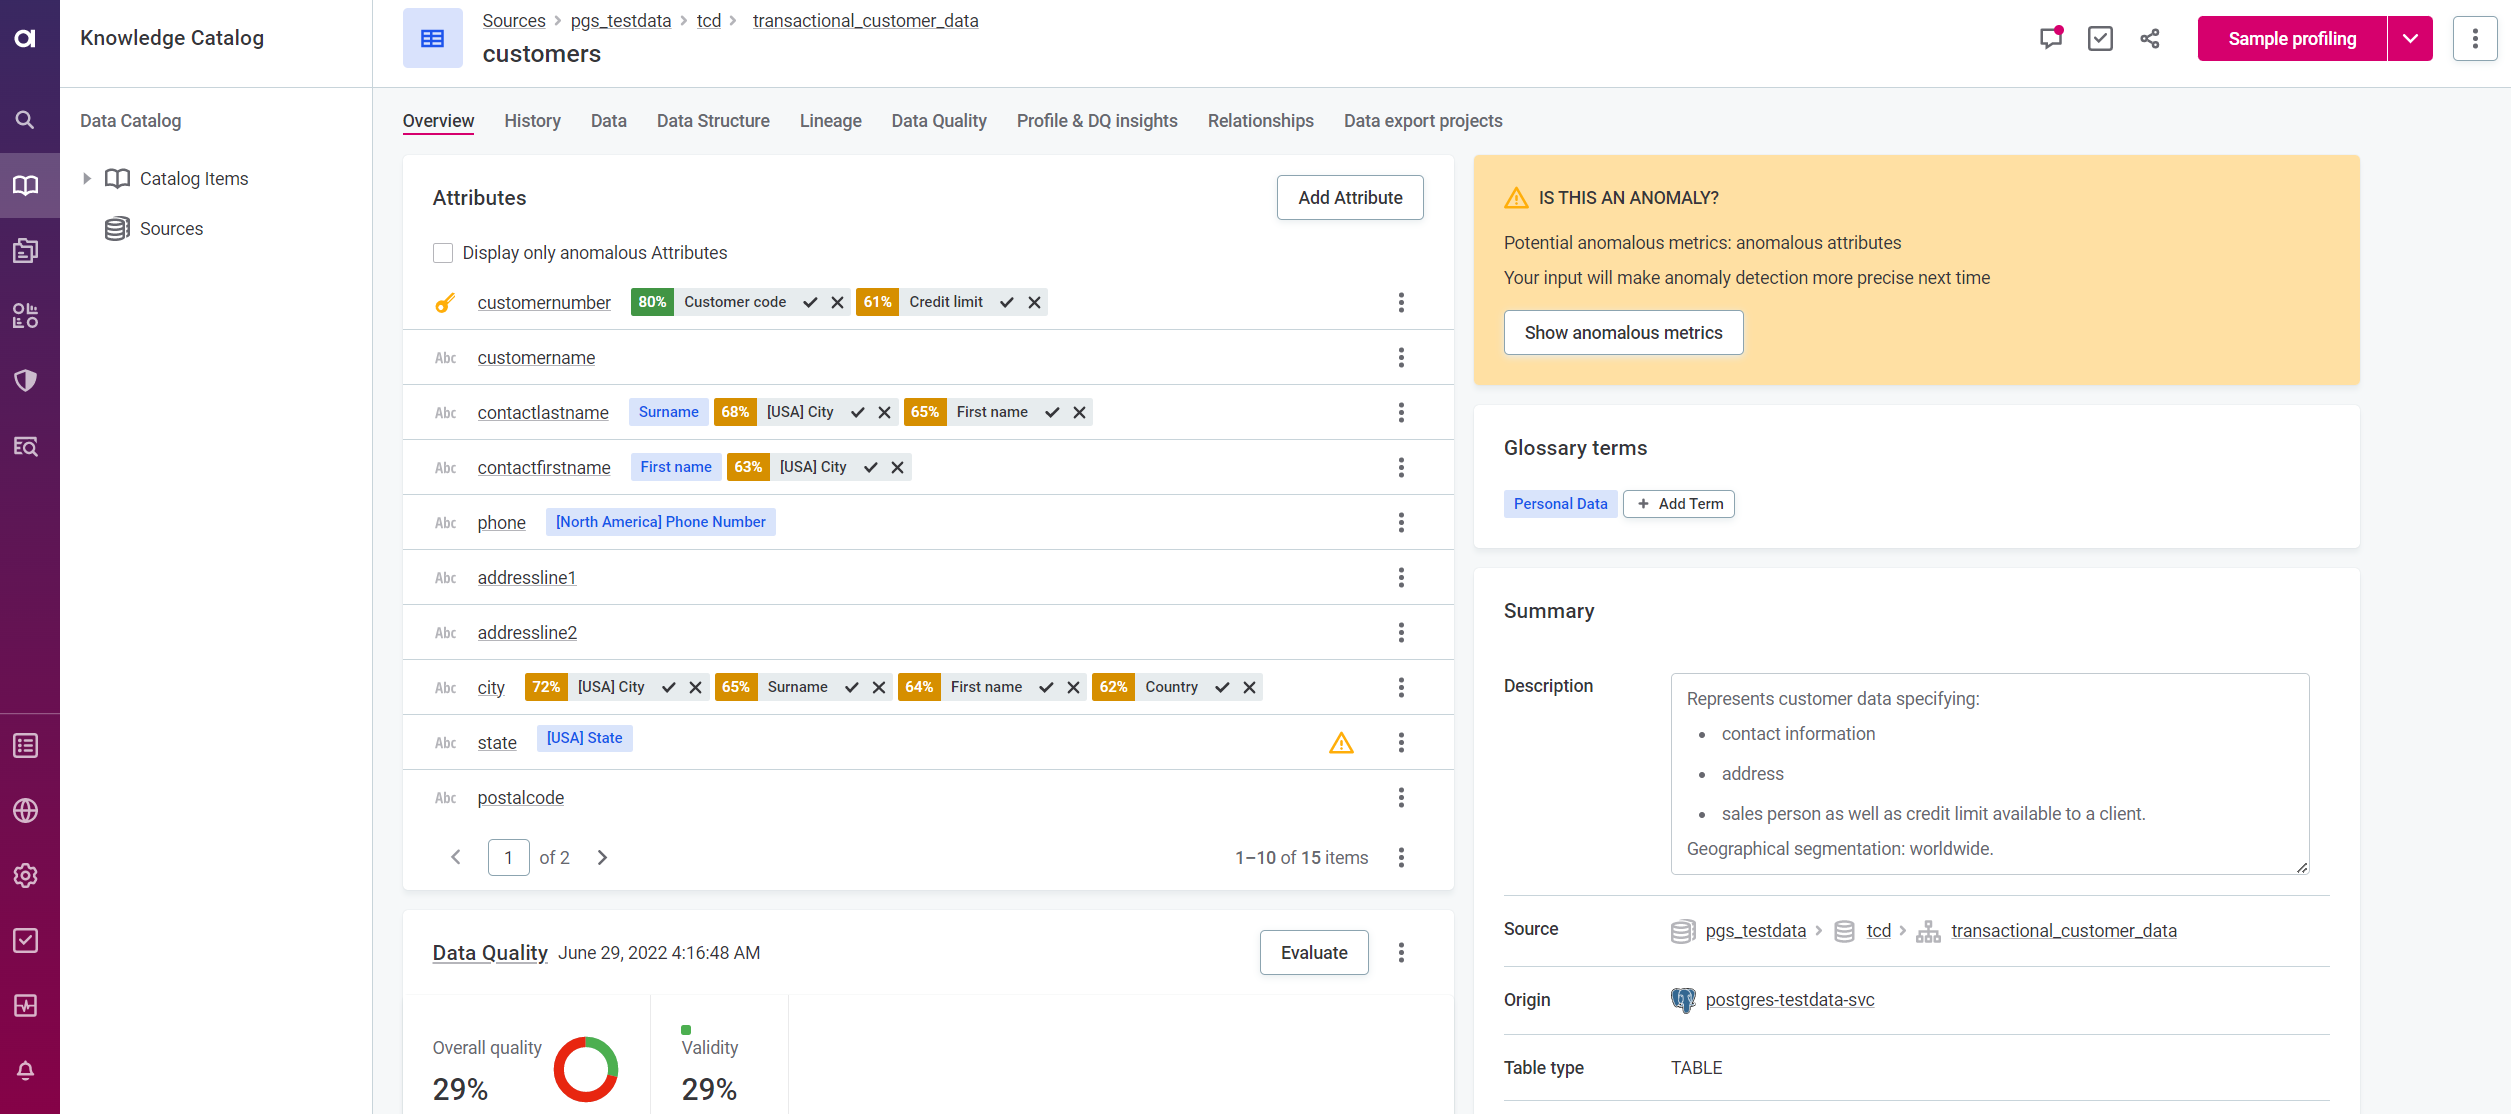
Select a catalog item to learn more about it:
-
Attributes tell you about the catalog item structure. These correspond to table columns in a relational database.
-
The Data tab displays a sample of records from the catalog item.
Depending on the asset you picked, the catalog item might have some business terms added or suggested and some DQ evaluation results available. If there aren’t any, it means the catalog item was imported but not yet analyzed or validated. We’ll get back to this later, in section Profile and validate data assets.
|
Recommended resources
|
Resolve term suggestions
Let’s go back to the catalog item customers to take a closer look at term suggestions.
On the Overview tab of the catalog item, in the Attributes section, notice the difference between terms and term suggestions.
Terms are used to label your data and play a key role in evaluating and maintaining the quality of your data. On the other hand, term suggestions are generated as potential matches for your data and should be accepted or rejected.
Review the list of suggestions and confirm those that make sense to you while removing any that don’t. This way, the platform learns from your choices and makes future suggestions more precise.

| Check the Data and Profile & DQ Insights tabs to see what the data looks like and make more educated decisions about term suggestions. |
Once you resolve the suggestions, you need to finalize your changes by publishing them.
|
Recommended resources
|
Add business terms
In addition to confirming term suggestions, you can manually add business terms that best describe your data. The same process can also be automated using term detection and detection rules: we cover this in Get Started with Data Quality.
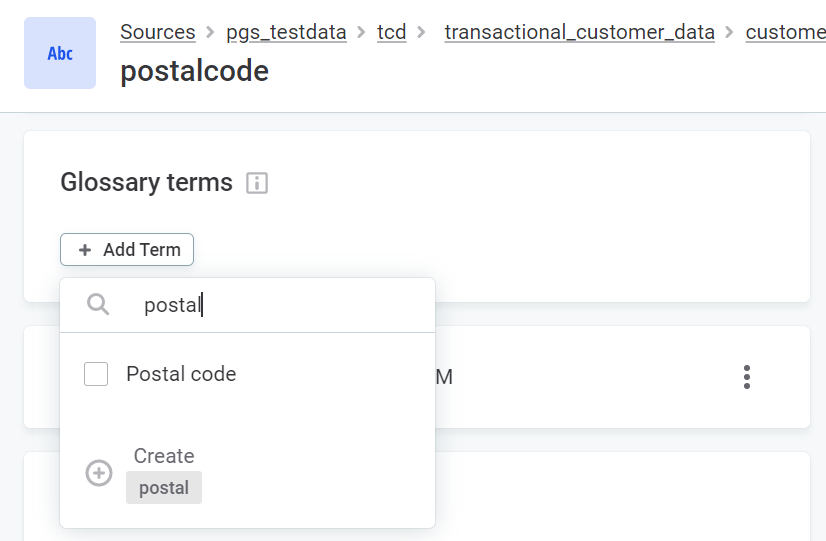
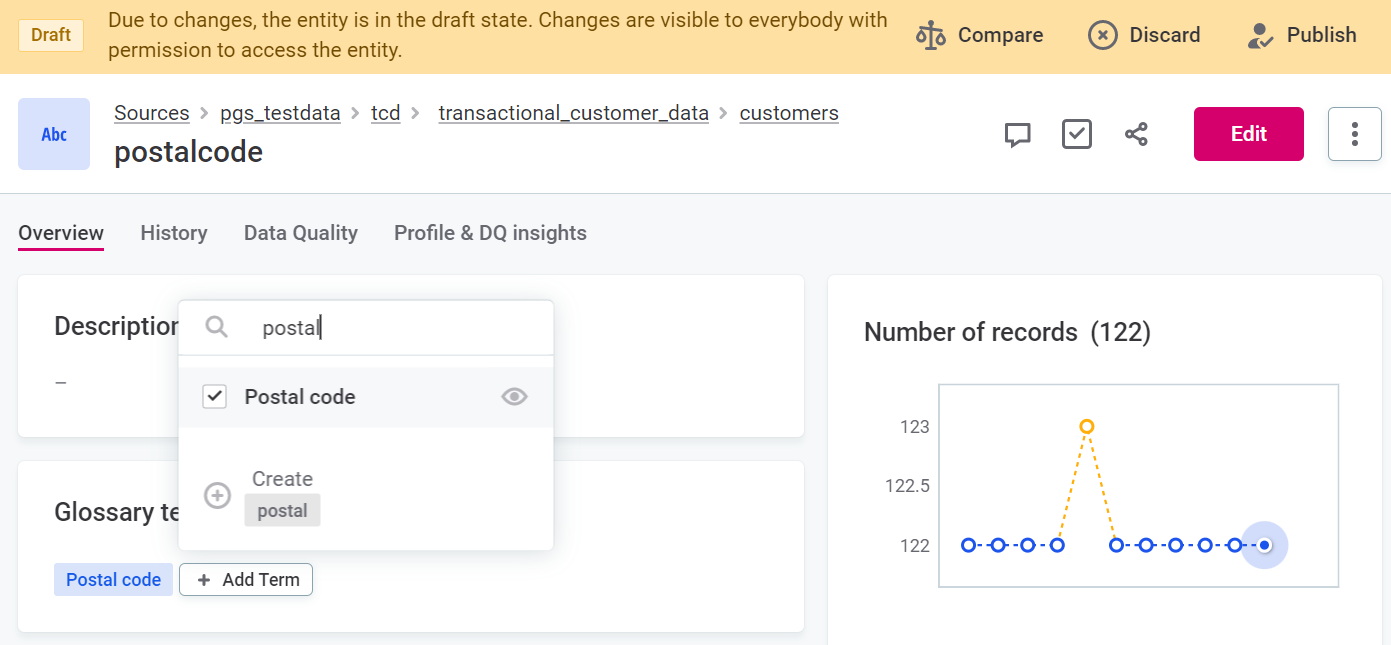
To try it out, open the customers catalog item and find the postalcode attribute.
In the three dots menu, select Show details.
In Terms, find a suitable term, for example, Postal code, and add the term.
Finally, publish your changes. Not all users have the necessary permissions for this. If that is the case, submit your draft for publishing instead.
To share your term with other users, use the Share option (see Share access to data assets).
|
To summarize, terms are labels that help you make sense of your data. They also enable DQ evaluation, which relies on terms to determine which DQ rules should be applied on a particular attribute. Terms can be added to attributes in a catalog item in one of the following ways:
|
|
Recommended resources
|
Profile and validate data assets
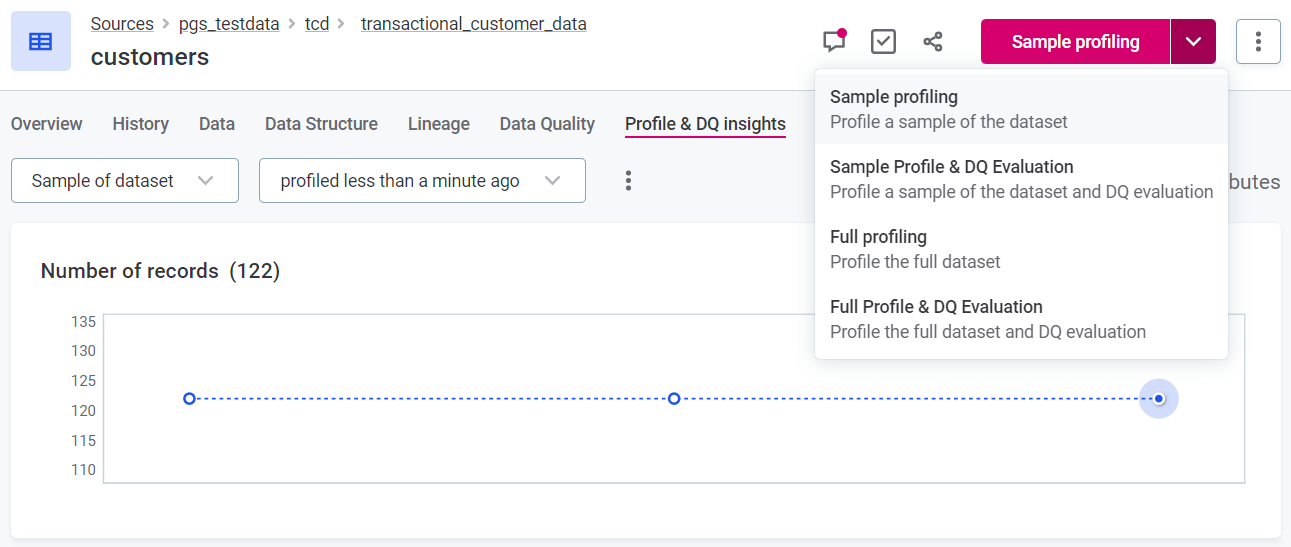
If you applied additional terms to your catalog item, the profile of your data is no longer up-to-date. To update it, you need to run sample or full profiling.
|
Profiling refers to the process of examining and analyzing data in order to collect statistics, discover patterns and distributions, and provide other useful metrics about data.
Additionally, both sample and full profiling can include DQ evaluation. DQ evaluation calculates the quality of your data based on conditions defined in DQ rules. These rules are applied to your data indirectly, through business term mappings. Data discovery is data profiling applied to a whole data source, which allows you to document the entire source in a single click. By default, three options are available:
|
Navigate to the data asset you’re interested in and check the profiling results on the Profile and DQ insights tab. Run Sample or Full profiling to recalculate the results or create your first profile if none are available.
From this same tab, select a specific attribute to view a more detailed breakdown.
Look also at what profiling results are available for attributes of different data types, for example, for string and numeric values.
|
Profile multiple assets at once from the Knowledge Catalog screen. 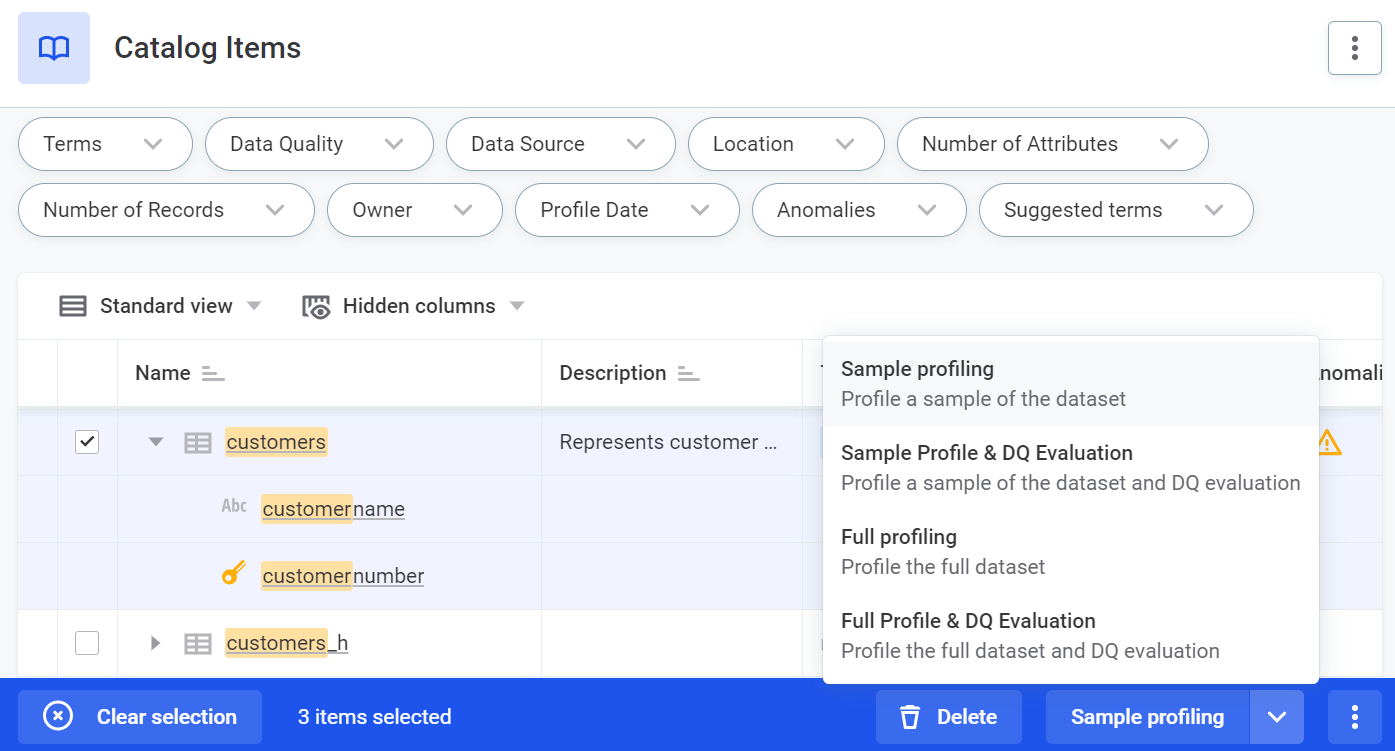
|
|
Recommended resources
|
Create a business term
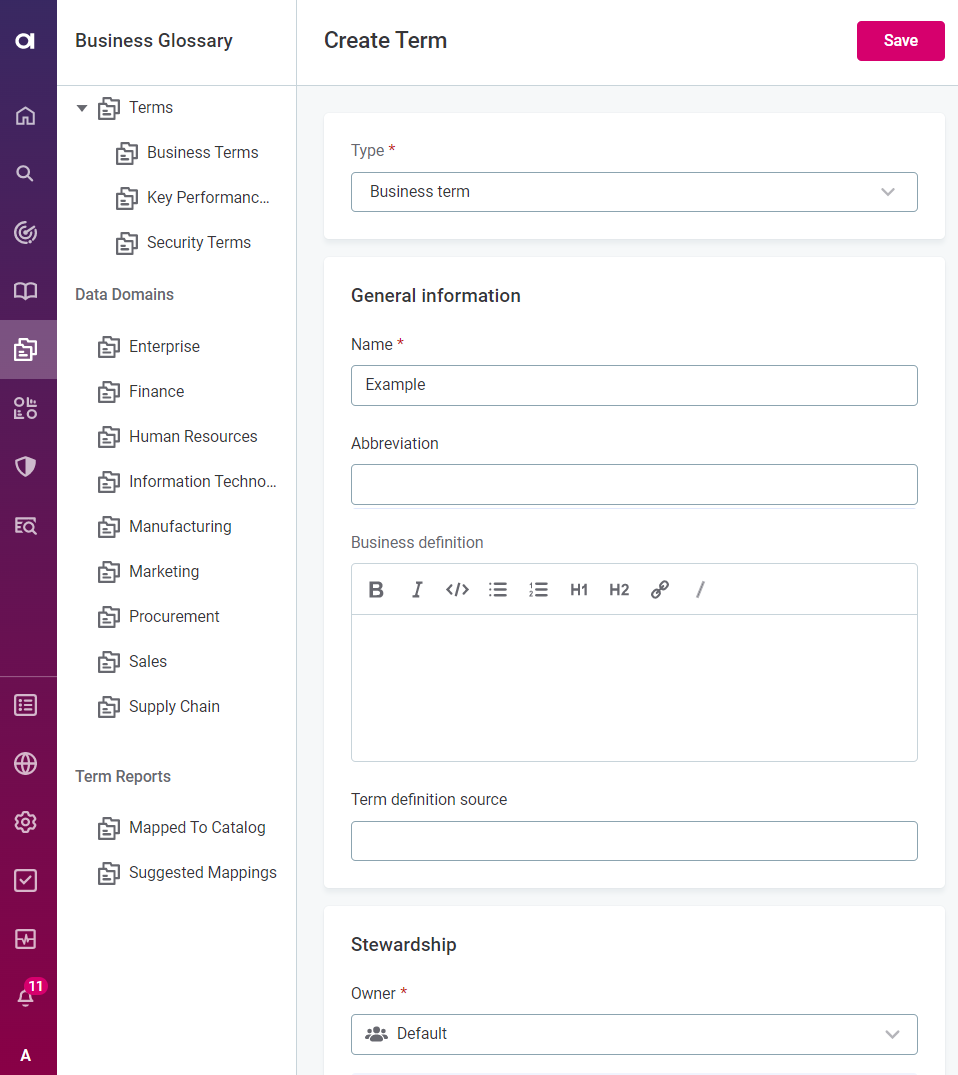
Ataccama ONE comes with a number of preconfigured business terms. While these cover a wide array of different domains, such as finance, marketing, or sales, you often need to create additional business terms specifically for the data you’re working with.
To create a new business term, go to Business Glossary. Select Create and pick the term type that best suits your need.
Enter the term name and business definition, then choose the term owner from the list of users.
|
Use an existing business term as a template for your custom term definition. In Business Glossary, choose a term you want to work with and in the three dots menu select Duplicate. Modify the information as needed and save your changes. |
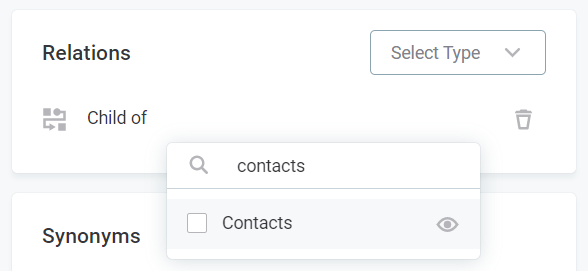
Now let’s define how the new term relates to other terms in the hierarchy.
On the term overview screen, in Relations, select the appropriate relationship type, for example, child of.
The next step is to define the parent term: select Add next to the relationship type and choose a term from the list.
Finally, explore the term hierarchy to see where your term fits in. In Business Glossary, switch to the All tab, and search for the term. Select the appropriate viewing mode and expand the term hierarchy from the parent to the child level.

|
Recommended resources
Terms - Check this for more detailed instructions about how to manage your business glossary, including creating, editing, or applying terms. |
Configure term detection
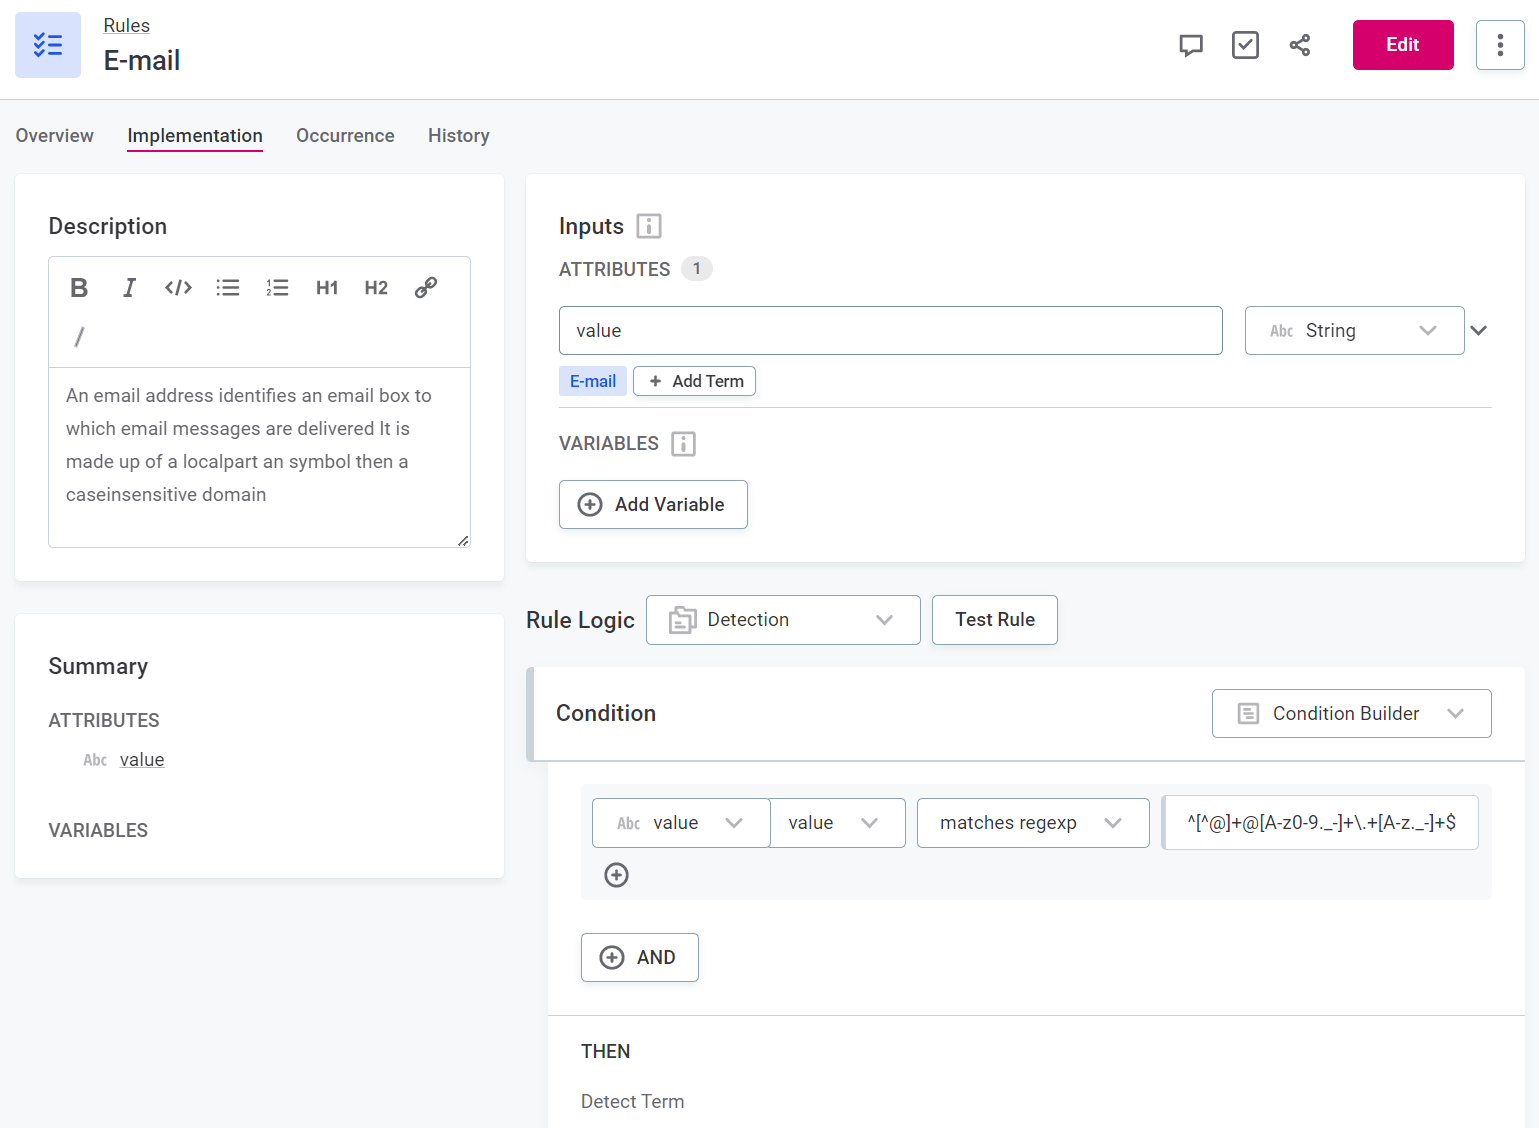
Data categorization is one of the first steps towards knowing your data better. As we mentioned previously, you can manually add new terms to data assets or automate the process using detection rules.
Detection rules function independently from AI-powered term detection, which generates term suggestions.
These rules let you define a stricter set of conditions for recognizing business domains, so you can verify the value format, look for values from a reference list, and so on.
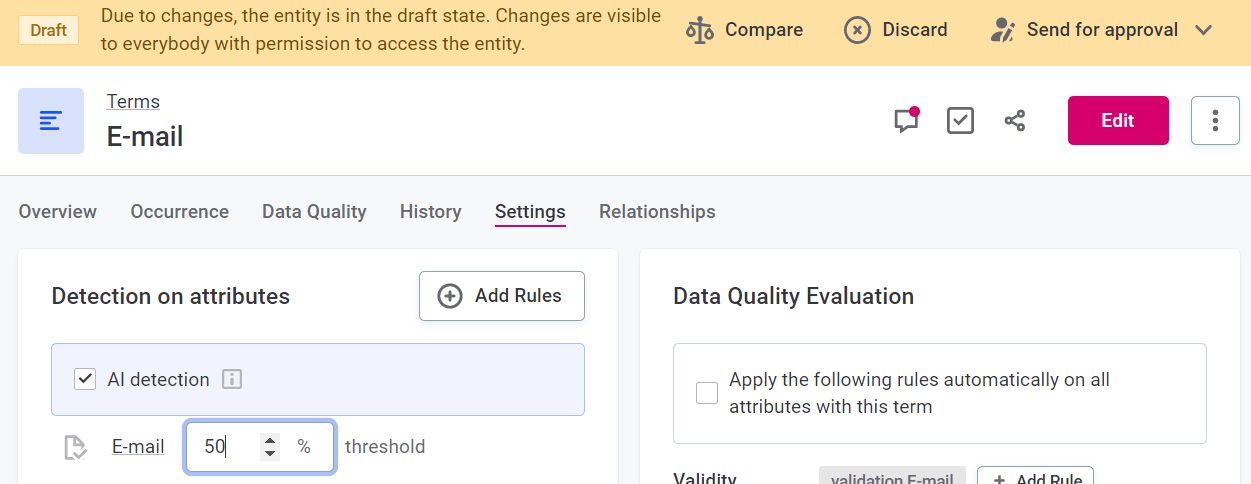
Whether a term is added to catalog item attributes based on a detection rule depends on two factors:
-
The rule logic: This is how the application identifies the attributes to which a term should be applied.
-
The detection threshold: For each rule, you specify the percentage of values in the attribute that must fulfill the rule conditions. If this threshold is not met, the term is not added.
|
Null values are ignored when calculating the percentage of attribute values which fulfill rule conditions. For example, you have 100 records for an attribute and a threshold of 80%. 50 of those records contain null values. The percentage that is considered when deciding if the term should be applied to the attribute is the percentage of the 50 non-null records that satisfy the rule conditions, not the percentage of all records. This behavior is not reflected in the Test Rule feature in ONE. |
|
Term suggestions are always a result of AI detection. If this is enabled for a term (the default setting), the platform proposes this term to be added to data assets based on similarities with other assets with added terms. In other words, if catalog item attributes with already added business terms are found to be similar enough to attributes in another data asset, then these same terms appear as term suggestions on those attributes. You then determine how accurate the suggestions are by approving or rejecting them, as described in Resolve term suggestions. |
|
Recommended resources
|
Collaborate with your coworkers
Use comments and tasks to collaborate efficiently across teams.
Comments
Kickstart conversations with team members, ask questions, and keep track of all relevant information in one spot. By default, you can add comments to terms, catalog items, rules, or monitoring projects.
You can personalize your comments with emojis and gifs and tag your team members (@mention).
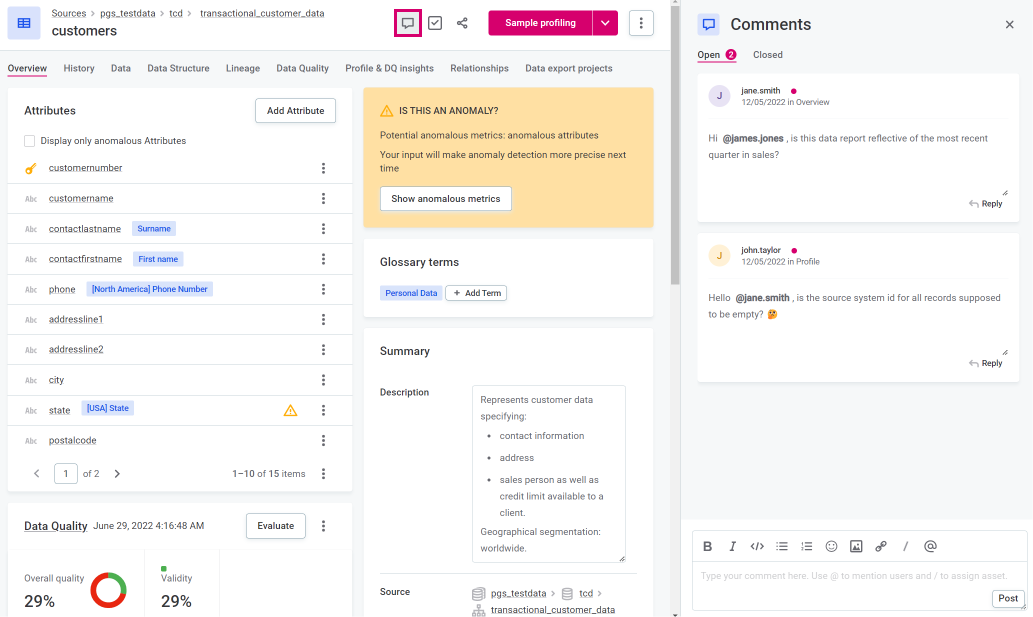
When someone tags you or replies to your comment, you receive an in-app notification so you don’t miss any updates.
You can find all your comments in the Comments part of the Notification Center.

Tasks
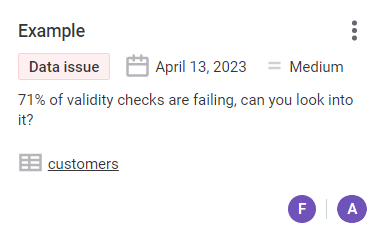
Use tasks to ask for a data asset review or update, or to report an issue with the asset. If your request doesn’t fall under any of these types, select General instead.
| Tasks can also be used to request access to a data asset. Use the Request access option, available when you expand the three dots menu of the asset. This automatically creates an Access Request task. |
The tool links the task with the data asset it is created on, so the person the task is assigned to is aware of what they are dealing with.
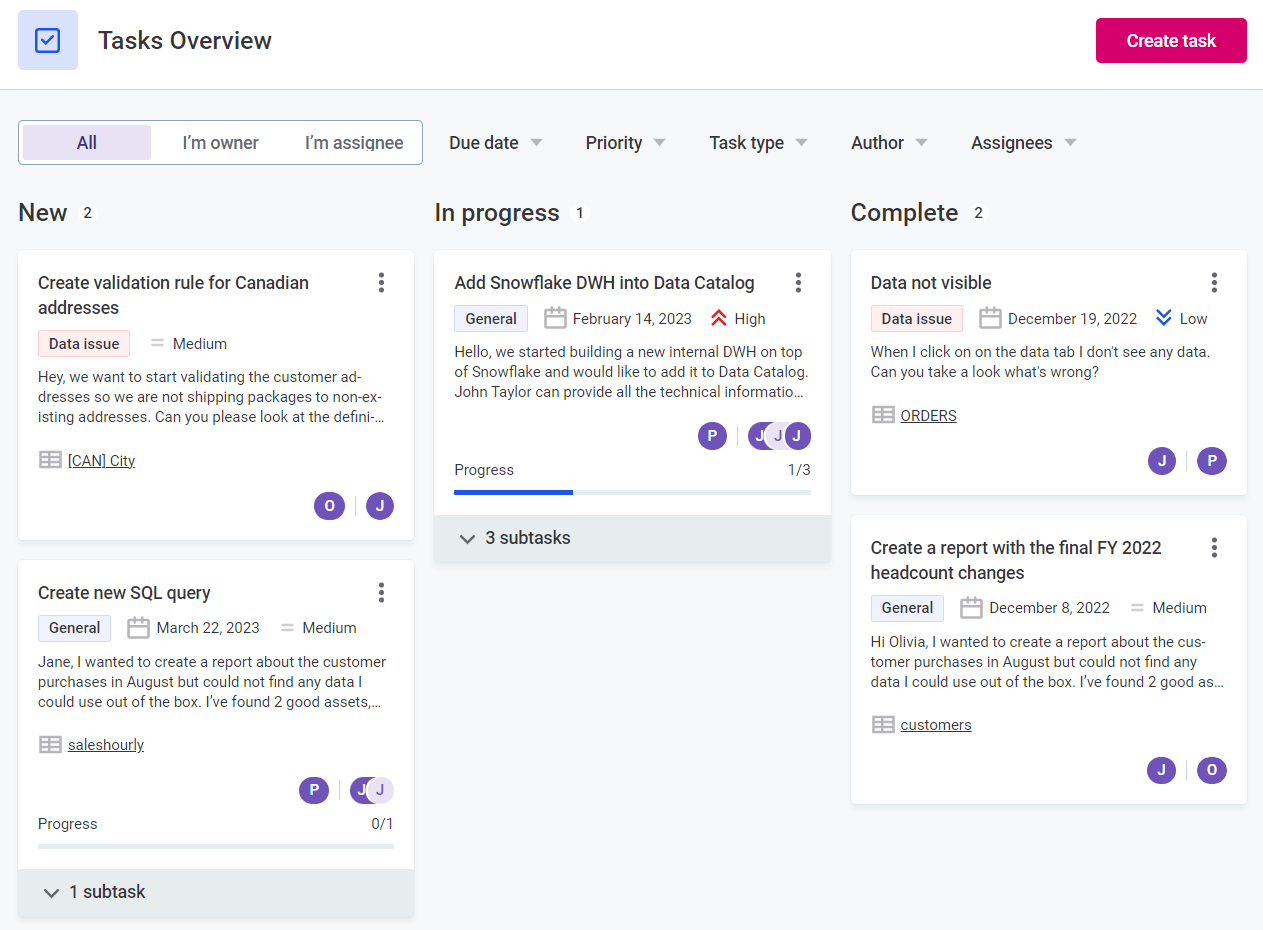
Once you create a task, both you and the task assignee can follow the progress of the task on the kanban board (Tasks Overview) and communicate via comments on the task.
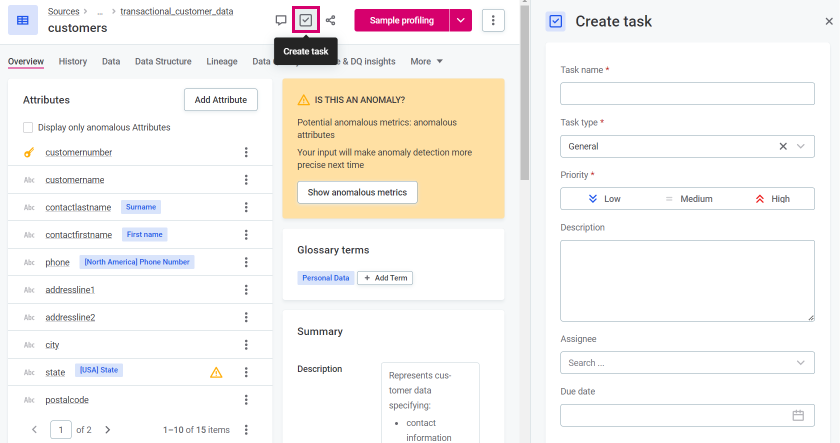
Let’s create an implementation task on a catalog item, for example, customers. Enter a description and select priority, assign it to a colleague, and save your changes.
Track the status of the task and communicate with your colleague about the task requirements on the Tasks and Workflows > Tasks Overview tab in the main navigation menu. You can also view your tasks from the Task Management part of the Notification Center.
Publish your changes
Any change made to the configuration of a data asset must be approved by the asset owner before it is made visible to other users.

| Compare the changes between the updated version of the asset configuration and the previously active one using the Compare option. |
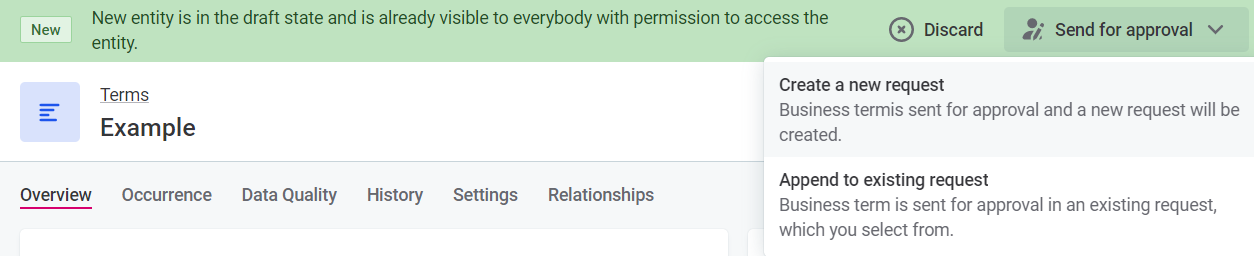
In some cases, like when creating a new business term, a more complex, multistep approval process is initiated. Here you can choose whether to create a new approval request or, if there are other pending changes, add your request to an existing one.
Describe each change in a dedicated field so that the approver has all the information they need in one spot.
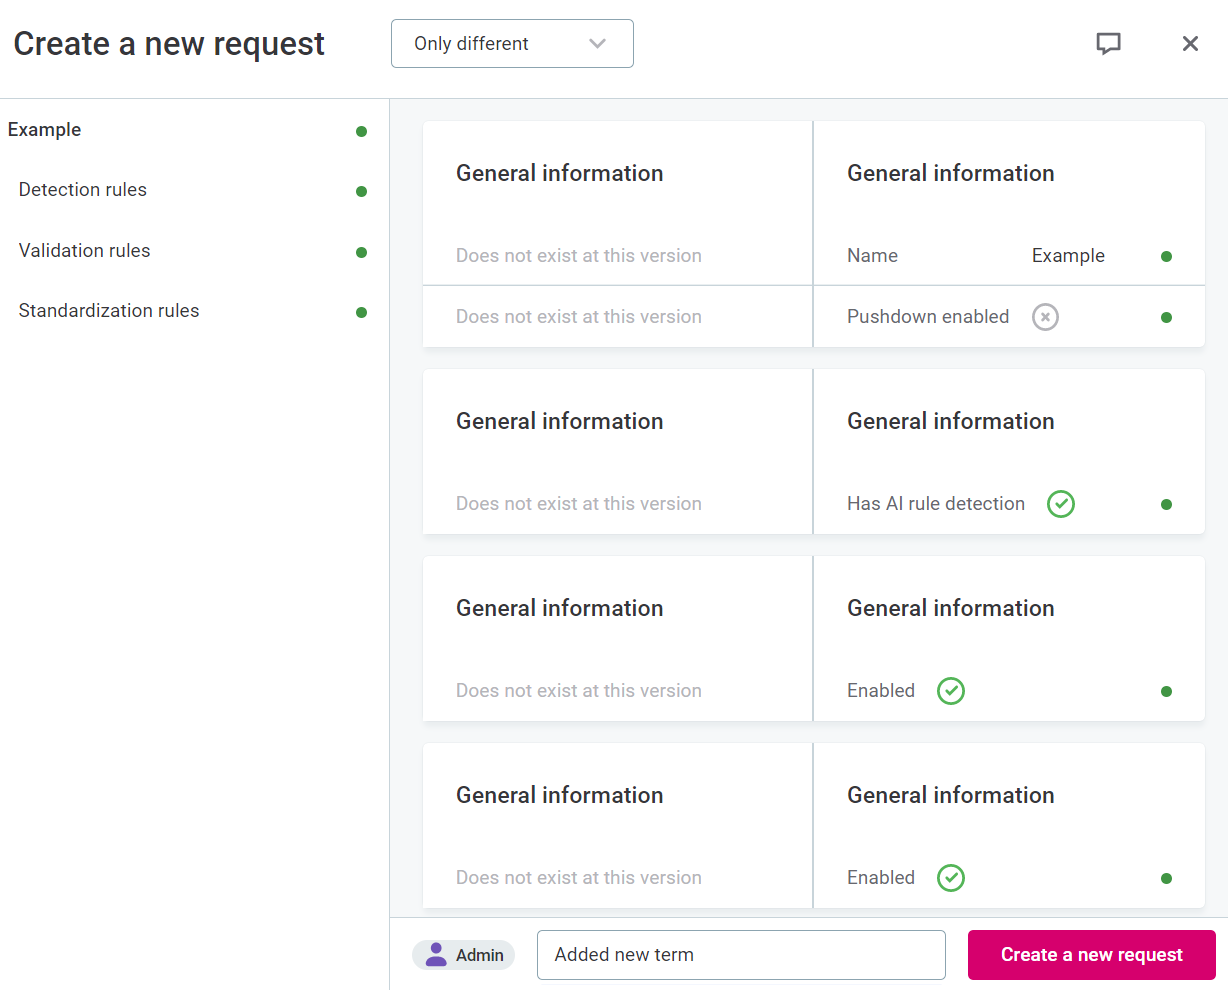
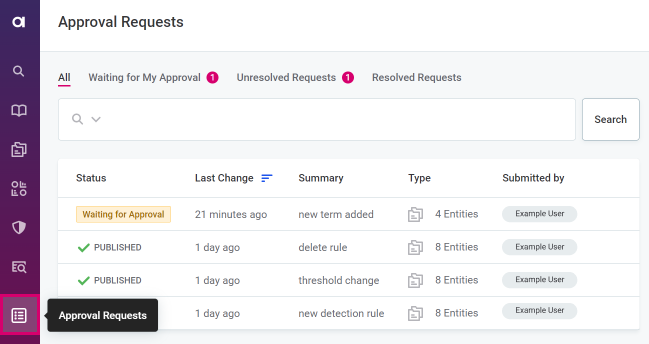
Approval requests are then assigned to the person who should validate the change and confirm or decline it. With default settings, this is the admin user.
View all approval requests from the Approval Requests section of the application.
|
Recommended resources
|
Share access to data assets
If you find a data asset that should be made available to a specific team in your organization, use Share to grant access to all relevant parties, whether it’s a user or a group.
| When your coworker asks for access to an asset using the Request Access option, an Access Request task is generated. Once you approve it, the sharing configuration is updated accordingly. |
You can share catalog items, terms, rules, and so on. The Share option is available in the upper-right corner of every screen.

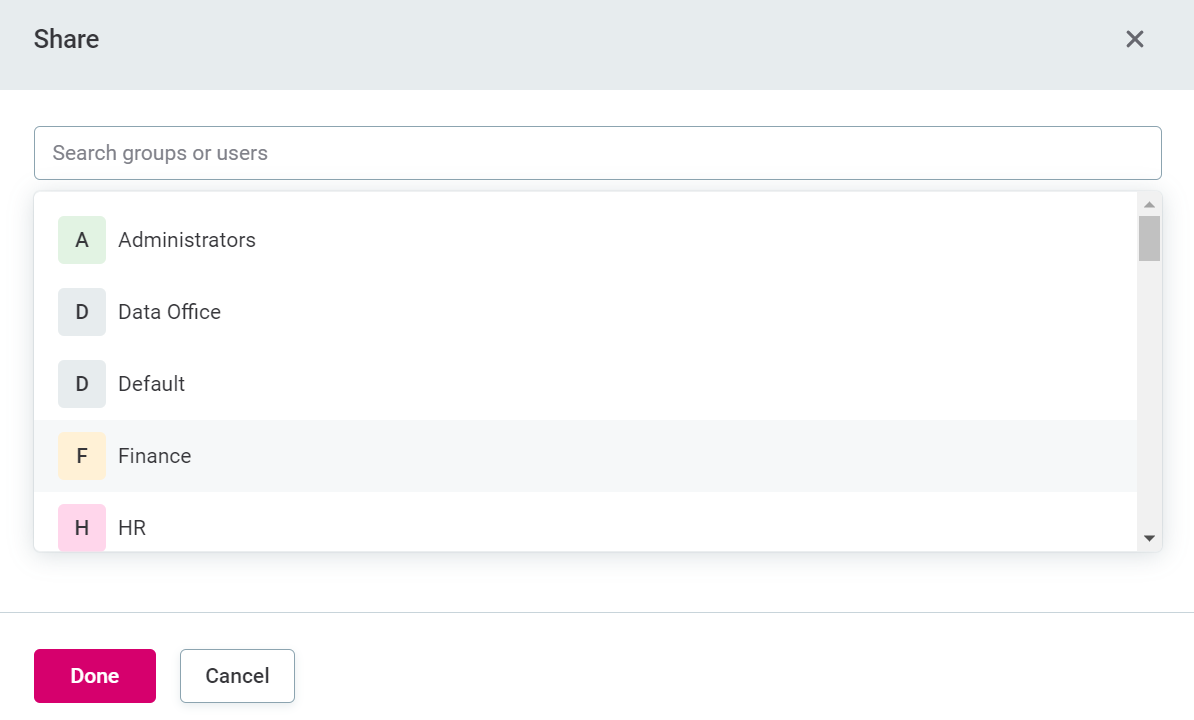
You can review the current access configuration at any point and check the list of available values through search.
Select the user or group you want to share the asset with and then select the appropriate access level. The following access levels are available:
-
Full access: Complete set of permissions for an asset, including the permissions to delete, create, publish, and share. Default roles
data owneranddata stewardhave full access to some assets. -
Editing access: Users can collaborate on an asset with other users and groups. Editors can modify drafts but can’t create, delete, or publish assets. They also can’t manage access to assets.
-
View metadata access: Users can only view metadata but not edit anything. This access level can be useful for metadata reviewers or when a table contains sensitive data.
-
View data access: Users can view all data and metadata but they’re not allowed to edit anything. This is suited for users who should be able to view real data, review assets, and add comments.
You can review or remove the access provided at any point using the same Share option.

|
Recommended resources
|
Was this page useful?