
Create DQ Evaluation Rule
There are multiple ways to create a DQ evaluation rule in ONE:
-
Rule creation in the rule library. This method gives you access to all the possible rule-creation options, including variables, parameters, and scoring. See Create DQ evaluation rule in the rule library.
-
Quick rule creation from the attribute. Workflow optimized for quick and easy rule creation from your data. The rule template is prefilled with input and test data from the catalog item, and contains only the most commonly used options from the rule creation workflow. For more advanced options, such as variables, you can modify the rule in the rule library once it’s created. The rule is automatically applied to the attribute it was created from. See Quick DQ rule creation from attribute.
-
Quick rule creation from the profiling results. You can use mask, pattern, and frequency results available after profiling directly in rule conditions to help make rule implementation quicker and easier. For more information, see Create Rule from Profiling Results.
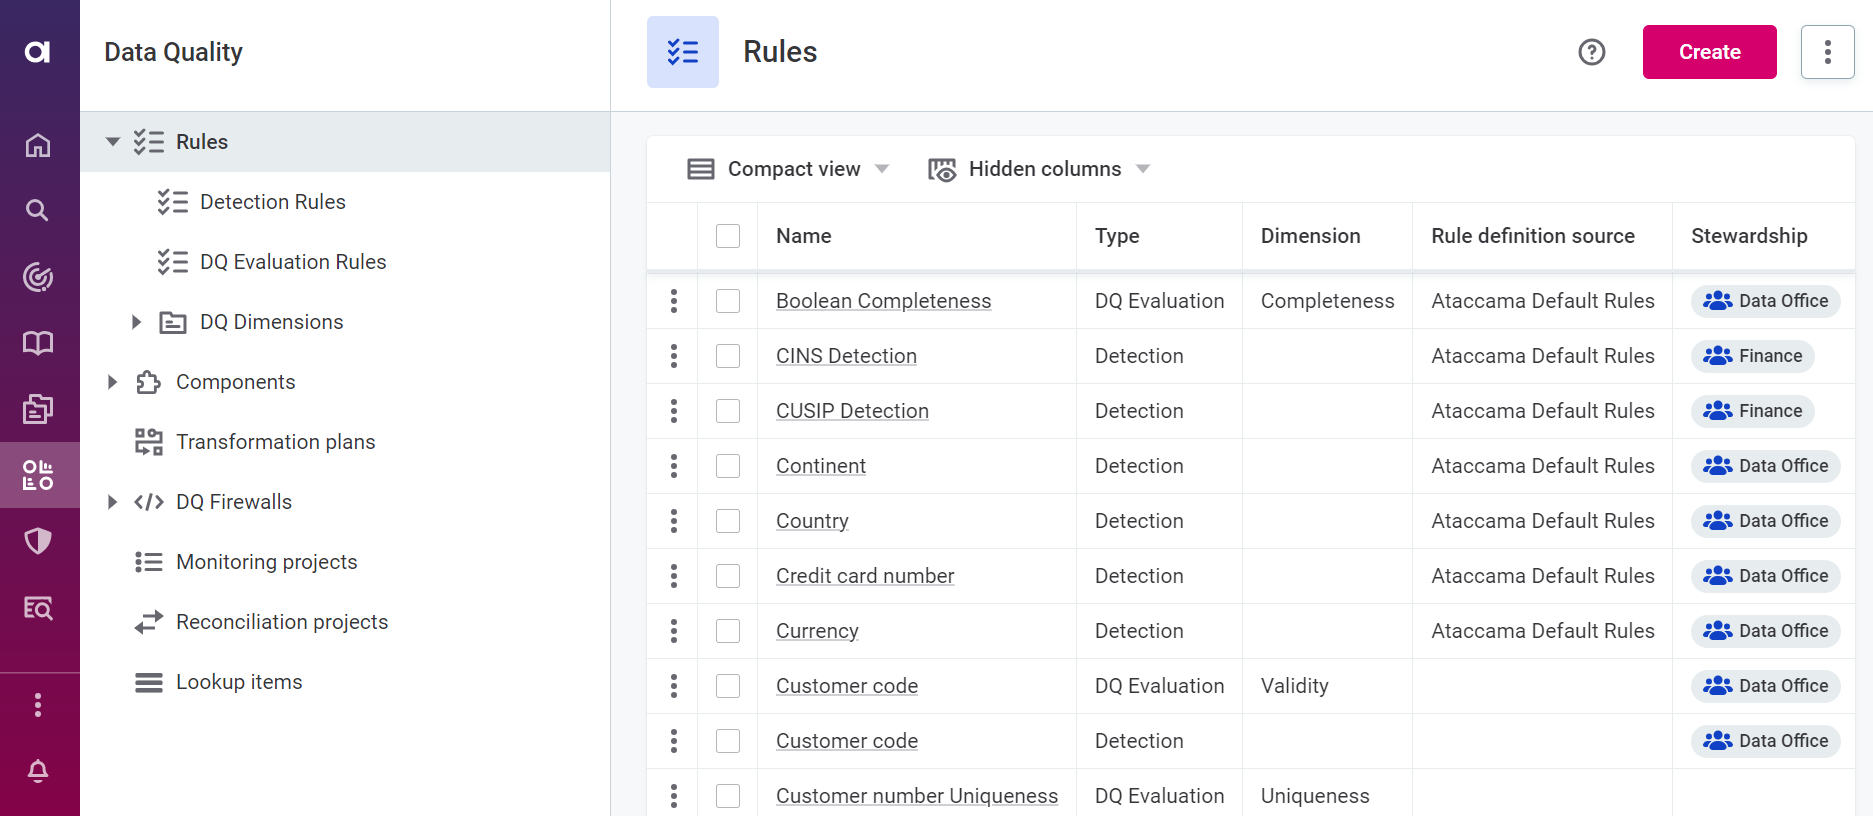
All rules are saved to the rule library under Data Quality > Rules, where you can access and edit them.
| For an example of how to create a DQ rule for a specific use case, see Get Started with Data Quality. |
Before you start
Check the following topics:
-
Data Quality Overview - Learn how data quality works in ONE.
-
Rule Types: DQ and Detection - Read more about the types of rules and their role.
Quick DQ rule creation from attribute
Quick rule creation workflow enables you to quickly create a rule from an input attribute and automatically apply it to that attribute. This is useful in the following scenarios:
-
While browsing Data Catalog, you see wrong data and know the logic of the rule needed to evaluate the data. You can create and apply such a rule straight away, from the attribute listing on the catalog item Overview and Profile & DQ insights tabs.
-
When you need to apply a rule to an attribute but do not find a rule you need, you can create a new one from the Add Rule dialog.
| Before creating a new rule, check for available rule suggestions. |
To create a rule:
-
Open Create DQ Rule dialog in one of the following ways:
-
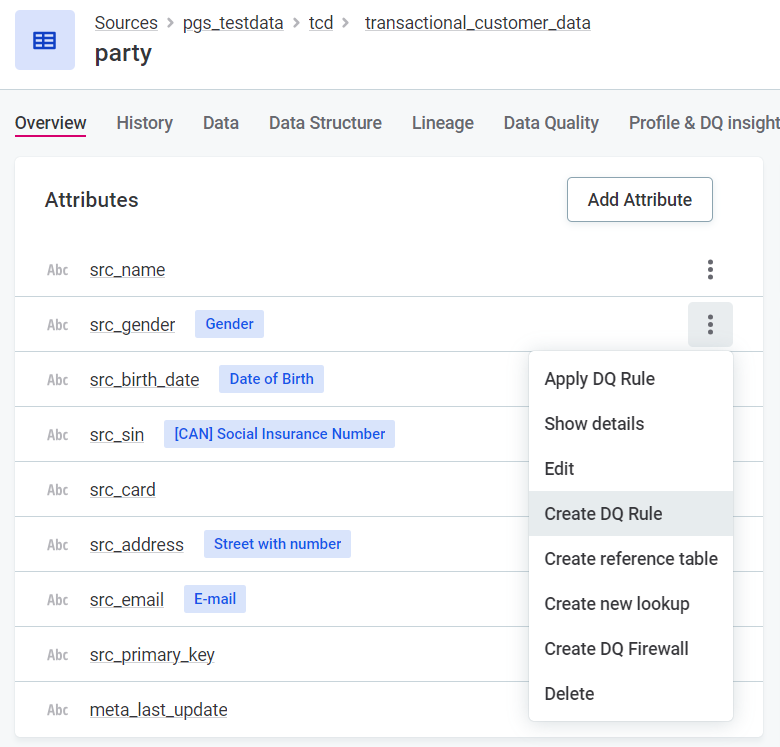
In the catalog item attribute listing (for example, on the Overview tab), select the three dots menu for the attribute and then Create DQ Rule.
-
Select Create Rule from any Add Rule dialog in ONE.
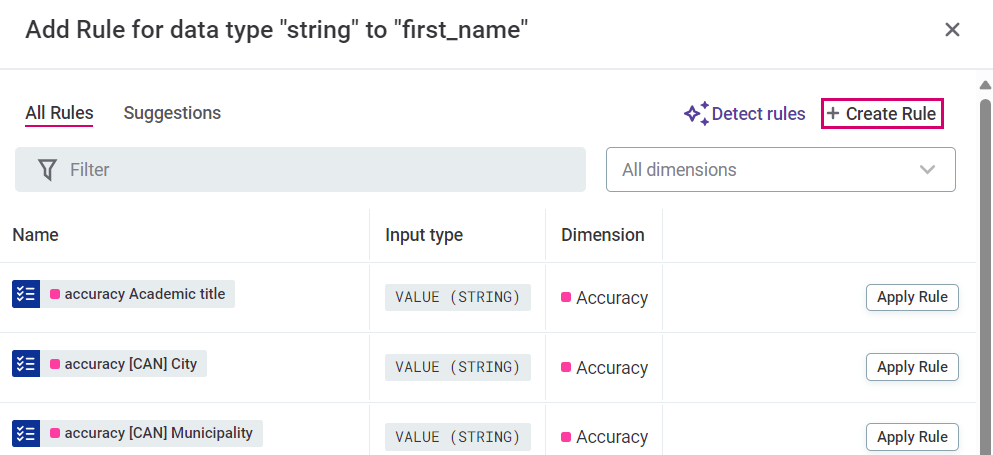
The Add Rule dialog is available throughout ONE in multiple places where you might need to apply a rule.
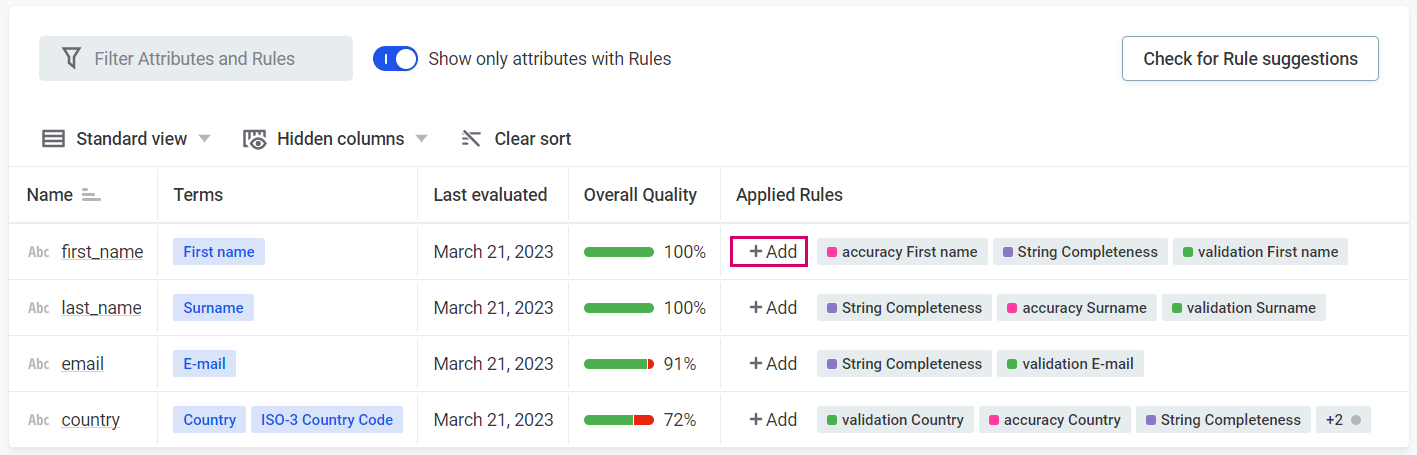
To open the dialog, select Add (catalog item Data Quality tab, monitoring project Configuration & Results tab) or Add Rule (catalog item attribute Overview, Data Quality, Profile & DQ insights tabs).
The rule creation is not possible from the Add Rule dialog in Business Glossary, where rules are applied to terms instead of attributes.
-
-
A Create DQ Rule dialog opens and a draft of the new rule is created, already filled in with the following details:
-
Validity as a default rule dimension.
-
Input attribute name and data type are filled in based on the attribute from which you started rule creation.
You can change these to suit your needs.
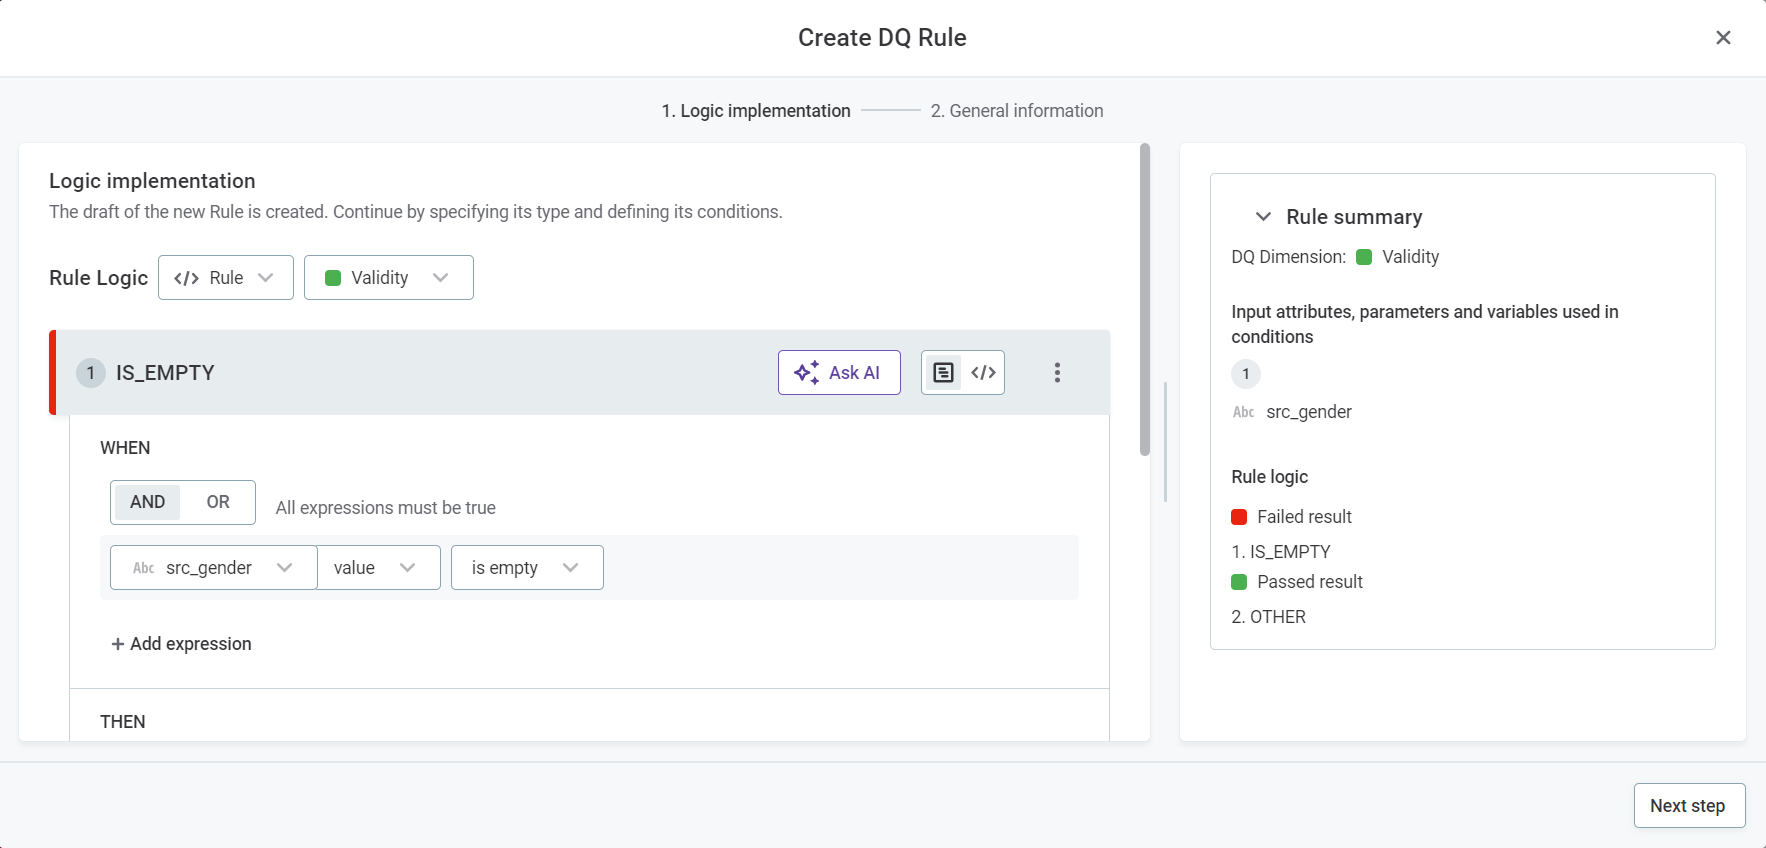
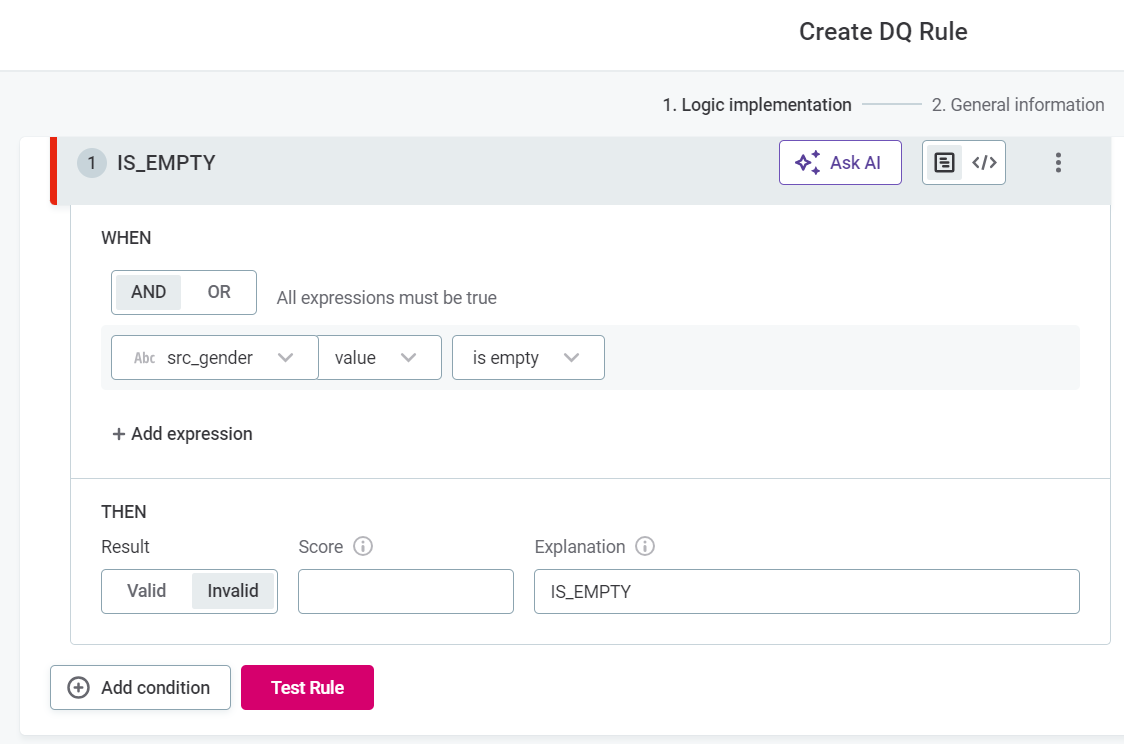
If you are using the quick rule creation workflow for the first time, the rule logic is empty. Select Add condition for the prefilled rule draft to appear.
-
-
Specify the rule conditions. For details on building rule conditions, see Create DQ evaluation rule in the rule library, section Rule logic.
-
You can optionally test the rule by selecting Test Rule and trying different inputs in the test table.
The test table is prefilled with the data from the samples saved in the Data tab of the catalog item. You can also fill in the values manually, or copy and paste them from an Excel or CSV file.
Data samples are visible only to users with View data accessto the catalog item (Data Owner and Data Steward by default). This data is not stored and is deleted once you exit the rule creation dialog.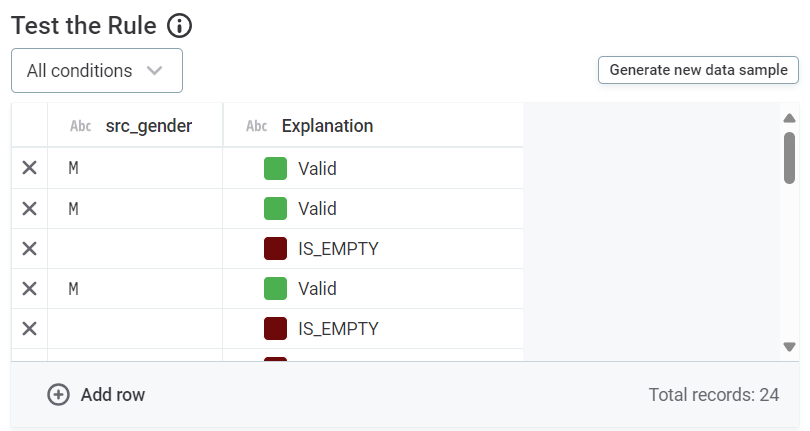
You can edit any value in the table by double-clicking it. To remove a row, select X next to the row, and to add a row, select Add row at the bottom of the test table.
The results are evaluated automatically after any change in the test table.
To renew the test data, or to populate the test table column after adding a new condition, select Generate new data sample.
-
Select Next step.
-
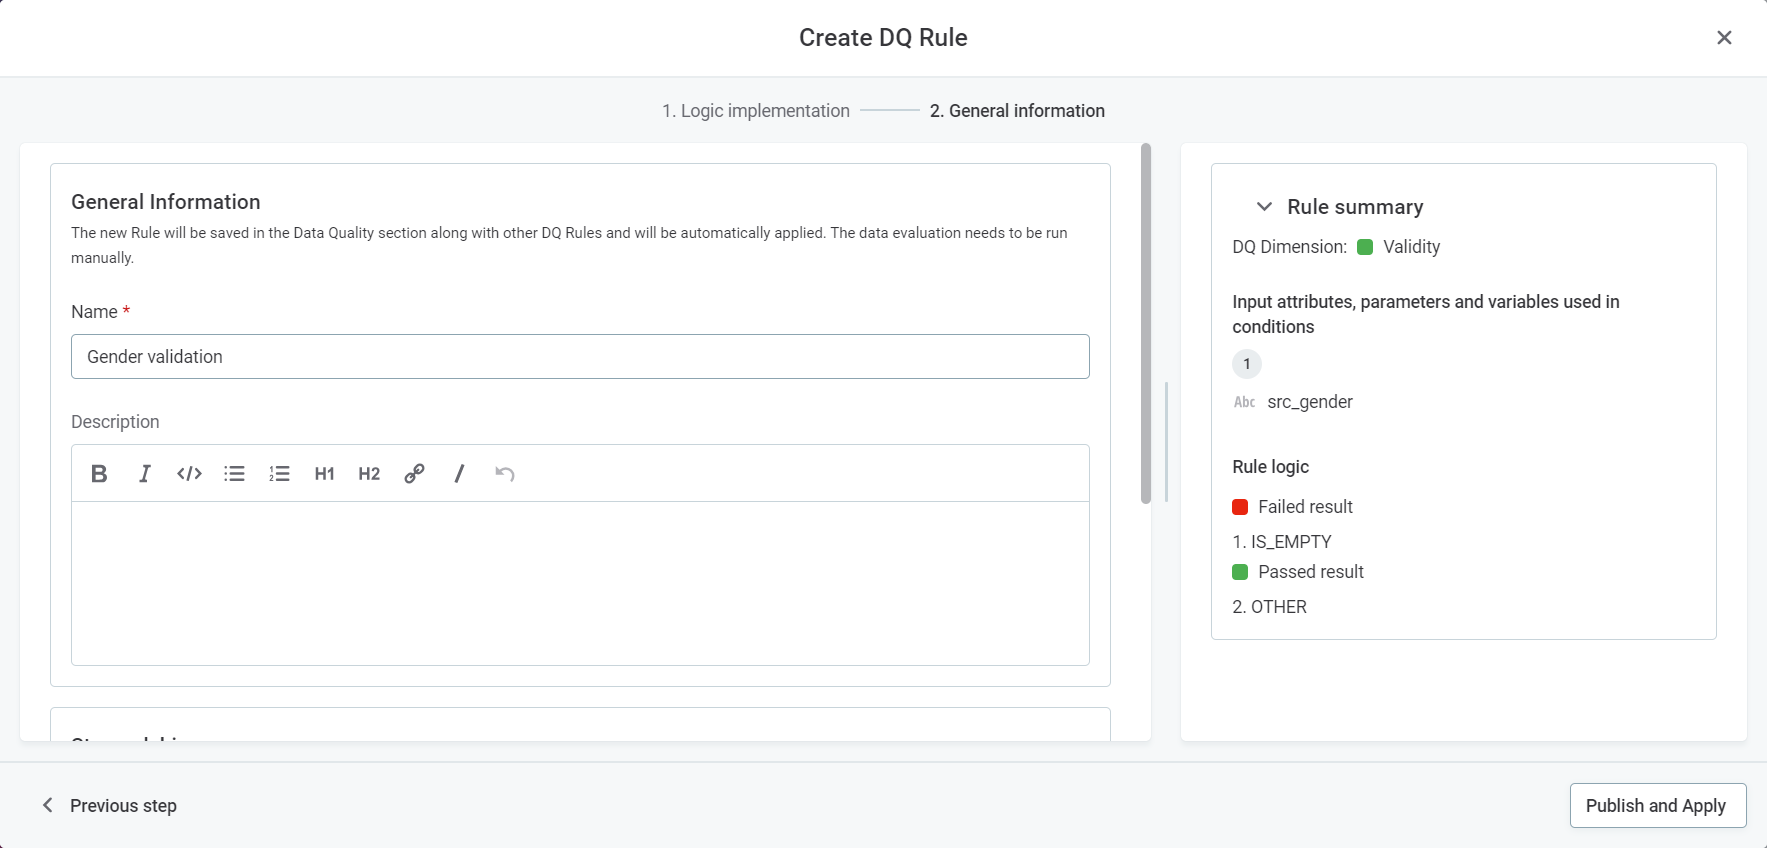
In the General Information screen, provide the following information:
-
Name: The name of the rule.
-
Description (optional): A description of the rule and how to use it.
-
Stewardship (recommended): Select the user group which are owners of the asset. After you select a group, the list of users assigned to the governance roles within the selected group is displayed. For more information, see Stewardship.
-
Share with: Select groups or users with whom you want to share the rule (see the section Share access to data assets in Get Started with Catalog and Glossary).
If needed, select Previous step to return to the previous screen.
You can leave rule creation dialog at any time - select X and decide whether to keep or discard the draft. If you keep the draft, you can find it in the rule library in Data Quality > Rules.

-
-
Select Publish and apply to publish the rule and apply it to the attribute.
Depending on your access and whether the review workflow is set, you might see Publish, Request publish, Request publish and apply, or Request review and publish. Select the option to proceed with publishing and applying the rule to attribute. -
A message appears confirming that the new rule was created and applied to the attribute.
-
To use the rule for DQ evaluation, publish the catalog item.
Create DQ evaluation rule in the rule library
To create a rule, do the following:
-
Navigate to Data Quality > Rules
-
Click Create.
-
Provide the following information:
-
Name: The name of the rule.
-
Rule type: See Rule type for details.
-
Description (optional): A description of the rule and how to use it.
-
Rule definition source (optional): A descriptive name for the data source associated with the rule.
-
Find similar rules (recommended): Use the AI-powered feature to identify existing rules with similar names or descriptions. Review the results to avoid creating duplicates.
-
Stewardship (recommended): Select the user group which are owners of the asset. After you select a group, the list of users assigned to the governance roles within the selected group is displayed.
For more information, see Stewardship
-
-
Click Save to create a draft of the rule.

-
Before publishing or submitting an approval request, you need to define the rule logic consisting of at least one input attribute and condition. Continue to Rule implementation.
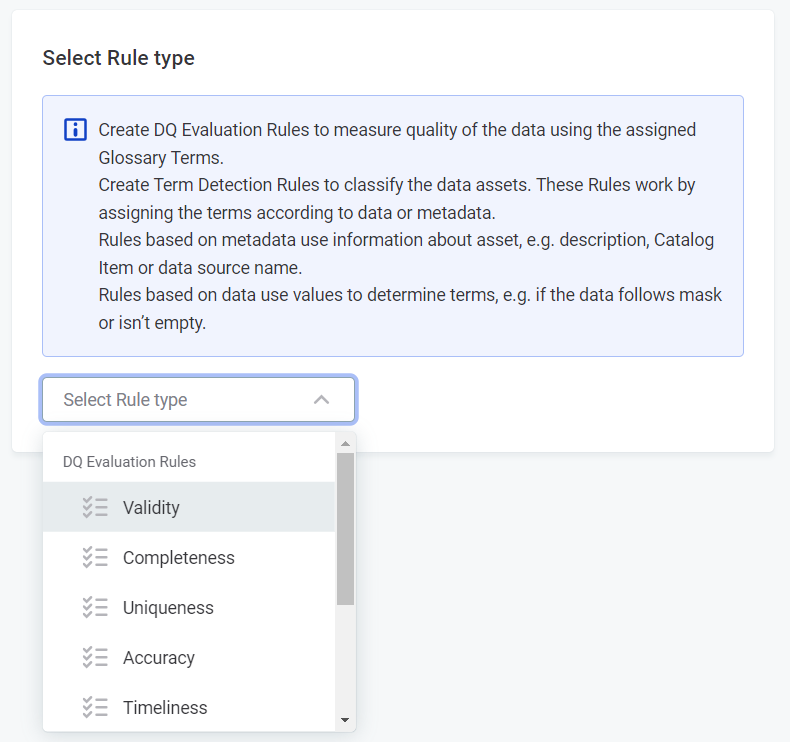
Rule type
Use the dropdown, and under DQ Evaluation Rules, choose from the following:
-
Validity: Validity rules verify the usability of the data (for example, regarding data format, data content or attribute relations). The default results are
ValidandInvalid. -
Uniqueness: Use this dimension to verify that there are no duplicate values and only one instance appears in the dataset. The default results are
Unique,Not populated, andNot Unique. -
Completeness: Use this dimension to verify that the value field is filled. The default results are Complete and Not complete.
-
Accuracy: Use this dimension to check whether values are accurate and reflect the true values, for example, based on reference data. The default results are
Accurate,No reference available, andNot accurate. -
Timeliness: Use this dimension to verify whether data is available at the time it is needed. The default results are
Timeliness ok,Minor delay, andMajor delay. -
Custom: If you have created any custom dimensions, they can also be selected here.
| DQ dimensions are fully customizable. Validity, Uniqueness, Accuracy, Completeness, and Timeliness are available by default, but their configuration and results can be changed if required. For more information, see Data Quality Dimensions. |
Rule implementation
Once you have created the rule draft, you are redirected to the Implementation tab.
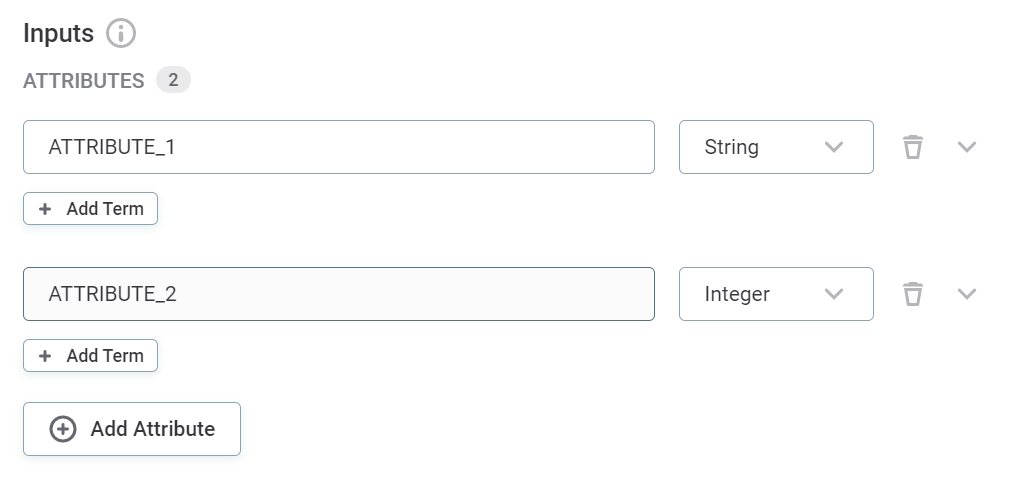
Inputs
-
Add input attributes by providing names and selecting the data types. Select Add attribute if you require additional fields.
Input attributes are abstract at this point. The number of input attributes defined here and their rule logic become available when you apply rules to catalog items.
The attribute names can be as you choose and do not affect the implementation.
If special characters or reserved words are used in input names, they must be enclosed in square brackets or publishing fails. -
(Optional) Add terms to the attribute.
Adding terms to input attributes during implementation results in this rule being suggested by the system in the instance an attribute also has this term. -
(Optional) Add Parameters. Parameters are placeholders for values provided by the user. First, use parameters in conditions instead of constant values, and then provide parameter values when applying the rule. This way, you can create reusable rules that can be applied with different parameter values.
For example, you can use parameters to set up a DQ rule that checks whether the value of an
ageattribute falls within a certain interval, which is not known upfront. This rule will use any age interval specified by the user while applying the rule to theageattribute.To add parameters:
-
Select Add parameter.
-
Provide a meaningful parameter name.
-
Provide a data type.
There are two additional data types that can be used with parameters:
-
List of values: Useful for validating whether the value is or is not from a predefined list. The list of values is provided by user when applying the rule.Used in combination with the
Is from parametrized listorIs not from the parametrized listcondition. -
List of masks: Useful for validating whether masks and patterns come from a predefined list or not. This is useful especially for autogenerated rules where the masks are prefilled from profiling (an option preferred to specifying masks manually).This datatype is not supported in the Condition Builder yet, use ONE expression
matches([Valid masks], Attribute)instead.
To add fields for additional parameters, select Add parameter.
Parameter values are case sensitive. -
-
-
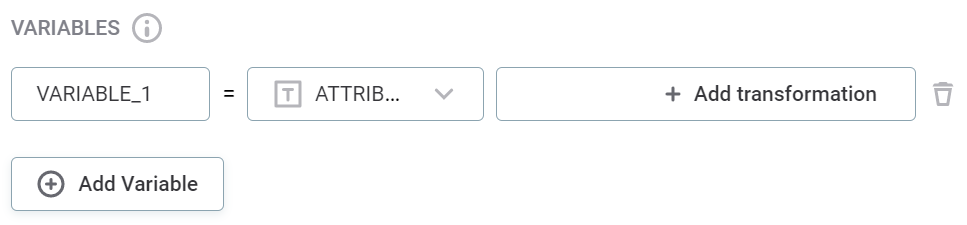
(Optional) Create Variables from your inputs. Within the Variables section, you can apply a range of transformations to your input attribute. For example, apply the rule conditions only on trimmed versions of string attributes.
To create variables:
-
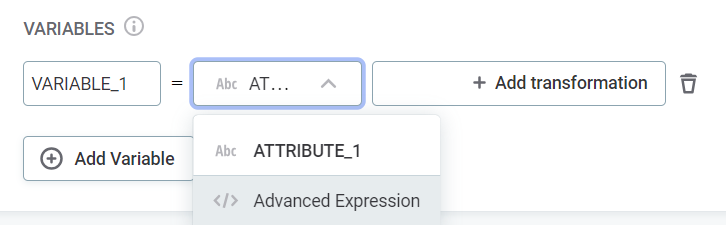
Select a name for your variable. You can choose a meaningful name or leave as default. To add fields for additional variables, select Add variable.
-
Select the attributes on which the transformations are applied. Use the dropdown to select from the list of input attributes - you apply the transformations in the next step.
Alternatively, if you are an advanced user, use the dropdown to select Advanced Expression and define the attribute and the transformations using ONE expression language.
-
Add transformations using the Add transformation option. The transformations available depend on the data type of the selected attribute: a full list of types and available transformations is provided below.
You can apply multiple transformations to one attribute, but you can only add them in a sensical sequence. For example, if you start with an attribute of data type
Stringand apply the transformationTo integer, you can’t then add theUppercasetransformation, as this is only available on string.For the same reason, you can only remove the last transformation in a sequence at any given time. To remove the transformation, hover over the last transformation and use the
xto delete.Expand to see all available transformations
Datatype Available transformations Description StringTo floatChanges data type from string to float.
To integerChanges data type from string to integer.
To longChanges data type from string to long.
UppercaseConverts string characters to uppercase.
LowercaseConverts string characters to lowercase.
TrimRemoves spaces from both ends of the string.
Squeeze spacesTrims string and replaces repeated spaces with a single space.
Remove non-digitsRemoves non-digit characters from string.
Remove non-lettersRemoves non-letter characters from string.
IntegerTo floatChanges data type from integer to float.
To dateChanges data type from integer to date.
To longChanges data type from integer to long.
BooleanTo StringChanges data type from Boolean to string.
DateTo datetimeChanges data type from date to datetime.
To stringChanges data type from date to string.
DatetimeTo dateChanges data type from datetime to date.
To stringChanges data type from datetime to string.
LongTo floatChanges data type from long to float.
To stringChanges data type from long to string.
To dateChanges data type from long to date.
To datetimeChanges data type from long to datetime.
FloatTo stringChanges data type from float to string.
FloorRounds to the nearest integer that is less than or equal to float value.
CeilingRounds to the nearest integer that is greater than or equal to float value.
RoundRounds to nearest integer.
-
-
-
Rule logic
First, select whether you are creating a standard Rule, Aggregation rule, or Component rule.
|
Component rules need to be created first in ONE Desktop by power users. To add a component rule, select the component from the list of existing components by clicking Select a Component. The component rule needs to fulfil the following conditions in order to ensure the correct results are returned:
Aggregation rules require additional configuration, described in Aggregation Rules. |
Provide the rule conditions and an explanation of the results. There are two ways to do this: through the Condition Builder or via Advanced Expression:
-
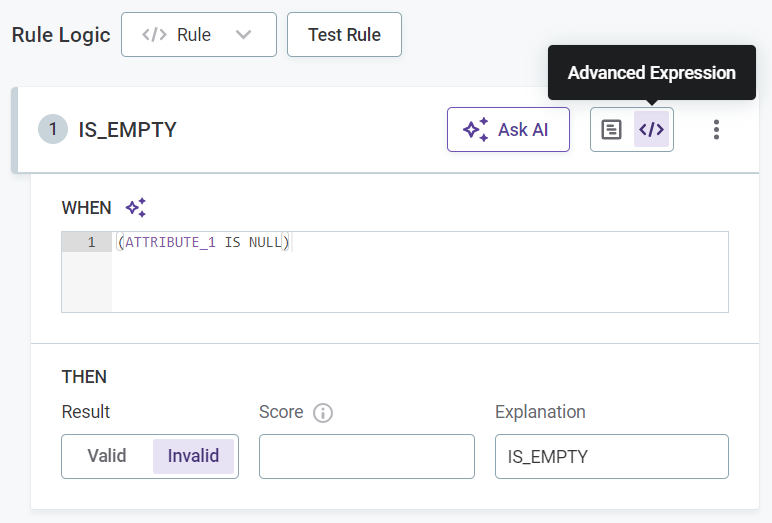
Select Advanced Expression to leverage ONE expressions in your rule condition (see the ONE Expressions Handbook).
-
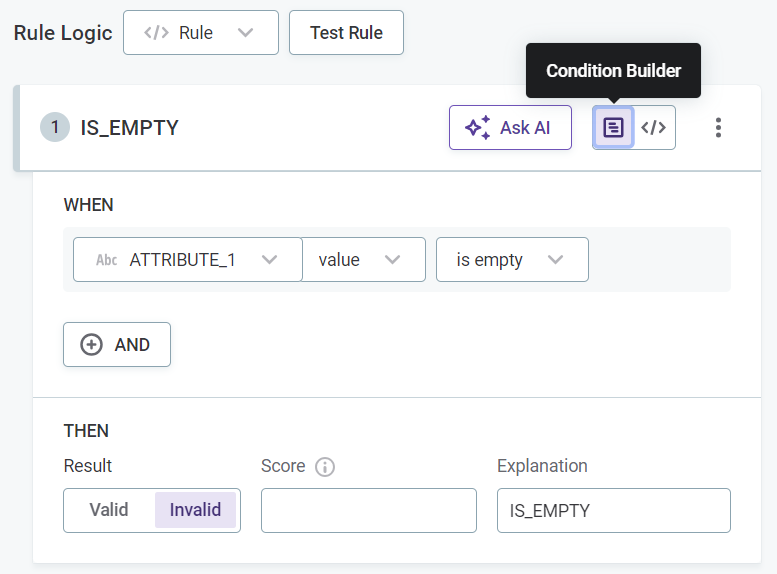
Select Condition Builder to define the rule logic using the predefined options.
If you selected Advanced Expression, enter the expression in the space provided and proceed to Test rule.
If you selected Condition Builder:
-
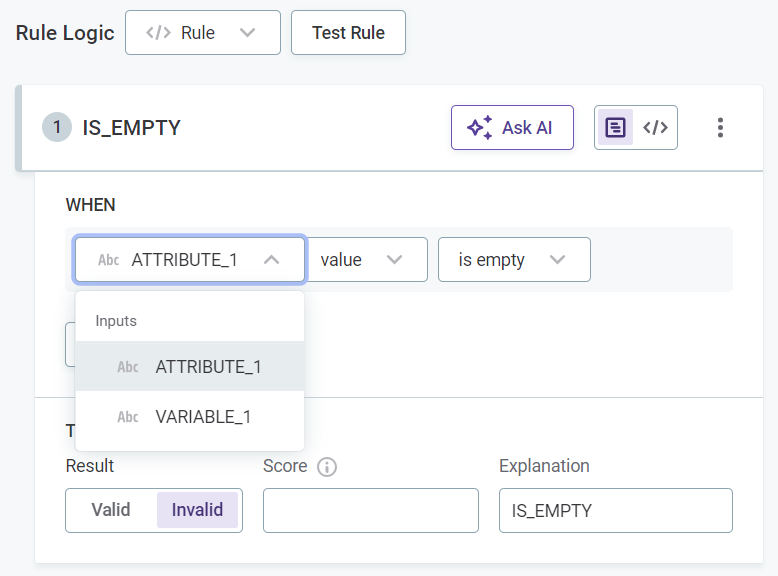
Select the input attributes to use in the rule logic.
-
Select any required modifiers, for example,
TrimorRound. Different modifiers are available for string and integer inputs.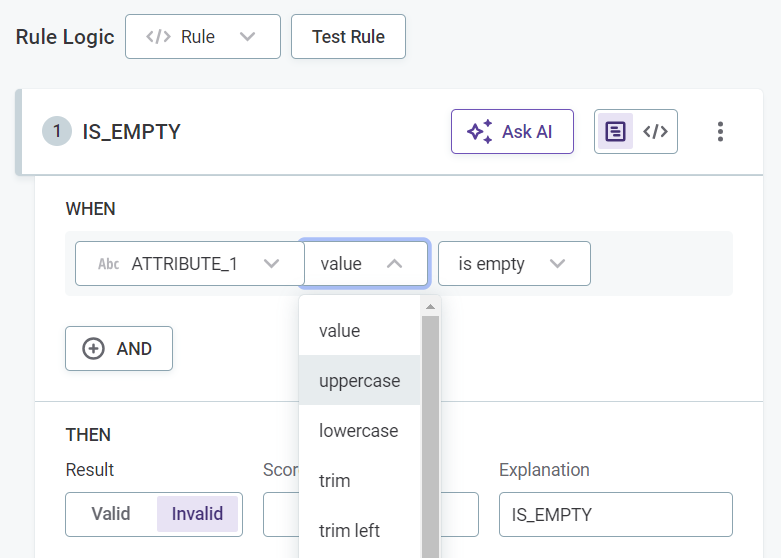
Expand to see all available modifiers
Modifier Description ValueThe given value of an attribute.
UppercaseUppercase version of string.
LowercaseLowercase version of string.
TrimRemoves any whitespaces from both sides of strings.
Trim leftRemoves any leading whitespaces from strings.
Trim rightRemoves any trailing whitespaces from strings.
SquaredSquares the value of an integer, float, or long data type attributes.
RoundRounds the value of an integer, float, or long data type attributes to the nearest whole number.
AverageAverages the value of integer, float, or long data type attributes (available only when using aggregation rules and grouping).
MinThe minimum of string, integer, or long data types attributes (available only when using aggregation rules and grouping).
MaxThe maximum of string, integer, or long data type attributes (available only when using aggregation rules and grouping).
SumThe sum of of string, integer, or long data type attributes (available only when using aggregation rules and grouping).
-
Select the required conditions, for example,
matches_maskorhas length of, and provide the necessary requirements. The options available depend on the data type of the input attributes.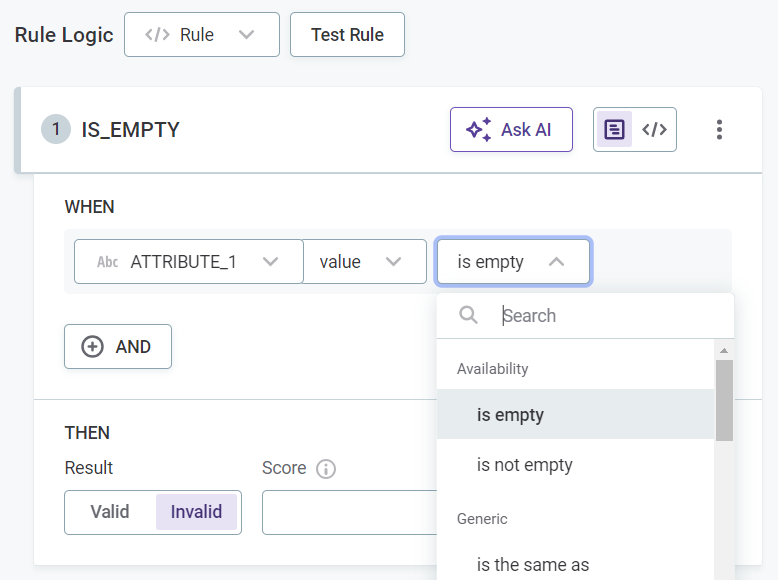
Expand to see all available conditions
Condition Description Is emptyWhen the input is not filled.
This checks if the field is filled, but a field is not identified as empty if it is filled with: NULL,Null,null,.,,,-,_,N/A,n/a, and so on.Is not emptyWhen the input is filled.
Is the same asWhen the input is the same as the value you define.
Is the same as attributeWhen the attribute is the same as the attribute you select.
Is not the same asWhen the input is not the same as the value you define.
Is not the same as attributeWhen the attribute is not the same as the attribute you select.
Is from the following listWhen the attribute belongs to the list you define.
Is not from the following listWhen the attribute does not belong to the list you define.
Is from parametrized listWhen the attribute belongs to the list of parameters you define (available only when using
List of valuesparameter data type).Is not from parametrized listWhen the attribute does not belong to the list of parameters you define (available only when using
List of valuesparameter data type).Has length ofIs the same as the length you define.
ContainsWhen the input contains a substring you define.
Is from catalog itemWhen input belongs to a lookup item built from specified catalog item attribute or reference data in ONE Data.
To make sure the rule always uses the latest data available, select ON DATA CHANGE in Data updates. If you select a catalog item that is not managed using ONE Data, no automatic updates are available.
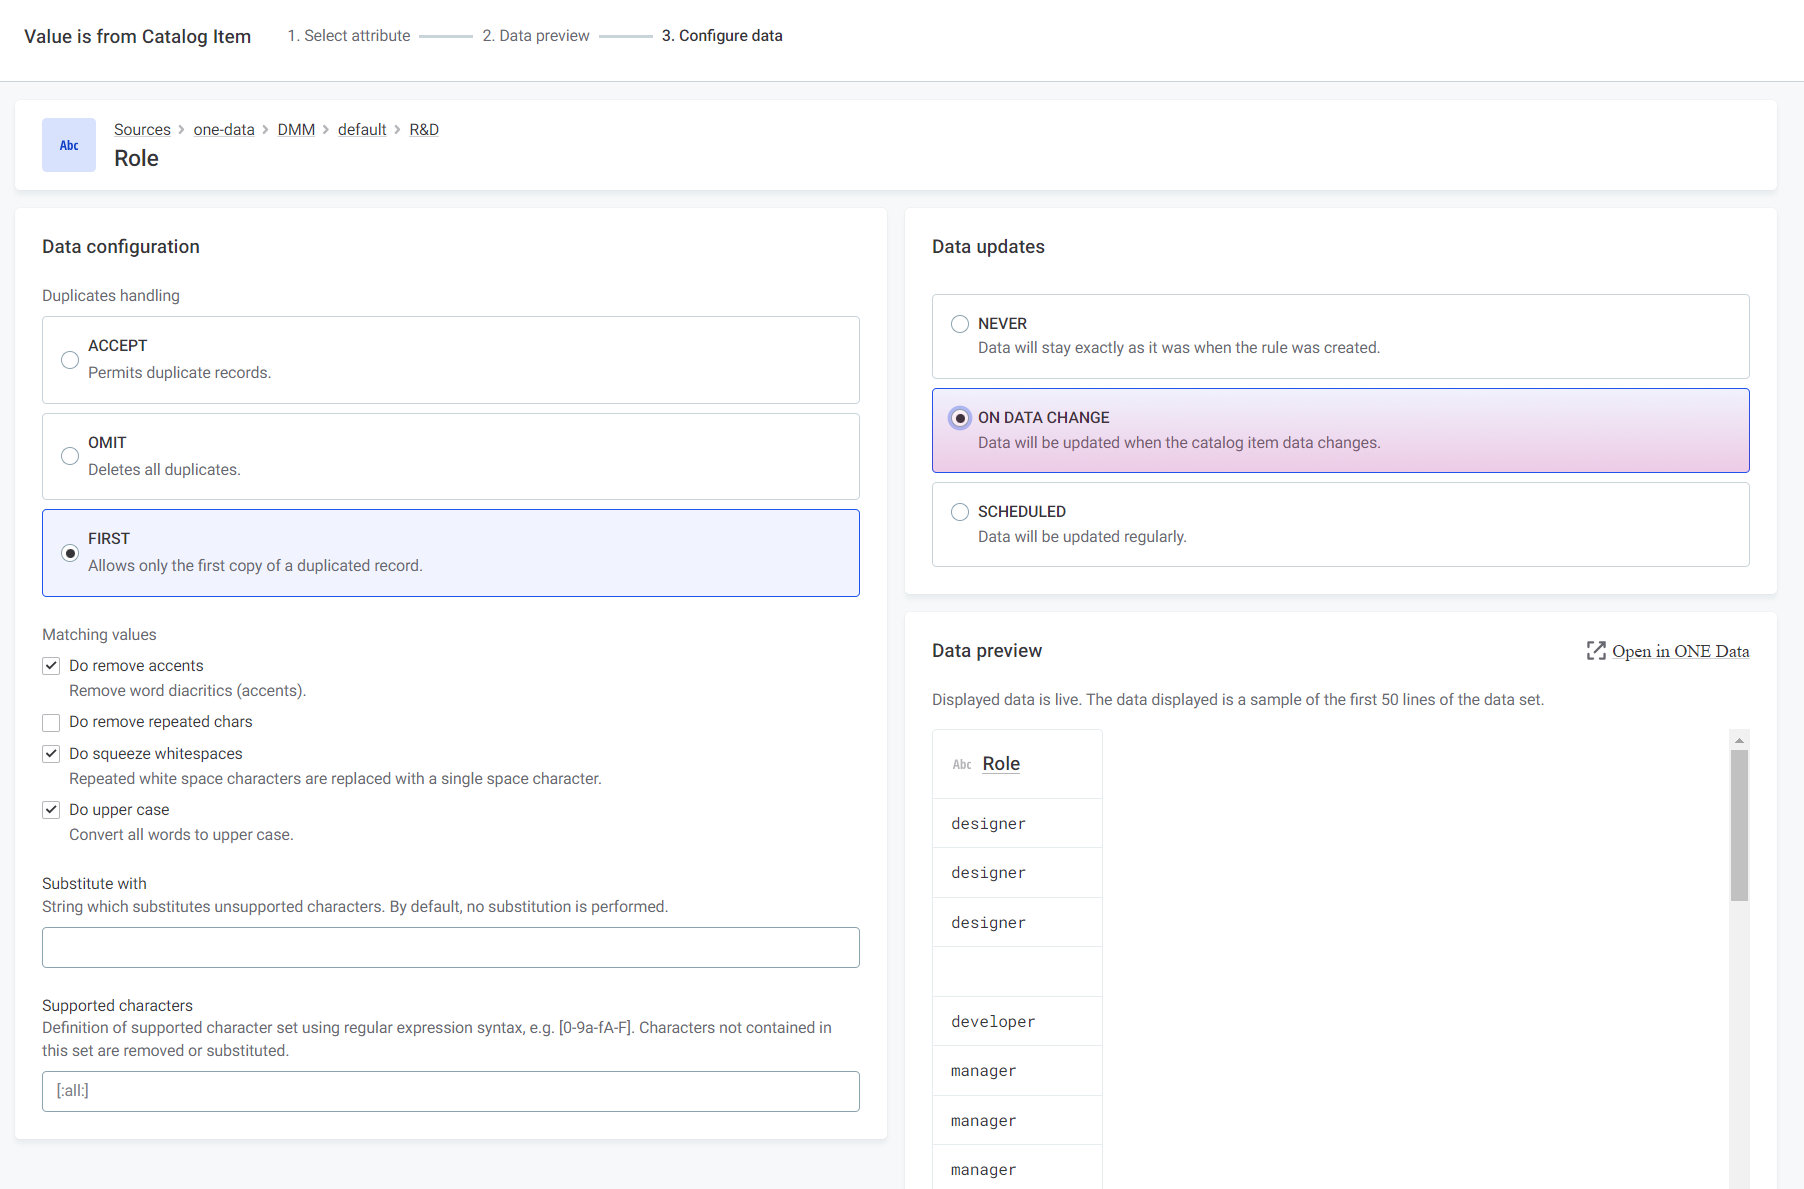
For more information, see Use Lookups in Rules.
Is not from catalog itemWhen input doesn’t belong to a lookup item built from specified catalog item attribute or reference data in ONE Data.
Is from lookupWhen attribute input belongs to the lookup file you select.
Is not from lookupWhen attribute input does not belong to the lookup file you select.
Matches maskWhen input corresponds to the mask you define.
Does not match maskWhen input does not correspond to the mask you define.
Matches regexpWhen input corresponds to the regular expression you define.
Does not match regexpWhen input does not correspond to the regular expression you define.
Is trueWhen Boolean input is true.
Is falseWhen Boolean input is false.
Is uniqueWhen aggregated group is unique.
Is not uniqueWhen aggregated group is not unique.
-
Select which result the condition produces.
You can only choose from the results configured for the rule’s dimension, so the available options differ between dimensions.
Each result impacts the data quality in one of the following ways, depending on its Effect on overall quality setting:
-
Positively, when the effect is Pass (for example, a result named Valid).
-
Negatively, when the effect is Fail (for example, a result named Invalid).
-
Not at all, when the effect is Not applicable (the record is excluded from the overall quality percentage).
The Not applicable option appears only if the dimension has a Not applicable result defined. See Not applicable results. 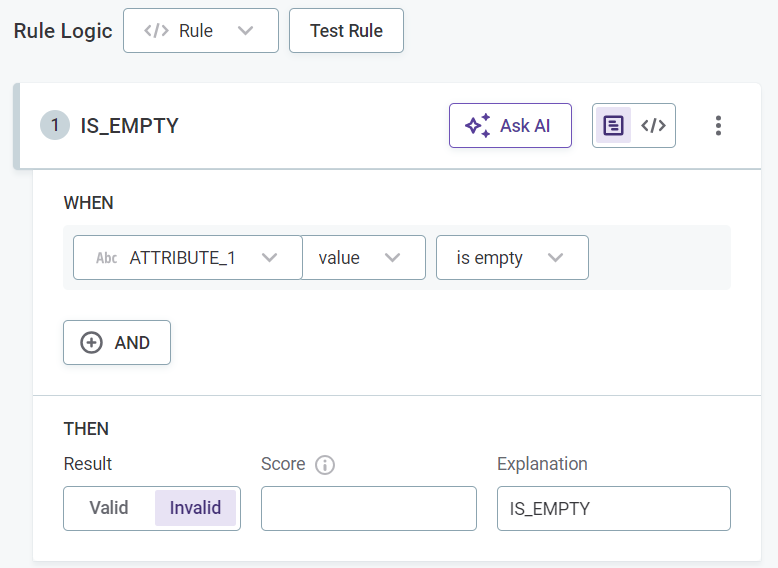
-
-
(Optional) Enter an explanation to help distinguish between multiple rules of the same dimension.
-
(Optional) Assign a score to results that are then used during evaluation. See Assigning scores.
Test rule
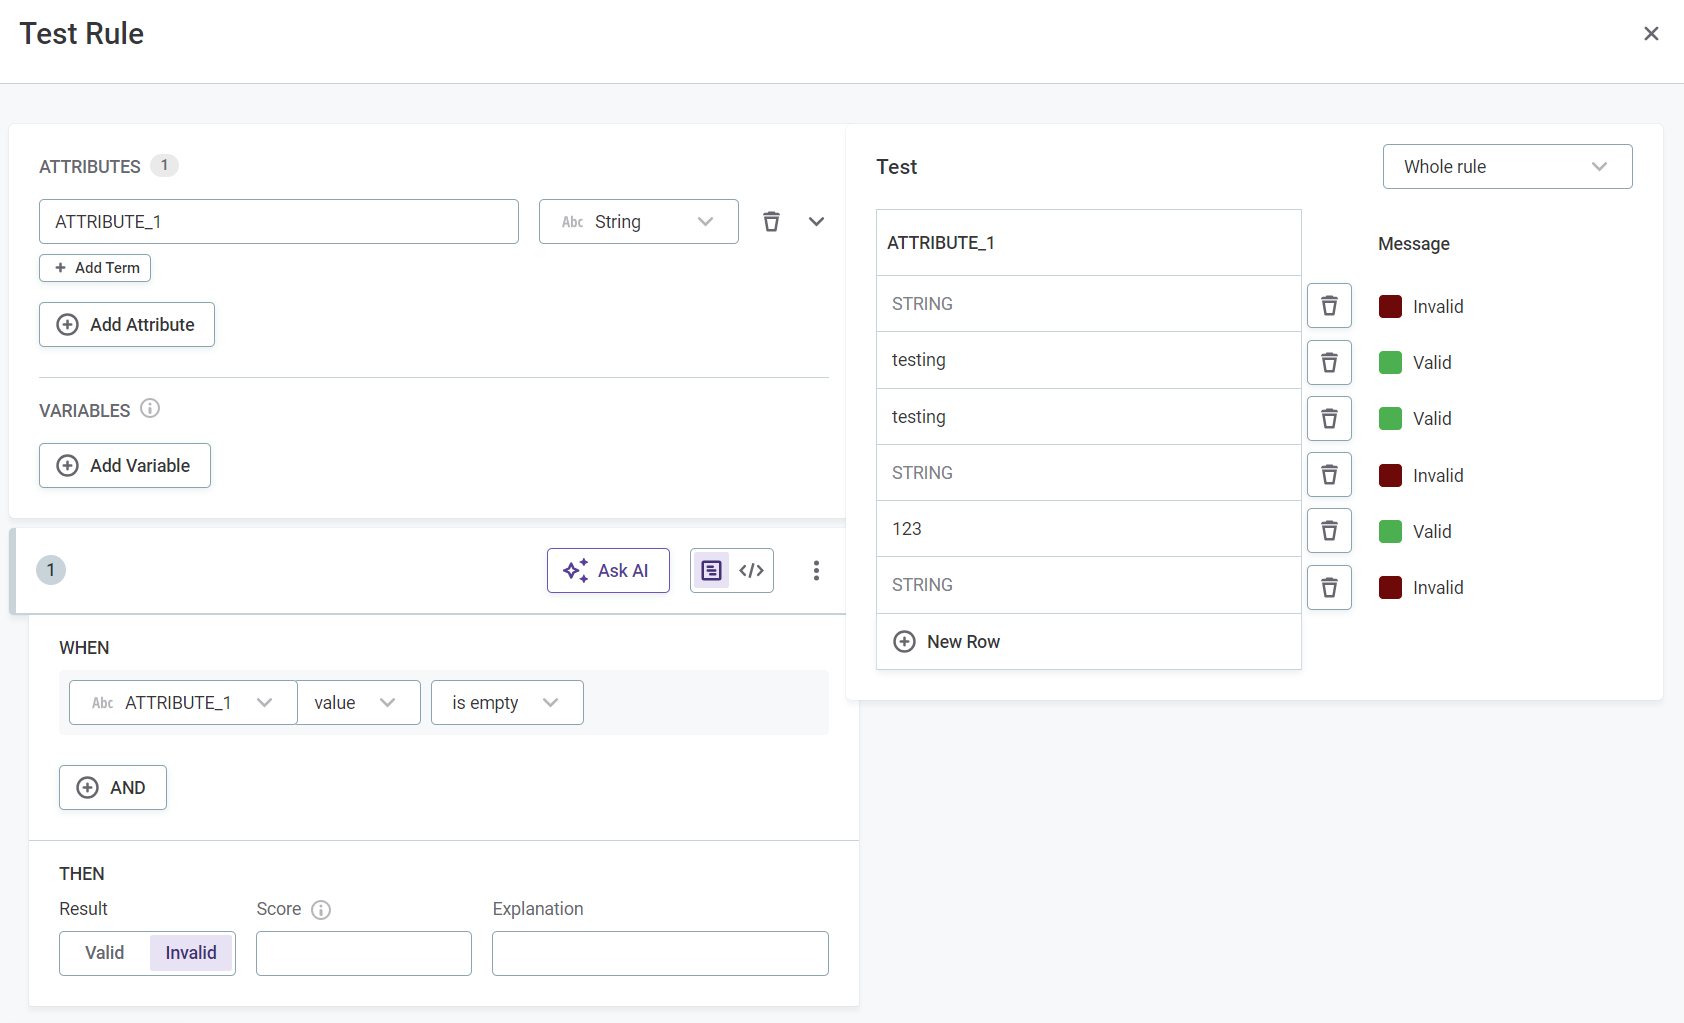
You can optionally test the rule by clicking Test Rule and trying different inputs in the Test section. The results for each input are shown automatically in Message next to the test input row.
Publish rule
After the changes are implemented, they need to be published.
Scoring records
The score is used as a numeric expression of the severity of each record’s invalidity according to the rule. This is mainly useful for monitoring projects to detect the most pressing issues and to be able to improve the data quality.
Scores are arbitrary and can be assigned to suit your project.
Typically, the logic follows that the higher the score, the worse the issue. For example, if a non-critical value is missing, the invalidity score could be 100. If a critical value is missing, the invalidity score could be 10000.
Assigning scores
|
It is also possible to assign scores via the validation component in ONE Desktop. This is available only for power users. For more information, see Validation Components. |
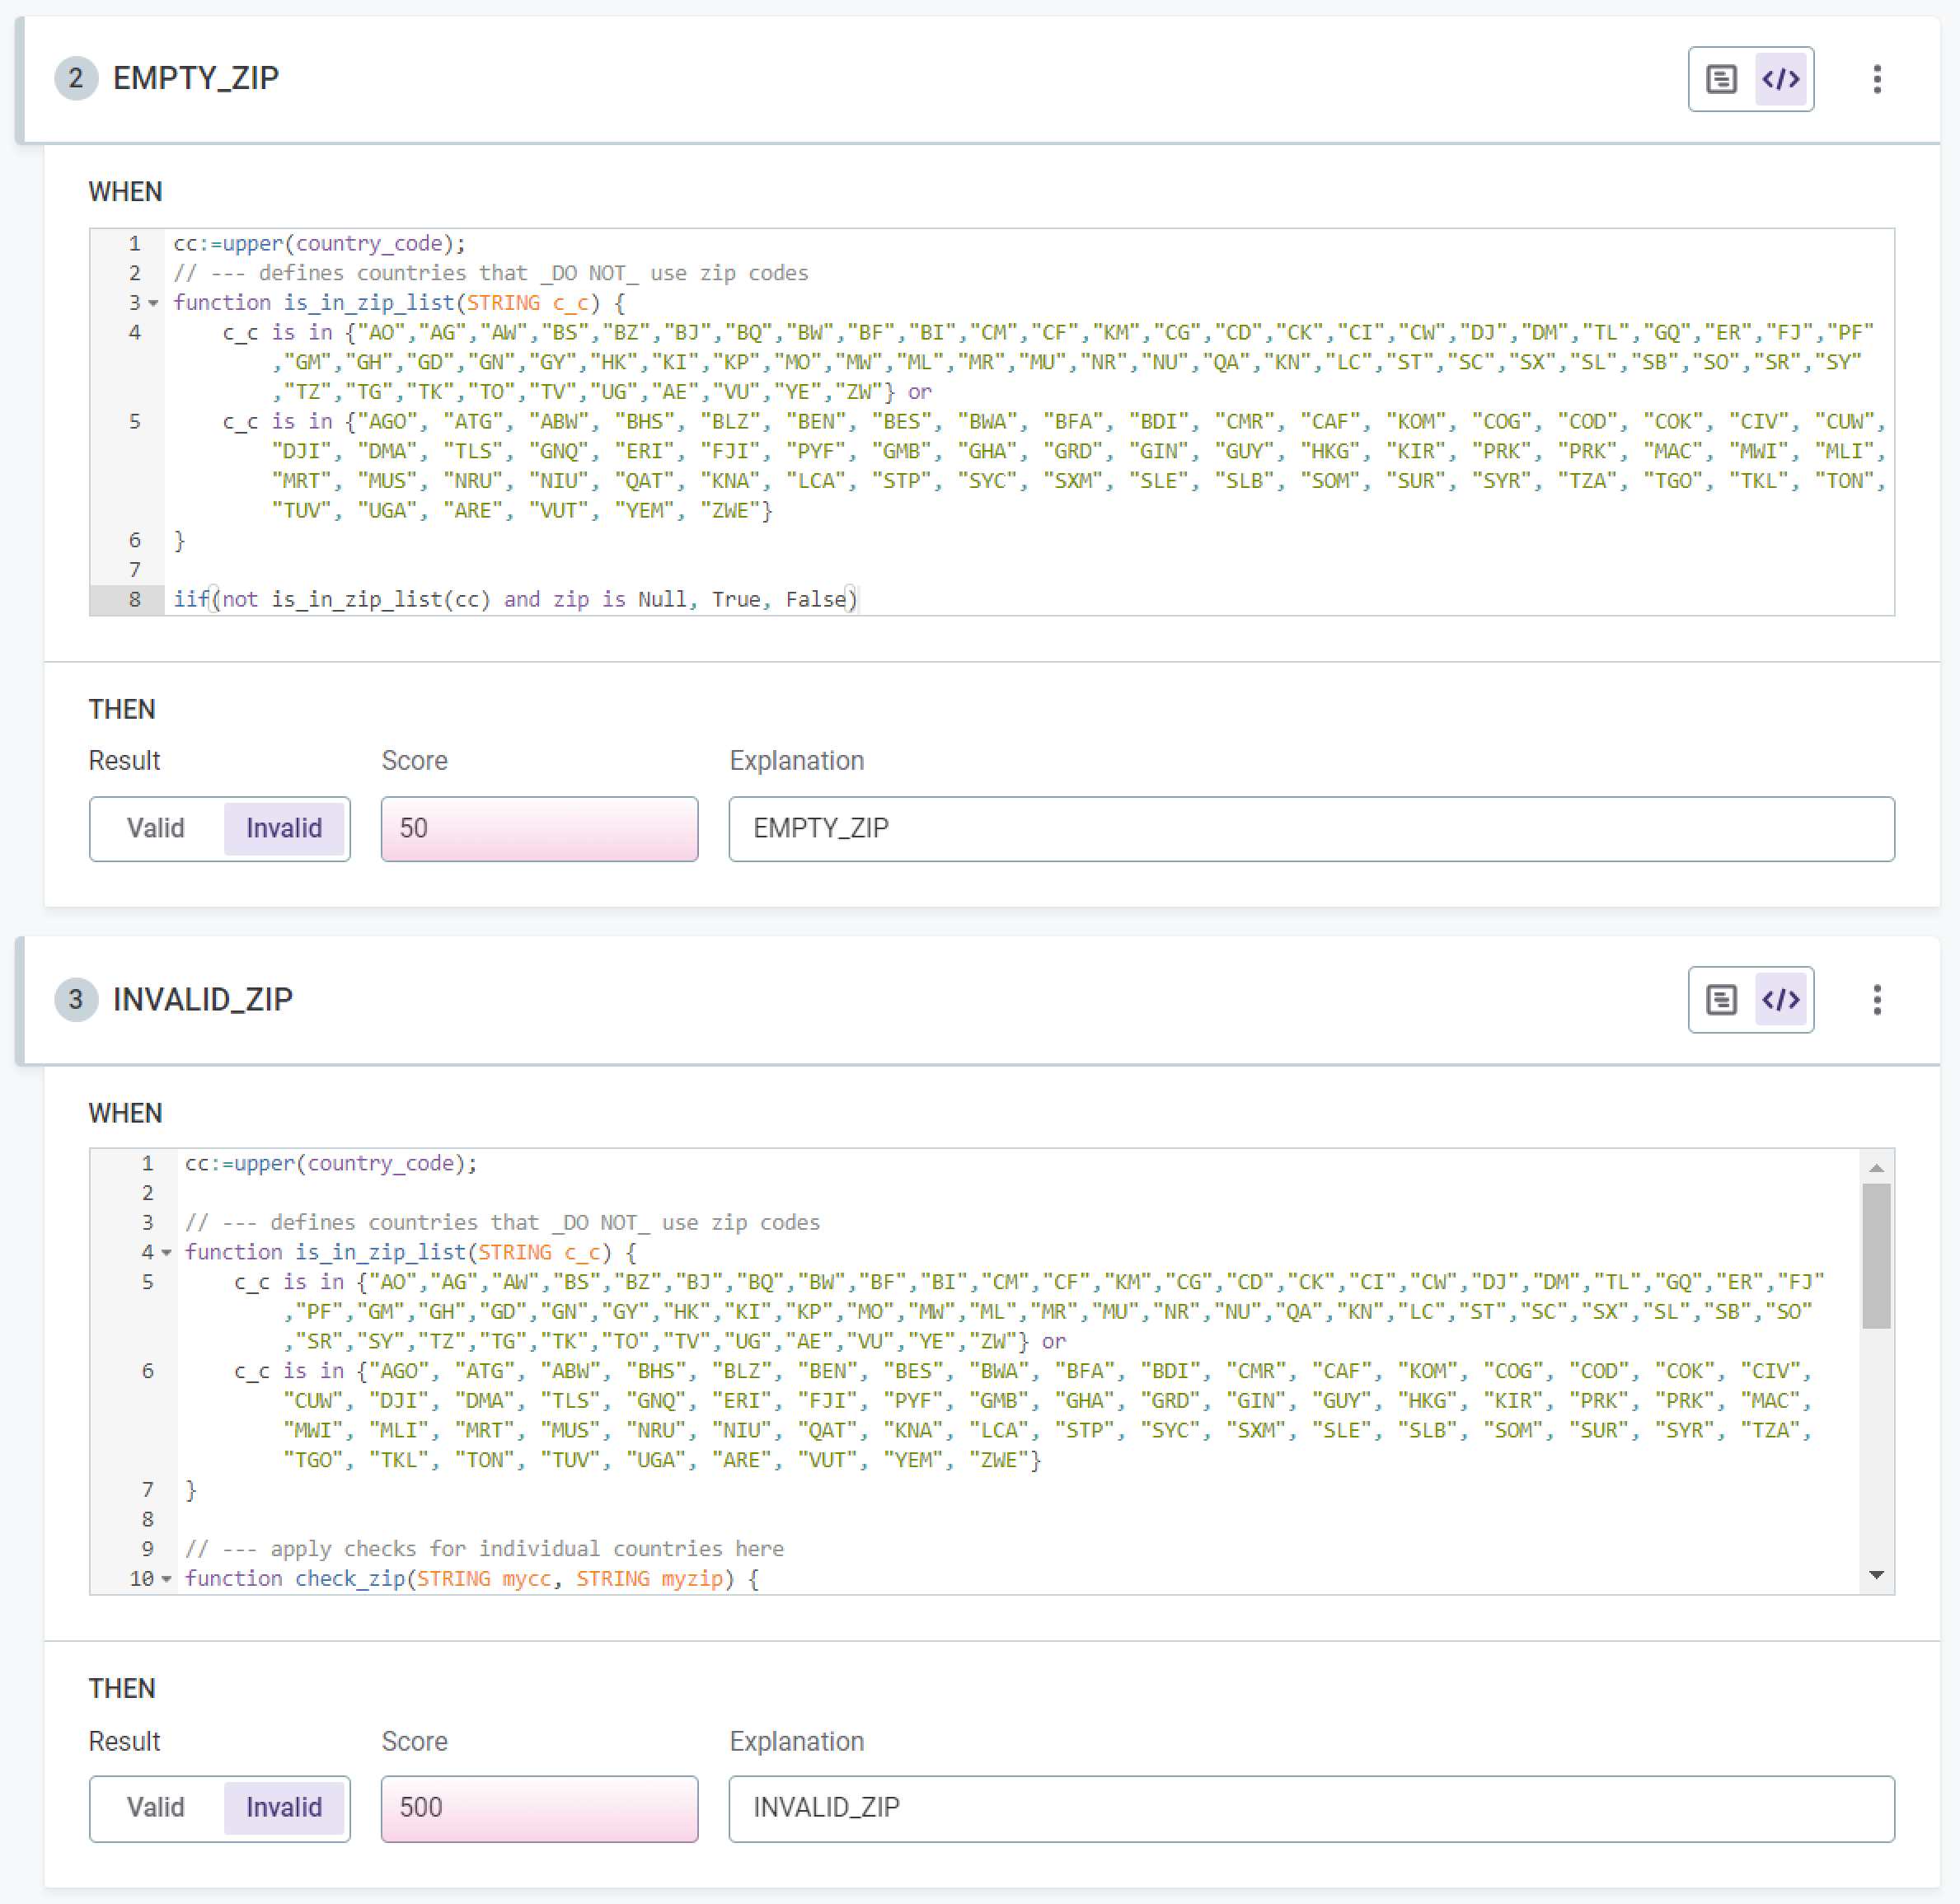
In the example shown, you have a validity rule in which an invalid record due to errors is considered of higher importance than an invalid record due to a null value, the invalid results being scored at 50 and 500 respectively.
Cumulative results of data quality statistics are shown on the Configuration and Results tab of a monitoring project. However, to be able to see the score of each record, it is necessary to export the project.
Next steps
Apply your newly-created DQ rule to a term, or directly to attributes in the data catalog. See Add DQ Rules to Terms and Add DQ Rules to Attributes.
Troubleshooting
Rule can’t be published
When rule input name contain special or reserved characters, the rule cannot be published due to a clash with the rule expression parser. However, when you are using the Condition Builder, no error is shown.
To avoid this issue, the input names must be enclosed in square brackets, for example:
-
(special character: space)
input 1→[input 1] -
(reserved words)
in→[in]
| To check if a word or character clashes with the expression parser, switch the rule configuration to Advanced Expression where errors are correctly displayed. |
Reserved words are: in, is, and, not, or, xor, div.
|
Was this page useful?