
Get Started with ONE Data
This page provides an overview of everything you should know before creating your first ONE Data table.
To learn more about how to provision data into ONE Data, see these topics:
-
Create a Table - Learn how to create a table from scratch.
-
Import Data from a Catalog Item - Discover how to import data from an existing catalog item or how to deduplicate data.
-
Import Data from a File - Find out how to upload data from a file.
For information about DQ and ONE Data, see:
-
DQ Evaluation in ONE Data - Describes how data quality works in ONE Data.
-
Data Remediation with ONE Data - Explains how to use ONE Data for data remediation purposes.
-
Validate Data Using ONE Data Tables - Tells you how to use ONE Data as a source of your reference data.
| Before you start using ONE Data, the module must be configured as a data source in ONE. For instructions, see ONE Data Connection. |
Tables
ONE Data tables function like catalog items in a lot of ways and you might be familiar with many of the concepts and terms used here. However, the key difference between the two is that ONE Data tables represent actual data stored in the application, which offers you more flexibility when it comes to modifying their content.
How to access tables
Your main workspace in the ONE Data tab. Here you can find an overview of your tables and other general information. This is also where you create a table or import your data.
In addition to this, all your ONE Data tables are also listed in the Data Catalog and can be accessed from there as well. In Catalog Items, open the table you want to work with, then switch to the Data tab and select Open in ONE Data.
|
Use the search bar to search by the table or column name. Alternatively, you can use Ataccama Query Language (AQL) search to build more complex search queries. For more details, see Search and AQL Query Syntax respectively. |
Which tables are listed and how can be adjusted in several ways:
-
Switch between the Standard and the Compact view to change the column height to best fit your screen size.
-
Hide irrelevant information by selecting attributes in Hidden columns.
-
Sort by column (applicable for columns with the bar sort icon).
-
One click: Sort in ascending order.
-
Two clicks: Sort in descending order.
-
Three clicks: Remove the sort. Or, select Clear sort.
-
-
Get a quick summary of table details by clicking anywhere in the table row. Use this as a shortcut to add glossary terms to tables, create a data visualization, or run DQ evaluation.
The sidebars on the table listing and the table details pages as well as the table Metadata tab also contain an option for adding and modifying attributes. However, as these change only the metadata, any changes to the table structure must be made only from the table details page.
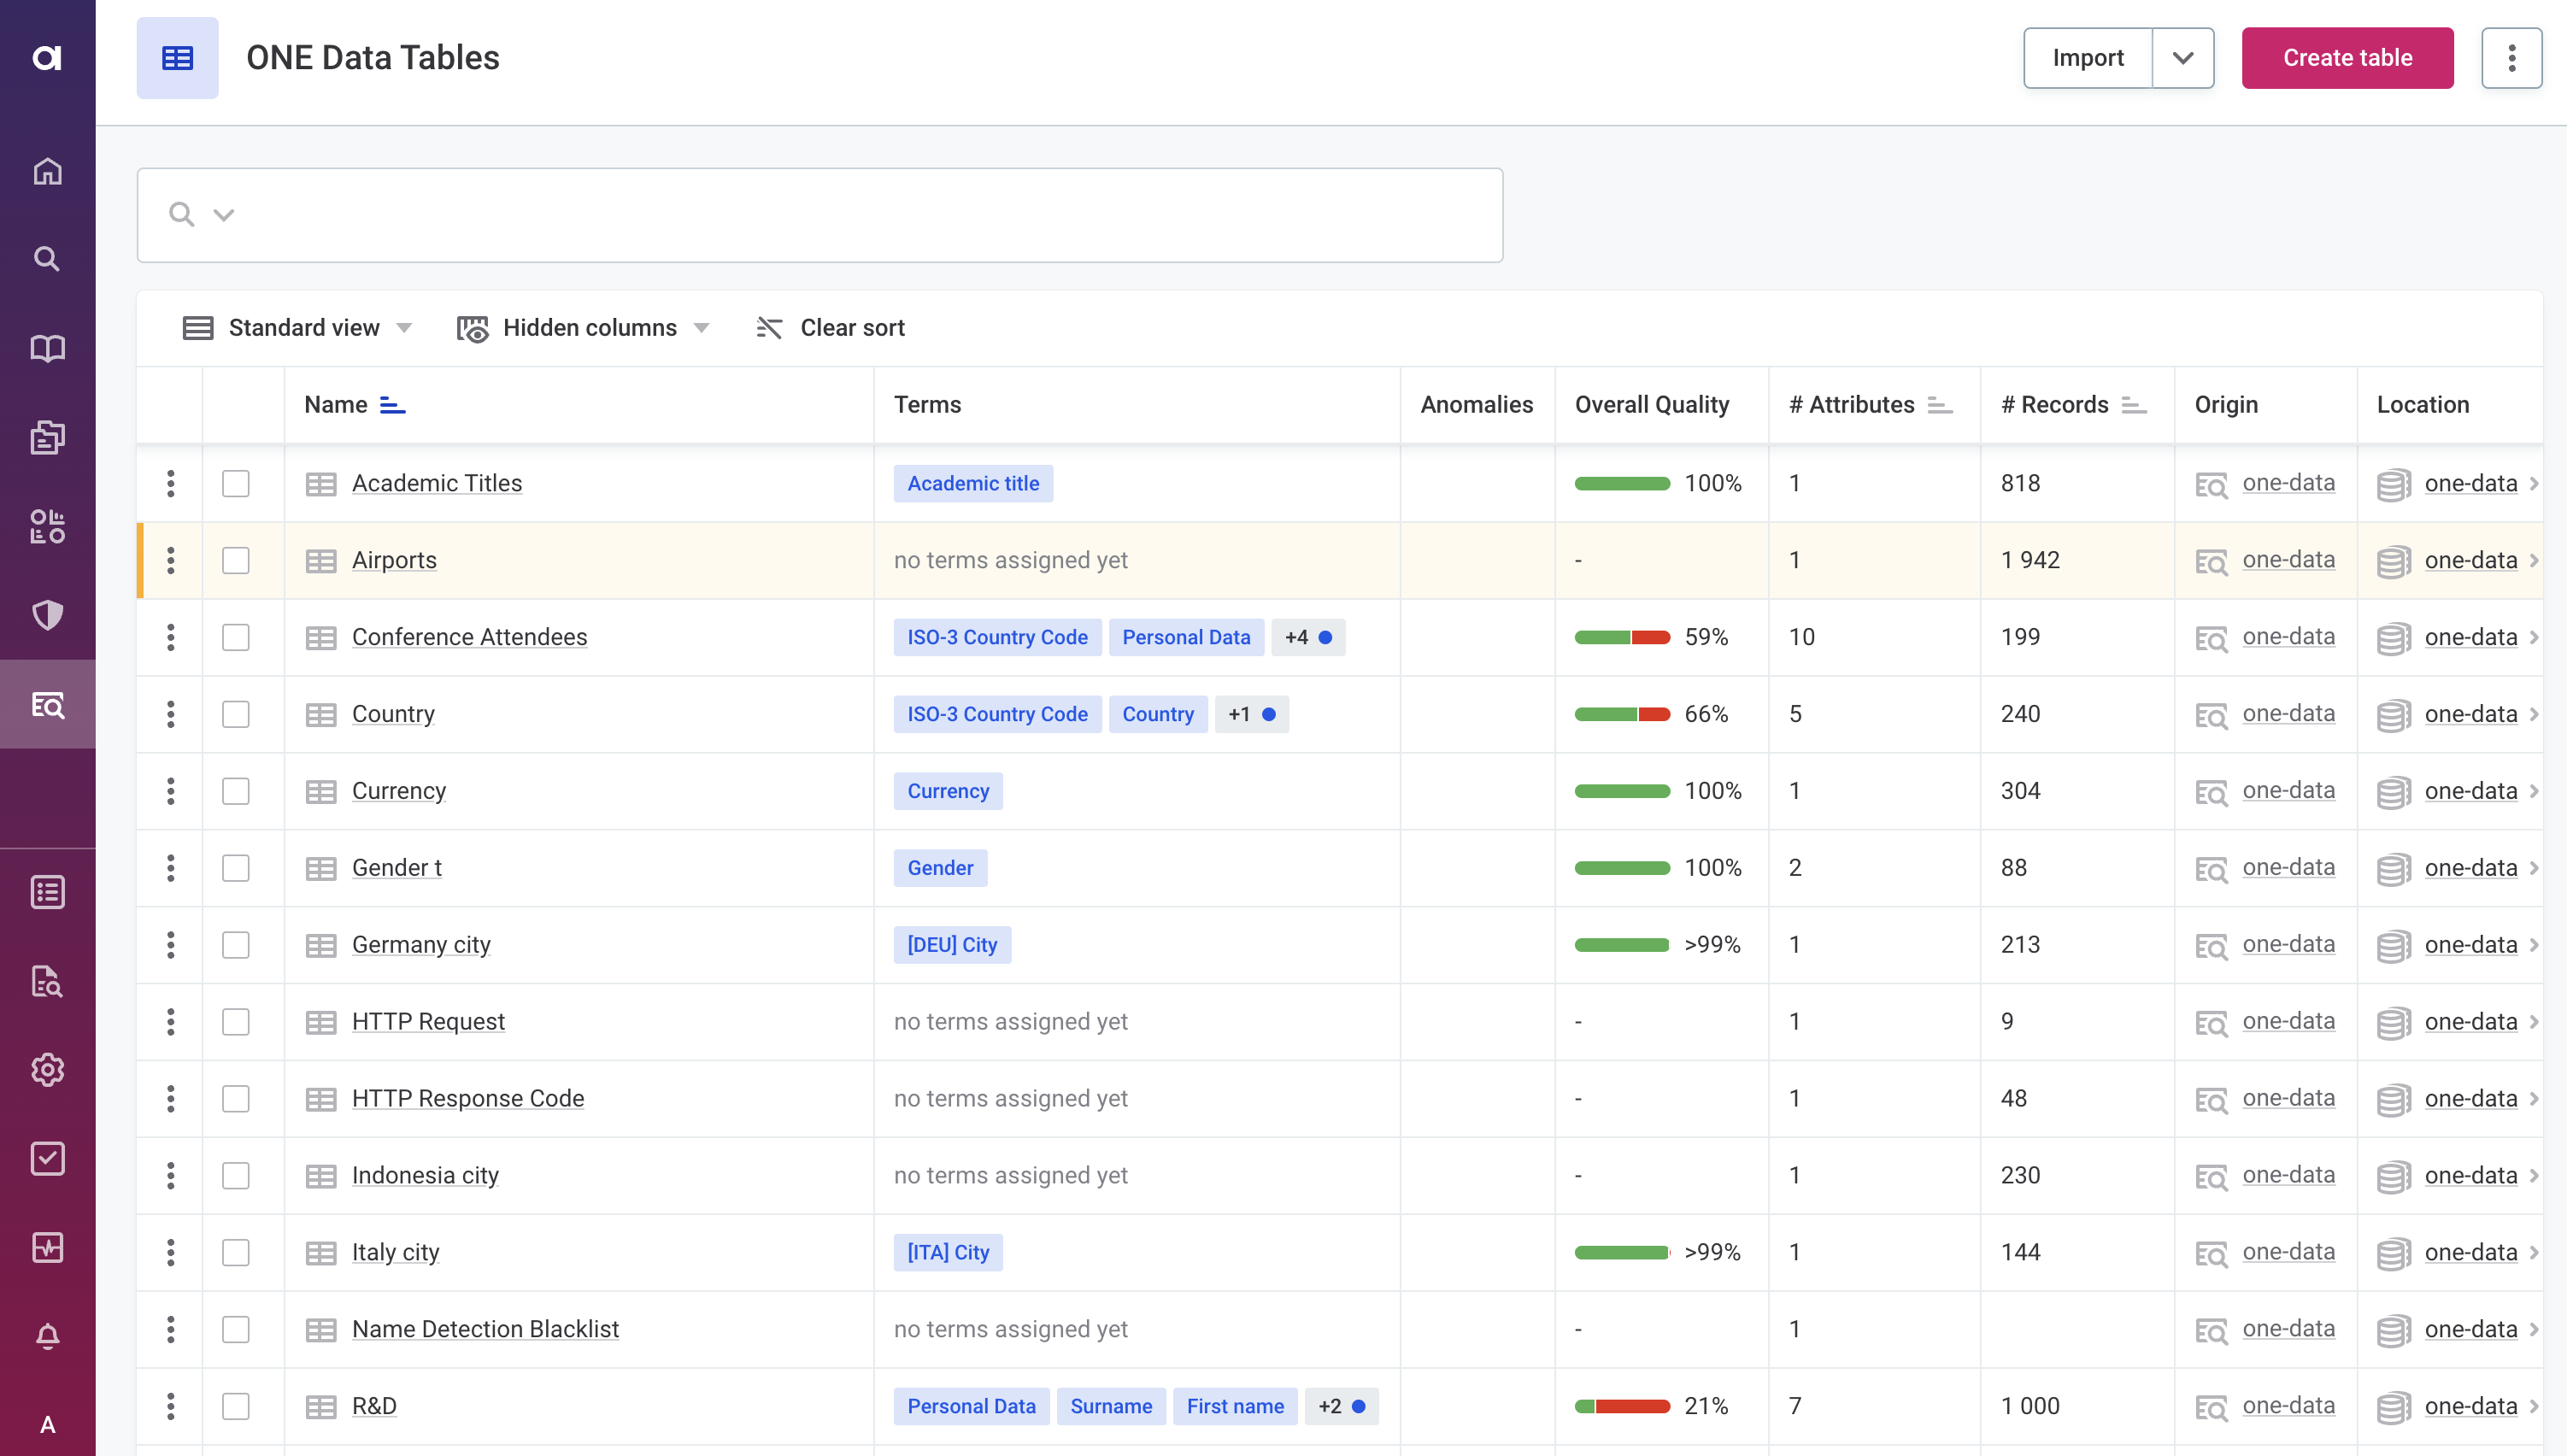
For each table in the listing, you can see the following:
-
Name: The table name.
-
Terms: Added glossary terms. Select a term to find out more about where it’s used and its overall data quality. For more information, see understanding-term-statistics.adoc.
-
Anomalies: Marks the items containing potential anomalies. Hover over the icon to see the number of possible anomalies detected, or select the item to open the profile inspector where you can confirm or dismiss the anomaly. For more information, see Anomaly Detection in Catalog Items.
-
Overall Quality: The percentage of records that passed all applied data quality rules. Only results of rules with DQ dimensions that contribute to overall quality will count towards this metric.
-
# Attributes: The number of attributes in the catalog item.
-
# Records: The number of records in the catalog item.
Currently, the number of records is correctly displayed only after the table has been profiled. Otherwise, the number shown is zero. -
Origin: The data source where the catalog item is located. For ONE Data catalog items, the origin is always ONE Data.
-
Location: The full path from the data source (Origin) to the current catalog item.
Table details
To view full table details, select the table name.
The individual tabs let you view:
-
Data: At-a-glance information including table data, key metadata (attribute data types, glossary terms), and DQ results. This is also where you change the table structure.
-
Overview: Metadata information.
-
History: Previous versions of the table.
-
Lineage: A MANTA graph of connections between items in different data sources. Only available if you are using MANTA.
-
Data Quality: DQ evaluation results.
-
Profile & DQ insights: Profiling results, including DQ insights.
-
Relationships: A graph showing connections between tables from the same data source.
-
Data Export Projects: An overview of data export projects.
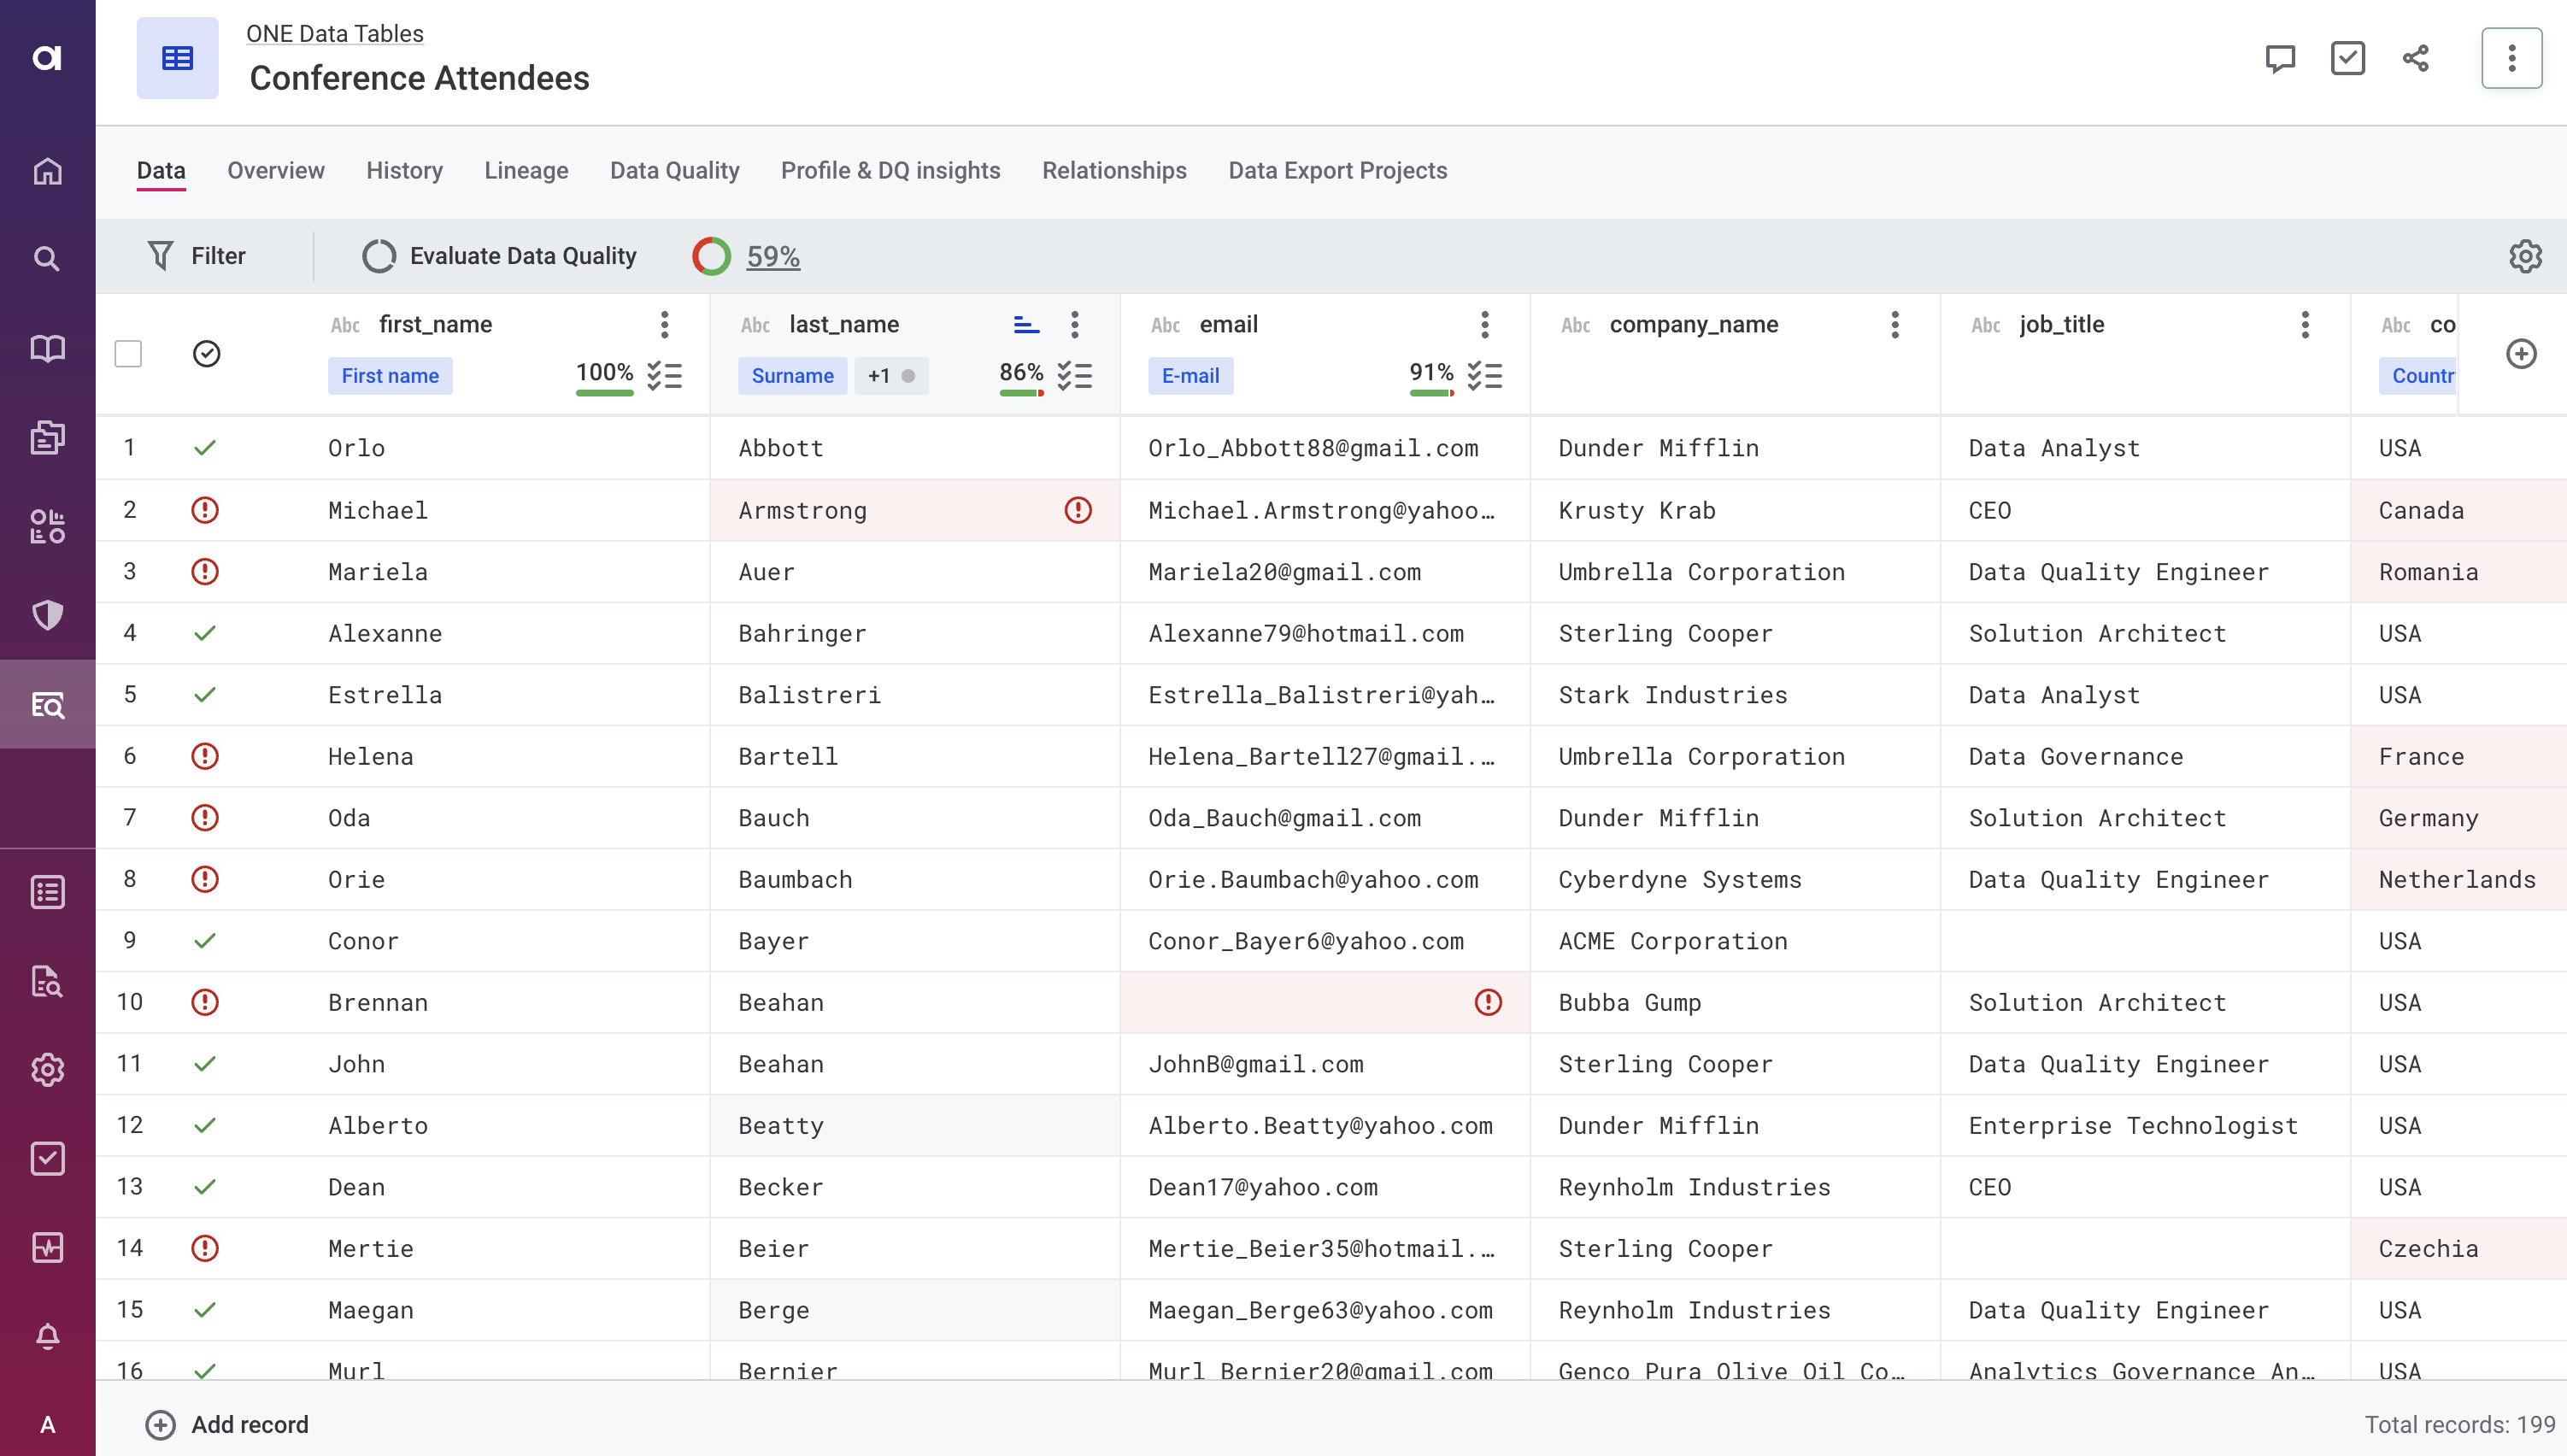
You can sort the table by any column that has a three dots menu available.
Right-click the column name (or, open the three dots menu) and pick Sort ascending or Sort descending.
Once the sorting is applied, a sort icon appears next to the column name (see the column last_name in the screenshot).
|
To quickly change the sorting order, click the sort icon to switch between ascending and descending order. To remove the sort, right-click the column name (or, open the three dots menu) and clear the selection. |
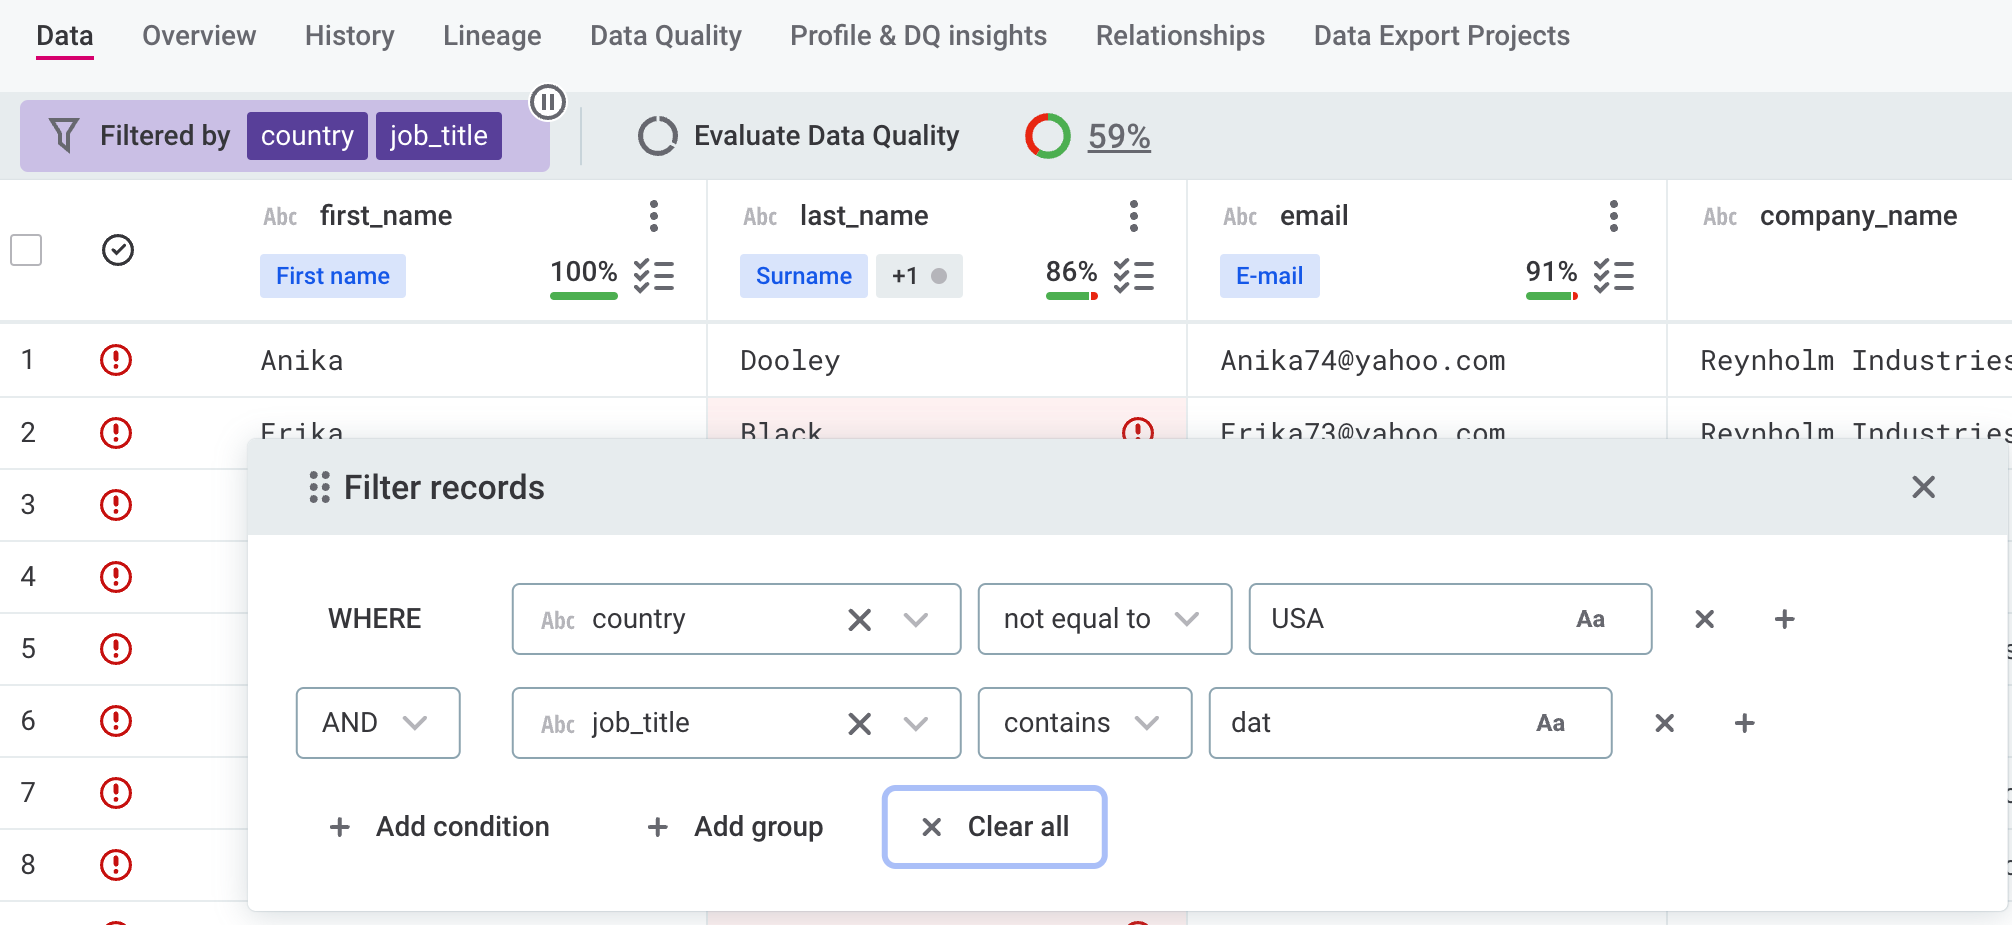
Filters
ONE Data comes with comprehensive filtering options allowing you to easily find, analyze, and edit the correct records. To open the menu, select Filter on the table Data tab. Alternatively, right-click the attribute header and select Filter to access it.
To learn more about how filtering works and how to filter by data quality, see Filters.
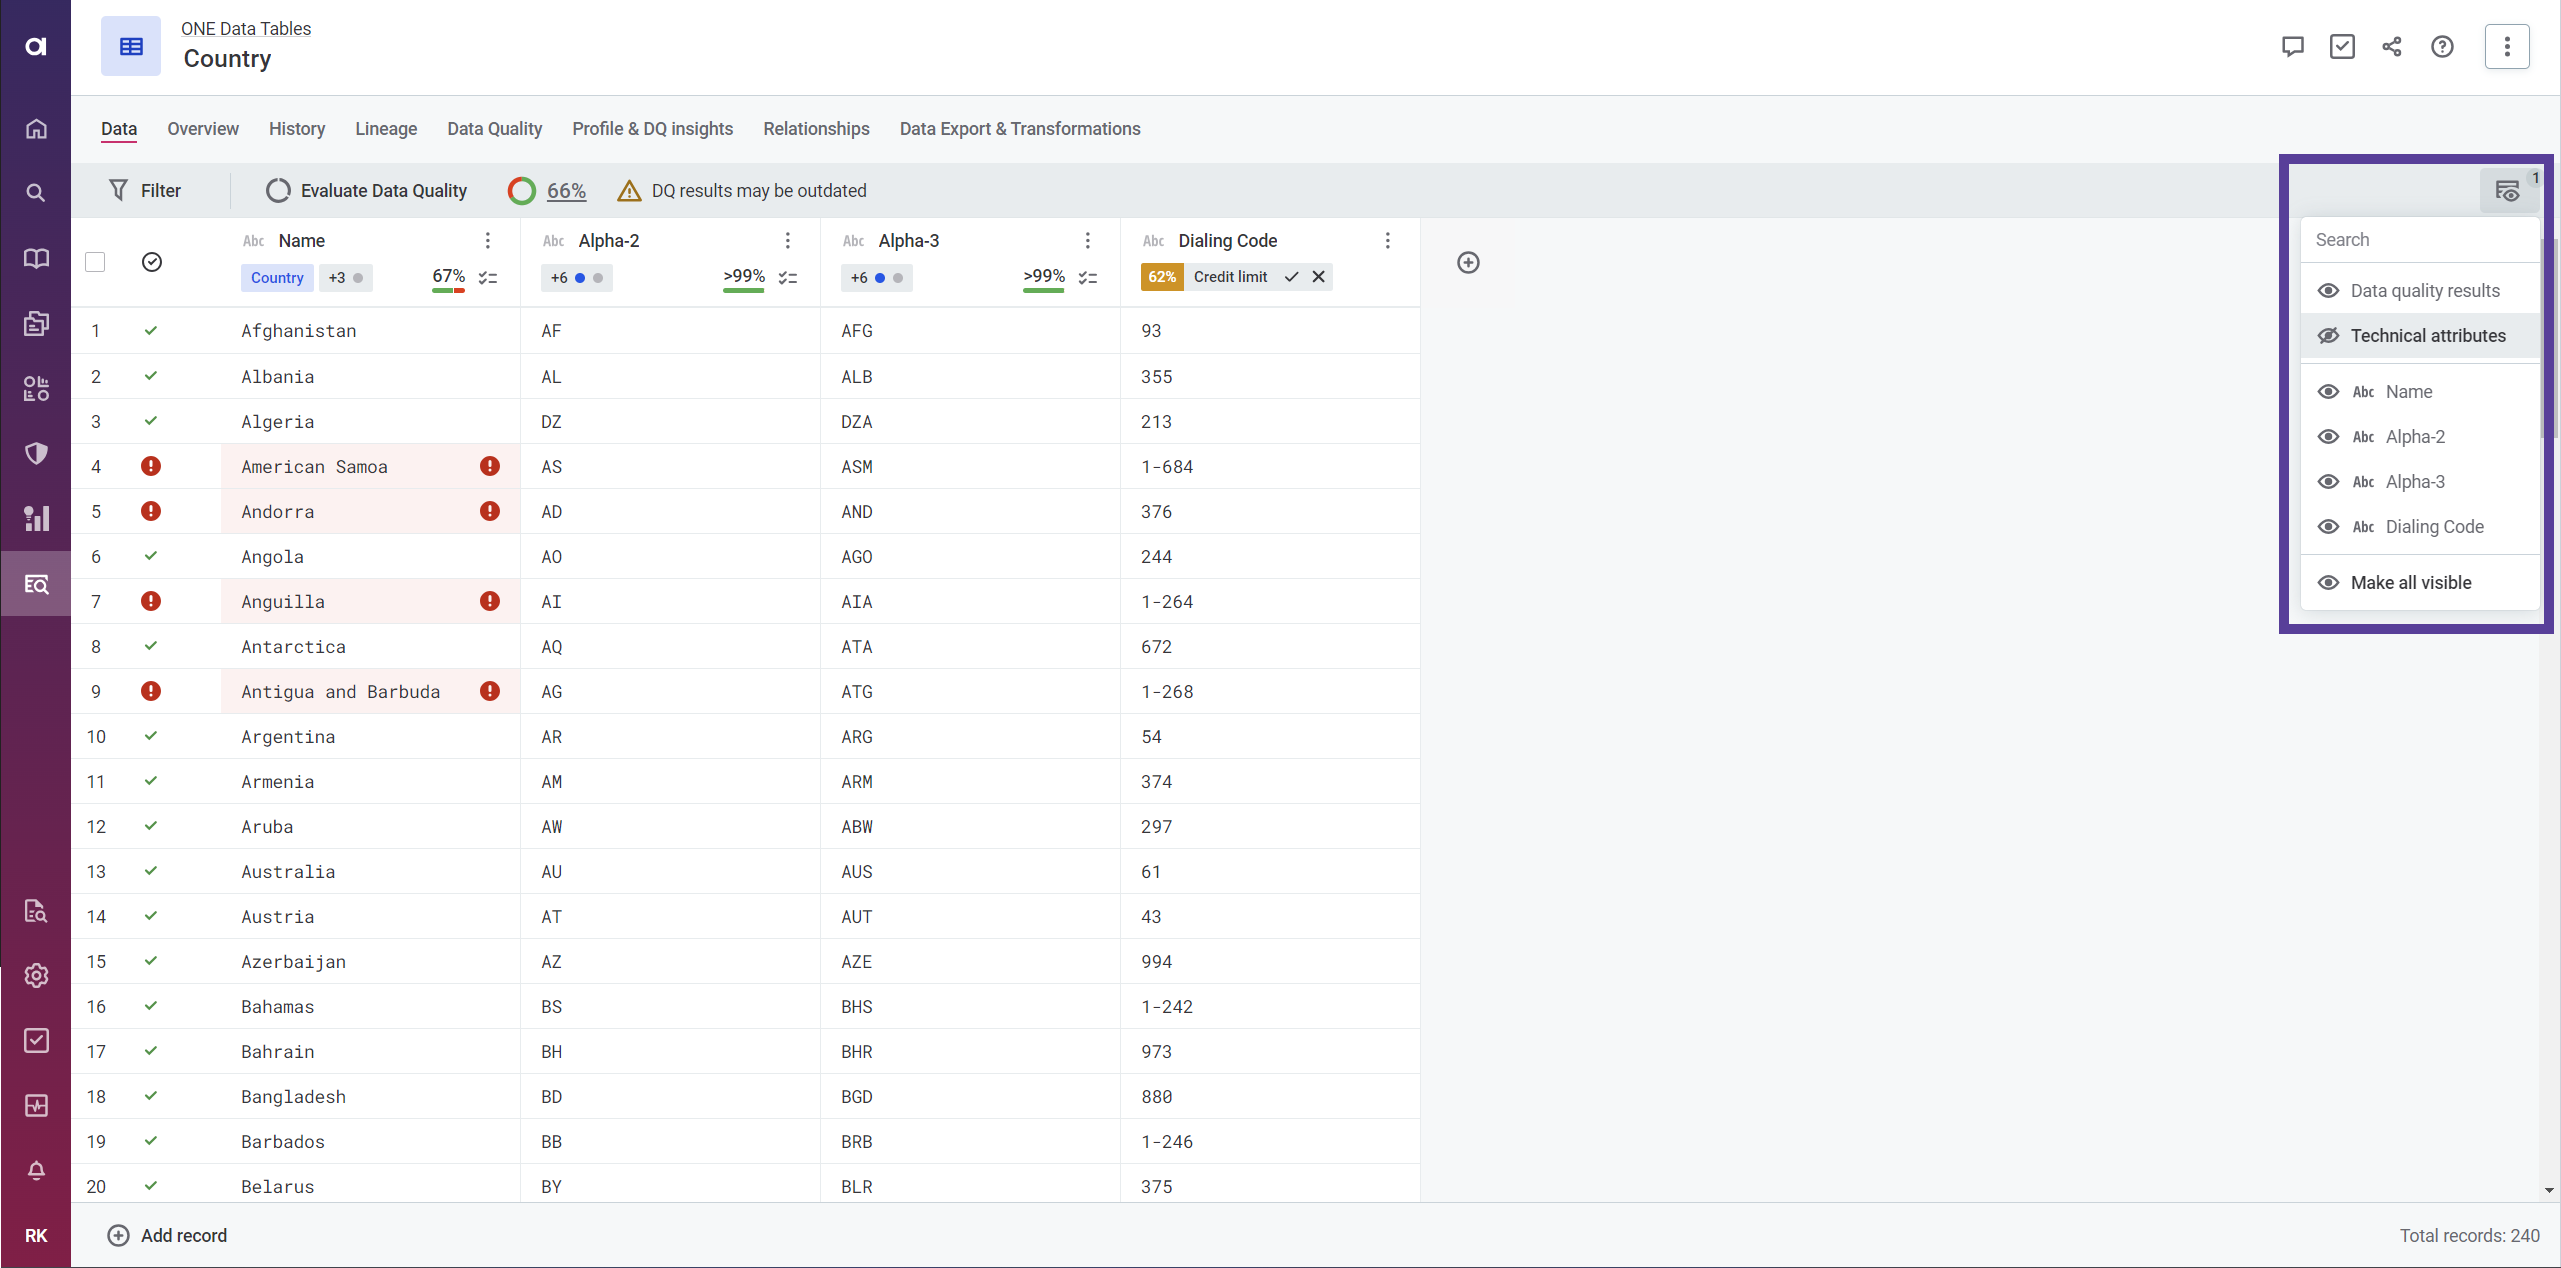
Configure visibility of attributes and DQ results
ONE Data lets you hide attributes and data quality results from view on the Data tab.
To configure this, select which attributes are hidden or shown from the visibility menu. You also have the option to hide all Technical attributes and Data quality results. To make all previously hidden attributes appear, select Make all visible.
Edit table model
To make changes to your ONE Data table model, select the table you want to work with. This takes you to the Data tab, from where you can:
-
Add attribute: Select the plus icon (
+) at the end of the column header. Once you provide the attribute name and data type, select Confirm. This adds the attribute to the last position within the table.-
If you don’t want to add the attribute to the last position, right-click an existing attribute header and select Add attribute left or Add attribute right accordingly.
Keep in mind that you cannot change the attribute data type once the attribute is created. 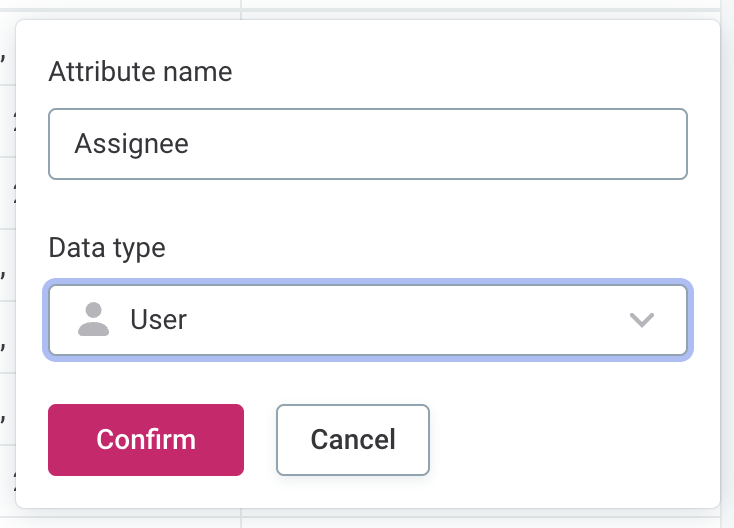
-
-
Rename attribute: Double-click the attribute name and provide a new one, then press Enter (or click outside the field). Alternatively, right-click the attribute header and select Open details. Provide a new name and select Apply changes.
-
Rearrange attribute: Select and drag the attribute header to where you want.
-
Copy attribute: Right-click the attribute header and select Duplicate. This copies the attribute and the data inside it to the right of the original one.
The new attribute name is
[source_attribute] Copy. Double-click the attribute name to rename it. -
Delete attribute: Right-click the attribute header and select Delete.
When you delete an attribute, the data is permanently lost. Use with caution.
| The sidebars on the table listing and the table details pages as well as the table Metadata tab also contain an option for adding and modifying attributes. However, as these change only the metadata, any changes to the table structure must be made only from the table details page. |
Optimistic locking
When making changes to the table structure, the application makes sure all users are working on the latest available version of the table. This means that, if you try to add or remove an attribute from a table that another user modified in the meantime, you are prevented from saving your changes and the following message appears.
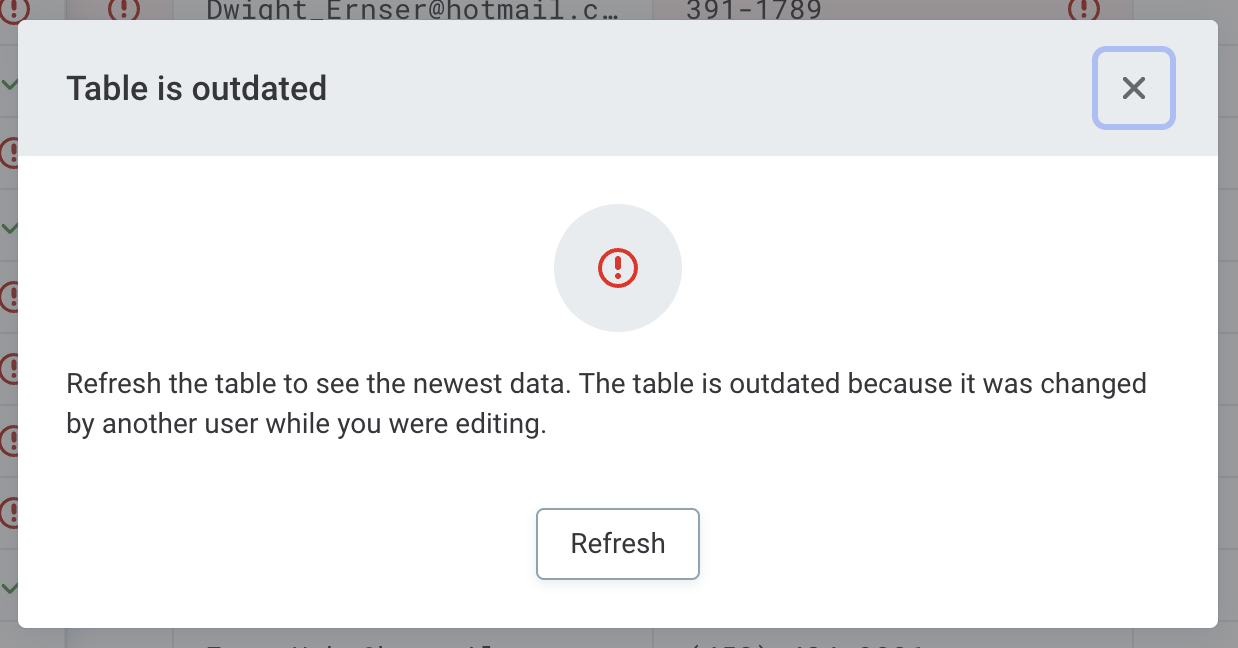
The same applies to duplicating, renaming, or reordering an attribute. Once you load the latest changes (Refresh table), you can continue editing the table model.
Edit data inline
ONE Data supports inline editing so you can create, alter, or remove records from your ONE Data tables at any point.
|
Editing data or changing the table structure doesn’t initiate the publishing workflow and your changes are immediately applied. However, any changes to the table metadata, such as adding a glossary term or renaming the table, have to be published first. |
Open the table you want to work with and stay on the Data tab. How you change table data is very similar to how you change the table structure:
-
Add record: Select Add record or use the plus icon (
+) after the last record in the table. If you don’t want to add the record to the last position, right-click the row and select Add record above or Add record below accordingly.To start editing, press Enter or double-click the cell.
-
Edit or remove record:
-
To modify any single value, select the cell in the row and start typing (or press Delete to clear it).
-
To remove the whole row, open the three dots menu on the row header and select Delete.
-
You can also add or edit values in bulk. Select the attribute header and then Multi-edit values. Or, filter the records first and update the filtered records only.
-
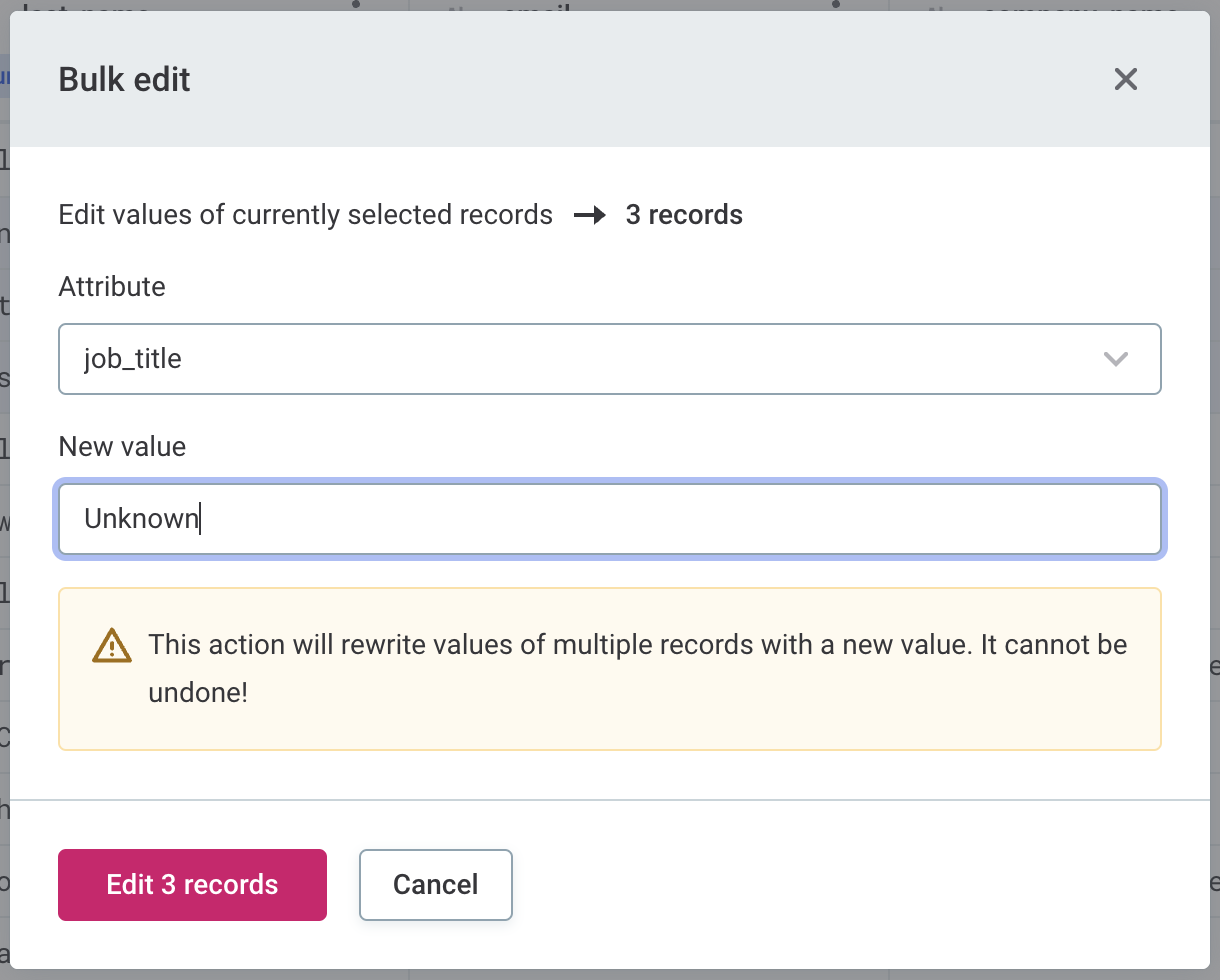
To edit multiple records, select the records you want to edit and then Bulk edit in the ribbon that appears (or, right-click the selection and then Bulk edit). Next, select the attribute you want to modify, provide a new value and select Edit n records to confirm.
-
To edit all records in an attribute, right-click the attribute header and choose Bulk edit. Provide a new value and confirm your changes.
-
-
To delete multiple records, select the records and click Delete in the ribbon that opens.
-
-
Fill values: Select the cells you want to fill, including the cell whose value you want to use (this should be the first cell in the selection) and press Ctrl+D. Alternatively, right-click the selection and choose Fill values.
If you’re using filters to find records that you want to edit or delete in bulk, keep in mind that any previously selected records will not be modified.
| Your changes are instantly saved after you press Enter or focus on another element. |
Copy and paste data
To copy a record, open the three dots menu on the row header and select Duplicate. The record is added right after the original record.
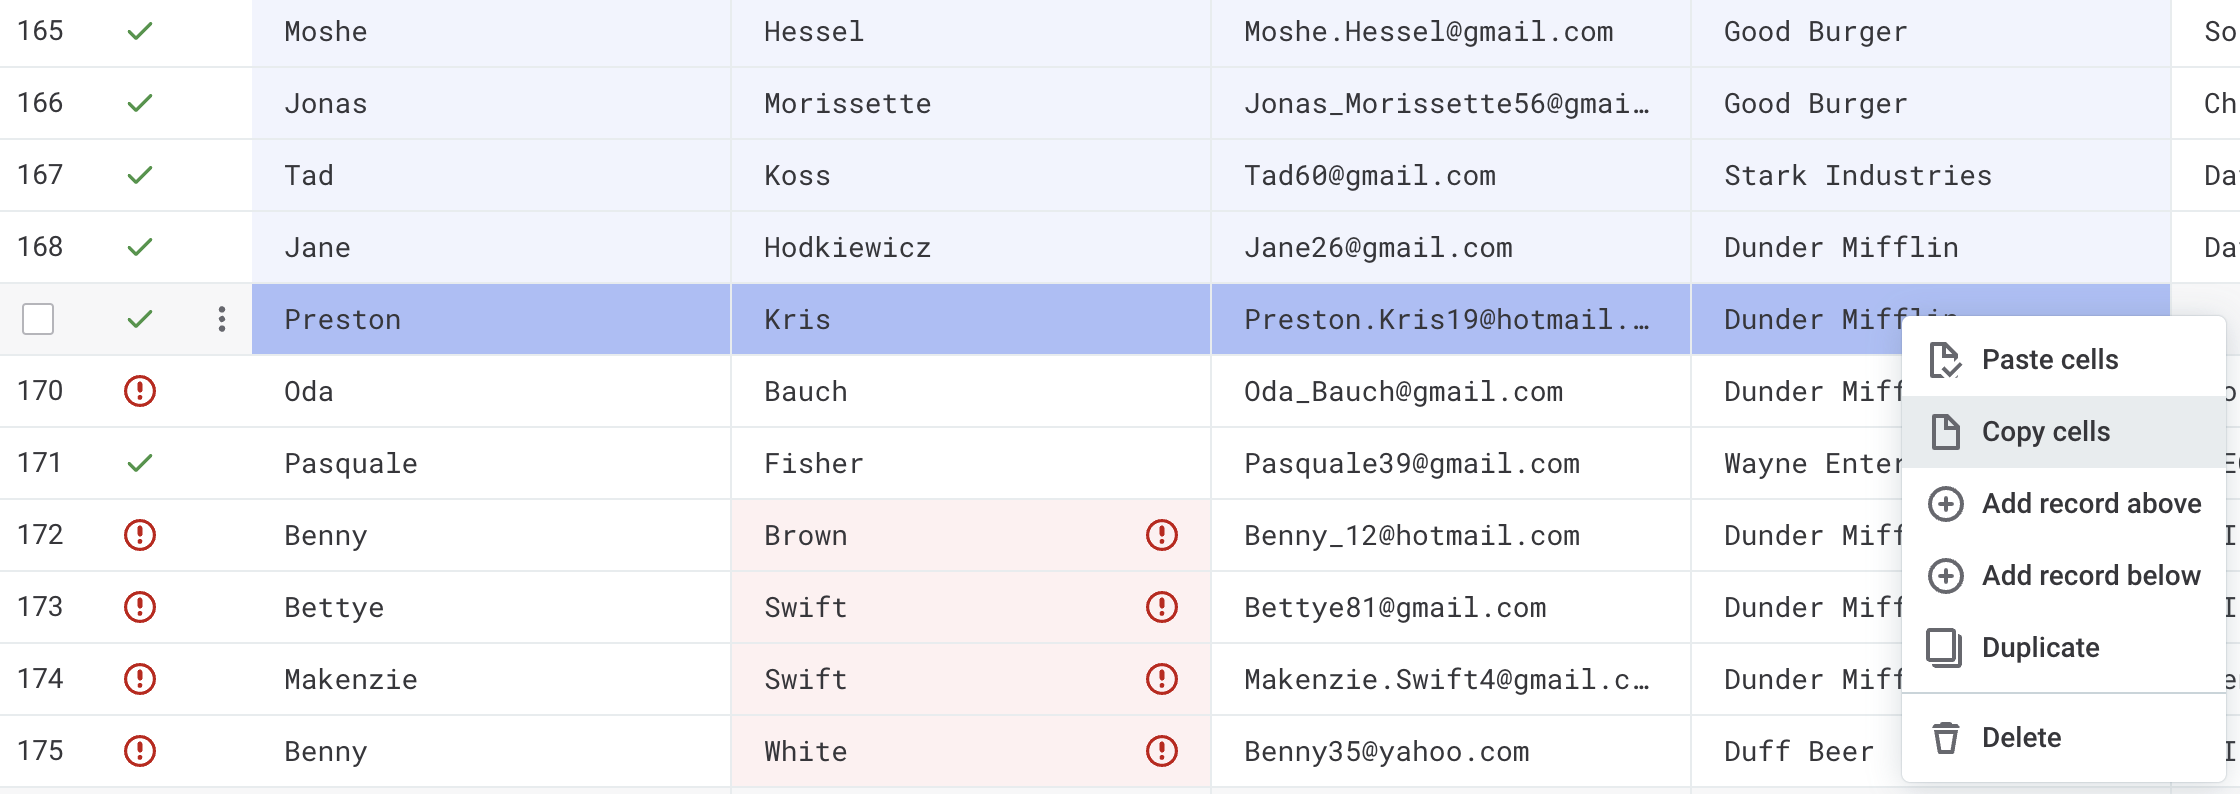
To copy and paste cells, select the cells you want to copy and press Ctrl+C. Alternatively, right-click the selection and choose Copy cells.
Next, navigate to the cell where you want to paste data and press Ctrl+V. Alternatively, right-click and select Paste cells. Pasted cells are evaluated on the fly, allowing you to quickly spot issues in the data.
|
You can also fill in multiple cells at once. To do this, when pasting, select an array of cells (spanning one or several columns) instead of a single one. Keep in mind this doesn’t work if an entire column is selected; in that case, use the Bulk edit option. |
When copying between attributes of different data types, cells are pasted as follows:
-
If conversion between data types is not possible, your action is ignored. For example, if you paste cells from an attribute of type String to an attribute of type Boolean, the cells remain empty.
-
If values can be converted between data types, the pasted values are updated accordingly. For example, if you copy cells from a Boolean attribute to a String attribute, the pasted cells will have values
trueorfalse. -
When pasting a string value to a date column, the US formatting (
mm-dd-yyyy) is applied by default. For example, if you try to copy16/01/2023, an error occurs as there are 12 months in a year.
|
In addition, pasting cells overwrites any existing data and automatically adds additional rows if needed. However, if you’re copying cells from multiple columns, your selection is pasted only partially in case it’s wider than the columns available. The action cannot be reversed. Use with caution. |
Keyboard shortcuts
Here is how you can interact with ONE Data using your keyboard.
When you select an attribute header:
-
Move through attributes: Use arrows.
-
Select an entire attribute: Press Ctrl+Space. To clear the selection, press Ctrl+Space again.
-
Select multiple attributes: Hold Shift+Ctrl and press Left arrow or Right arrow as many times as needed.
-
Open the attribute menu: Press Enter.
-
Reverse the sort order: Press Shift+Enter. If records were sorted in ascending order, this sorts them in descending order, and vice versa. To change the sort order again, press Shift+Enter one more time.
When you select a cell:
-
Start editing a cell: Press Enter. Once you’re done, press Enter again to move to another cell in the same row. Or, use arrows to navigate to a different cell.
-
Clear a cell: Use Delete or Backspace when the cell is selected.
-
Move through records: Use arrows.
-
Select multiple records: Hold Shift and press Left arrow or Right arrow as many times as needed.
-
Open the record menu: Use arrows to move to the three dots menu on the record level (first column in any ONE Data table), then press Enter.
Depending on your browser and OS, you might need to first press Esc or Enter after selecting an attribute header or a cell respectively for other shortcuts to work.
Permissions and access
ONE Data uses the Access Levels of the ONE Platform.
The following access levels can be set for individual tables:
-
Full access: Provides the complete set of operations available on an asset, including the permissions to delete, create new data assets, publish, and share.
-
Editing access: Allows editing drafts on the corresponding node. The editor cannot share access to the node with other persons or groups, delete or publish assets.
-
View data access: Allows to view metadata and data of the asset. This access level can be useful for data reviewers.
-
View metadata access: Allows to view metadata of the asset but not data. This access level can be useful for metadata reviewers or when a table contains sensitive data. In this case, you can only view the following elements:
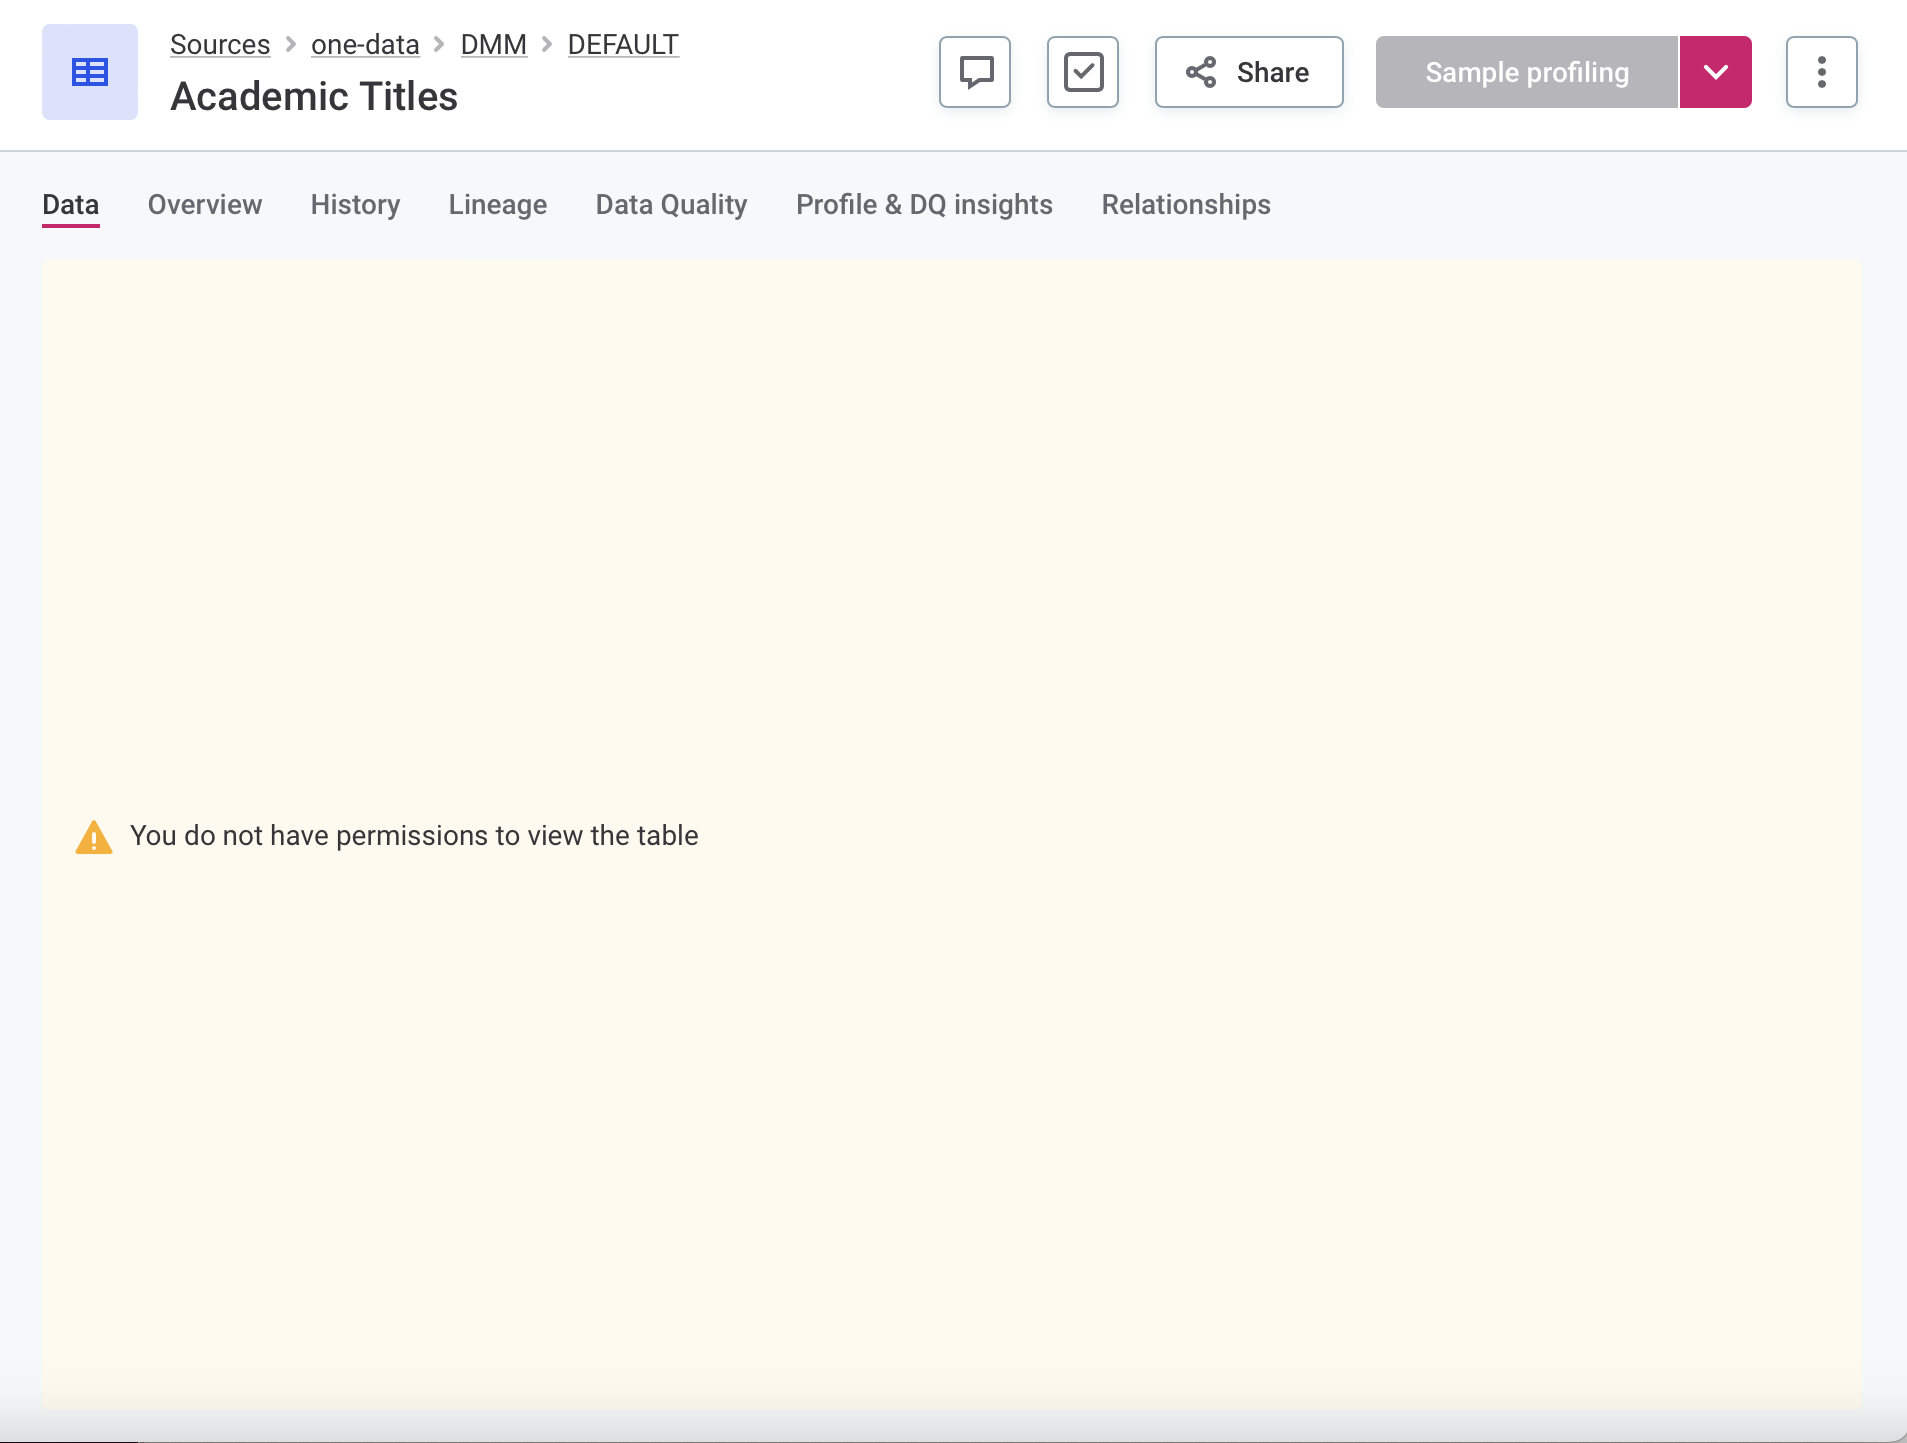
To easily manage access levels, specify the table owner when creating a new ONE Data table. For more information, see Stewardship.
To share access to a table, open the table and select Share. Select the users or groups that will be given access to the table as well as the appropriate access level for each of them.
|
If an option is grayed out, this means you don’t have the sufficient access level. To request a higher access level, open the table you want to work with and in the three dots menu select Request access. For additional instructions, see Workflows, section Request data access. 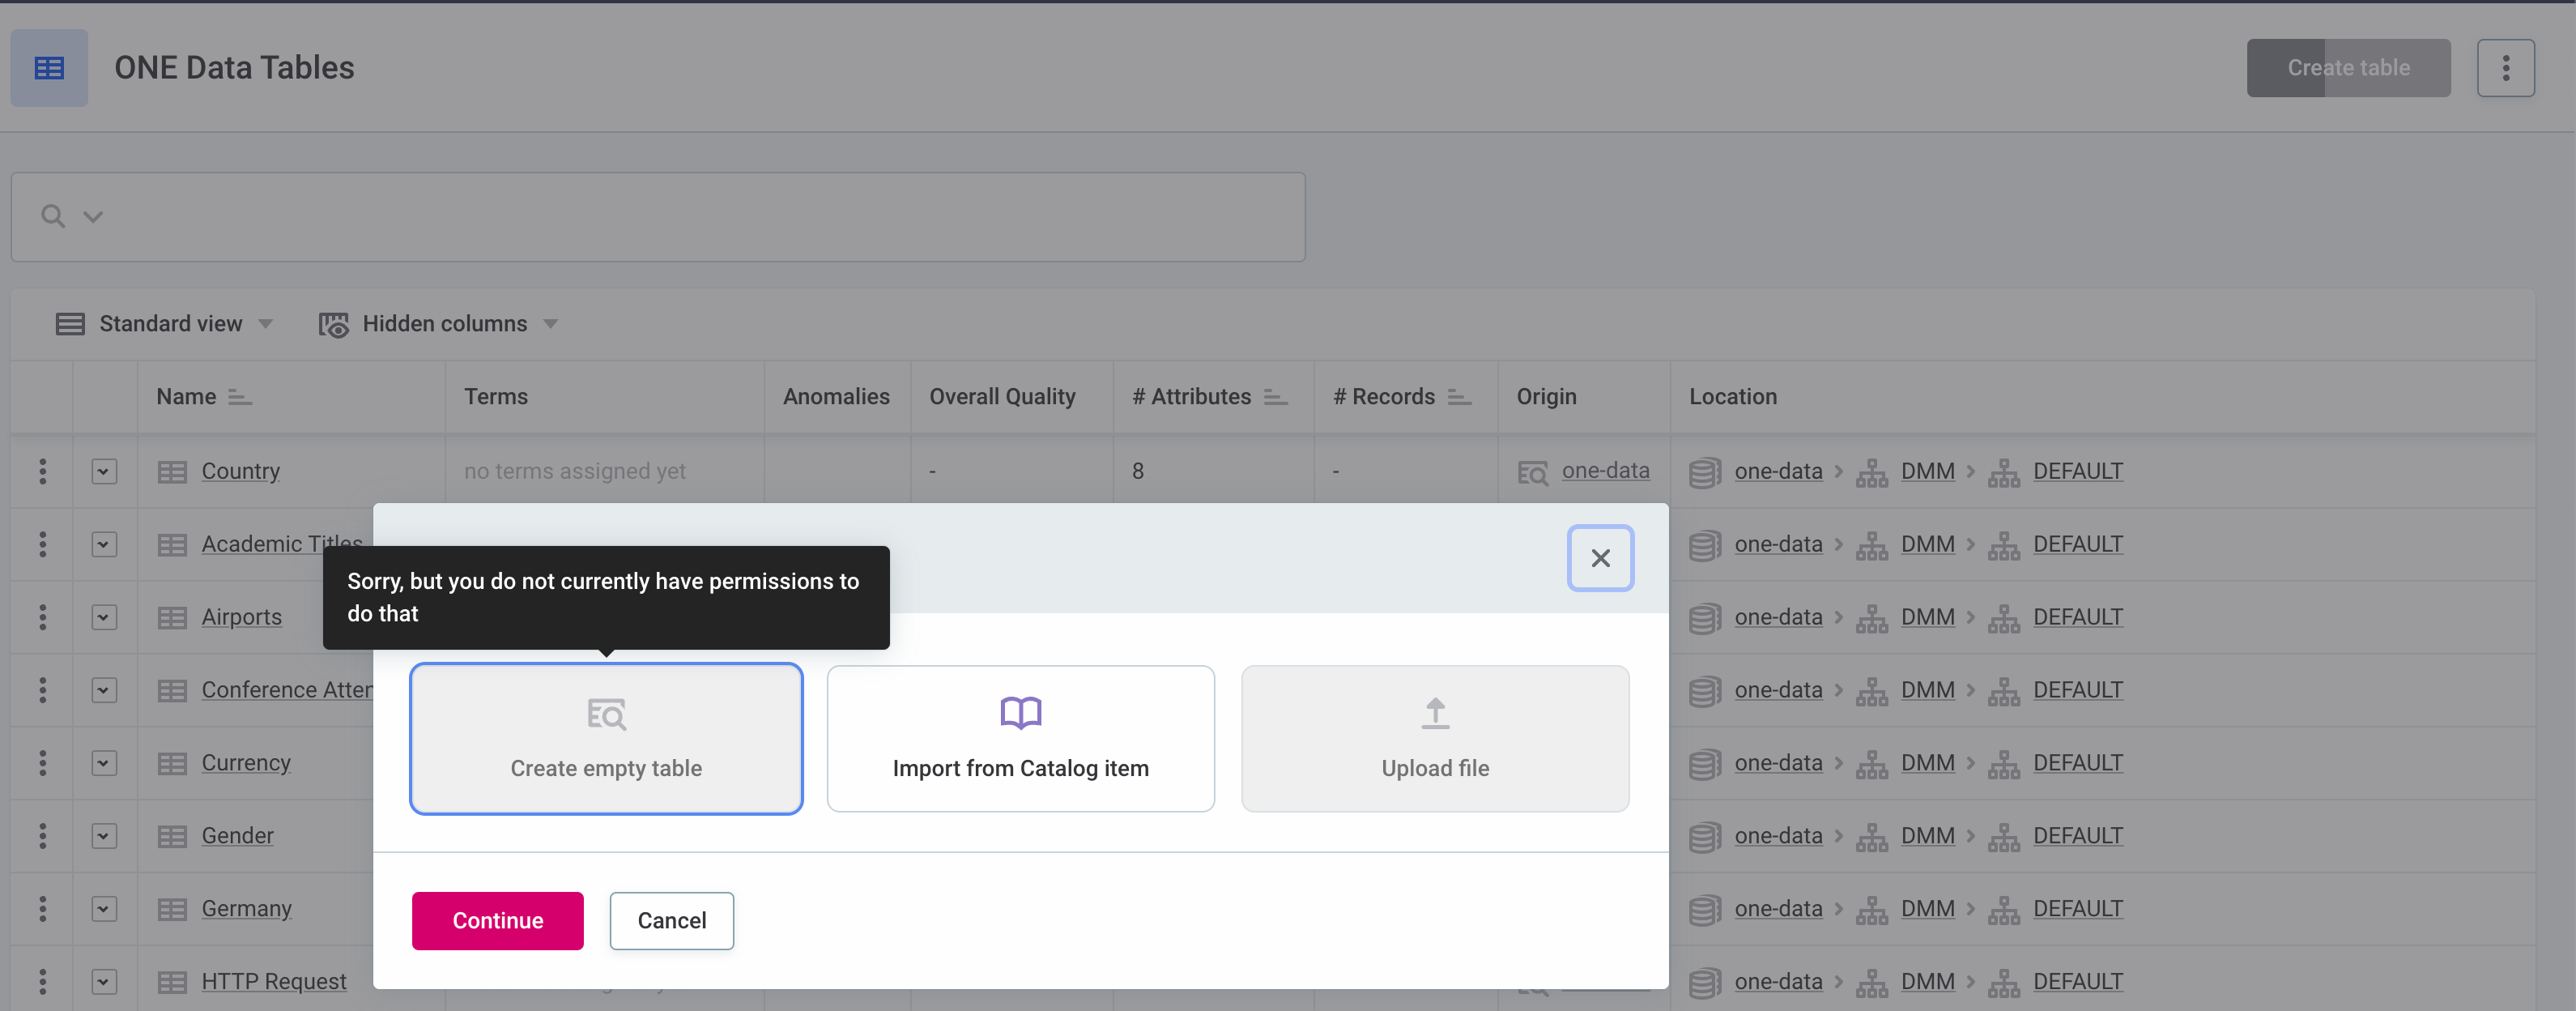
|
User data type
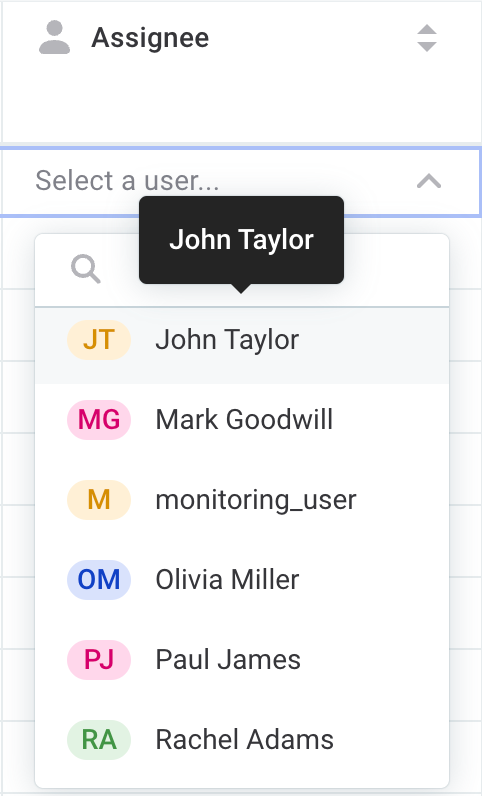
When you share access to a ONE Data table with your team, you can assign particular records to different users. Combine this with tasks to easily keep track of how your data set is managed and the progress of your workload.
Create a new attribute and select User as the data type. Select a cell (or, use the bulk edit option) and choose a user from the list.
| Make sure you share the table with the assigned user and that they have the appropriate permissions granted. |
Tasks and comments
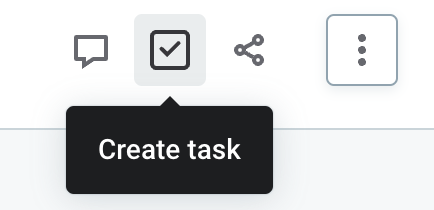
To further streamline the collaboration within your team, create tasks and comments. This way, you can keep all relevant information contained in the application and easily available to all team members.
The Create comment and Create task options are available in the upper-right corner of the table details page.
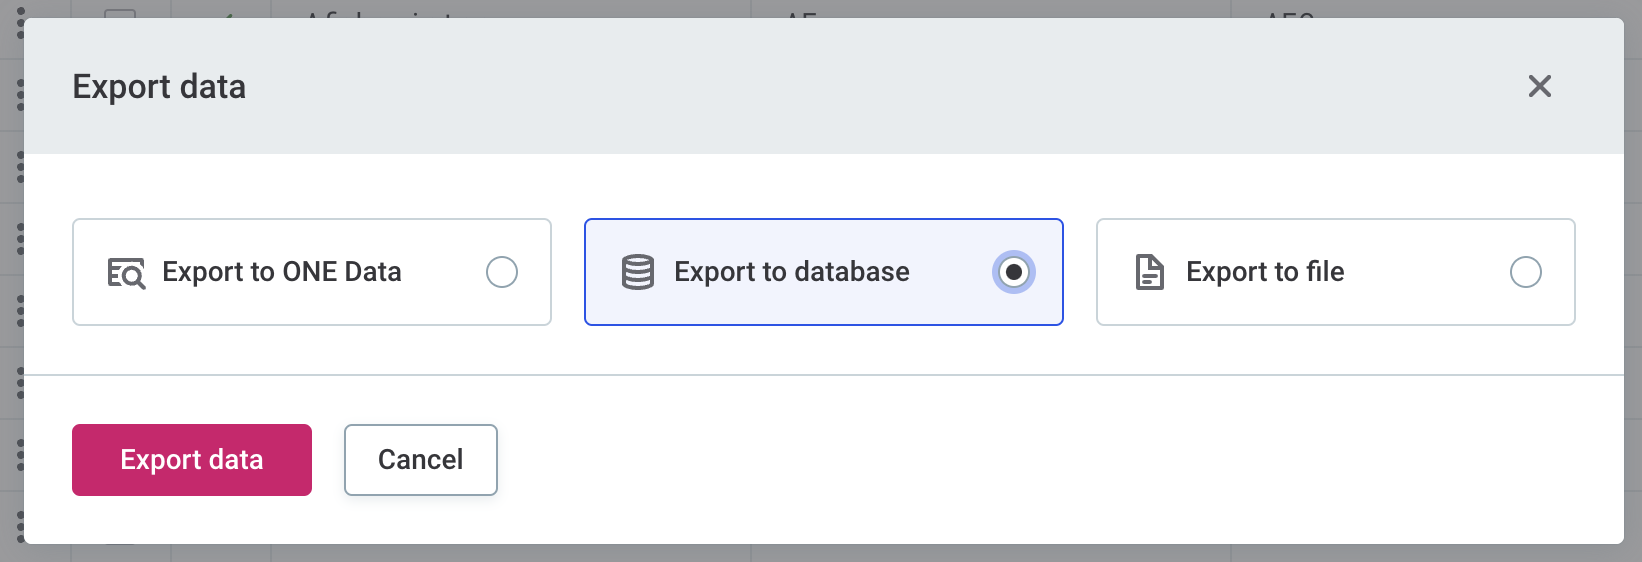
Export data to another data source
You can use data managed and edited in ONE Data both internally within the platform and externally, by exporting it to other data sources. To do this, open the table that you want to export and in the three dots menu select Export > Export to database. For more detailed instructions about how to configure a data export, see Data Export.
This is particularly handy for synchronizing data between different data sources. For example, if you imported some reference data from Snowflake that turned out to be incomplete, you can validate it and fix the issues in ONE Data. Then you can export it back to Snowflake and perform a join query with the existing table.
|
You can use the same feature to quickly create a new table based on another ONE Data table (Export > Export to ONE Data). The new table can either be a copy or a subset of the existing table. For more detailed instructions, see Import Data from a Catalog Item. |
Visualize data with Data Stories
Use Data Stories to get a better overview of patterns and tendencies in your ONE Data tables. For example, if you’re preparing a report about the events your company organized over the past year, you might be curious to visualize how many different job positions the attendees hold.
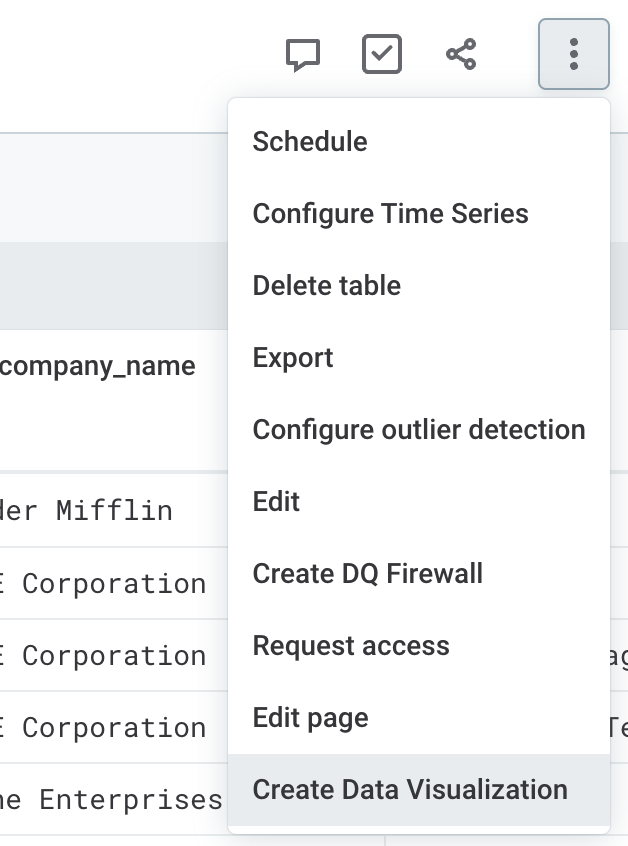
To quickly create a pie chart based on the attribute that contains this information (job_title), on the table details page, open the three dots menu and select Create Data Visualization.
This redirects you to Data Stories.
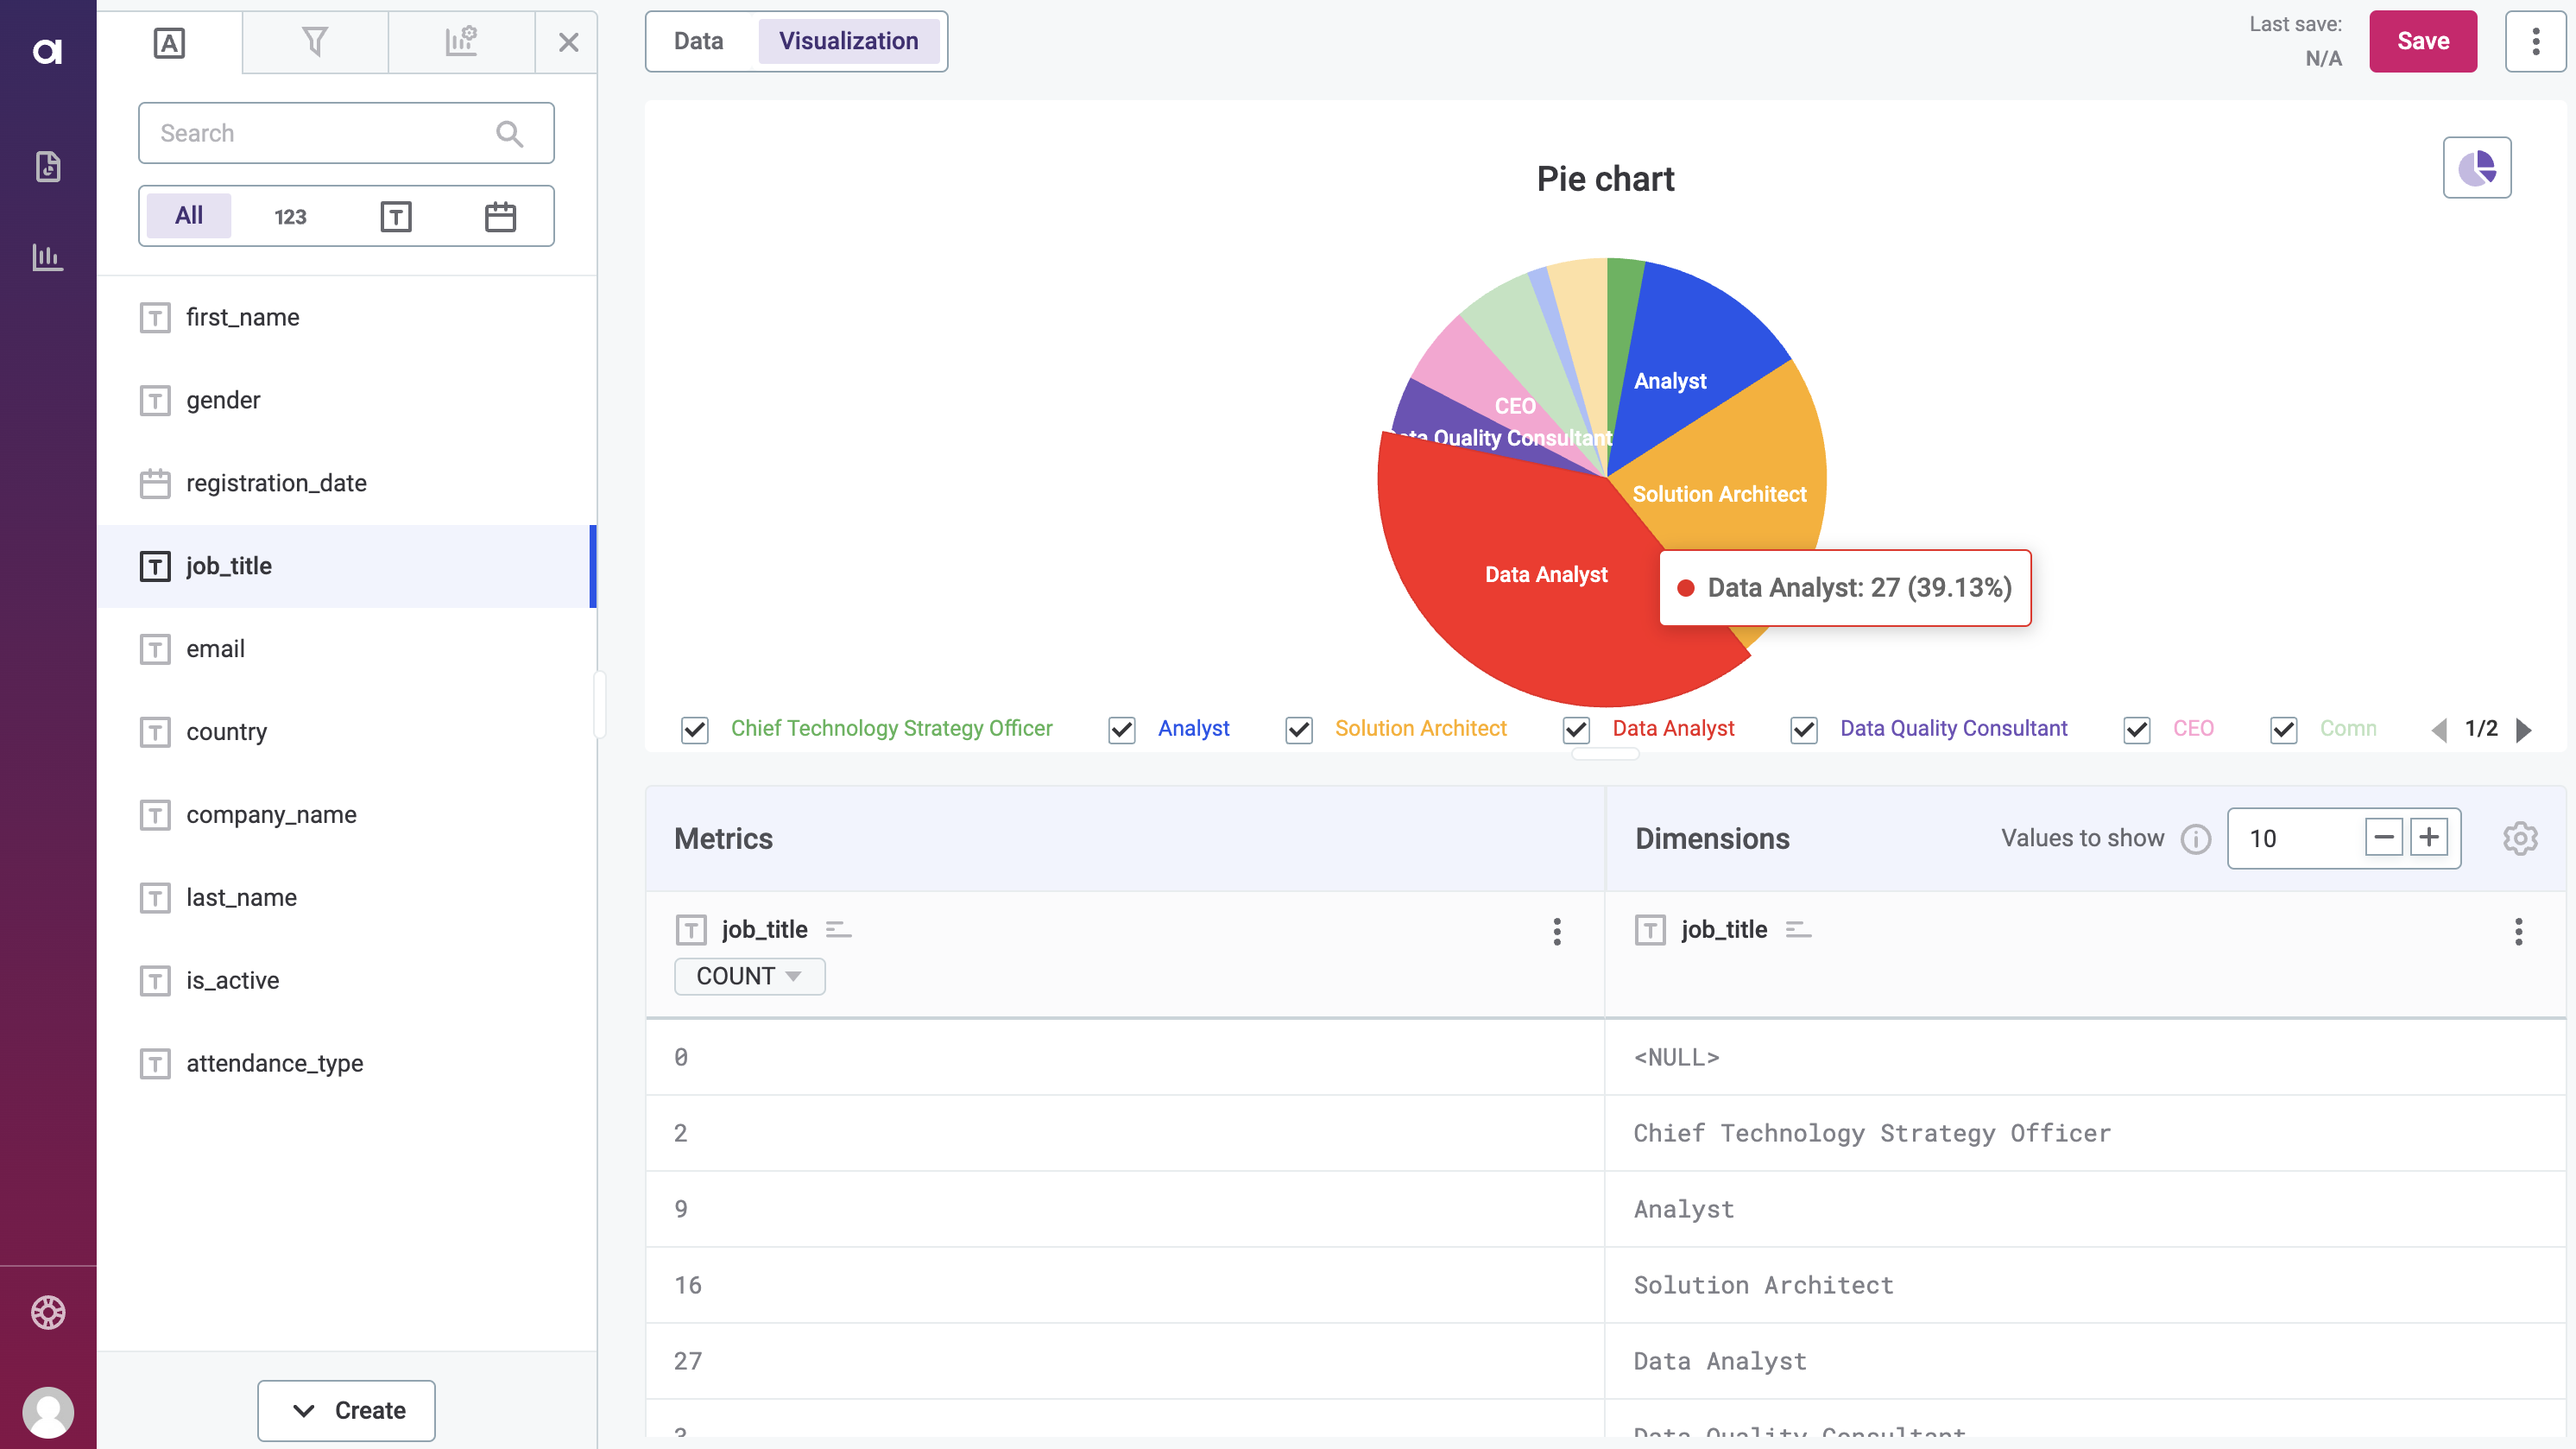
From the Attributes tab on the left, drag and drop the job_title attribute to both Metrics and Dimensions columns.
This creates a bar chart.
To change the chart type, select the Bar chart icon that appears on the canvas and choose Pie chart instead.
Finally, customize the visualization as needed: change the metric display name, update the colors, or share it with your team members. For more information, see Welcome to Data Stories.
| To list Data Stories reports in ONE, go to the Reports tab in the Knowledge Catalog. |
|
To work with ONE Data tables in Data Stories, the following conditions must be met:
Users can only view report previews and edit stories if they have appropriate access levels provided to them in both ONE Data and Data Stories. |
Audit logs
Monitor how users in your organization interact with data. User actions in ONE Data are logged in the Audit module and can be explored directly in ONE (Audit tab), or using the dedicated Audit API. To learn more, see Audit and Audit API respectively.
| By default, access to audit logs is restricted to power users. You can also create custom roles as needed. |
For ONE Data, the following actions are audited:
-
Metadata changes, such as:
-
Creating or deleting a table.
-
Adding, renaming, reordering, or deleting an attribute.
-
-
Accessing data.
-
Editing data, such as:
-
Adding, editing, or duplicating records.
-
Duplicating an attribute.
-
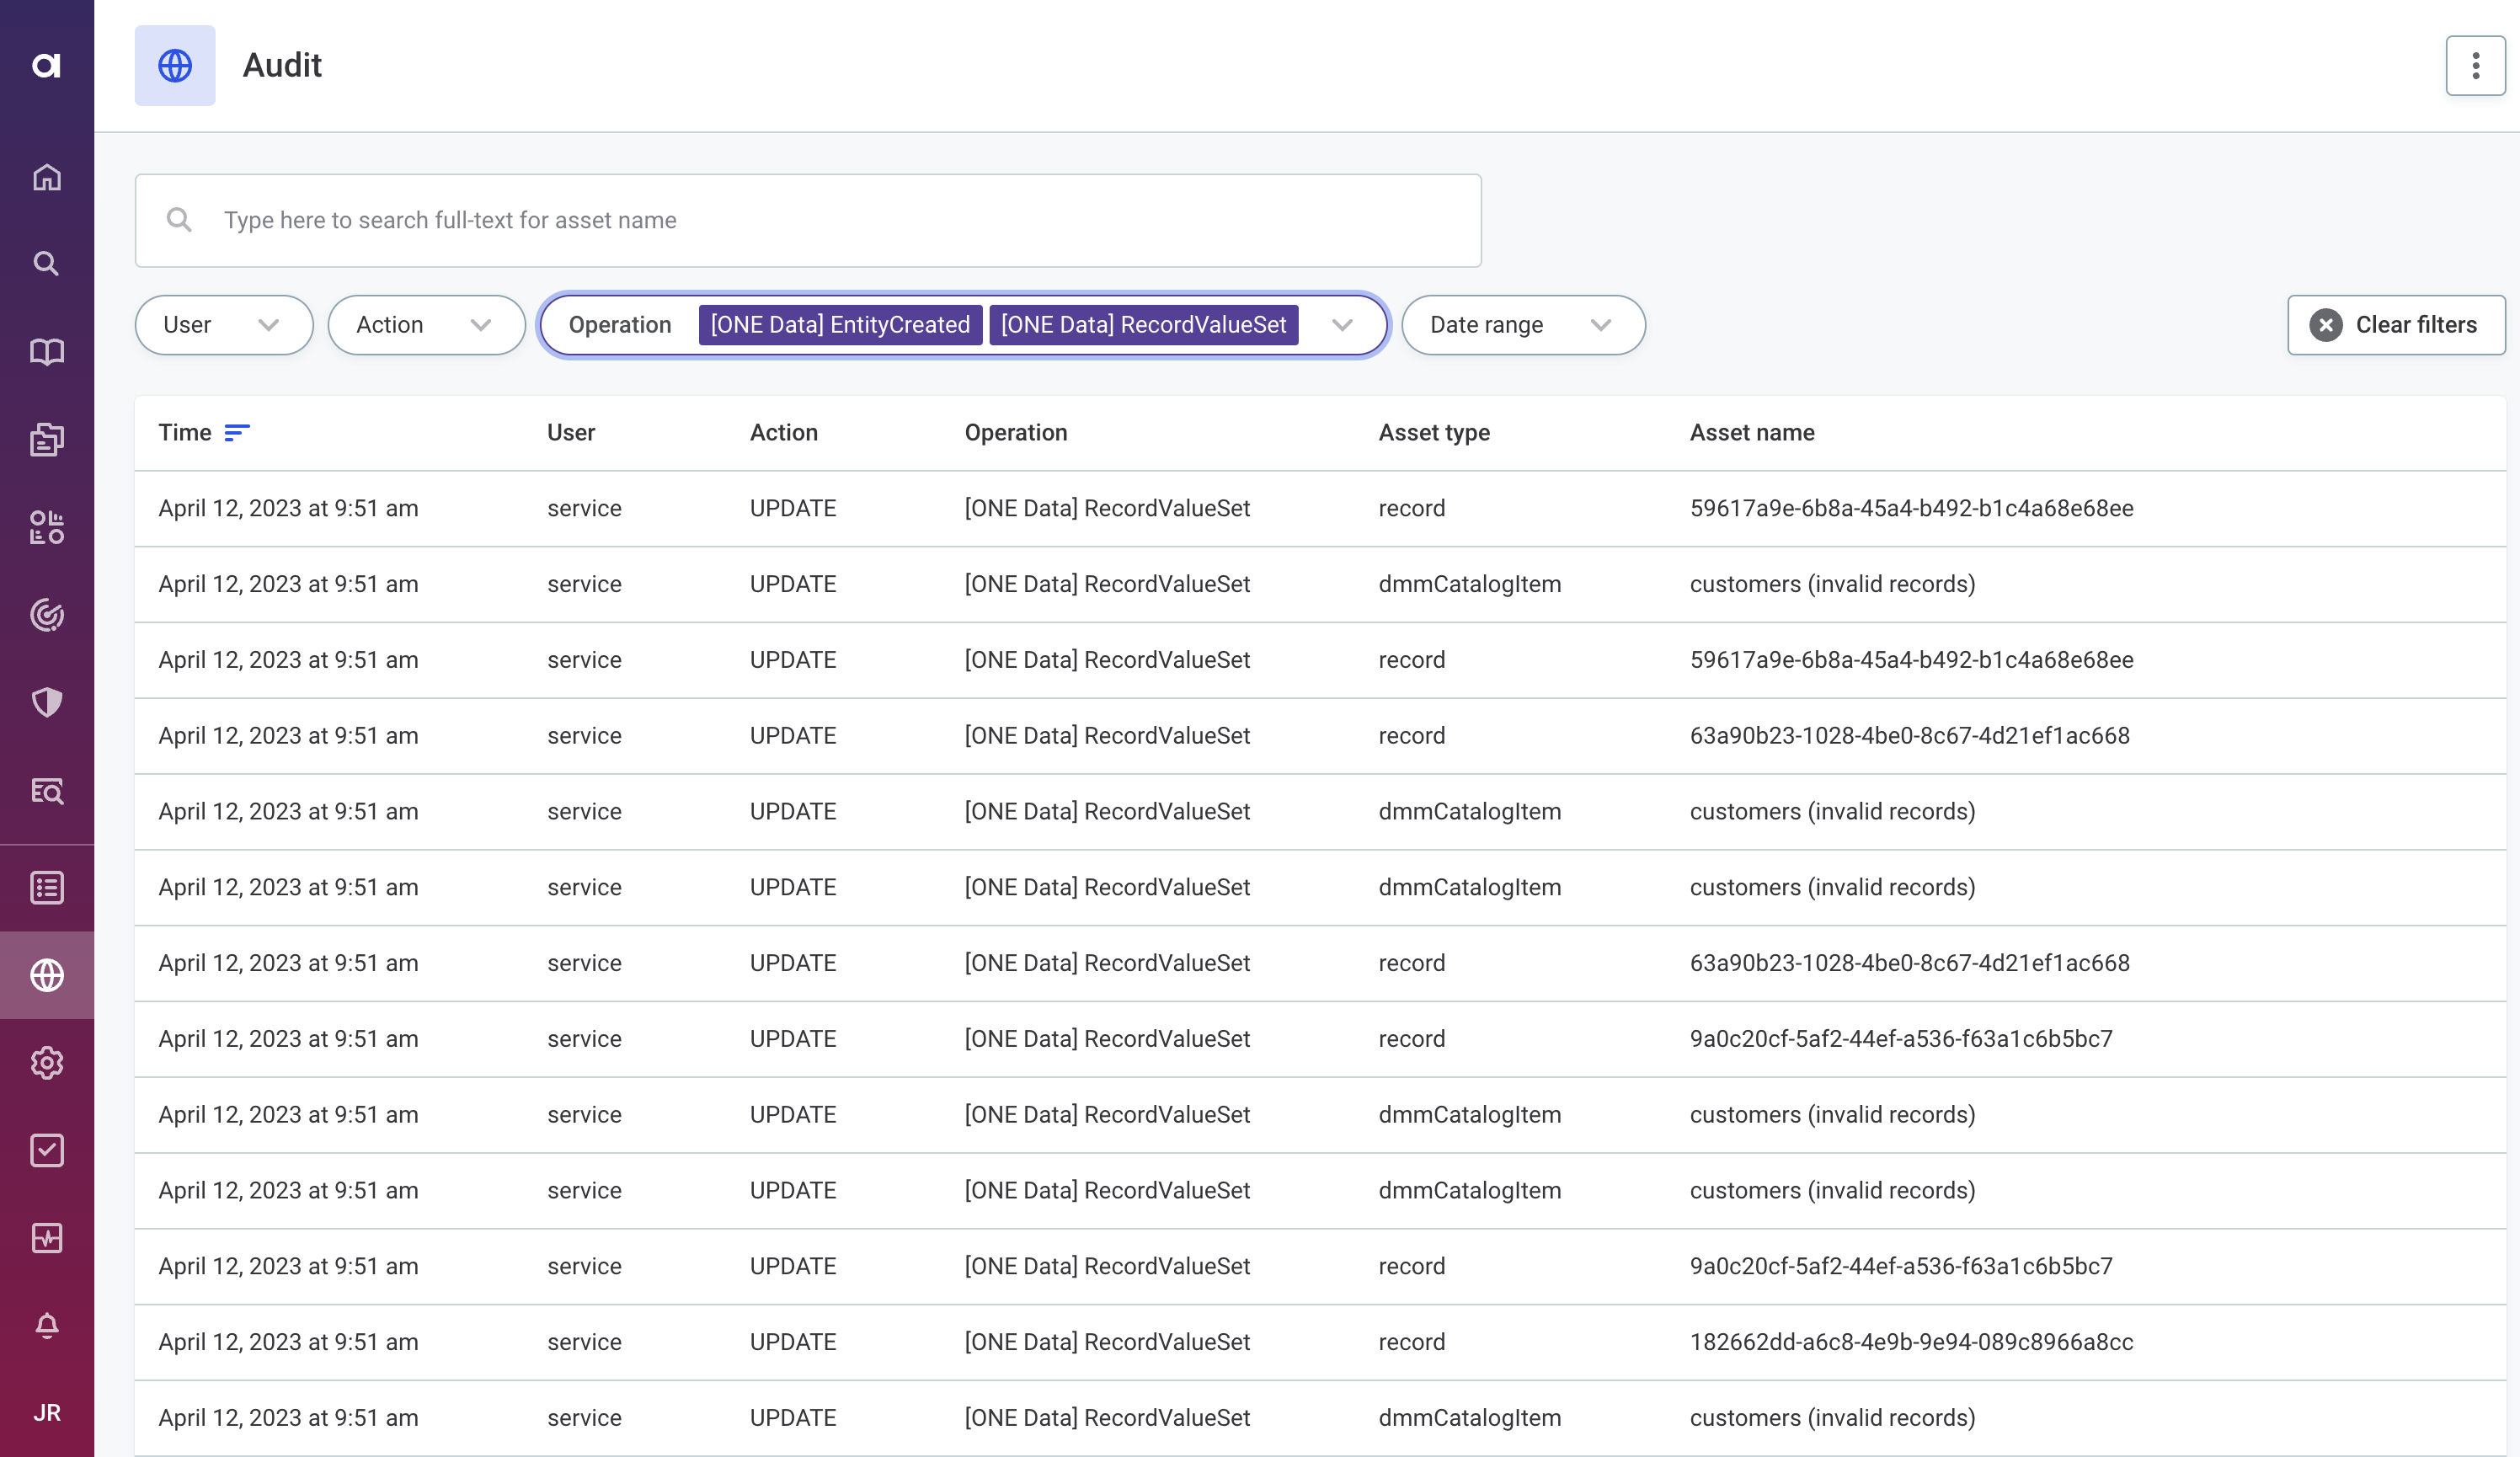
Operations related to ONE Data use the prefix [ONE Data].
Operations without this prefix originate from another component.
|
On the Audit tab, you can filter logs by action or operation to quickly narrow down your search results. Select an entry to view more details, including related operations and affected assets.
Was this page useful?