
Language
|
Automated translation is available in Ataccama Cloud deployments only. |
The following guide provides information about the options related to language and localization in ONE.
Change language
ONE lets you change the language of the application to your preferred option.
Currently, the following languages are available:
-
English
-
Czech
-
German
-
French
-
Italian
-
Spanish
-
Brazilian Portuguese
Take note that not all UI text is fully localized and you might still encounter English in some parts of the application regardless of your personal settings.
To change the language in ONE:
-
Go to My Account > Language.
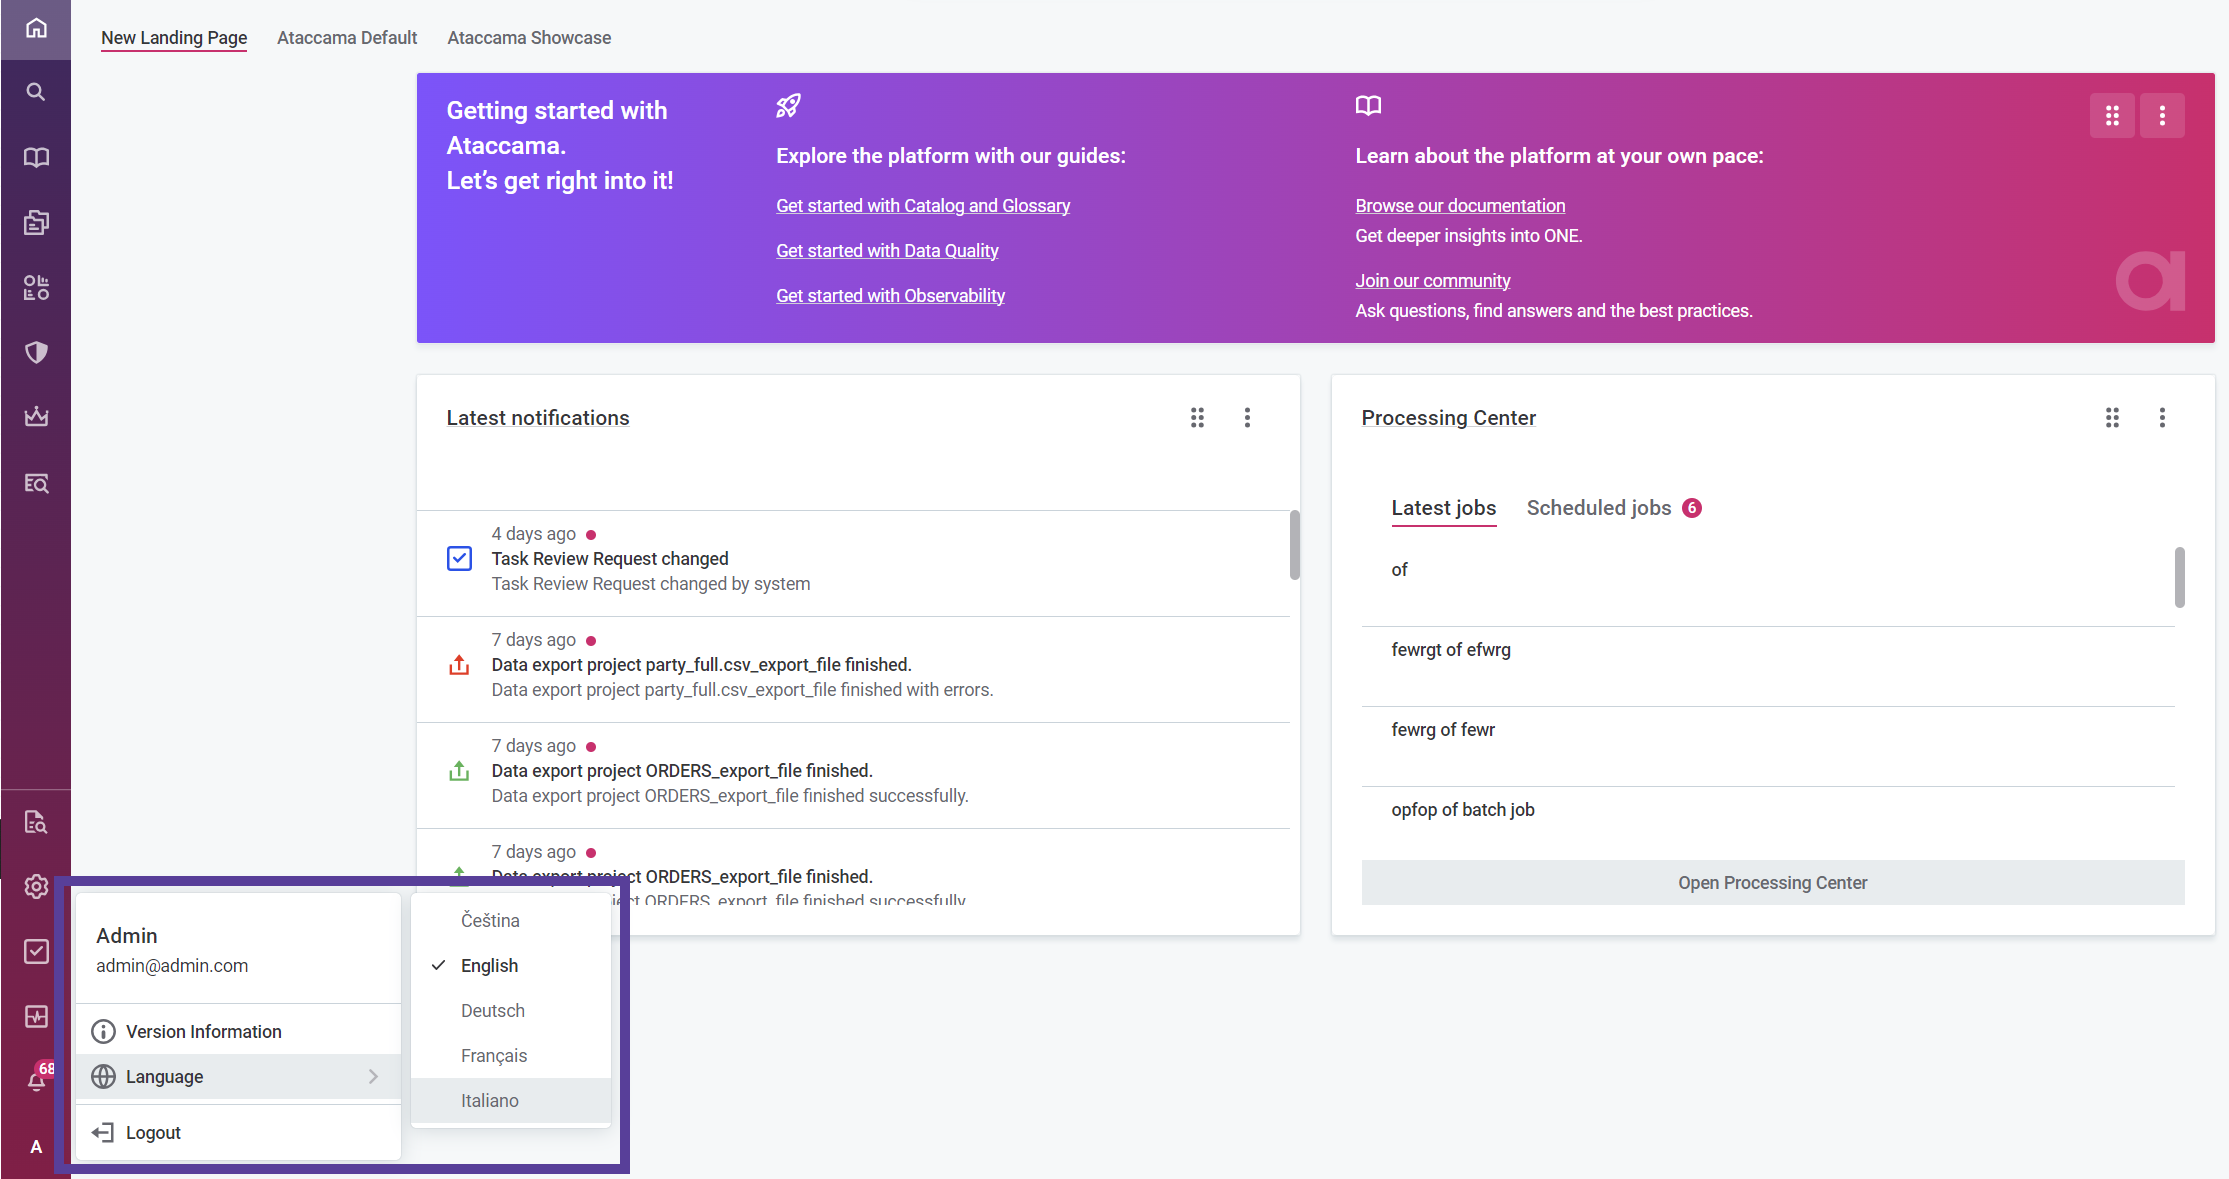
-
Select your preferred option.
The page reloads to update the language.
Automated translation
| This feature is powered by Gen AI. See Generative AI in ONE. |
If a text in a Description (or other rich text) field is detected to be of a different language than you currently have selected, you have the option to automatically translate the text to your selected language.
Mind that the automated translation might not be accurate.
To automatically translate text, select the Automated translation icon in a Description field.
You can revert the text back to the original text by selecting the Show original icon.
Translations of customized sections
You can add translation for sections of ONE you have customized.
You can download a ZIP file containing XML files of sections prepared for translation, and then import the translated files.
Alternatively, you can translate the strings of the customized sections directly in ONE with the Quick translate option.
To add translations for customized sections:
-
Go to Global Settings > Customization > Translations.
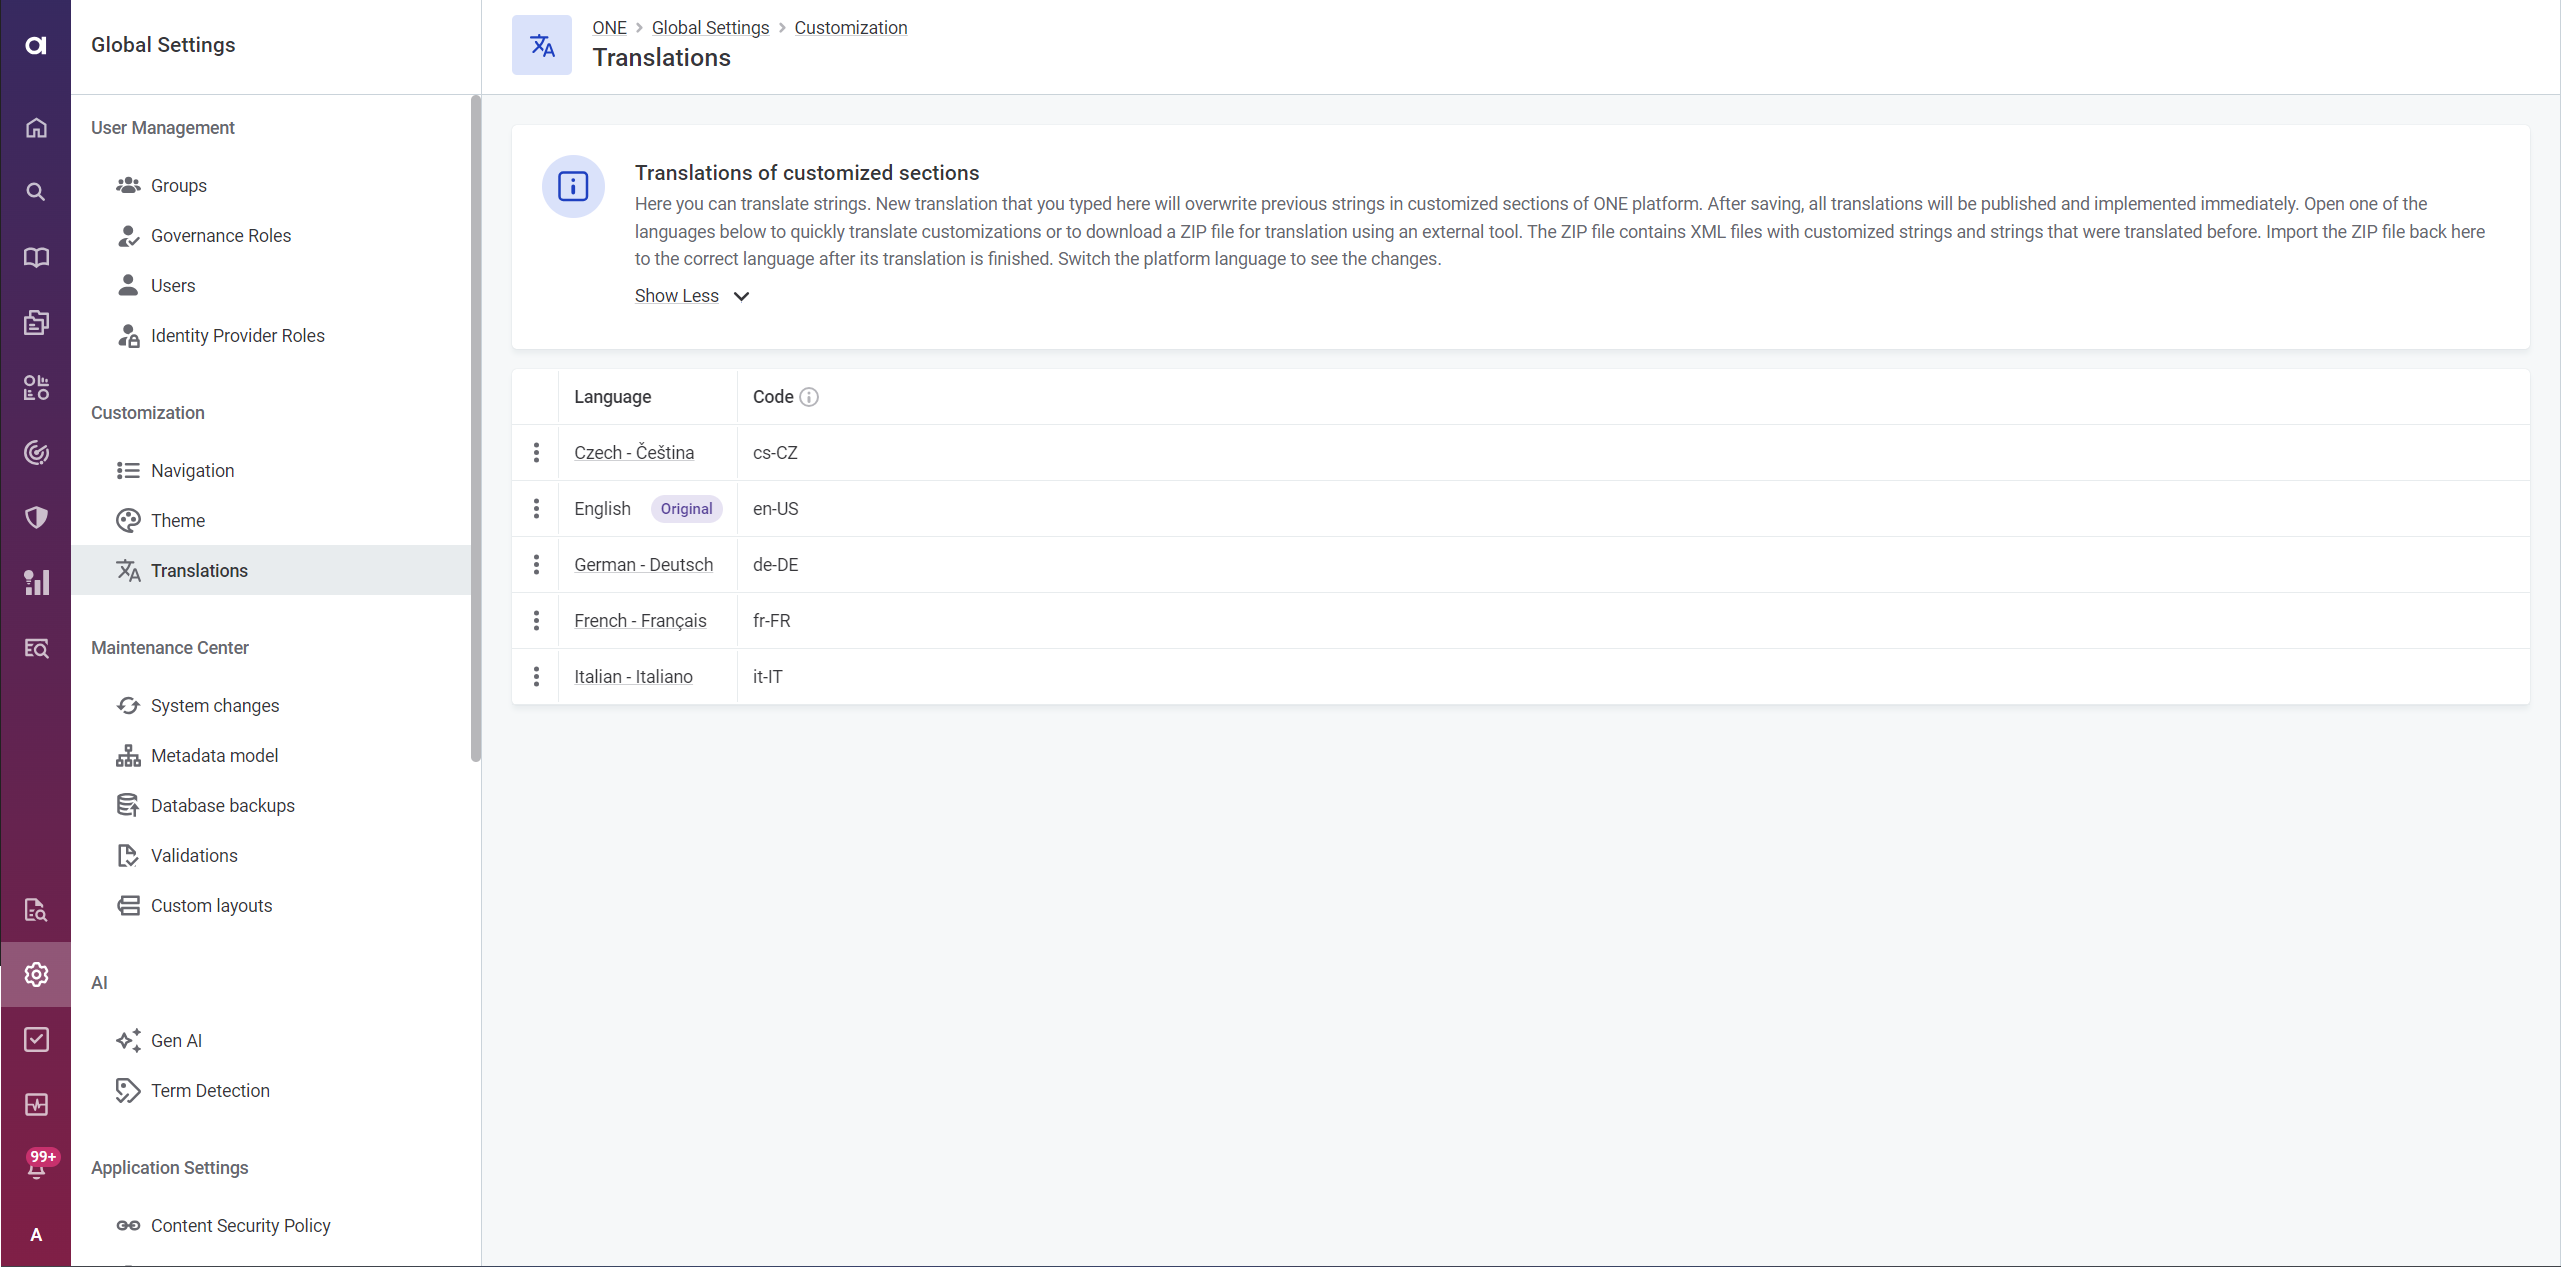
-
Select a language for which you would like to add translations. The list is limited to the currently available global language selection options.
-
The page of your selected language is divided into the following sections:
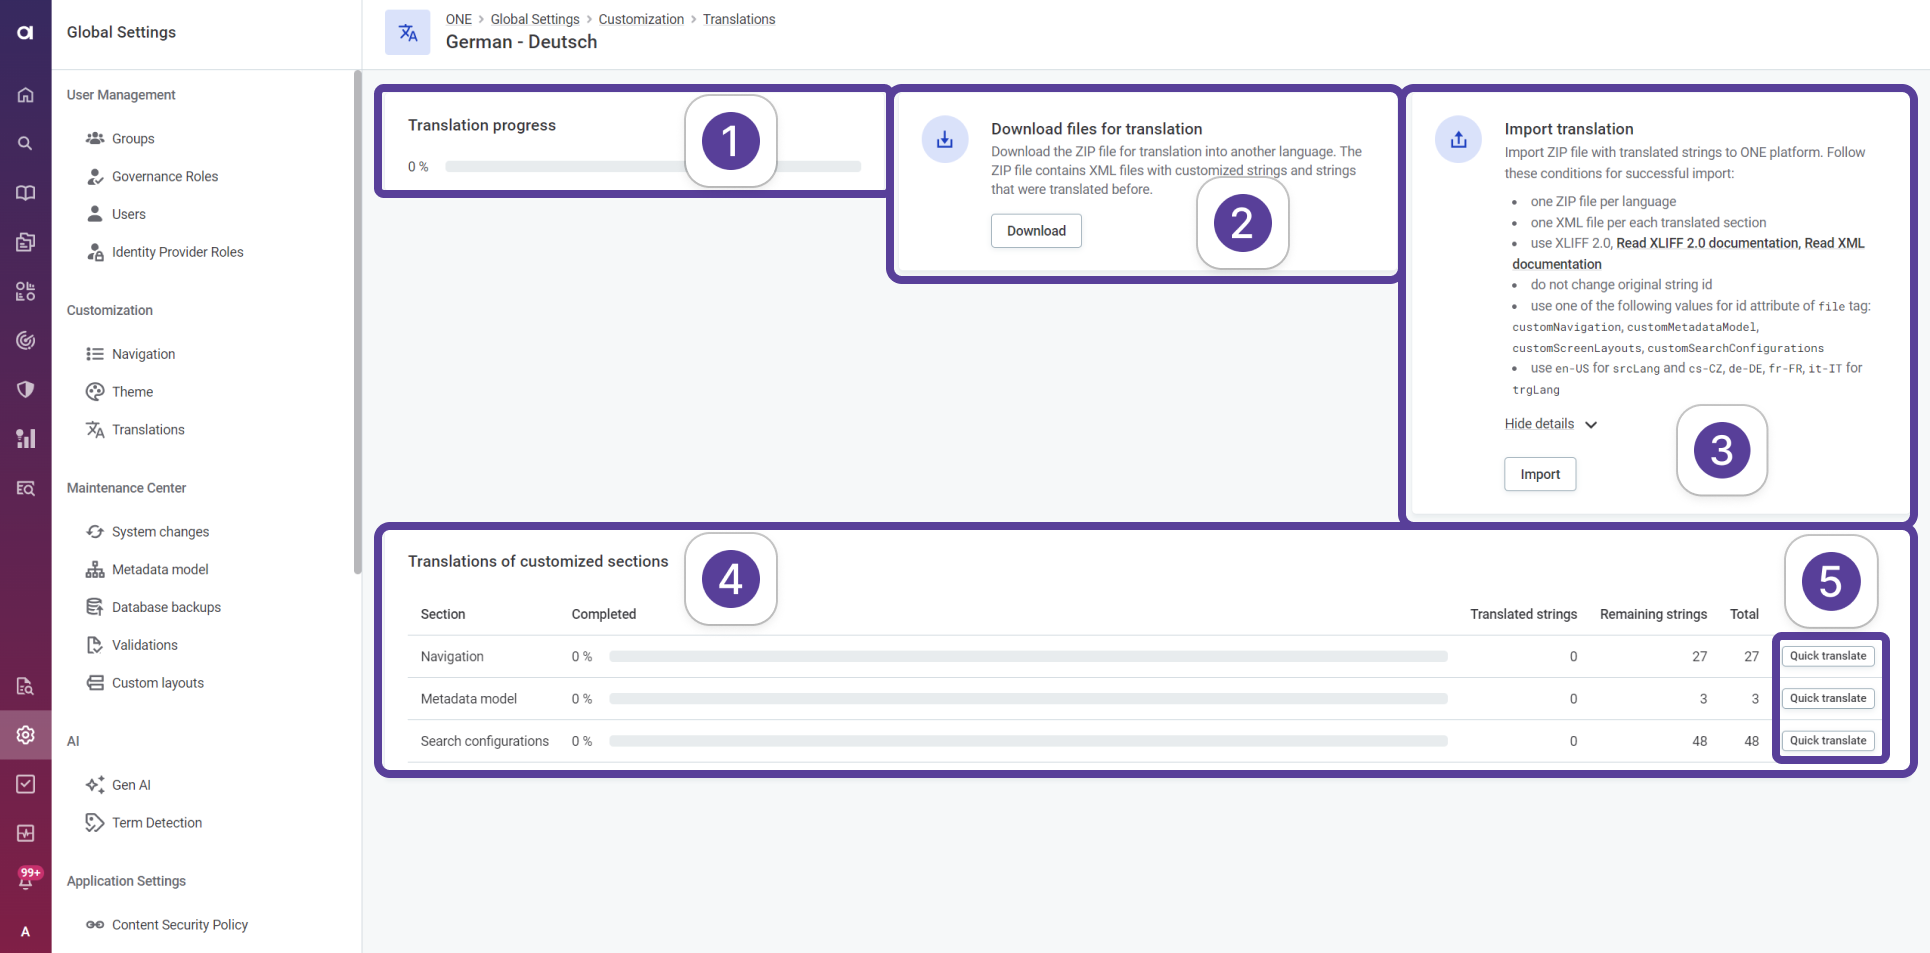
-
(1) Translation progress: Check the overall progress of translation for the selected language.
-
(2) Download files for translation: Select Download to download a
ZIPfile of all sections prepared for translation externally. -
(3) Import translation: Select Import to upload a
ZIPfile containing your translations. -
(4) Translations of customized sections: View in detail the progress of the translations.
-
(5) Quick translate: Select Quick translate to begin the translations of a section directly in ONE.
-
External translation guidelines
If you decide to perform the translation externally, we recommend you use the ZIP file available in the Download files for translation section.
The ZIP file contains all XML files with customized strings and strings that were translated before.
If you use this file, you ensure the structure and format of the files are retained during import of the translated files.
Otherwise, the follow these guidelines for successful import:
-
Import one
ZIPfile per language. -
Import one
XMLfile per each translated section. -
Use
XLIFF 2.0. For more information, see XLIFF 2.0 documentation and XML documentation. -
Do not change the original string
idattribute. -
Use one of the following values for the
idattribute of thefiletag:customNavigation,customMetadataModel,customScreenLayouts,customSearchConfigurations. -
Use
en-USforsrcLangandcs-CZ,de-DE,fr-FR,it-IT,es-ESfortrgLang.
Was this page useful?