
Create a Table
This article describes how to create a new table from scratch in ONE Data.
In addition to this, you can also import an existing catalog item from the Knowledge Catalog or upload a local file from your machine.
|
ONE Data is a type of data source in ONE and you can access the metadata of each ONE Data table in the Knowledge Catalog as well. These tables are labeled as ONE Data catalog items. To easily navigate to ONE Data from the Knowledge Catalog, when viewing the table in the Knowledge Catalog, go to Data > Open in ONE Data. |
| In the current version, we recommend working with datasets of up to 50k records for optimal performance. |
Create ONE Data table
To use ONE Data as your table creation tool, follow these steps.
-
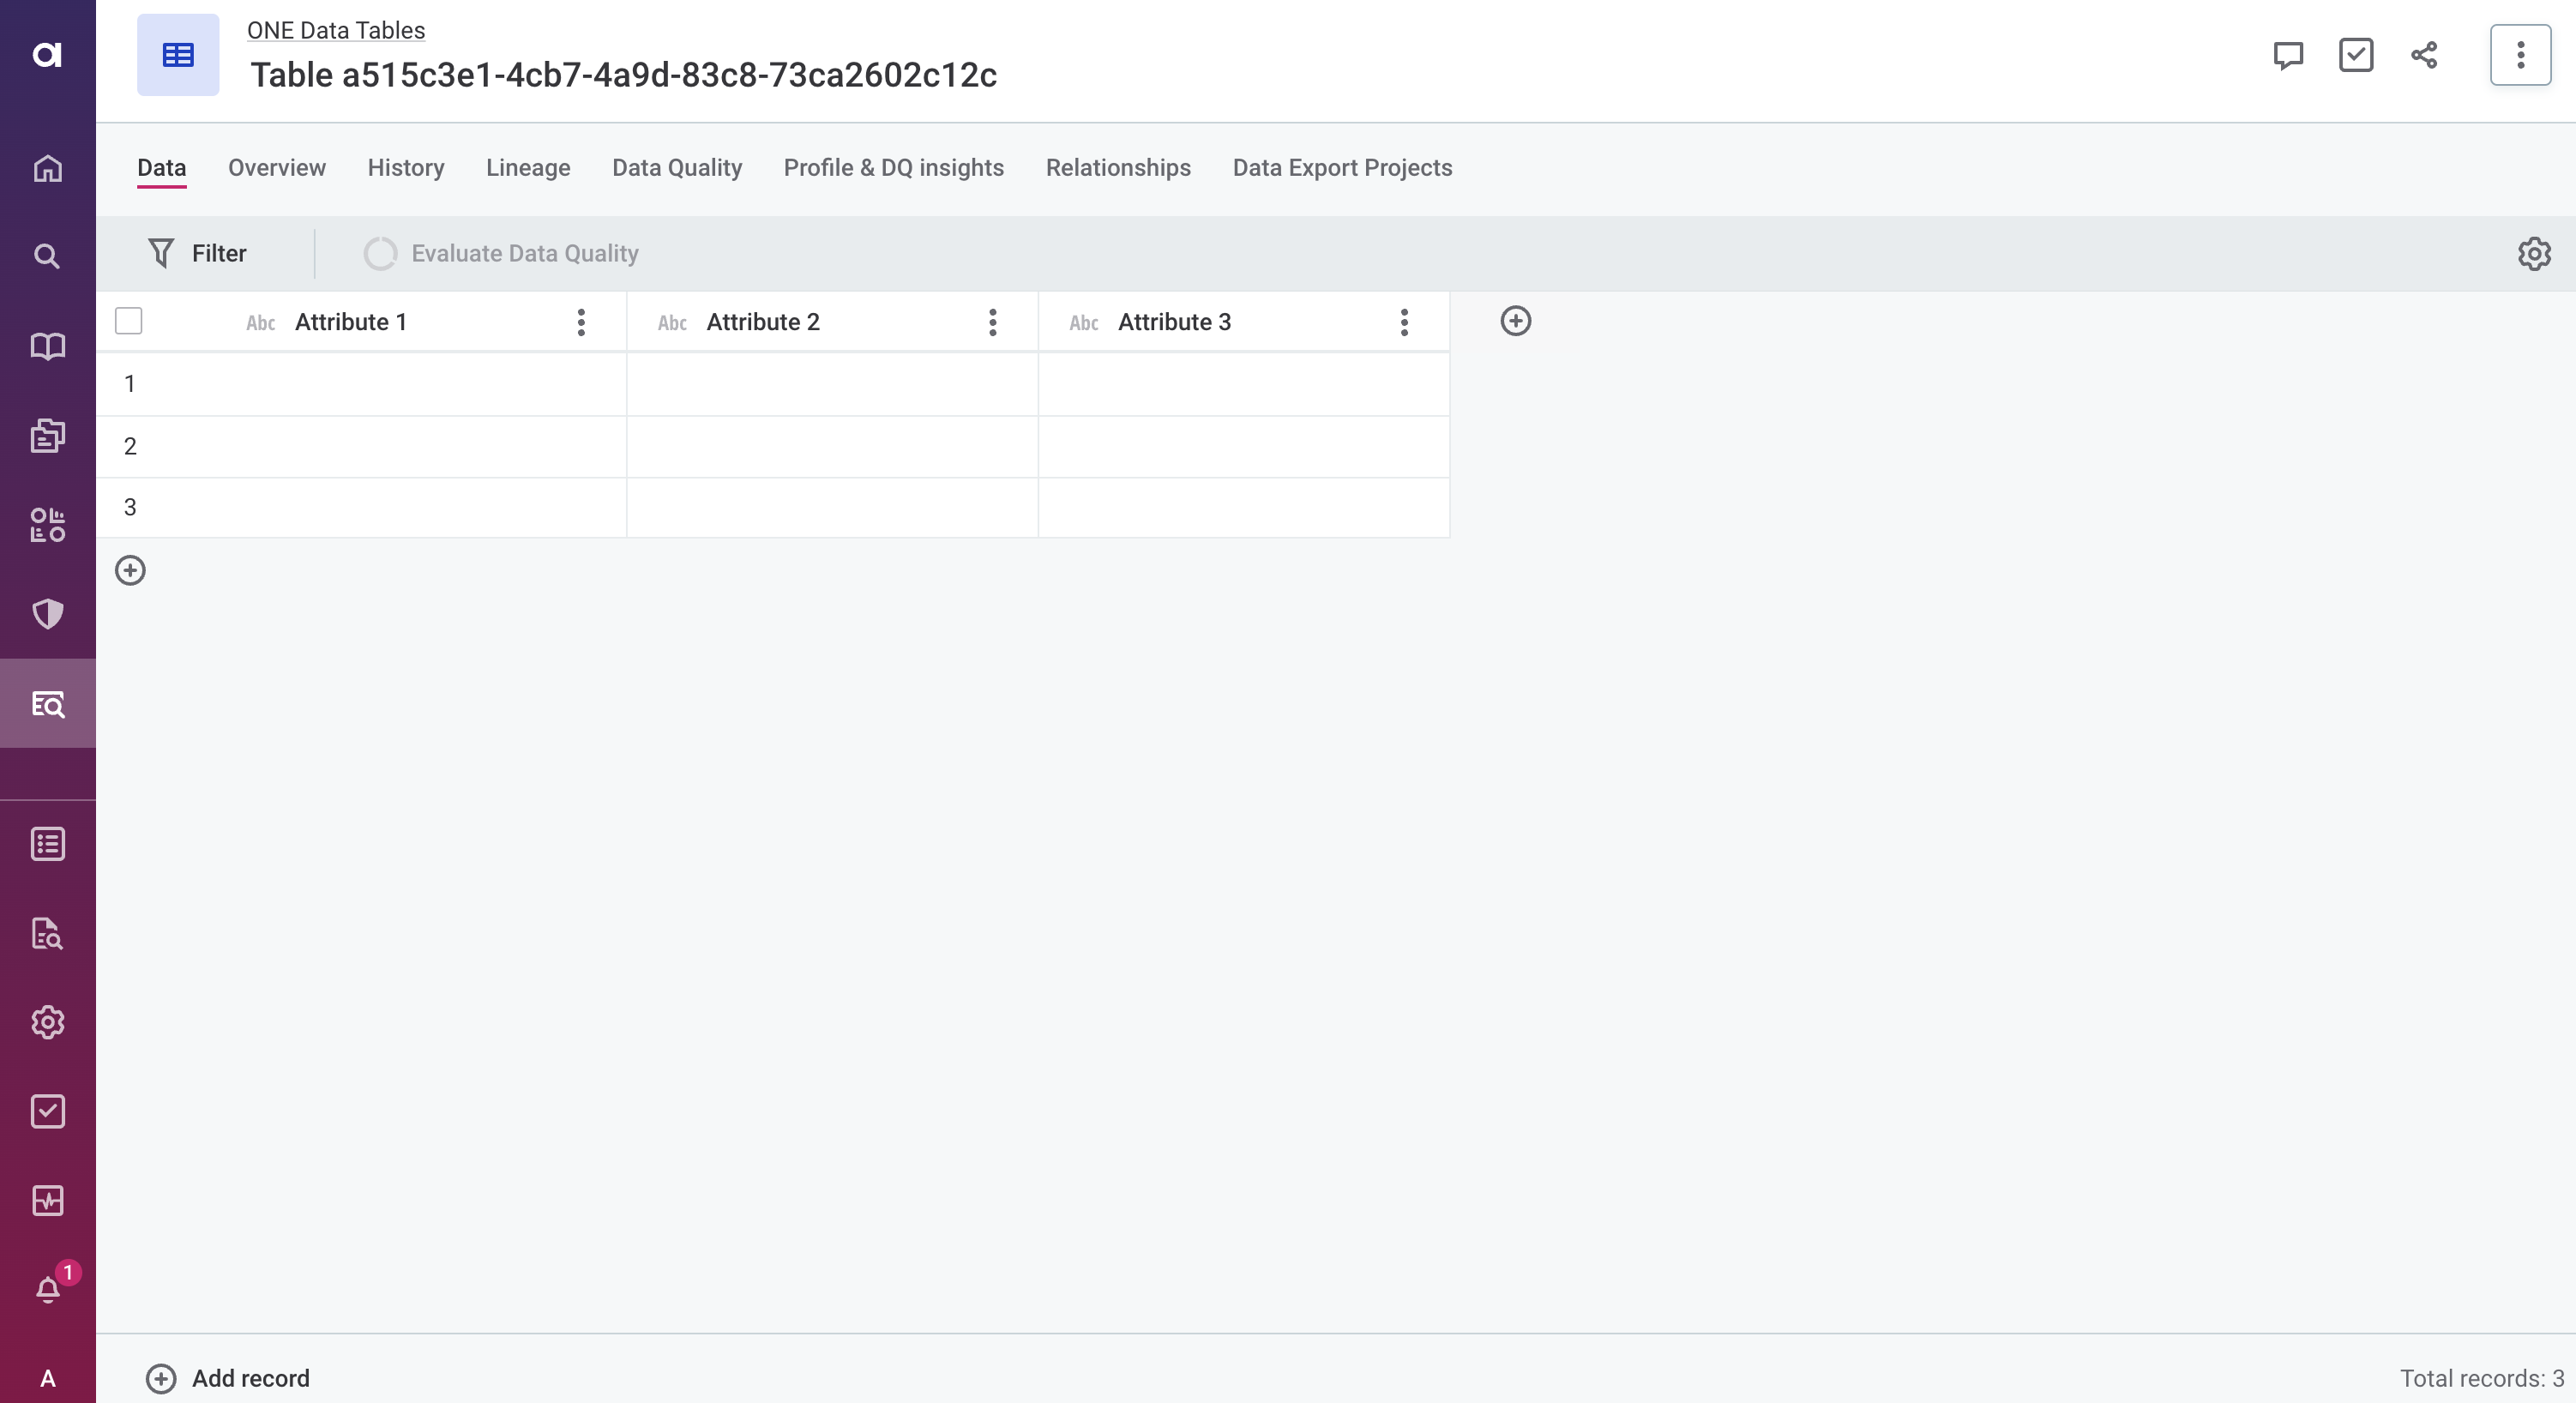
In ONE Data, select Create table. This creates a table template that you can further modify.
-
Change the table name. Double-click the table name and provide a new value, then press Enter. For example, if you want to create a table of all events that your marketing team organized over the past year, let’s name the table
Events.
Customize the table structure
-
Start by removing any of the default attributes you might not need. To delete an attribute, open the three dots menu of the attribute and select Delete.
For our table, we will keep two String attributes and delete the third one.
To delete multiple attributes at once, select the attributes and use the Delete option from the ribbon that appears instead. You cannot change the data type once the attribute is created. In this case, you need to delete it and create a new one with the correct type. -
Rename the remaining default attributes. To do this, double-click the attribute name, provide a new value, and press Enter.
In our example, we will rename the String attributes to
Event nameandLocation.The attribute name must be unique. Therefore, you cannot rename an attribute to any of the reserved keywords that are used for technical attributes in ONE Data ( dmm_record_idordmm_rank). -
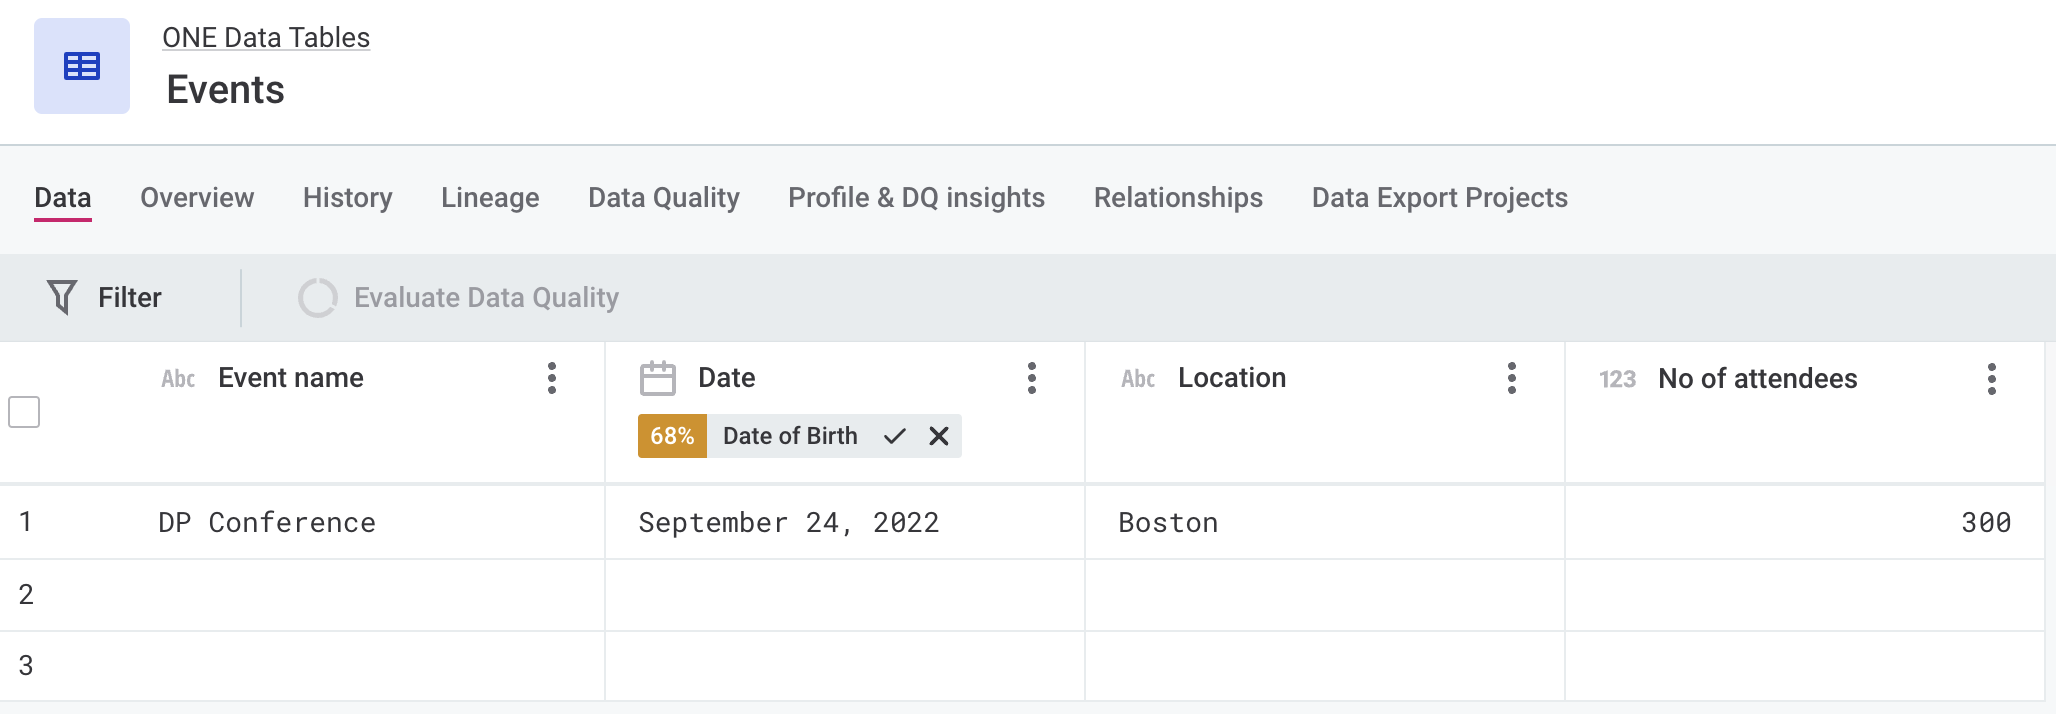
Add more attributes as needed. For each attribute that you want to add, do the following:
-
In the attribute header, select the plus icon (
+). -
Specify the attribute name and data type. For example, add a
Dateattribute of type Date. -
Select Confirm to create the attribute.
-
-
Repeat step 3 for each attribute that you want to add.
For our Events table, we will define one more attribute:
No of attendees(of type Integer).
Fill in records
Once the table structure is ready, you can fill in your records.
-
To create a new row, in the row header select the plus icon (+).
-
When it comes to inputting data, there are several options.
-
To fill in a single cell: Select a cell and start typing. Your changes are saved automatically as soon as you press Enter or select another cell.
-
To fill in the entire attribute at once: If the same value should be used in multiple rows, right-click the attribute name and select Bulk edit. Provide the value and select Edit n records. This value is then inserted to all rows in the attribute.
For example, if most of our events are held in the same city, we could use this option to specify the location for all events and then edit any outliers individually.
You can also copy and paste cells using Ctrl+C and Ctrl+V. Or, copy an entire record using the Duplicate option.
For more information about how copying works between attributes of different data types, see Get Started with ONE Data, section Edit data inline.
-
-
Verify whether the stewardship is correctly set for this table. Unless modified, the table owner and roles are inherited from the data source. To view and edit this, open the table Overview tab and check the Stewardship section. For more information, see Stewardship.
-
Check that the appropriate access is set up for this table. Access levels on a ONE Data table are inherited from the ONE Data source and cannot be modified at the table level. You can, however, share additional access with other users or groups manually on individual tables. For more information, see Get Started with ONE Data, section Permissions and access.
-
Your table is now ready for use. See the Next steps section for more tips about how to proceed.
Next steps
Once you have successfully created a ONE Data table, start exploring what ONE Data and ONE can offer you.
-
Change the structure or the contents of your table at any point from the Data tab of your table, as explained in Get Started with ONE Data, sections Edit table model and Edit data inline.
-
Check the data quality of your table (DQ Evaluation in ONE Data) or learn how to use it in a rule (Validate Data Using ONE Data Tables).
-
If you imported invalid records, learn how to use ONE Data to resolve your data quality issues (Data Remediation with ONE Data).
-
If you want to export the data back to the origin data source, see Get Started with ONE Data, section Export data to another data source.
-
Or, share the table with your team members and collaborate with them using tasks and comments. See Get Started with ONE Data, sections Permissions and access and Tasks and comments.
Was this page useful?