
Run Documentation Flow
After you connect to a data source, run data discovery documentation flows to get a better picture of the data you’re working with.
As you work with your catalog over time and catalog items become obsolete, use Sweep documentation flow to identify them and keep your catalog synchronized with the data source.
Documentation flows
Data discovery
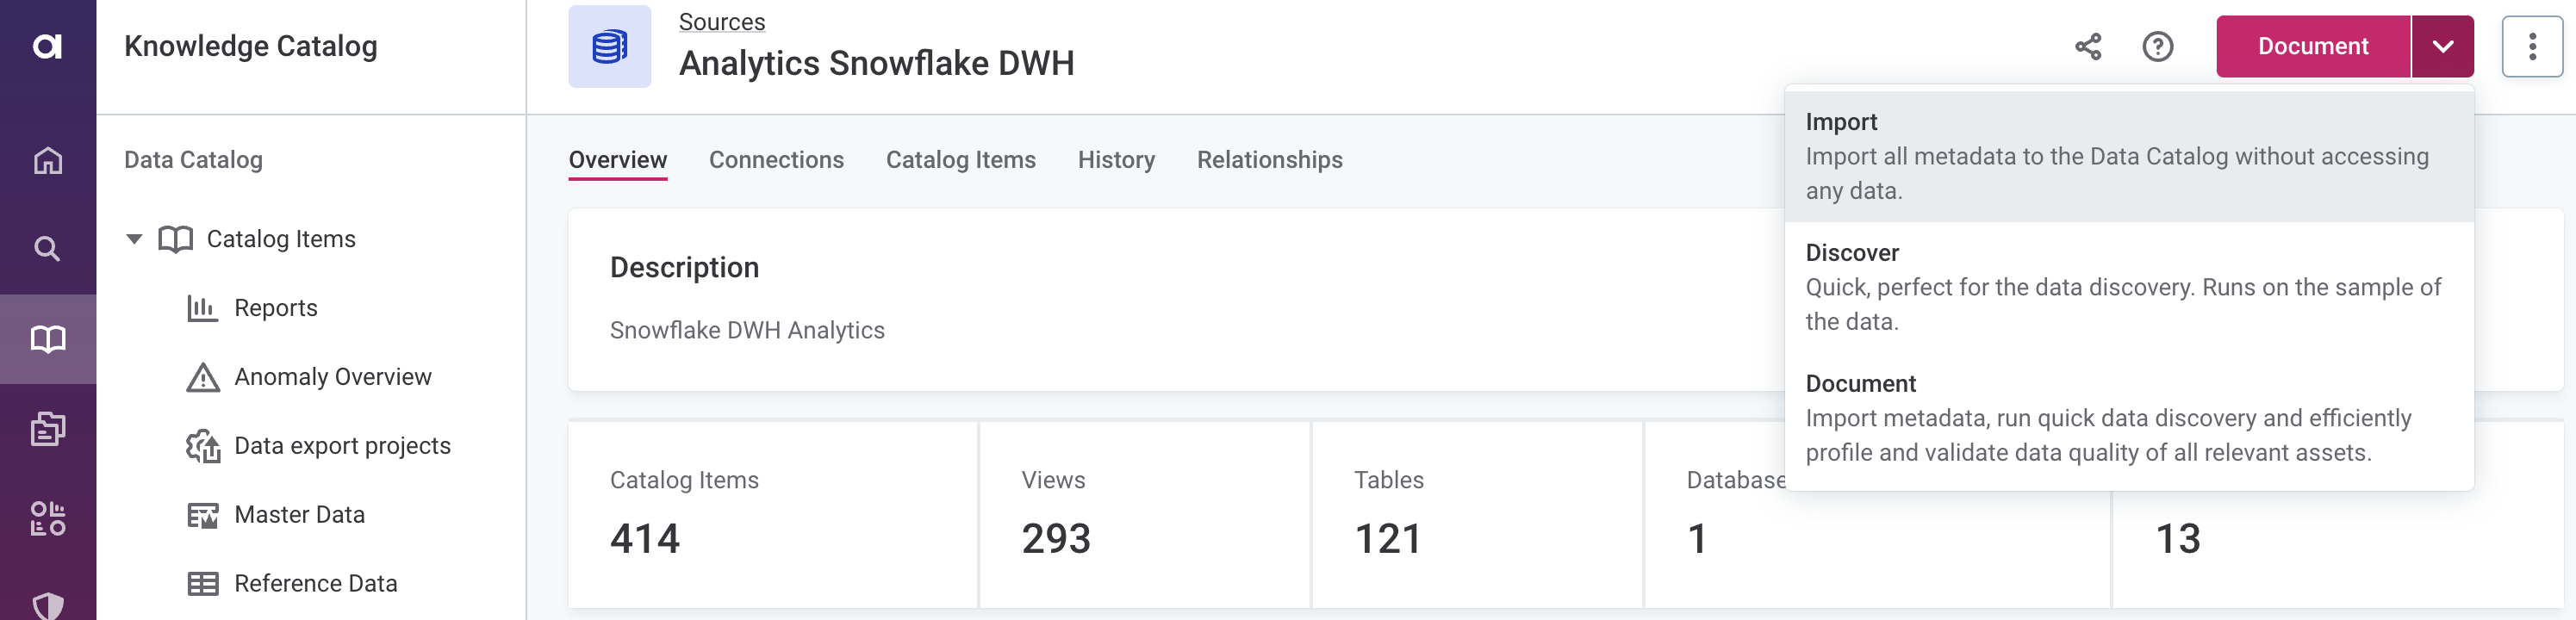
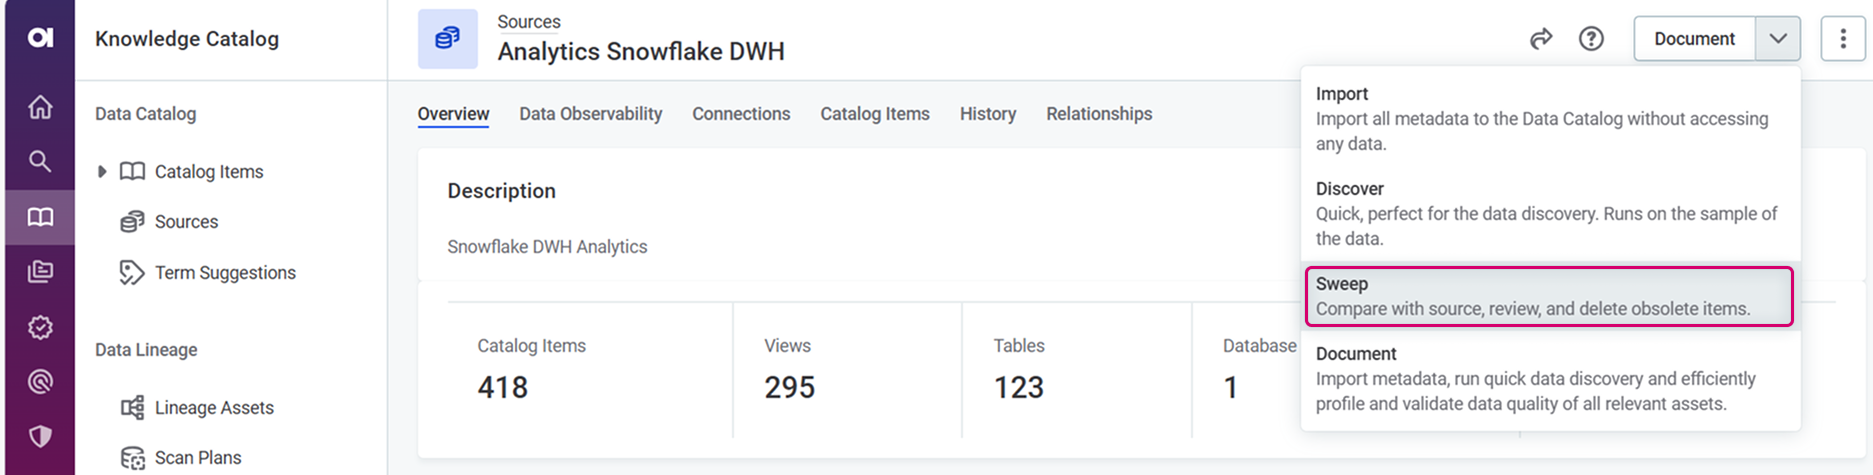
There are three default documentation flows available for data discovery:
- Import
-
Imports all catalog items from a source and analyzes their metadata without accessing the data. Running this flow populates the metadata information for each catalog item (displayed on the Overview tab).
- Discover
-
The fastest way to dig deeper into your data. This flow imports metadata and runs sample profiling on all catalog items in a source, which allows you to see the relationships between the assets and preview the data.
- Document
-
The most complex documentation flow. The flow imports metadata and runs sample profiling on all catalog items, then identifies the most relevant assets and analyzes them using full profiling, and DQ evaluation, and anomaly detection, giving you the most complete information about the data source.
| If catalog items which are included in monitoring projects are profiled as part of the Discover or Document flow, any detected anomalies will be visible in the monitoring project results. |
|
We do not recommend making changes to technical (imported) catalog item metadata after it’s been processed using a data discovery documentation flow. If attributes (or tables) are renamed, modified, or removed, subsequent documentation attempts might fail. However, if such changes are required, first delete the catalog item and all the related objects, such as monitoring projects, then rerun the documentation flow to import and profile the data again. You can freely edit non-imported metadata like descriptions, stewardship, and relationships. |
Required metadata fields and draft imports
Your metadata model can mark some catalog item properties as required, for example, to make sure each published catalog item has a description. An import brings in technical metadata but usually can’t provide values for these required fields, which data stewards typically fill in later.
A catalog item can’t be published until all its required properties have values. So, rather than failing, the import saves catalog items as drafts that data stewards can complete and publish later.
Whether a catalog item is published or saved as a draft depends on whether it’s newly discovered or was already published by an earlier import:
-
Newly discovered catalog items: Within a single import, these are either all published or all saved as drafts. If at least one is missing a value for one of its own required properties, the whole import is saved in the draft state, and all newly discovered catalog items become drafts, even those that have all their required properties filled in. If none are missing values, they’re all published as usual.
-
Previously published catalog items: Catalog items published by an earlier import of the same source aren’t affected and stay published, even when other catalog items in the same import become drafts.
A draft catalog item shows a validation error listing the required properties that still need values; you can’t publish it until they’re filled in.
To make a draft catalog item available to others, fill in its missing required properties and publish the changes. A draft is excluded from the Discover and Document flows—profiling runs only on catalog items that already have a published version, so after you publish a draft, rerun the flow to profile it.
Catalog synchronization
You can use a documentation flow to synchronize your Data Catalog with data sources:
- Sweep
-
Identifies catalog items for tables that no longer exist in the data source—either because they’ve been deleted or renamed—so that you can remove them and keep your catalog up to date.
| You can customize the default documentation flows as needed, or create a custom one (see Configure Documentation Flow). |
Discover data
Run data discovery
To run a documentation flow on an ad hoc basis:
A whole source
-
In Data Catalog > Sources, select the required source.
-
From the document menu, select the flow you want to run: Import, Discover, or Document. Confirm your choice when prompted (Import or Proceed).
Specific assets
If your data source is a relational database, you can choose the schemas and/or tables that you want to analyze. If your data source is a file system, use this to import only specific files.
-
In Data Catalog > Sources, select the required source and switch to the Connections tab.
-
Open the [source name] connection browser and select all the required assets.
-
In the ribbon that appears, select the flow you want to run: Import to catalog, Discover, or Profile. Confirm your choice when prompted (Import or Proceed).
To select specific tables from a schema, select the schema first, then choose the required tables. 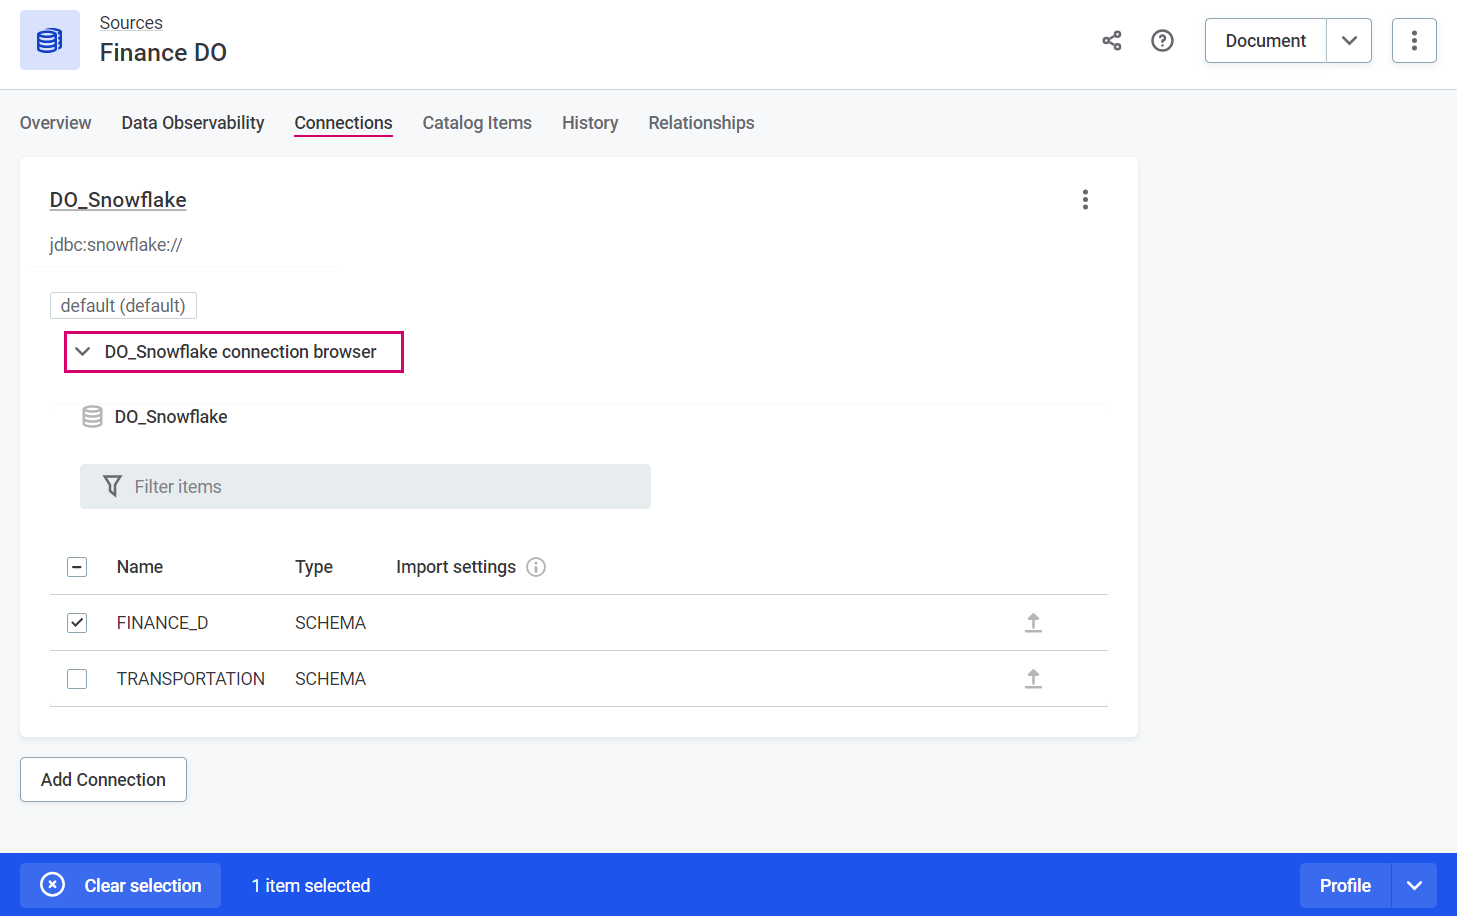
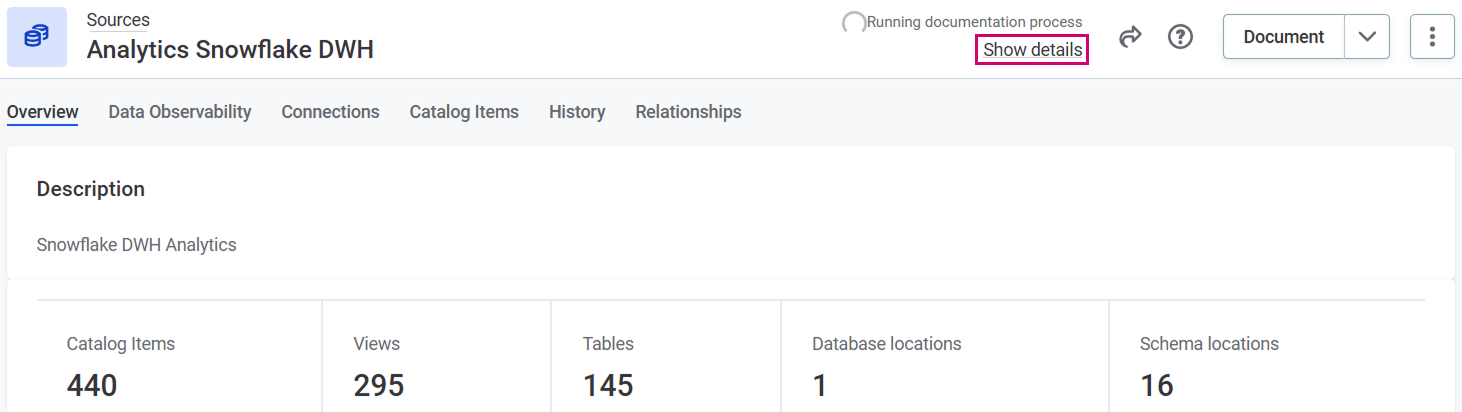
While the documentation flow is running, you can view the details by selecting Show details from the source detailed view.

Alternatively, track the progress using the Processing Center. See Monitor flow progress.
|
In addition, you can also view more details about the status of a particular source by going to Sources > [your data source] > Connections and selecting Show details from the three dots menu. 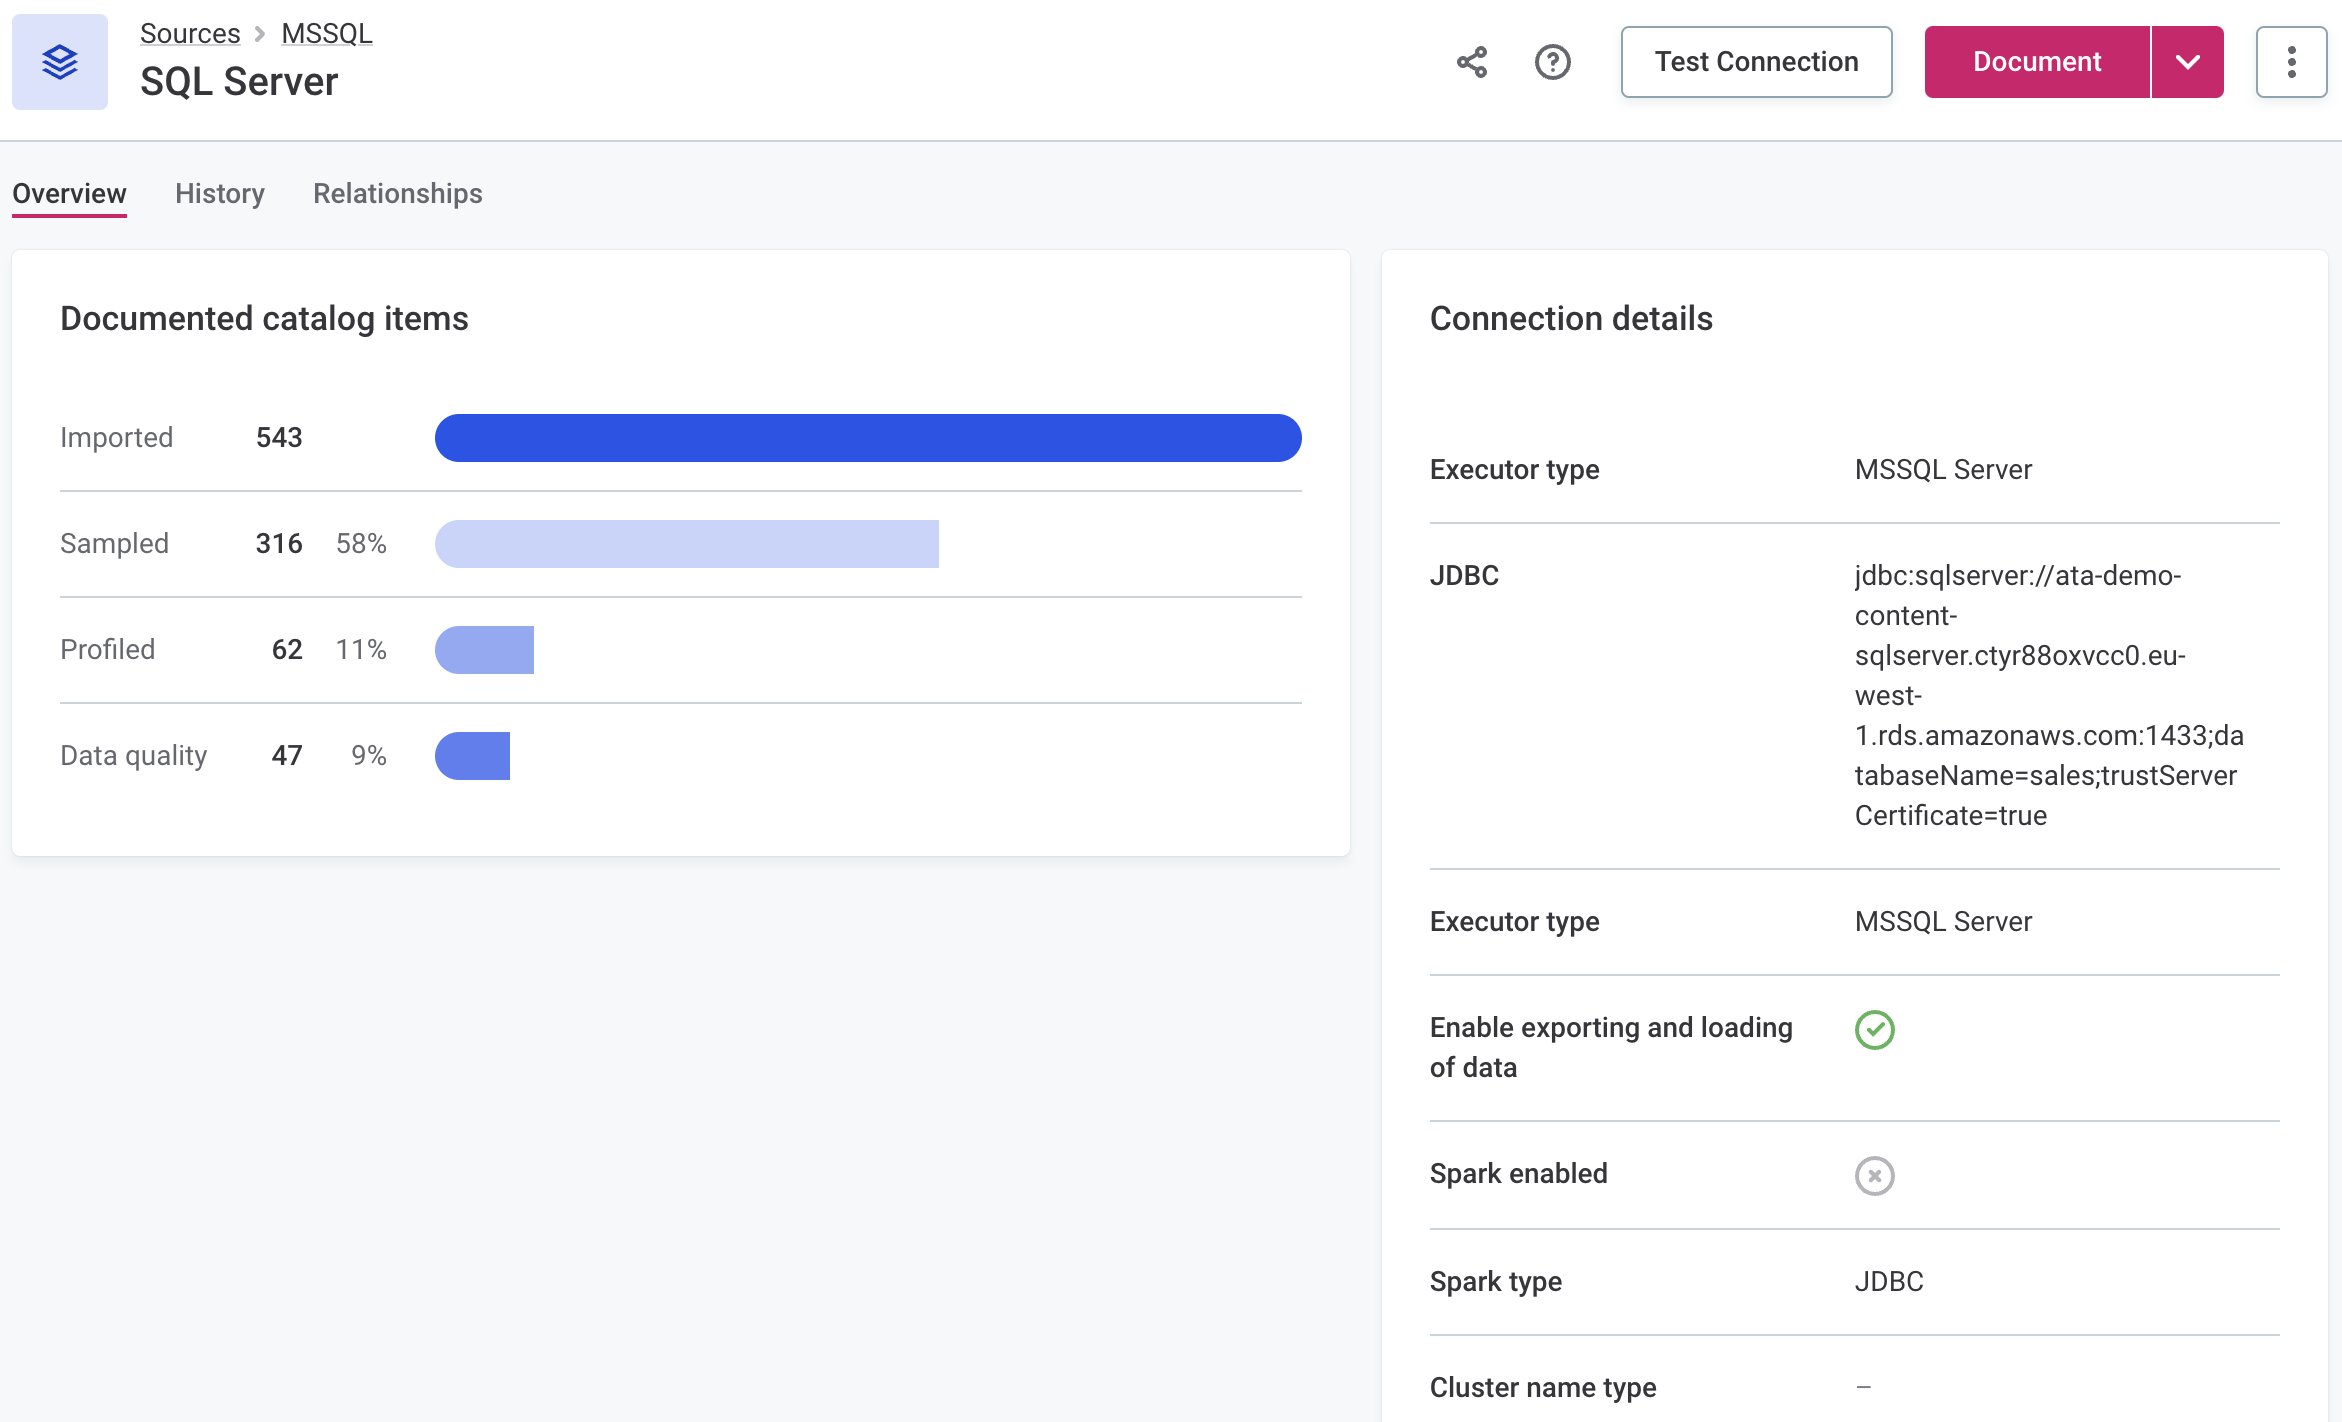
|
When the documentation flow finishes, it remains in the Running status until it is published. Make sure to publish changes.
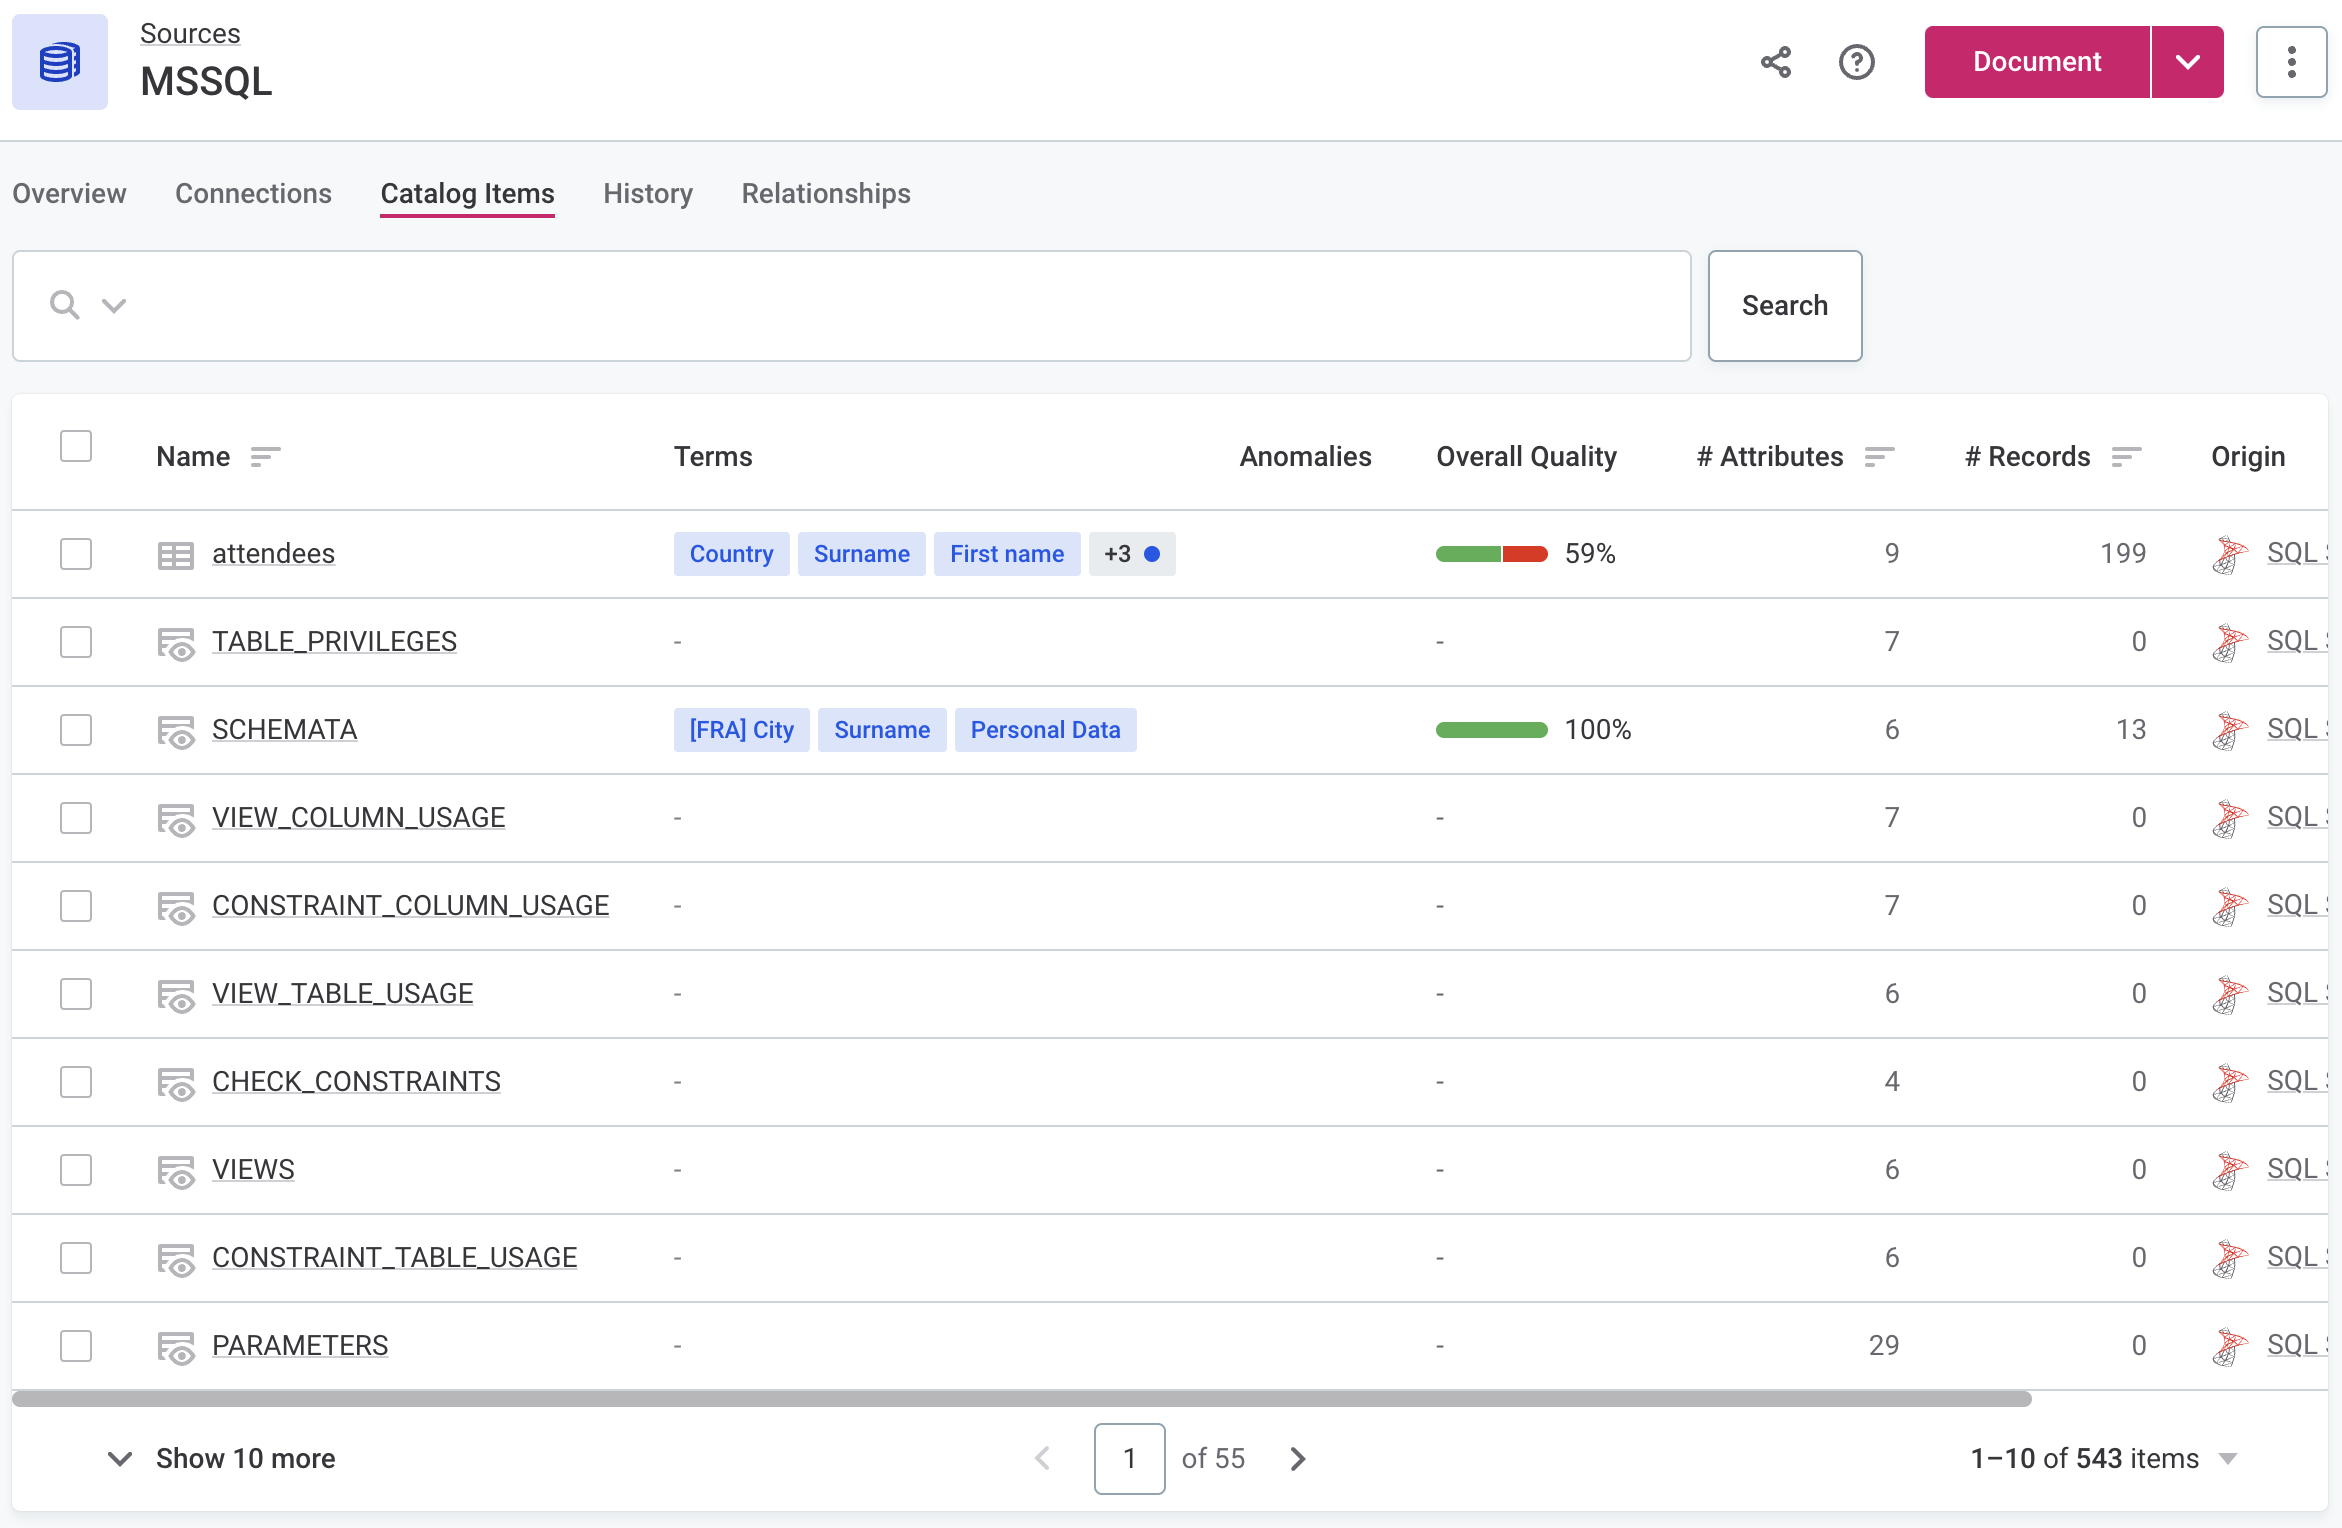
To view a list of imported (Import flow) or profiled (Discover and Document flows) catalog items, open the Catalog Items tab of the source.
| Once the documentation flow is completed, create tasks that should be performed next on the analyzed assets. For instance, create a task detailing which catalog items need to be fully profiled or a task suggesting how to address the anomalies detected. |
Schedule data discovery
To run a documentation flow following a particular schedule:
-
In Data Catalog > Sources, select the required source, and in the three dots menu select Schedule.
-
Select Add Scheduled Event.
-
In Documentation flow configuration, select from the available documentation flow configurations (Import, Discover, Document, or custom).
-
Define the schedule using either Basic or Advanced configuration:
-
For Basic configuration:
-
In Repeat, select how often the documentation flow should run.
-
In At, specify the time (24-hour clock) at which the flow should run, and select the time zone.
-
If required, select Queue action for later if the platform is not accessible at the scheduled time.
-
In Valid from, define the date from which the schedule should be followed.
-
If the schedule should have a finite end date, select Enable expiration and in Valid to define the date at which the schedule should no longer be effective.
-
-
For Advanced configuration:
-
Set the schedule using Cron expression syntax. For more information, see Cron Expression Generator and Explainer.
-
In Valid from, define the date from which the schedule should be followed.
-
If the schedule should have a finite end date, select Enable expiration and in Valid to define the date at which the schedule should no longer be effective.
-
-
-
Select Save and publish your changes.
You can see the scheduled jobs in the Processing center under Scheduled jobs.
Edit scheduled event
To edit, pause, or delete the scheduled event, select the required source, and in the three dots menu select Schedule. In the three dots menu for the event you want to modify, select the appropriate action.
If an event is enabled, you can see the next date and time when it will be executed.
Synchronize catalog
When tables no longer exist in a data source (either because they’ve been deleted or renamed), you can remove the corresponding catalog items by running the Sweep documentation flow and bulk-deleting the catalog items it identifies as obsolete.
We recommend running the Sweep documentation flow regularly, with a frequency that reflects how often tables are deleted or renamed in your data source.
Run catalog synchronization
To delete obsolete catalog items manually:
-
Run the Sweep documentation flow on the required source to identify the obsolete catalog items:
-
In Data Catalog > Sources, select the required source.
-
From the document menu, select Sweep. Confirm your choice when prompted.
-
-
Delete obsolete catalog items:
-
Select Notification Center from the left navigation menu and then Open Notification Center under the list of notifications.
-
From the System menu, select Documentation Flow.
-
Open the documentation flow detail and select Review.
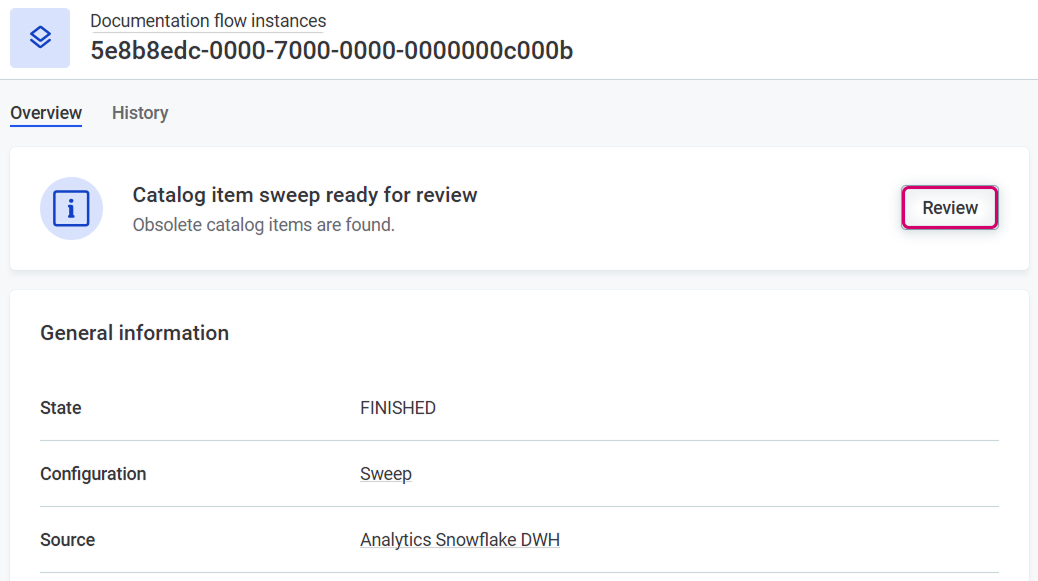
-
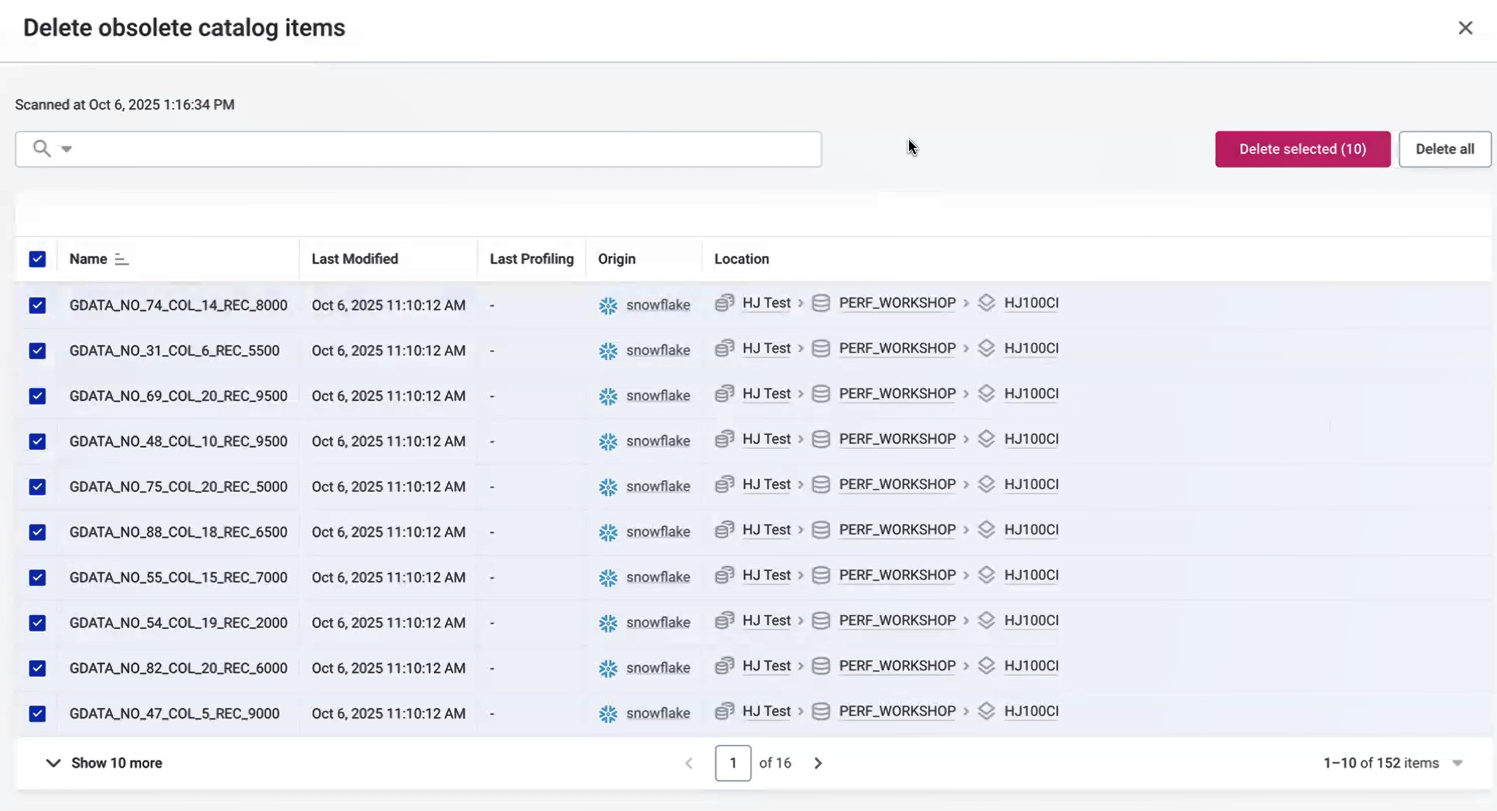
A list of obsolete catalog items appears (catalog items that no longer exist in the source).
-
Select the catalog items you want to delete and select Delete selected. Alternatively, select Delete all to remove all obsolete items.
You can filter catalog items using AQL expressions.
For example, you can:
-
Filter for catalog items from a specific schema (here,
public):schema is 'public' $parent.originPath is 'public'
-
Filter for catalog items whose connection uses a specific connection type (here,
PostgreSQL):$parent.$parent.$parent.connections.any(executorType like 'postgre')
-
-
Select the X icon to leave the sweep process.
Once you delete catalog items and leave the sweep process, you cannot return to review the same results. This ensures you always work with the most up-to-date information.
To review obsolete catalog items again, rerun the Sweep documentation flow.
-
Schedule catalog synchronization
Schedule the Sweep documentation flow to automatically identify and delete obsolete catalog items without manual review. This requires configuring the threshold for automatic deletion.
A catalog item is automatically deleted only when both of the following conditions are met:
-
The item no longer exists in the data source (deleted or renamed).
-
The item has not been modified or has not been profiled within the threshold period.
|
As a fail-safe, if a connection fails during the sweep operation, only catalog items from successful connections are deleted. Catalog items from failed connections are skipped to prevent accidental data loss. |
To schedule catalog synchronization:
-
Schedule Sweep documentation flow:
-
In Data Catalog > Sources, select the required source, and in the three dots menu select Schedule.
-
Select Add Scheduled Event.
-
In Documentation flow configuration, select Sweep.
-
Define the schedule using either Basic or Advanced configuration (see Schedule data discovery for details).
-
Select Save and publish your changes.
-
-
Configure threshold for automatic deletion:
-
Go to Global Settings > Documentation Flow.
-
Set the
scheduledSweepDeleteLastModifiedThresholdproperty for the Sweep documentation flow. This threshold defines how long a catalog item must be unmodified or unprofiled before it is automatically deleted.For instructions, see Define threshold for scheduled synchronization.
-
Permissions
Documentation flows require the following access levels on the source:
-
Run a documentation flow (Import, Discover, Document, or Sweep): View data access or higher.
-
Schedule a documentation flow: Full access.
-
Delete obsolete catalog items identified by the Sweep flow: Full access.
For the full description of the access levels, see Access Levels.
Only the user who started the flow or configured the schedule can see:
-
The completion notification in Notification Center.
-
The list of obsolete catalog items returned by the scan (applies to manual Sweep flow only).
Monitor flow progress
When you run a documentation flow, ONE starts jobs depending on your configuration: Metadata import, Metadata classification, Profiling, Anomaly detection, DQ Evaluation of catalog item, and Sweep scan jobs.
More information about these jobs can be viewed at any time in the Processing Center.
Monitor job status
To monitor the job status, select the Processing Center icon in the main navigation menu to open the Processing Center notifications view.
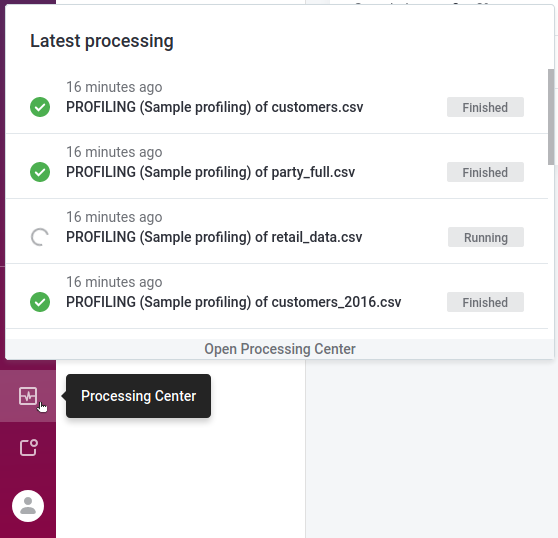
Once the job is successfully completed, its Status changes from RUNNING to FINISHED.
Otherwise, the status is updated to FAILED and an error message is provided.
To view the job results, select the job directly from the notifications list.
View job details
To see the job details:
-
Select Processing Center from the left navigation menu and then Open Processing Center under the list of notifications.
-
From the Base jobs menu, select the job type and locate your job.
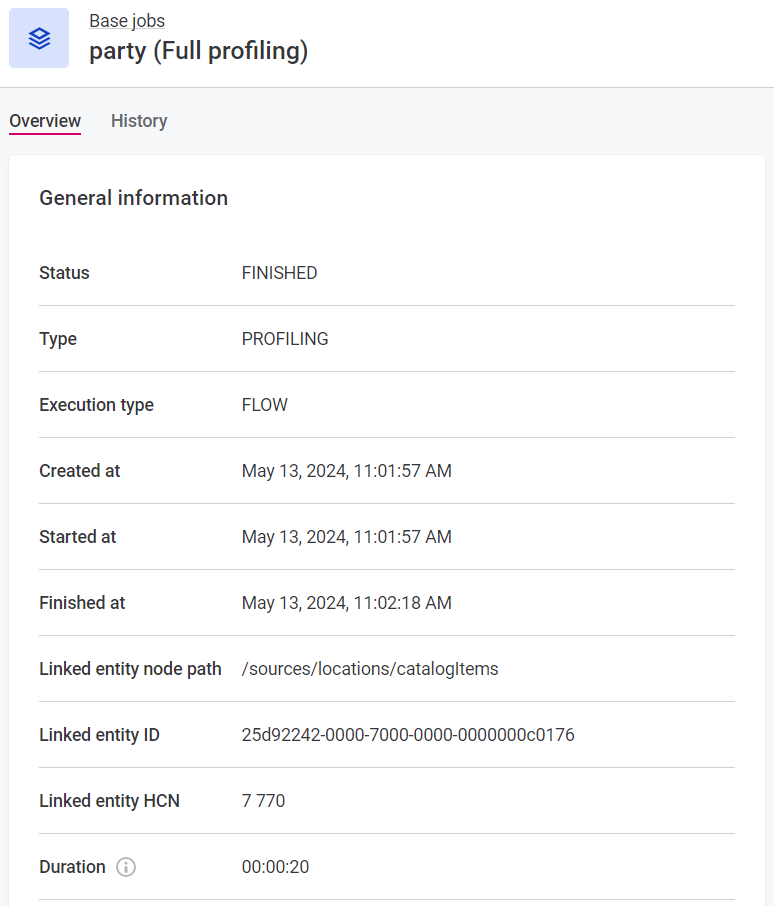
If the job was started as part of a documentation flow, its Execution type is
FLOW. For manually initiated jobs, the type isMANUAL.
Cancel flow
To cancel a documentation flow:
-
Go to the source on which the flow is running. When the flow is running, you see a spinner and the Running documentation process in the source header.
-
Select Show details under Running documentation process.
-
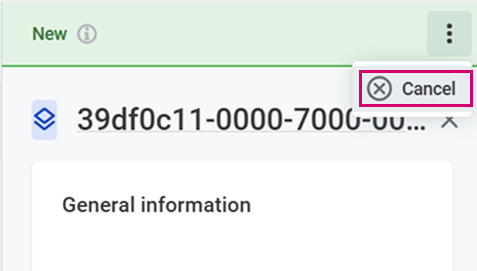
A sidebar opens with the information about the running flow.
-
From the three dots menu, select Cancel.
-
Confirm with Cancel flow.
Next steps
View profiling results
Open the source and select a catalog item to learn more about the state of your data (available from the Profile and DQ insights tab) and decide on the next steps for improving the data quality. For details, see Understand Profiling Results.
Was this page useful?