
Data Remediation with ONE Data
In this article, we’ll take a look at how you can leverage DQ and other features of ONE in ONE Data for data remediation. With ONE Data, you can import all invalid records from Data Catalog or the Data Observability module to ONE Data, where you can then filter results by DQ, edit records, and make other necessary changes before exporting the data back to the data source.
| Before you start, we recommend getting familiar with how DQ is evaluated in ONE Data. See DQ Evaluation in ONE Data. |
Import invalid records
For the purpose of this guide, we’re using a table containing information about the people who attended the company’s events in the past year.
The table has the following attributes: firstname, lastname, email, company, job_title, country, attendance_type, registration_date, is_active.
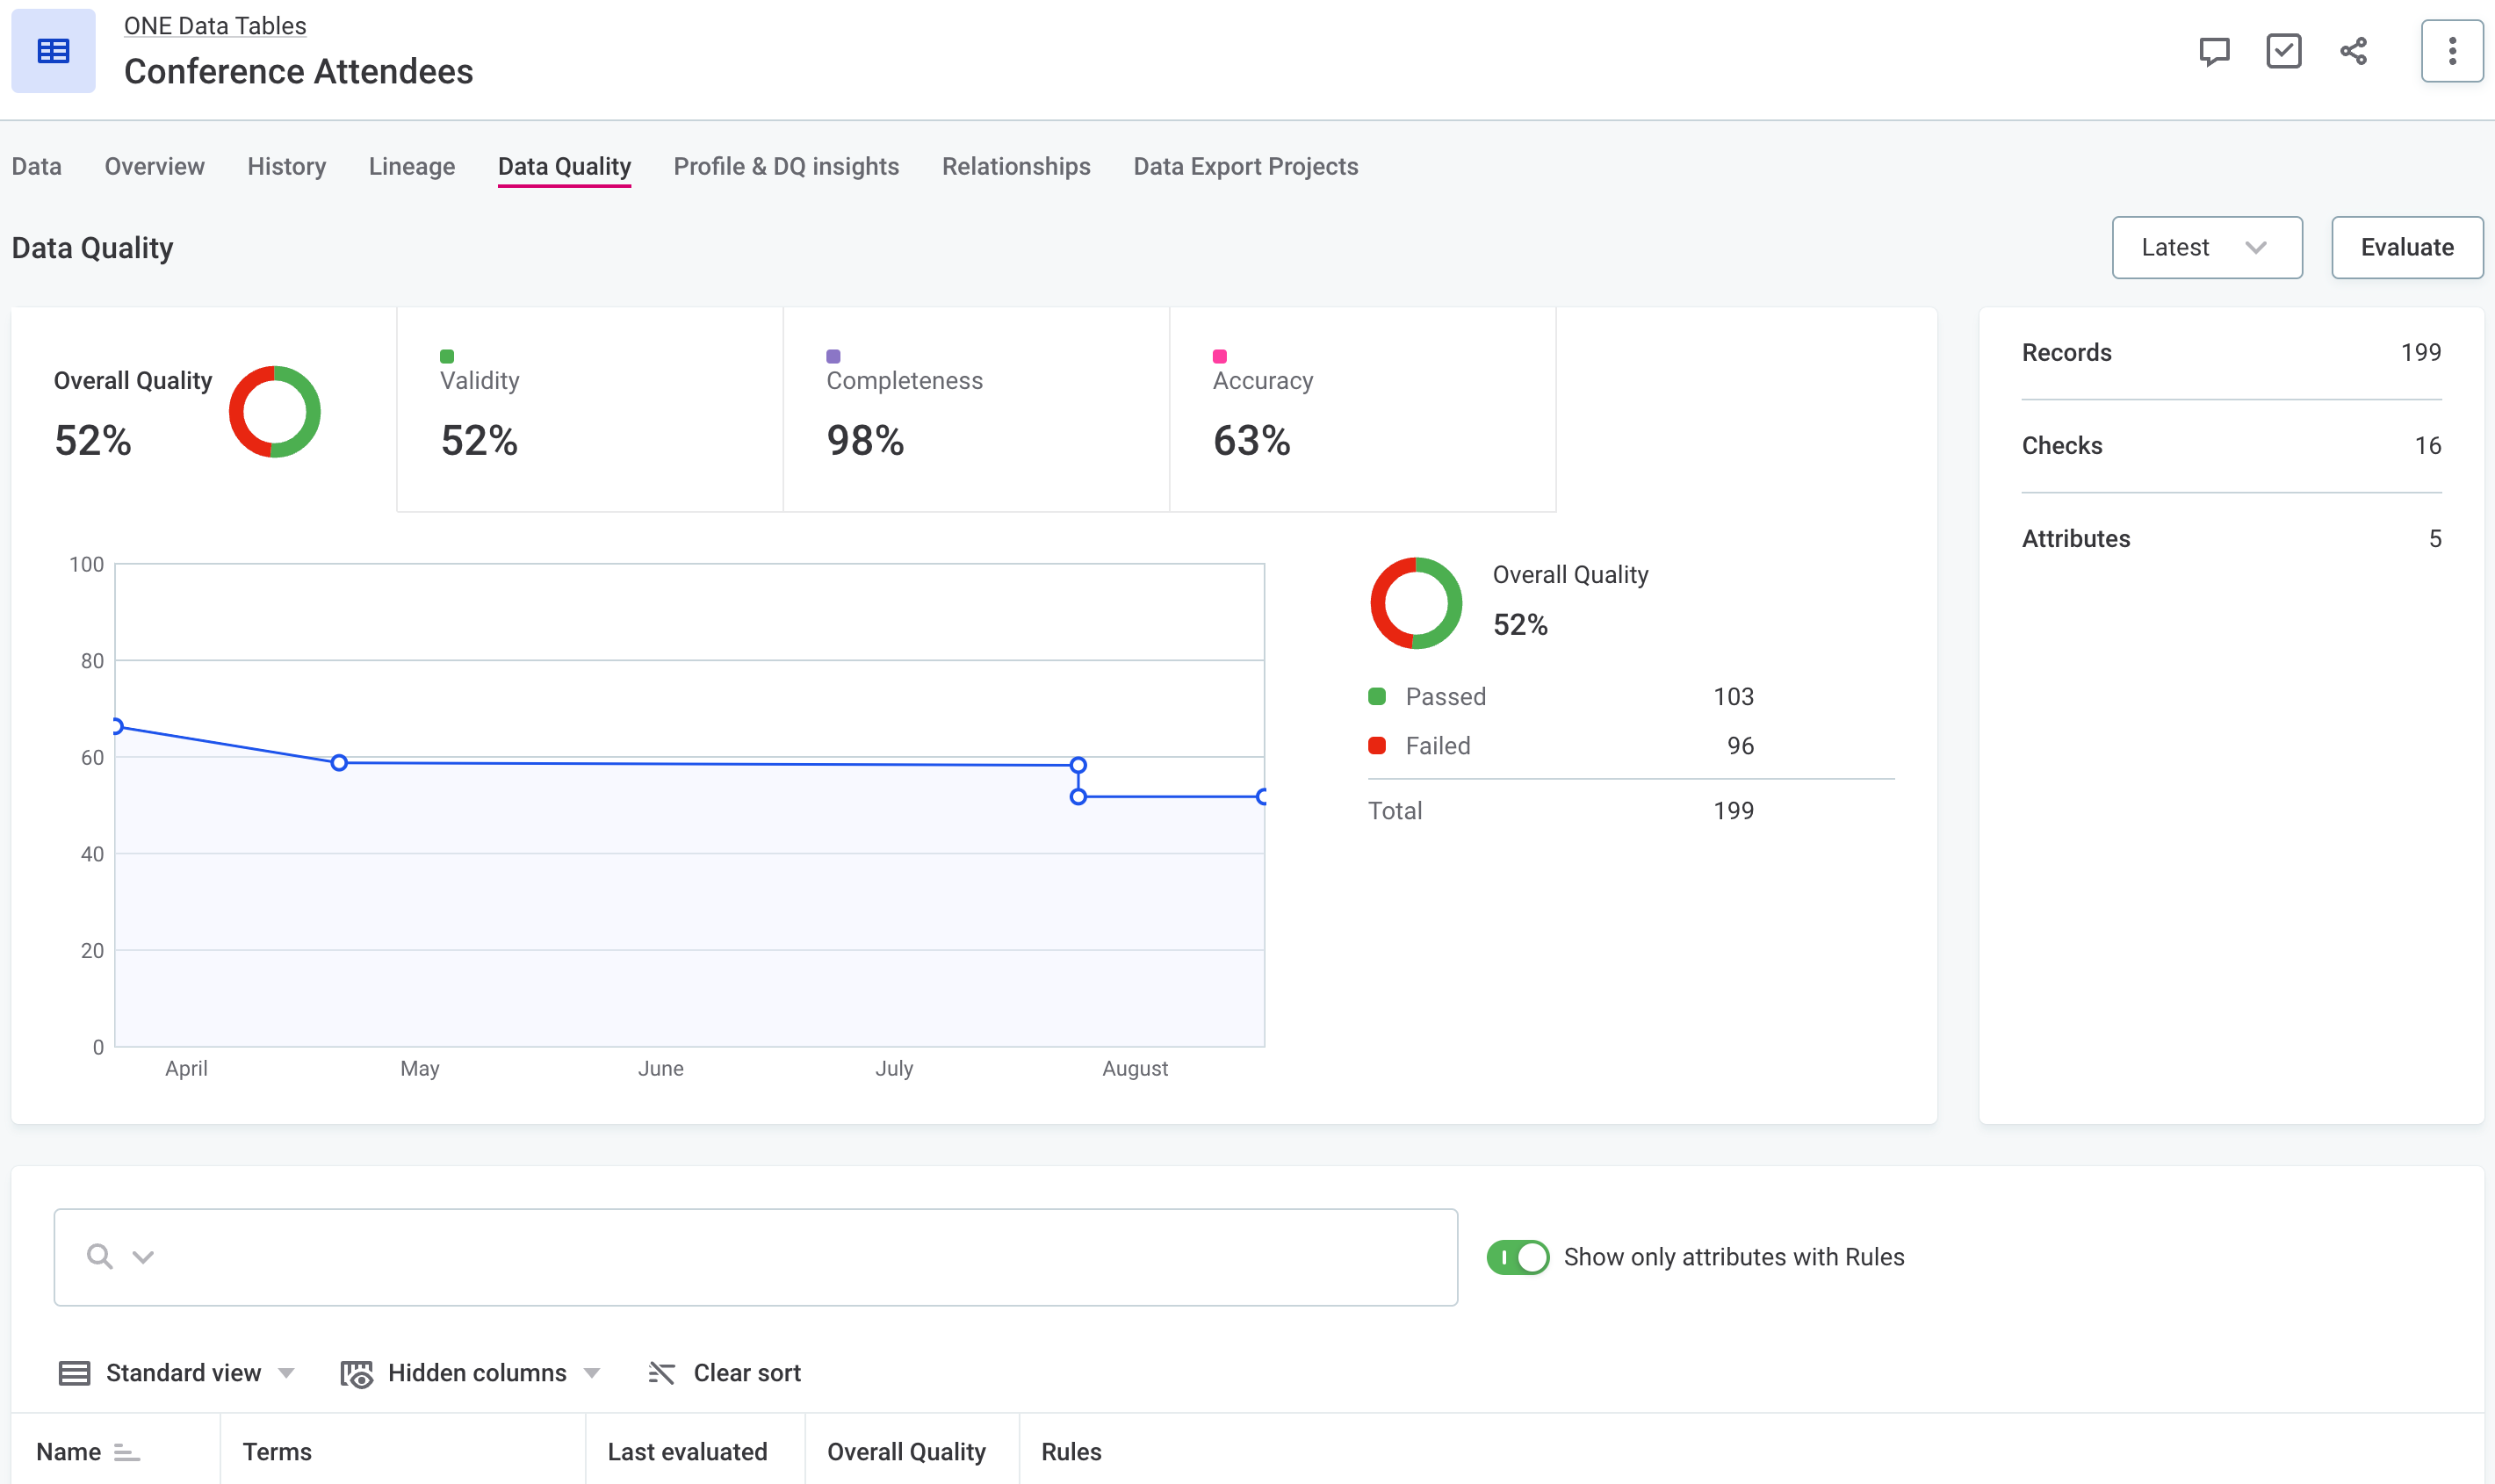
After initial DQ evaluation, several attributes are flagged.
We’ll start by importing invalid records to ONE Data. In the three dots menu, select Load to ONE Data and then as Data load type choose Full (data with DQ results) and Invalid records.
Modify the table metadata as needed and select Create table. For more detailed instructions, see Import Data from a Catalog Item.
Access levels on the new ONE Data table are inherited from the ONE Data source, not from the original catalog item. These inherited access levels cannot be modified at the table level, but you can share additional access with other users or groups manually on the table. For more information, see Get Started with ONE Data, section Permissions and access.
| If you want to remediate data written to ONE Data using a data remediation plan, you don’t need to import records. Instead, locate the table you are writing to as specified by the Data remediation output step. |
Fix invalid records
Once the import finishes, find your new table in ONE Data.
| Even though DQ results are not currently visible in the application, notice that the total number of records in the table matches the number of failed records from the previous step (in this example, 96). If you prefer to have DQ results displayed while fixing issues, run DQ evaluation again. Keep in mind that if you imported only invalid records, the DQ score of the table will be 0%. |

Here, we’ll focus first on the email attribute.
To quickly get an overview of the issues we’re dealing with, we can add a DQ filter that searches for all invalid records in this attribute.
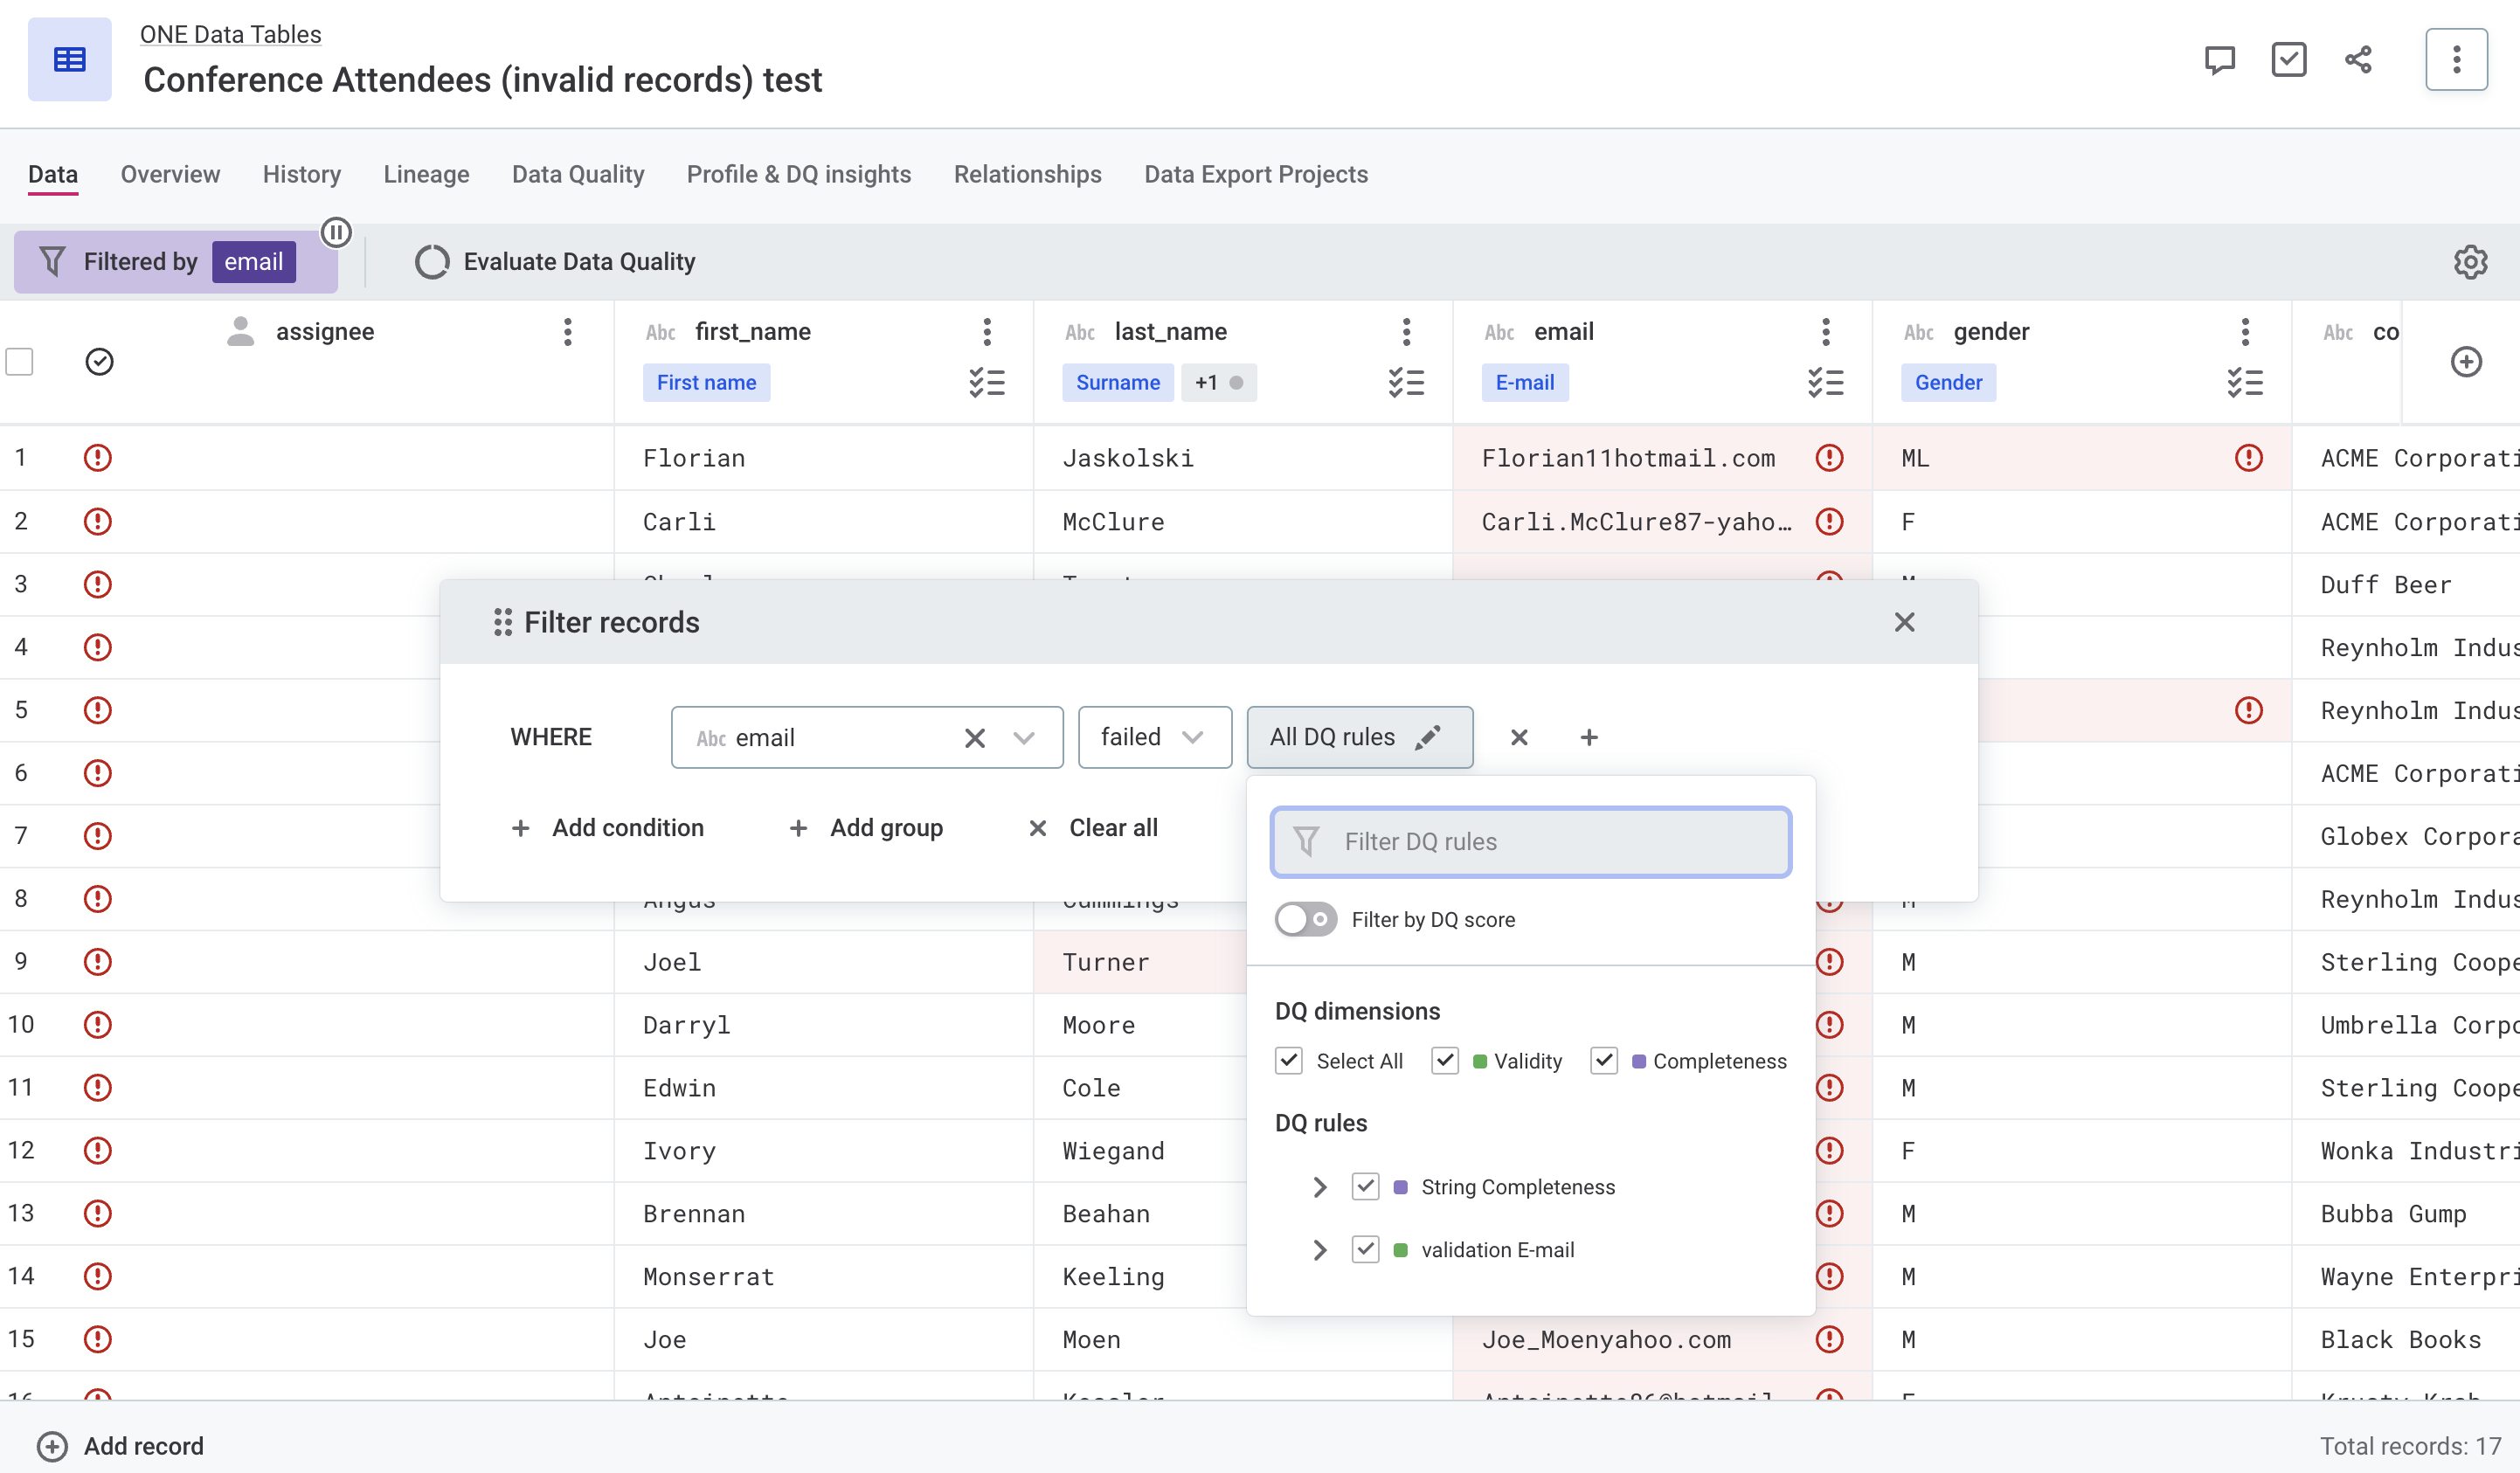
To do this, right-click the attribute and select Filter.
Set the expression to failed and in DQ rules choose Select All (dimensions).
Based on the DQ rules available for the business term email (String completeness and validation E-mail), this means that the invalid records in this attribute are either null or contain incorrect values.
Check the filtered records to see whether there is anything you can fix on the spot.
For example, if there are values such as Florian11hotmail.com or Joel45@yahoo . com, you can add the missing at sign (@) or remove the extra space characters respectively.
The changes are automatically saved, the DQ warning is removed, and the list of filtered records is updated.
The DQ results remain the same until you recalculate them.
|
Hover over an invalid record to see which DQ rule it failed, then search for it in the filtering menu to speed up the process. 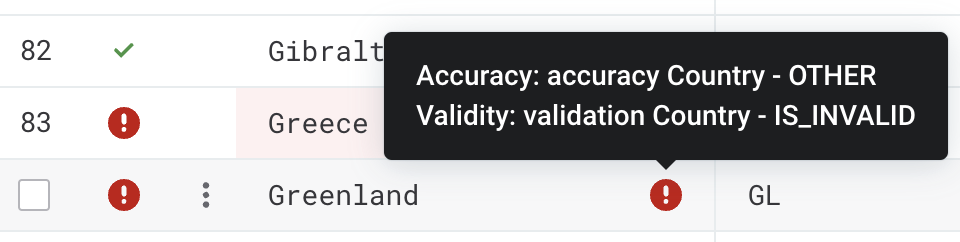
If you’re interested in a more detailed breakdown, right-click the attribute and select Open details. DQ rules are listed under each term in the Data Quality section. |
To remediate the null records, you might need to ask a coworker for assistance as additional data collection or verification might be required. Here, you can create a new assignee attribute of type User in the table and assign the invalid records to a coworker. For more details, see Get Started with ONE Data, section User data type.
The quickest way to do this is by updating the filter to search only for records that failed String Completeness rule.
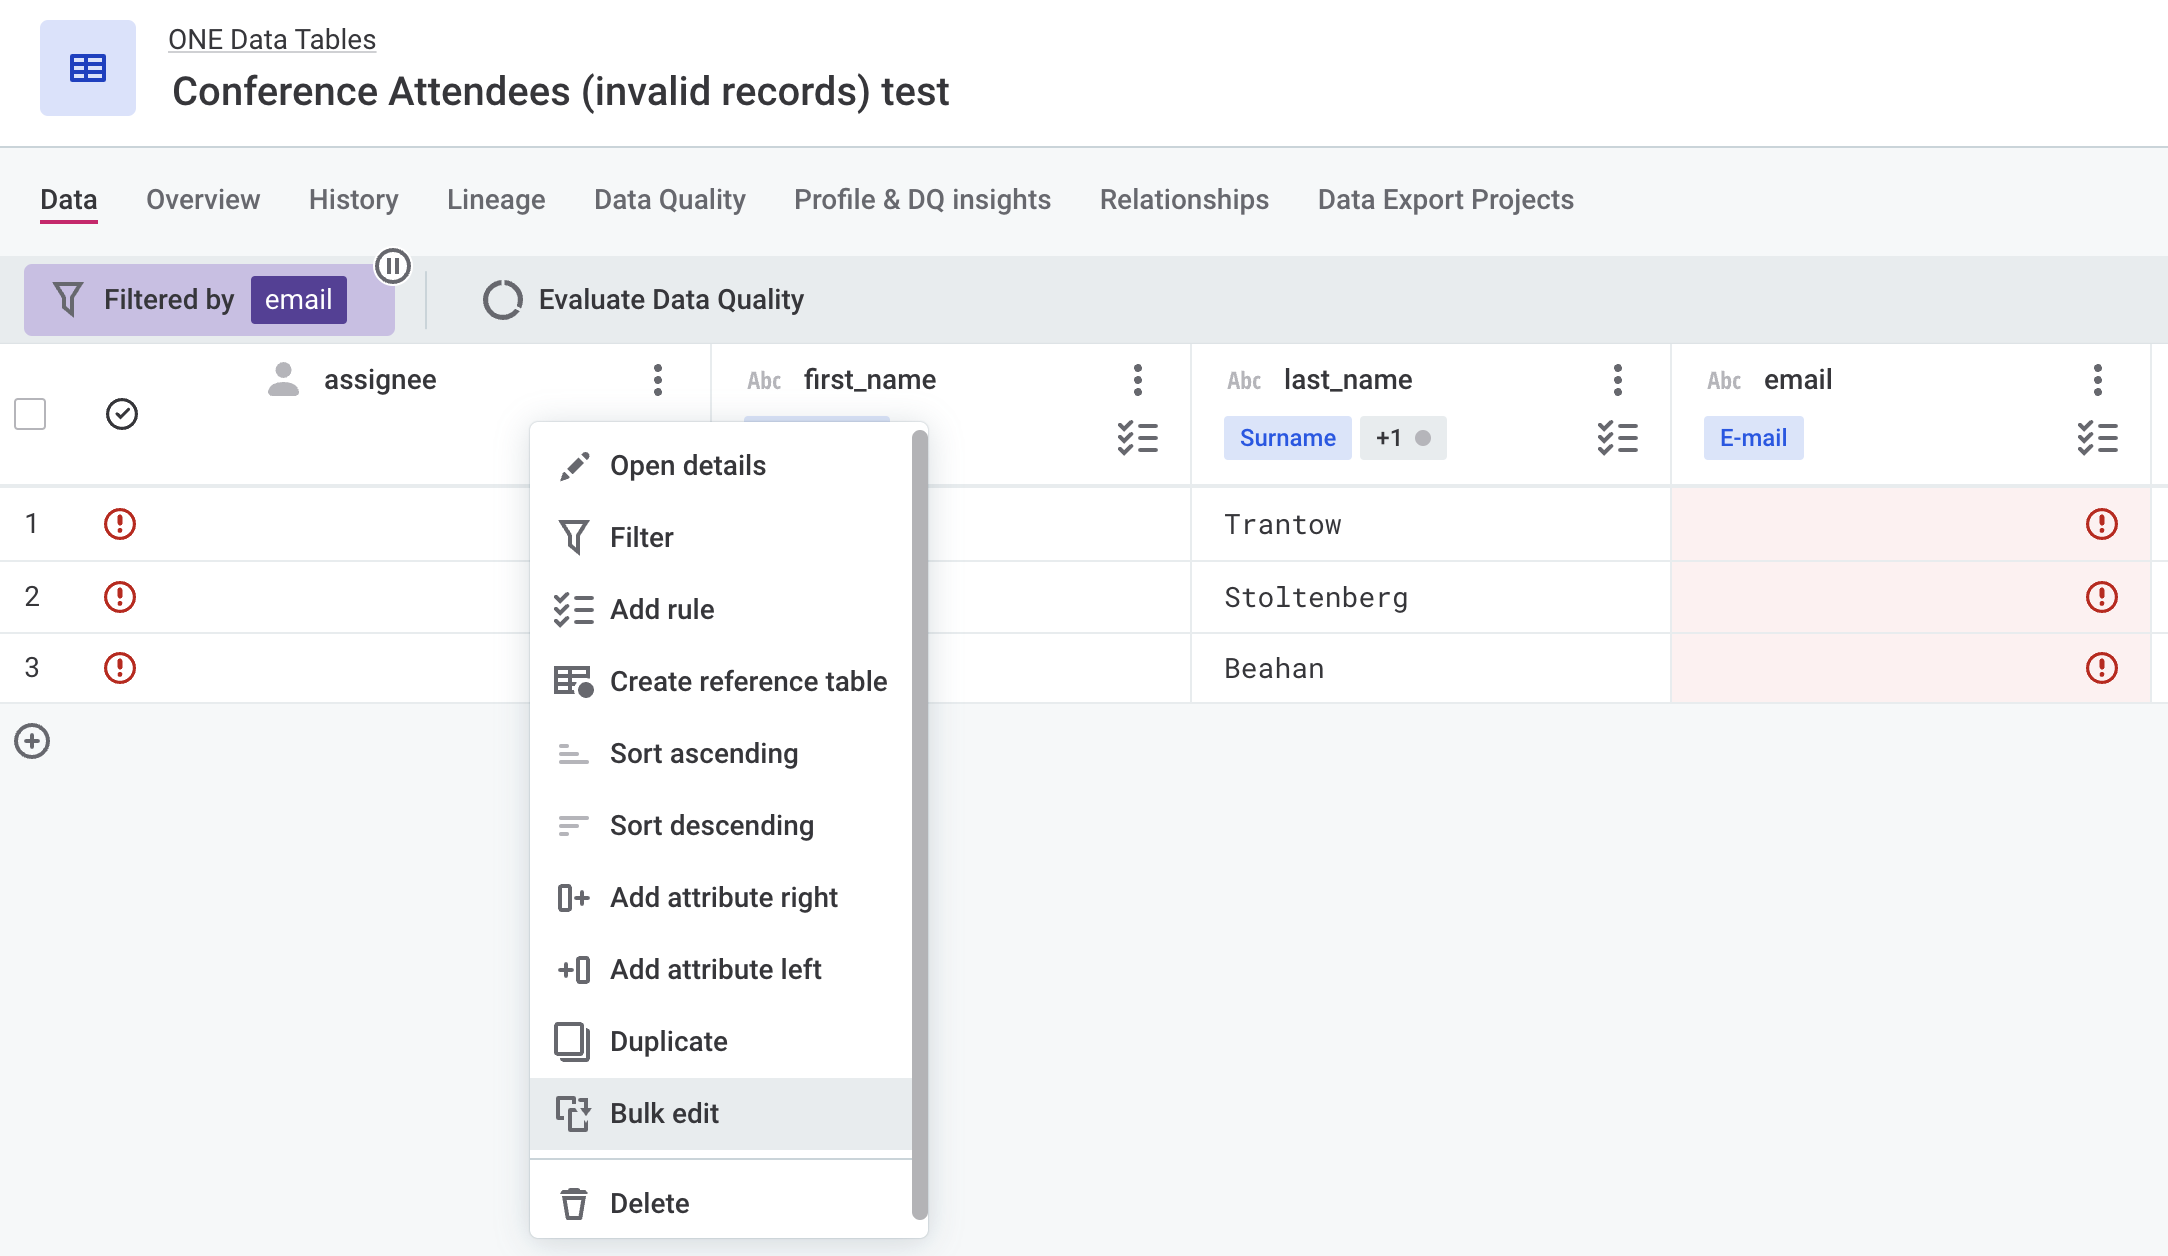
Next, select all filtered records, then right-click the assignee attribute and choose Bulk edit.
Select a user from the list and then Edit n records.
| In addition to this, you can create a task or leave a comment to make sure your coworker gets notified when they log in. For more details, see Get Started with ONE Data, section Tasks and comments. |
Examine rule implementation
In some cases, it might be less obvious what the reported problem is.
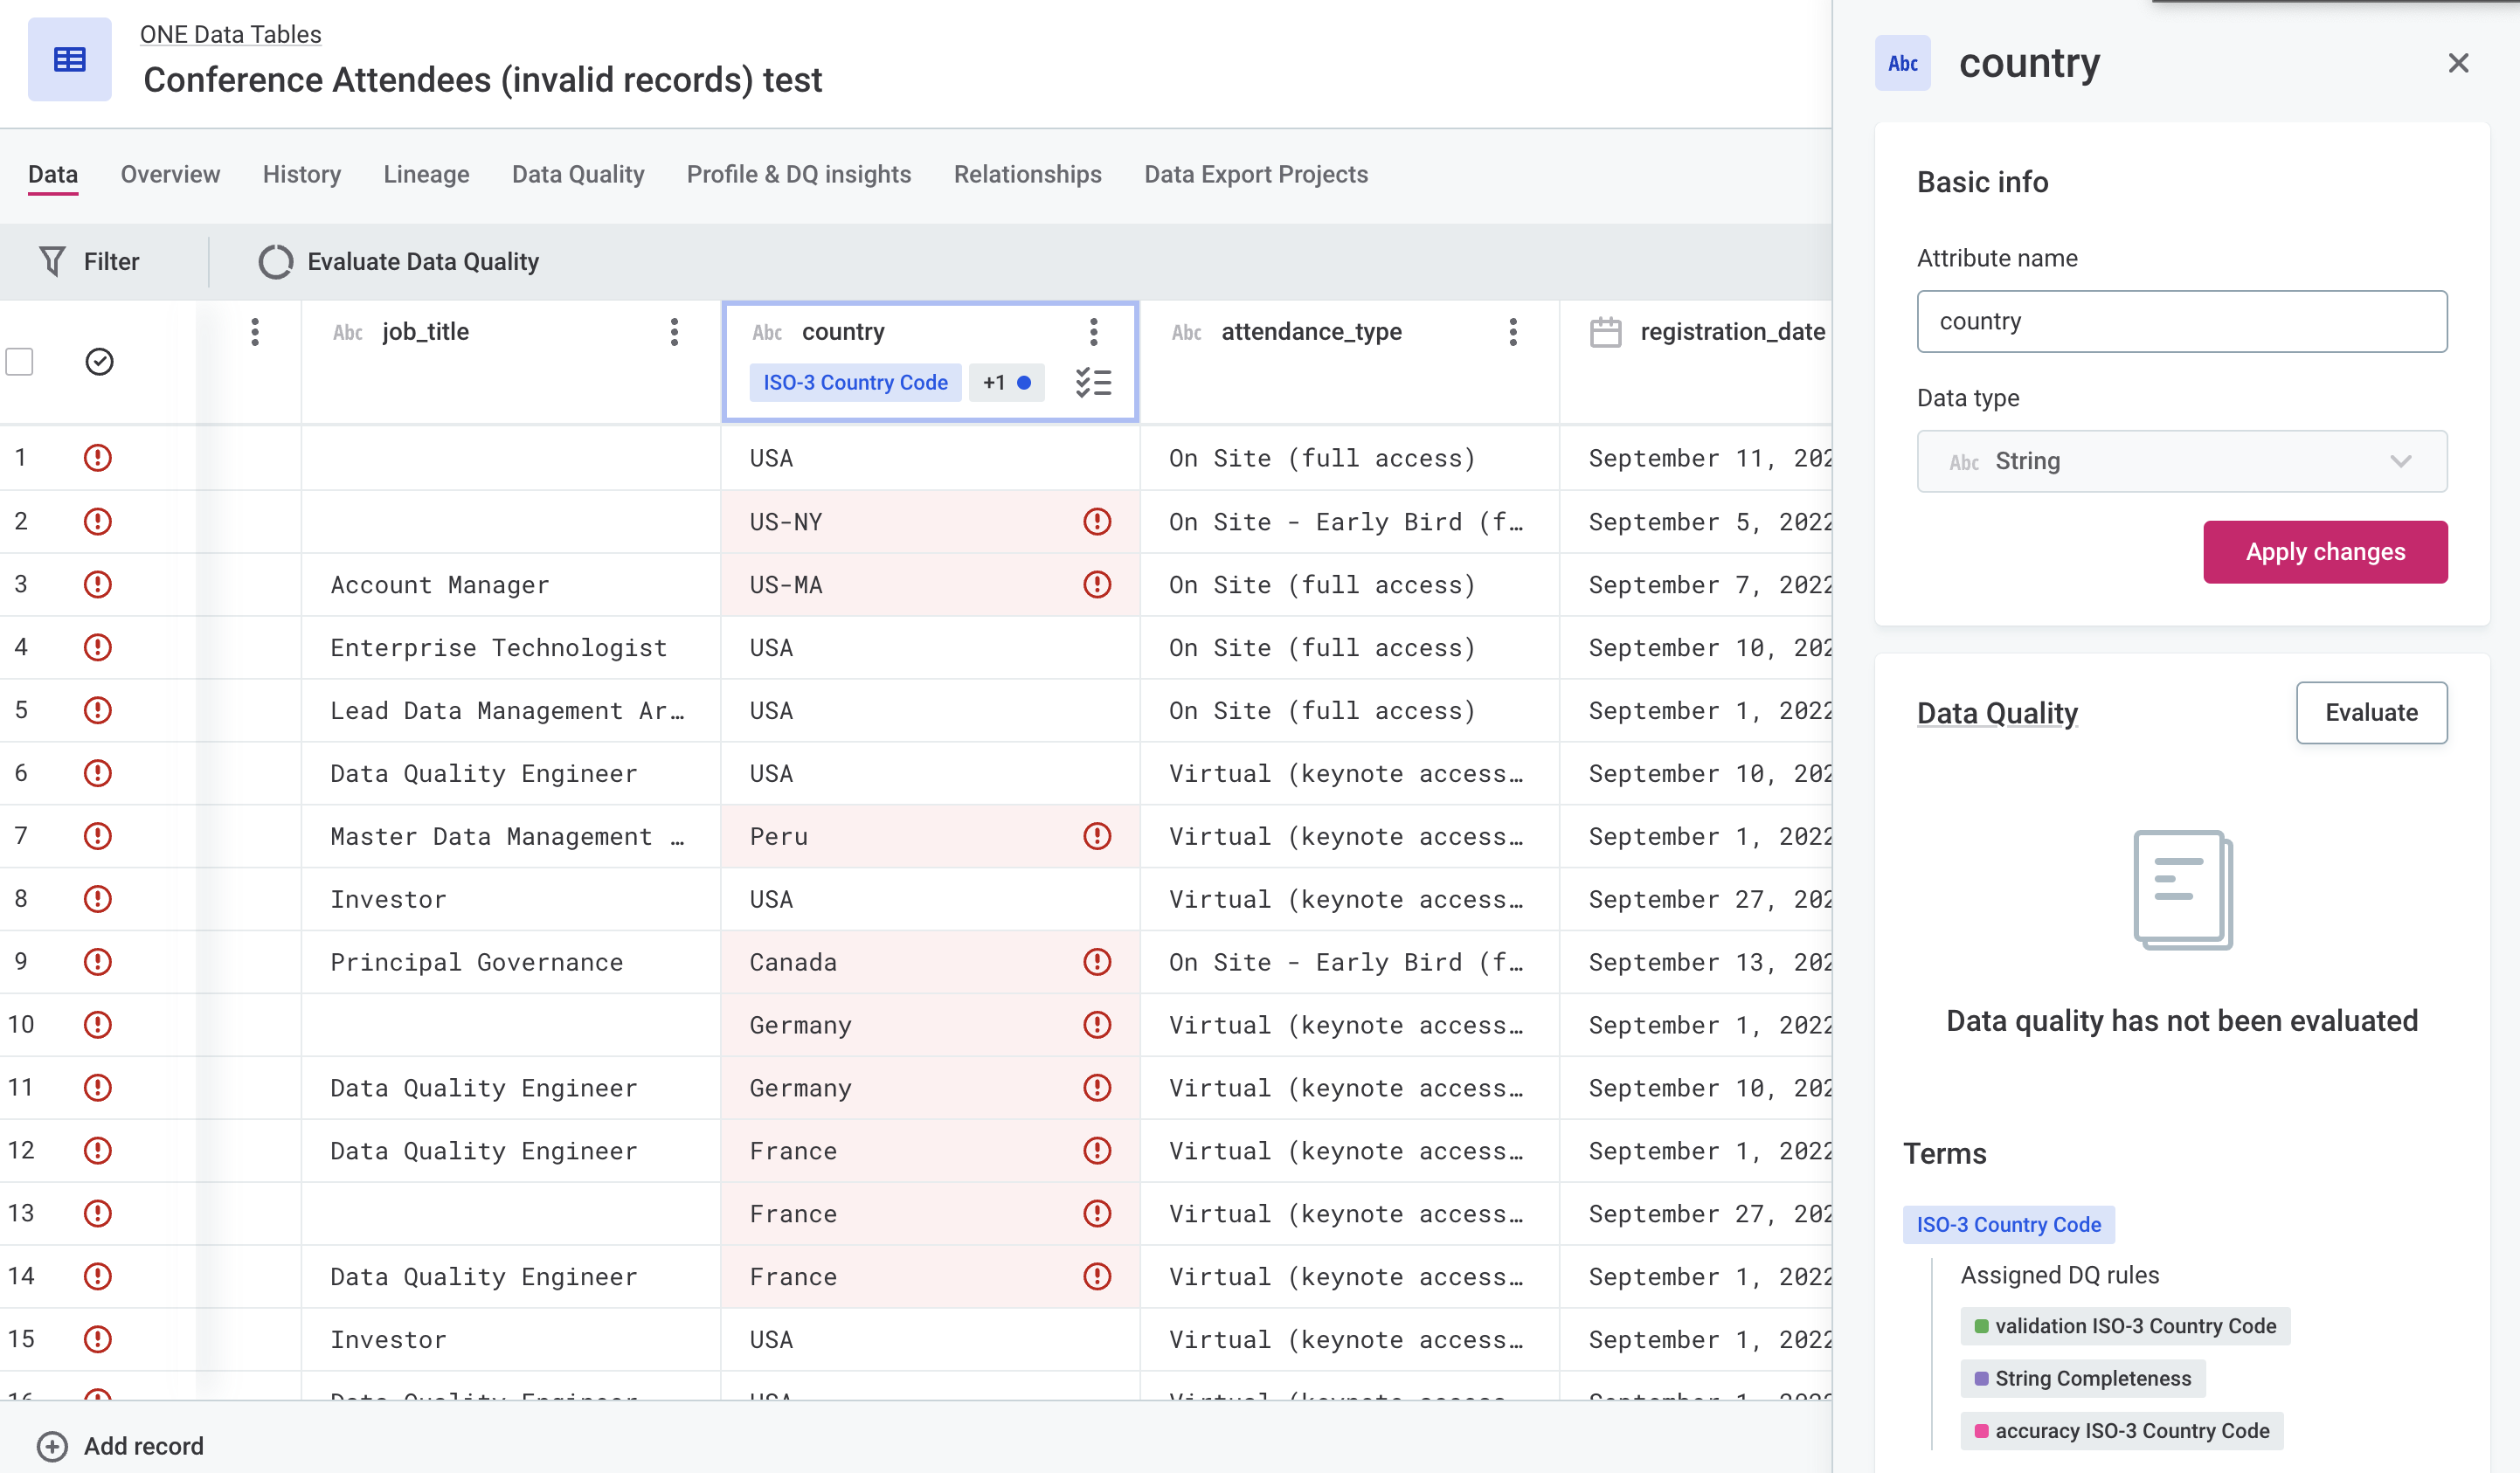
For example, if we take a look at the country attribute, we can see that values such as Canada, France, or US-NY were flagged as invalid, it’s worth further investigating which DQ rules are applied.
Hover over these records to see which DQ rules the records failed (in our case, these would be Country and ISO-3 Country Code, depending on the record).
To further investigate the issue, you can check the rule implementation from the attribute details page.
Here, we can see that the ISO-3 Country Code term verifies whether the value is exactly three characters long.
Therefore, all values with more than three characters are considered invalid.
|
To view the rule implementation logic, open the attribute details. In the Terms section, select one of applied rules for the term you’re interested in. On the Implementation tab that opens, check the Rule Logic section. 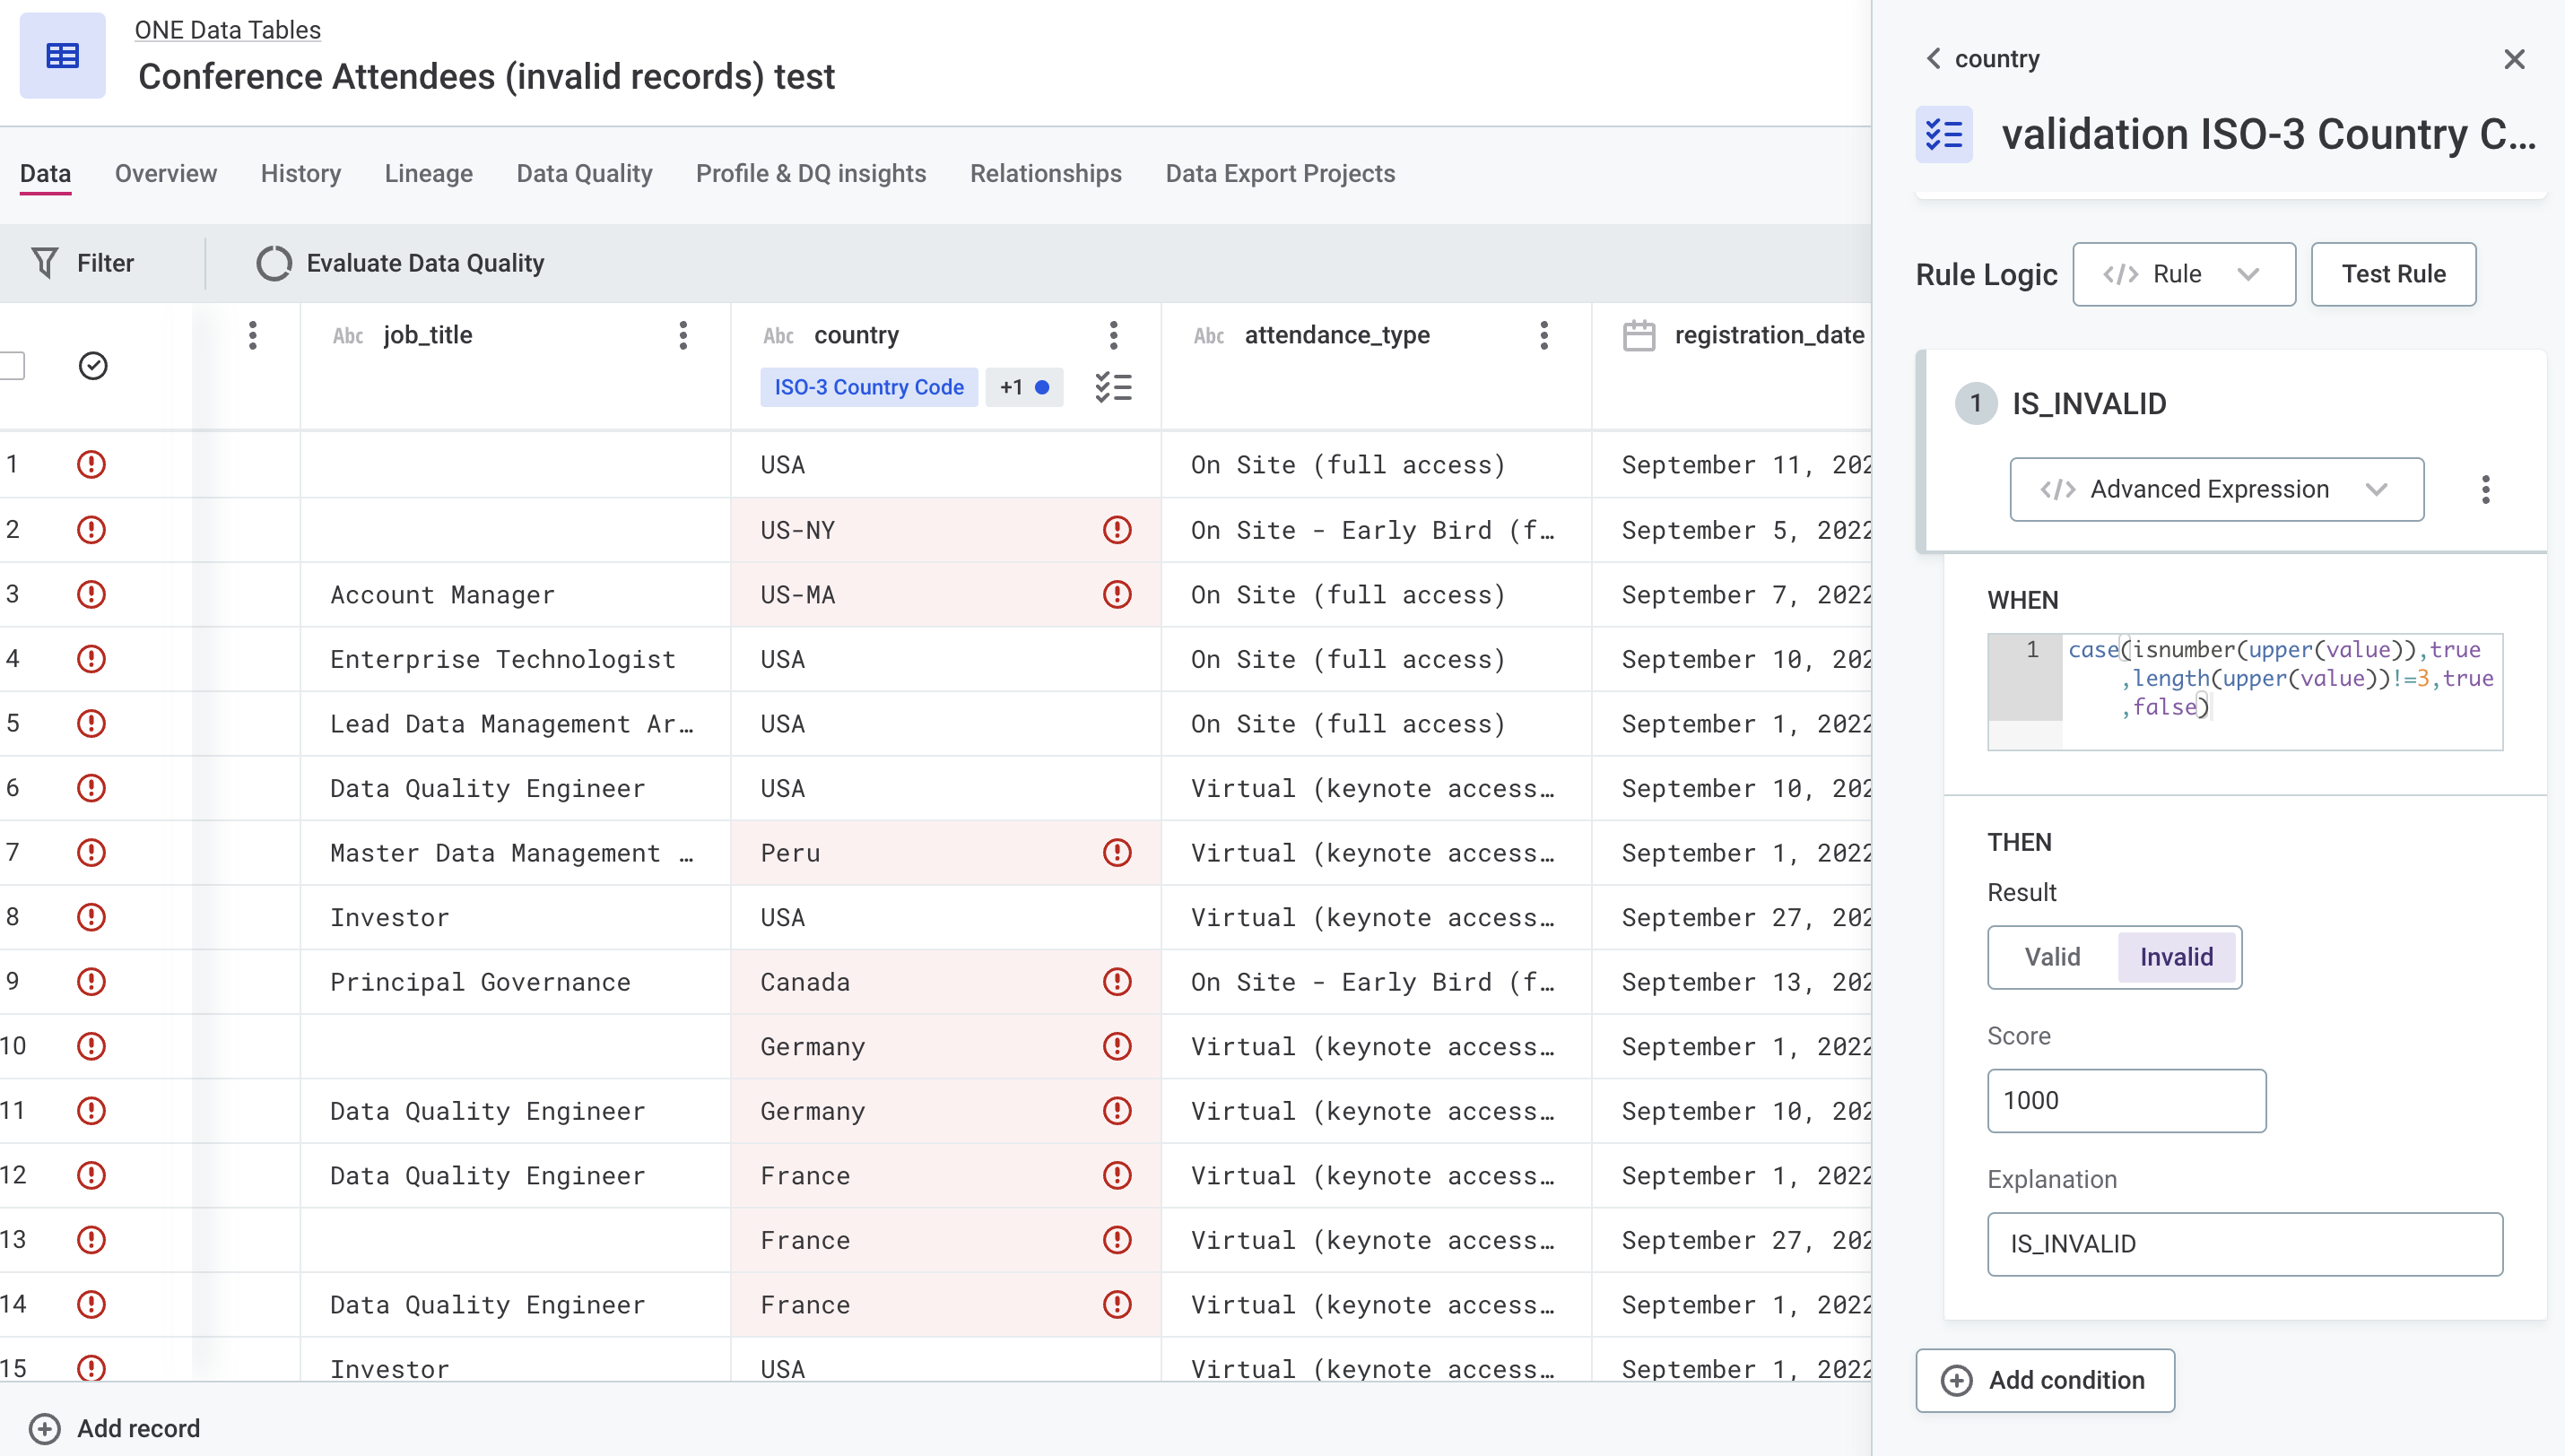
|
Depending on which information you prefer to keep, you can opt to edit invalid values to comply with the ISO-3 country codes or remove the term ISO-3 Country Code from the attribute.
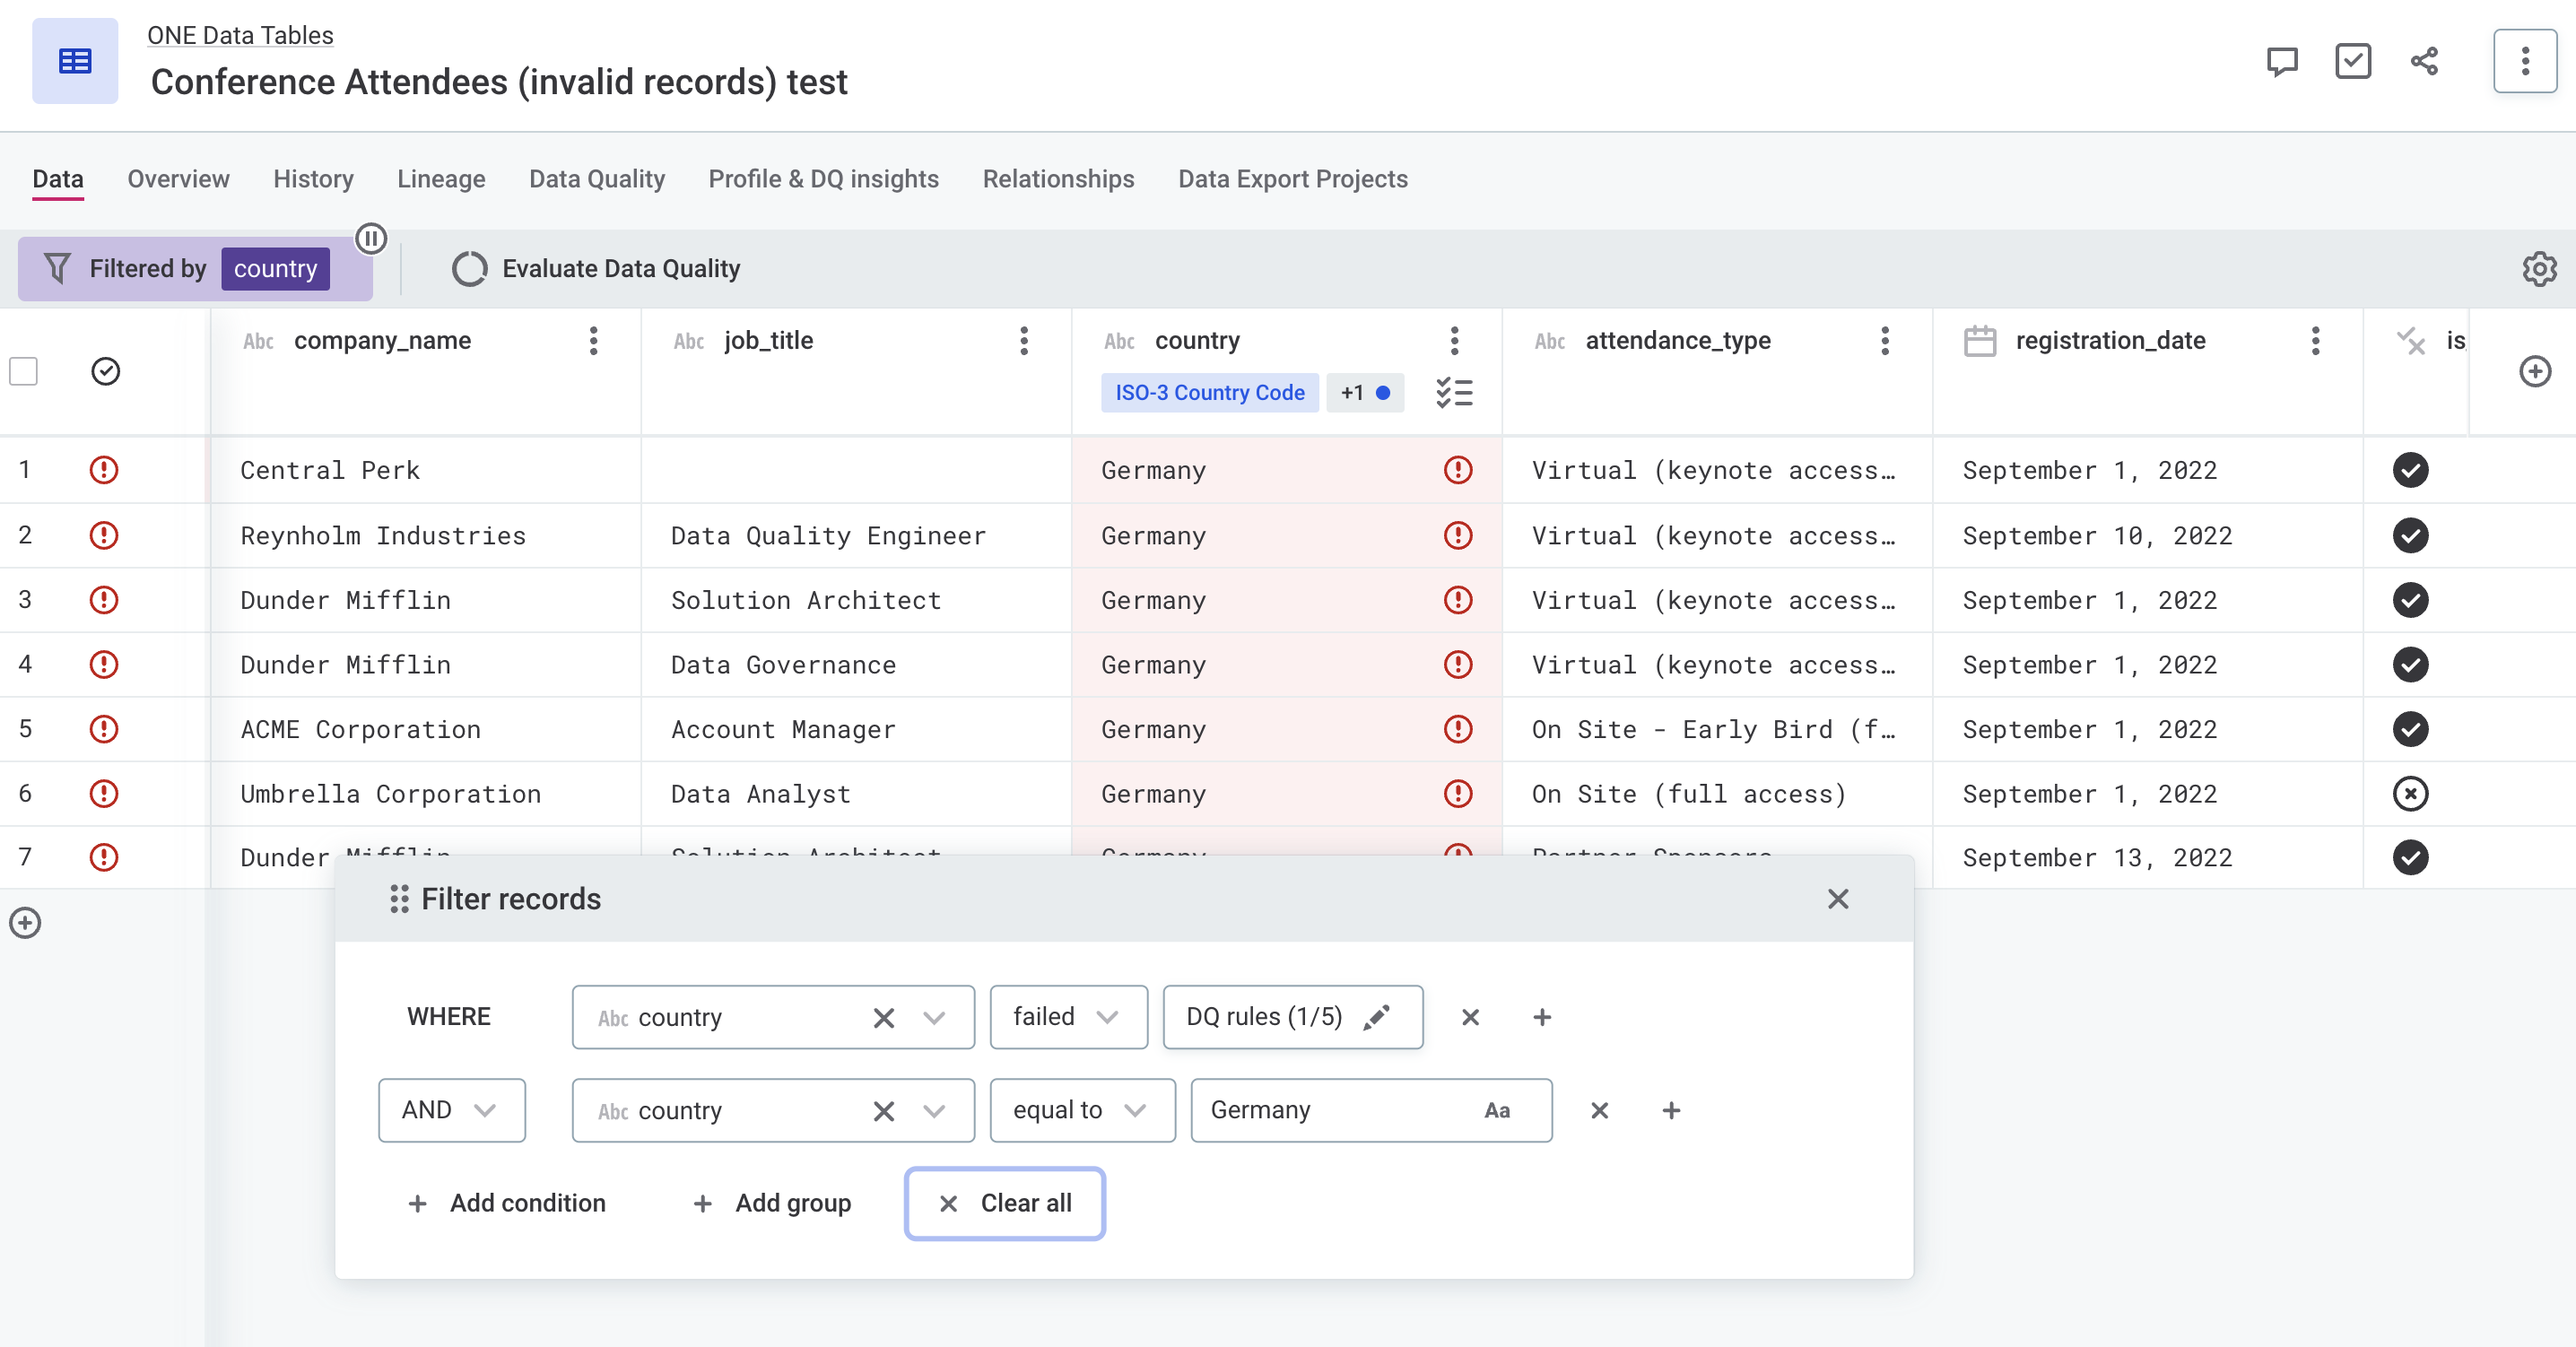
If you choose to edit the values, combine DQ and other filters to find the affected records before you start editing. Next, select all filtered records with the same country name and edit them at once using the Bulk edit option.
If you prefer to remove the business term, after it is unassigned, you need to publish the changes and run DQ evaluation again (Evaluate Data Quality).
Update DQ results
Finally, check the remaining invalid values.
In our case, these are US-NY and US-MA.
They are not included in the reference data used for the country name validation rule and can both be updated to USA.
Once again, you can filter records by country name and use the Bulk edit option to update all affected records at once.
After the update, run DQ evaluation once more: the country attribute no longer contains any invalid records.
|
After you update a value in the table or if DQ results haven’t been updated in a while, the following message is displayed in the application. We recommend periodically running DQ evaluation to make sure you stay on top of any DQ issues. 
|
| To learn how to use your ONE Data tables to validate data in ONE, see Validate Data Using ONE Data Tables. |
Export results from ONE Data
Once you’re happy with the state of your data, you can export it back to the origin source using the Export feature. Open your table either from the Knowledge Catalog or ONE Data, then in the three dots menu select Export > Export to database.
Select which attributes you want to export and find the target table where records will be exported to. You can choose whether to overwrite the existing table or create a new one.
For more information about how to configure and run the export project, see Data Export.
Was this page useful?