
Okta Integration
Security Assertion Markup Language (SAML) is a protocol for authenticating user access to web applications.
Often, user identities are stored across discrete applications and organizations - SAML allows these federated apps and organizations to communicate and trust one another’s users. SAML provides a way to authenticate users to third-party web apps by redirecting the user’s browser to a company login page, then after successful authentication on that login page, redirecting the user’s browser back to that third-party web app where they are granted access.
In this article, we cover SAML configuration for Ataccama products using Okta.
For versions 12.5.0 onwards, you need to add saml-post-form.ftl file into <ataccama.home>/keycloak/themes/ataccamaone/login folder before you start the Okta and Keycloak configuration.
You can download the file from here: saml-post-form.ftl.
|
Prepare Keycloak realm for integration with Okta
|
If you are using a single Keycloak instance for multiple Ataccama products (ONE, RDM, MDM) and want to set up individual Okta connections for each of the products, you need to split the existing Ataccamaone realm to several realms (one realm per product). To do this, see first Split Ataccamaone realm. You can then continue with the following instructions. |
Before starting the OKTA configuration, we need to gather some information from Keycloak.
-
Login to the Keycloak Administration Console.
-
Open Ataccamaone realm in Keycloak.
-
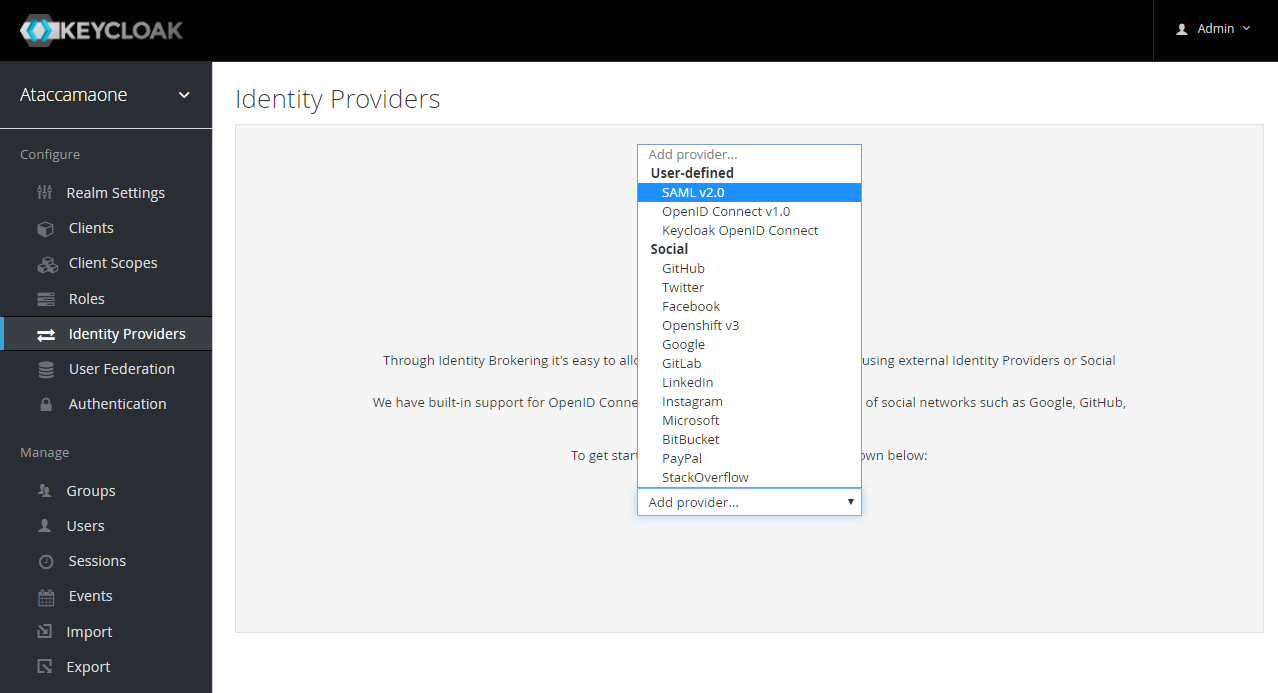
Go to the Identity Providers.
-
From the dropdown, select SAML v2.0.
-
On the Add identity provider screen that opens, set up the Alias to 'LoginWithOkta'. This alias will be used in the redirect URL.
You can also add a Display Name which will be visible on the Ataccama Login page.
-
Add any value into the Single Sign-On Service URL field temporarily, in order to be able to save the Identity Provider details.
-
Select Save.
-
Keep the Add identity provider window open, we will come back to it later once we have the Okta configuration ready.
Split Ataccamaone realm
If you are using a single Keycloak instance for multiple Ataccama products (ONE, RDM, MDM) and want to set up individual Okta connections for each of the products, we need to split the existing Ataccamaone realm to several realms (one realm per product).
In this example, we will create a new realm for RDM:
-
Go to Keycloak folder in the Ataccama build.
-
Copy
ataccamaone.jsonfile and name itataccamardm.json. -
Open the newly created
ataccamardm.jsonfile and changeataccamaonetoataccamardmfor both occurrences at the top of the file: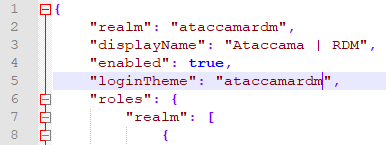
-
On the Add realm screen in Keycloak, import the
ataccamardm.jsonfile: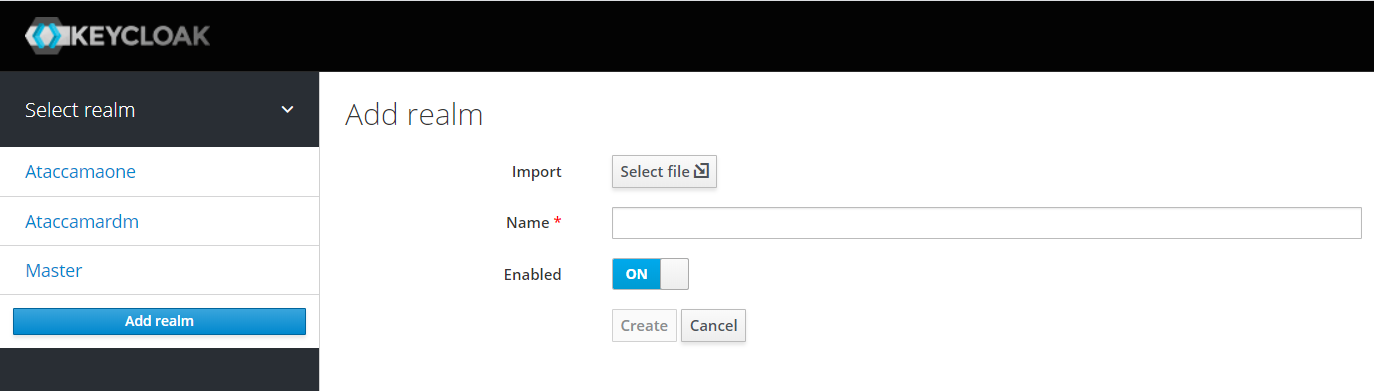
-
Configure the relevant clients:
-
one-rdm-steps. -
one-rdm-webapp.
-
-
Go to the server and update the following RDM application files by pointing them to the new
ataccamardmrealm. In other words, you need to changeataccamaonetoataccamardmwherever it occurs:-
<rdm-webapp>/WEB-INF/keycloak-steps.json. -
<rdm-webapp>/WEB-INF/keycloak-webapp.json.Now that you can access RDM through the newly created realm, you can configure Okta for this realm following the guide.
-
Set up a custom SAML application in Okta
To integrate Okta with Keycloak:
-
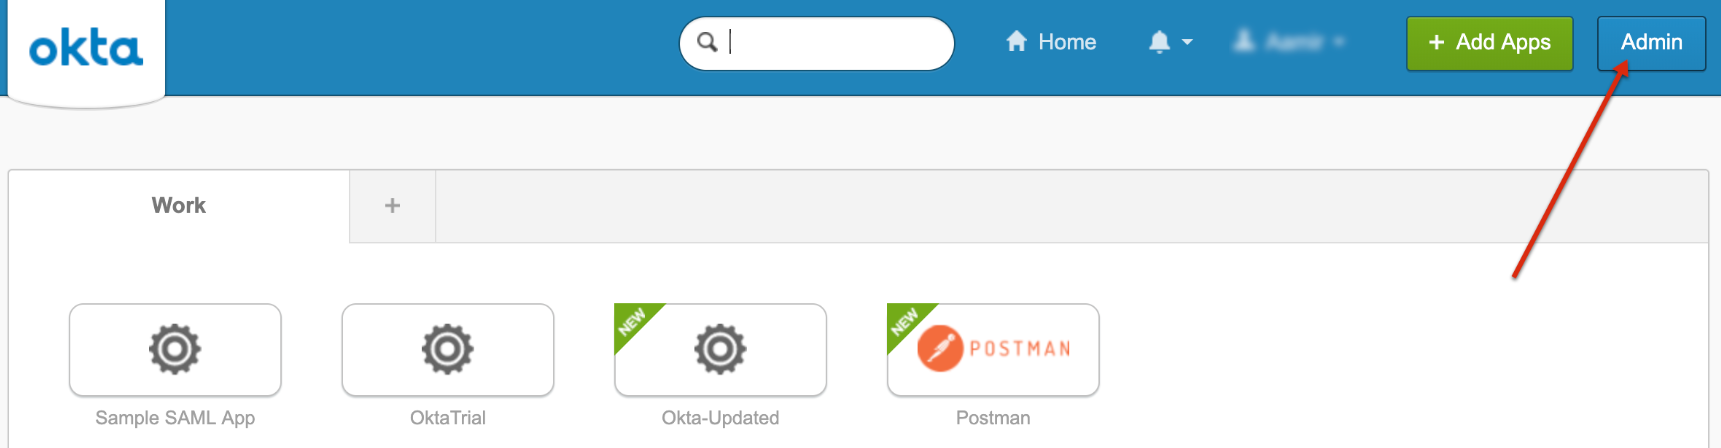
Login to your Okta portal.
-
Select Admin.
-
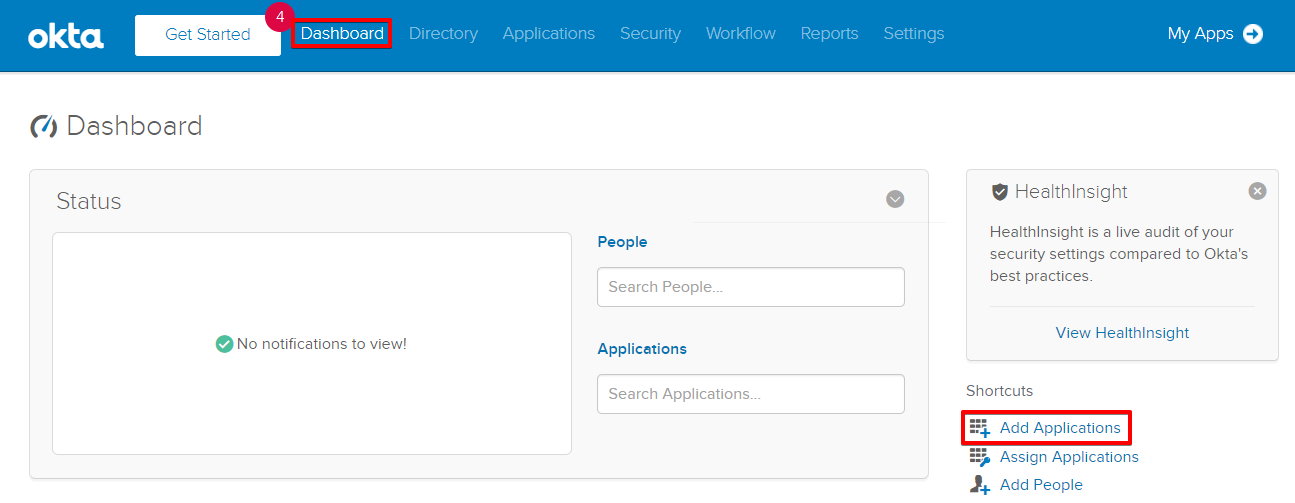
From the OKTA Dashboard, select Add Applications.
-
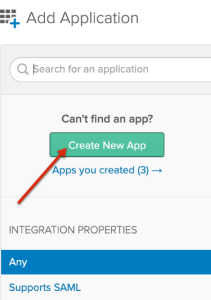
Select Create New App.
-
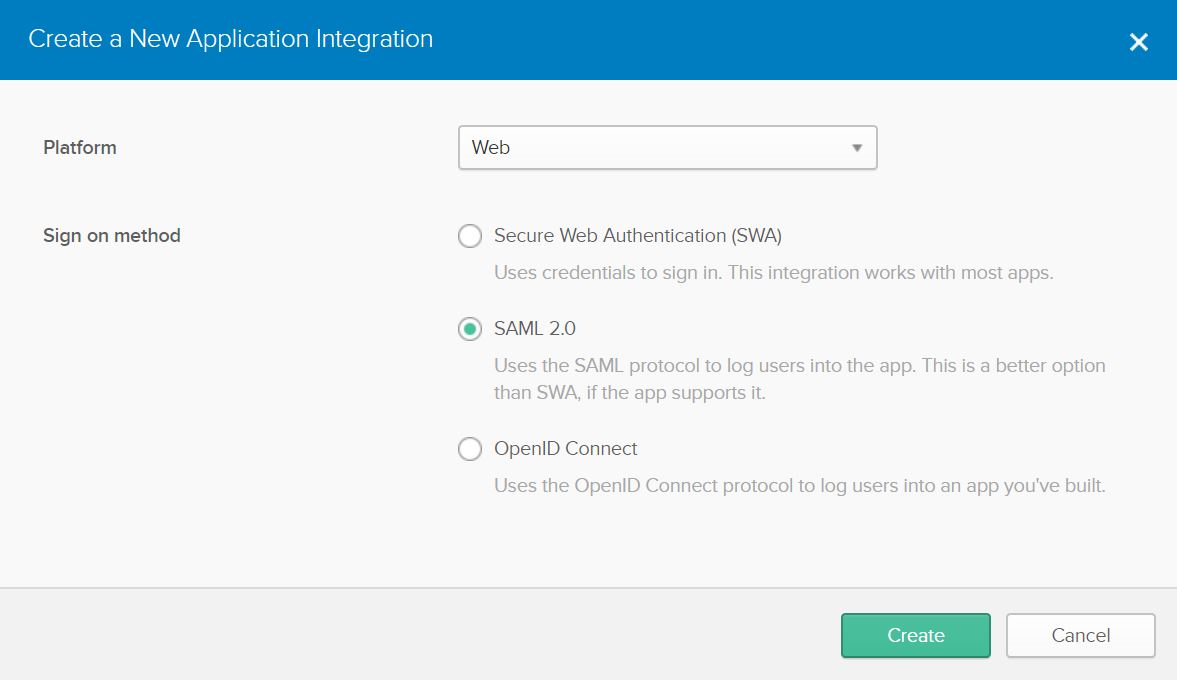
On the Create a New Application Integration dialog that appears, ensure that Web is selected under Platform, select SAML 2.0 under Sign on method, and select Create.
-
In General Settings, define the App name as
Ataccama. This is the name that will be visible in your Okta applications. Optionally, you can also add the logo.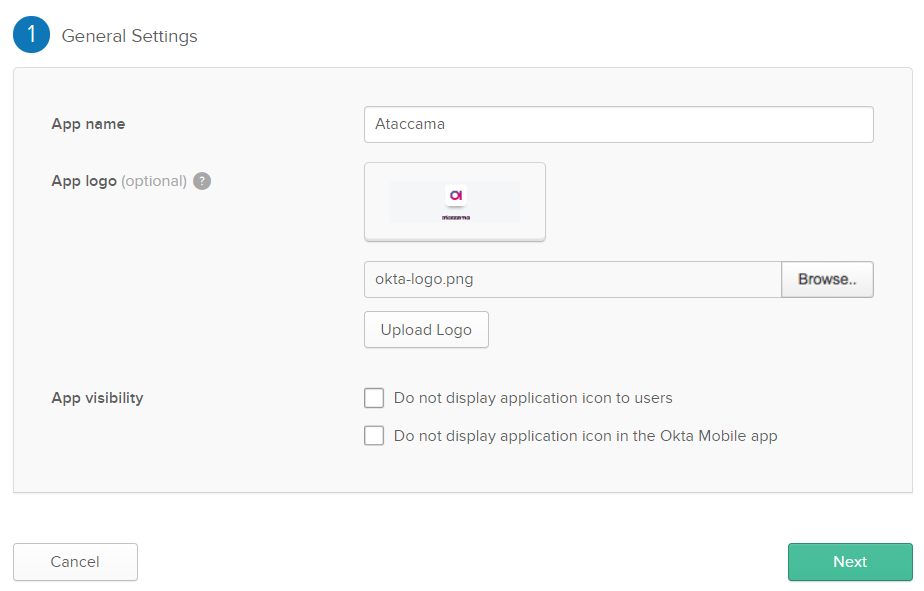
-
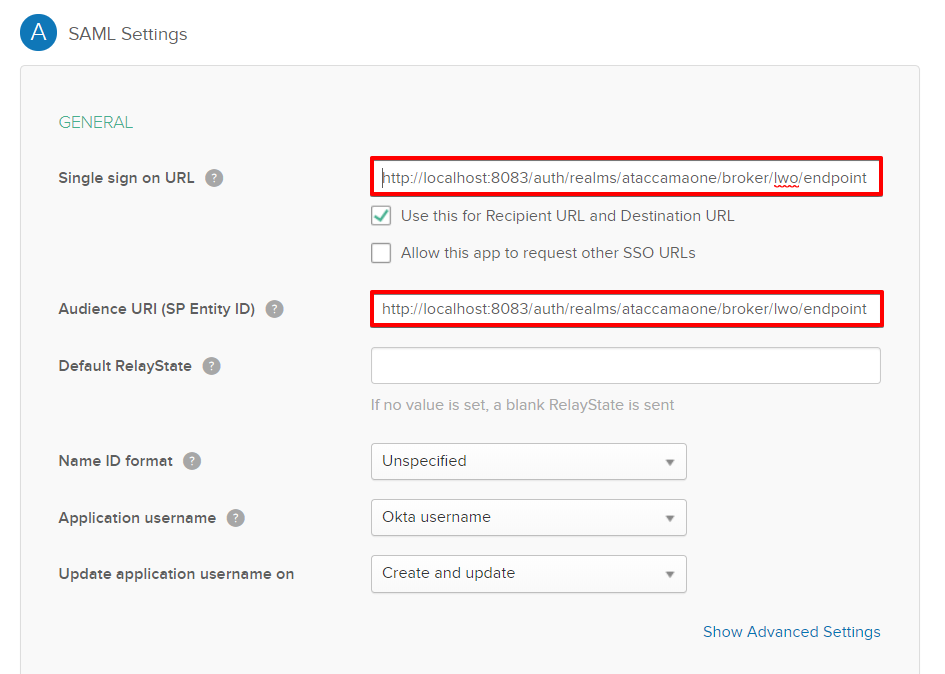
In SAML Settings, copy the Keycloak Redirect URL to both Single sign-on URL and Audience URI (SP Entity ID).
-
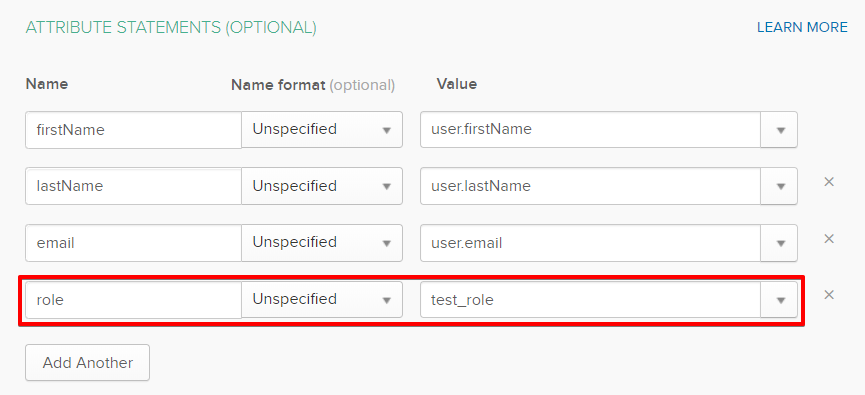
Add Attribute Statements:
firstName,lastName, andemail. The same name is used further in the Keycloak Identity Provider Mapper.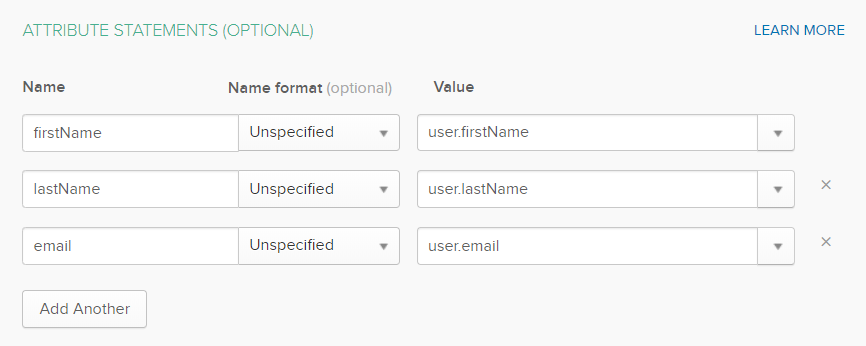
-
Configure the application type (select I’m an Okta customer adding an internal app and This is an internal app that we have created), and then select Finish.
-
Assign users to the newly created Okta application.
-
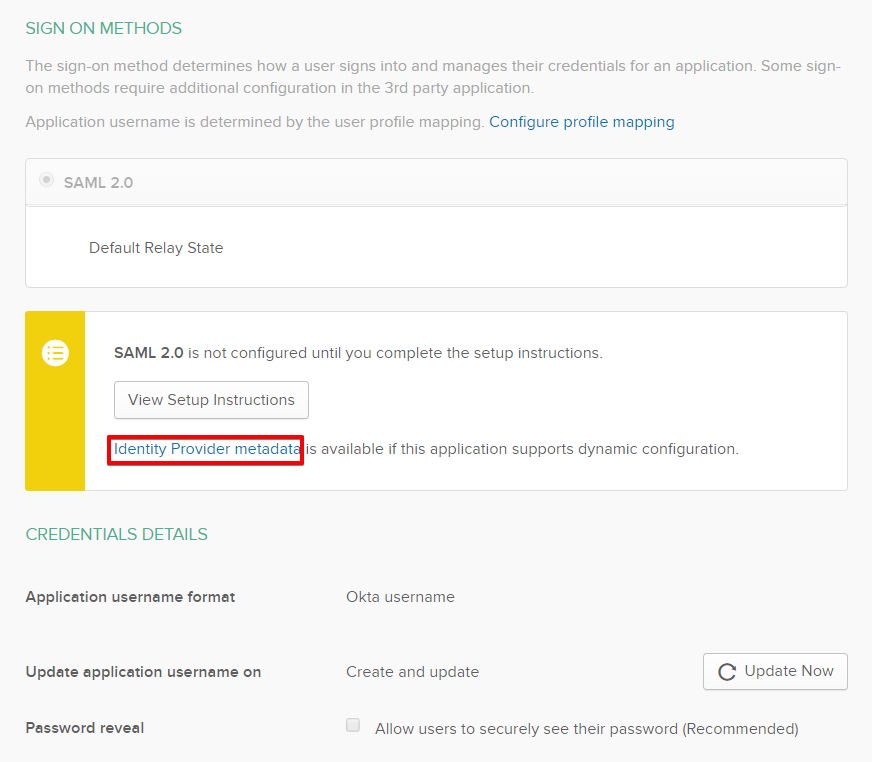
Now the application has been added to Okta, you need to copy the Identity Provider metadata link and import it into Keycloak in the Add identity provider window which should still be open. To do this, click the Identity Provider metadata link in Settings. To open the XML file in a new tab, copy the link instead.
Keycloak realm integration (continued)
Return to the open Add Identity Provider page, and follow these steps:
-
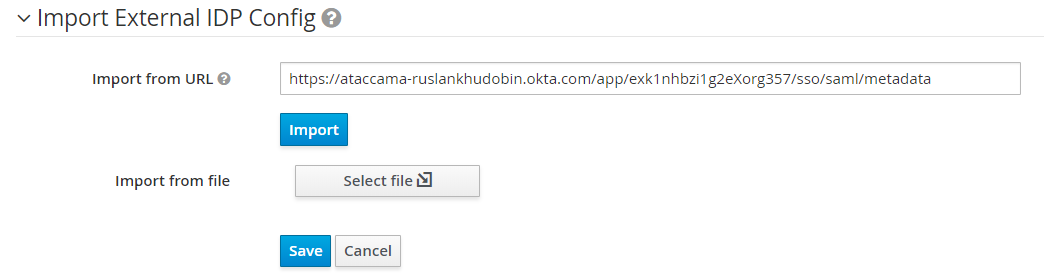
Find the Import External IDP Config section at the bottom of the screen and paste the copied metadata link into the Import from URL field.
-
Select Import.
-
The SAML Config section should now be updated according to the imported metadata.
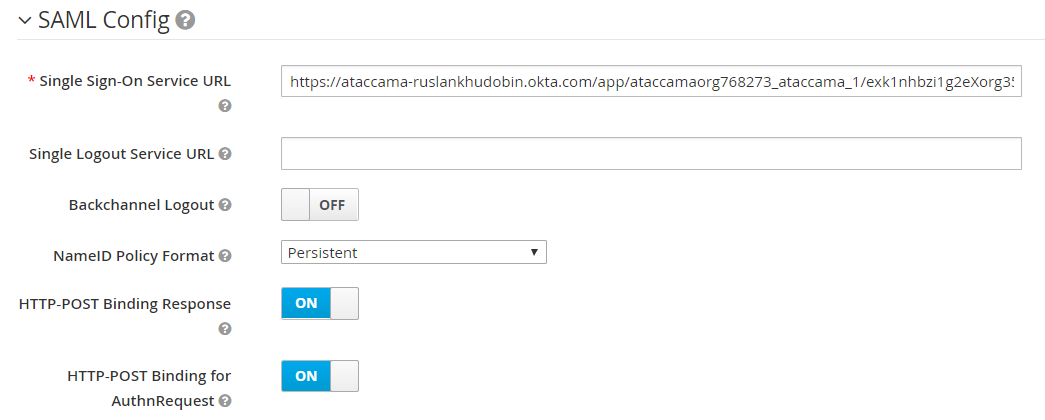
Check the First Login Flow is set as
first broker login.
-
Open the Mappers tab, and then select Create.
-
Fill the Add Identity Provider Mapper form according to the Attribute Statements added in Okta.
You need to repeat it three times for each Attribute Statement:
firstName,lastName,email. The Name field can be custom for Keycloak, but all other fields should match what is defined in Okta.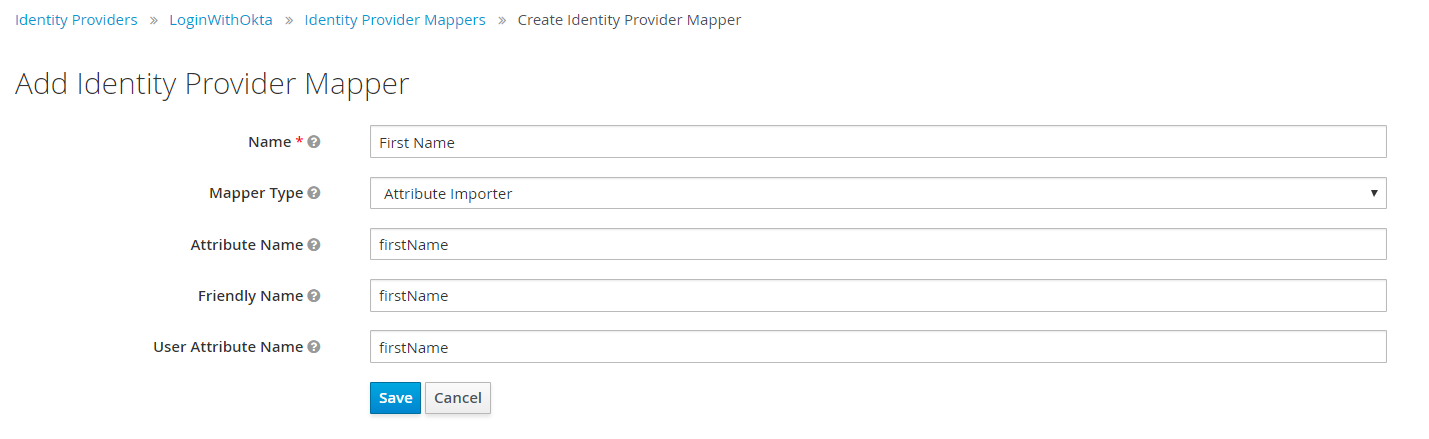
Once all three Attribute Mappers are added, the configuration should look like this:

Set permissions in Okta-Keycloak through the Active Directories
You can manage roles via Okta and assign a role in Keycloak based on the Okta attribute. To do this:
-
Add an additional Attribute Statement to Okta. As an attribute value, you can pass a logic which assigns value based on the Active Directory name of the group.
-
Add the additional mapper to the Identity Provider Mappers window in Keycloak.
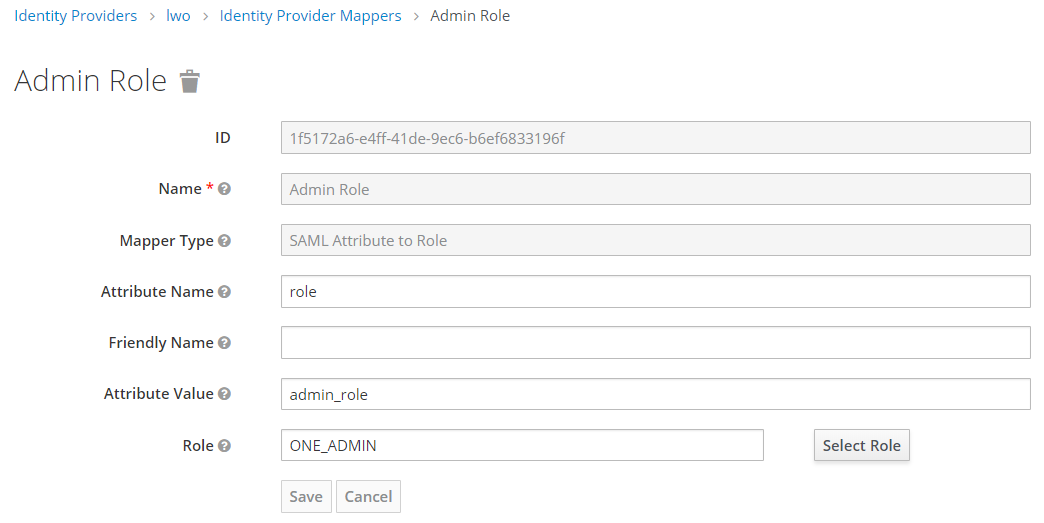
You can create multiple SAML Attribute to Role mappers for each Active Directory group and assign multiple roles. A new mapper is required for each role added.
Leave Friendly Name blank, otherwise the Mapper fails as it cannot locate this attribute and value in Okta.
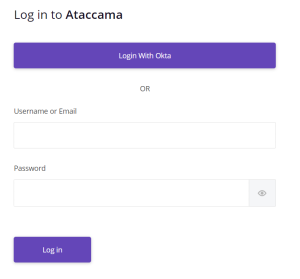
Once you complete these steps, each time a user logs in to Ataccama ONE, user permissions are verified according to the user’s Active Directory group and assigned to their roles. When you open the Ataccama ONE login page, you will see the option to Login With Okta.
Was this page useful?