
Custom Relationships
This page describes how to configure relationships between entities in ONE. Relationships are then shown on the Relationships graph.
Create custom relationships between entities
To create a relationship between two objects, you need an entity that explains the type of relationship between these objects. To create this entity:
-
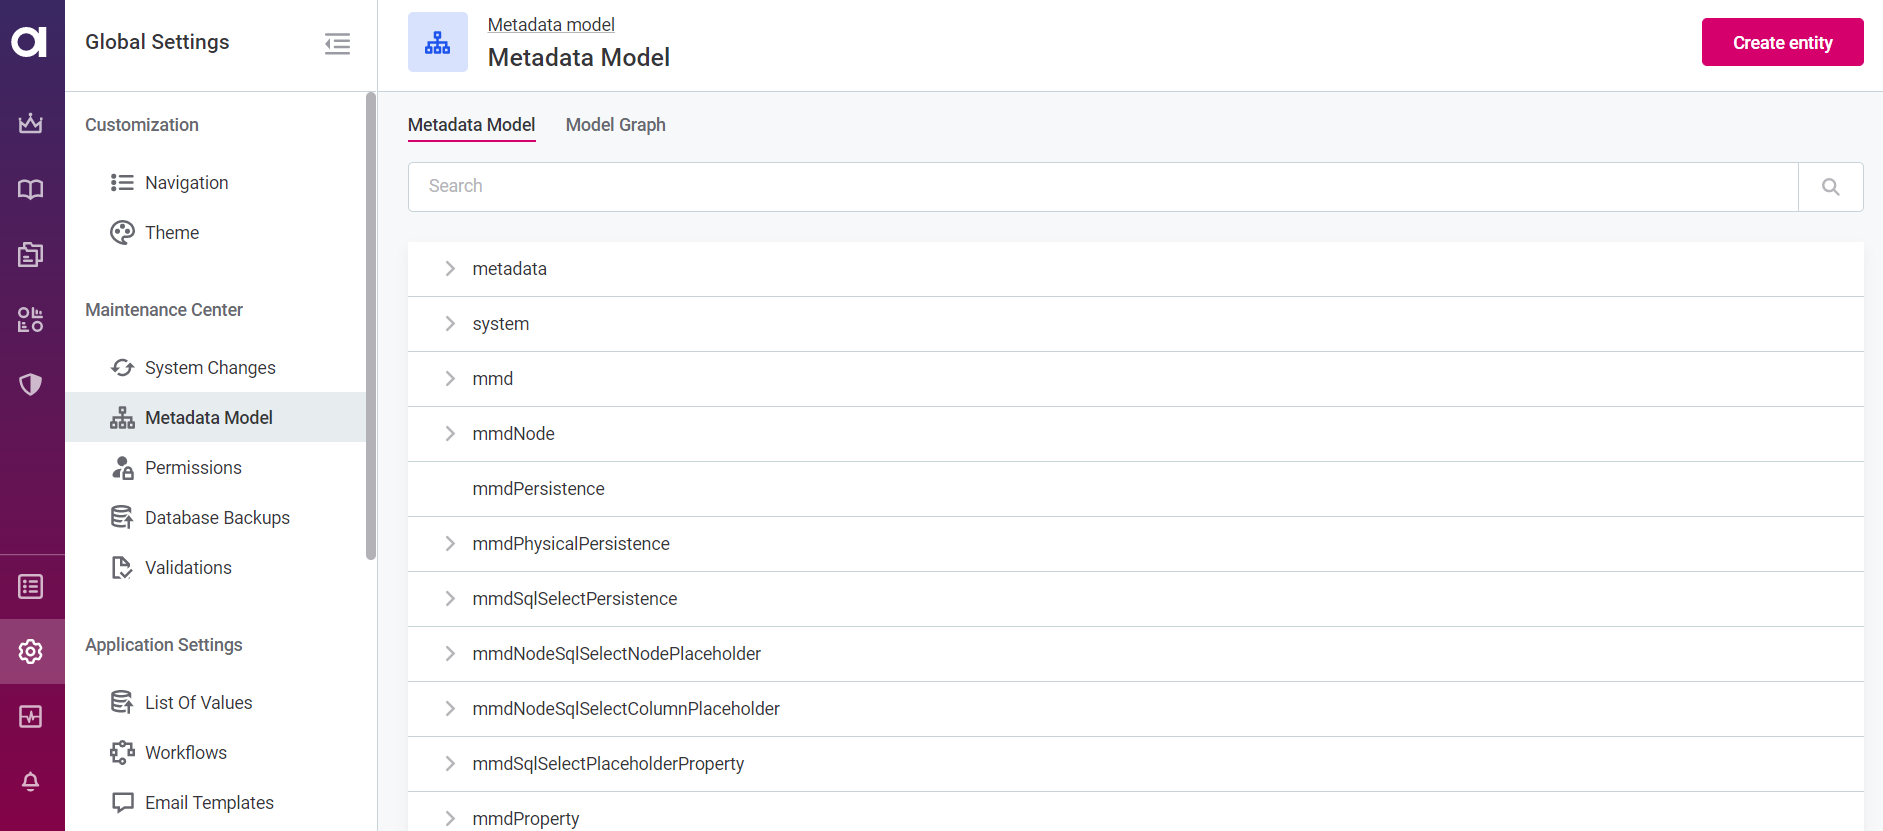
Go to Global Settings > Metadata Model.
-
Select Create entity.
-
Provide the following information:
-
Name: A meaningful name for the entity that would explain the type of connection.
For example, if the custom relationship is between two attributes, you can name the entity attributesRelationship. -
Add the following properties. Set them as mandatory and choose
Referenced objectas the property type.-
Source: Points to the source of the relationship (the arrow tail), referencing
attribute. -
Target: Points to the target of the relationship (the arrow head), referencing
attribute. -
Type: Specifies the relationship by referencing the
relationshipTypeentity. -
(Optional) Order: In this case, the property type is Integer.
-
-
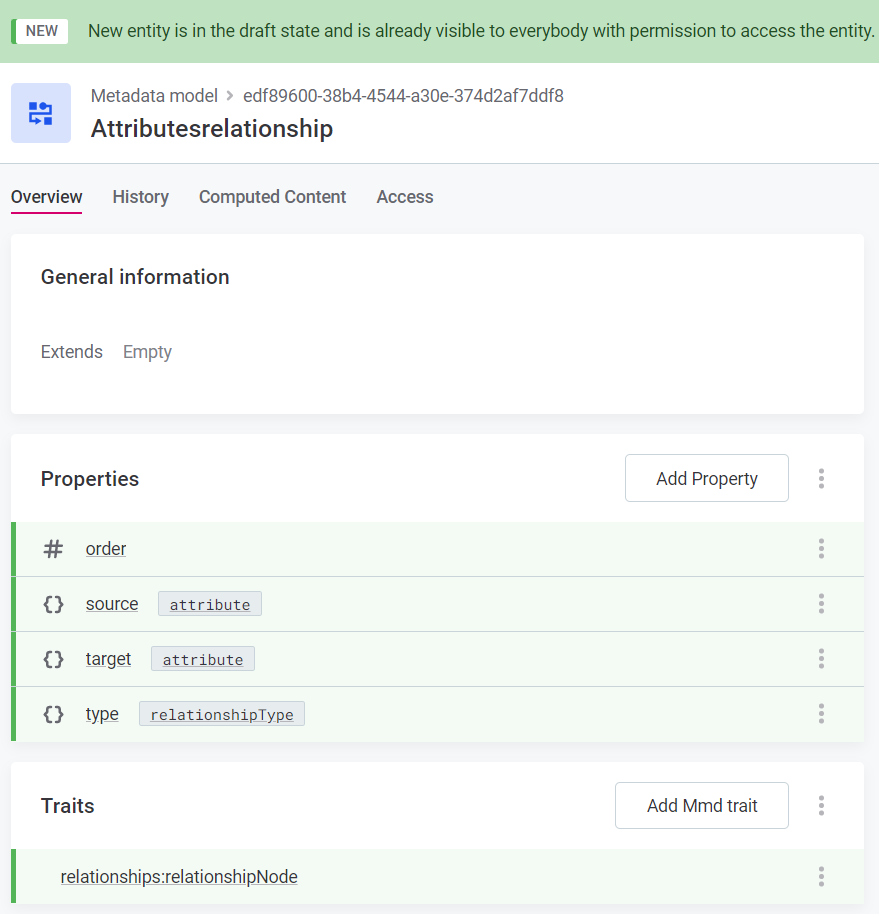
Specify the trait
relationships:relationshipNode, where thesource,target, andtypeparameters are configured as follows:{ "sourceProperty":"source", "targetProperty":"target", "relationshipTypeProperty":"type" }
Make sure that the parameters reference the correct values for sourceProperty,targetProperty, andrelationshipTypeProperty, depending on the relationship you are creating.
-
-
Select Save.
-
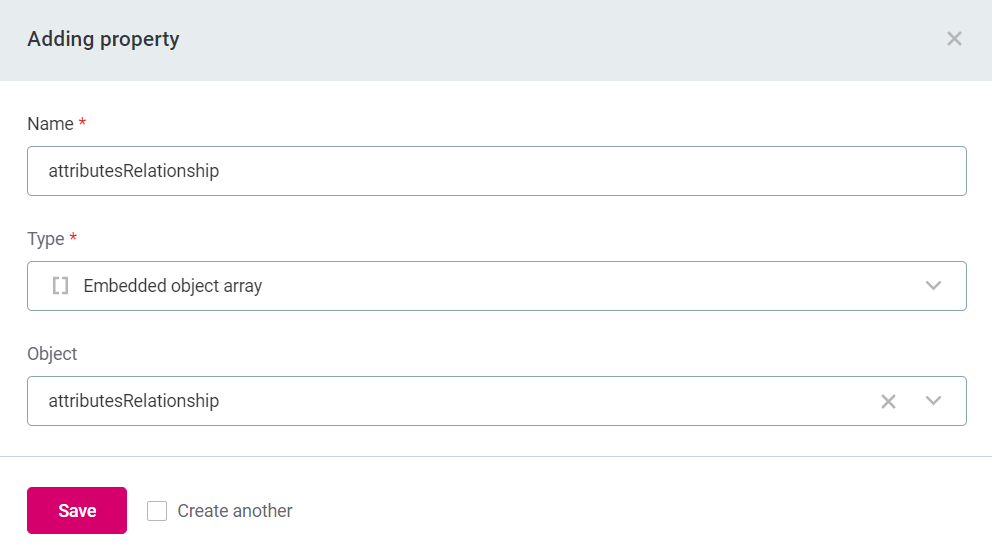
Go to Global Settings > Metadata Model and open the
metadataentity. -
Select Add Property and set the following information:
-
Name: Property name. You can use the name of the new entity.
-
Type:
Embedded object array. -
Object: Select the entity that you have previously created (steps 1-4):
-
-
Select Save.
-
Navigate to the Global Settings > System Changes and publish the changes.
This includes switching to the maintenance mode, creating a database backup, and resolving any potential conflicts. For more information and step-by-step instructions, see System Changes, section Run and publish changes. -
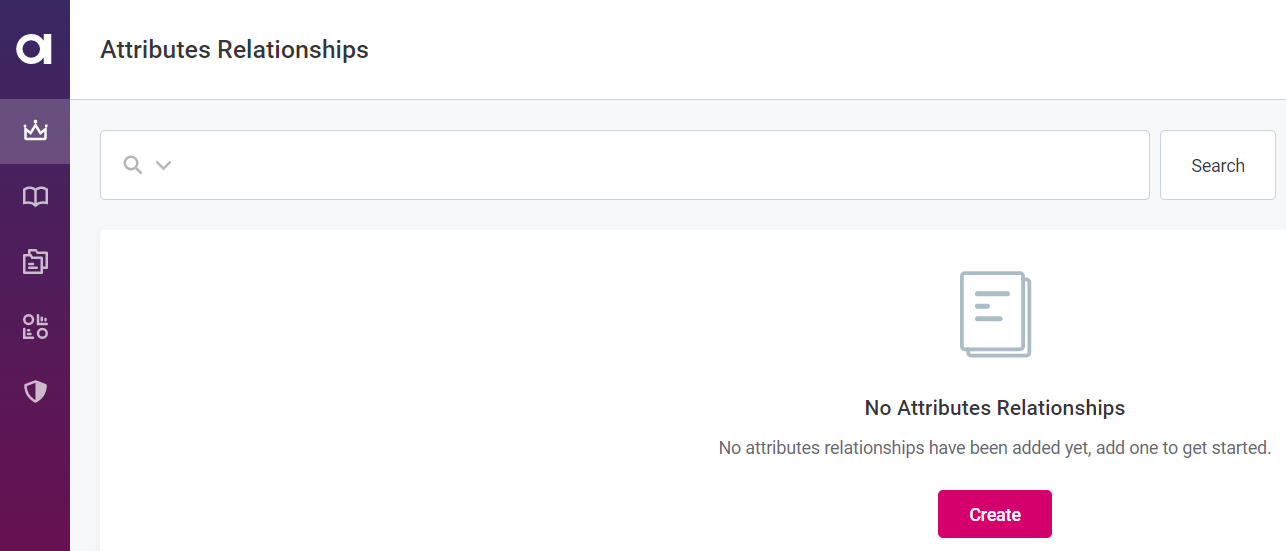
Once the upgrade is complete and the application switches back to the application mode, a new tab is displayed in the main menu.
You can move this tab to another position within the navigation menu, or hide it. For more information, see Left Navigation Menu. -
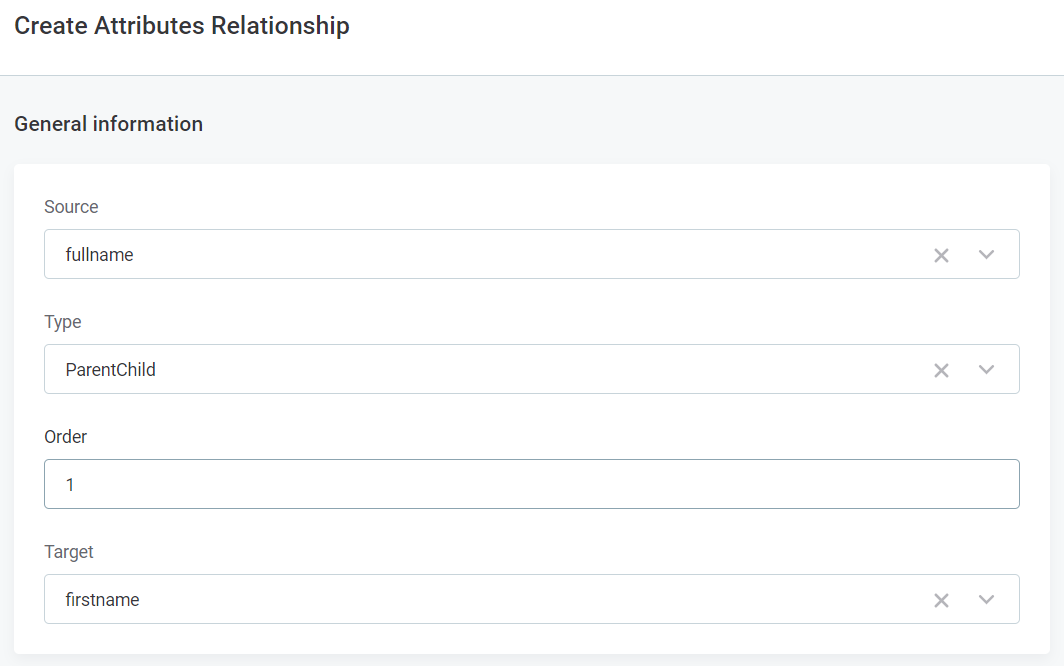
To set a new relationship between two attributes, on the newly added tab (Attributes Relationships), select Create and then set the relationship source and target entities, as well as the relationship type and order.
For example:
For more information about relationship types, see Configure Relationship Types.
Visualize relationships on the graph
To see custom relationships on the graph, modify the graph settings.
-
Go to Global Settings > Metadata Model.
-
Open the entity for which you want to enable configuring the relationship graph. For example, if a custom relationship is established between attributes, you need to edit the
attributeentity. -
In Traits, select Add Mmd trait and add the trait
relationships:enabled.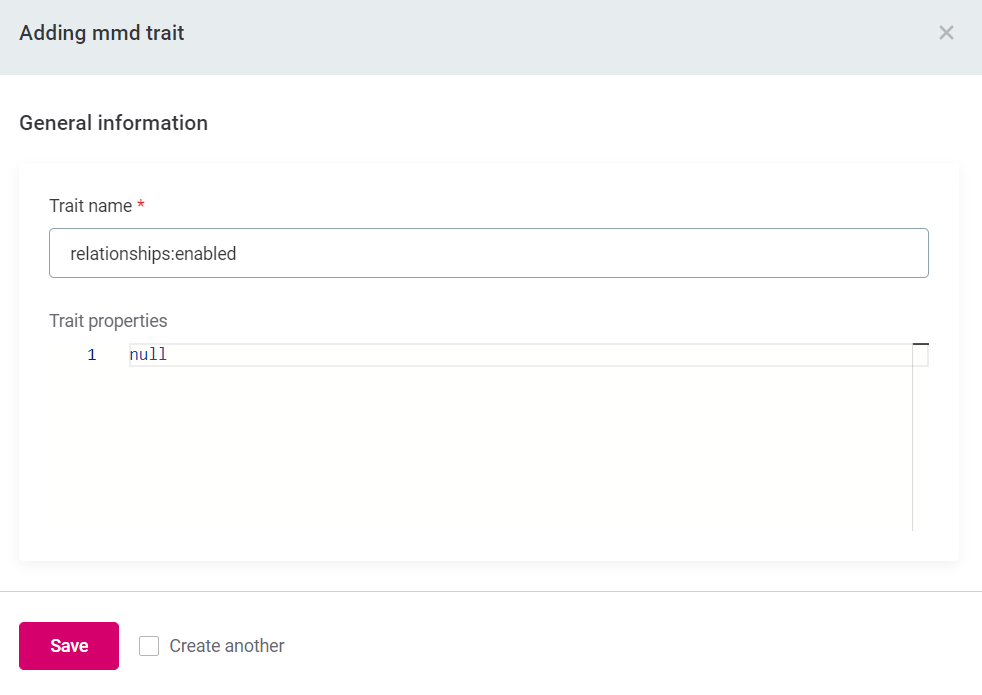
-
Select Save.
-
Go to the Global Settings > System Changes and publish the changes.
This includes switching to the maintenance mode, creating a database backup, and resolving any potential conflicts. For more information and step-by-step instructions, see System Changes, section Run and publish changes. -
Once the upgrade is complete and the application switches back to the application mode, you can proceed with configuring how the graph is visualized. For more information, see Configure Graph Visualization.
In the Allowed relationship nodes section, make sure to add the relationship type entity that you created earlier. For example, if you have created a custom relationships between attributes, add the node
attributesRelationship.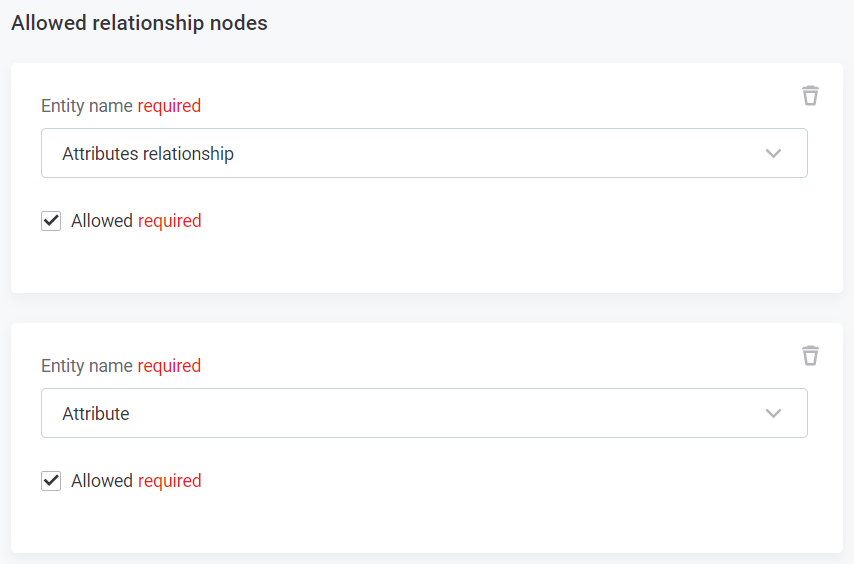
After you have configured the new graph visualization, the custom relationships can be seen on the Relationships graph.
Was this page useful?