
DPM and DPE Configuration in DPM Admin Console
DPM Admin Console features a Configuration tab that streamlines the process of configuring Data Processing Module (DPM) and Data Processing Engine (DPE).
The tab is divided into the following sections:
-
Runtime Configuration: Defines the global runtime configuration, previously specified through the
plugin.dqc-support.ataccama.one.dqc.runtime-config.defaultproperty. -
Connection Throttling Rules: Allows for the configuration of connection throttling rules, replacing the
plugin.jdbc-datasource.ataccama.one.dpm.resource-allocation.connectionsproperty. -
DPE Configurations: Lets you view and manage DPEs, including driver configurations and constraint settings.
-
Authorized Components: Provides the means for setting up and managing the authentication between DPM and DPEs before installing any DPE.
Access to DPM Admin Console is only granted to users with the admin or DPP_admin role, as specified in the ataccama.one.webserver.gql.allowed-roles DPM property.
For more information, see DPM Configuration.
|
The following guide explains how to use DPM Admin Console in order to configure DPM and DPE.
Runtime configuration
For each job, DPM generates a specific runtime configuration or receives it from ONE Desktop. However, it is also possible to extend those properties by supplying a global runtime configuration that is then merged with the generated one.
To configure the global runtime configuration file, use the XML editor available on the Runtime Configuration tab.

Any confirmed changes to the runtime configuration are applied immediately without restarting DPM, starting from the first next job that comes to DPM in the preprocessing state.
In case a configuration is already defined through the plugin.dqc-support.ataccama.one.dqc.runtime-config.default property, it is displayed in the editor as the initial value, where you can adjust it as needed.
The changes you make in the editor override any previous settings, even though the property value remains the same.
If the configuration is not yet defined, you can either write your configuration, or paste it in from another source, and then select Save. Alternatively, you can upload the configuration file from your machine by selecting Upload.
| If the configuration file you create contains syntax errors, your changes do not take effect. Make sure to carefully check the syntax of your configuration file before saving it. |
Once you are finished configuring the settings, you can download the configuration file in the XML format for backup or export purposes by selecting Download.
Data source configurations and credentials rotation
If your environment includes data source configurations that reference encrypted secrets, these must be updated during credentials rotation.
If connecting to the same data source using ONE Desktop or ONE Runtime Server, the change described here must also be made in the datasources.xml file located in your runtime configuration directory.
|
-
On the Configuration > Runtime Configuration tab, locate the
<dataSources>element and within it, the relevant data source entry (<dataSource>element). -
Replace the existing
passwordproperty with the new encrypted string generated from the encryption utility:<dataSources> <dataSource name="MySnowflakeSource" driverclass="com.snowflake.jdbc.Driver" url="jdbc:snowflake://myaccount.snowflakecomputing.com" user="myUser" password="<new-encrypted-secret>"> </dataSource> </dataSources> -
Save your changes.
-
Ensure the DPE recognizes and can successfully connect to the data source using the updated credentials. To do this, try testing the data source connection or browsing the source.
For more information about how to successfully manage secrets during credentials rotation, see Encryption Configuration
Connection throttling rules
Use this section to limit the number of connections used by ONE and to prevent issues caused by overconsumption of connections by the DPE jobs. This is done by limiting connections separately for DPE jobs and queries for previewing, testing, and browsing data source connections.
From this tab, you can also create new throttling rules or edit, enable, duplicate, or delete existing rules using the three dots menu.
Do not use the property plugin.jdbc-datasource.ataccama.one.dpm.resource-allocation.connections to configure connection throttling rules as any changes made to the property are ignored.
|
Create connection throttling rule
To create a connection throttling rule:
-
In DPM Admin Console > Connection Throttling Rules, select Create.
-
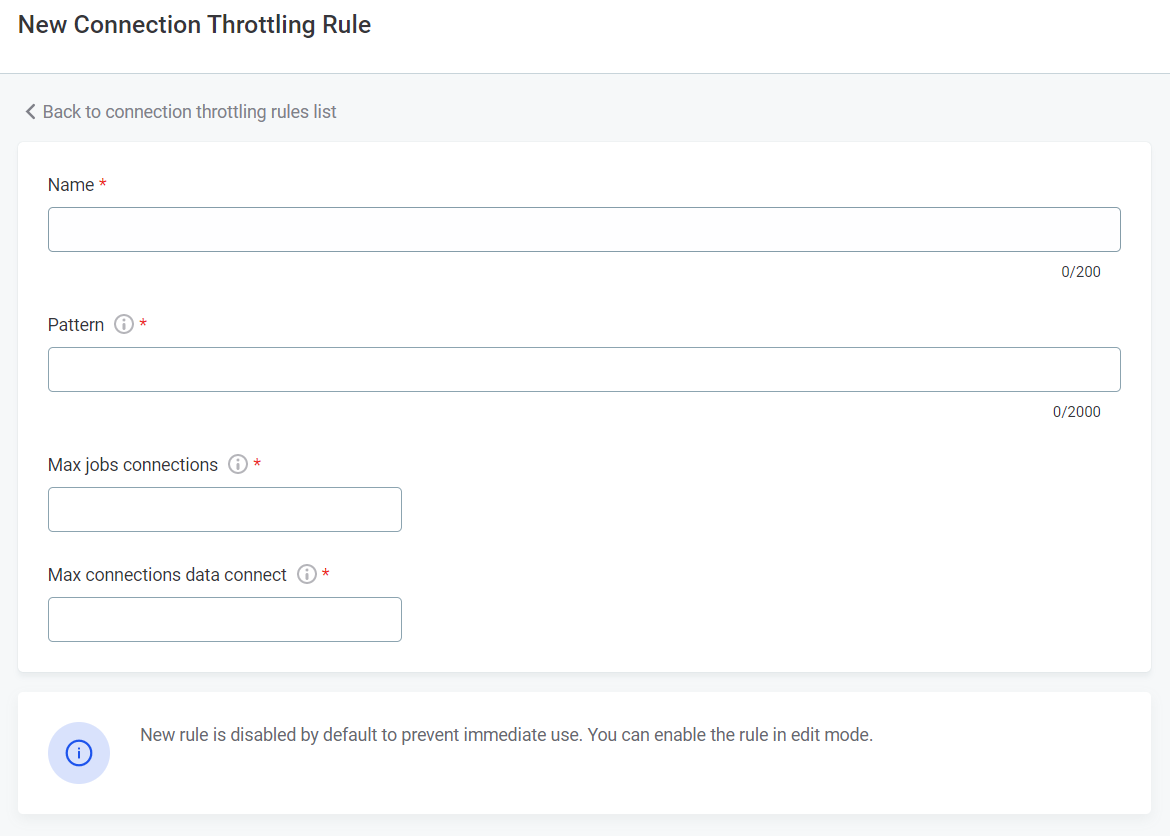
Provide the following information:
-
Name: A meaningful name for the throttling rule.
-
Pattern: A regular expression used to match the connection string of the data source, for example:
jdbc:oracle://183.121.078.56:1521>/.*,jdbc:postgres:.*.Make sure to use the correct syntax (see Pattern (Java Platform SE 12), otherwise DPE fails to run properly. -
Max job connections: The maximum number of connections that can be used for DPE jobs. Unused slots are automatically allocated for previewing, testing, and browsing data source connections if needed.
If set to zero, no threads are allocated and all jobs fail. If set to a value lower than is required by a specific job, the job fails immediately.
-
Max connection data connect: The maximum number of connections that can be used for previewing, testing, and browsing data source connections. Unused slots are not available for other DPE jobs.
If set to zero, any available slots are used to allow for catalog browsing.
Discard your changes at any time by selecting Back to connection throttling rules list. This redirects you to the rules listing without saving your changes.
-
-
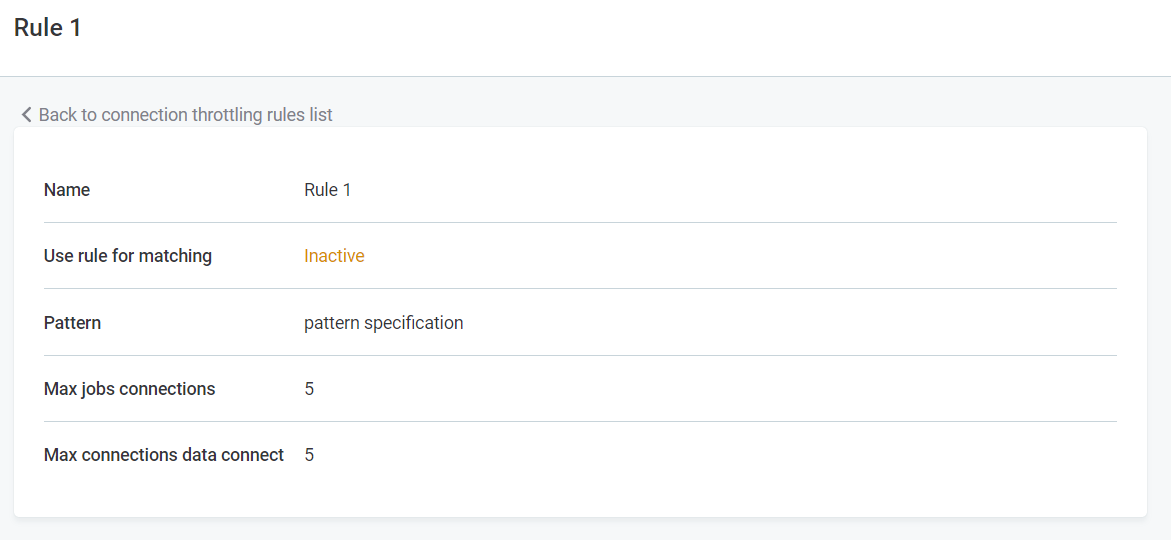
Save your changes. A summary of the newly configured rule is now displayed for your review.
-
To use the rule, you now have to enable it. To do this, go to Connection Throttling Rules and in the three dots menu for the selected rule choose Enable rule.
-
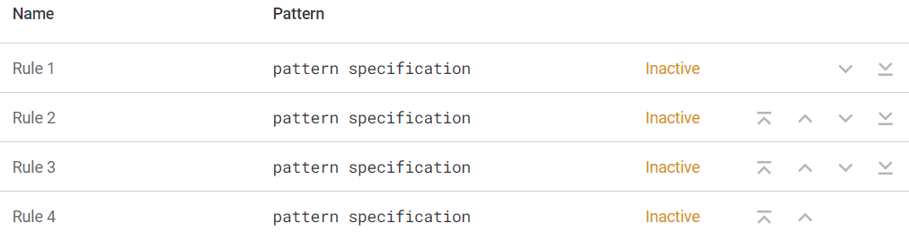
If needed, adjust the rule order on the Connection Throttling Rules tab using the arrows next to the rule.
If multiple rules match the connection string of a particular connection, the order of the rules in the connection throttling rules list determines how they are applied to that JDBC connection string. Higher priority is given to rules at the top of the list.
DPE configurations
The DPE Configurations tab displays a list of labels that are used to identify and group DPEs. From this list, you can view and manage DPEs that are associated with each label.
Select a label from the list to display the details for the corresponding DPE or group of DPEs. On the details screen, there are two tabs: Connectors and Capability Overrides.
Configure DPE labels
To configure the DPE label, use the ataccama.one.dpe.label DPE property.
By default, the property is set to dpe, which means that all DPE instances where the label is not specifically set are grouped together.
You might want to group DPEs according to certain criteria, such as the connector settings for on-premise deployment.
To do this, set the ataccama.one.dpe.label property for each DPE to a value that is unique to that DPE instance (for example, dpe-onprem-1 and dpe-onprem2).
This would create two separate groups of DPEs, one for each connector setting.
|
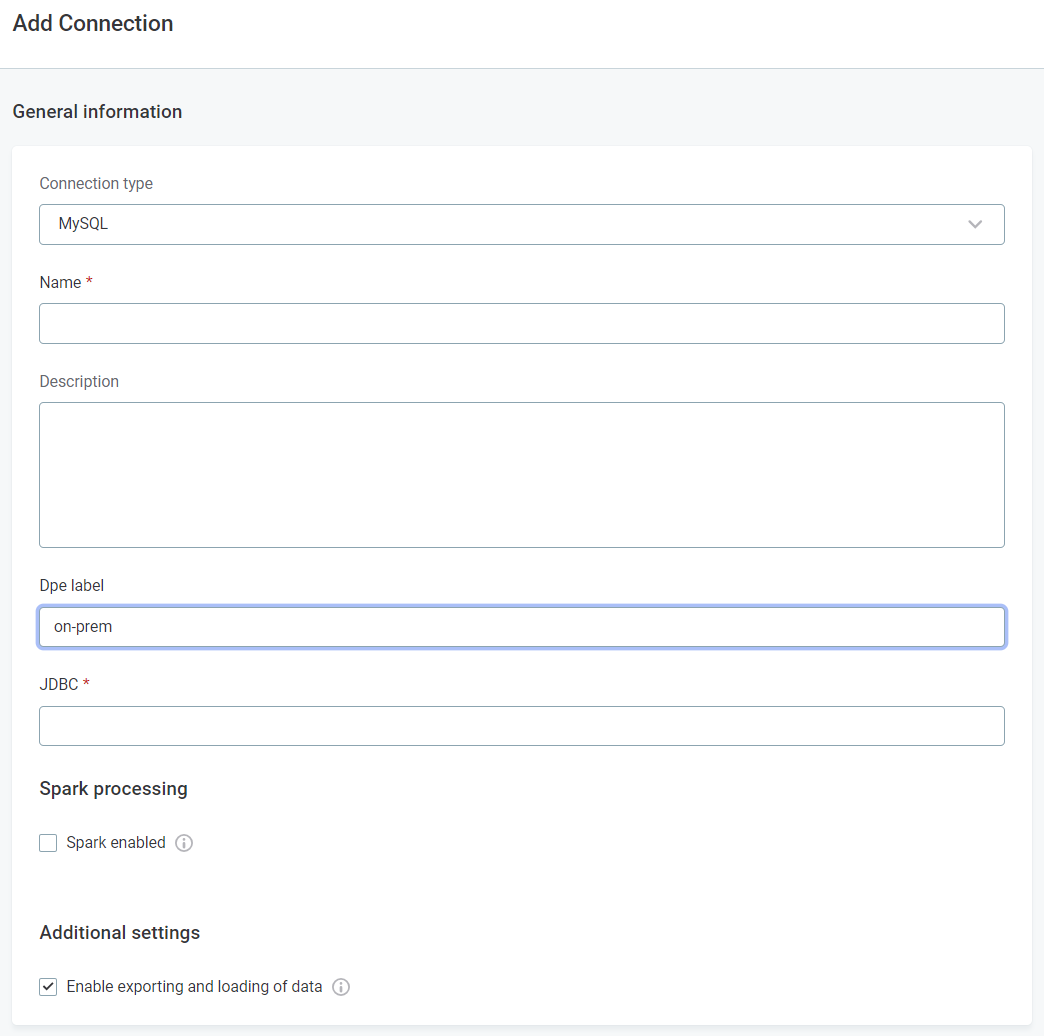
Using DPE labels, you can assign the processing of a data source to a particular DPE. When creating the data source connection in ONE, use the Dpe label field to define which DPEs the data source should use.
For example, if you have a data source which is accessible only on-premise, and you, therefore, need to deploy a hybrid DPE and configure the network access so this hybrid DPE can access the data source, we recommend assigning a DPE label to the DPE with access (for example, on-prem) and specifying this label when setting up the data source connection.
Otherwise, another DPE which does not have access can be chosen when jobs are run on that data source, and the jobs would then fail.
Specify DPE labels when you set up a new data source connection, or edit an existing connection. This is done in Knowledge Catalog > Sources > [Your source] > Connections.
| DPE labels are specified in the connection configuration of a data source. See Connect to a Source. |
|
Make sure that DPEs with different configurations do not have the same label. If you need to make changes only to a specific instance, give it a unique label. Shared labels should only be used when you expect the configuration to be identical in the same DPE replicas (for example, for cloud DPEs). |
| Spaces in label names are not supported. |
DPE labels in plan execution and workflows
By specifying a DPE label, you can execute plans or workflows on a specific group of DPEs.
| Ensure that the DPE labels used in plans, workflows, or data source connections exactly match the labels configured in DPM Admin Console. |
-
In ONE Desktop: When executing plans remotely, specify the DPE label in the Run Configuration to select the DPE that will execute your plan.
For instructions about how to set the DPE label in ONE Desktop, see Remote Plan Execution. -
In workflows: When using the Run DPM Job task in a workflow, you can specify the DPE label in the task configuration.
For more details, see Run DPM Job.
Configure drivers
Use the Connectors tab to set up the properties needed to configure data sources in DPE. For a comprehensive list of all available configuration properties, see Data Sources Configuration.
To configure drivers, choose a driver from the Connectors tab and select Edit:
-
Configure the properties using the designated fields.
Do not rename default connectors, otherwise DPE might not run as expected. Instead, if a connector is not needed, you can disable it, or create a copy to support multiple configurations. When configuring cloud connectors, you can specify the file format discovery limit, which determines how many characters of a file stored in the cloud should be read to determine its file format. -
Enable or disable the driver by selecting or clearing the Enabled option.
If you disable a driver, you need to restart your DPEs for the change to take effect. To do so, go to DPM Admin Console > Engines, and in the three dots menu of the DPE you want to restart select Restart engine.
Make sure to save your changes once you are finished editing.
Alternatively, you can also configure the drivers directly from the Connectors tab. Select Edit to:
-
Enable or disable drivers (select the drivers to enable them).
-
Edit, duplicate, or restore a driver using the three dots menu.
Disabled JDBC drivers are grayed out. 
Configure capability overrides
Capability overrides are properties that allow you to customize the capabilities of DPE for specific purposes. Changes to capability overrides are immediately applied to the next submitted job or task.
For more information about the constraining properties, see Constraints Configuration.
On the Capability Overrides tab, you can:
-
Add a new capability override.
-
Select a capability to see the details.
-
Turn a capability on or off by selecting or clearing it.
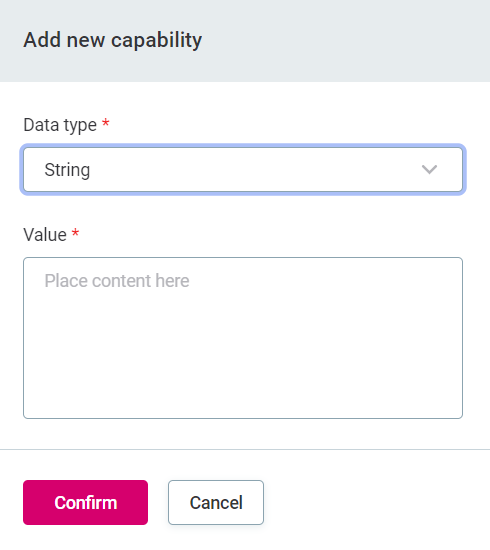
To add a new capability:
-
On the Capabilty Overrides tab, select the capability you want to edit.
-
Select Add capability.
-
Provide the data type and value.
-
Select Confirm.
Authorized components
This section explains how to establish the communication between DPM and DPE modules.
Cloud deployments
Cloud DPEs have authentication keys already set up, so no extra steps are needed for communication with DPM.
Hybrid deployments
For hybrid DPEs, set up the authentication manually. Otherwise, DPM and DPE fail to communicate securely. For more information about hybrid deployment, see Hybrid Deployment.
Make sure to set up the authentication between DPM and DPE prior to installing DPE. This includes obtaining the DPM public key, generating a private key for DPE using the tool provided with the Ansible installer, and adding the public key and associated properties of DPE to DPM.
To do so:
-
Generate a private key for on-premise DPE. For more information about how to generate the key, see How to Generate JWT Keys.
To ensure that DPM can authenticate DPE, propagate the associated public key and properties of each DPE to DPM as part of step 3b in this process.
-
In DPM Admin Console > Authorized Components, select Add component.
-
Configure the DPE public key and associated properties:
-
General information
-
Name: A meaningful name for this authorization.
-
-
Public key: The public key for DPE.
-
Name: A meaningful name for this public key.
-
Fingerprint: Copy the value generated in step 1.
-
Content: Copy the value generated in step 1. The value must use JSON syntax.
-
-
Service roles: The user role used to create the service identity during authentication.
-
Service roles name: Set to
IMPERSONATIONby default.To set the service role name, configure the
ataccama.one.config-client.authentication.internal.jwt.impersonation-roleproperty.
-
-
-
The DPM Public key section displays values defining the public key for DPM. Copy and paste these values to use during the DPE installation process.
You can find the DPM Public key values under Authorized Components during the addition process. -
Save your changes. This opens a list of all your authorized DPEs.
Here you can:
-
Delete an authorization using the three dots menu.
-
Select an authorization to configure it, including the option to add a new key in the Public keys section.
You can also access the list of all the authorized DPEs from DPM Admin Console > Authorized Components.
-
Was this page useful?