
Validation Components
What are components?
Component rules, or components, are ONE Desktop files that can be used for three possible data processing steps:
-
Validation components: Used for checking whether the loaded data meets quality rule requirements, and for sending notifications or identifying the values that are not.
-
Transformation components: Used for creating Virtual Catalog Items (VCIs).
-
Post-processing components: Used for any kind of post-processing actions on the data in accordance with the defined rules.
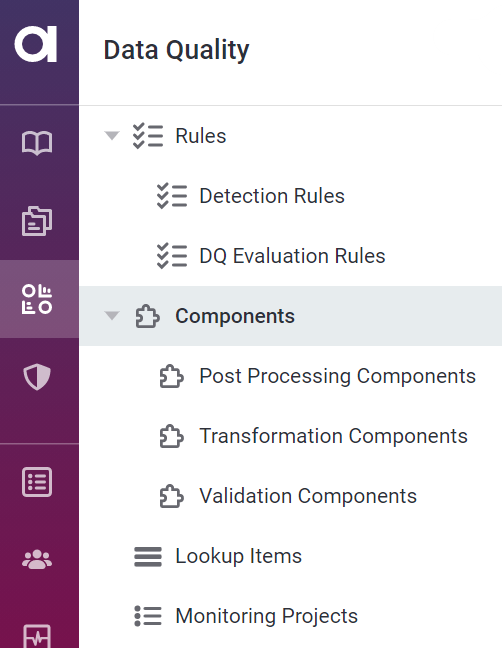
Where can I find them?
In Data Quality, navigate to Components. There you can see list of all components, as well as the three component types separately in the corresponding subsections under the Components section.
Working with validation components
|
In ONE, it is possible to create only validation components. Creation of transformation and post-processing components is initiated from ONE Desktop. For instructions, see Virtual Catalog Items and Post-Processing Plans, respectively. |
To create and use validation components, follow these steps:
-
Create a component rule in ONE. See Create a component rule.
-
Define component rule logic in ONE. See Define component logic.
-
Implement component logic in ONE Desktop. See Implement component logic in ONE Desktop.
-
Use component when creating rules. See Create a rule using component.
Create a component rule
-
In Data Quality, navigate to Components. This screen contains the general list of all components.
-
Select Create.
-
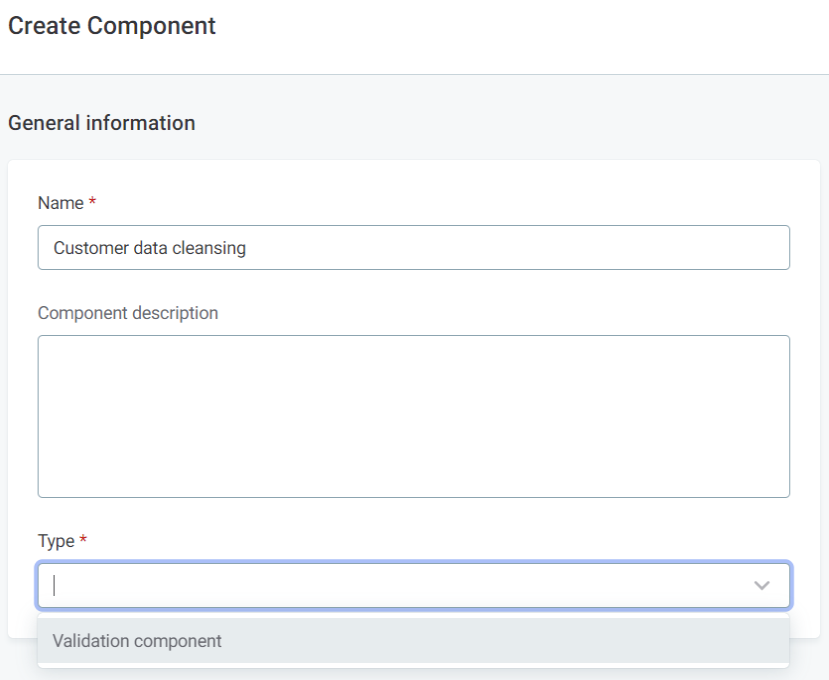
In the General information section, provide the following information:
-
Name: The name of the component.
-
Component description (optional): A description of the component and how it should be used.
-
Type: Select Validation component.
-
-
Select Save. This creates a draft of the component.
-
Before publishing or submitting an approval request, you need to describe the component logic and its input attributes.
This is done on the Implementation tab. To continue, see Define component logic.
Define component logic
-
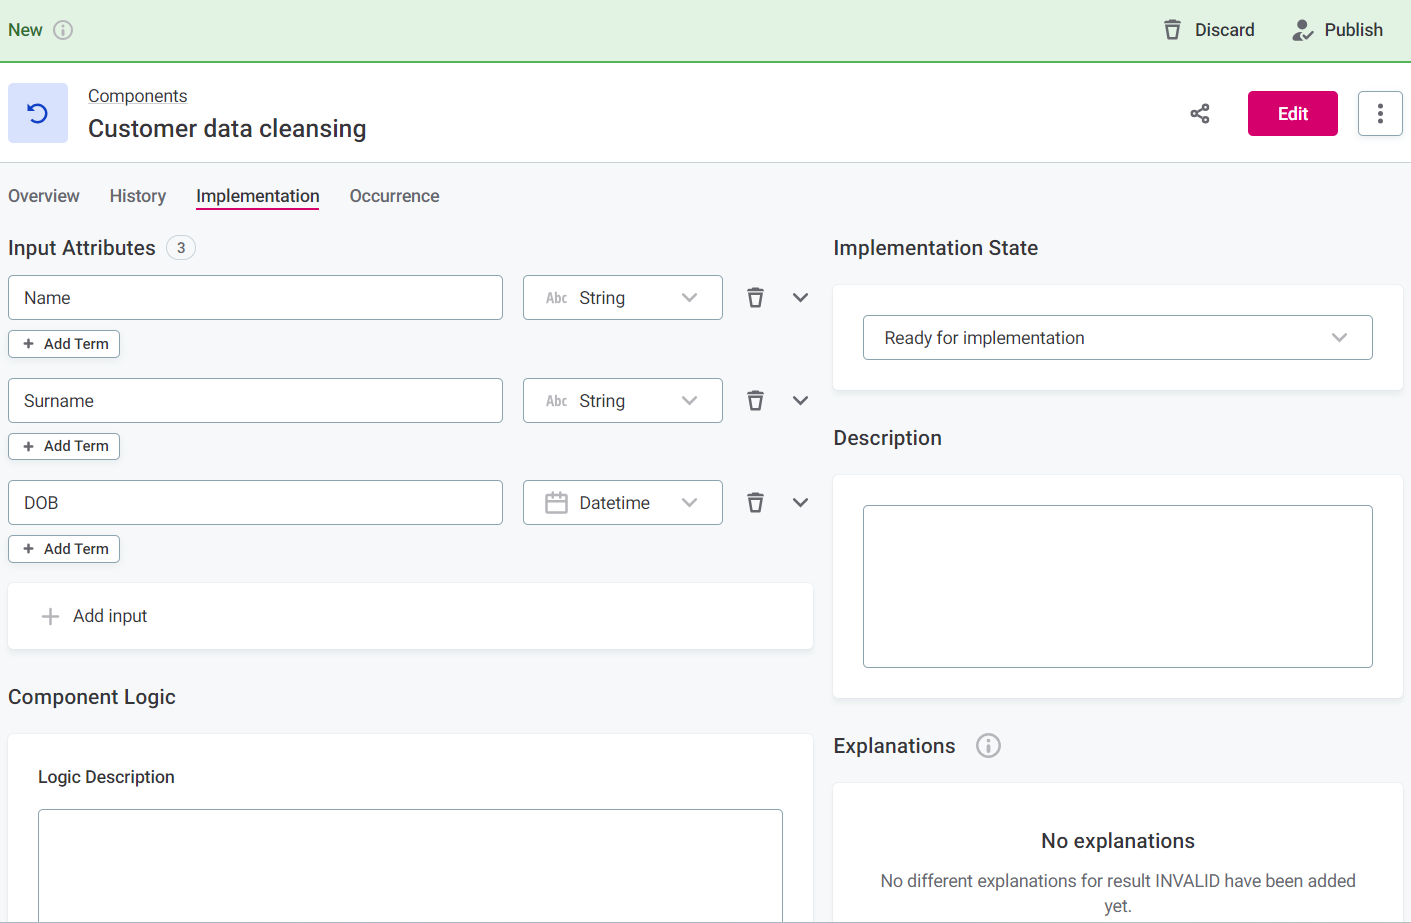
Navigate to the Implementation tab of the component and fill in the following:
-
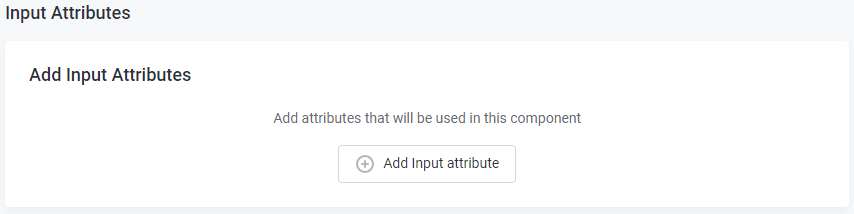
Input Attributes: Select Add Input Attributes to set input attributes.
-
Component Logic: Explain the component logic to the ONE Desktop user who will be implementing the component.
-
Implementation state: Once your component is configured, set to Ready for implementation.
-
Description (optional): A description of the component and how it should be used.
-
Explanations: Explanations are propagated to ONE Desktop where they are used in rule logic as reasons why the rule is invalid.
-
-
After the changes are implemented, they need to be published.
-
After the changes are published, the component is ready for implementation in ONE Desktop.
Implement component logic in ONE Desktop
The component implementation in ONE Desktop is done typically by advanced users (power users). Requirement for such implementation is a local installation of Ataccama ONE Desktop tool. For instructions, see Component Steps.
If you don’t have access to ONE Desktop, contact your admin.
Create a rule using component
The following instructions are specific to creating a rule using a component. For more information about creating rules, see Create DQ Evaluation Rule.
-
Navigate to Data Quality > Components and make sure that State of your component has changed to IMPLEMENTED.
This means that the component has been implemented in ONE Desktop and now you can use it in your rules.
-
Navigate to the Rules section in Data Quality and create a new rule, corresponding to a component.
-
Navigate to the Implementation tab of the newly-created rule.
-
In Select Rule type, select the rule dimension.
-
Select Add Input Attribute and set the input attributes. They must be the same data type as input used in the component.
-
Change Rule logic to Component and confirm Change Type.
-
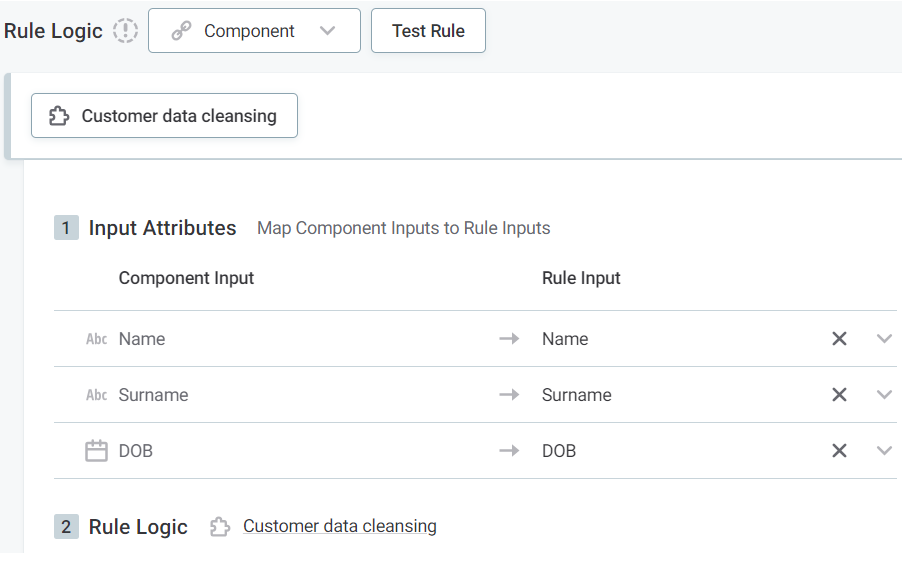
Click Select a Component and select your component.
-
Map attributes from component to rule.
-
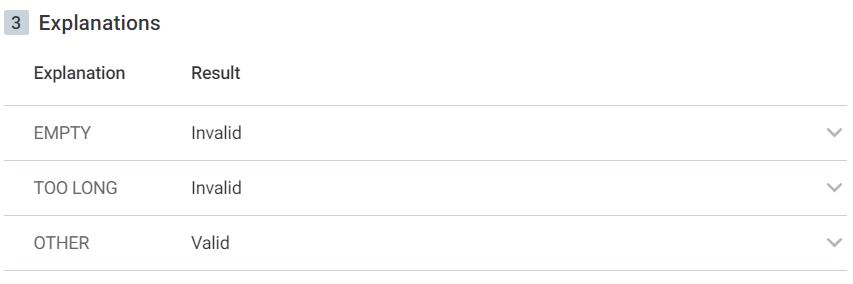
The Rule logic > Explanations section lists explanations defined for the component.
Map each Explanation with a Result. The list of available results depends on the selected rule dimension.
-
-
After the changes are implemented, they need to be published.
Was this page useful?