
Component Steps
| We recommend checking out Build Plans and Run Plans before reading this article. |
What are component steps?
Component steps, also known as simply components, are files very similar to plans. They are very convenient if a part of your solution can be reused in other plans or as a way to break down a big plan into several parts.
Components are constructed from steps (and possibly other components) but have the following unique features:
-
Components behave like steps inside other plan files and can be reused multiple times.
-
Components can have any property inside their constituent steps mapped as a parameter called from an outside plan (see Map a property as a parameter).
-
Components can be launched directly from the console with a parameter (see [How to run a component from a command line with a parameter]).
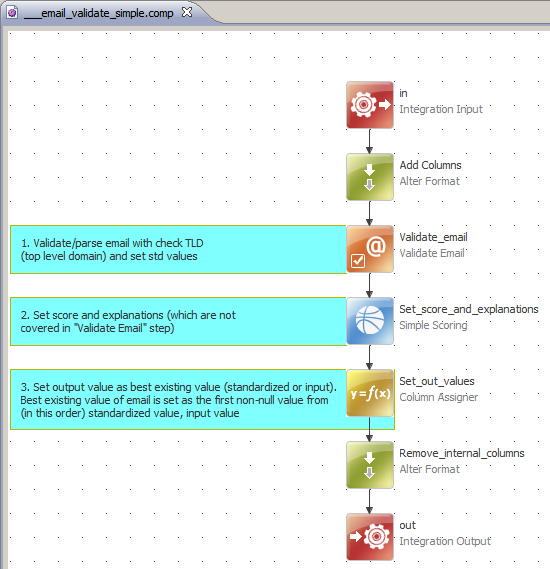
The following is an example of a component meant to be placed in the middle of a plan and designed to validate an input email address.
Component files have a .comp extension.
Ataccama offers 76 ready-made components, 54 of which are free, for data cleansing, validation, and standardization, some of which are country-specific solutions, for example, a component for validating and standardizing US phone numbers. For detailed information, see Components and Modules.
Where are components located?
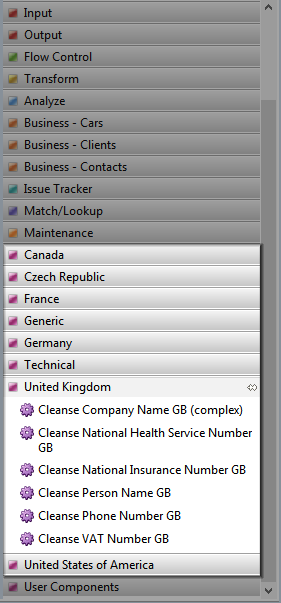
Free components available with Ataccama products are located in the Palette along with steps:
Paid components and component modules (multiple component packages) need to be installed separately.
How to install paid components and modules
To install a module:
-
Extract the ZIP archive to
[product_installation_folder]/templates/projects/. -
Start (or restart) ONE Desktop.
-
In the File Explorer, right-click DQ Projects > New > Project > Project from template.
-
Choose the package to deploy (for example, Data Masking Module (CA)) and select Finish.
-
Set up a database connection if required by components in the module: see the component documentation in the
docfolder.
To install a component:
-
Extract the ZIP archive to your project folder.
-
Set up folder shortcuts if not already set:
Shortcut name Folder Description COMPONENTS/[your_project_folder]/componentsAll components folder
TESTS_ROOT/[your_project_folder]/unit_testsAll unit tests folder
DATA/[your_project_folder]/dataLookups, for example,
Data/ext/src
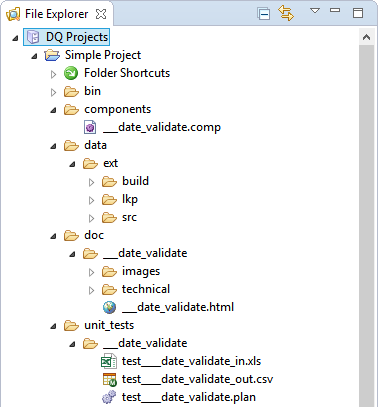
Components folder structure
Ataccama components usually come as a package with the following structure:
-
components - Contains components themselves (
.compfiles). -
data - Contains lookups used by the component, lookup build plans, and source data for lookups.
-
doc - Contains documentation for each used component.
-
unit_tests - Contains test plans, test input and output data.
Use a component in a plan
Integrating component steps in a plan is similar to using any other step:
-
Drag the component from the Palette (or File Explorer for manually installed or created components) and connect it to other steps, like you would any step. All the necessary files are automatically copied into your project; mandatory folder shortcuts (DATA, COMPONENTS, TESTS_ROOT) will be set (see Components folder structure).
Some components use the same lookups, so when one such component is in use and another one is dragged to the canvas, you are asked whether you want to replace the files. We recommend selecting Skip All.

-
Double-click the component and map the input and output columns created in the component to the columns in the plan in one of the ways shown. This is needed to assign the data flow from the component to the plan.

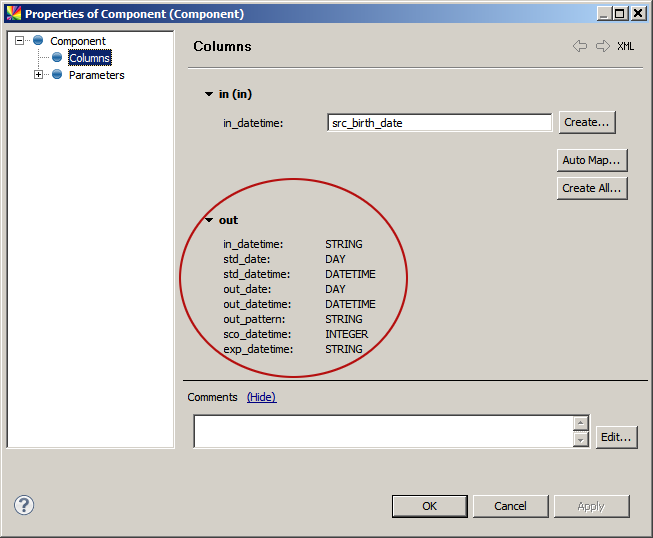
In the previous example, we would use a Create All option since we have not added any shadow columns in Text File Reader or Alter Format steps. We would clear the in_datetime input column since we are going to use a different column from Text File Reader. Some components do not have mappable output columns. This happens because the data format is changed inside the component. For more information, see Why some components do not have mappable output columns. -
If the component has any property in any of its steps mapped as a parameter, it appears in the Parameters node of the component properties. Change parameter values where necessary.
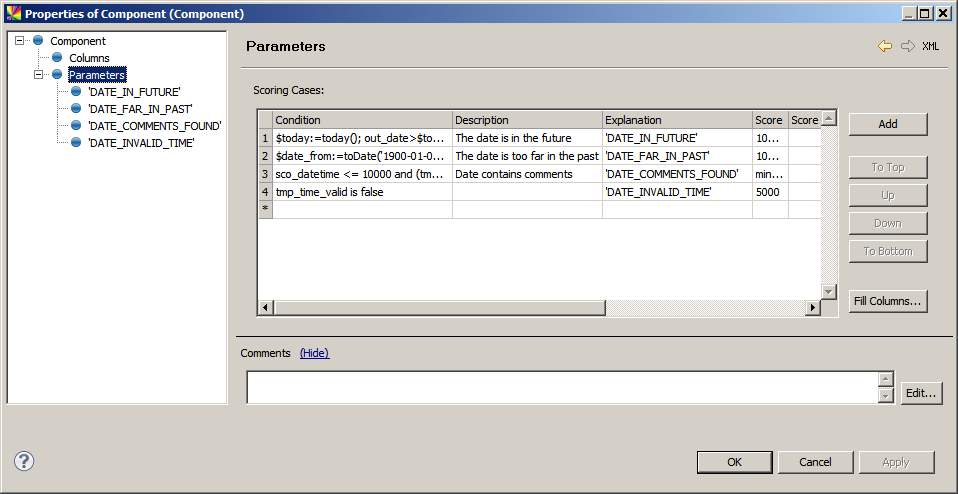
In the following example, the component has scoring cases mapped as a parameter. This means that, if needed, we can edit scoring conditions and results for each scoring case. See Map a property as a parameter.
The component is now configured.
Create a component
Creating a component step is similar to building a plan, and depending on how it is meant to be used, it must start and end with certain steps, depending on their position in the plan.
-
At the beginning of a plan: Must begin with an input step connected to an actual data source, that is, not Integration Input.
-
In the middle of a plan: Must have at least one input endpoint with Integration Input and one output endpoint with Integration Output.
-
At the end of a plan: Must have at least one input endpoint with Integration Input and end with an output step other than Integration Output (so that data is actually written somewhere).
For information about building and executing plans, see Build Plans and Run Plans respectively.
Create a component while building a plan
A component can be created immediately while building a plan.
-
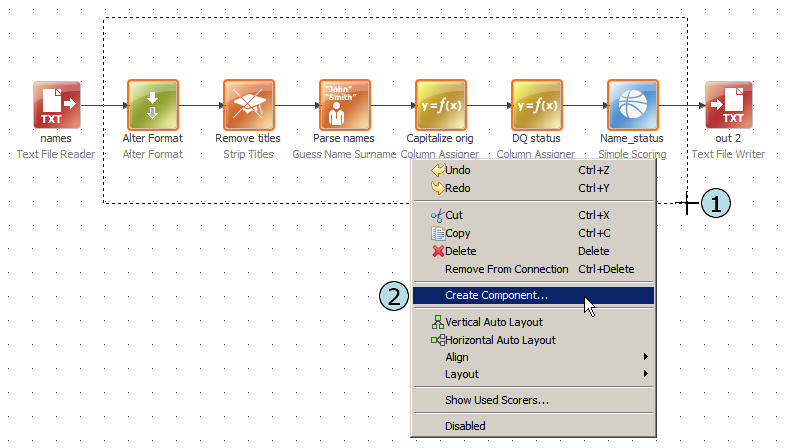
Select the steps in the plan from which you want to create a component.
-
Right-click one of the selected steps and select Create Component.
-
Configure component options:
-
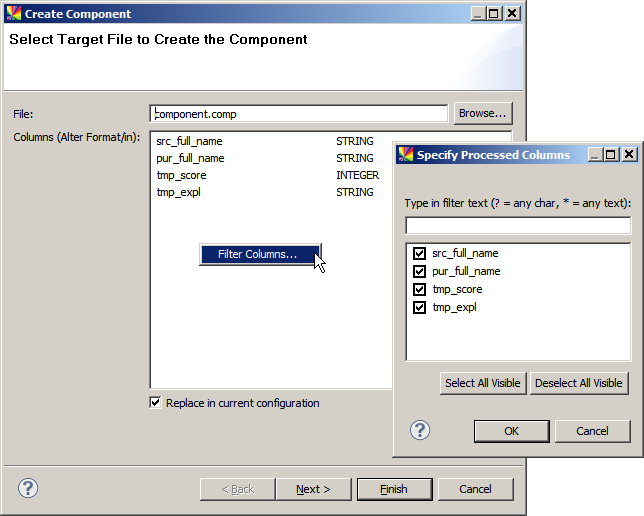
Enter the path to the component and its name.
-
Select the columns to be created in the Integration Input step of the component (columns present in the flow before the first step). If the first of the selected steps in the original plan is Alter Format, columns are created there (see the following image).
-
Select Replace in current configuration to replace the step with a component directly in the current step (otherwise, the selected steps remain in the plan, and a component is created in the specified location).
-
-
Optionally, select Next and choose an icon for the component. The image must be a PNG, JPG, or a GIF file and 48 x 48 px in size.
-
Select Finish.
If you selected the Replace in current configuration option in step 3, the plan now includes a component.

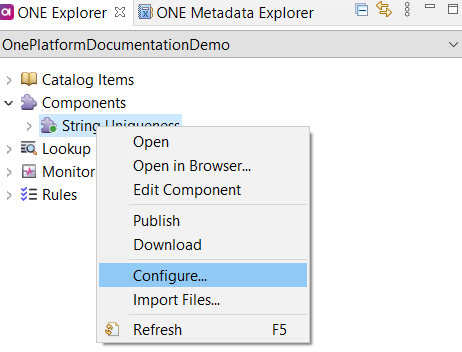
Configure a component in ONE Desktop
You can configure the state and the main file for ONE components in ONE Desktop:
-
Right-click a ONE component and select Configure.
-
You can edit Implementation state and select the main file in order to determine which components are nested.
Map a property as a parameter
Mapping a step property as a parameter allows setting a different value for that property each time a component is used.
For example, when using the Ataccama Derive Name of Day from Date component, you can specify values for the following two parameters:
-
Language to be used when generating the output names of days.
-
Whether to use abbreviated or full names of days.
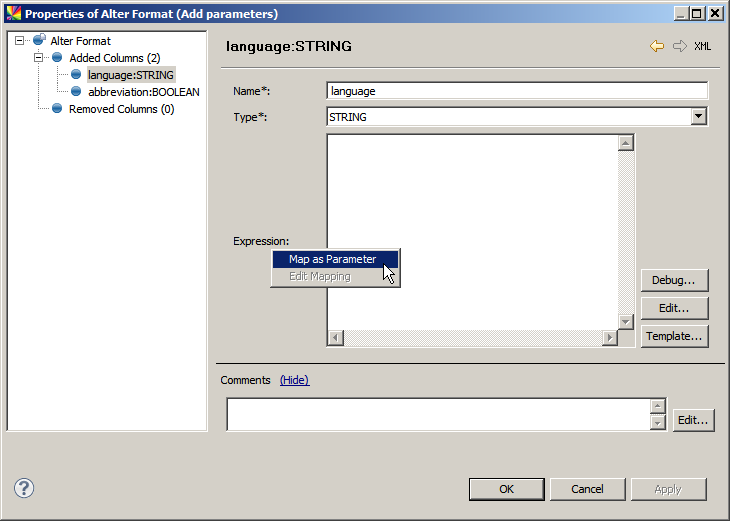
Let’s see how this works. In our component, the Add parameters Alter Format step has two columns added to serve as parameters. Let us enter the step properties to map the language column as a parameter:
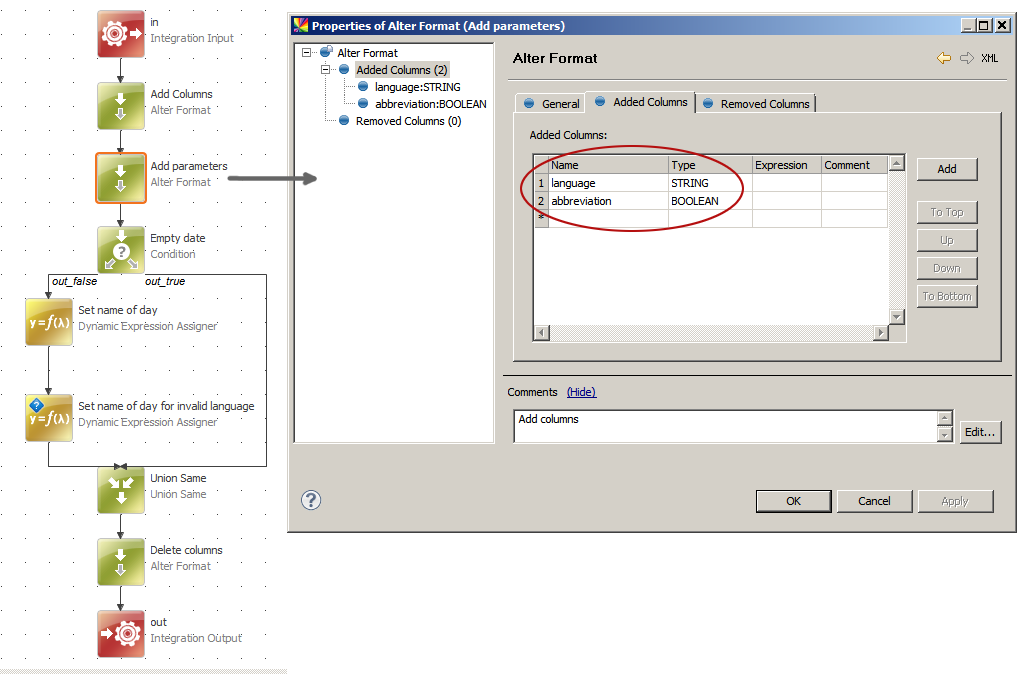
Now let’s enter the language column properties by double-clicking the one next to it and map the Expression property as a parameter (right-click Expression and select Map as Parameter):
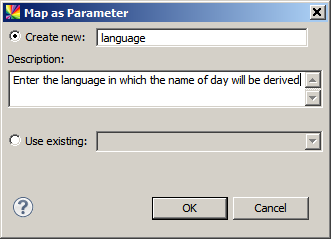
We now enter the name of the parameter and description, which will help when the parameter is used in an outside plan (or another component):
After you select OK, a small P sign appears next to the Expression property:
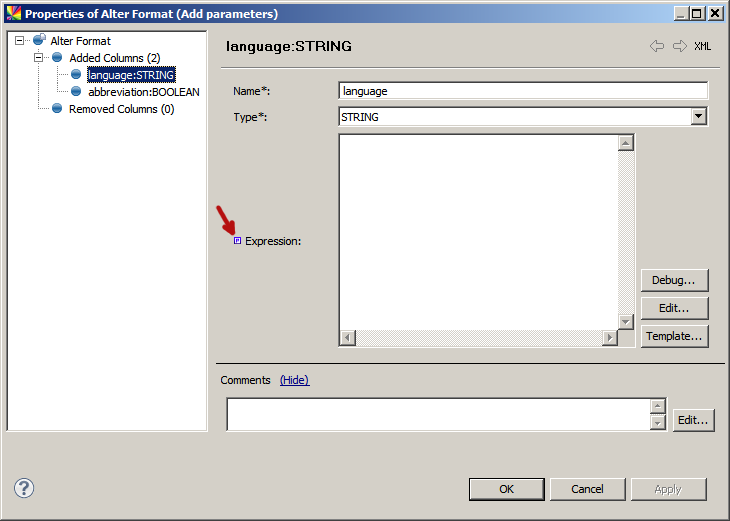
You can edit the mapping by right-clicking Expression and selecting Edit mapping.
After mapping a property as a parameter, you can fill in a value to the property, which will be used as the default value if the parameter value is not provided.
|
When you use the component with a parameter in a plan, its name is displayed capitalized. If the name includes more capital letters, it is displayed as separate words. For example:
|
Why some components do not have mappable output columns
It might sometimes happen that when you try to use a component in a plan (or other component) and map output columns, you see something similar to the following in the component properties:
This happens because the data format inside the component changes. In other words, new records are created from input data, so the columns created in the plan to the output columns are created inside the component because the records before entering the component have different identifiers than after leaving it.
Some of the steps that affect data in this way are Join, Representative Creator, Group Aggregator, and Union.
Run a component from a command line with a parameter
One additional benefit of components mappable attributes is the possibility of independent parametrized launches, that is, directly running the component from the command line and passing parameters. This feature comes in handy when it is necessary to parametrize the File Name attribute of one of the Reader steps (for example, Text File Reader). This way, components act like plans: they do not have to be included into plans but can be run independently.
For example, consider the following component:
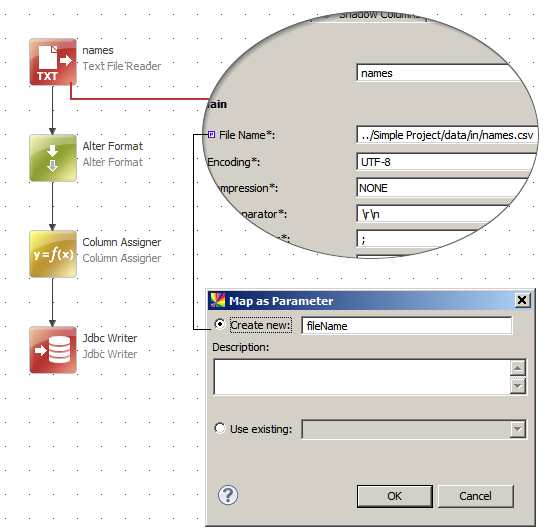
The component starts with Text File Reader that has the File Name attribute mapped as the fileName parameter. Some transforming logic (Alter Format, Column Assigner) follows. The component ends with Jbdc Writer, which writes data to a database table upon each launch.
The command for launching the component would look similar to the following:
runcif.bat -runtimeConfig "../server/etc/default.runtimeConfig" -params.fileName="data/in/names.csv" "../../workspace/project/component.comp"The -runtimeConfig option is necessary because the component uses a database, which must be defined in the runtime configuration file.
It is also possible to parametrize the File Name attribute of a Writer step (for example, Text File Writer), to include, as an example, today’s date into the file name.
Was this page useful?