
Databases
All Ataccama solutions use databases in one way or another. They can be used as data sources and repositories for storing data. Profiles can be created from data stored in databases too.
Connect to a database
To connect to a database:
-
Right-click the Databases node in the File Explorer and select New Database Connection.

-
Configure the connection and select the environment in which to create the connection.
-
Database type: The database connection type.
-
Connection name: The name for the new database connection.
-
Host: The hostname or IP of the database host.
-
Port: The port allocated for the database connection.
-
Database name or Catalog: The name of the database instance located on the host.
-
Username: The username used to connect to the database.
-
Password: The password used to connect to the database.

-
-
To set additional JDBC properties for this data source, select Edit Driver Properties:
-
Name: Specify the name of the JDBC property, for example,
ata.jdbc.aad.clientSecret. -
Type: Select either a value or a file.
-
Encrypted: Select this to encrypt the value. Strongly recommended for passwords and other secrets.
-
Value/Filename: Enter a value, for example,
keyvault:SECRET:snowflake-ad, or browse for a file.For more information about driver properties, see Add Driver Properties.
-
-
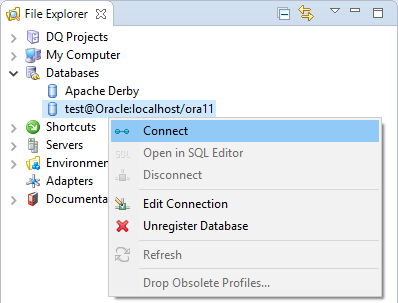
After you set up the database connection, the database is shown in the Databases node in the Explorer panel. To connect to the database, right-click the connection name and select Connect.
Execute SQL queries
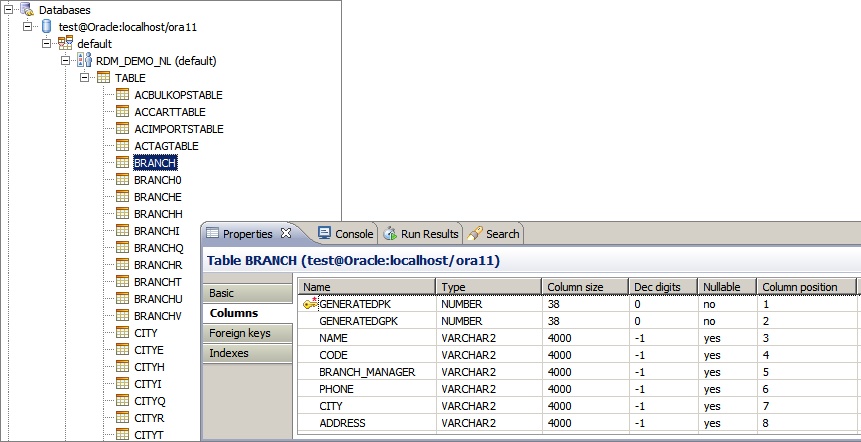
To view the results of an SQL query on a table, double-click the table.

A default query is shown, listing all table entries (grouped in batches if the number of rows is large). To change the query, edit the query text and select Execute. To retrieve more results from the query, select Next Batch or Read Rest to show all results.
To learn how to use data from a database in a plan, refer to the JDBC Reader step documentation in the product Help (Help > Help Contents).
Install database connectivity drivers
ONE Desktop uses the Java Database Connectivity (JDBC) API for connecting to databases. JDBC drivers are available for most database engines and are distributed as a component of the database engine or separately as connectivity components.
The licensing terms do not always allow distribution of these drivers with Ataccama products. Therefore, only a basic set of drivers for the most common databases is shipped. You can download and install additional drivers on your own.
For security reasons, database drivers are not transferred to DPM when remotely executing plans. Make sure the file name (case insensitive) of the database driver is the same in both your DPM instance and in ONE Desktop, for example, the PostgreSQL driver is called "Postgresql" on DPM and "PostgreSQL" in ONE Desktop > Ataccama DQC > Database.
Bundled database drivers
The database drivers that are shipped with the product are installed automatically when ONE Desktop is started for the first time. For the list of the drivers, see Supported Data Sources.
Install custom drivers
To install additional (custom) database drivers:
-
Download the required driver, usually an archive.
-
Extract the archive to the desired location.
-
Go to Window > Preferences > [your product] > Database.
-
Add or edit a database driver:
-
In the case of a preconfigured driver (that is, a driver that is already on the list, for example, MySQL) double-click it.
-
In case you want to add a new database driver, select Add.
-
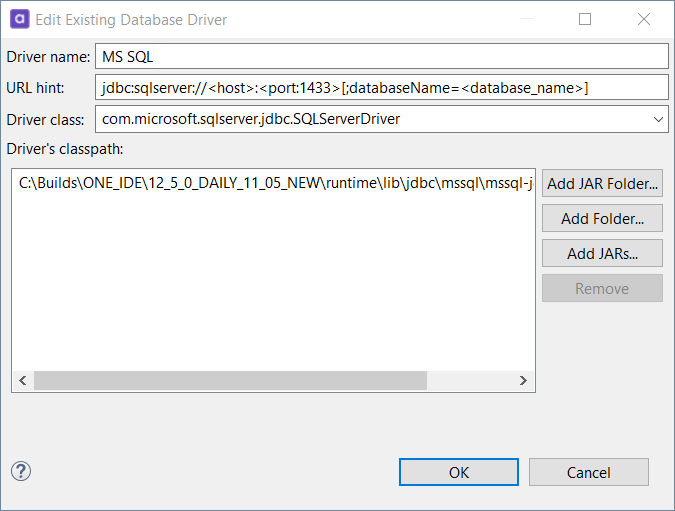
Provide the following information:
-
Driver name: The name of the database. This is used in the Database type dropdown when adding a new database connection.
-
URL hint: The hint of the correct format for the JDBC string supported by the database driver in question, for example,
jdbc:mariadb://<host>:<port:3306>/<database_name>. -
Driver class: This is automatically filled once you add the driver’s classpath property.
-
Driver’s classpath: There are three options for adding the driver’s classpath:
-
Add JAR Folder: Adds all
.jarfiles in the path by adding awildcard, for example,C:/Drivers/DBs/MariaDB/*. -
Add Folder: Adds the path of the browsed folder, for example,
C:/Drivers/DBs/MariaDB. -
Add JARs: Allows you to select specific
*.jarfiles from the folder.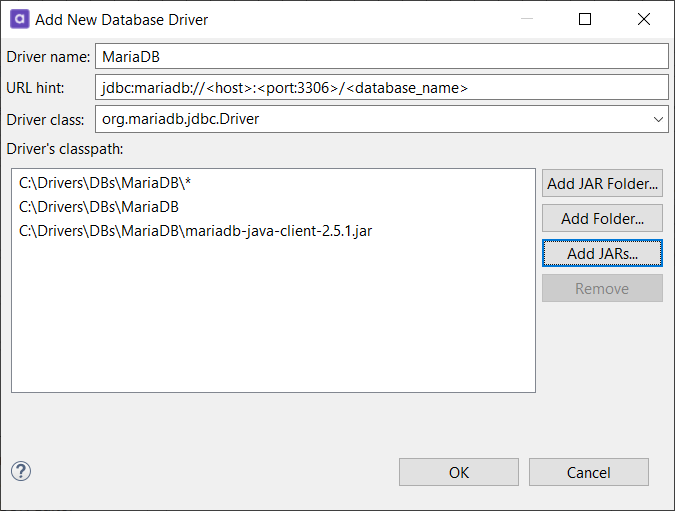
-
-
-
-
Select OK to finish.
The configured driver has a green light and YES in the Configured column of the table.
Troubleshooting
Amazon Redshift
The Amazon Redshift driver has the buffer size set to 2 GB by default. Results of Redshift queries are buffered into ONE Desktop process memory, which has the reserved size of 1 GB.
In order to prevent possible memory issues with data intensive queries, we recommend decreasing the size of the buffer by adding the following parameter to your Redshift connection string:
fetchRingBufferSize=1MThis sets the ring buffer size to 1 MB, which should be sufficient for most usability scenarios.
Alternatively, you can increase the maximum memory size of ONE Desktop. For more information, see Increase Maximum Memory Size.
jdbc:redshift://redshiftdb.com:5439/dev;fetchRingBufferSize=1M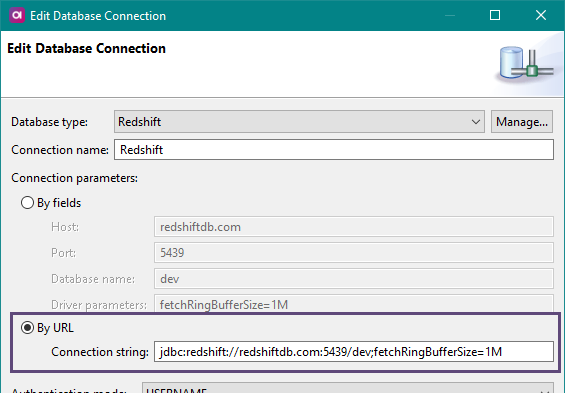
Salesforce CDATA JDBC
Starting from v25.0.9434.0, Basic Authentication is obsolete.
If your connection fails with a OAuthAccessToken is required error, refer to Salesforce CDATA JDBC for details.
Was this page useful?