
Model Projects
Model projects are needed to configure Ataccama products such as DQ Issue Tracker, ONE RDM, and ONE MDM.
Model projects are defined by model templates, which create a specific set of nodes, folders, and possibly other files for project configuration upon project creation or import. The configuration nodes created by a template cannot be changed or deleted.
Model projects use a module called the Advanced Metadata Editor (AME). Metadata, in this case, refers to the actual configuration made in the model project nodes, which is then used to generate plans, components, web service configurations, XML and other files needed for the functioning of a given solution.
Developing metadata-based solutions is done in the Model Explorer view. One model project that is available in all builds is Bulk Profiling, which makes it possible to profile multiple inputs simultaneously and write them into separate profile files.
| All features of regular DQ projects are available in model projects. |
Create a new model project
To create a new model project:
-
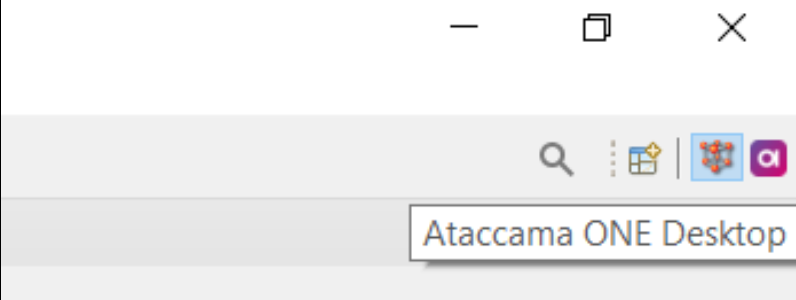
Start ONE Desktop.
-
Select the Ataccama ONE Desktop perspective.
-
Select File > New > Model Project. Or. use the New Model Project icon.

-
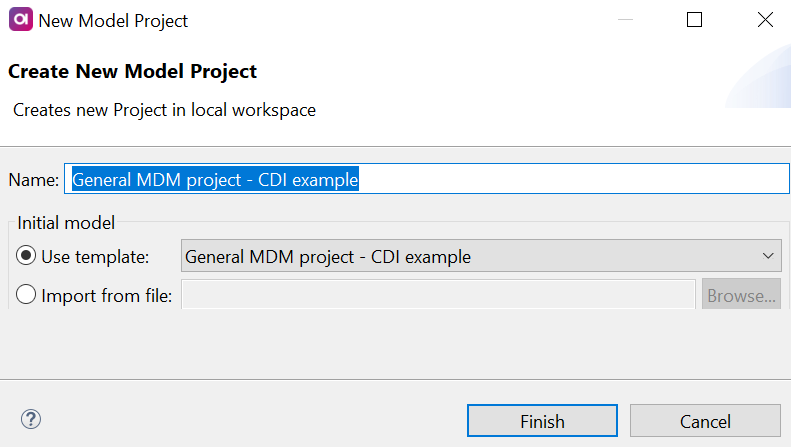
In the New Model Project dialog, enter the project Name and select its type in the Use template field. The available templates depend on your product.
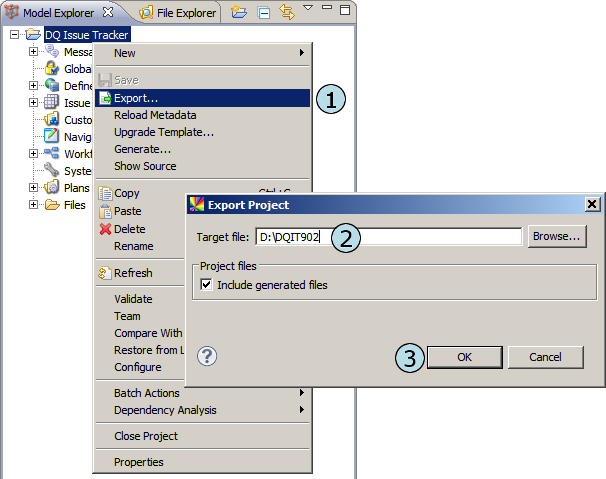
A model project can also be imported from a previously exported one. See Export a model project and Import a model project. -
Select Finish. The project appears in the Model Explorer.
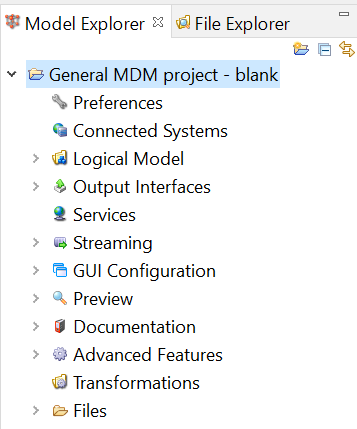
The following image displays the nodes of General MDM project - empty.
Save changes
When configuring a model project, notice an asterisk appearing next to the project name. This means there are unsaved changes to the project.
To save changes, right-click the project name and select Save. After this, we recommend reloading metadata to make sure you’re working with the latest version of the project: right-click the project name and select Reload Metadata.

Undo changes
Undoing changes can be done in two ways:
-
Change-by-change: In the main application menu, select Edit > Undo Edit Properties or press Ctrl+Z. This undoes your last action.
To revert the change, select Edit > Redo Edit Properties or press Ctrl+Y.
-
Restore project configuration to the last save: This option is helpful for undoing multiple changes at once. Right-click the project name and select Reload Metadata.
This restores the project configuration to the state after the last save.
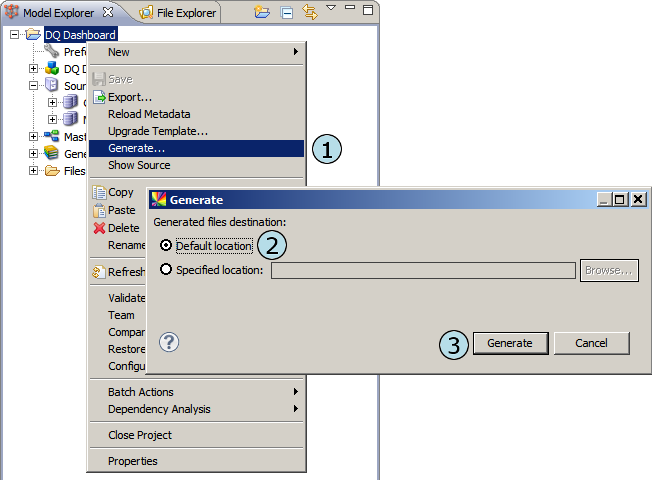
Generate files
When you are done editing metadata (that is, configuring the project), you can generate the files necessary for the solution.
Right-click the project name and select Generate. Keep the default location option and select Generate again.
You can also generate the files from metadata in a given node. For more information about the use cases and the expected results, refer to the documentation of your product.
Was this page useful?