Create DQ Evaluation Rule
Before you start
Check the following topics:
-
Data Quality - Learn how data quality works in ONE.
-
Detection and DQ Evaluation Rules - Read more about the types of rules and their role.
Create new DQ evaluation rule
|
As well as being created from scratch, DQ evaluation rules can be created from the attribute statistics. For example, create a DQ evaluation rule for the correct format for social insurance numbers using existing masks from profiling results. 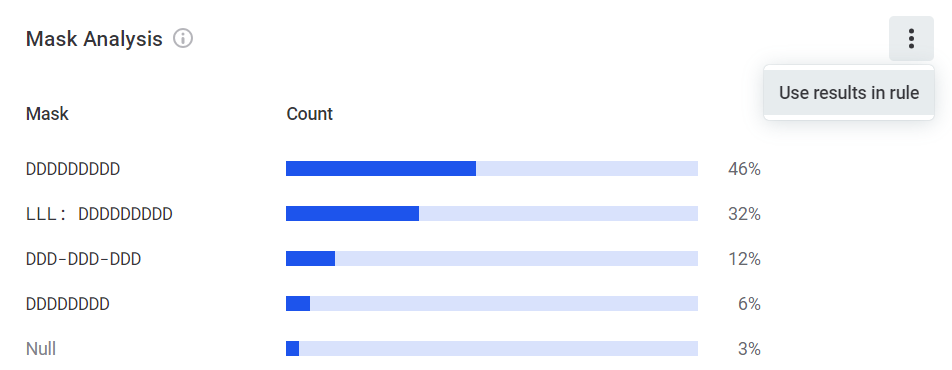
|
To create a rule:
-
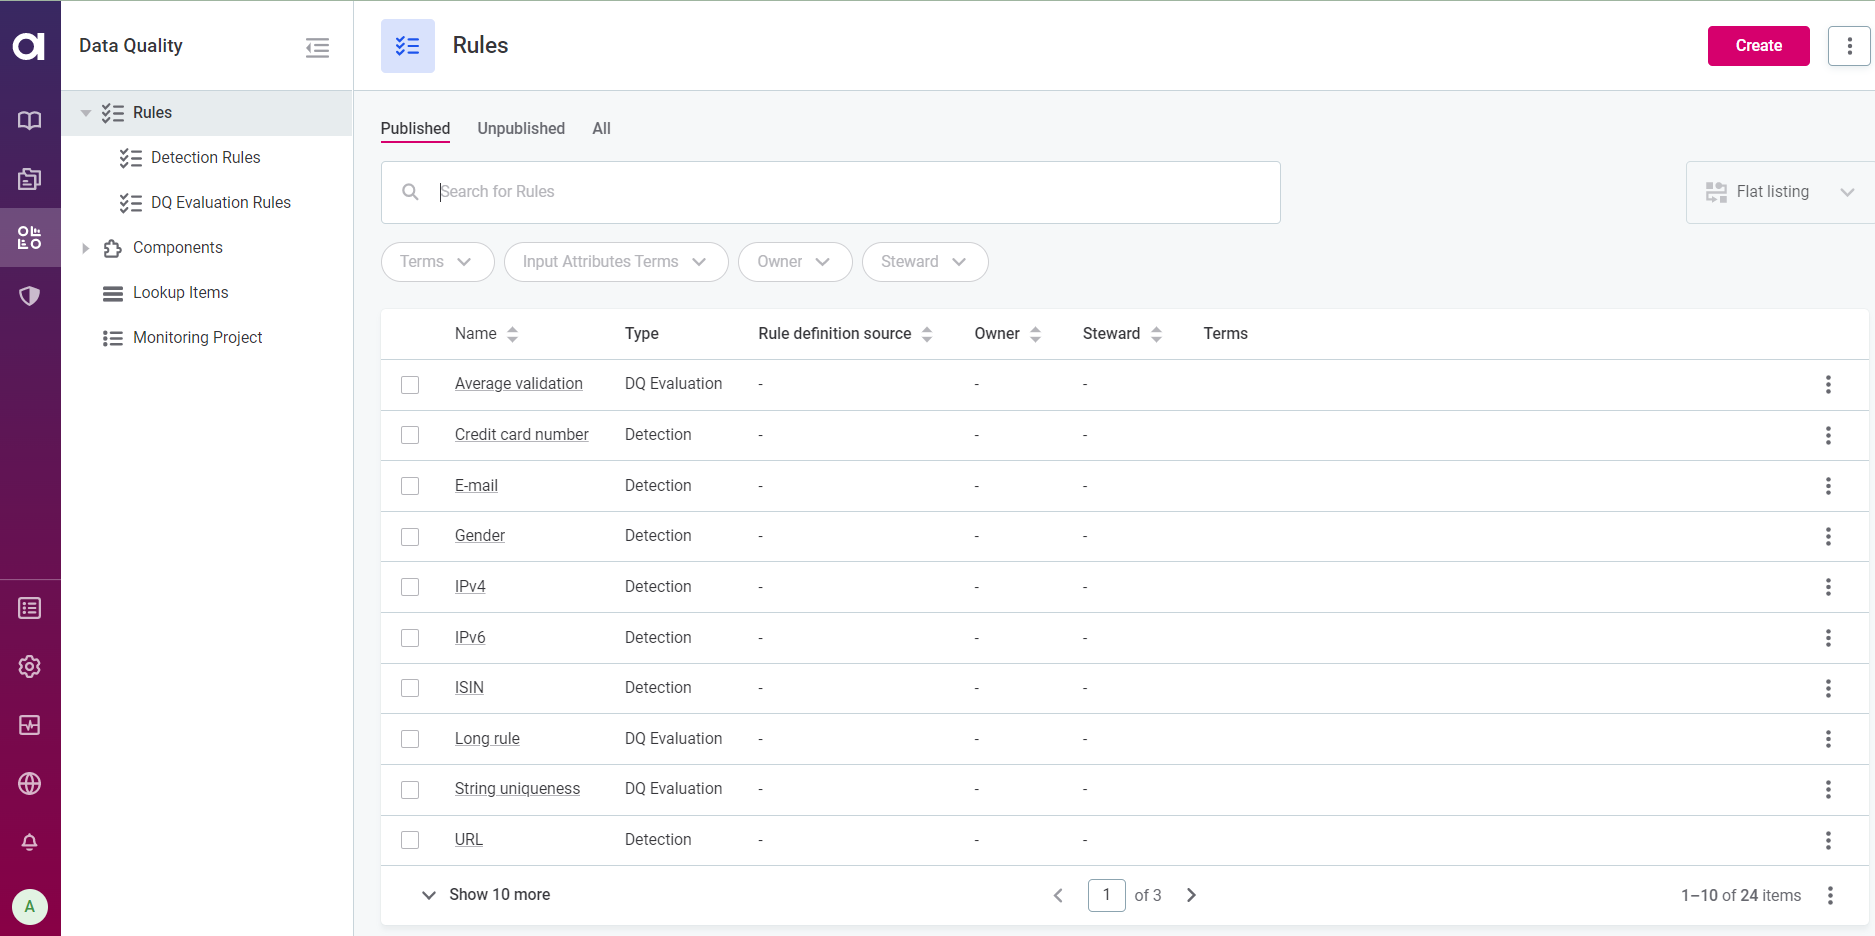
Navigate to Data Quality > Rules
-
Click Create.
-
Provide the following information:
-
Name: The name of the rule.
-
Description (optional): A description of the rule and how to use it.
-
Rule definition source (optional): A descriptive name for the data source associated with the rule.
-
Owner (recommended): Select the owner of the rule. Owners are responsible for the accuracy of the information provided and need to approve any changes made to the rule before the rule is published.
-
Steward: Select the data steward of the rule. Data stewards are typically subject matter experts in a specific domain and their role is to define data quality rules and the related glossary terms.
-
-
Click Save to create a draft of the rule.

-
Before publishing or submitting an approval request, you need to define the rule logic consisting of at least one input attribute and condition. Continue to Rule implementation.
Rule implementation
Once you have created the rule, go to the Implementation tab
Inputs
-
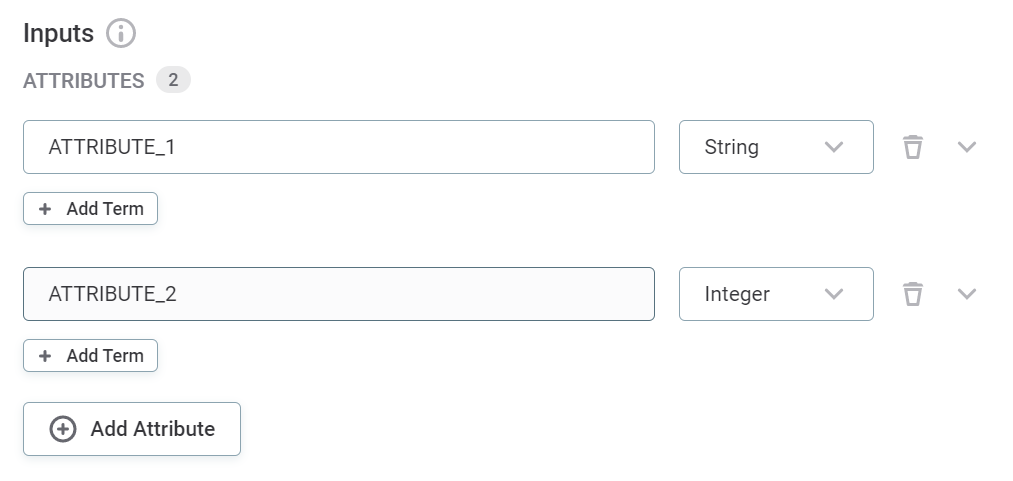
Add input attributes and select the data types.
Input attributes are abstract at this point. The number of input attributes defined here and their rule logic become available when you assign rules to catalog items.
The attribute names can be as you choose and do not affect the implementation.
If special characters or reserved words are used in input names they must be enclosed in square brackets or publishing fails.
-
(Optional) Assign terms to the attribute.
Assigning terms to input attributes during implementation results in this rule being suggested by the system in the instance an attribute also has this term.
-
Rule logic
-
Select the dimension that the rule should validate:
-
Validity: Validity rules verify the usability of the data (for example, regarding data format, data content or attribute relations). The default results are
ValidandInvalid. -
Uniqueness: Use this dimension to verify that there are no duplicate values and only one instance appears in the dataset. The default results are
Unique,Not populated, andNot Unique. -
Completeness: Use this dimension to verify that the value field is filled. The default results are Complete and Not complete.
-
Accuracy: Use this dimension to check whether values are accurate and reflect the true values, for example, based on reference data. The default results are
Accurate,No reference available, andNot accurate.
-
-
Select whether you are creating a standard Rule, Aggregation rule, or Component rule.
Component rules need to be created first in ONE Desktop by power users. To add a component rule, select the component from the list of existing components by clicking Select a Component.

The component rule needs to fulfil the following conditions in order to ensure the correct results are returned:
-
The total number of input records must match the total number of output records in the component.
-
The order of output records must match the order of input records.
Aggregation rules require additional configuration, described in Aggregation Rules.
-
-
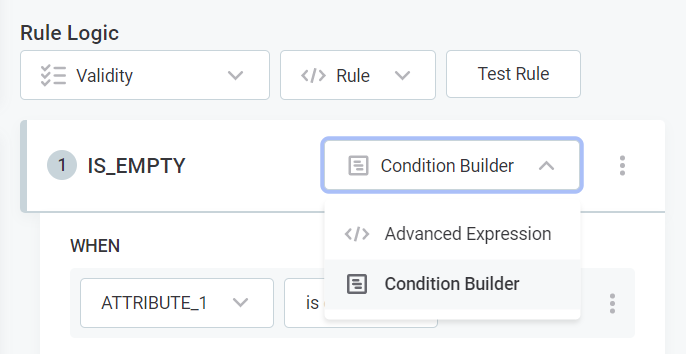
Provide the rule conditions and an explanation of the results. There are two ways to do this: through the Condition Builder or via Advanced Expression:
-
Select Advanced Expression to leverage ONE expressions in your rule condition (see ONE Expressions).
-
Select Condition Builder to define the rule logic using the predefined options.
-
If you selected Advanced Expression, enter the expression in the space provided and proceed to Test rule.
If you selected Condition Builder:
-
Select the input attributes to use in the rule logic.
-
Select the required conditions, for example,
matches_maskorhas length of, and provide the necessary requirements. The options available depend on the data type of the input attributes.Expand to see all available conditions
Condition Description Is emptyWhen the input is not filled.
This checks if the field is filled, but a field is not identified as empty if it is filled with: NULL,Null,null,.,,,-,_,N/A,n/a, and so on.Is not emptyWhen the input is filled.
Is the same asWhen the input is the same as the value you define.
Is the same as attributeWhen the attribute is the same as the attribute you select.
Is not the same asWhen the input is not the same as the value you define.
Is not the same as attributeWhen the attribute is not the same as the attribute you select.
Is from the following listWhen the attribute belongs to the list you define.
Is not from the following listWhen the attribute does not belong to the list you define.
Has length ofIs the same as the length you define.
ContainsWhen the input contains a substring you define.
Is from catalog itemWhen input belongs to a lookup item built from specified catalog item and attribute.
During the rule logic definition, if you choose the option is from catalog item, a lookup item will be built automatically from the chosen catalog item and used in the rule.
Is from reference dataWhen attribute input belongs to the lookup file you select.
Is not from reference dataWhen attribute input does not belong to the lookup file you select.
Matches maskWhen input corresponds to the mask you define.
Does not match maskWhen input does not correspond to the mask you define.
Matches regexpWhen input corresponds to the regular expression you define.
Does not match regexpWhen input does not correspond to the regular expression you define.
-
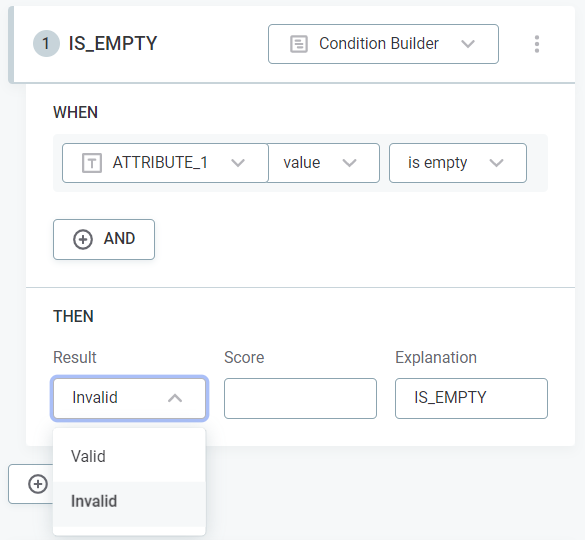
Select whether the condition defined should produce the result that is, for example, Valid or Invalid. Options are different depending on the dimension chosen.
Optionally, enter an explanation to help distinguish between multiple rules of the same dimension.
-
(Optional) Assign a score to results that are then used during evaluation. See Assigning scores.
Test rule
You can optionally test the rule by clicking Test Rule and trying different inputs in the Test section. The results for each input are shown automatically in Message next to the test input row.
| There is a known issue when testing component rules. However, this does not affect the functionality of the rule itself. |
Expand for details
Problem There is an issue when testing component rules caused by a change in the order of results (the order of the input data was not affected). This means a component will change the order of values when producing results.
For example:
-
You create a component rule using a uniqueness component.
-
You select test rule
-
You enter 1, 1, 2, 2, 3
The expected result would be that 3 is valid and 1 is invalid. Because the order of the results has been switched you will instead see that 1 is valid and 3 is invalid.
Solution If you need to test component rules it will be necessary to manually fix the defective components. This can be done by adding a shadow column with values based on the order and then sorting the results in the end with sort step.
Publish rule
After the changes are implemented, they need to be published.
Scoring records
The score is used as a numeric expression of the severity of each record’s invalidity according to the rule. This is mainly useful for monitoring projects to detect the most pressing issues and to be able to improve the data quality.
Scores are arbitrary and can be assigned to suit your project.
Typically, the logic follows that the higher the score, the worse the issue. For example, if a non-critical value is missing, the invalidity score could be 100. If a critical value is missing, the invalidity score could be 10000.
Assigning scores
|
It is also possible to assign scores via the validation component in ONE Desktop. This is available only for power users. For more information, see Validation Components. |
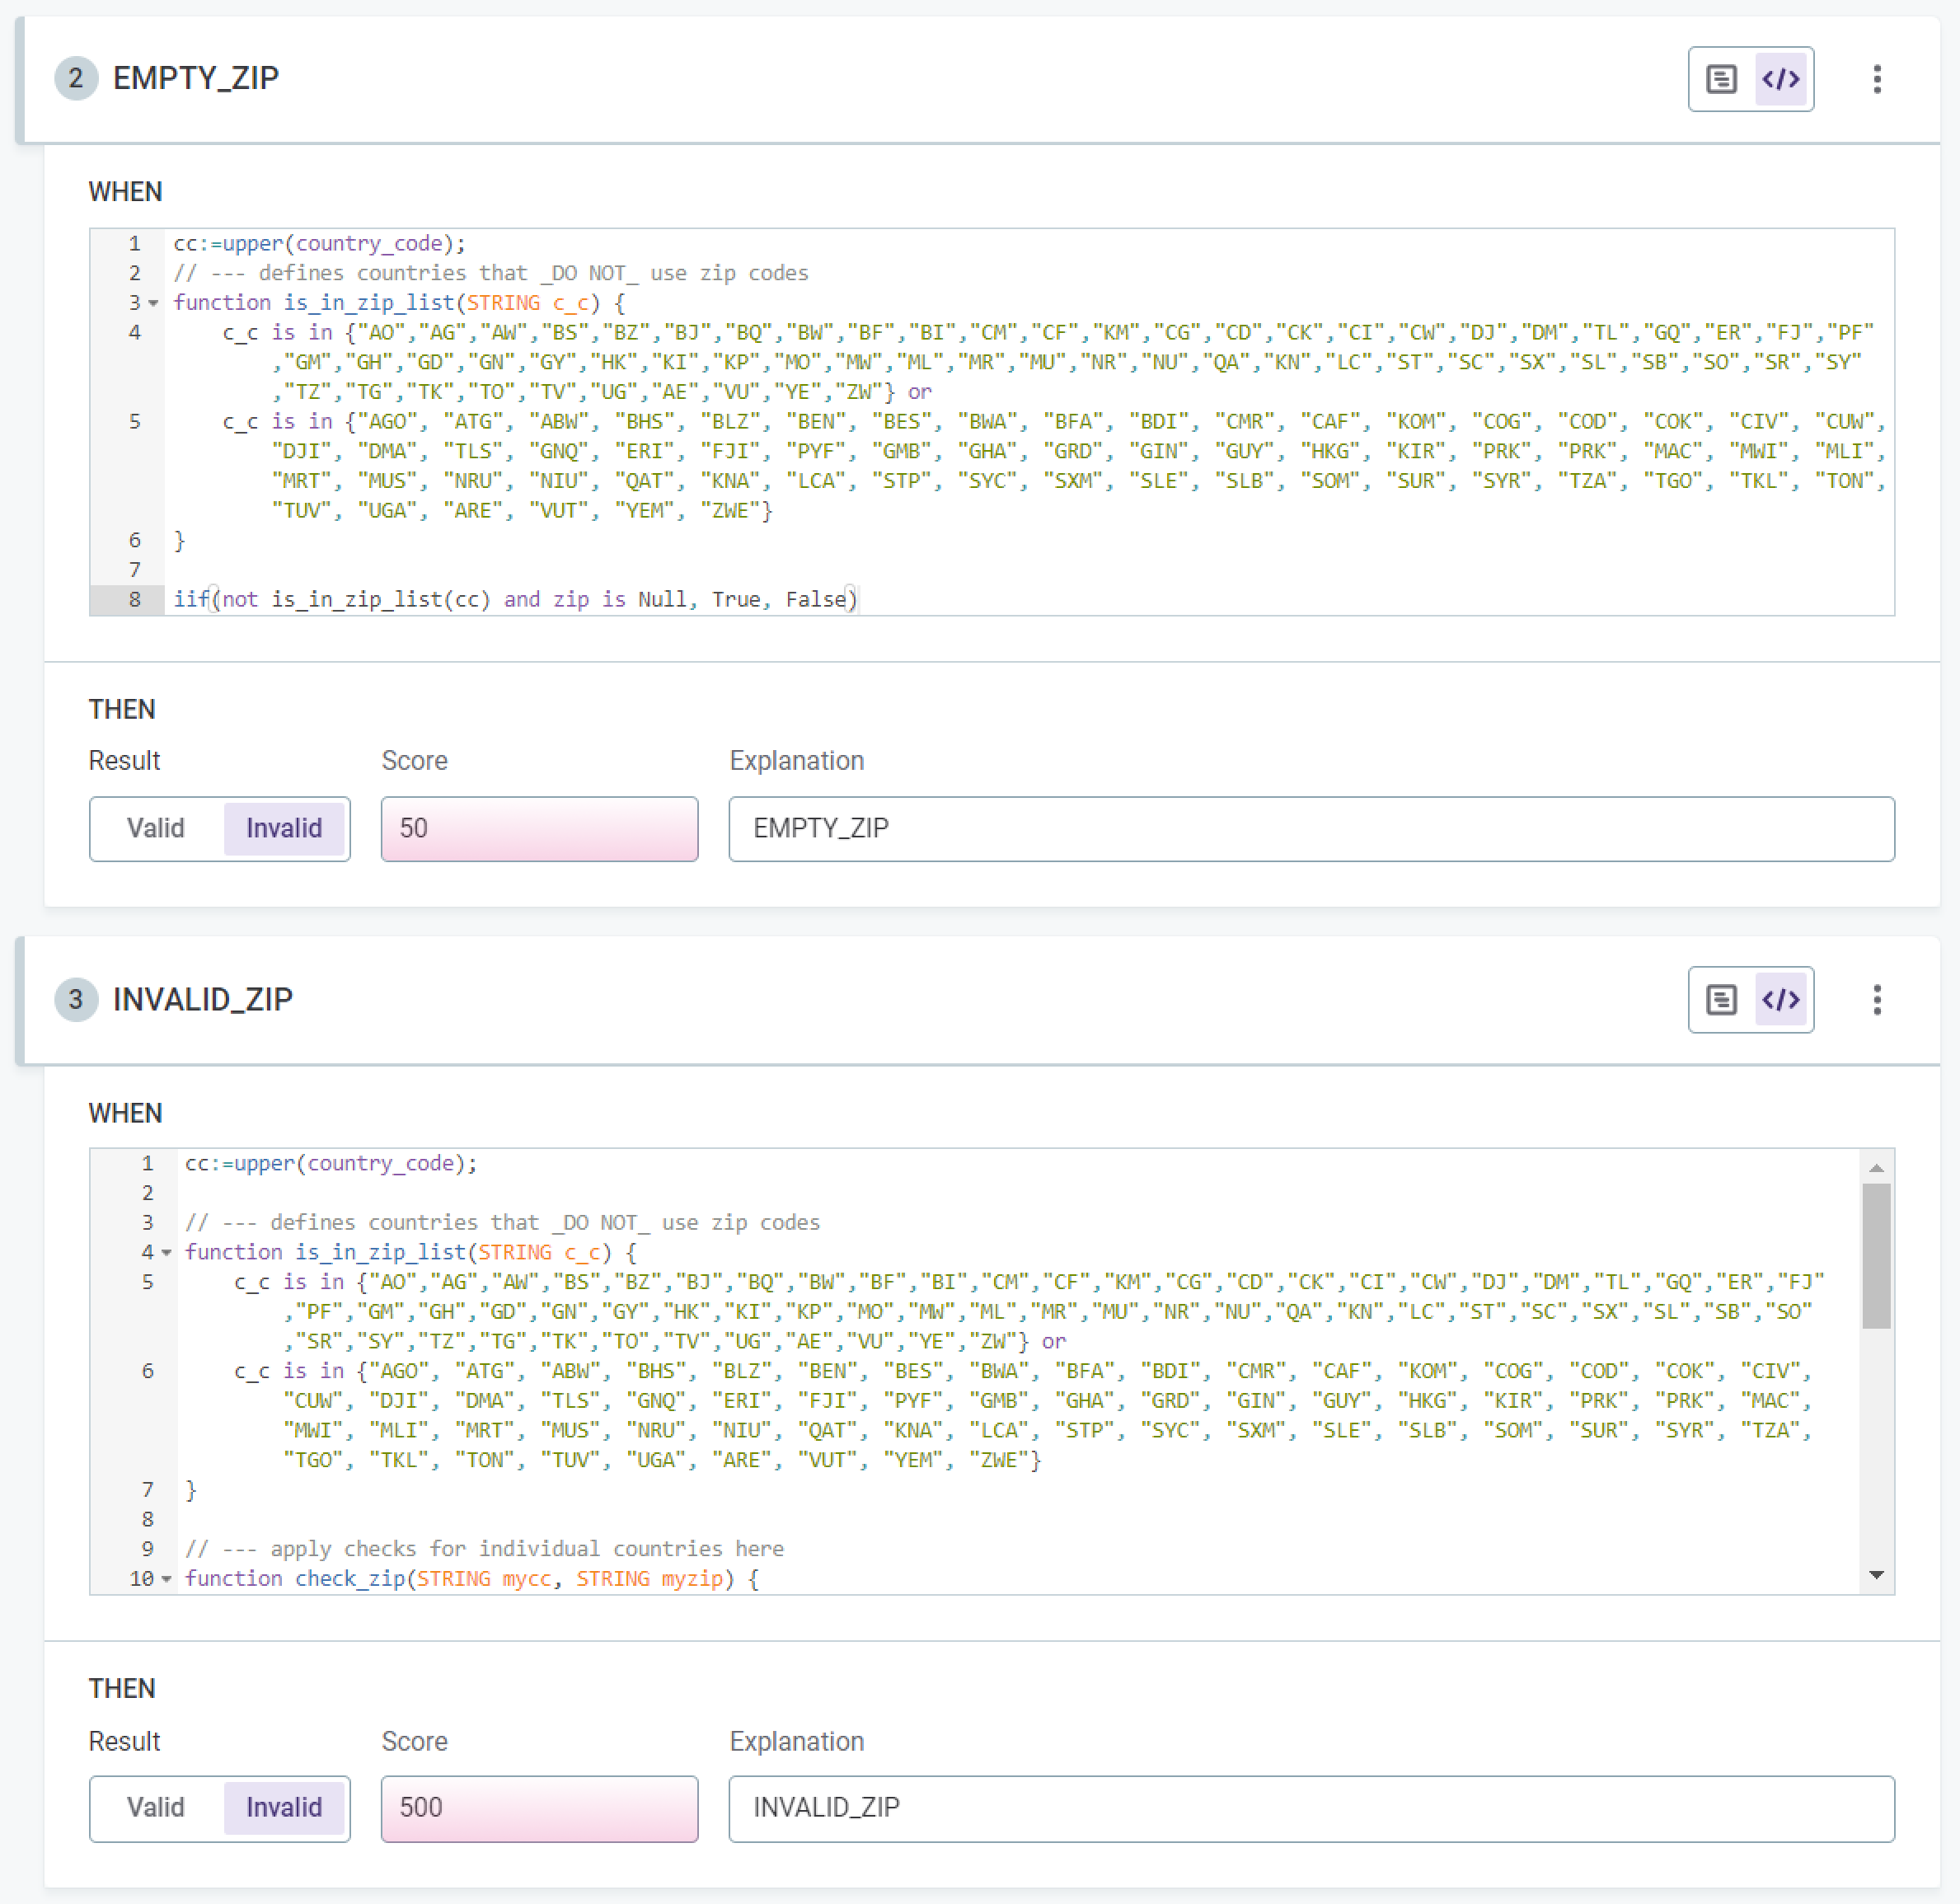
In the example shown, you have a validity rule in which an invalid record due to errors is considered of higher importance than an invalid record due to a null value, the invalid results being scored at 50 and 500 respectively.
Cumulative results of data quality statistics are shown on the Configuration and Results tab of a monitoring project. However, to be able to see the score of each record, it is necessary to export the project.
Next steps
Apply your newly-created DQ rule to a term. See Add Rules to Terms.
Was this page useful?
