
Promote Assets
This article describes how to export assets from a source environment, import them into a target environment, and verify the results.
Prerequisites
-
Complete the steps in Prepare for Asset Promotion.
-
If needed, configure environment mapping.
Promote a monitoring project
This scenario describes how to promote a complete monitoring project from DEV to PROD.
-
Export: In the source environment, export the monitoring project. Select the Monitoring projects export plan, which includes dependent rules, glossary terms, SQL catalog items, virtual catalog items, and post-processing plans.
-
Import: In the target environment, import the archive. Use Run validations only first to catch any conflicts before committing.
-
Review and publish: Review the import results. If assets were imported as drafts, review and publish them. Verify that the monitoring project is operational in the target environment.
|
Connection credentials are not exported. Before running the monitoring project in the target environment, verify and update connection configurations. |
Update a single rule
This scenario describes how to promote a rule that was fixed in TEST to PROD.
-
Export: In TEST, export the fixed rule. Select the rule-specific export plan.
-
Import: In PROD, import the archive. The rule is automatically updated in all monitoring projects that reference it.
-
Verify: Navigate to the monitoring projects that use this rule and verify that the updated implementation is active. Run a monitoring project execution to confirm the fix is applied.
|
Configure the For details, see Update rule references. |
Promote with conflict resolution
This scenario explains how to handle conflicts that arise during promotion.
-
Export and validate: Export assets from the source environment. In the target environment, import the archive with Run validations only selected.
-
Review conflicts: Open the Import Report and review the validation errors. For common conflict types and how to resolve them, see Resolve Import Conflicts.
-
Resolve and re-import: After resolving all conflicts, upload the archive again, re-run validation to confirm the issues are fixed, and proceed with the full import.
|
You can skip broken assets during import by selecting the appropriate option in the import configuration. Skipped assets remain in draft state for manual review. |
Export and import workflow
Export assets
-
In your source environment, navigate to the asset listing for the type you want to export. For example:
-
Data Quality > Monitoring Projects for monitoring projects.
-
Data Quality > Rules for individual rules.
-
-
Select the assets you want to export and in the action bar, select Export.
-
Configure the export:
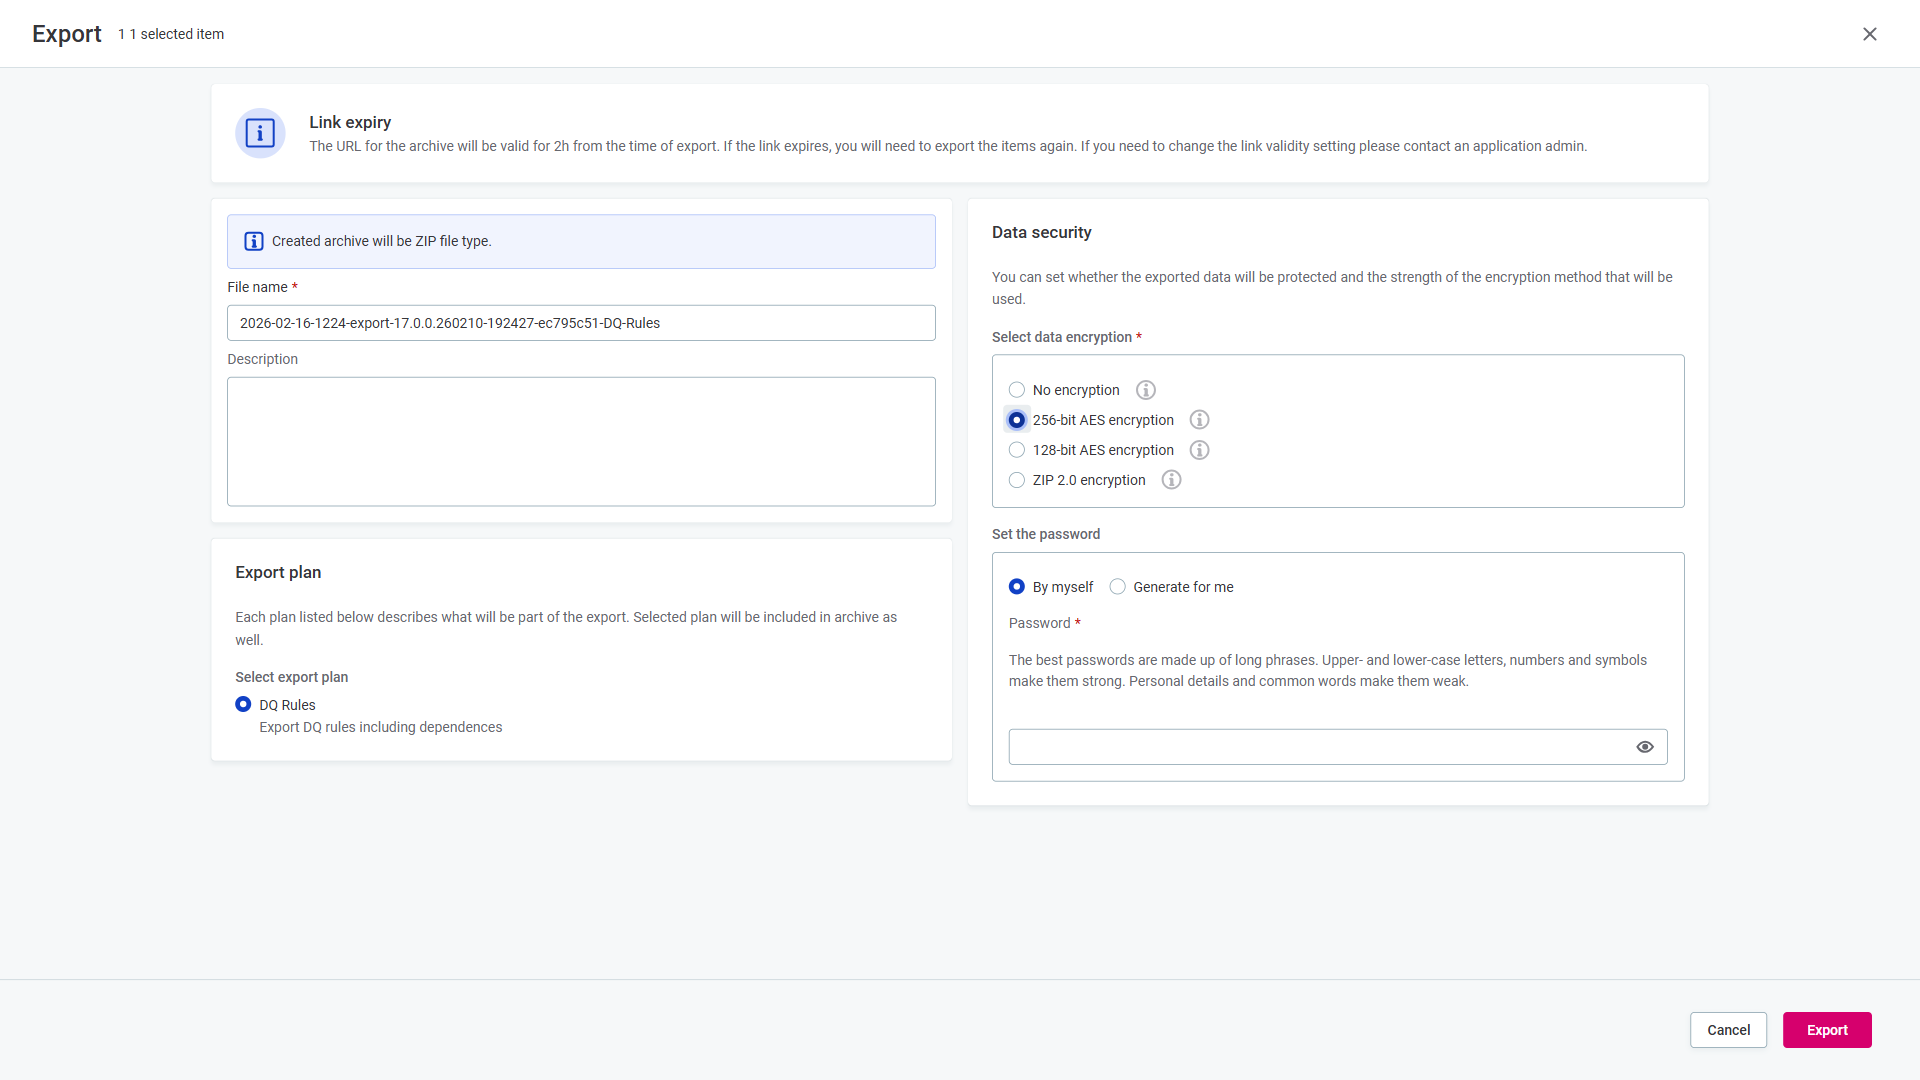
-
File name: Auto-generated in the format
{date}-{time}-export-{version}-{id}-{type}.zip. Edit if needed. -
Description: Optional description for the export.
-
Export plan: Select the plan that matches the asset type you are exporting. For example, Monitoring projects for monitoring projects including their dependent rules and transformation plans.
-
Data security: Select the encryption level.
-
256-bit AES encryption (recommended): Strongest protection. Requires a third-party tool (for example, 7-Zip) to decrypt.
-
128-bit AES encryption: Strong encryption, compatible with more tools.
-
ZIP 2.0 encryption: Standard encryption, compatible with all systems but not recommended for sensitive data.
-
No encryption: Not recommended (default).
-
-
Password: Required when encryption is selected.
-
-
Select Export to create a ZIP archive with exported assets.
-
When the Export finished notification appears, select Download archive.
Alternatively, go to Global Settings > Application Settings > Import and Export > Exports and select the archive link.

|
Instead of exporting entire projects each time, consider exporting only the assets that changed. This reduces archive size, simplifies conflict resolution, and makes the Import Report easier to review. Use the Update a single rule workflow for individual fixes. |
|
The archive download URL is valid for two hours. If the link expires, you need to export the assets again. The validity period can be configured using the property |
Import assets
-
In your target environment, go to Global Settings > Application Settings > Import and Export.
-
On the Imports tab, select Import.
-
Configure the import:
-
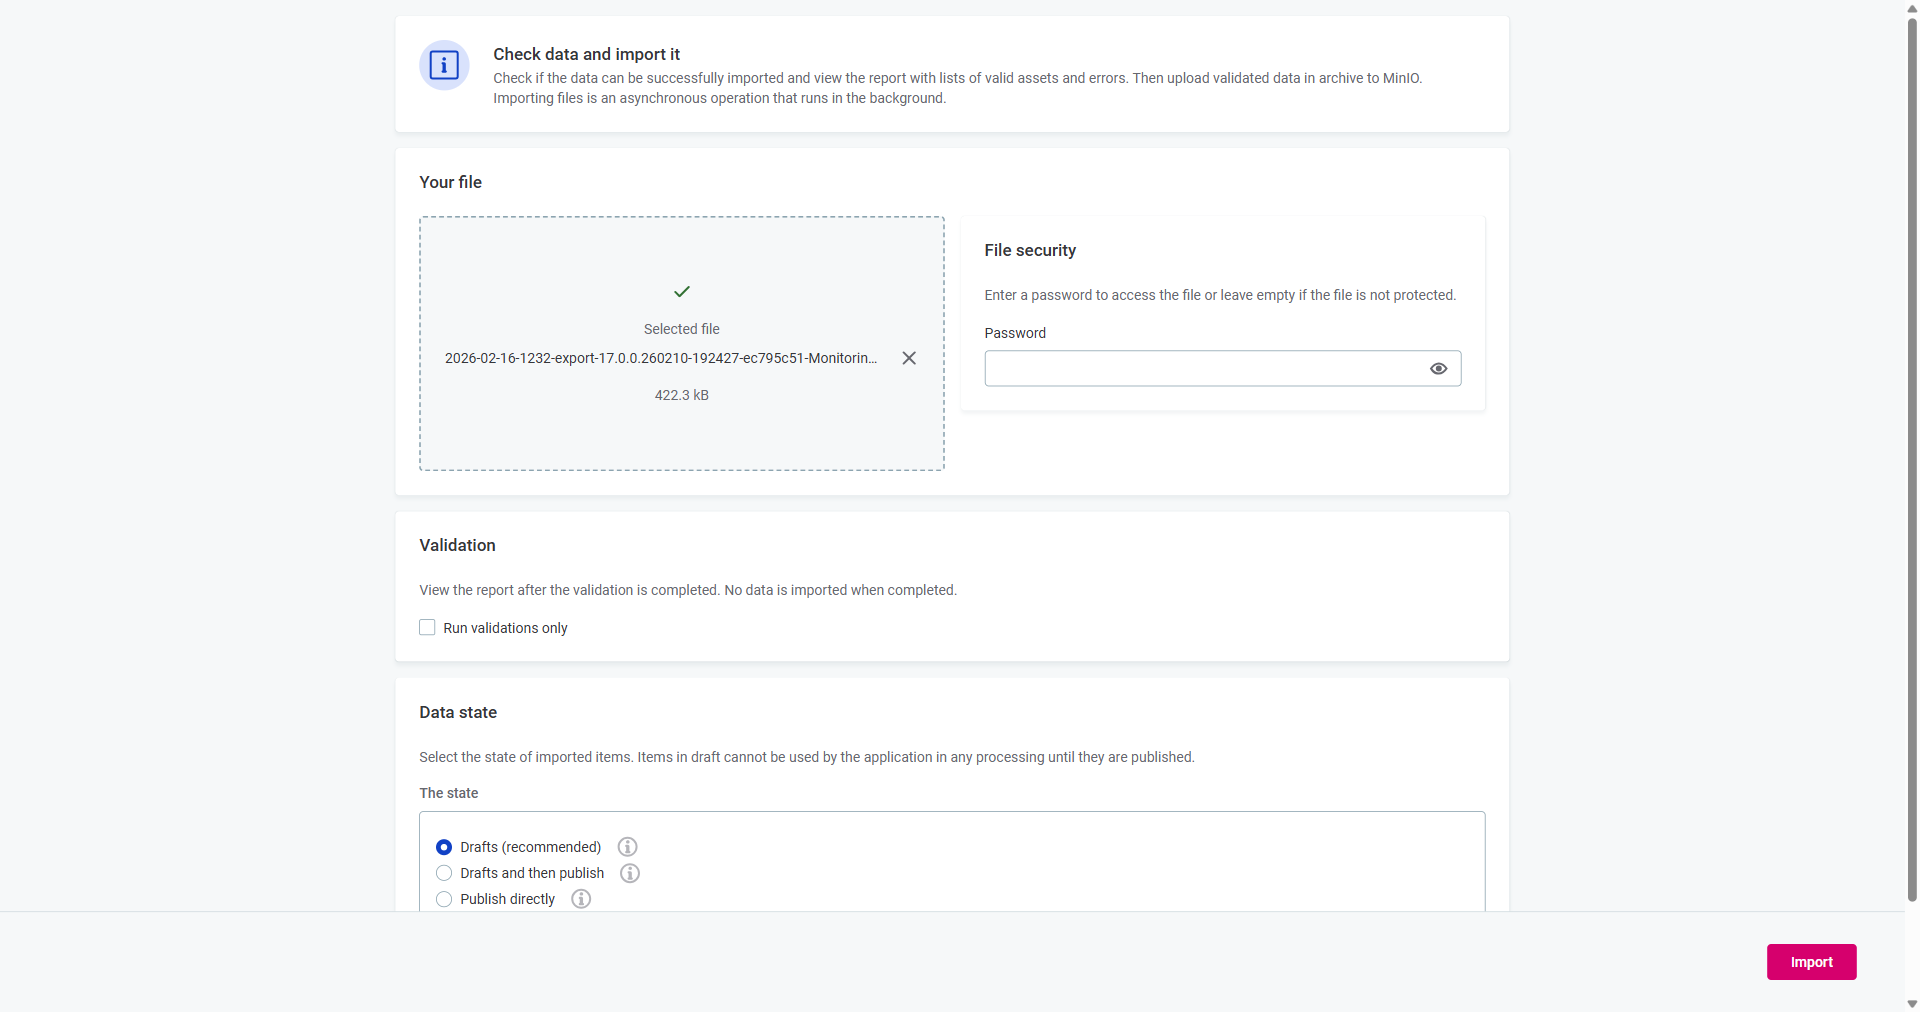
Your file: Upload the exported archive (drag and drop or Browse files).
-
File security: Enter the password if the archive is encrypted.
-
Validation: Select Run validations only to check for conflicts without importing anything.
Always run validation before performing the actual import. This lets you identify conflicts, review the scope of changes, and prepare any missing environment configurations without risk.
-
-
Select Validate.
-
Review the Import Report for errors and warnings. For details about what the report contains, see Validation results.
Select Download report to save the full report as a JSON file for auditing or troubleshooting. -
If validation passes, run the actual import:
-
Clear Run validations only if it is selected.
-
Choose a Data state for imported assets:
-
Drafts (recommended): Assets are imported as drafts which you review and publish manually.
If validation errors occur, drafts are created but marked with errors.
-
Drafts and then publish: Assets are imported as drafts and automatically published.
Assets with validation errors remain as drafts.
-
Publish directly: Assets are imported directly as published.
If any validation error occurs, the entire import is rolled back.
-
-
Select Import to finish importing assets.
Check the import notification for success status.
-
Review import results
After the import completes, the Import Report shows one of the following outcomes:
| Status | Message | Action required |
|---|---|---|
Finished |
Validations completed successfully. This import did not include any changes. |
None. Assets are already up to date. |
Review needed |
Import complete. Review drafts before publishing. |
Review imported drafts and publish them manually. |
Published |
All imported changes were published successfully. |
None. Assets are live. |
Discarded |
All imported changes were discarded. |
Review why changes were discarded and re-import if needed. |
Failed |
Validation issues found. Fix them and try to import again. |
Review errors in the report, resolve issues, and re-import. See Resolve Import Conflicts. |
| Every import is recorded in the audit trail. For details, see Audit trail and compliance. |
After reviewing the results:
-
Verify that environment mappings were applied correctly and all assets are listed in the promotion summary.
-
Check the History tab on imported assets to confirm the import event was recorded. The event includes a link to the Import Report.
-
If assets were imported as drafts, review and publish them.
|
The version creator is recorded as either "Ataccama promotion" or the username of the person who performed the import. |
Validation results
The Import Report provides a hierarchical view of all issues organized by validation type, asset type, and error category.
Validation types
-
Import Success: Successfully processed records.
-
Schema Validation: Compares the target environment’s metadata model with the imported archive’s metadata model.
-
Structure Validation: Compares the imported asset structure (properties, paths, matching keys) with assets in the target environment.
-
System Validation: Checks constraints (for example, uniqueness) against the imported data.
-
Plugin Validation: Checks rules and logic implemented by extensions or custom plugins.
-
Discarded Drafts: Issues from drafts that failed validation during import (only shown when using error-tolerant import modes).
Report hierarchy
The report groups errors in the following structure:
-
Validation type (for example, Structure Validation).
-
Asset type (for example, Business Term, Power BI Catalog Item).
-
Error category (for example, Data Node Import Failed, Reference Import Failed).
-
Individual errors with path in the metadata model and number of impacted assets.
Each error entry shows:
-
Path in MMD model: The location of the affected asset (for example,
/terms). -
No. of impacted assets: How many assets were affected by this error.
-
Error Message: Detailed description of the issue.
-
View button: Opens a dialog with full error details including asset type and structure validation information.
Next steps
-
Resolve Import Conflicts - Handle conflicts and validation errors that occur during import.
-
Asset Promotion Best Practices - Keep your source and target environments in sync over time.
Was this page useful?