
CyberArk Secrets Manager Integration
Integrate ONE with CyberArk Central Credential Provider (CCP) to retrieve secrets when connecting to data sources.
Create new CyberArk Secrets Manager integration
-
Go to Global Settings > Application Settings > Secret Management.

-
Select Add.
-
Provide the following information:
-
General
-
Provider: The key vault or secret manager you are connecting to. Select CyberArk Secrets Manager.
-
Name: A unique name for this service.
-
URL: The complete URL of the CyberArk Central Credential Provider (CCP).
-
Application ID: The unique ID of the application issuing the password request.
-
Description (Optional): A description for this service.
-
-
Authentication method: Select from the options provided.
-
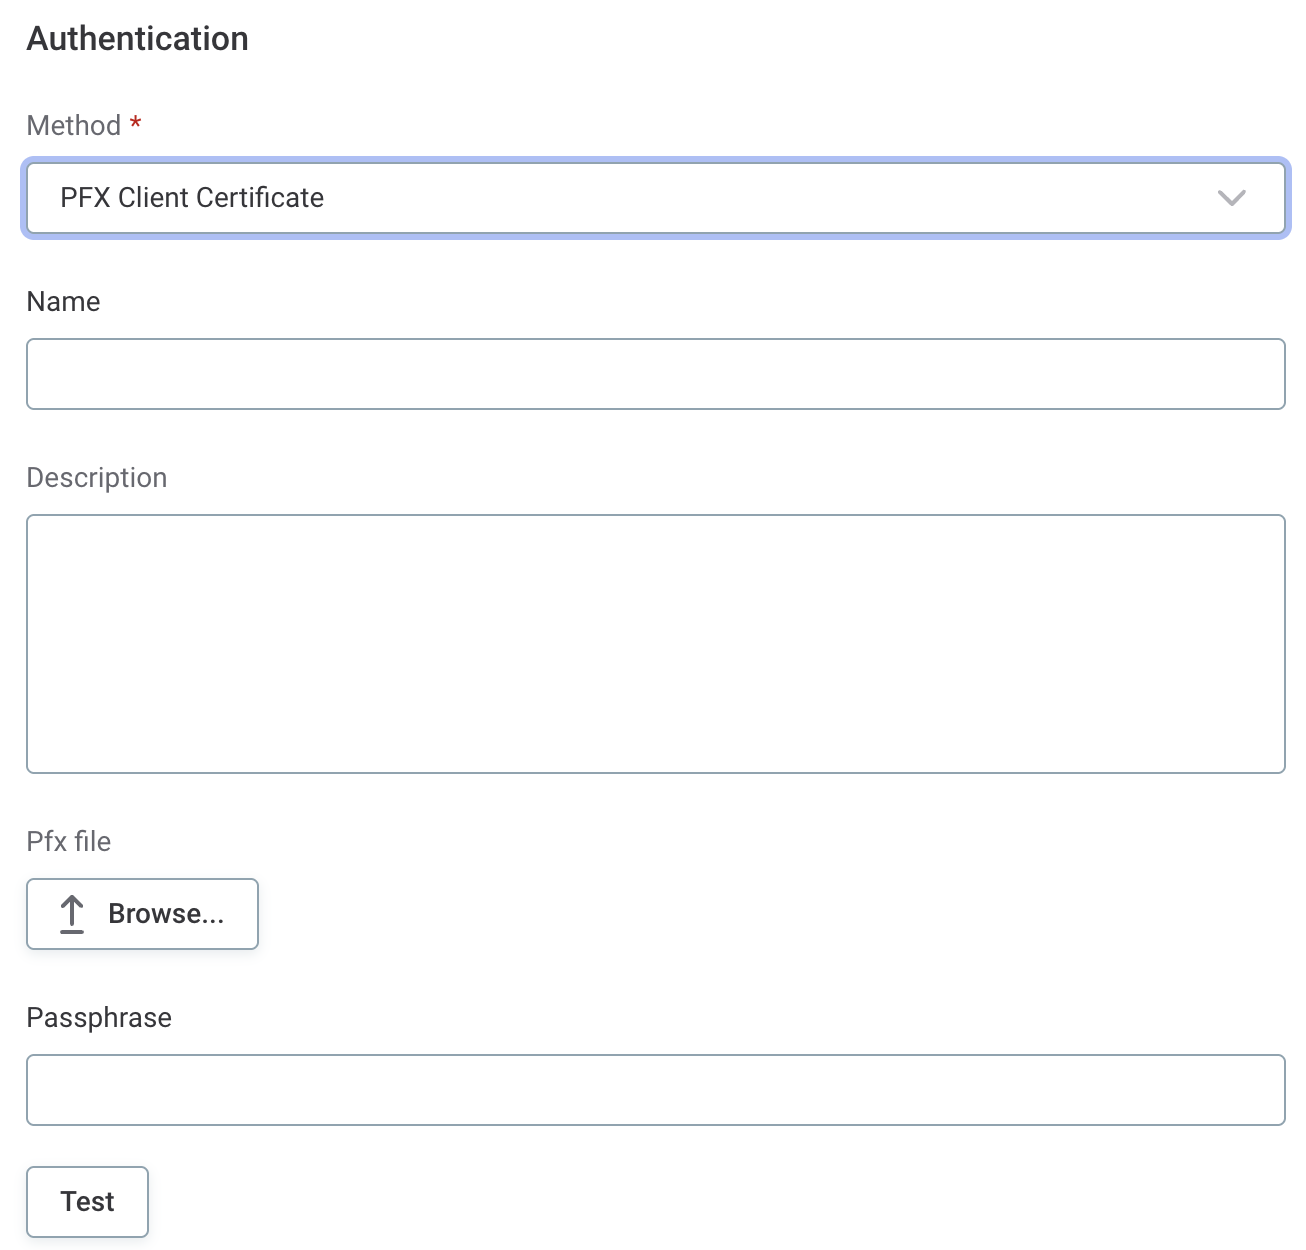
PFX Client Certificate
-
Pfx file: A single bundled file containing the client certificate, private key, and optionally the CA certificate.
-
Passphrase: The password used to protect the PFX file.
-
-
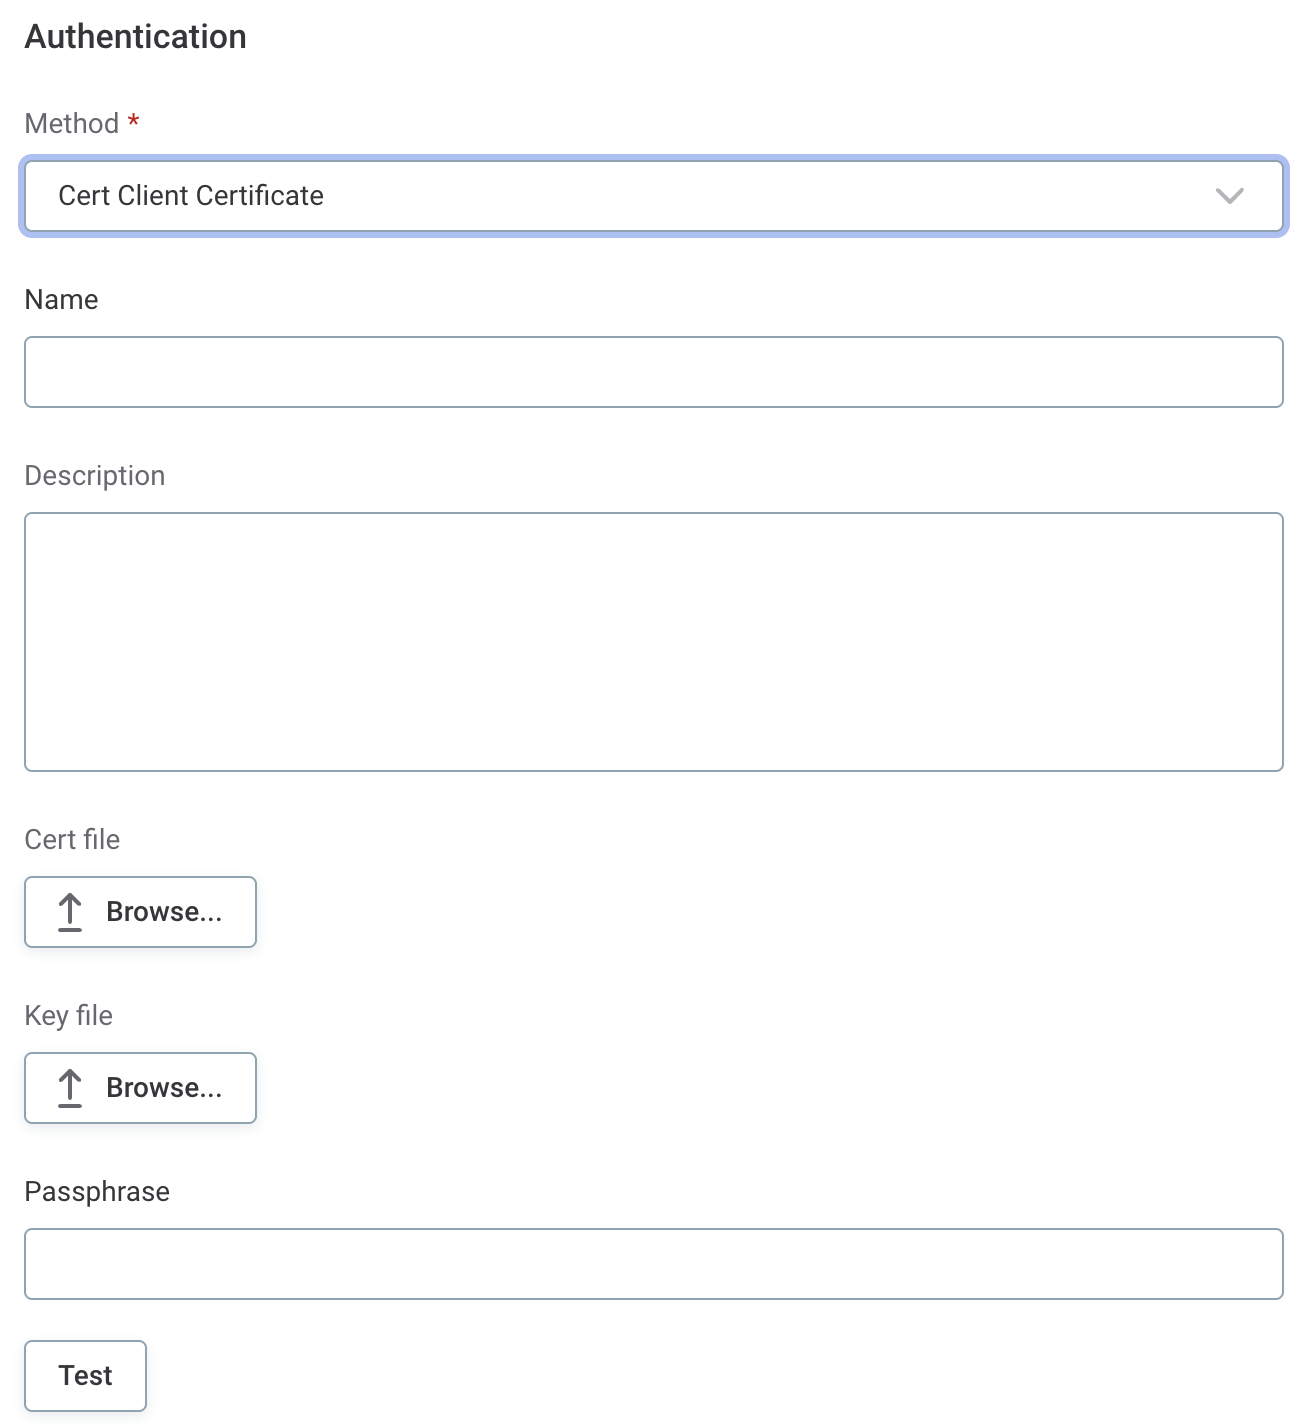
Cert Client Certificate
-
Cert file: A client certificate file, which can also contain the CA certificate.
-
Key file: The private key file.
-
Passphrase: The password used to protect the key file.
-
-
-
-
Select Test to test the connection.
If the connection is successful, select Save. Otherwise, verify that your configuration is correct.
CyberArk secret name format
When using CyberArk secrets in connection credentials, the secret name follows a specific format:
SafeName:ObjectName:FieldNameWhere:
-
SafeName: The name of the safe where the password is stored.
-
ObjectName: The account name of the password object to retrieve.
-
FieldName: The field from which to get the value.
For example: Partner-Ataccama:AWS_AccessKey_Demo:awsaccesskeyid.
Example accounts stored in CyberArk
The following examples show the structure of different account types stored in CyberArk.
AWS access key (Safe: 'Partner-Ataccama', Object: 'AWS_AccessKey_Demo')
{
    "Content": "XoJLflzB9X0qTQ+A/GR/wIQnlebVSRKOxncjnQu",
    "creationmethod": "PVWA",
    "awsaccesskeyid": "AZIA37MYHSL2HIIAYE10",
    "awsaccountid": "cyberarkDemo",
    "username": "Cyberark",
    "object": "AWS_AccessKey_Demo",
    "policyid": "BD-PMAWSAccessKeys",
    "Safe": "Partner-Ataccama",
    "devicetype": "Cloud Service",
    "Name": "AWS_AccessKey_Demo",
    "Folder": "Root",
    "PasswordChangeInProcess": "False"
}
MySQL account (Safe: 'Partner-Ataccama', Object: 'AtaccamaMysqlDemo')
{
    "Content": "XoJLflwB9DX0qTQ",
    "creationmethod": "PVWA",
    "Safe": "Partner-Ataccama",
    "database": "demo",
    "object": "AtaccamaMysqlDemo",
    "username": "ataccamaCyberark",
    "policyid": "MySQL",
    "devicetype": "Database",
    "Name": "AtaccamaMysqlDemo",
    "Folder": "Root",
    "PasswordChangeInProcess": "False"
}
SSH account (Safe: 'Partner-Ataccama', Object: 'account2retrieve')
{
    "Content": "CyberArkSSH",
    "creationmethod": "PVWA",
    "address": "address",
    "Safe": "Partner-Ataccama",
    "username": "username",
    "object": "account2retrieve",
    "policyid": "UnixSSH",
    "devicetype": "Operating System",
    "Name": "account2retrieve",
    "Folder": "Root",
    "PasswordChangeInProcess": "False"
}
Usage examples
Example using AWS access key credentials
-
In Data Catalog > Sources > [your source] > Add Connection, select Add Credentials.
-
Select Credential type from the options provided:
-
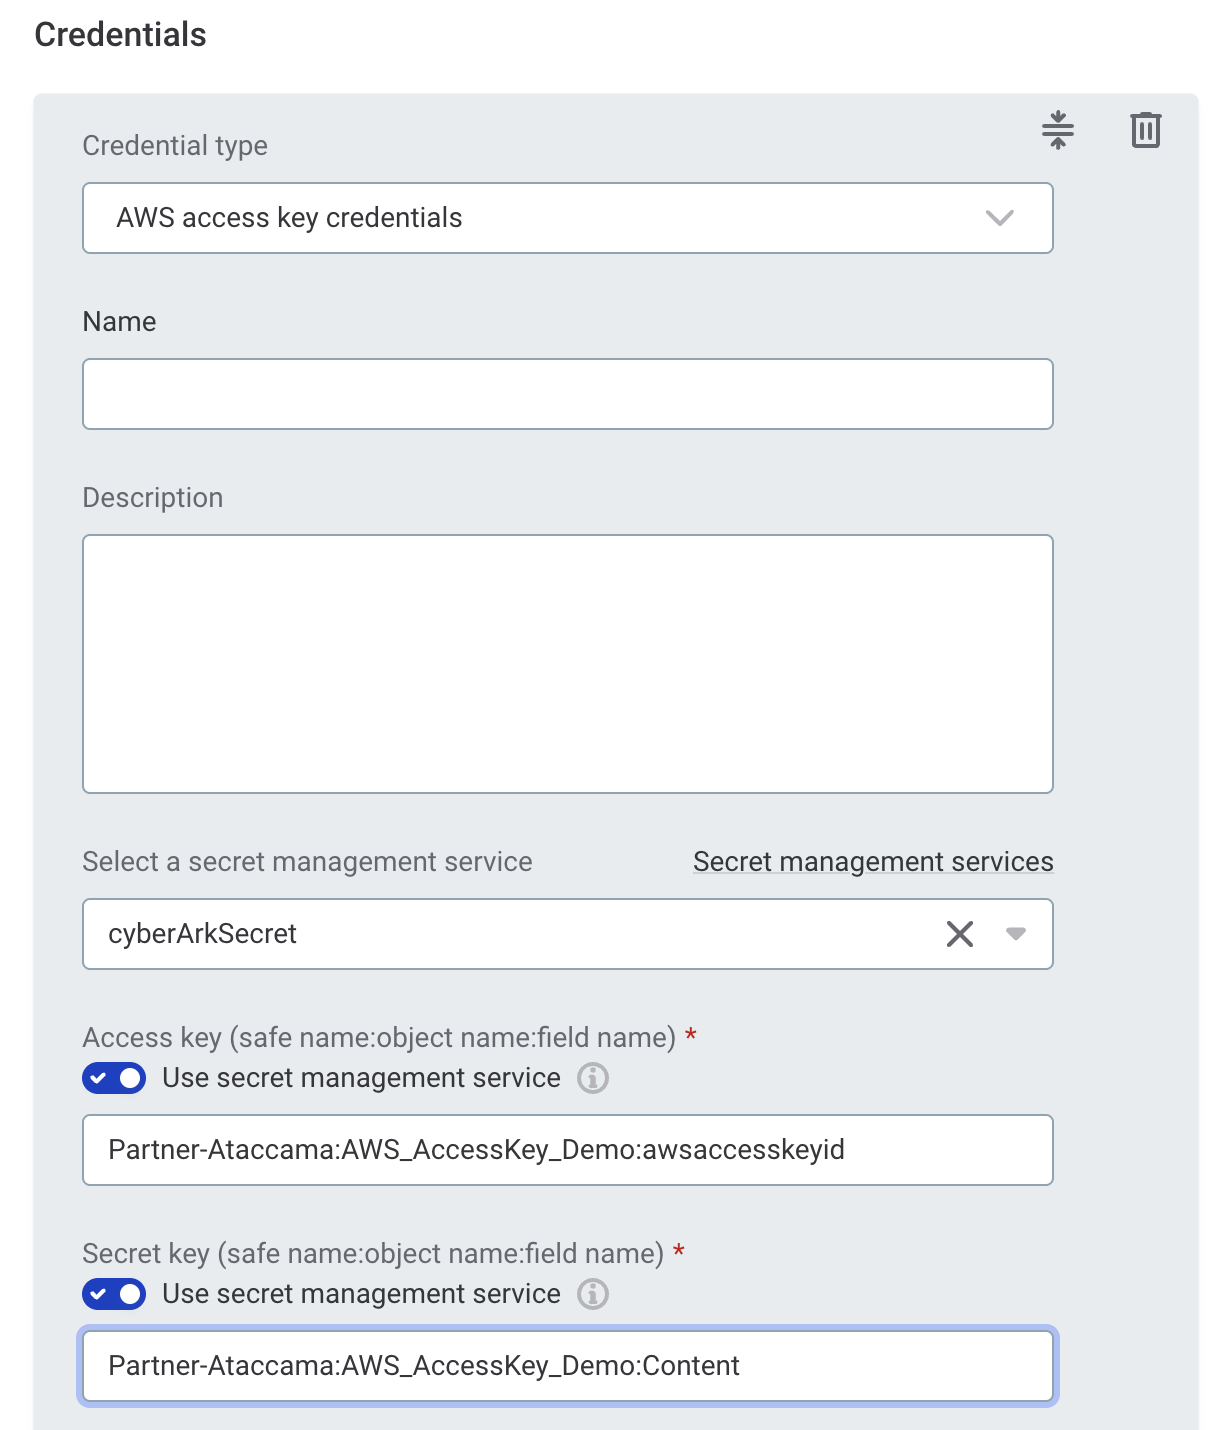
AWS access key credentials
-
Name: A unique name for this set of credentials.
-
Description (Optional): A description for this service.
-
Select a secret management service: Select the CyberArk Secrets Manager you configured.
-
Access key
-
Select the Use secret management service option.
You can enable Use secret management service to retrieve the access key, but it is not necessary as the access key can generally be shared and entered manually. -
Access key (secret name): Enter the secret name in the CyberArk format
SafeName:ObjectName:FieldName.For example:
Partner-Ataccama:AWS_AccessKey_Demo:awsaccesskeyid.
-
-
Secret key
-
Select the Use secret management service option.
-
Secret key (secret name): Enter the secret name in the CyberArk format
SafeName:ObjectName:FieldName.For example:
Partner-Ataccama:AWS_AccessKey_Demo:Content.
-
-
-
-
Select Test to test the connection. If the connection is successful, select Save. Otherwise, verify that your configuration is correct.
Was this page useful?