
Data Transformation Plans
| Spark pushdown is not supported. |
Transform data in ONE using data transformation plans. Plans are visual representations of data processing job definitions.
Once you have configured your plan to process the input data as required and defined the data flow and output format, you can run the plan to execute the jobs. Each step represents basic algorithms, and data is processed record by record.
This facilitates two key use cases:
-
Transformation of data quality monitoring project results. In this way, data transformation plans supersede post-processing plans.
When creating plans to transform monitoring project results, initiate the plan from the monitoring project itself to ensure correct processing. See Create plan to transform data quality monitoring results. 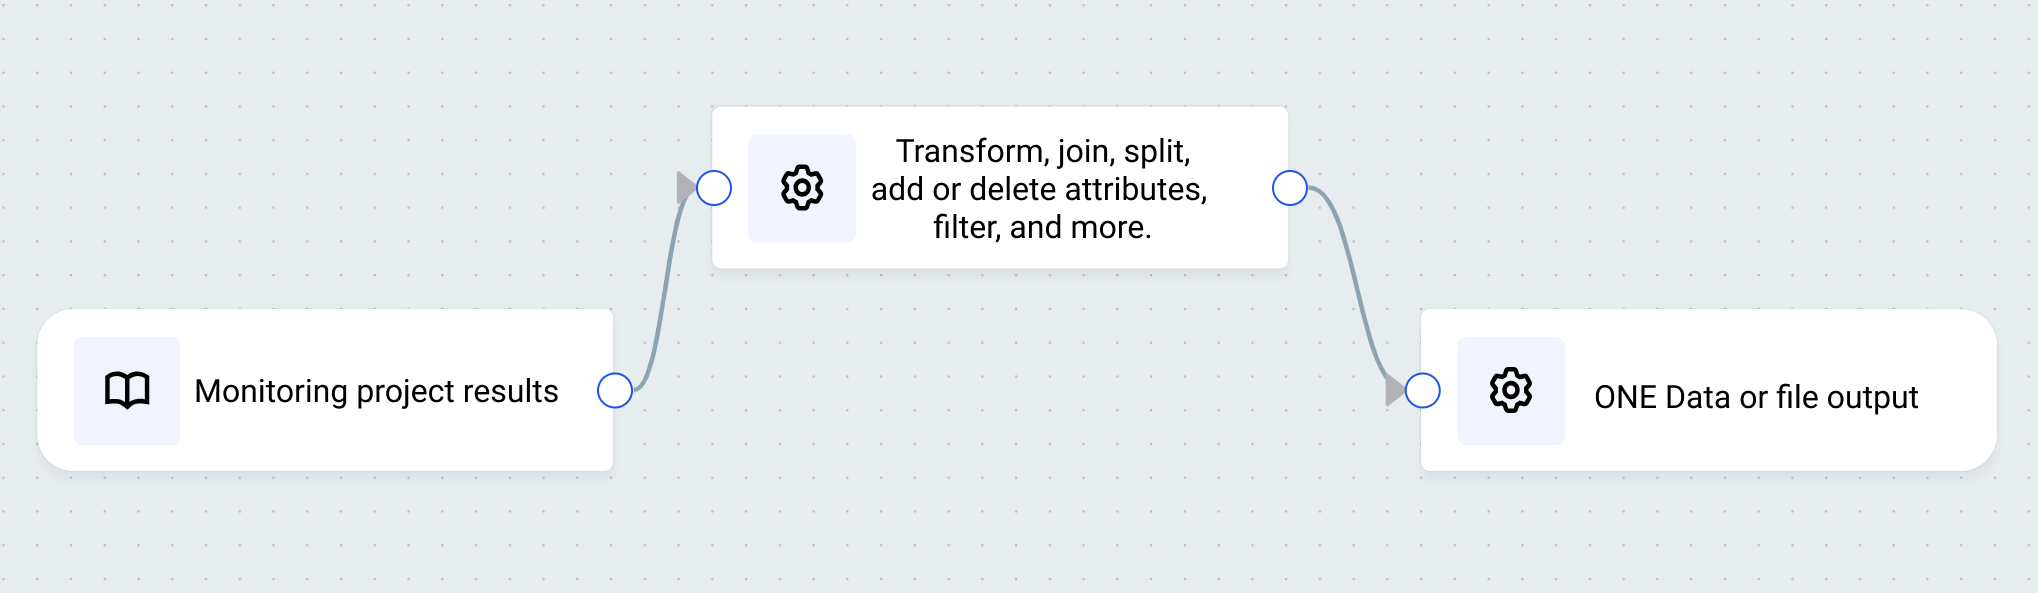
-
Standalone data transformation of catalog items. See Create plan to transform a catalog item.

|
In addition to transformation plans, data remediation plans are available. Using data remediation plans, users can load data, metadata, and DQ results from monitoring projects into ONE Data for data remediation. For details about the data remediation output step and how it compares to the ONE Data writer step, see Data remediation output. |
Once you have configured your data input (catalog item or monitoring project results), you can then add a number of steps, such as filter, split, join, or transform, and add or delete attributes. You can also embed plans within plans using the Embedded transformation plan step.
After transformation, data can be exported to ONE Data or to files in ONE Object Storage or be used in another plan. You can preview data and validate expressions in real time when working with data transformation plans.
|
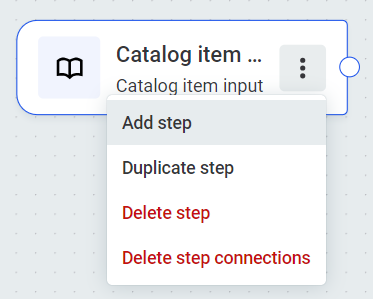
Click anywhere on the blue banner to minimize a step. You can then access the three dots menu. 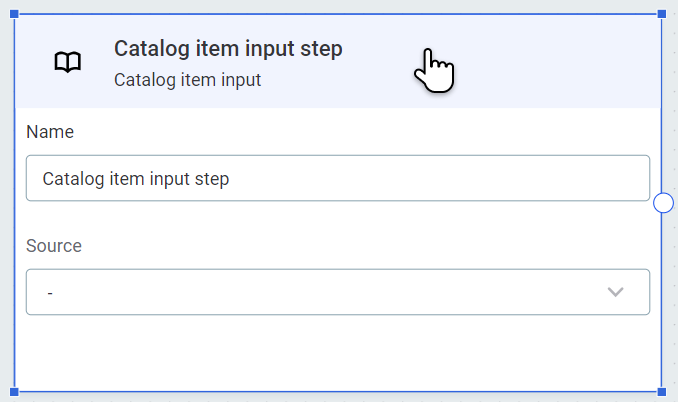
For easier editing you can switch to Full screen mode 
Zoom in or out as needed, and use the compass to recenter when editing. 
|
How is data transformed
To transform data using transformation plans:
-
Select your input data.
-
Build your plans using steps which can, for example, filter, transform, or join the data. These steps are similar to those in ONE Desktop, which leverage ONE Expressions. Each step represents a data processing job.
-
Draw connections between steps to control the data flow.
-
Select your data output.
-
Run the transformation to trigger the flow of data through the plan.
For the full list of steps available, and instructions about how to use them, see Available steps.
Prerequisites
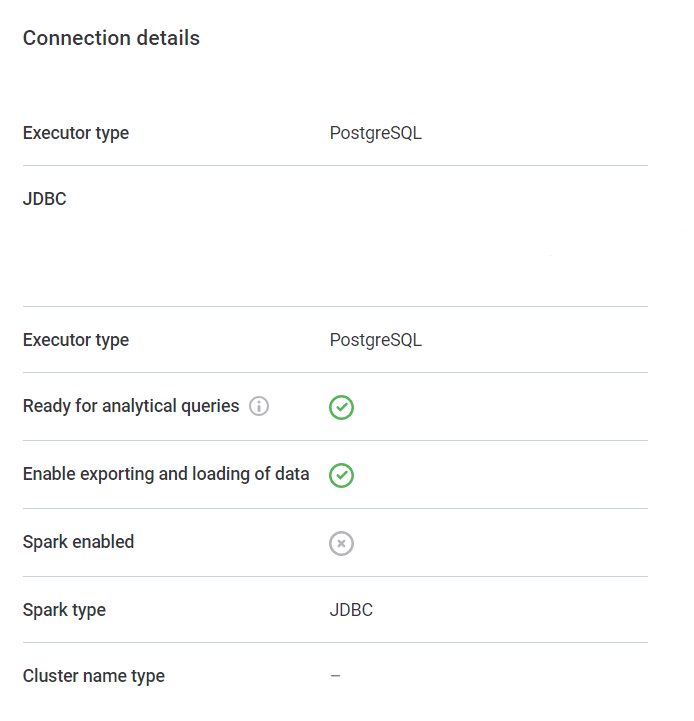
The data source connection of the catalog item you want to use in your transformation plan must have data export enabled.
To verify this, go to Data Catalog > Sources > [your data source] > Connections. In the three dots menu of your connection, select Show details.
In Connection details, Enable exporting and loading of data should be enabled. If not, use the three dots menu and select Edit.
Create plan to transform a catalog item
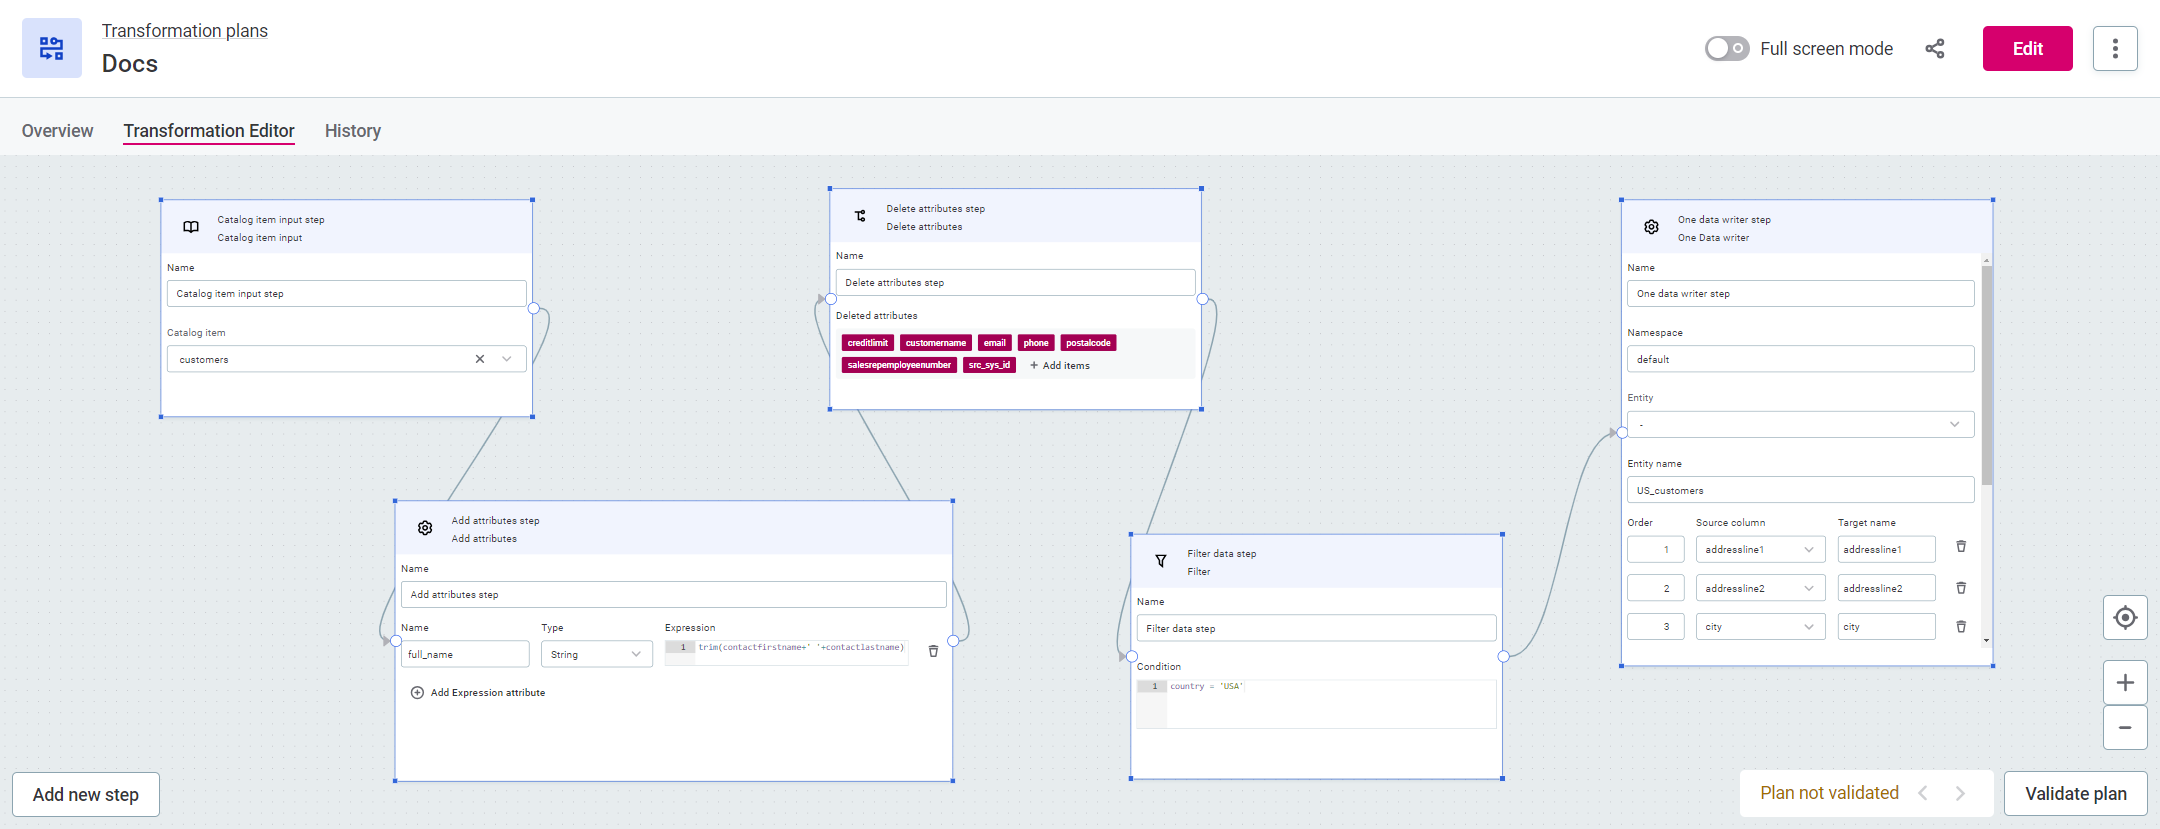
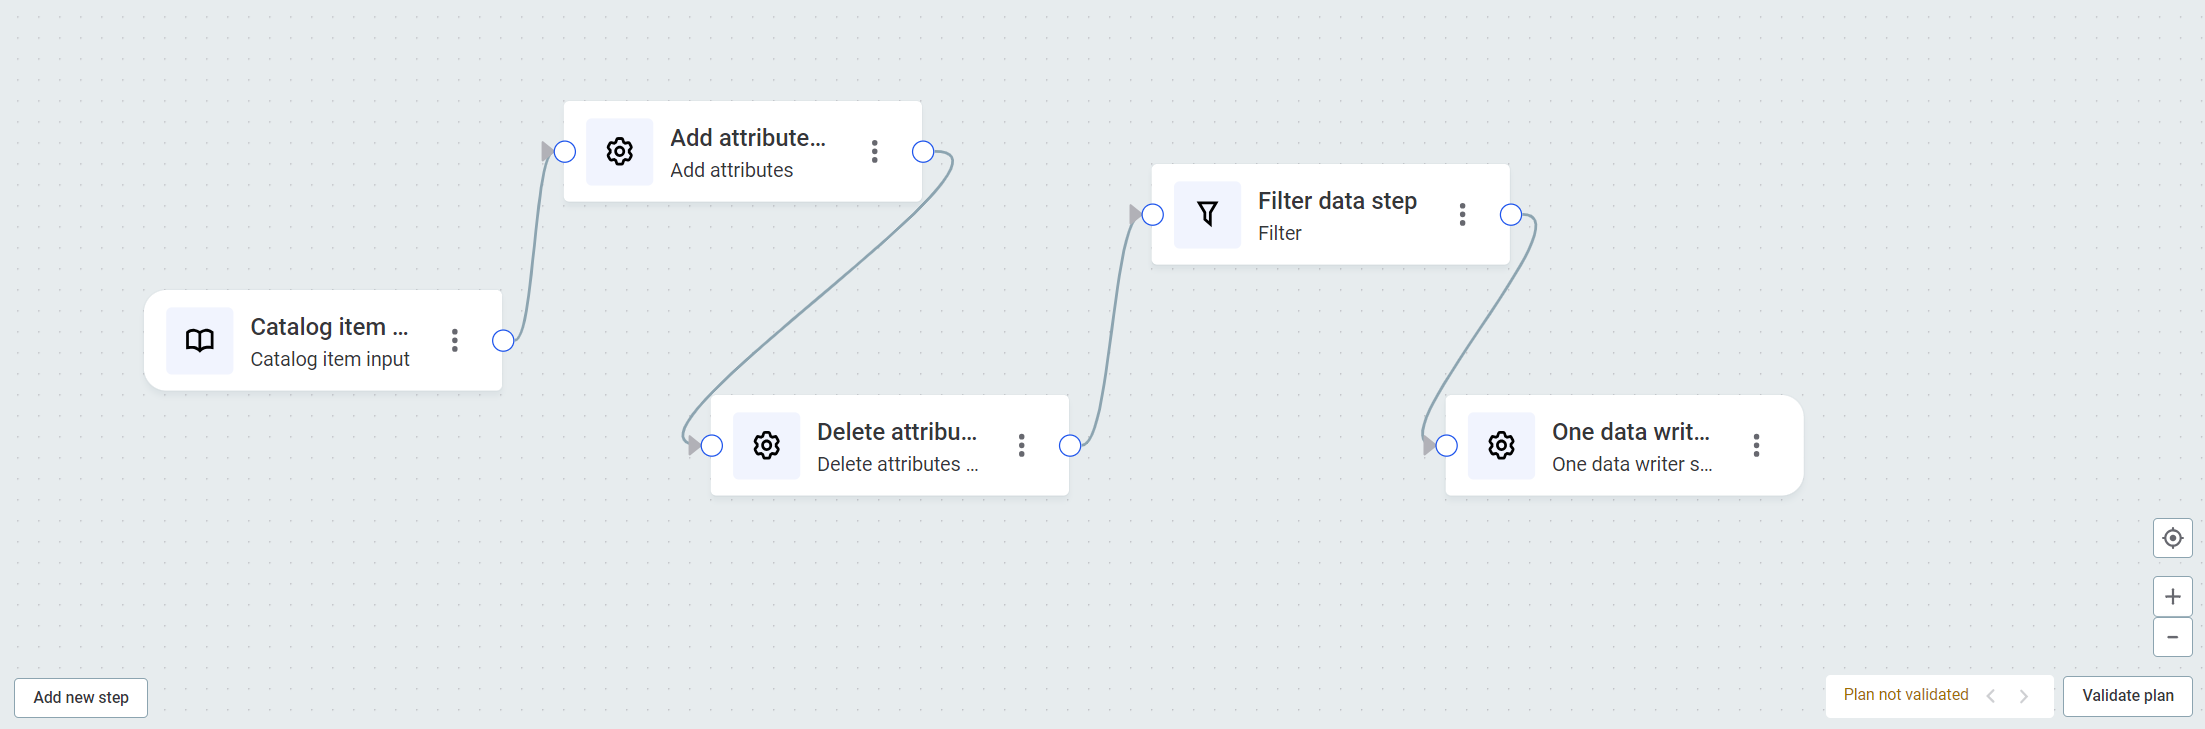
In this example, we will create a plan which inputs the catalog item customers, adds attributes, removes other attributes, filters out selected records, and then writes the output to a ONE Data table. In ONE Data you can create and maintain reference data, as well as fix and remediate errors.
The basic flow is as follows:
-
Add input step
-
Configure input step
-
Add additional steps, for example, transformation steps
-
Configure transformation steps
-
Preview data (optional)
-
Validate plan (optional)
-
Add output step
-
Configure output step
-
Run transformation plan
To create a plan for standalone transformation of a catalog item:
-
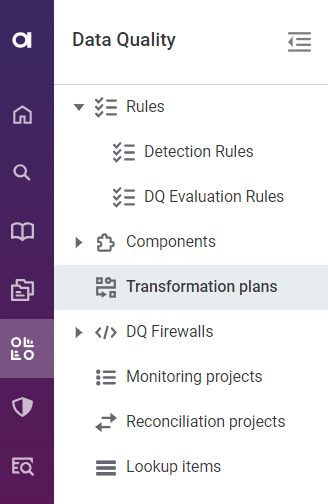
In Data Quality > Transformation plans, select Create.
Alternatively, from the required catalog item, use the three dots menu and select Add transformation.

-
Provide a name for the new plan and select Save. In this example, we are creating a transformation plan for the catalog item customers, so let’s call the plan Customers transformation plan.
After selecting Save, you are redirected to the plan canvas.
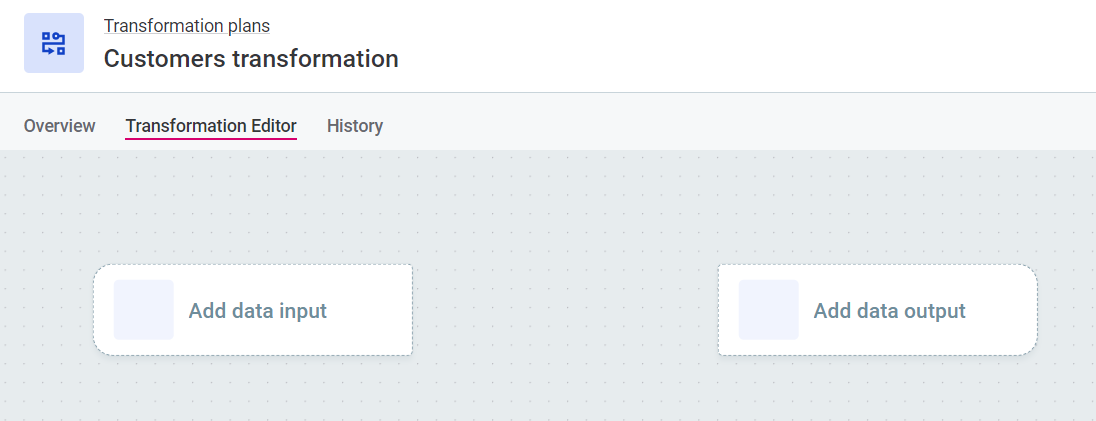
-
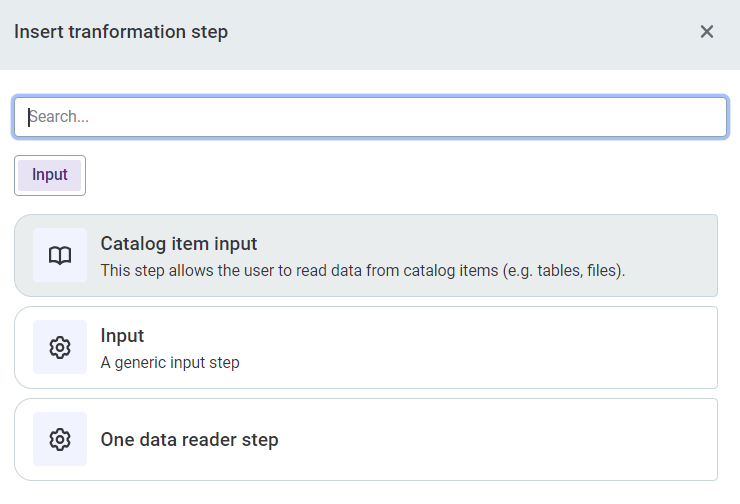
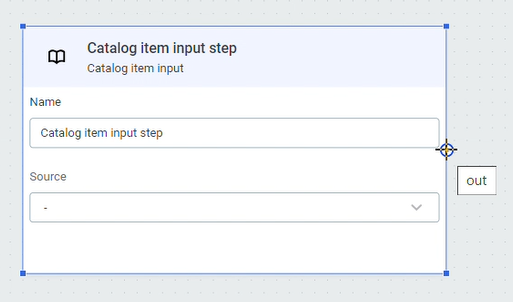
Select Add data input and then Catalog item input.
-
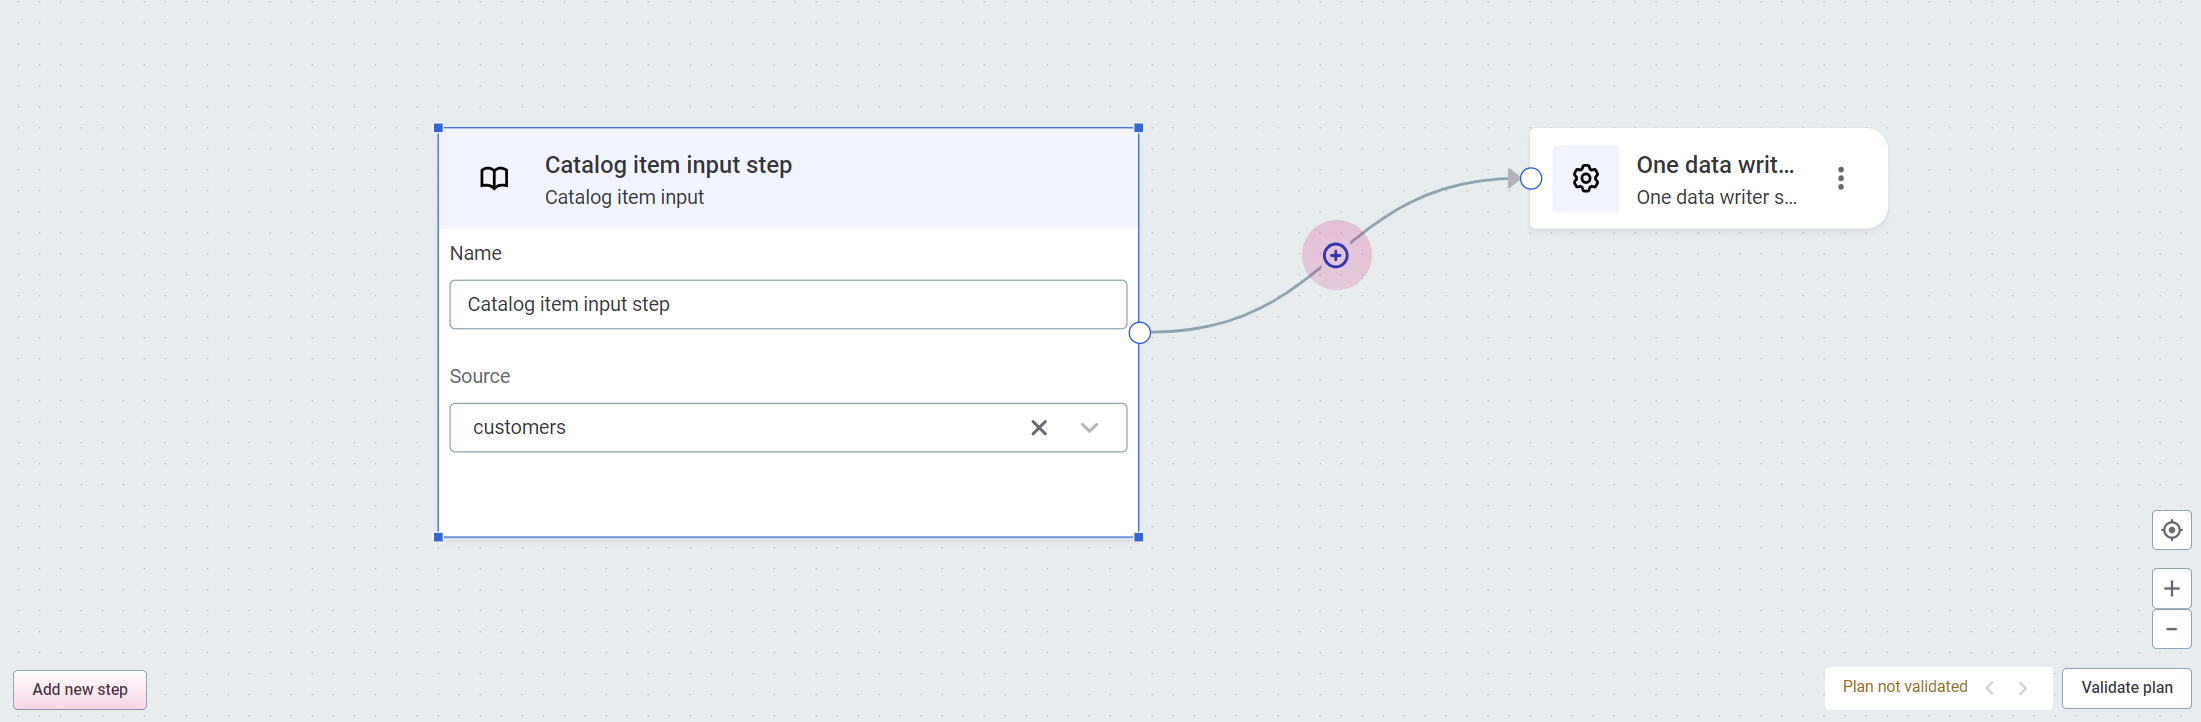
Repeat with Add data output. For the purpose of this example, we are using the ONE Data writer step.
-
Draw a connection between the two steps.

To create step connections, hover your mouse over the circle on the edge of the step. When a cross appears, click and then draw a connection to another step.
-
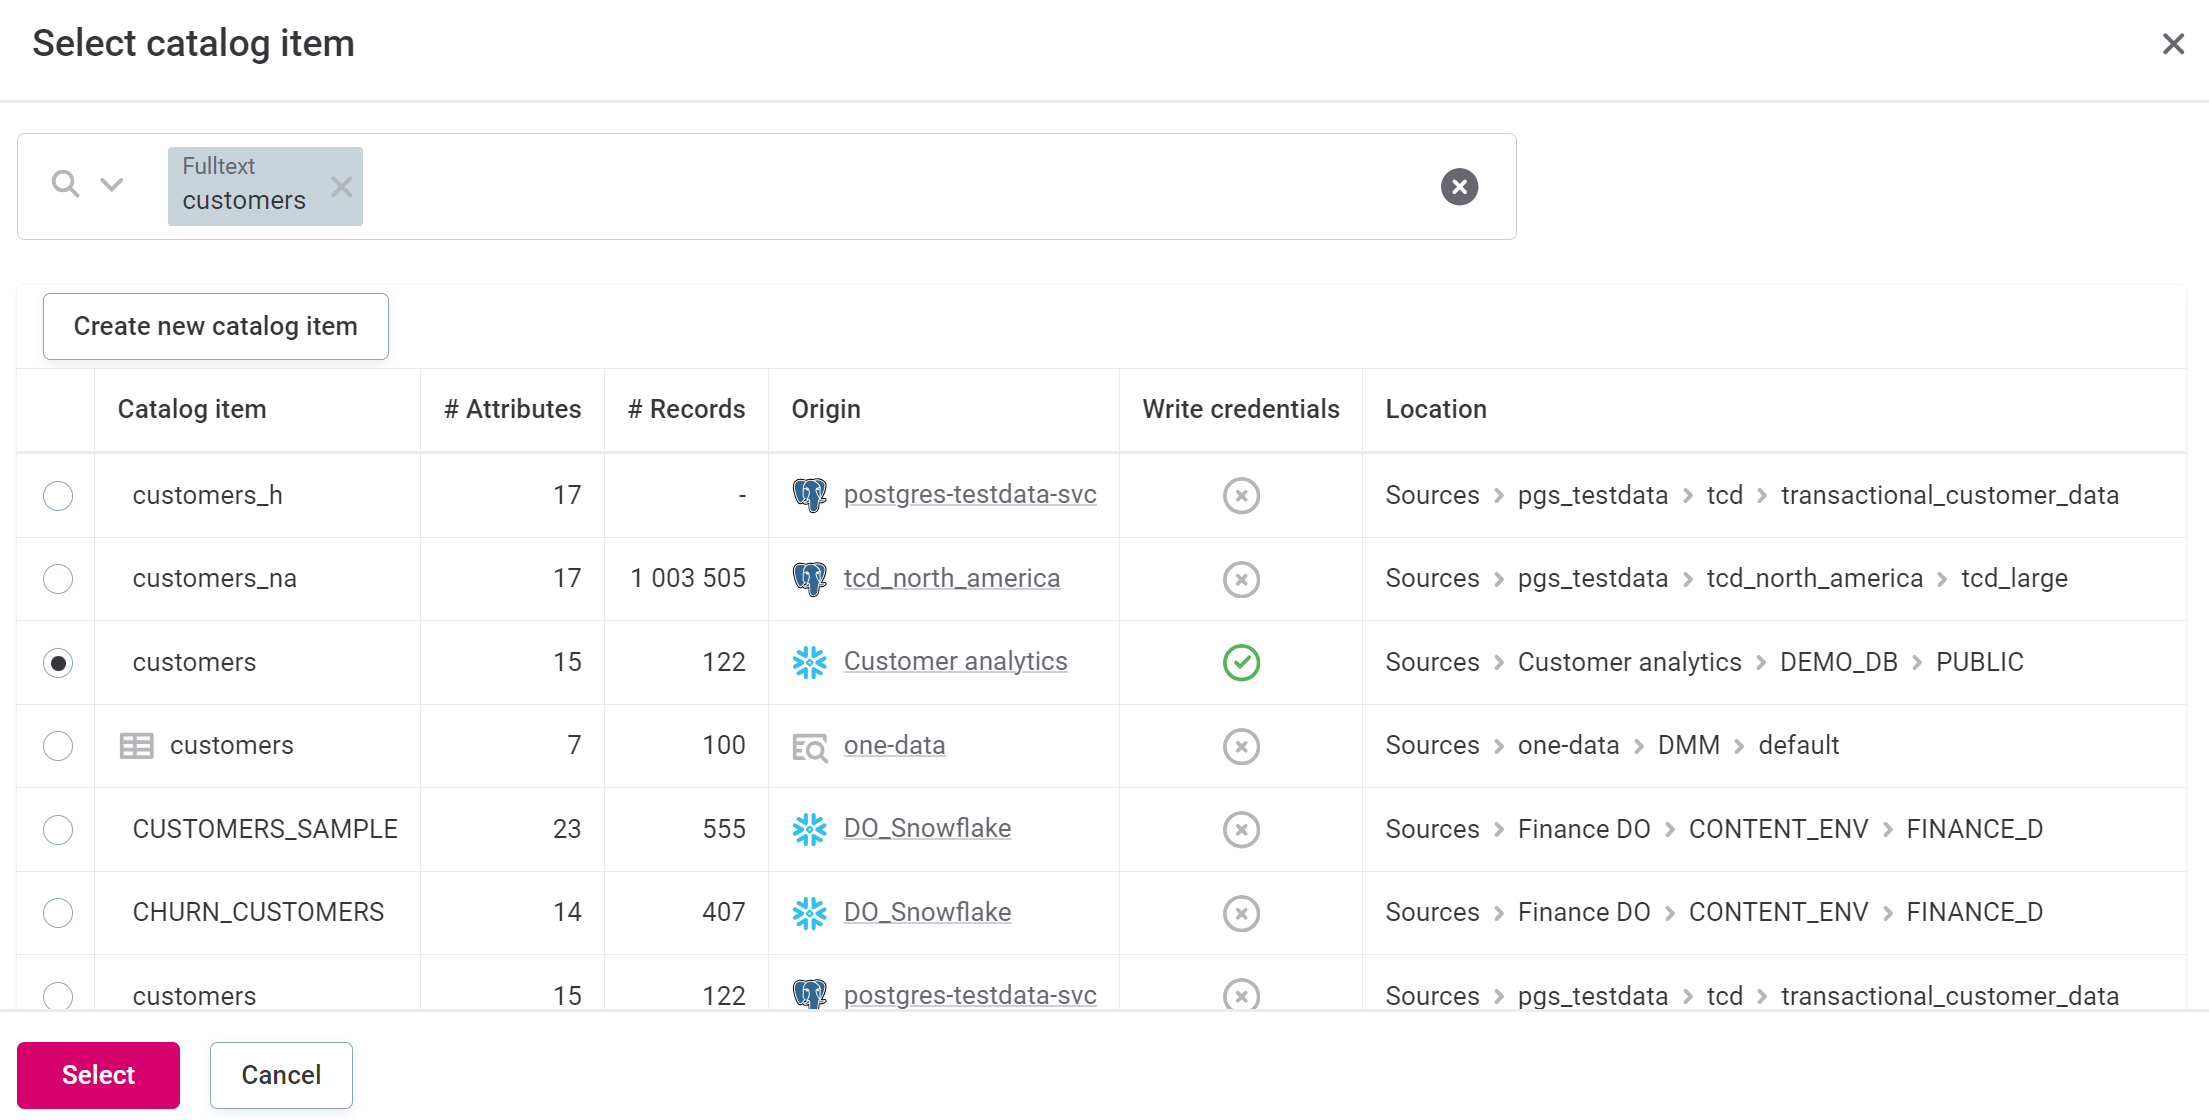
In Catalog item, select the catalog item you would like to use as an input. In our case, this is customers.
To see how to configure alternative input steps, see Available steps. 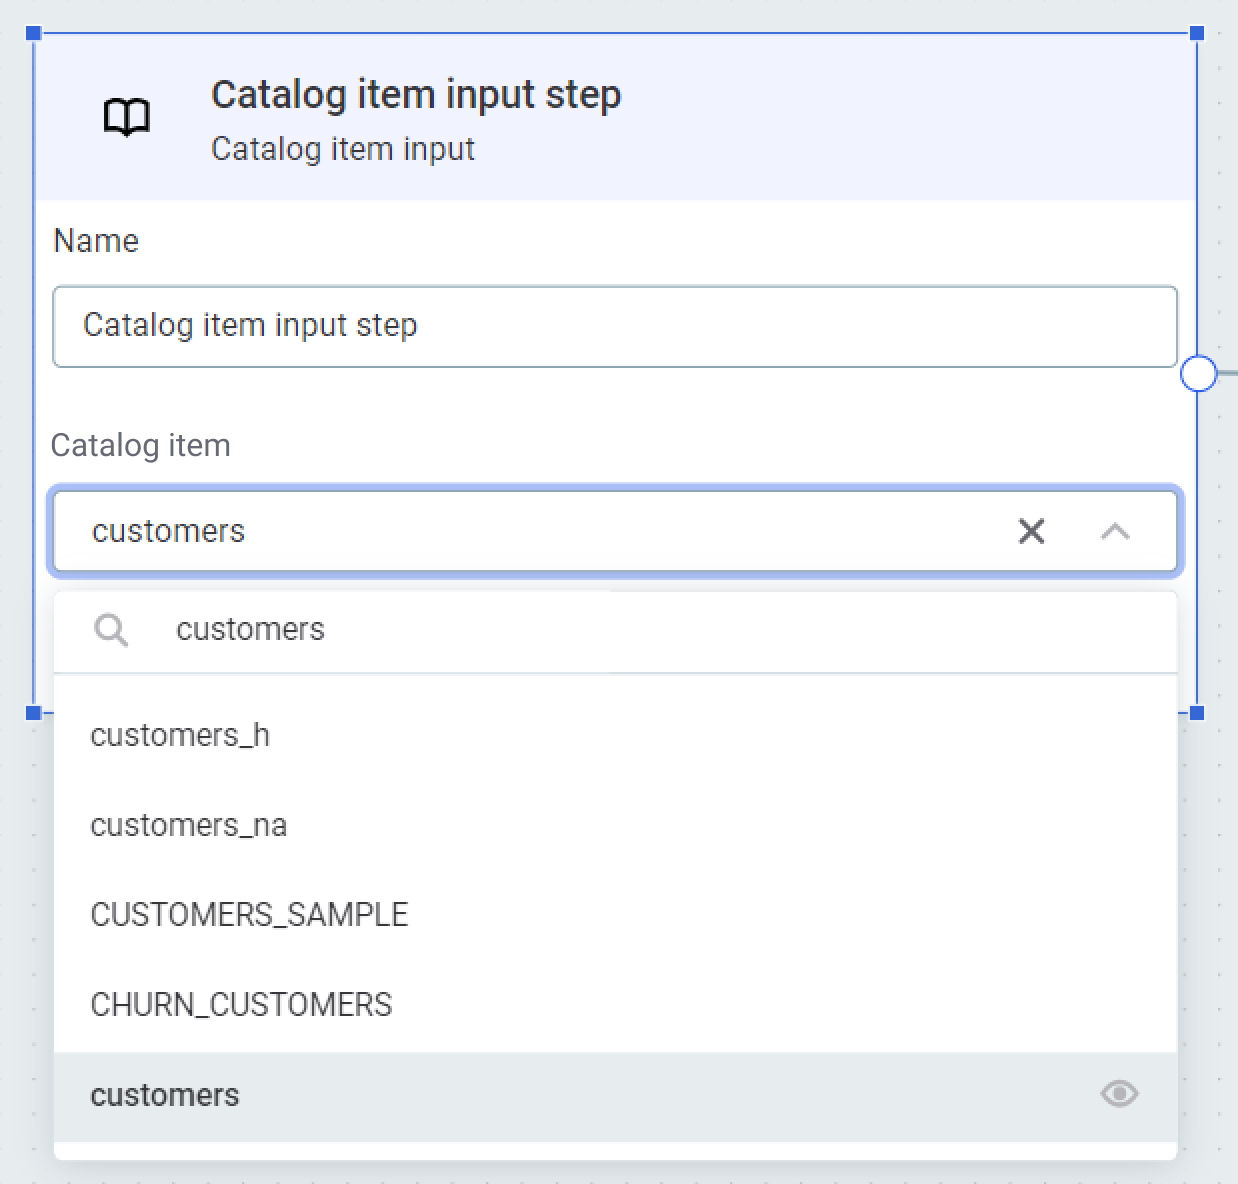
-
To add more steps, use the plus icon in the connection, or select Add new step.
For the purpose of this example, we need to add the following steps:
-
Add attributes, to create a new attribute in the output,
full_name, which is a concatenation of the existing input attributescontact first nameandcontact last name. -
Delete attributes, to remove surplus attributes, leaving us with just the key attributes in the output.
-
Filter, to filter out all records which are not from a selected country. In our case, this will be everything not from the United States.
Click each step in turn to configure it according to the following instructions:
-
-
To create a new attribute,
full_name, which is a concatenation of the existing input attributescontact first nameandcontact last name, use the Add attributes step. It is configured as follows:-
Select Add expression attribute.
-
Name and Type: The attribute name and data type that will be used for the output. In our case, this is
full_nameandString. -
Expression: A ONE expression which defines the new attribute. For our use case, we can use the expression trim
(contactfirstname+' '+contactlastname). This also trims the inputs before joining them.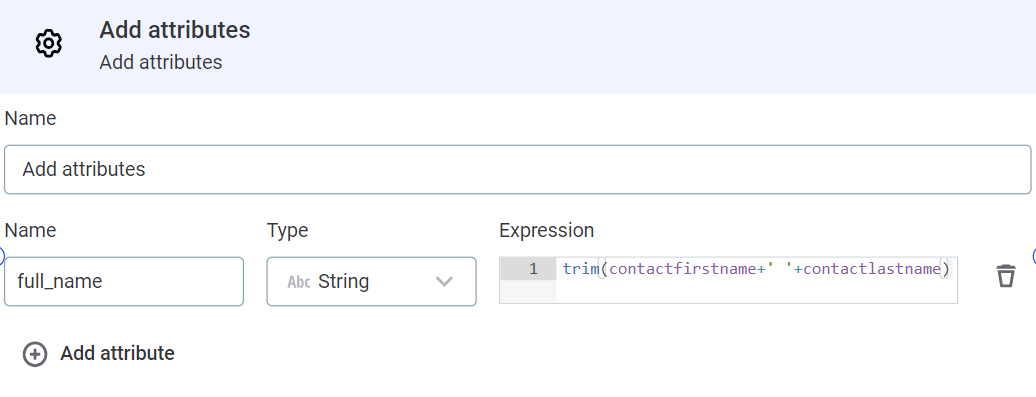
-
-
There are some attributes in our catalog item, customers, that we do not need in the output. To remove these we can use the Delete attributes step. It is configured as follows:
-
Deleted attributes: Use Add and select attributes from the options available. In our case, this is
creditlimit,customername,email,phone,postalcode,salesemployeenumber,src_sys_id.
-
-
To filter out all records which are not from the United States, we can use the Filter step. It is configured as follows:
-
Condition: The filter condition, defined using ONE Expressions. In our case, this is going to be
attribute name = 'value', socountry = 'USA'.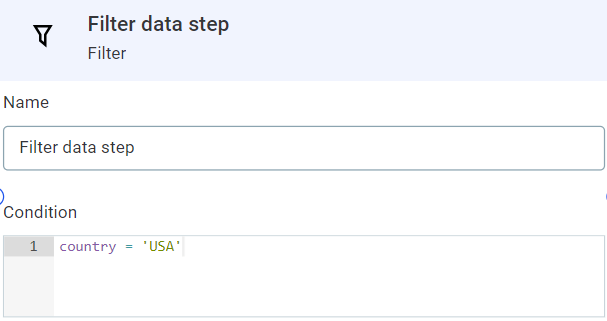
To see how to configure alternative transformation steps, see Available steps.
-
-
You can optionally preview the data that will be output as a result of the selected step to verify it is functioning as you planned.
-
To preview data, select Compute data preview. Use the dropdown to switch between steps.
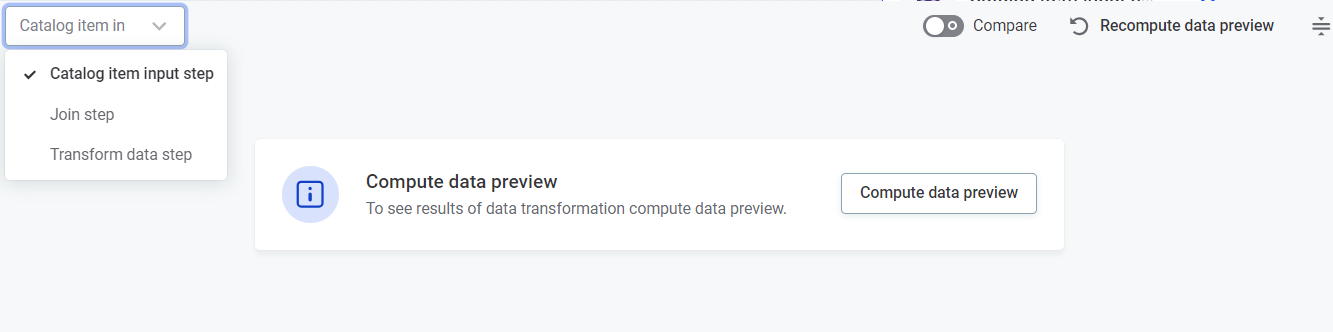
For more information about how data preview works, see Data preview.
-
-
You can also validate the plan as you go:
-
Select Validate plan in the lower-right corner of the canvas. You are alerted of any errors, for example, incorrect expression conditions. If validation issues are present, when you select Run transformation, the data processing job fails.

-
-
Next, we need to configure our output step. You can export transformed catalog items to ONE Data, or directly to the Data Catalog.
-
To export to ONE Data, use the ONE Data writer step. It is configured as follows:
-
ONE Data table: The name of the table you want to write into. Select an existing table, or create a new one:
-
To create a new table, type the name you want to use for the new table, then select Add {table name}.
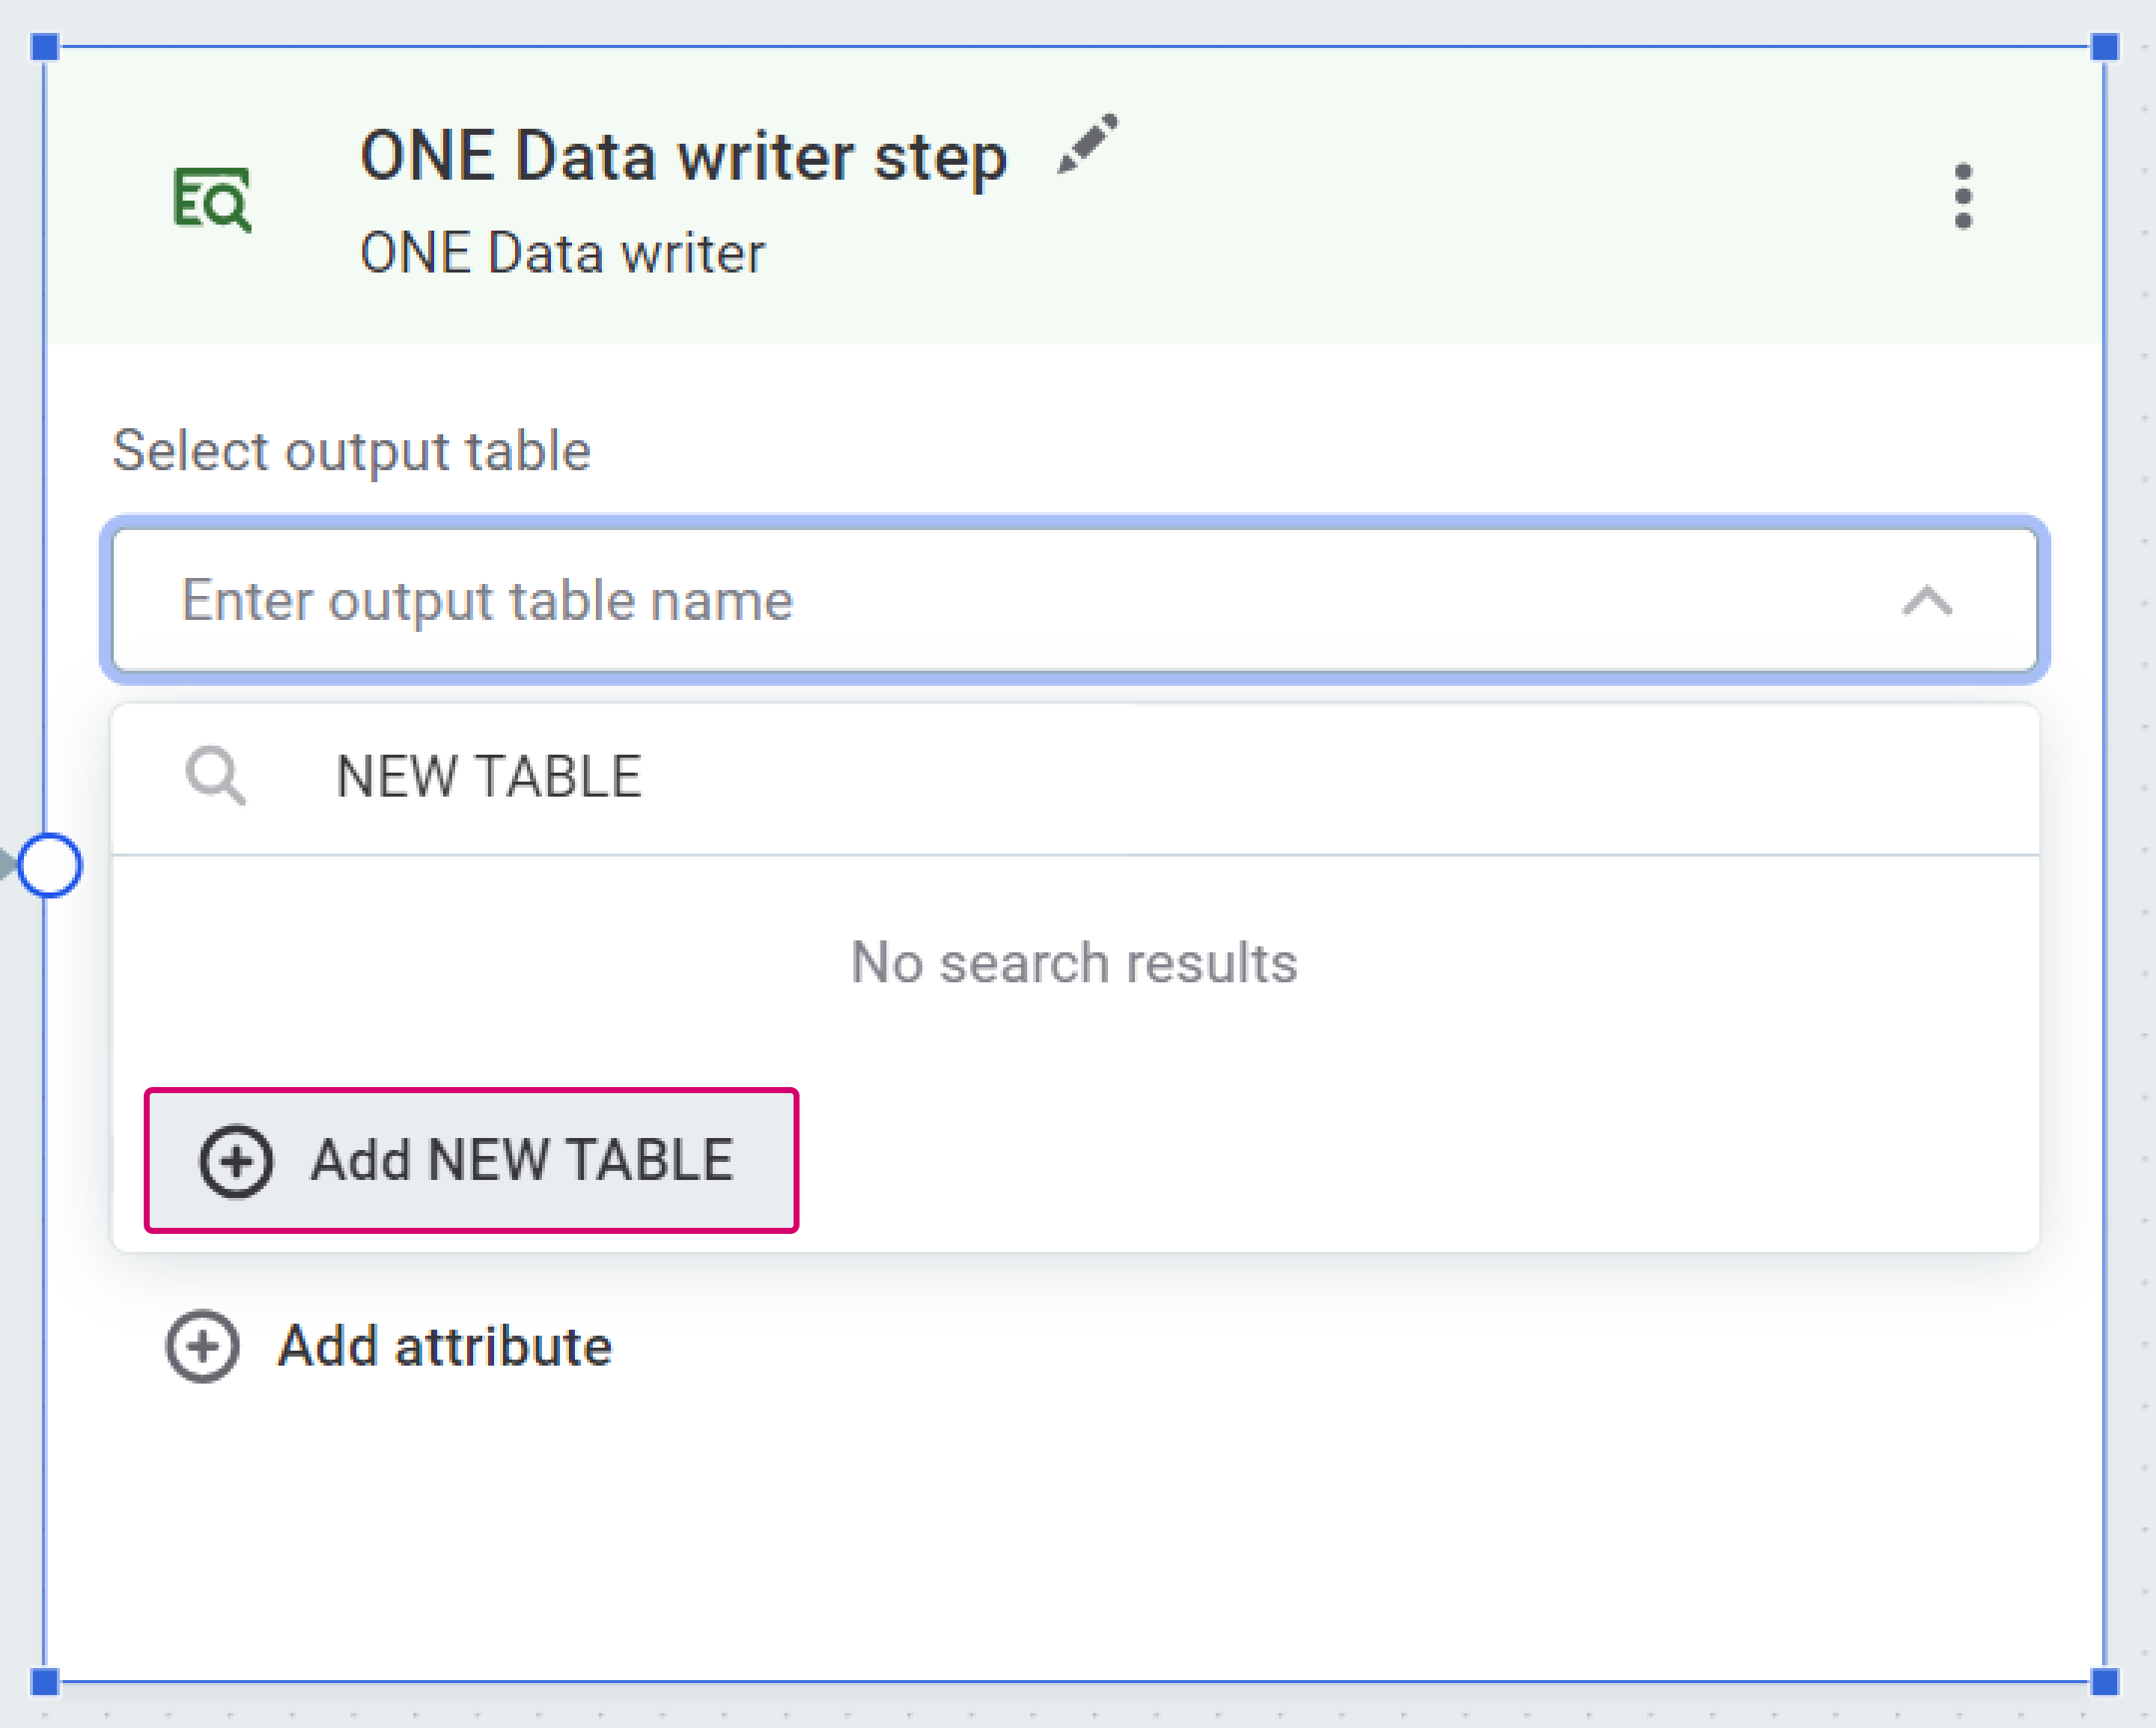
If a catalog item with this name already exists, and you have sufficient permissions, the existing table is overwritten by the outputs of the plan. -
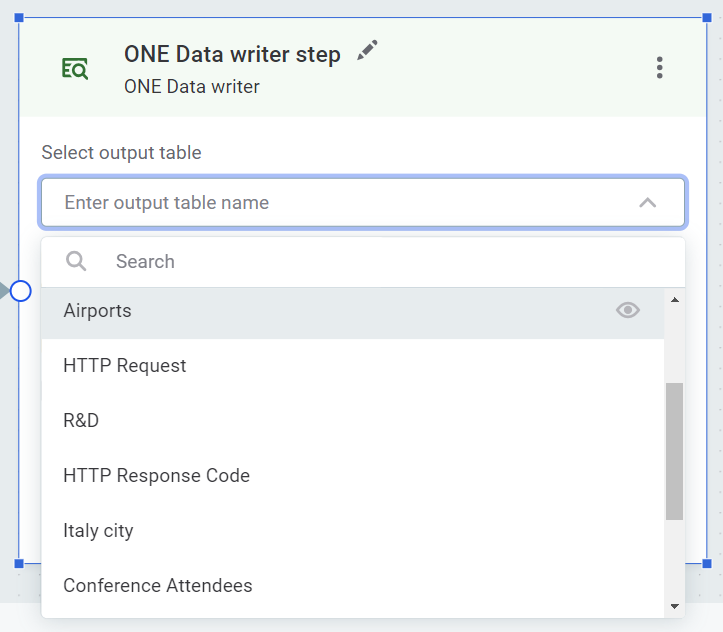
To write into an existing table, select the table from the list available.
Select Write all attributes to include all attributes that are inputs to the step, without having to add them manually. 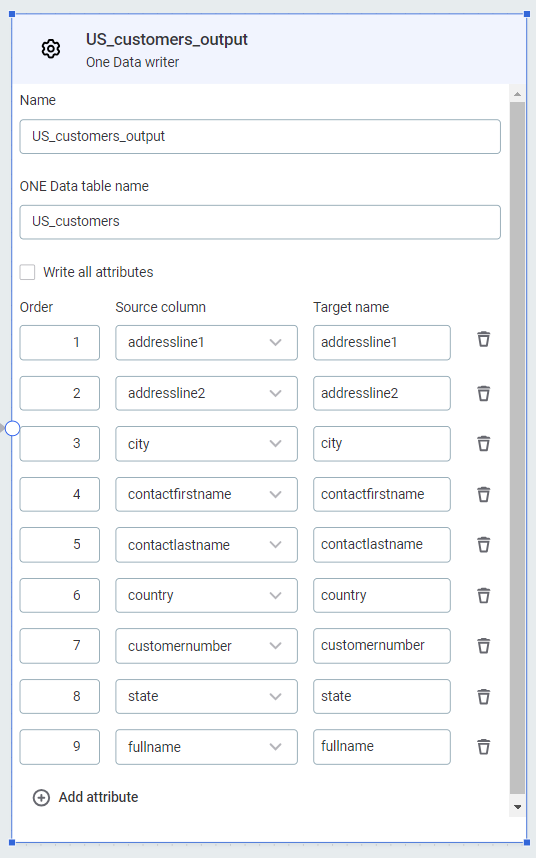
Use Write all attributes or add attributes manually. These two methods cannot be used in combination.
-
-
-
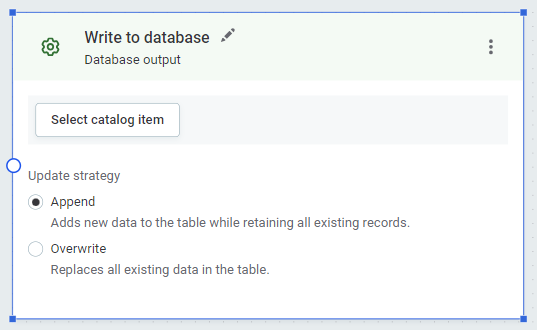
To write to the Data Catalog, either overwriting the data, appending new data, or creating a new catalog item, use the Database output step.
-
Select Select catalog item.
-
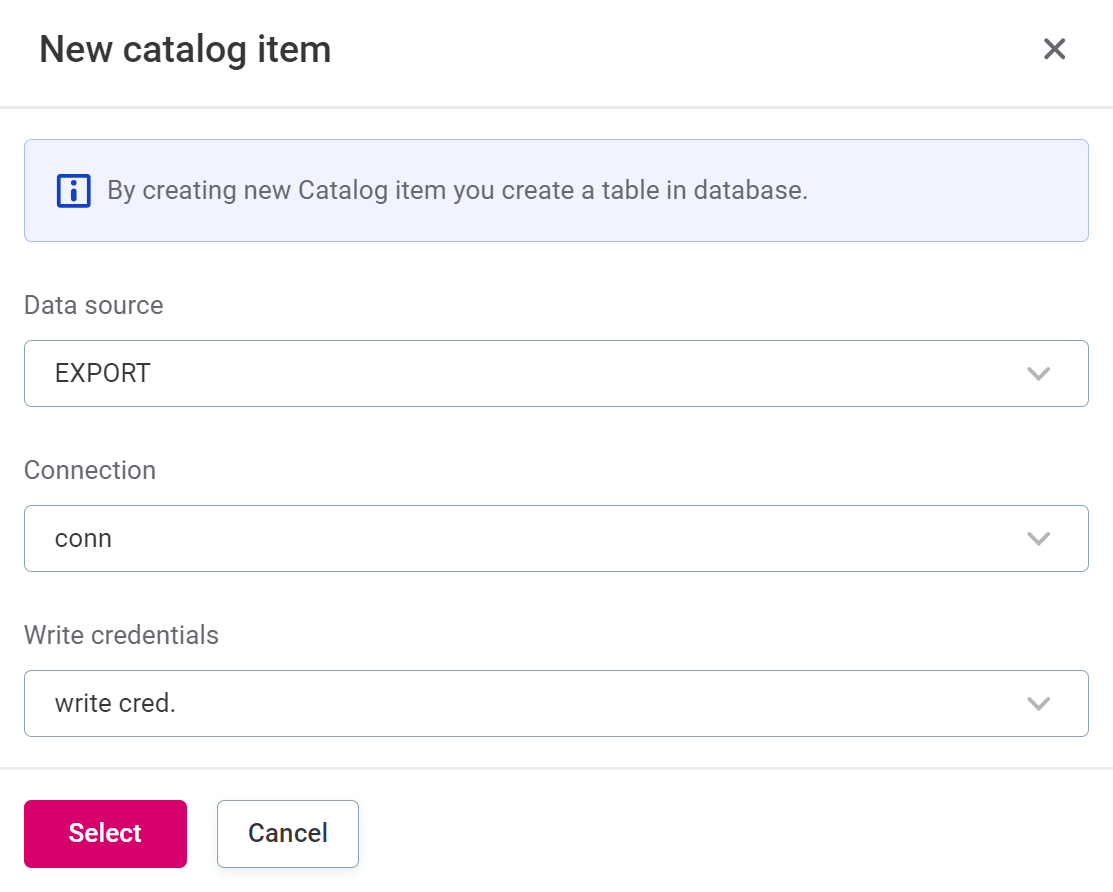
To create a new catalog item, select Create new catalog item.
-
Select the data source, connection, and write credentials you want to use, and then Select.
To write to the Data Catalog, the selected connection must have write credentials configured. These are set on a connection in the data source.
Go to Data Catalog > Sources > [your data source] > Connections. In the three dots menu of your connection, select Show details. Credentials for the connection are listed in the Credentials and Write credentials section.
In case write credentials are not yet configured, in the Write credentials section, select Add credentials. Follow the instructions according to the page for your respective connection type in Connect to a Source.
-
-
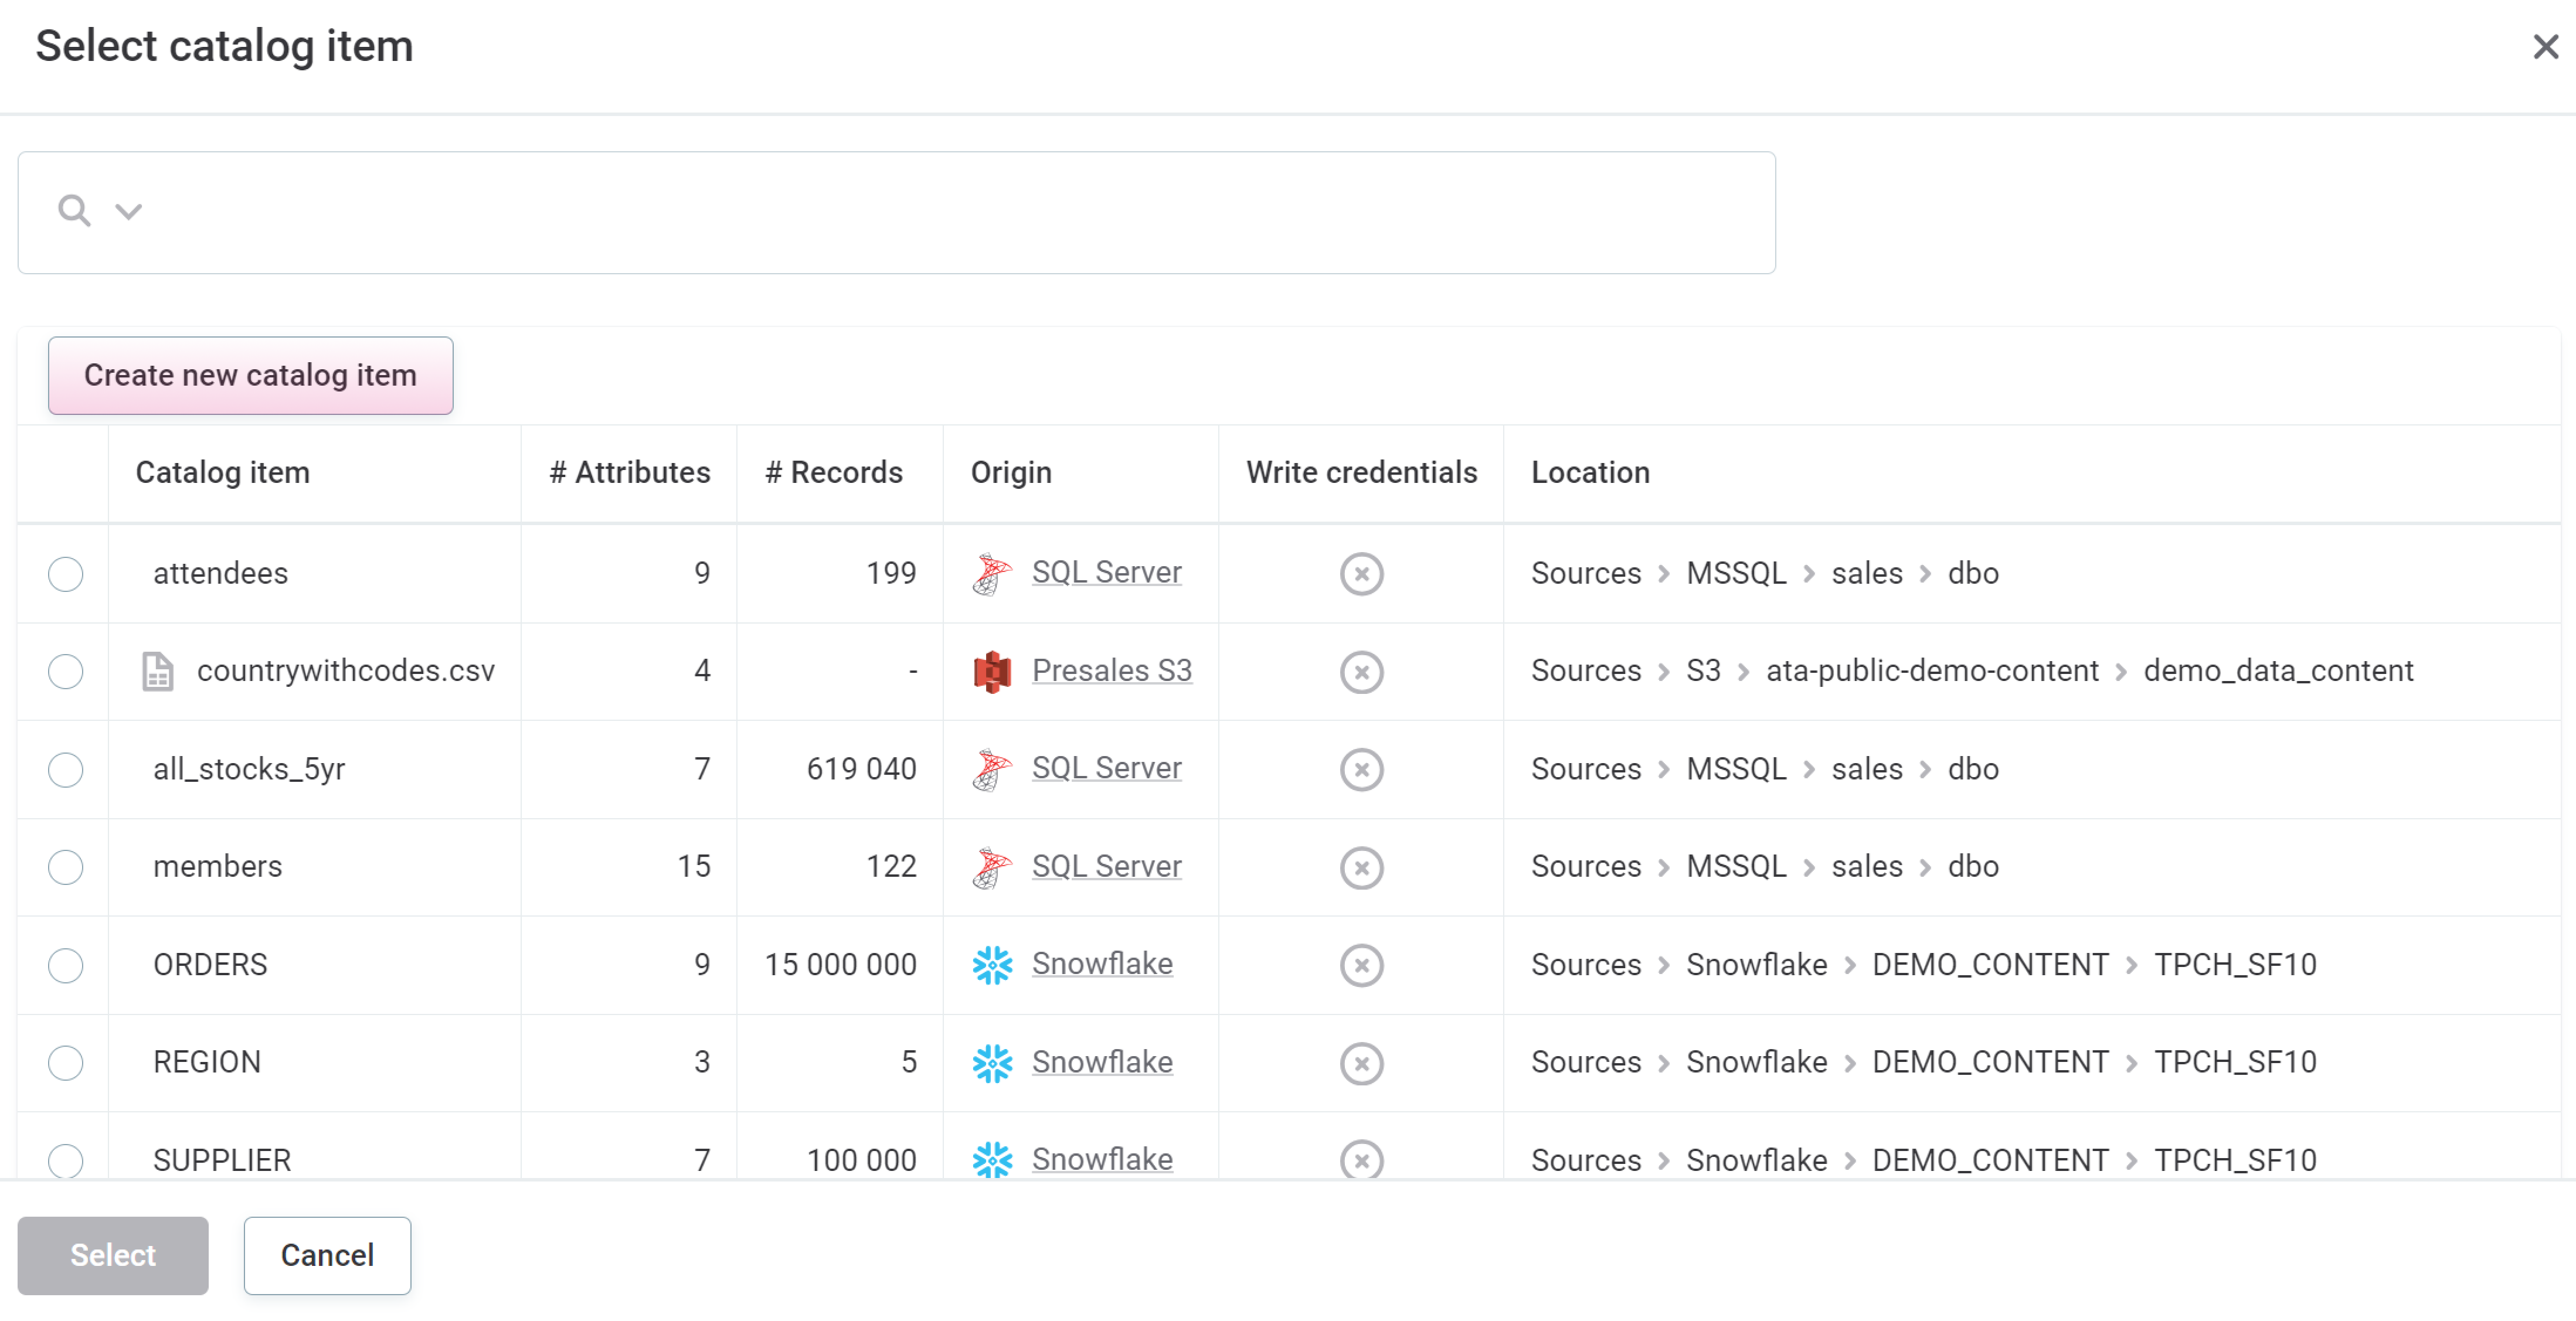
To choose an existing catalog item, select the item from the list available and then Select.
-
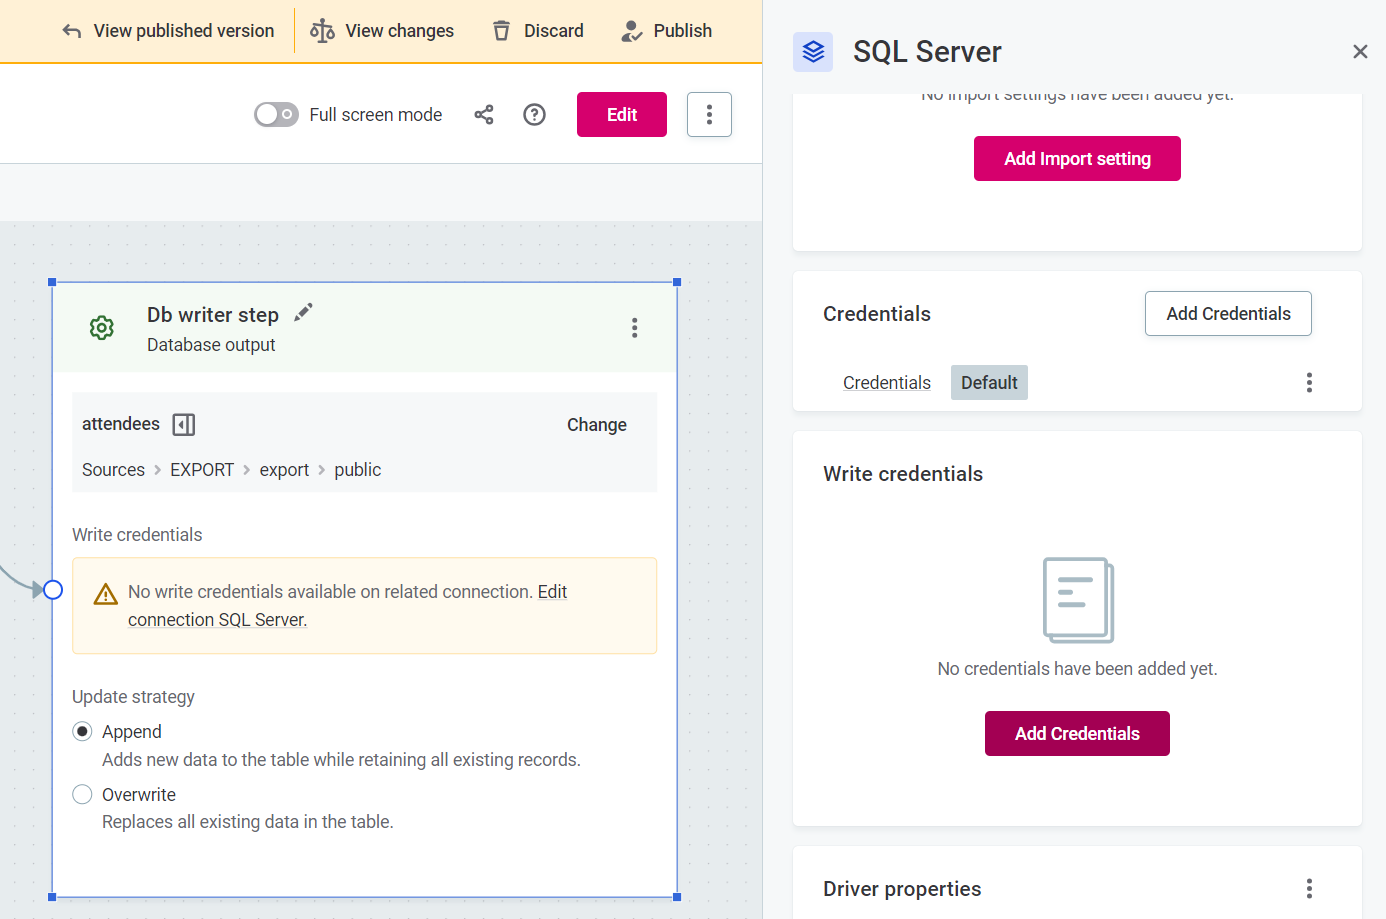
Select the Write credentials for the connection of the catalog item.
If write credentials are not configured, select Edit connection [connection name], and in Write credentials, select Add credentials.
-
Under Data write strategy, select Append or Replace.
-
-
-
-
-
Now we are ready to run the transformation plan. Use the three dots menu and select Run transformation.
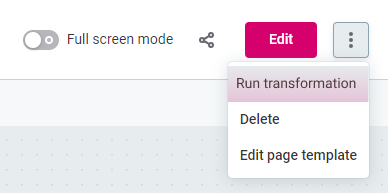
A new job runs for the transformation plan. Data from the data source is read and processed on Ataccama Data Processing Engine (DPE), with results stored in the configured plan output. You are alerted when the job is finished.
Information about transformation plan jobs can be found by going to Processing center > Base jobs > Transformation plan jobs, or by searching for job Type DQC.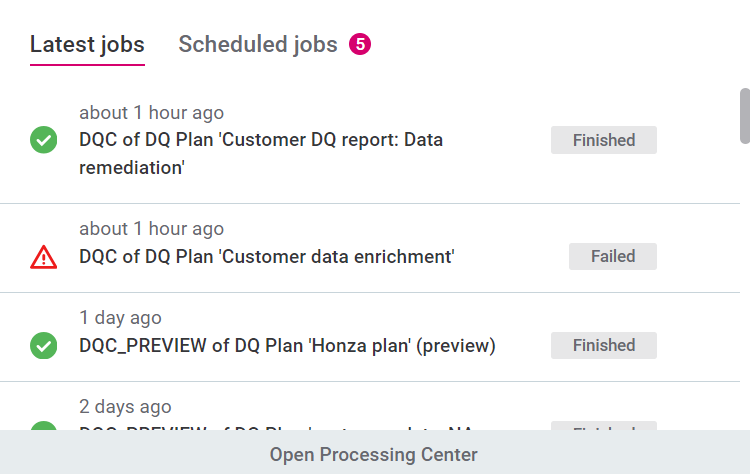
Create plan to transform data quality monitoring results
When creating a transformation that processes not only the source data but also needs results of data quality (such as passed or failed rules), you start creating your transformation plan from the desired monitoring project. This then ensures this plan is run whenever the monitoring project runs, and that the output is available on the monitoring project Export tab.
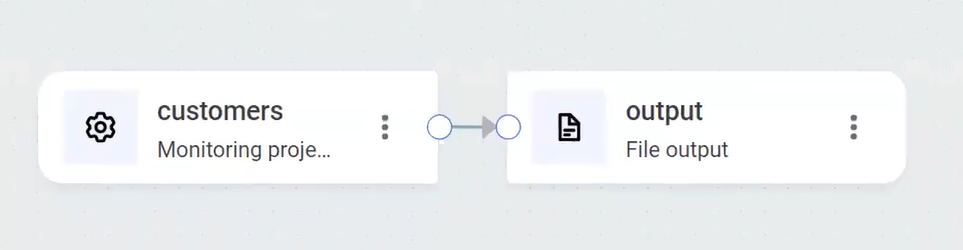
In this example, we will create a plan which inputs results from a catalog item in a monitoring project, filters the results, and writes them to a .csv file.
The basic flow is as follows:
-
Initiate plan from your monitoring project
-
Add and configure transformation steps
-
Run monitoring
| Create transformation plans from monitoring project items to automatically apply transformations after data quality has been evaluated. |
-
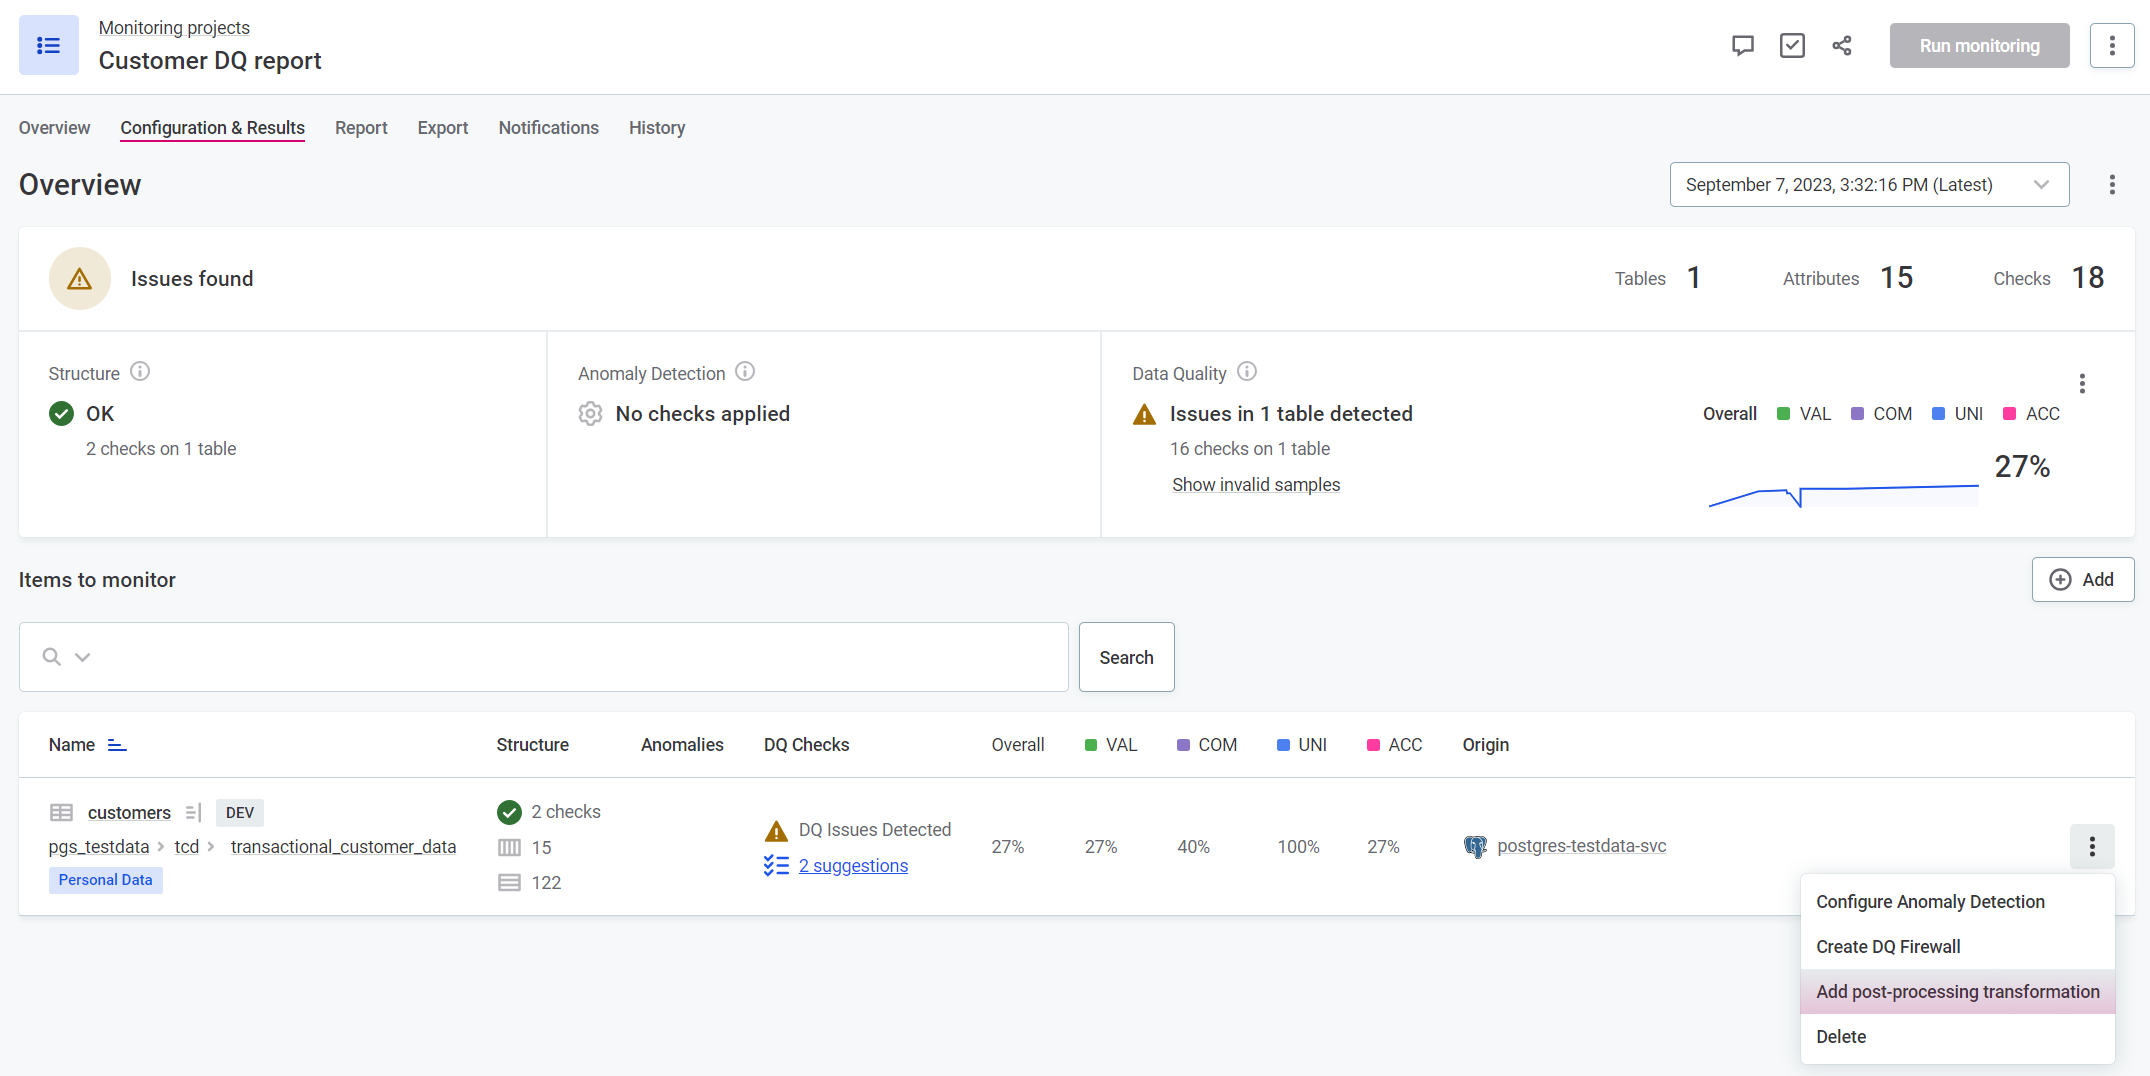
To create a new transformation plan from a monitoring project item, select the required project and navigate to the Configuration & Results tab. On the relevant catalog item, select the three dots menu and then Add post-processing transformation.
-
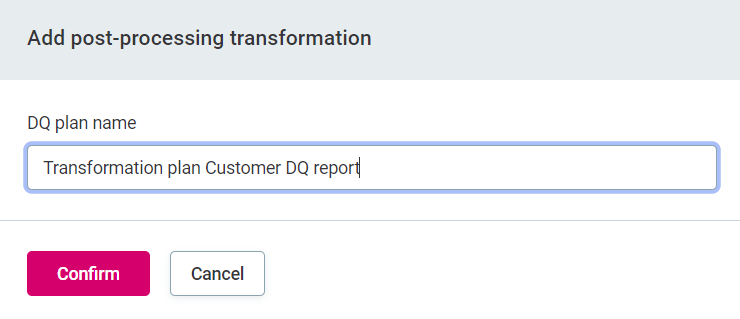
Provide a name for your transformation plan.
-
This opens the plan editor with preconfigured inputs and outputs.
-
By default, the output is a
csvfile named after the catalog item from which the project has been created. In this example, we will filter out all results which are not from the US, and all those without data quality issues, so we can rename the output file accordingly.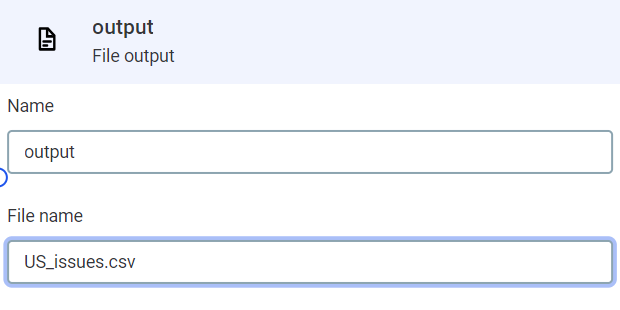
-
To filter out all data without data quality issues and which is not from the US, we can use the Filter step. To add a new step, use the plus icon on the connection, or select Add new step.
-
Select Filter. For our use case, we need the expression
invalid_rules is not null and country = 'USA'.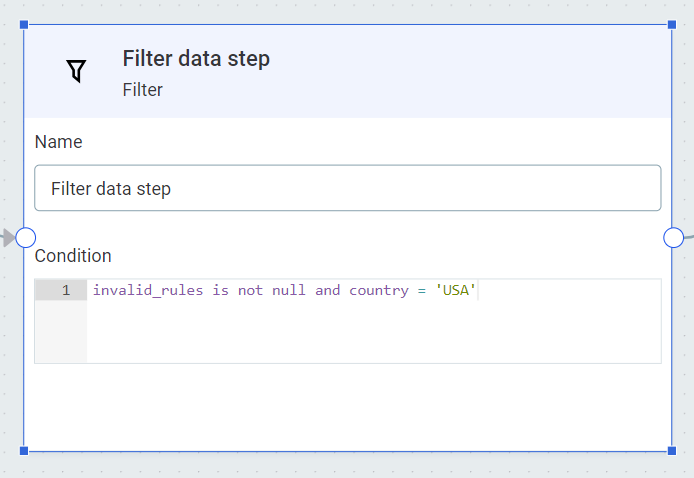
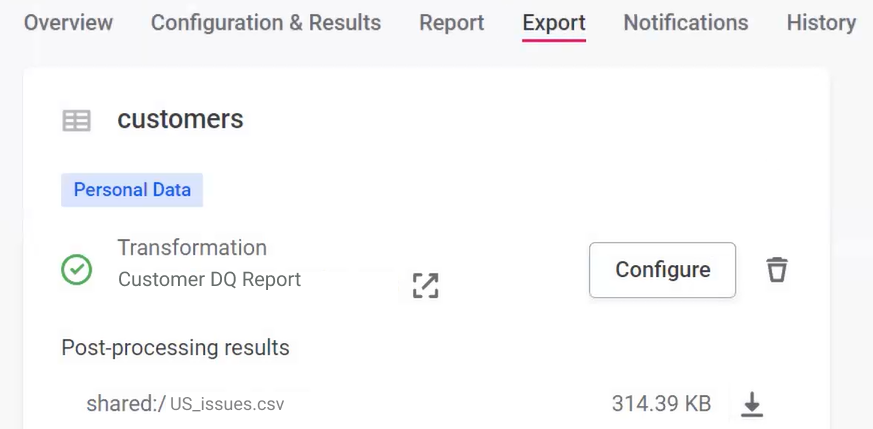
Running the monitoring project automatically triggers the transformation plan. After navigating to the monitoring project from which you initiated the transformation plan, select Run monitoring. After the jobs have finished, the results of the transformation plans are found on the monitoring project Export tab.
Available steps
In the previous examples, you can see how to configure a few selected steps. This section contains a full list of steps available as well as information about how to configure them.
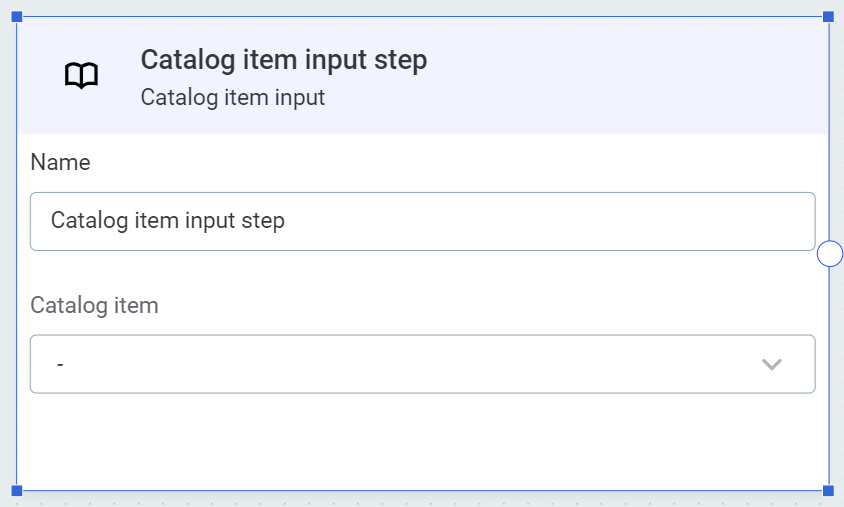
Catalog item input
Reads data from the selected catalog item. In Catalog item, select the catalog item from the list available.
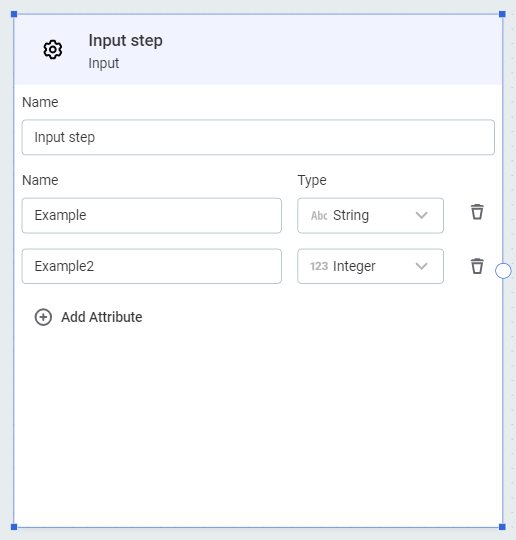
Input
A generic input step that can be used to embed the plan into another. Use Add attribute to add input attribute names and data types.
| Typically, these would correspond with the output endpoints of another plan. |
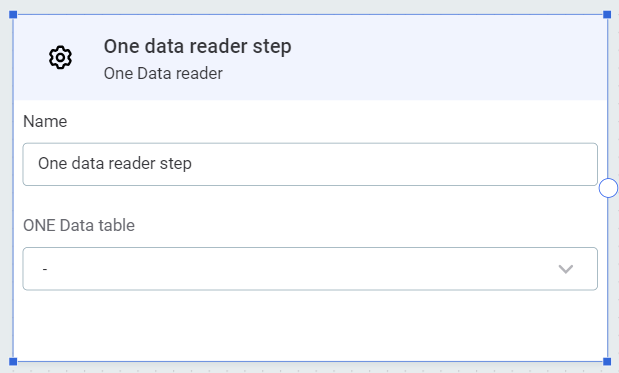
ONE Data reader
| Use ONE Data to create and maintain reference data, as well as fix and remediate errors. For more information, see Data Remediation with ONE Data. |
Reads data from the selected ONE Data catalog item. In ONE Data table, select the item from the list provided.
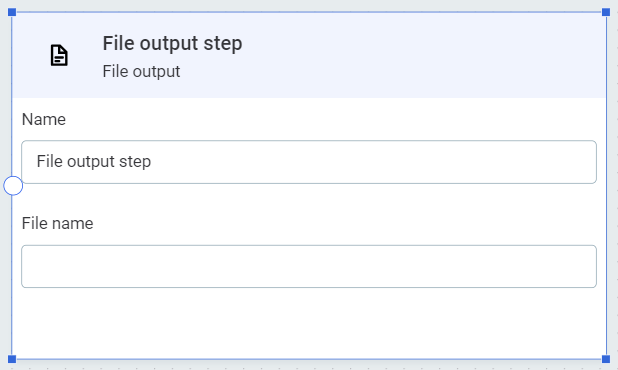
File output
Writes data into a text file in ONE Object Storage. In File name, provide the name for the output file.
| When writing to a text file, columns will be separated by delimiters. |
| Text files are only available to users when they are generated as part of a DQ monitoring project, that is, as part of plans using the Monitoring project post-processing input step which are initialized from the monitoring project. You can find them on the Export tab of the relevant monitoring project. |
ONE Data writer
Writes data into new or existing ONE Data catalog items.
-
In ONE Data table, select a table to write into, or create a new one:
-
To create a new table, type the name you want to use for the new table, then select Add {table name}.
If a catalog item with this name already exists, and you have sufficient permissions, the existing table is overwritten by the outputs of the plan. -
To write into an existing table, select the table from the list available.
-
-
Use Add attribute and add all the attributes you want to be present in your ONE Data table. Map the attributes to your input data. Attribute names can match the source data, or you can provide alternative names.
Select Write all attributes to include all attributes which are inputs to the step, without having to add them manually.

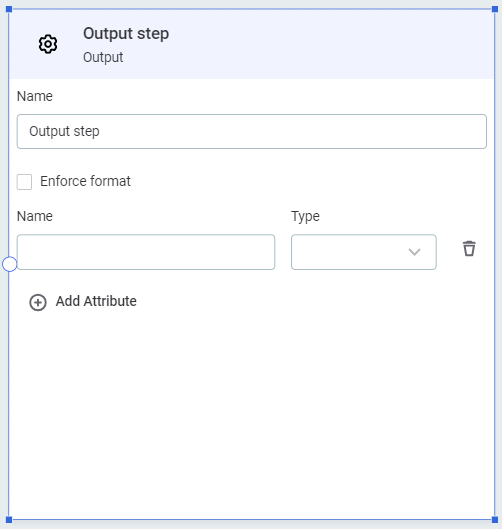
Output
A generic output step which can be used to embed the plan into another.
-
Select Enforce format to limit the visible fields in the output to the attributes defined. Otherwise, the format is defined by the inputs to this step.
-
Using Add attribute, add input attribute names and data types.
Typically, these would correspond with the input endpoints of another plan.
Data remediation output
The data remediation output step should be used in data remediation plans. See Data Remediation Plans.
The data remediation output step writes the term and rules metadata from catalog items to ONE Data: ONE Data writer step does not copy information about applied terms or rules.
Due to this, there are fewer data transformation options in data remediation plans (which use the data remediation output step) than in general transformation plans, as it is not possible to change attribute structure.
The remediation step also stores DQ results in ONE Data, meaning you can view DQ results and also filter by them. The data remediation output is designed for the specific use case of import of issues for manual resolution.
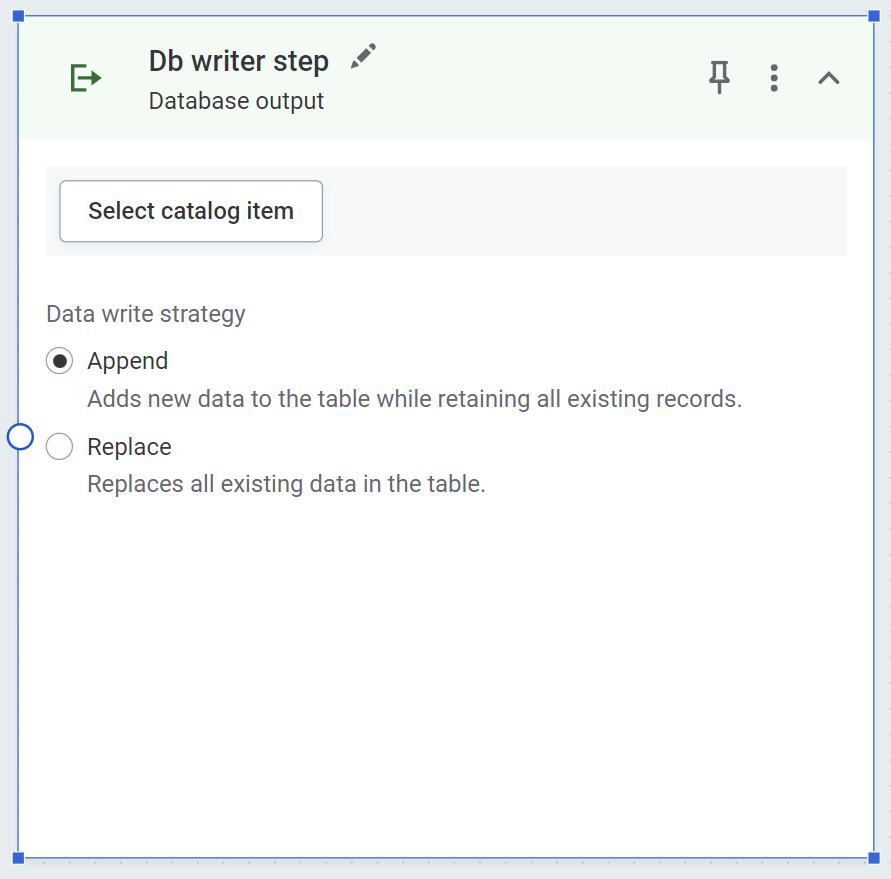
Database output
Write transformed catalog items back to the data catalog, either as new items, or by overwriting or appending existing items.
-
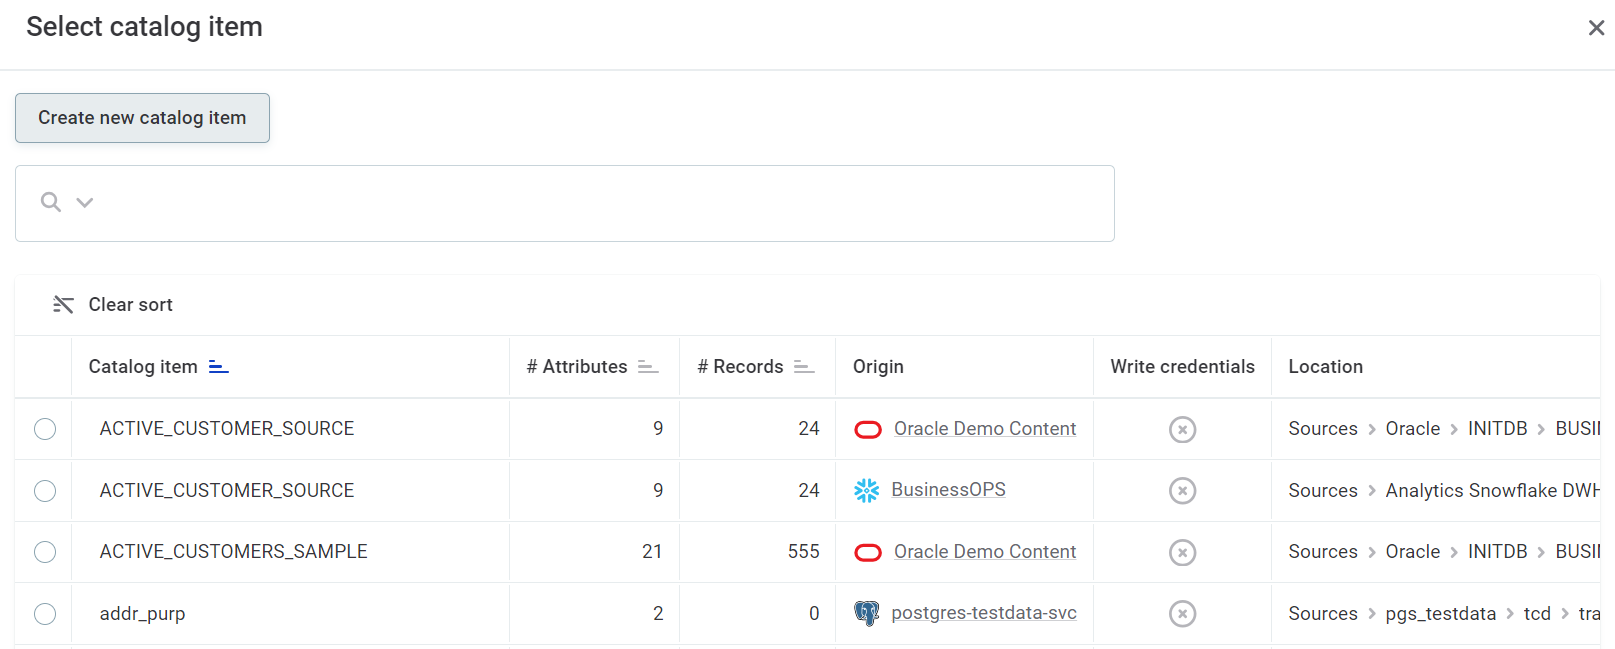
Select Select catalog item.
-
To create a new catalog item, select Create new catalog item.
-
In Data source, select the data source you want to write to from the list provided.
-
In Connection, select the connection.
-
In Write credentials, select the credentials that should be used. For details, see Write credentials.
-
In Schema, select the schema.
-
In Catalog item name, provide a name for the catalog item.
-
Select Create catalog item.
-
-
To choose an existing catalog item, select the item from the list available and then Select.
-
Select the Write credentials for the connection of the catalog item.
If write credentials are not configured, select Edit connection [connection name], and in Write credentials, select Add credentials.
-
Under Data write strategy, select Append or Replace.
-
-
Add attributes
Adds new attributes.
-
Provide the attribute name and data type, and define the attribute using ONE expressions.
For example, to create a new attribute,
full name, which concatenates two existing attributes,first nameandlast name, and also trims the value, you would use the expressiontrim(contactfirstname+' '+contactlastname). For more information, see ONE Expressions.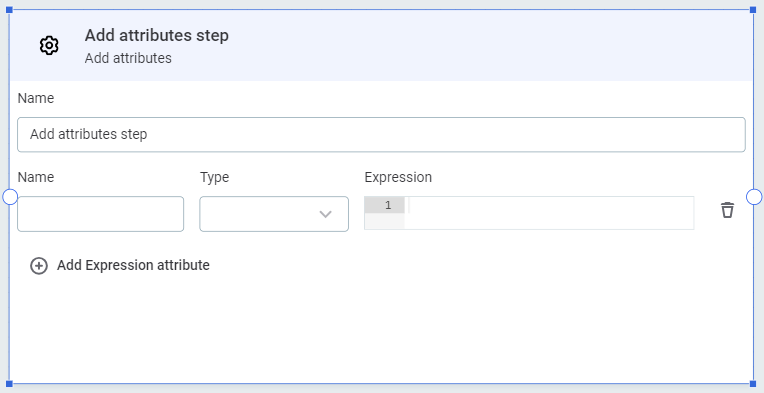
-
Select Add Expression attribute to add additional attributes, and repeat step 2 as necessary.
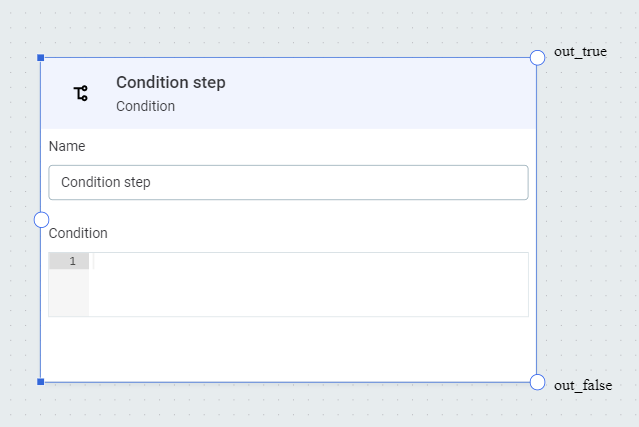
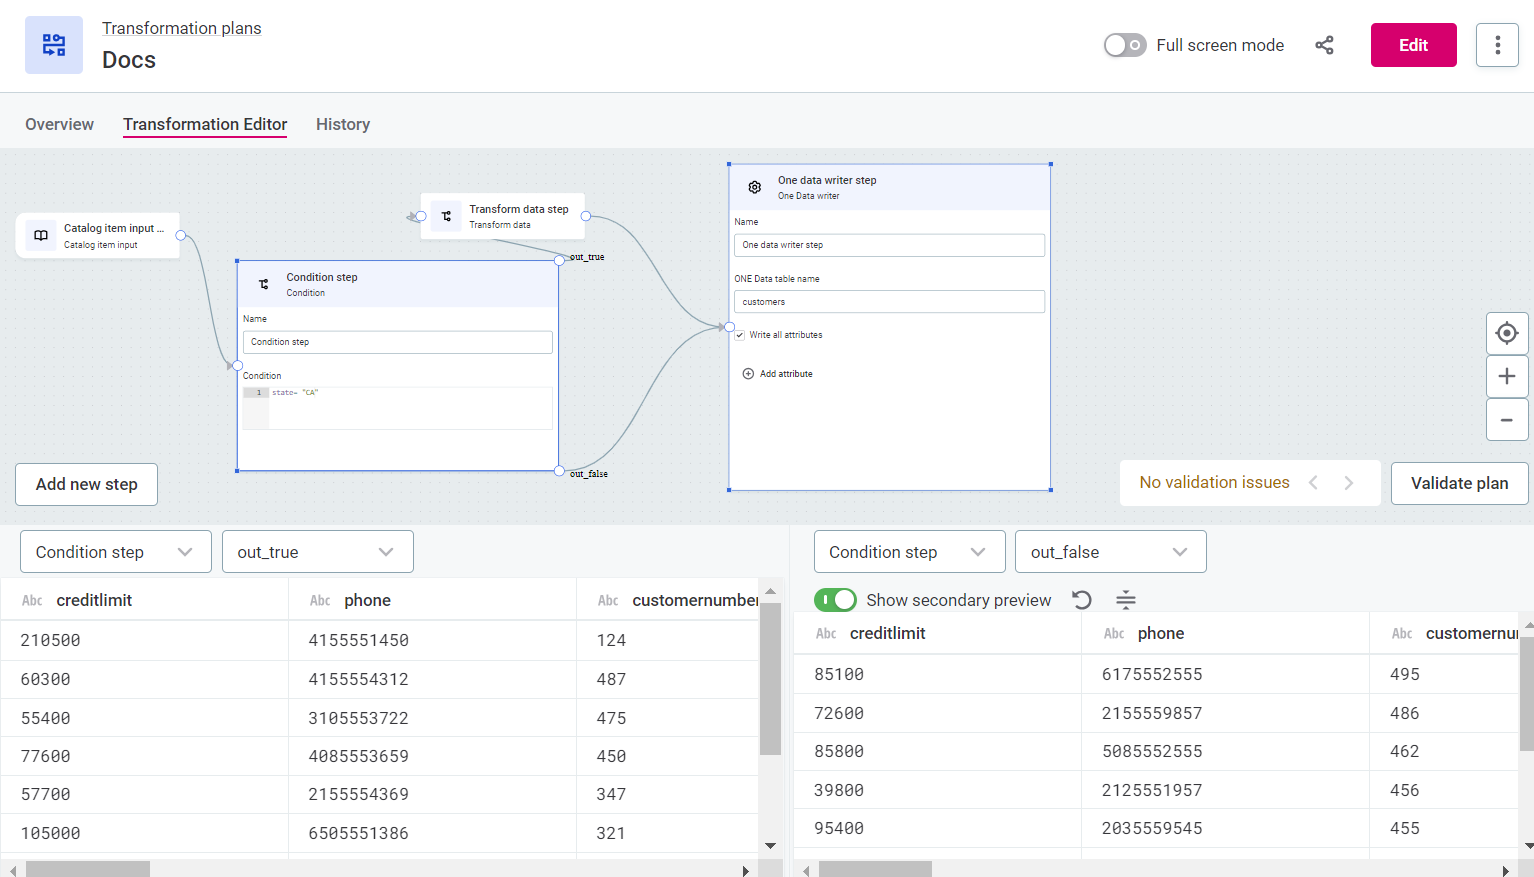
Condition
Splits the data flow into two streams based on the ONE expression condition.
In Condition, define a condition to separate the data using ONE expressions.
Data that satisfies the condition is sent to the output out_true, data that does not satisfy the condition is sent to the output out_false.
From these outputs, create connections to further steps as required.
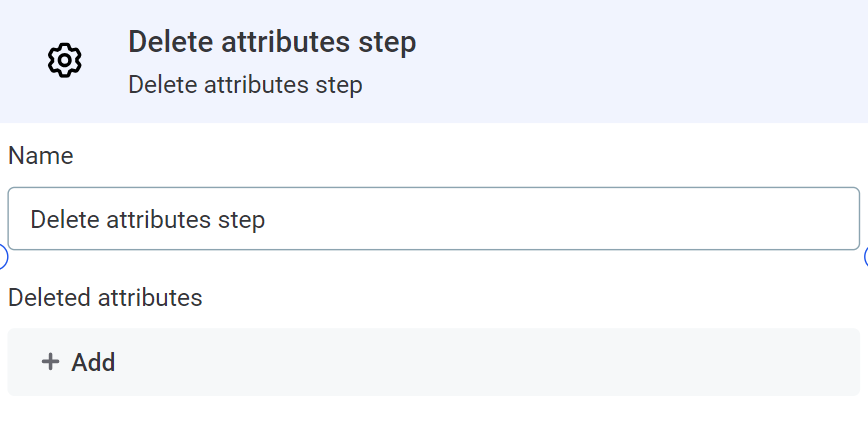
Delete attributes
Deletes selected attributes.
Select Add to add attributes to be deleted from the list provided.
| You will only see attributes from steps which have already been connected as inputs to the Delete attributes step. |
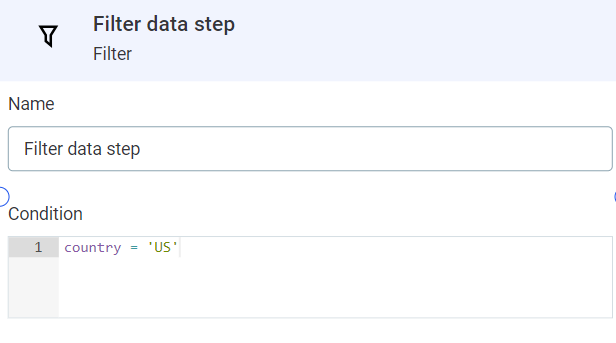
Filter
Filters out all records that don’t pass the ONE expression condition.
To use this step, add a condition using ONE expressions. Only data that satisfies this condition will be output to the next step of the plan.
Embedded component
Inserts a component from ONE Desktop. In Component, select the component from the list available.
|
The components available here are those which have been created in ONE Desktop. They can be seen in ONE by selecting Data Quality > Components. 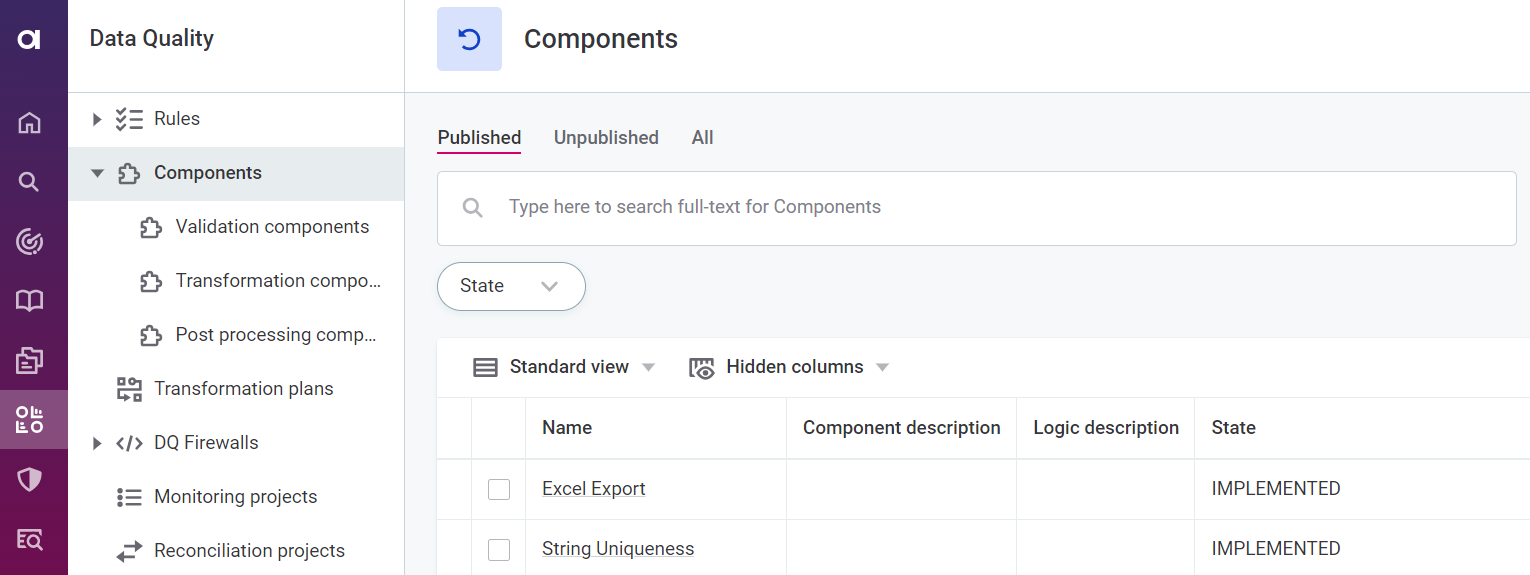
|
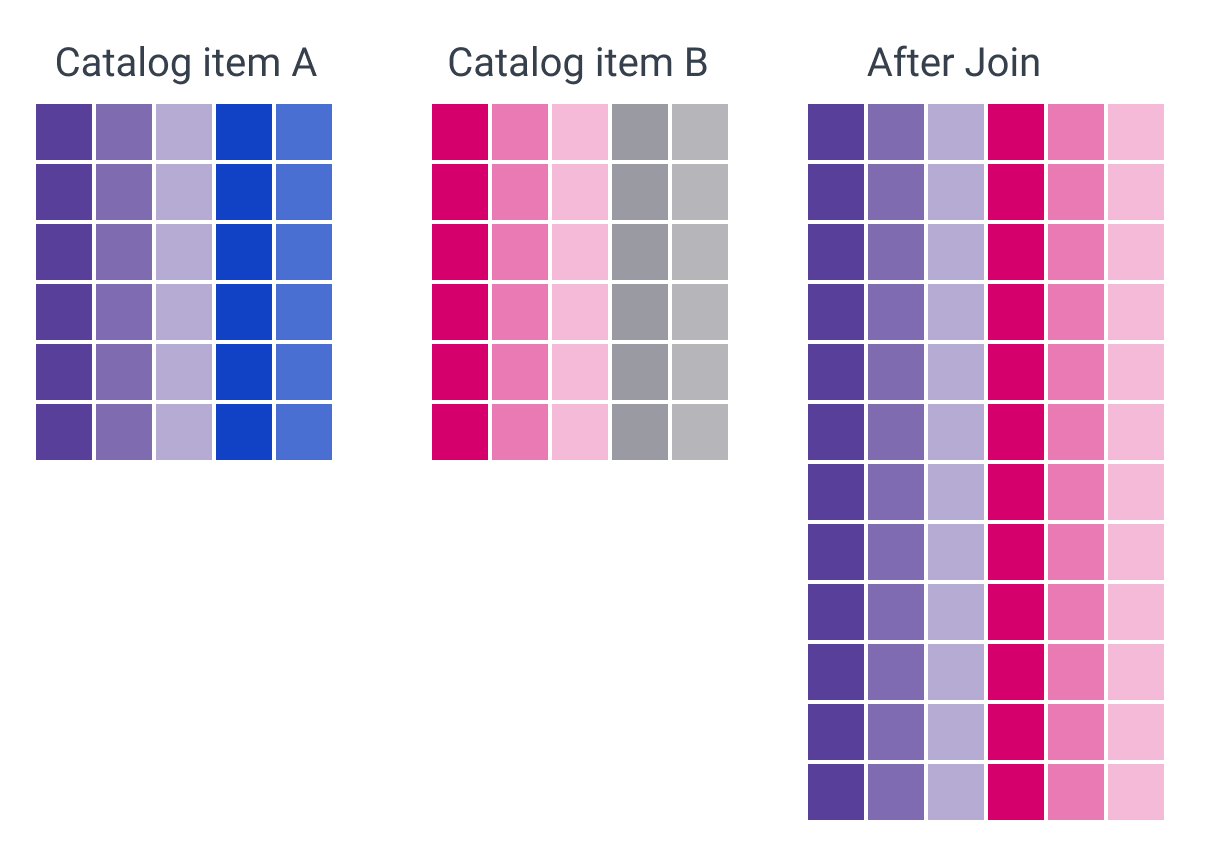
Join
Joins two separate data flows into a single data flow (vertical merge).
-
From other steps, create a connection to
in_leftandin_right, as required. -
Use
leftKeyandrightKeyvalues to govern how the data records are paired up across the data input flows.-
In Left key, add the column that contains key values (primary keys) of the
in_leftinput flow -
In Right key, add the column that contains key values (primary keys) of the
in_rightinput flow.
-
-
Select the required Join type:
-
Inner join: Only data that has a key that was found in both input flows is sent to output (records are joined when the
leftKeyvalue matches therightKeyvalue). -
Outer join: All records from both input flows are sent to output (even those with a key that was not found in both flows).
-
Left join: All records from the left input flow are sent to output (even those with a key that was not found in the right flow). Records in the right data frame which lack a match in the left data flow are dropped.
-
Right join: All records from the right input flow are sent to output (even those with a key that was not found in the left flow). Records in the left data flow which lack a match in the right data flow are dropped.
-
-
Specify the columns that should be present after the join.
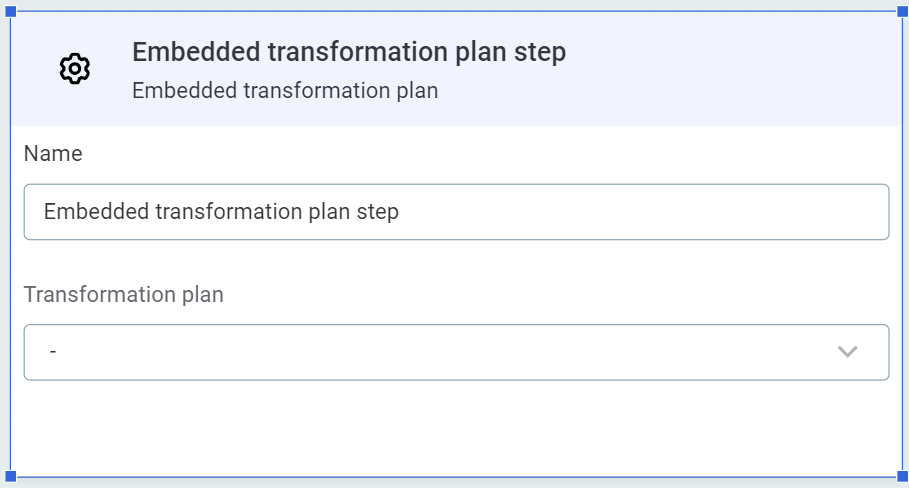
Embedded transformation plan
Inserts an existing transformation plan created in ONE. In Transformation plan, select the plan from the list available.
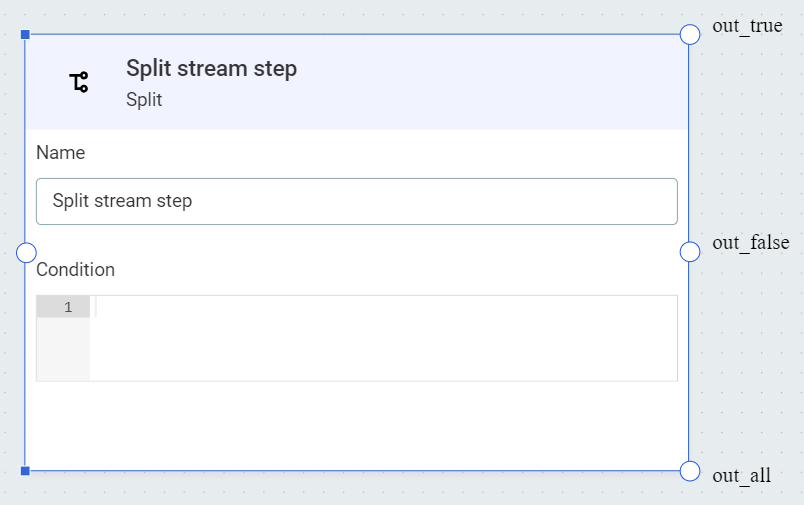
Split
Splits the data flow into three streams based on the ONE expression condition.
In Condition, define a condition to split the data using ONE expressions.
Data that satisfies the condition is sent to the output out_true, data that does not satisfy the condition is sent to the output out_false.
All input data is output to out_all.
From these outputs, create connections to further steps as required.
Transform data
Transforms attribute values using ONE expression language.
Provide the attribute you want to transform and define the transformation using ONE expressions.
+ image::data-transformation-plans-transform-data.png[transform data step, 400]
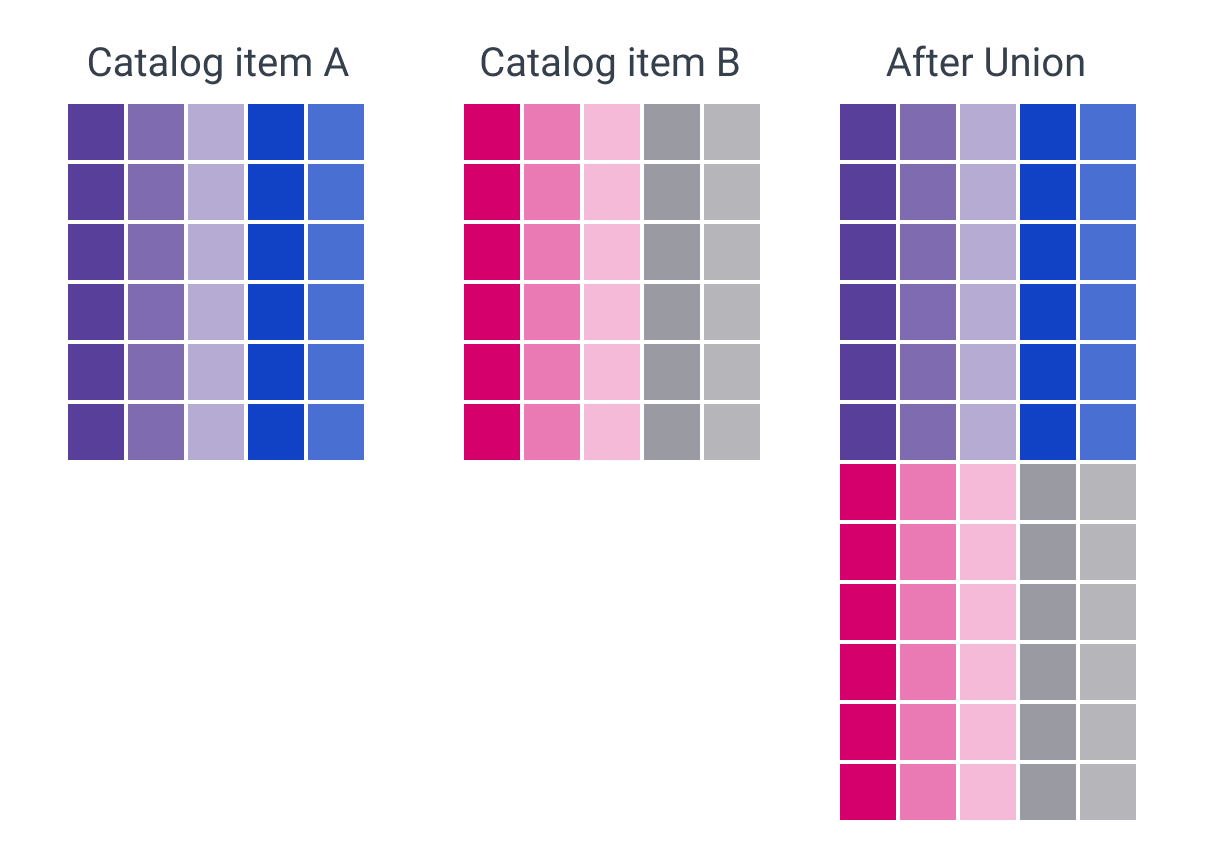
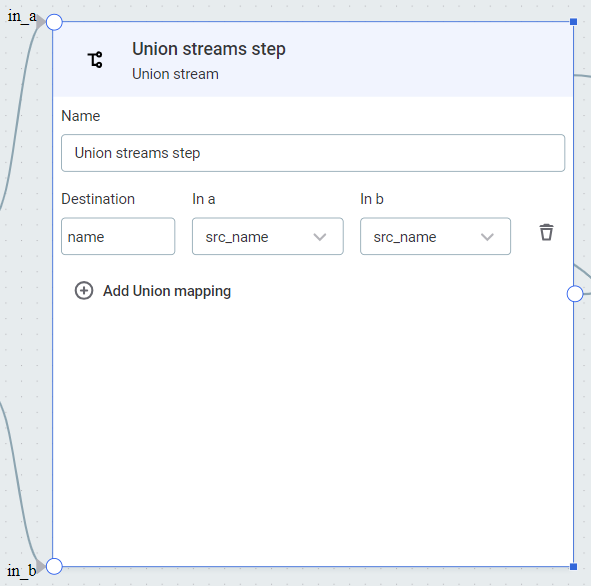
Union streams
Merges input formats of two defined inputs into a single output format (horizontal merge).
Data is read from the individual inputs (in_a or in_b) and written to the output.
Therefore, in the output there are merged-format data records, where each row contains data read from either in_a or in_b input.
-
From other steps, create a connection to
in_aandin_b, as required. -
Select Add Union mapping and specify:
-
Destination: Destination column name.
-
In a: Data to be input from
in_a. -
In b: Data to be input from
in_b.
-
-
Repeat as necessary.
|
If the structure or data type of the inputs is not altered by intermediate steps, it is also possible to mimic Union stream by mapping two compatible inputs to your output, for example using the ONE Data writer step. This means you can make use of the Write all attributes feature rather than having to manually define your outputs in the Union stream step. This functions like the Union Same step in ONE Desktop. 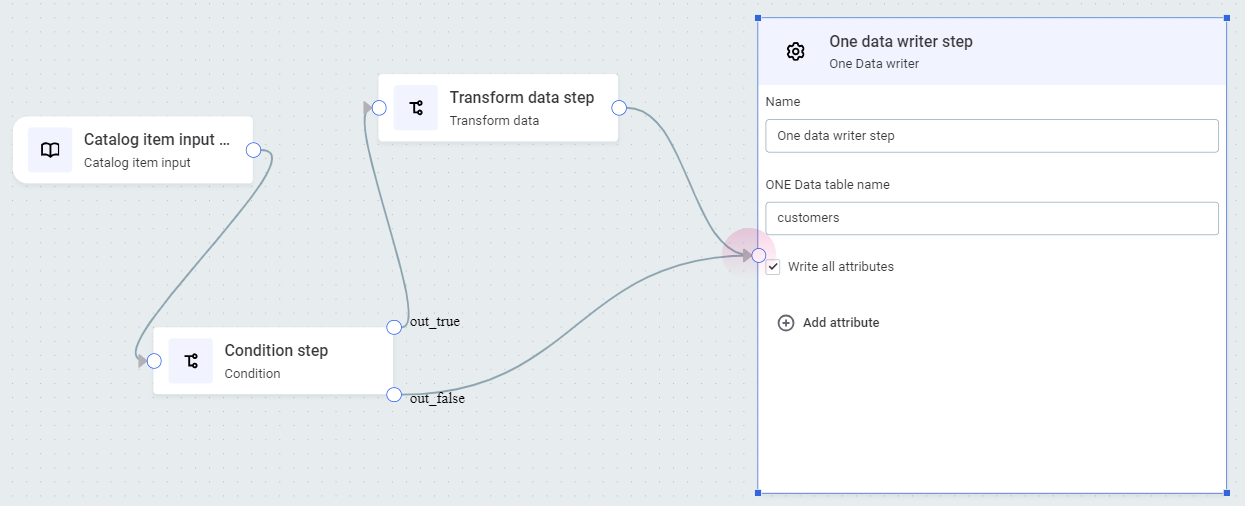
|
Monitoring project post-processing input
Inputs the data and DQ evaluation results from a monitoring project.
| When using the monitoring project post-processing input step, initiate the plan from the monitoring project itself to ensure correct processing: don’t add the step in the plan editor using Add data input or Add step. |
-
Locate the required catalog item on the Configuration & Results tab of a monitoring project.
-
Select the three dots menu and then Add post-processing transformation.
-
Provide a name for the plan and select Confirm. Your input step is ready to use.
Data preview
When transformation plans are run, the data gets stored in internal tables in ONE Data (these are not visible in the application).
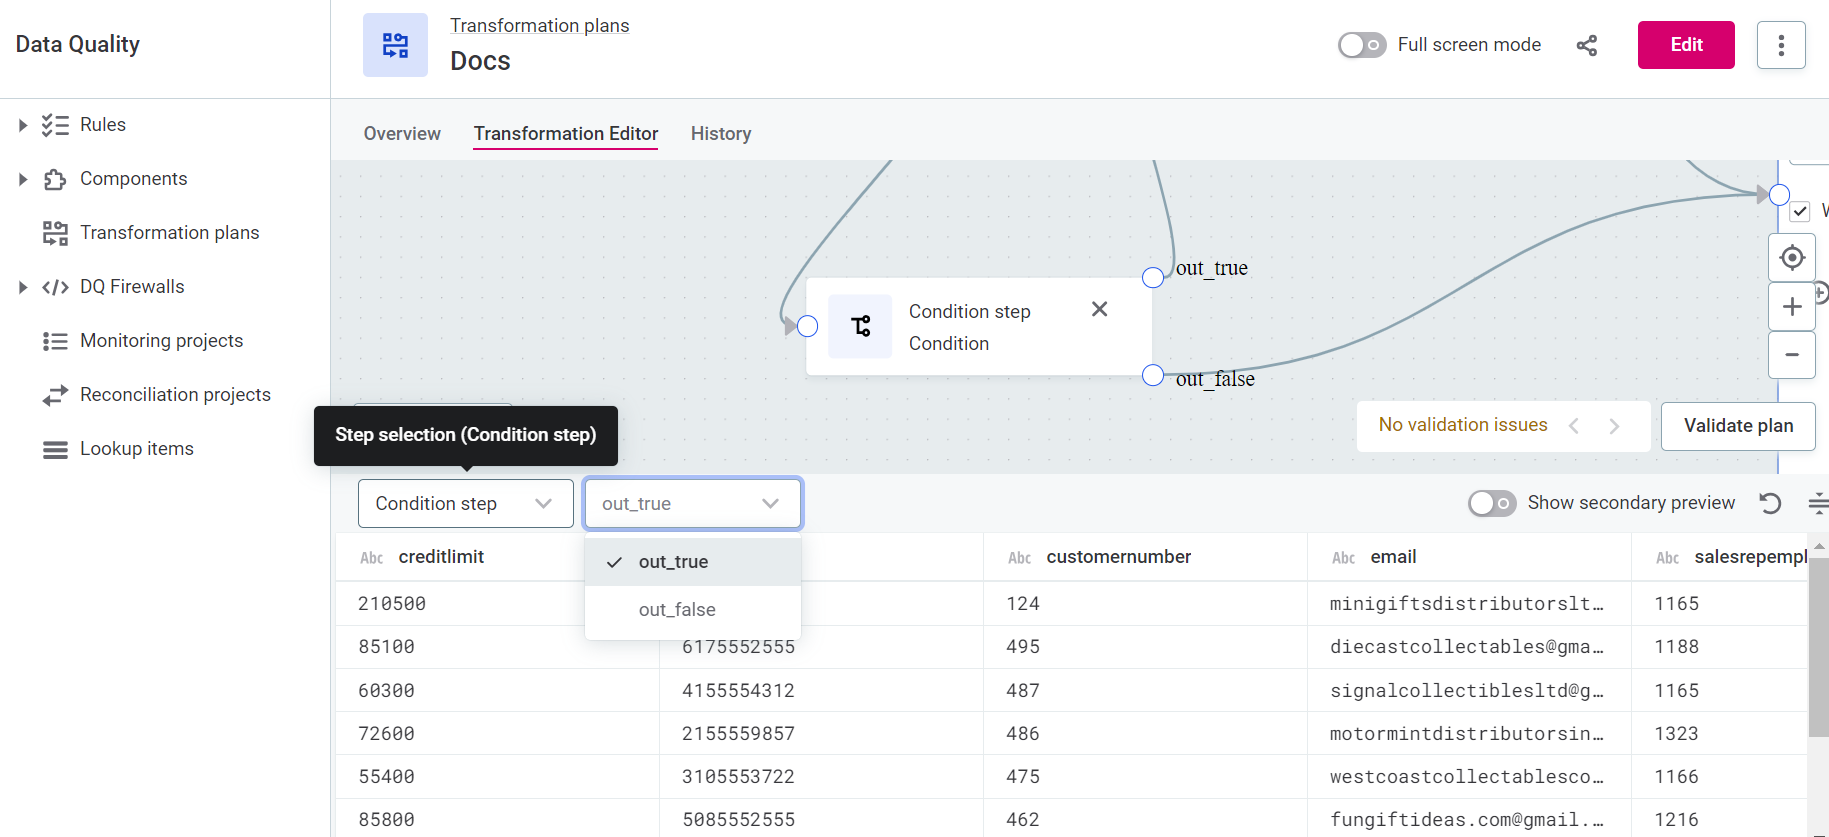
Select a step to see a preview of the resultant data.
If the step has multiple outputs, you can further select for which output you want to view the data, for example, out_true or out_false.
The preview is retained if you close the plan and re-open it. Likewise, after editing a plan, the preview is not updated unless you manually recompute it: to do this, select Recompute preview.

You can also view two different previews side-by-side using the Show secondary preview option.
Preview is a separate job.
If it fails, check the Processing Center for more details.
Transformation plan preview jobs can be found by going to Processing Center > Base jobs > Transformation plan preview jobs, or by searching for job Type DQC_PREVIEW.
Was this page useful?