
Configure Master Layer Matching
This article provides configuration instructions for master layer matching, which is required when using mixed style MDM implementation that allows authoring records directly on the master layer.
Before you start
Master layer matching configuration is additional setup required when your implementation allows users to create and modify records directly on the master layer (mixed style MDM), in addition to receiving data from source systems.
For mixed style implementations, you typically need to configure matching on both:
-
Instance entities - For source system data. See Configure Instance Layer Matching.
-
Master entities - For authored records (covered in this article).
Configure instance layer matching before continuing with master layer configuration. Once master layer configuration is defined, you can configure and run the matching plan.
Configure matching on the master entity
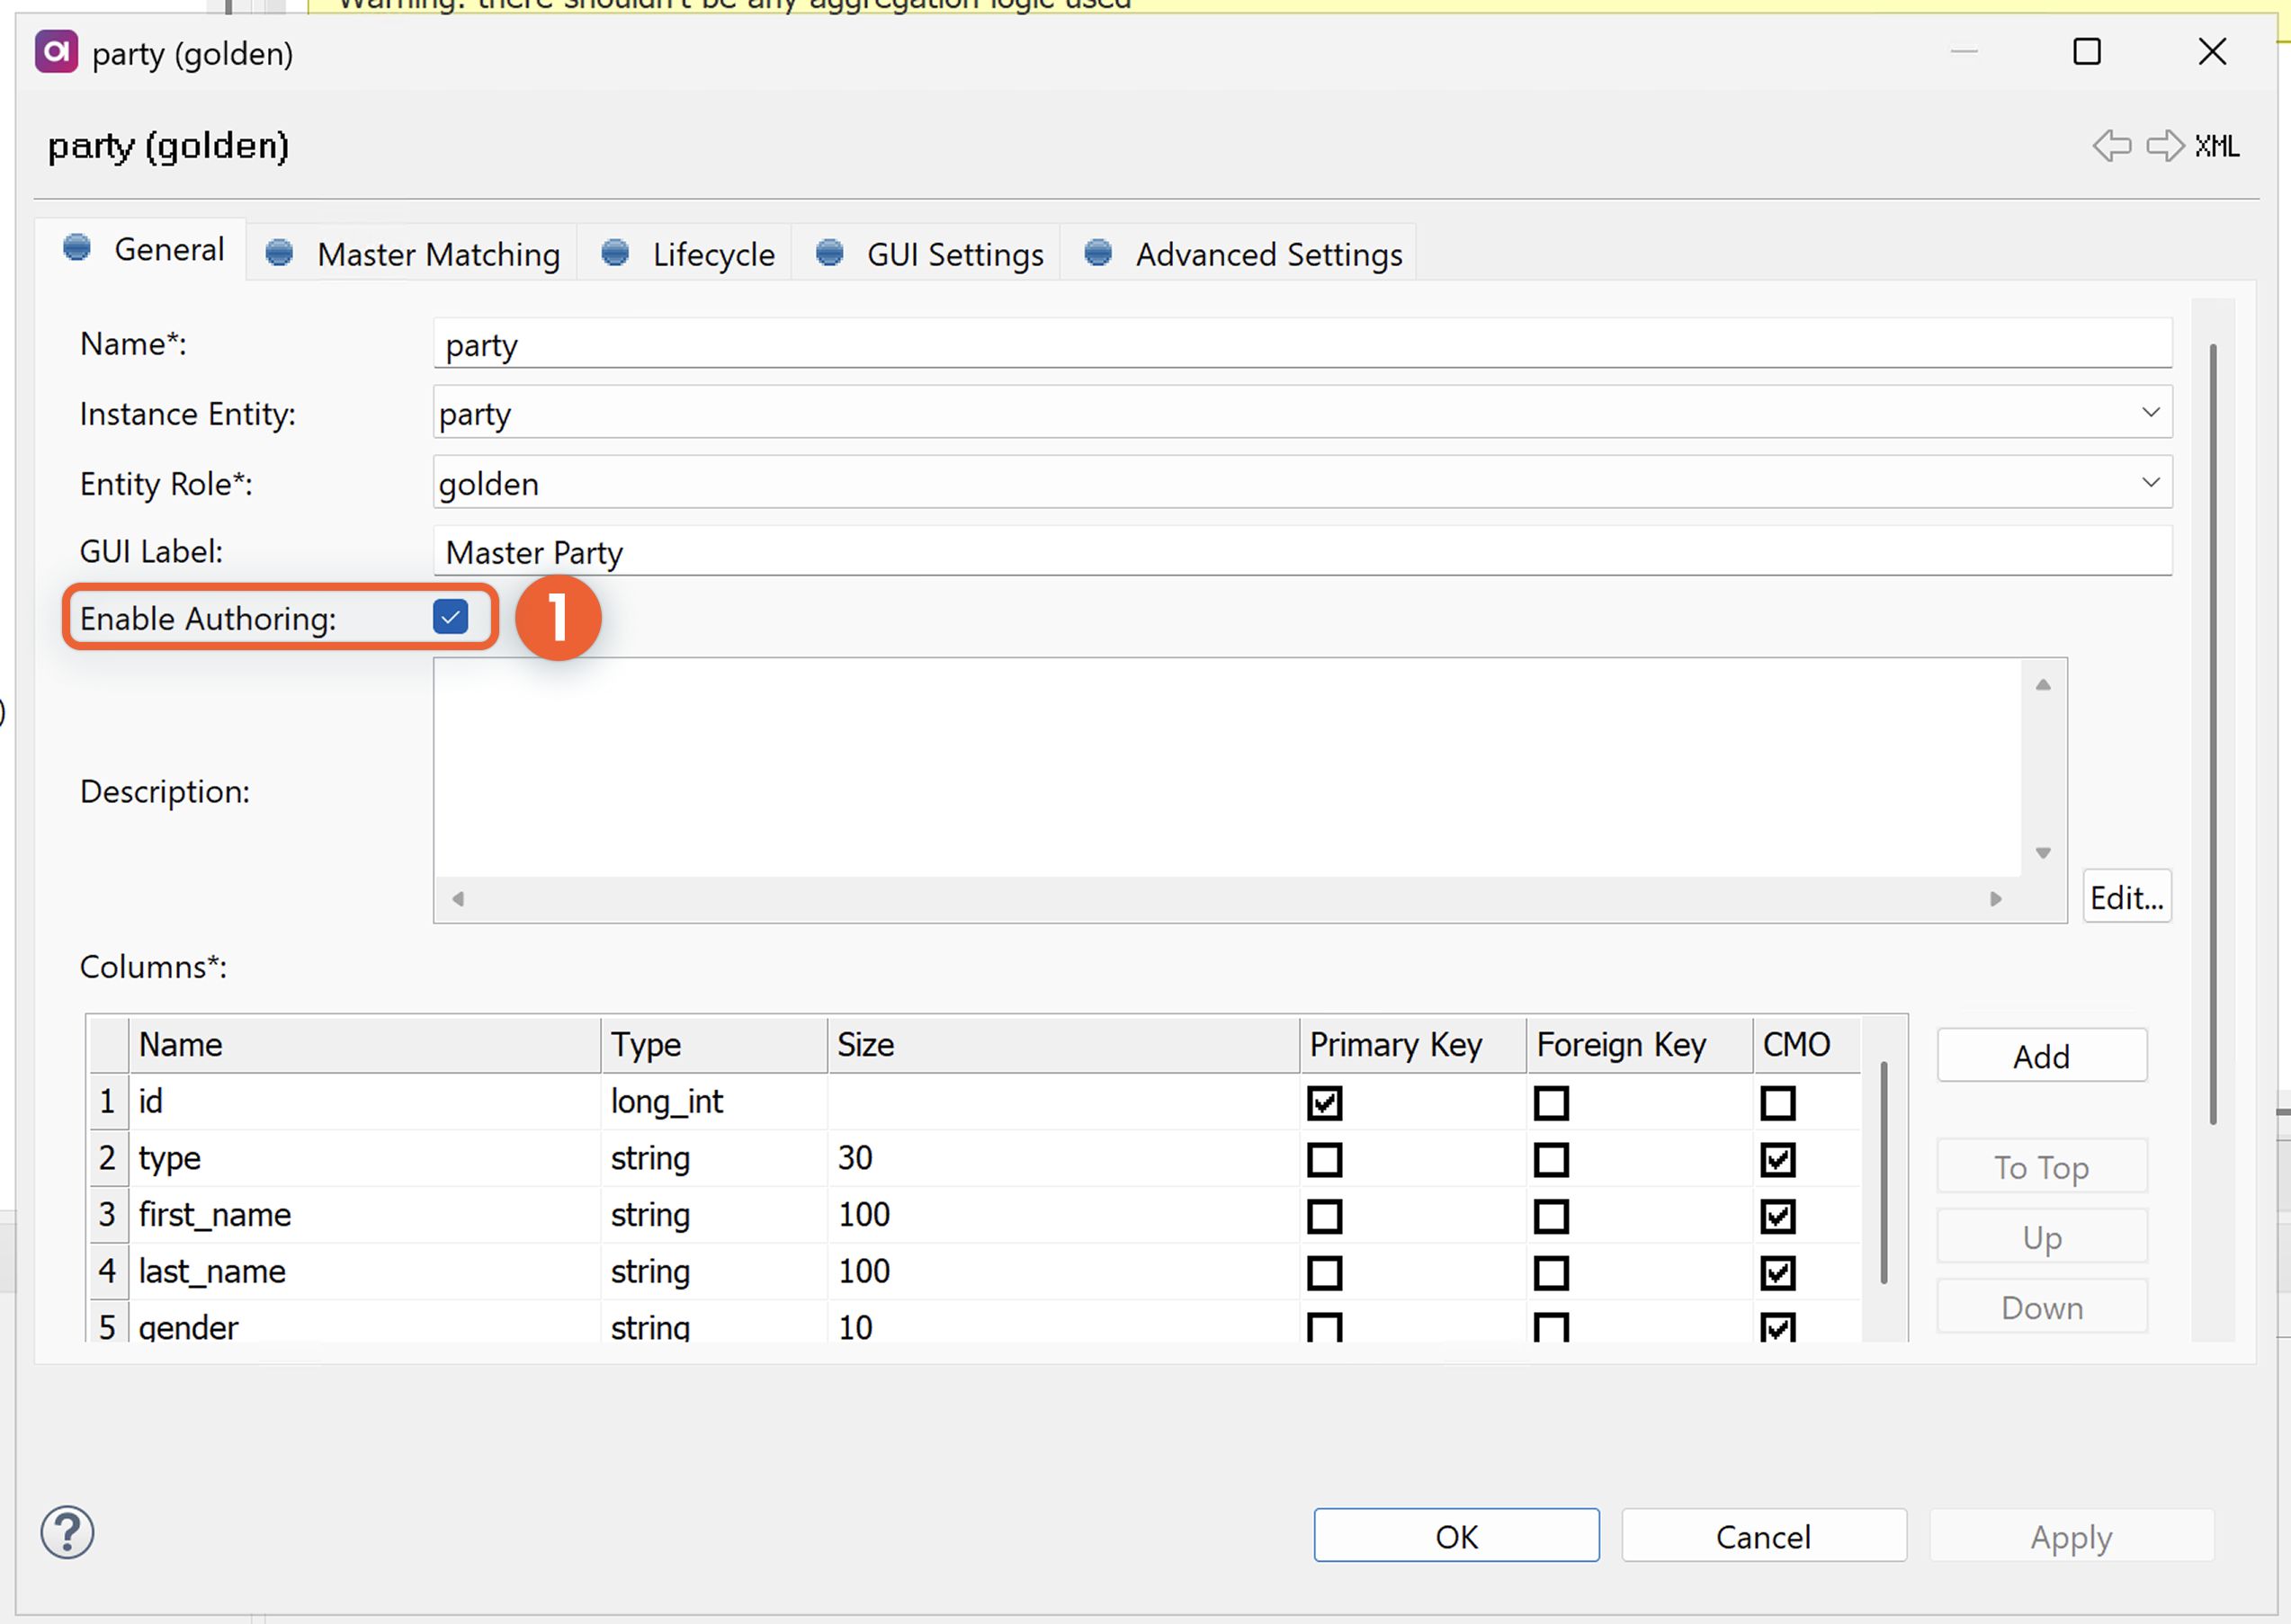
In ONE Desktop, open your MDM project and navigate to Logical Model > Master Data Layers. Find and double-click your master entity.
| Repeat the following steps for all master entities you want to use in the matching process. |
Enable authoring
On the General tab, make sure the Enable Authoring option is selected (1). If this is not the case, the entity cannot be used in the matching process.
Configure master matching settings
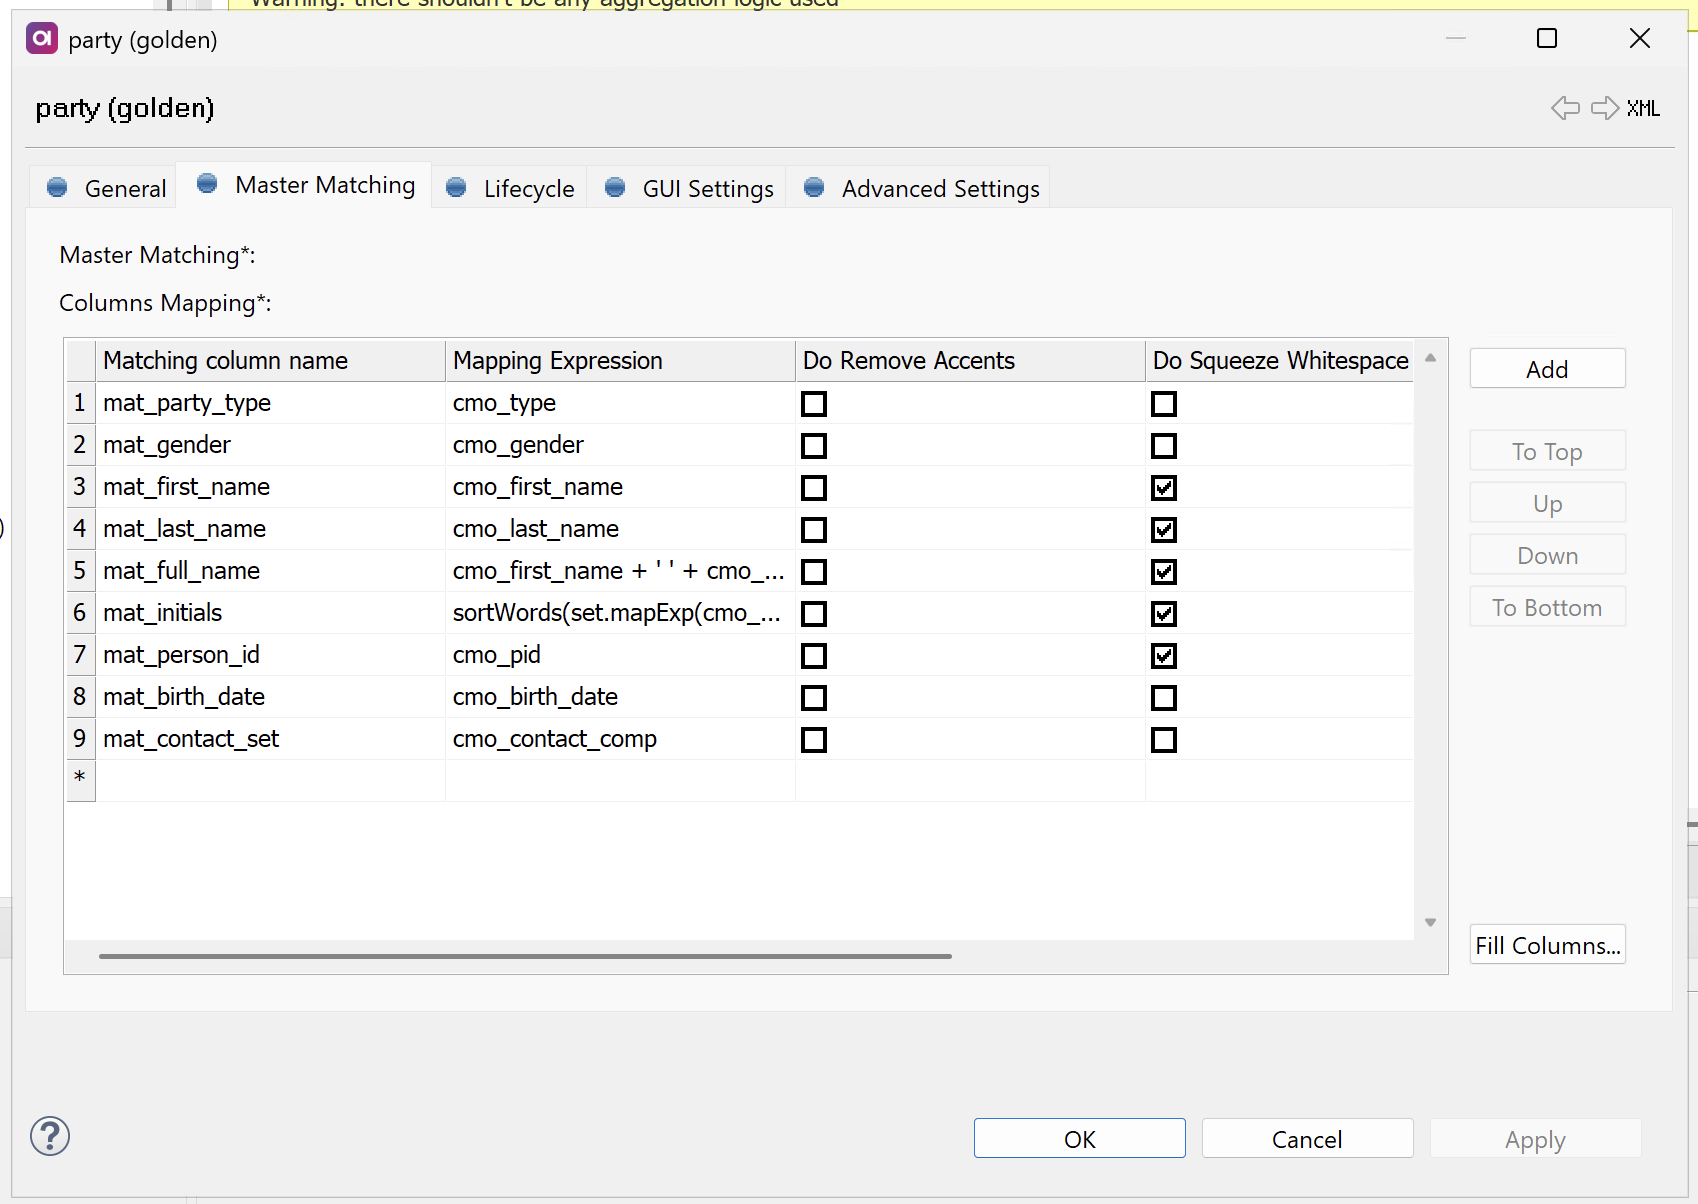
In the entity properties, switch to the Master Matching tab.
Here you define how columns from the master entity connect to the Matching step interface. This helps ensure data flows correctly through your matching process.
In Columns Mapping, configure:
-
Matching Column Name: The columns for storing optimized versions of your input data for matching comparison. We recommend using the format
mat_<column_name>, which follows Ataccama best practice naming convention.For more details, see also Define columns for transformed matching values.
-
Mapping Expression: An expression for transforming the standardized input data.
-
To apply common matching transformations, select as needed:
-
Do Remove Accents - Removes accents and diacritics.
-
Do Squeeze Whitespace - Removes repeated whitespaces so a single space character is left.
-
Do Upper Case - Converts text to uppercase.
Matching values transformation is a key preparation step before running matching as it addresses common data quality issues like inconsistent case, accents, double spaces, and formatting variations. For details, see Configure the Matching Values step and Matching Performance Best Practices.
-
Master matching behavior
Instances can be matched to authored master records, including related entities. To achieve this, copy columns are available on the master layer and can be used in matching expressions.
Additionally, if master matching is configured and authoring enabled, you can use the IdentifyMixedMasterService native service to check if a master record that is being created already exists.
See Native Services.
Update matching plan
Once you are finished configuring the Master Matching tab for your entity, select OK.
| If you want to save your changes without exiting the configuration, select Apply instead. |
Right-click your project and select Generate to update the project with the new configuration.
The matching plan can be found in your MDM project: look for Transformations > <entity_name> > <entity_name>_match (for example, Transformations > party > party_match).
Next steps
After configuring master layer matching, configure your matching plan. See Configure Matching Plan and Step.
| For guidance about how to optimize your implementation, see Matching Performance Best Practices. |
Was this page useful?