
MDM 13.0.0 Upgrade Notes
Engine column renaming
There are two options available in order to incorporate the configuration changes and the renaming of engine columns that occurred between version 12 and 13.
-
Manually migrate all data. This means exporting to a file and creating a new instance of MDM with a new database, using a migration load to fill the database. To do this, follow the procedure found in Migrating Data in MDM.
-
Make the relevant database changes to the existing version 12, and run MDM version 13 using this same database and data. To do this, follow the steps described in Update existing database.
Update existing database
-
Run the migration scripts to account for the renaming of engine columns that occurred between version 12 and 13. Follow the instructions found in the relevant script:
Database Upgrade script PostgreSQL
MSSQL
Oracle
-
As scripts apply only to instance and master layer tables, use the migration plans for history tables:
-
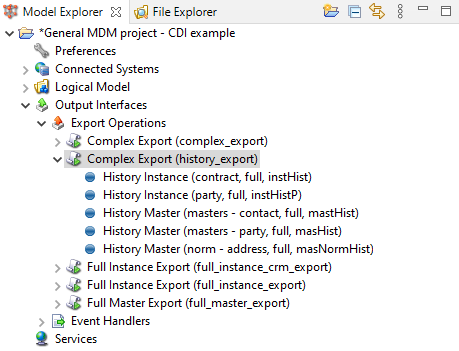
Enable export of entities defined in the History Plugin: configure a History Export under Output Interfaces > Export Operation.
-
Prepare the migration load for history entities defined in the History Plugin (in the new version 13): go to Advanced Features > Migration > History Migration Load and select Enable.
-
Load history entities defined in the History Plugin (see History Plugin) in version 13: go to Advanced Features > History Migration Load and select Enable.
The history load plan is now generated to Files > engine > migration >
+migration_history_load.comp. -
Run the export operation in the MDM Server version 12. All "intermediate" storage files and tables that are needed for history migration are now populated.
-
Stop the running server.
-
Upgrade the code and the solution to the version 13.
-
Drop the
H_tables. -
Deactivate and disable the History Event Handler in the Admin Center.
-
Perform a migration load by running the
migration_history_load.compplan using themigration_history_loadbatch operation in the Load Operations. -
Re-activate the History Event Handler once the load is complete.
-
-
Similarly, draft tables must be renamed manually. For details, see Changes to draft tables and attribute naming conventions.
Changes to draft tables and attribute naming conventions
Draft tables should now use database persistence like other technical tables in MDM. Previously, draft tables used VLBD persistence by default. VLDB is now considered an overhead, and as such, using it might lead to performance issues.
Draft custom field and data set configuration reference have been moved to nme-config.xml, but the structures remain the same.
|
Draft tables must be manually migrated before the upgrade as the new table structure is created when version 13 initializes. To do this:
-
Set persistence for technical tables in
nme-config.xmlto database persistence, as shown in the example. If<persistenceLayer className=.ataccama.nme.persistence.vldb.>is detected during migration, the migration fails.<config> <persistenceLayers> <persistenceLayer className=.ataccama.nme.persistence.database.> <dataSource>mdc_db</dataSource> <prefix>I_</prefix> </persistenceLayer> <persistenceLayers> ... -
Run the server for the new version. Empty draft tables are created automatically in the database.
-
Stop the server.
-
Manually copy the values from the old draft tables to the new ones.
-
Populate the
XIDcolumn (generated as a PK) by a unique sequence of numbers from 1 to n. Note that n has to be lower than[prefix]_ID_SEQmultiplied by 1000.Table 1. Draft column name changes Old New id
ID
label
LABEL
username
USERNAME
wfstep
WF_STEP
timecreate
TIME_CREATE
lastchange
LAST_CHANGE
draft
DESCRIPTION
history
HISTORY
publishid
PUBLISH_ID
status
STATUS
wfname
WORKFLOW
-
Table names have been changed as follows. There is one underscore (
_) less in each name.Old New I__DRAFTS
I_DRAFTS
I__DRAFTS_HIST
I_DRAFTS_HIST
I__DRAFTS_REC_IDS
I_DRAFTS_REC_IDS
I__DRAFTS_REC_IDS_HIST
I_DRAFTS_REC_IDS_HIST
-
-
Manually change the database sequence
draft_seqto thw latest ID indraftordraft_historytable.-
Find the value that is available from the database sequence
draft_seq.-- Oracle example: How to get the current value SELECT last_number FROM user_sequences WHERE sequence_name = 'draft_seq'; -
Find the highest
idormaster_idassigned to any entity, divide it by 1000, and round it up.To find the highest number, use an SQL query or profile the exported files. The ID sequence in the database has to be increased before the migration to be greater than the maximum (group ID or record ID). -
If the database sequence is lower than the highest
idused, increase the database sequence to have the both values equal. Otherwise, continue to the next step.-- Oracle example of how to increase the sequence as required -- note: Oracle does not let you change the value of a sequence. If you need to change its value, you should re-create the sequence. On the other hand, we can use a trick to change the value of a sequence without recreating it. Let's say we have a sequence and its value is 1000, and we want to set it to 1100. -- increase the sequence increment ALTER SEQUENCE draft_seq INCREMENT BY +100; -- set the required value SELECT draft_seq .NEXTVAL FROM dual; -- revert the sequence increment to 1 ALTER SEQUENCE draft_seq INCREMENT BY 1; -- check the result SELECT last_number FROM user_sequences WHERE sequence_name = 'draft_seq';
-
-
Run the server. Your data should now be available.
Keycloak changes
Keycloak is now the only Identity and Access Management tool available for the MDM web application.
Furthermore, all user-role mapping must be carried out in Keycloak, and can no longer be done within the web application.
As Keycloak can simultaneously manage roles and users for web applications of multiple Ataccama products, roles in Keycloak are automatically mapped to a specific Ataccama web application using the role prefix defined for the application.
For this reason, Keycloak roles for MDM must now have the prefix MDM_.
The roles available in the Ataccamaone Keycloak realm have changed.
The new configuration can be found in the ataccamaone.json file.
The default users for MDM are:
-
MDM_viewer(view-only rights) -
MDM_user(editing rights) -
MDM_admin(admin rights, it replacesMDA_superuser)
|
Roles without a prefix are intended to be composite roles, consisting of prefixed roles.
The prefix describes which roles should apply in each module.
For example For those already working with Keycloak for web application authorization, the main thing to note is the change in users that will be available by default with the version 13 builds. |
Changes to Keycloak clients
There are now only two token Keycloak clients by default: mdm-admin-client and mdm-token-client.
Clients are defined in the .runtimeConfig file and this file is then referenced in .serverConfig in place of the JSON file paths.
                   <clients>
                        <client id="mdm-admin-client">
                            <secret>mdm-admin-client-s3cret</secret>
                        </client>
                        <client id="mdm-token-client">
                            <secret>mdm-token-client-s3cret</secret>
                            <attributes>
                                <attribute name="use-resource-role-mappings" value="false"/>
                                <attribute name="public-client" value="false"/>
                                <attribute name="bearer-only" value="false"/>
                                <attribute name="autodetect-bearer-only" value="false"/>
                                <attribute name="always-refresh-token" value="false"/>
                                <attribute name="enable-basic-auth" value="true"/>
                            </attributes>
                        </client>
                    </clients>
You need to configure the clients and edit client adapter files in order for the MDM webapp to connect to Keycloak properly.
To define the configuration for your Keycloak clients, add or edit the KeycloakDeploymentContributor element in the runtime configuration file.
The settings in the KeycloakDeploymentContributor should correspond to the Keycloak settings for client.
| Keycloak is case sensitive. Make sure to use lowercase if referring to the Keycloak server URL via hostname. |
The following is a sample KeycloakDeploymentContributor configuration for MDM Webapp:
<config className=.ataccama.server.keycloak.>
            <keycloakConfigs>
                <keycloakConfig name="keycloak-local">

                    <url>http://localhost:8083/auth</url>
                    <realm>ataccamaone</realm>

                    <!--For Keycloak LOCAL in ONE 2.0
                    <url>http://localhost:8900/auth</url>
                    <realm>ataccamaone</realm>
                    -->

                    <attributes>
                        <attribute name="ssl-required" value="external"/>
                        <attribute name="principal-attribute" value="preferred_username"/>
                    </attributes>
                    <clients>
                        <client id="mdm-admin-client">
                            <secret>mdm-admin-client-s3cret</secret>
                        </client>
                        <client id="mdm-token-client">
                            <secret>mdm-token-client-s3cret</secret>
                            <attributes>
                                <attribute name="use-resource-role-mappings" value="false"/>
                                <attribute name="public-client" value="false"/>
                                <attribute name="bearer-only" value="false"/>
                                <attribute name="autodetect-bearer-only" value="false"/>
                                <attribute name="always-refresh-token" value="false"/>
                                <attribute name="enable-basic-auth" value="true"/>
                            </attributes>
                        </client>
                    </clients>
                </keycloakConfig>
            </keycloakConfigs>
        </config>
Edit the following client adapter files, so that MDM Webapp connects to Keycloak properly:
-
On the web application server, edit
application.properties. -
In the project configuration
Files/etcdirectory, edit the following files:-
application.propertiesName Default value Mandatory Description ataccama.authentication.keycloak.server-urlYes
Keycloak server URL. Ending with
/auth.ataccama.authentication.keycloak.realmataccamaone
Yes
Keycloak realm.
ataccama.authentication.keycloak.token.client-idmdm-webapp-public-client
Yes
Token Keycloak client ID.
Verify if you have the client configured in Keycloak. JSON file for import can be downloaded here. ataccama.authentication.keycloak.public.client-id${ataccama.authentication.keycloak.token.client-id}
Yes
Keycloak public client ID for web application browsing.
ataccama.authentication.keycloak.token.secretmdm-webapp-public-client-s3cret
Yes
Token Keycloak client secret.
ataccama.authentication.keycloak.token.issuer${ataccama.authentication.keycloak.server-url}/realms/${ataccama.authentication.keycloak.realm}
Yes
Token Keycloak issuer.
-
issue_management/config.xml(see Issue Management Configuration Files).In most cases, you have to modify the
ataccama.authentication.keycloak.server-urlattribute, which corresponds to the base URL of the Keycloak server. Treat other settings as expert and modify only if you know what you are doing.
-
MDM Webapp application properties
Move the webapp ports and URL from mda/WEB-INF/web.xml into mdm/etc/application.properties:
| Name | Default value | Mandatory | Description |
|---|---|---|---|
|
8050 |
Yes |
Application server port. |
|
Yes |
Application server URL. |
Integration with Ataccama ONE
For communication with the Ataccama ONE Metadata Management Module(MMM) and data source authentication, see MDM Web App Backend.
Was this page useful?