
Configuring Data Sets
Data sets allow you to combine two or more tables into a single view item with user-picked attributes. Each data set has a representative entity assigned to it, which determines which record opens when you click an entry in the data set listing.
To configure:
-
Open the MDM project in ONE Desktop.
-
Double-click the Data sets node in Logical Model.
-
Select Add.
-
Double-click the row number or right-click the row and select Edit to open the editing panel.
The editing panel consists of three tabs: General, SQL Source, and Sampling Setting.
Basic data set configuration
The basic configuration of data sets can be found on the General tab. It allows you to combine two or more tables.
To configure:
-
Open the data set configuration panel and create a new data set by following the previous steps.
-
Give the data set a name and a label. The label will be displayed in MDM Web App.
-
In Instance tables, choose which tables you wish to include in your data set. Double-click a field to create a new entry.
-
In Entity Name, press Ctrl+Space to get a list of entities. Choose the desired entity for the data set.
-
Select Use as detail for the entity you want to be the representative entity. Only one entity can be the representative entity.
-
To select the attributes, double-click the field in the Columns column. Select Edit element to open the column configuration.
-
Press kdb:[Ctrl+Space] in the Name field to get a list of available entity attributes. If no columns are chosen, the entire entity is displayed.
-
Repeat steps 4-7 as many times as needed.
-
Select Apply and then OK.
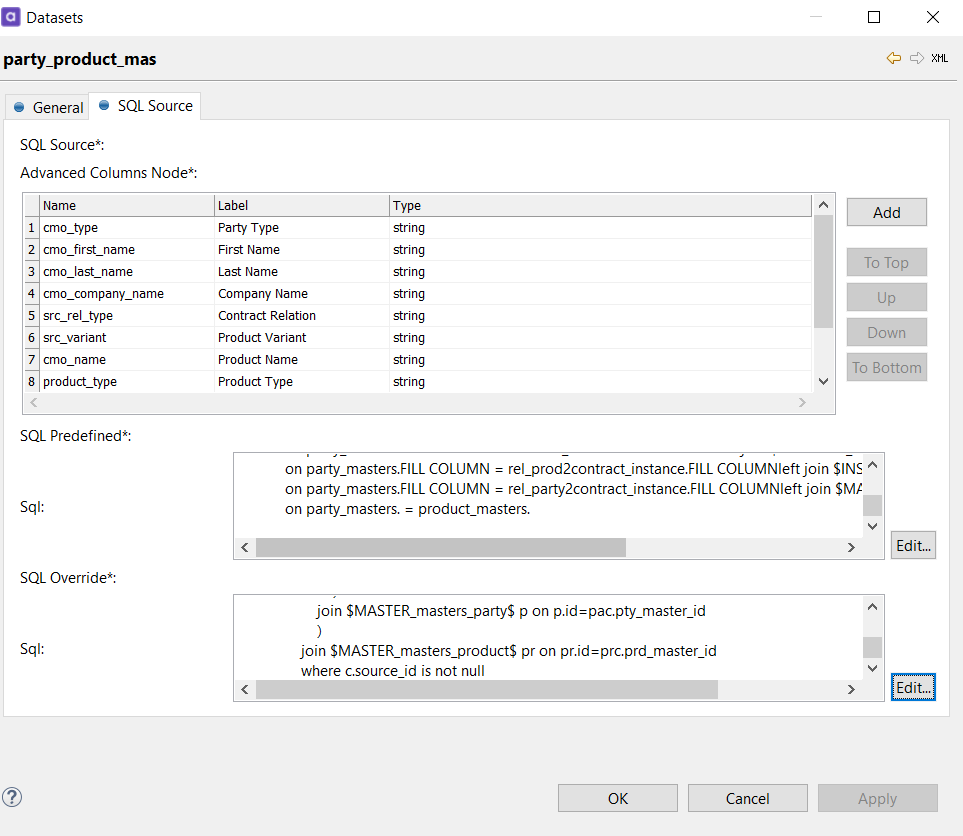
Advanced data set configuration
Advanced data set configuration is required when tables from different layers need to be combined, or when you want your data set to perform additional functionalities.
To configure:
-
On the General tab, create a data set using the steps described in Basic data set configuration.
-
Open the SQL Source tab.
-
In the Advanced Column Node, define additional columns as needed.
-
In the SQL Override field, write the override for the additional columns. The override is written in SQL Select clauses.
-
Select Apply and then OK.
The following image shows a possible advanced data set configuration:
Sampling settings
On this tab, you can configure sample settings for data sets. To learn more, see Configuring Data Samples.
Was this page useful?