
Migrating Data in MDM
How it works
Migrating data in the MDM engine using the Migration Export and Migration Load operations is the most comprehensive way to accommodate complex changes to your MDM solution. This is necessary, for example, when upgrading between major MDM versions, where additional business logic has been added.
At its core, migration has two phases:
-
Create a complete snapshot of all relevant data data using the Migration Export operation.
-
When all changes are applied, reload the MDM storage into the now empty database using Migration Load operation.
As part of the migration process, you can also:
-
Change the data structure as needed through transformations.
-
Perform an initial load of a newly connected system.
Before you start
For a successful migration, follow these guidelines.
| Stop data processing between the export and migration load. Otherwise you will lose any changes made to the data. |
When performing data migration, the stability of all metadata (eng_*date & eng*_tid), id, source_id, previous distinct values, inactive records, and matching IDs is ensured.
The list of columns needed depends on migration load operation settings.
The migration can be broken down into four main parts:
-
Step 1: Configure the migration export - Creates a snapshot of your data.
-
Step 2: Configure the migration load - Prepares the exported data so it can be imported back into the MDM storage.
-
Step 3: Prepare for the migration load - Ensures all prerequisites are properly set up before importing data.
-
Step 4: Perform the migration load - Imports data back into the MDM storage.
Step 1: Configure the migration export
Use the Migration Export feature to prepare a complete snapshot of your data.
-
Open your current MDM project.
-
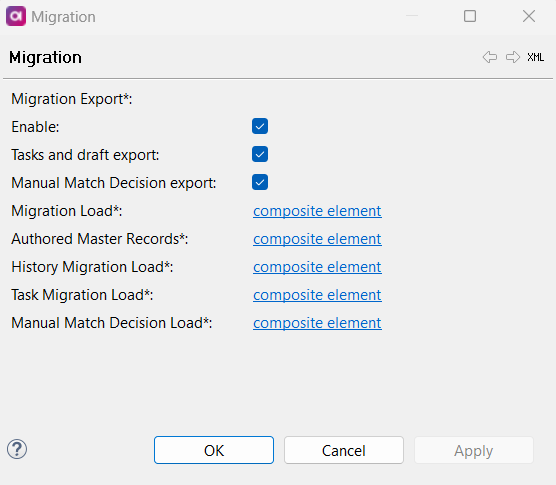
Open Advanced Features > Migration.
-
Under Migration Export, select Enable. Select Tasks and draft export and Manual Match Decision Load if you need to migrate tasks and drafts and manual match decisions respectively.
Included in the Migration Export operation are:
-
All instances.
-
Masters (all master layers and entities where authoring is enabled).
-
Instance and master override tables.
This means that whichever load you require—Migration Load, Authored Master Records, or both—Migration Export must be enabled and all will be incorporated into the same plan:
migration_export.comp.The configuration is generated to
nme-batch.gen.xml, where every entity defined generates adataProviderclass.History Migration Export is configured separately (see Configure history migration load).
-
-
Stop loading data by switching to the read-only mode (for example, by using the
switchReadWriteModenative service, see RW-RO Mode Switching Services). -
Wait for any running load to finish.
If VLDB persistence is in use, you need to wait until
I_TREGis empty. To see when this is the case, check the Persistence Status screen in the MDM Web App Admin Center (when 'number of known transactions' =0and 'LTC runnning' =false). For more information, see Monitoring > Persistence Status.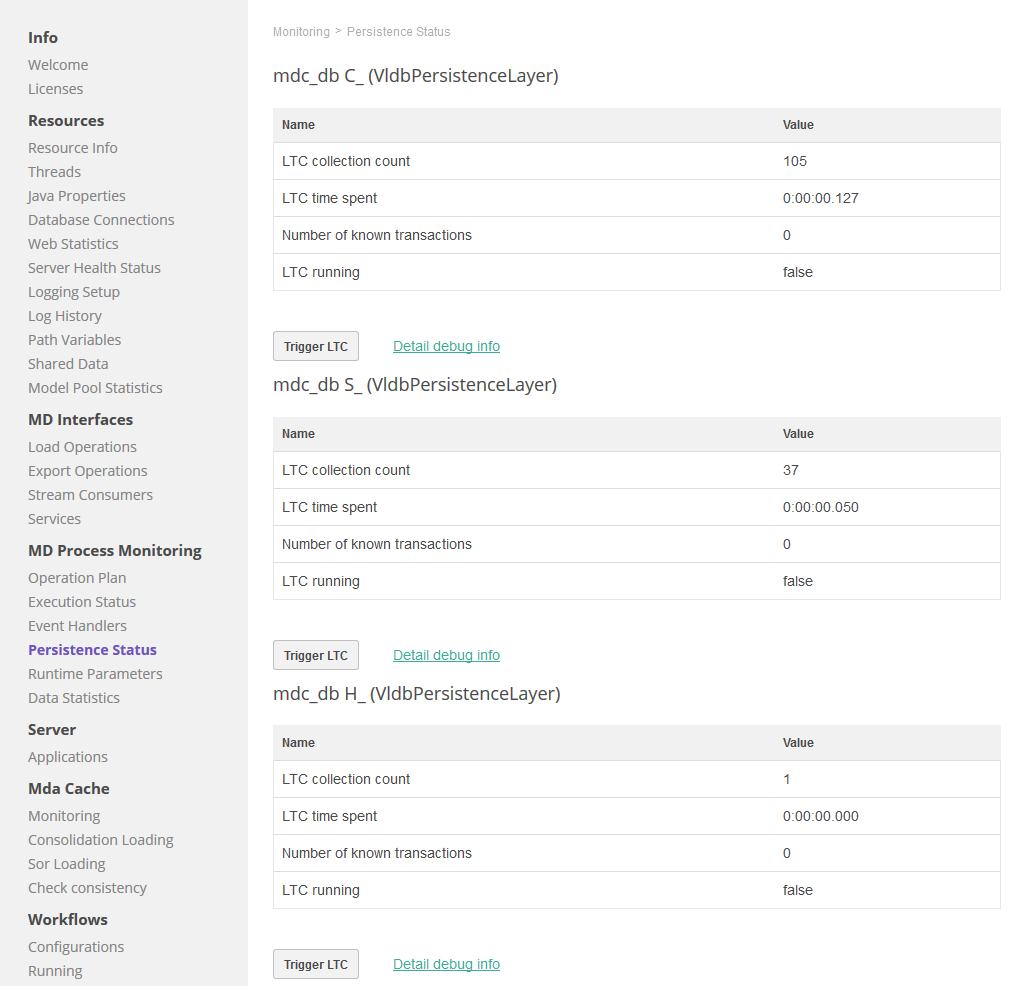
-
Right-click Migration and select Generate.
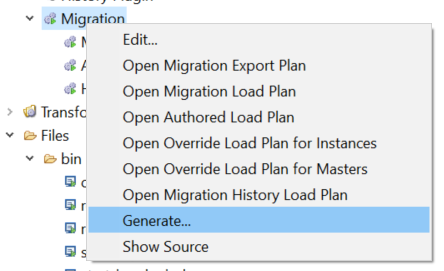
| To view the preconfigured migration plan, right-click Migration and select Open Migration Export Plan. |
Configure history migration export
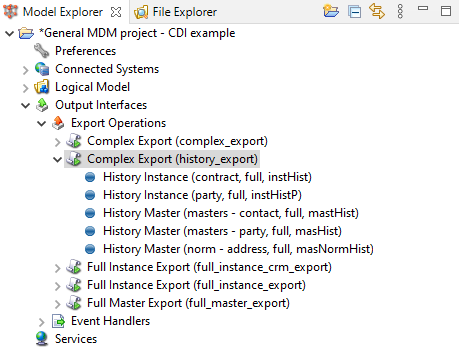
To enable export of entities defined in the history plugin (see History Plugin), configure a history export under Output Interfaces > Export Operations. See Complex Export Operation.
Step 2: Configure the migration load
Configure the Migration Load to be able to load all exported data back to the MDM solution.
|
MDM assigns all IDs from a single sequence so all IDs are unique across the whole solution. If you are migrating external data, there could be an issue with duplicate IDs (for example, master party might have the same ID as master address). We recommend ensuring that all IDs are unique before performing the migration load. |
-
Open Advanced Features > Migration.
-
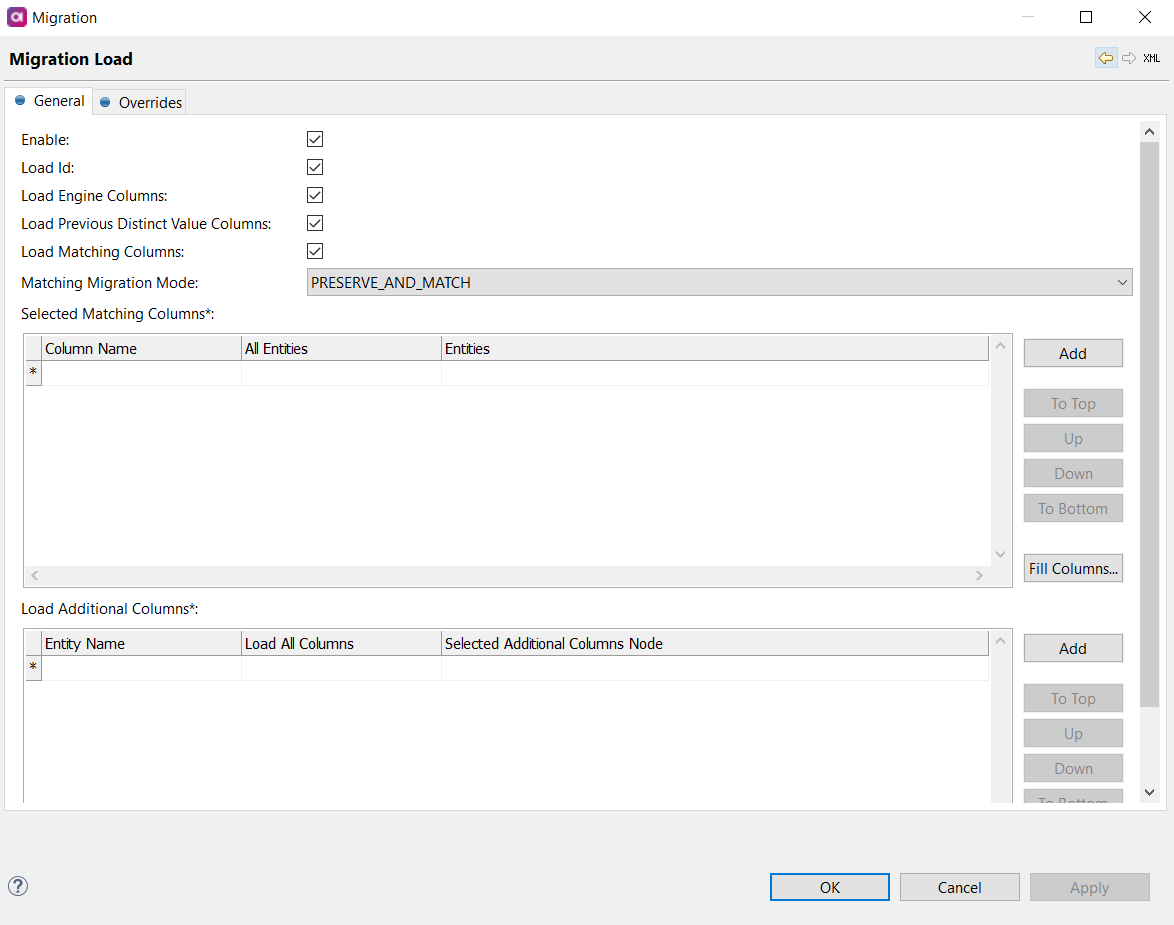
Select Migration Load composite element. Under Migration Load, keep all options selected and select the required Matching Migration Mode.
-
Preserve and Match (default): All provided group IDs are preserved as they are. New rules are applied and therefore the matching ID is only assigned if the group ID is empty on the migration load input. The relationship is defined across more Connected Systems.
This is the suggested option for reference data, dictionaries, or manual matching exceptions.
-
Preserve and Assign: Matching is not performed at all. Records without group IDs are considered as having no key, and a unique group ID is assigned to each record.
We recommend performing reprocess and rematch right after the migration to correctly match the records without previous results (with unique group ID assigned during the migration process).
-
Reload: All provided group IDs are both recomputed and reused, that is, the previous matching result is preserved only if it is confirmed by the new rules.
-
-
Add the matching columns you want to load in the Selected Matching Columns section. The default columns (
master_id, keeper flag, and isolate flag) are imported if the Load Matching Columns option is selected, and other columns are defined in this section. -
In Load Additional Columns, define columns for migration which are not Engine columns, Previous Distinct Vales columns, or Matching columns.
-
Right-click Migration and select Generate.
-
Right-click Migration and select Open Migration Load Plan. A preconfigured plan opens.
-
Add data sources (for example, TXT files from the migration export or another export operation) for each exported entity.
-
Perform column mappings.
As a general rule for this step, check the errors in the Integrated Output step and add all missing columns to make sure the plan is valid. -
Perform the mapping for each entity (attributes should be mostly the same); some default mapping is part of the load plan.
-
|
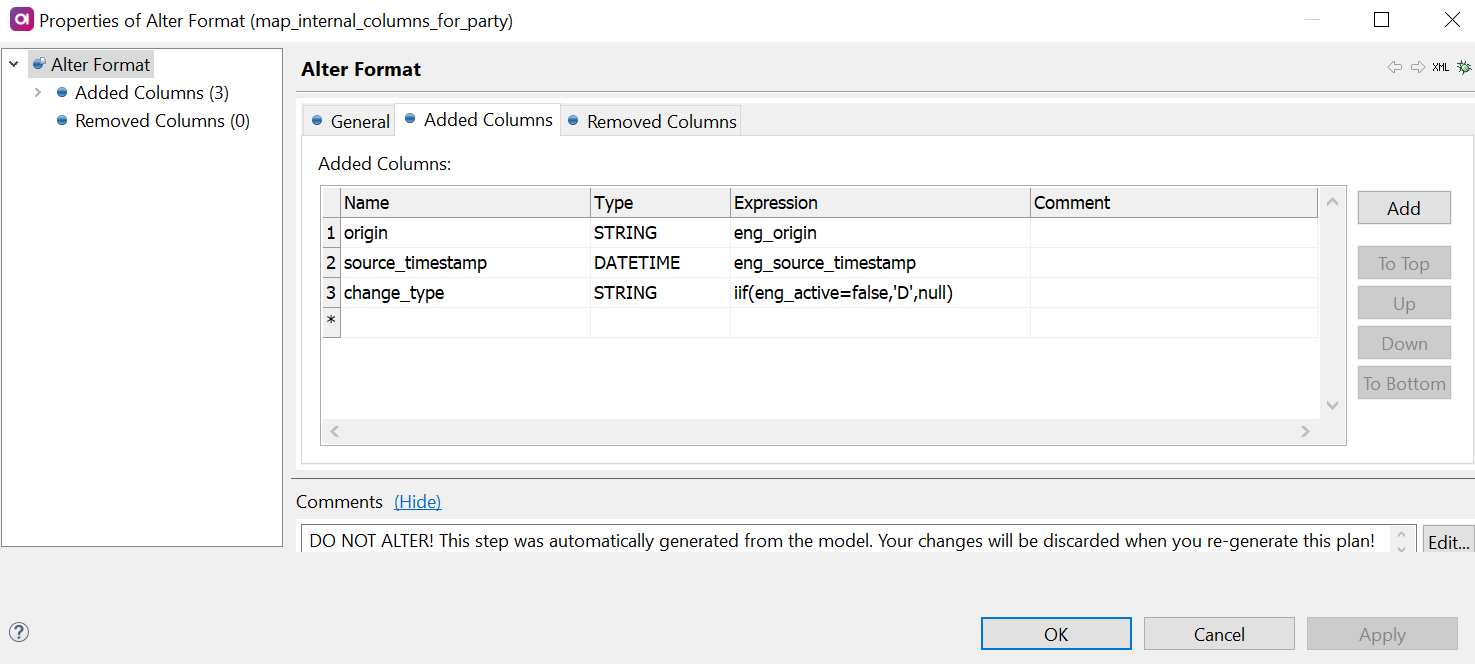
Use an additional Alter Format step to be able to add missing columns (solution-dependent) or perform some additional transformations, for example:
|
Configure overrides migration load
-
Open Advanced Features > Migration.
-
Select Migration Load composite element and select the Overrides tab.
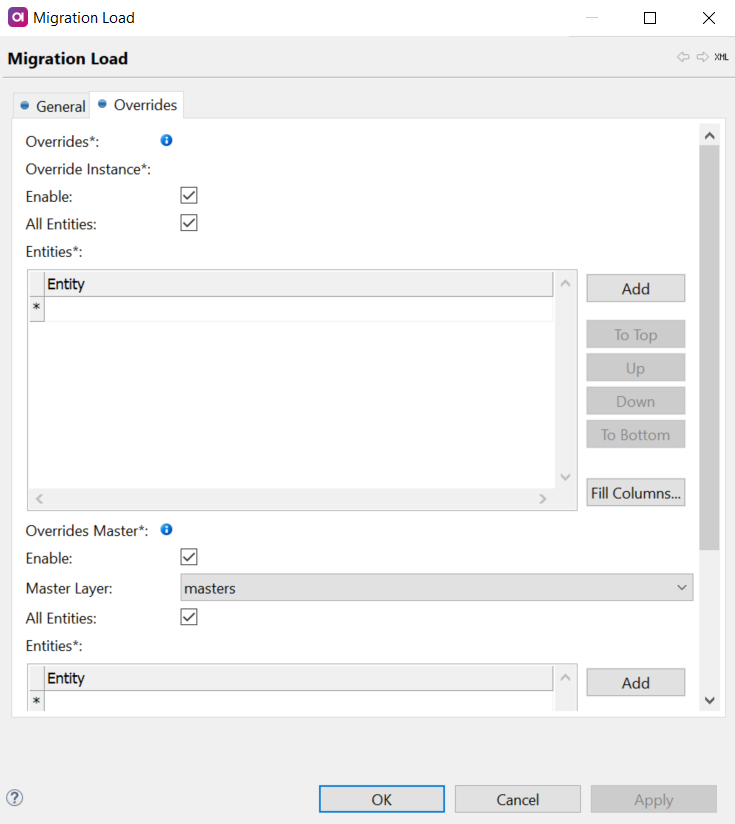
| To configure overrides migration, Load Id must be selected on the Migration tab. For engine columns to be loaded, Load Engine Columns must be selected on the Migration tab. |
Migrate overrides on the instance layer
-
Enable overrides migration on the Instance Layer by selecting Enable.
-
To migrate overrides on all available entities, select All Entities.
-
Otherwise, select individual entities within the Entities section. Double-click the asterisk (
*) to begin.Press Ctrl+Space to open a list of possible values when adding entities.
The new load plan is generated in Files > engine > load > migration_load_ovr_instance.comp.
Migrate overrides on the master layer
| Load Matching Columns must be selected on the Migration tab and the PRESERVE Matching Migration Mode is recommended. |
-
Enable overrides migration on the Instance Layer by selecting Enable.
-
Select the mater layer for which you want to configure the override migration load.
Migration is only possible on one master layer at a time. Select the name of the required layer using the dropdown. -
To migrate overrides on all available entities, select All Entities.
-
Otherwise, select individual entities within the Entities section. Double-click the asterisk (
*) to begin.Press Ctrl+Space to open a list of possible values when adding entities.
The new load plan is generated in Files > engine > load > migration_load_ovr_master.comp.
Configure authored master records migration load
-
Open Advanced Features > Migration.
-
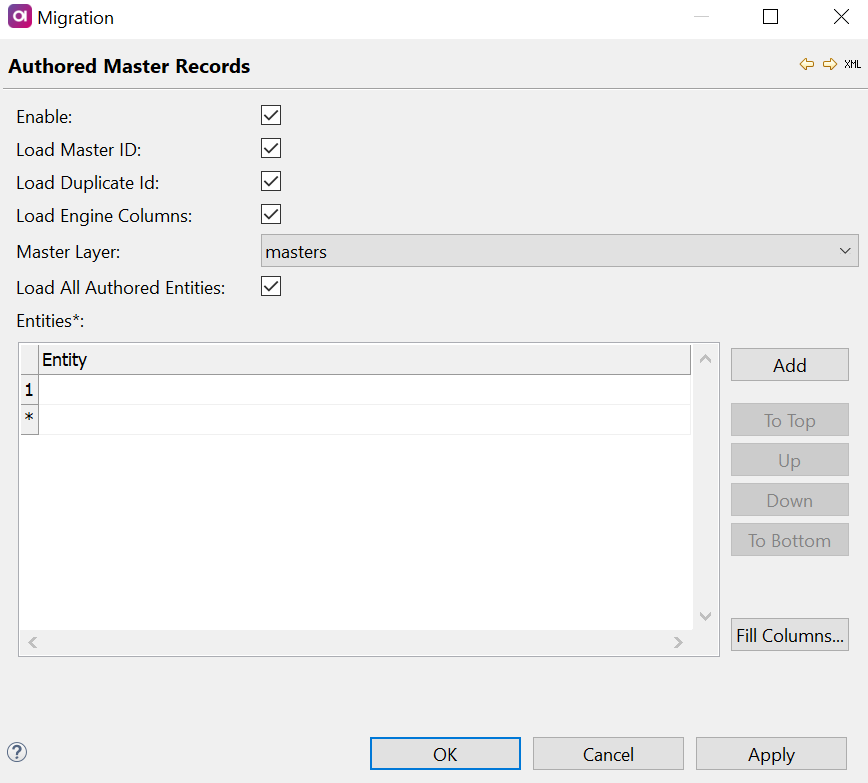
Select the Authored Master Records composite element.
-
Enable authored record migration by selecting Enable.
-
Enable Load Master ID, Duplicate Id, and Load Engine Columns.
-
Select the Master Layer for which the load plan is relevant. Only one can be selected.
-
To migrate overrides on all available entities, select All Entities.
-
Otherwise, select individual entities within the Entities section. Double-click the asterisk (
*) to begin.Press Ctrl+Space to open a list of possible values when adding entities.
| Matching Migration Mode is inherited from the Migration Load configuration. |
The new load plan is generated in Files > engine > load > migration_load_authored.comp.
Configure task migration load
-
Under Advanced Features > Migration > Task Migration Load, select composite element.
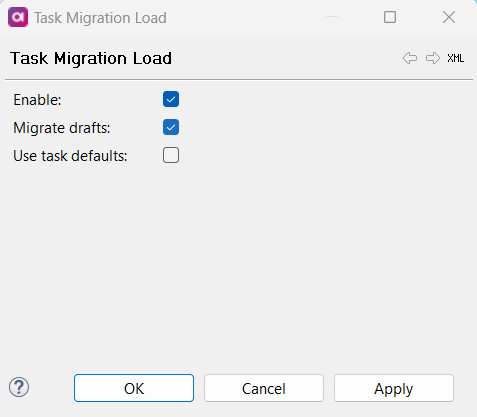
-
To enable task migration, select Enable.
-
To also migrate drafts, select Migrate drafts. This adds drafts integration outputs to the plan and is not selected by default.
-
To override null or empty input values by task template defaults, select Use task defaults. Do not select this when migrating existing tasks, otherwise you lose all the task details.
The new load plan is generated in Files > engine > load > migration_load_task.comp.
Configure manual match decision load
-
Under Advanced Features > Migration > Manual Match Decision Load, select composite element.
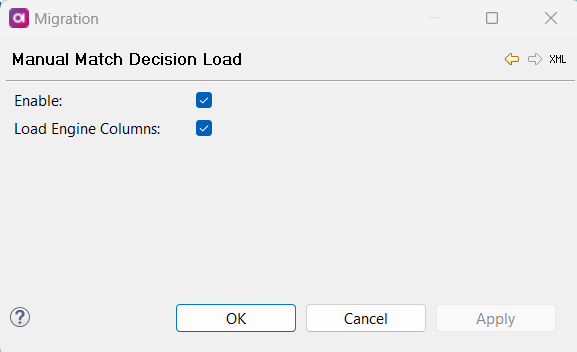
-
Select Enable to enable match decision load.
-
To be able to overwrite
eng_columns, select Load Engine Columns.
Configure history migration load
To load history entities defined in the history plugin (see History Plugin), go to Advanced Features > History Migration Load and select Enable.
The history load plan is generated in Files > engine > migration > migration_history_load.comp.
Step 3: Prepare for the migration load
Perform the following steps in the order given before doing the upgrade.
Migration procedure
The actual migration procedure is done in these steps:
-
Stop the current MDM server and back up the whole solution.
-
Ideally, copy the previous schema for the MDM storage and keep the old one as backup. You don’t need to copy data tables, for example,
[prefix][entity]_I,[prefix][entity]_[master layer], and all[prefix][entity]_K_[matching repository name]. -
Delete the
[prefix]_STATStable, otherwise the migration load does not start. Data statistics are filled in after the migration is finished. -
Check that the following exist (prefix =
I_for Internal):-
Tables (updated):
-
AC__EXPORT_REG- If you want to preserve the continuity of incremental instance exports, keep this table as it contains information about the data that was exported previously. Otherwise you can drop it.Check that Load Id and Load Engine Columns are selected in the Migration Load settings. -
I__TASKS -
I__TASKS_EH
-
-
Sequences:
-
I_ID_SEQ -
I_TASK_SEQ -
I__TASKS_EH_SEQ -
MDA sequence
I_MDA_SEQ(optional): theMDApart corresponds to the GUI System Name setting in Logical Model > Master Data Layers > [master data layer] > GUI Configuration.Indexes are not migrated.
-
-
-
Upload the new configuration and start the new MDM server.
-
Perform the Migration Load.
Adjusting [prefix]_ID_SEQ
| If Load Id or Load Matching Columns are enabled, the following steps have to be performed. Otherwise, the sequence can be dropped and recreated by the MDM engine during the startup procedure. |
The id and master_id are now assigned from one sequence, so it might be necessary to preserve and/or adjust the sequence.
| Make sure the MDM Server is not running while adjusting the sequence. |
-
Find out the value that is available from the database sequence
[prefix]_ID_SEQ.-- PostgreSQL: Get the last value obtained from the sequence SELECT last_value FROM A_ID_SEQ; -
Find out the highest
idormaster_idassigned to any entity, divide it by 1000, and round it up.To find out the highest number, use an SQL query or profile the exported files. The ID sequence in the database has to be increased before the migration to be greater than the maximum (group ID or record ID). -
If the database sequence is lower than the highest
idused, increase the database sequence to have both values equal. Otherwise, continue to the next step.-- PostgreSQL: Increase the sequence as required -- For example, if the sequence value is 1000 and you want to set it to 1100: -- Option 1: Use RESTART (simplest, available in PostgreSQL 10+) ALTER SEQUENCE A_ID_SEQ RESTART WITH 1100; -- Option 2: Use the INCREMENT trick -- Increase the sequence increment ALTER SEQUENCE A_ID_SEQ INCREMENT BY 100; -- Advance the sequence SELECT nextval('A_ID_SEQ'); -- Revert the sequence increment to 1 ALTER SEQUENCE A_ID_SEQ INCREMENT BY 1; -- Check the result SELECT last_value FROM A_ID_SEQ;
Step 4: Perform the migration load
-
Make sure all Instance, Master data tables, and data statistics tables in the MDM storage are empty, otherwise the migration load fails. The tables are:
-
[prefix][entity]_I -
[prefix][entity]_[master layer] -
[prefix]X[entity]_I -
[prefix]X[entity]_[master layer] -
[prefix]_STATS -
[prefix]X_STATSThis also applies to any history tables you are migrating (prefixed by [hist_prefix]).
-
-
Start the server using the latest runtime.
Make sure the MDM server is configured to run in the read-write mode. -
Perform the migration load in the following order:
-
Authored master records migration load
-
Migration load
-
Manual match decision load
-
Overrides migration load
-
Task migration load
-
-
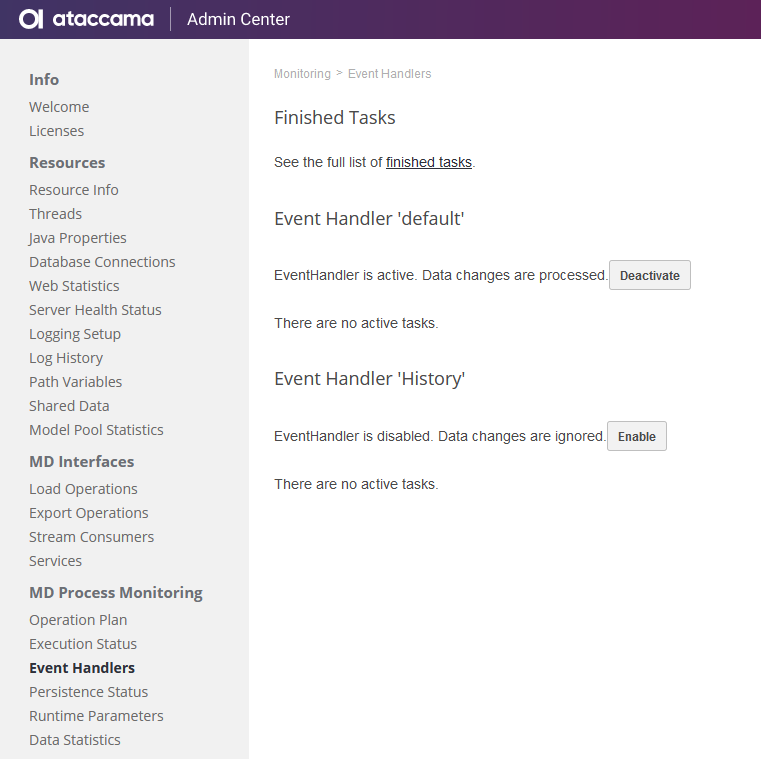
Optionally, perform history migration load. If you are migrating history tables, reactivate the History Event Handler afterwards.
-
Check the consistency of migrated data.
|
When the migration load is finished, although the engine metadata columns are preserved, the master layer is computed from scratch. This means all incremental exports provide a full set of the data in the first run after the migration. Instance increment exports are preserved when engine metadata are preserved as well. |
Was this page useful?