Customizing the Left Navigation Panel
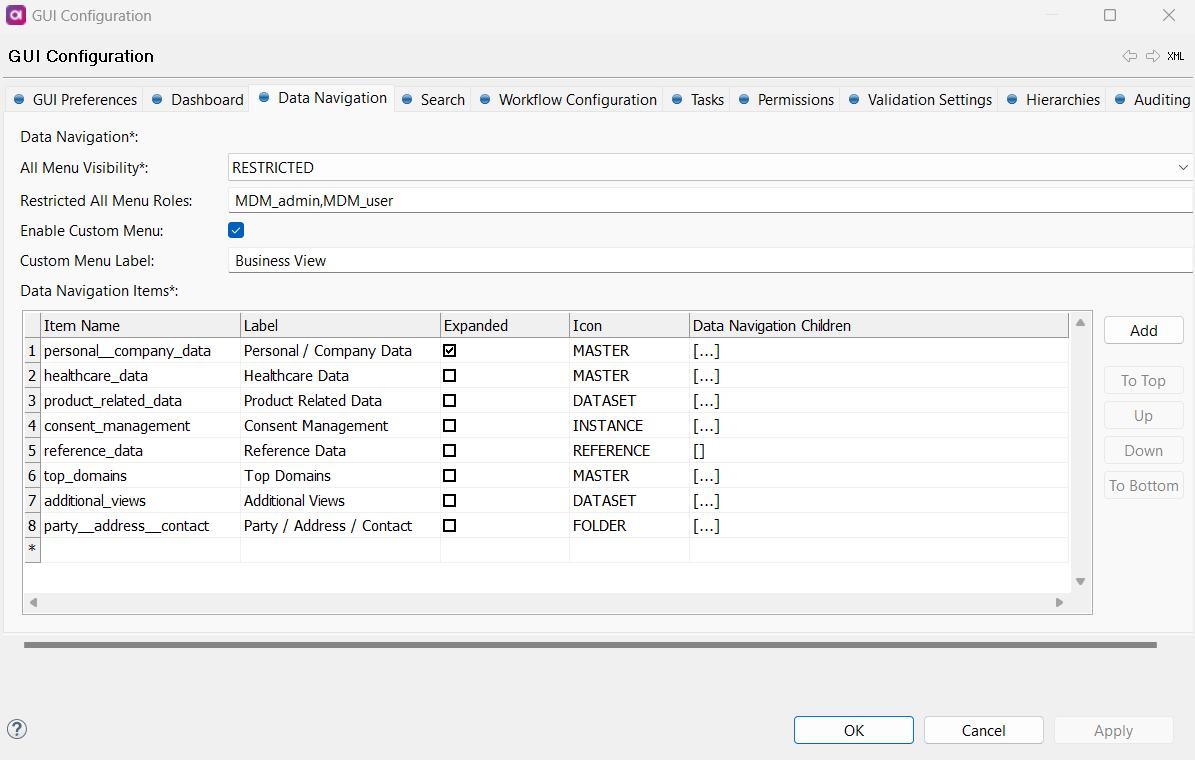
It is possible to customize the MDM Web App left navigation panel. If configured, you can toggle between the custom panel and the default All view.
To configure the custom left navigation panel:
-
Open your MDM project in ONE Desktop.
-
Go to GUI Configuration > Data Navigation.

-
Select Enable Custom Menu.
-
Name the custom menu in Custom Menu Label. This is the name that will appear in MDM Web App.
-
Next to the Data Navigation Items table, select Add. This creates a new data navigation parent.
-
Specify the following details:
-
Item name: The technical name for the navigation parent item.
-
Label : The name of the navigation parent. This name will appear in MDM Web App.
-
Expanded: Select if you want the navigation parent to be automatically expanded after loading the MDM Web App to show all the child entities.
-
Icon: Choose the icon that will represent your parent entity.
-
-
To add entities under a navigation item, double-click its row number. The detail view of the item opens.
-
Select the entities that you wish to include in this parent by pressing Ctrl+Space in the Name column to get a list of available entities.
-
Fill in the other details. These are the same as the details for the parent entities.
-
Select Apply.
-
Select the back arrow and repeat steps 5-10 to add another section.
You can also hide the All menu in MDM Web App, or restrict its visibility to only select users. To do this, in the Data Navigation tab, select one of the following options for All Menu Visibility:
-
ALL (default) - All users can see the menu.
-
RESTRICTED - Only selected roles can see the menu. You then need to select the roles in Restricted All Menu Roles.
-
NONE - No users can see the menu.
| If selecting RESTRICTED or NONE, you must also select Enable Custom Menu. |
These settings will be generated to the mda-data-navigation.gen.xml file, in the allMenuVisibility element.
Was this page useful?
