
Enrichments
For configuring enrichments, you can only use plans.
Plan providers generate a plan with Integration Input and Output steps, where you define the enrichment behavior. Plans can return multiple values so that several attribute values can be suggested in the application along with the one that is currently edited.
To configure enrichments you need to:
-
Define enrichments.
-
Configure enrichment plans.
-
Map enrichments to specific entities and columns.
Define enrichment
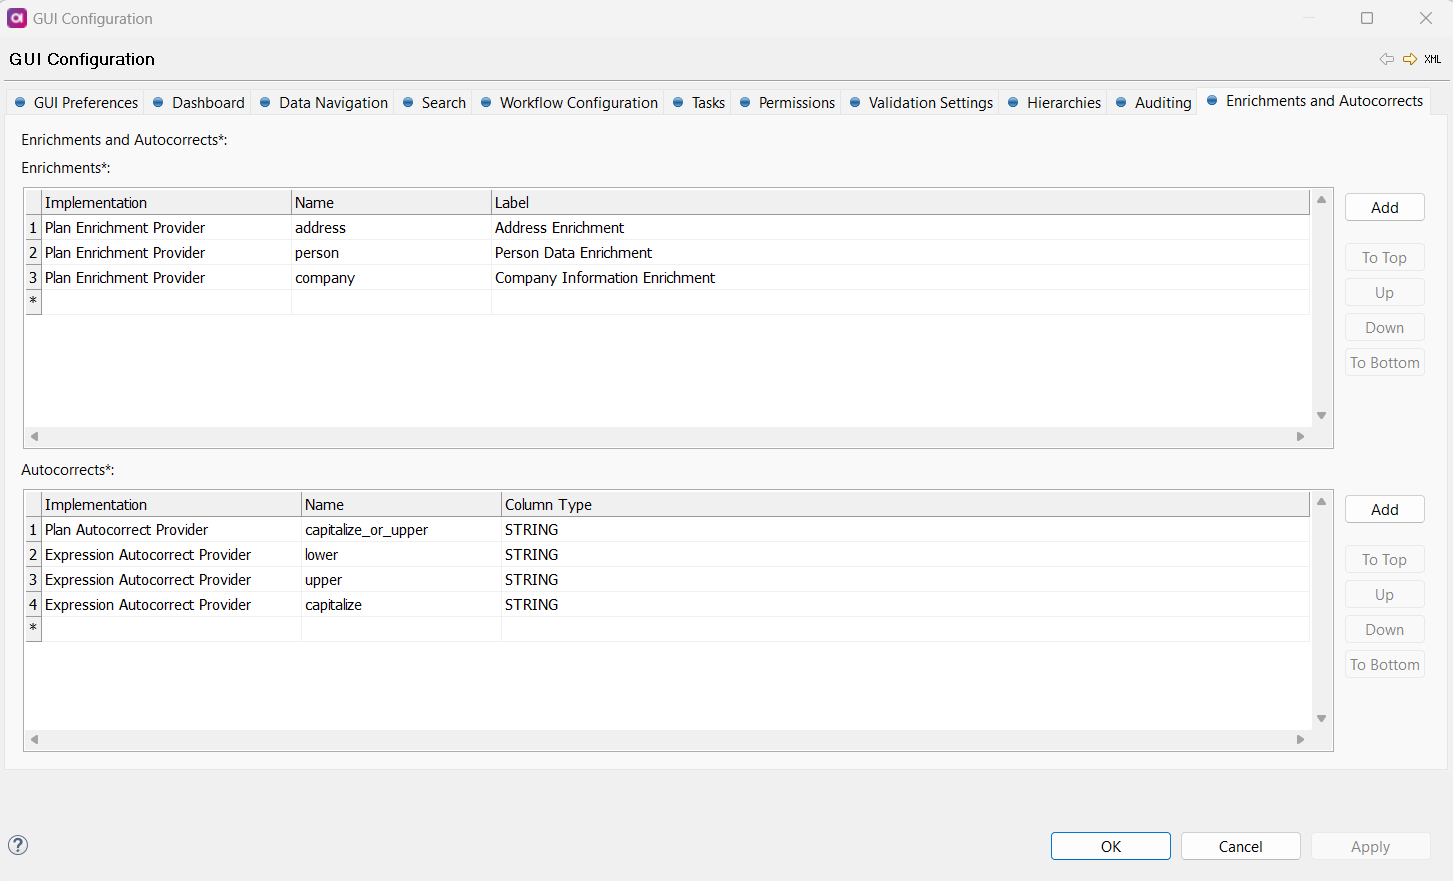
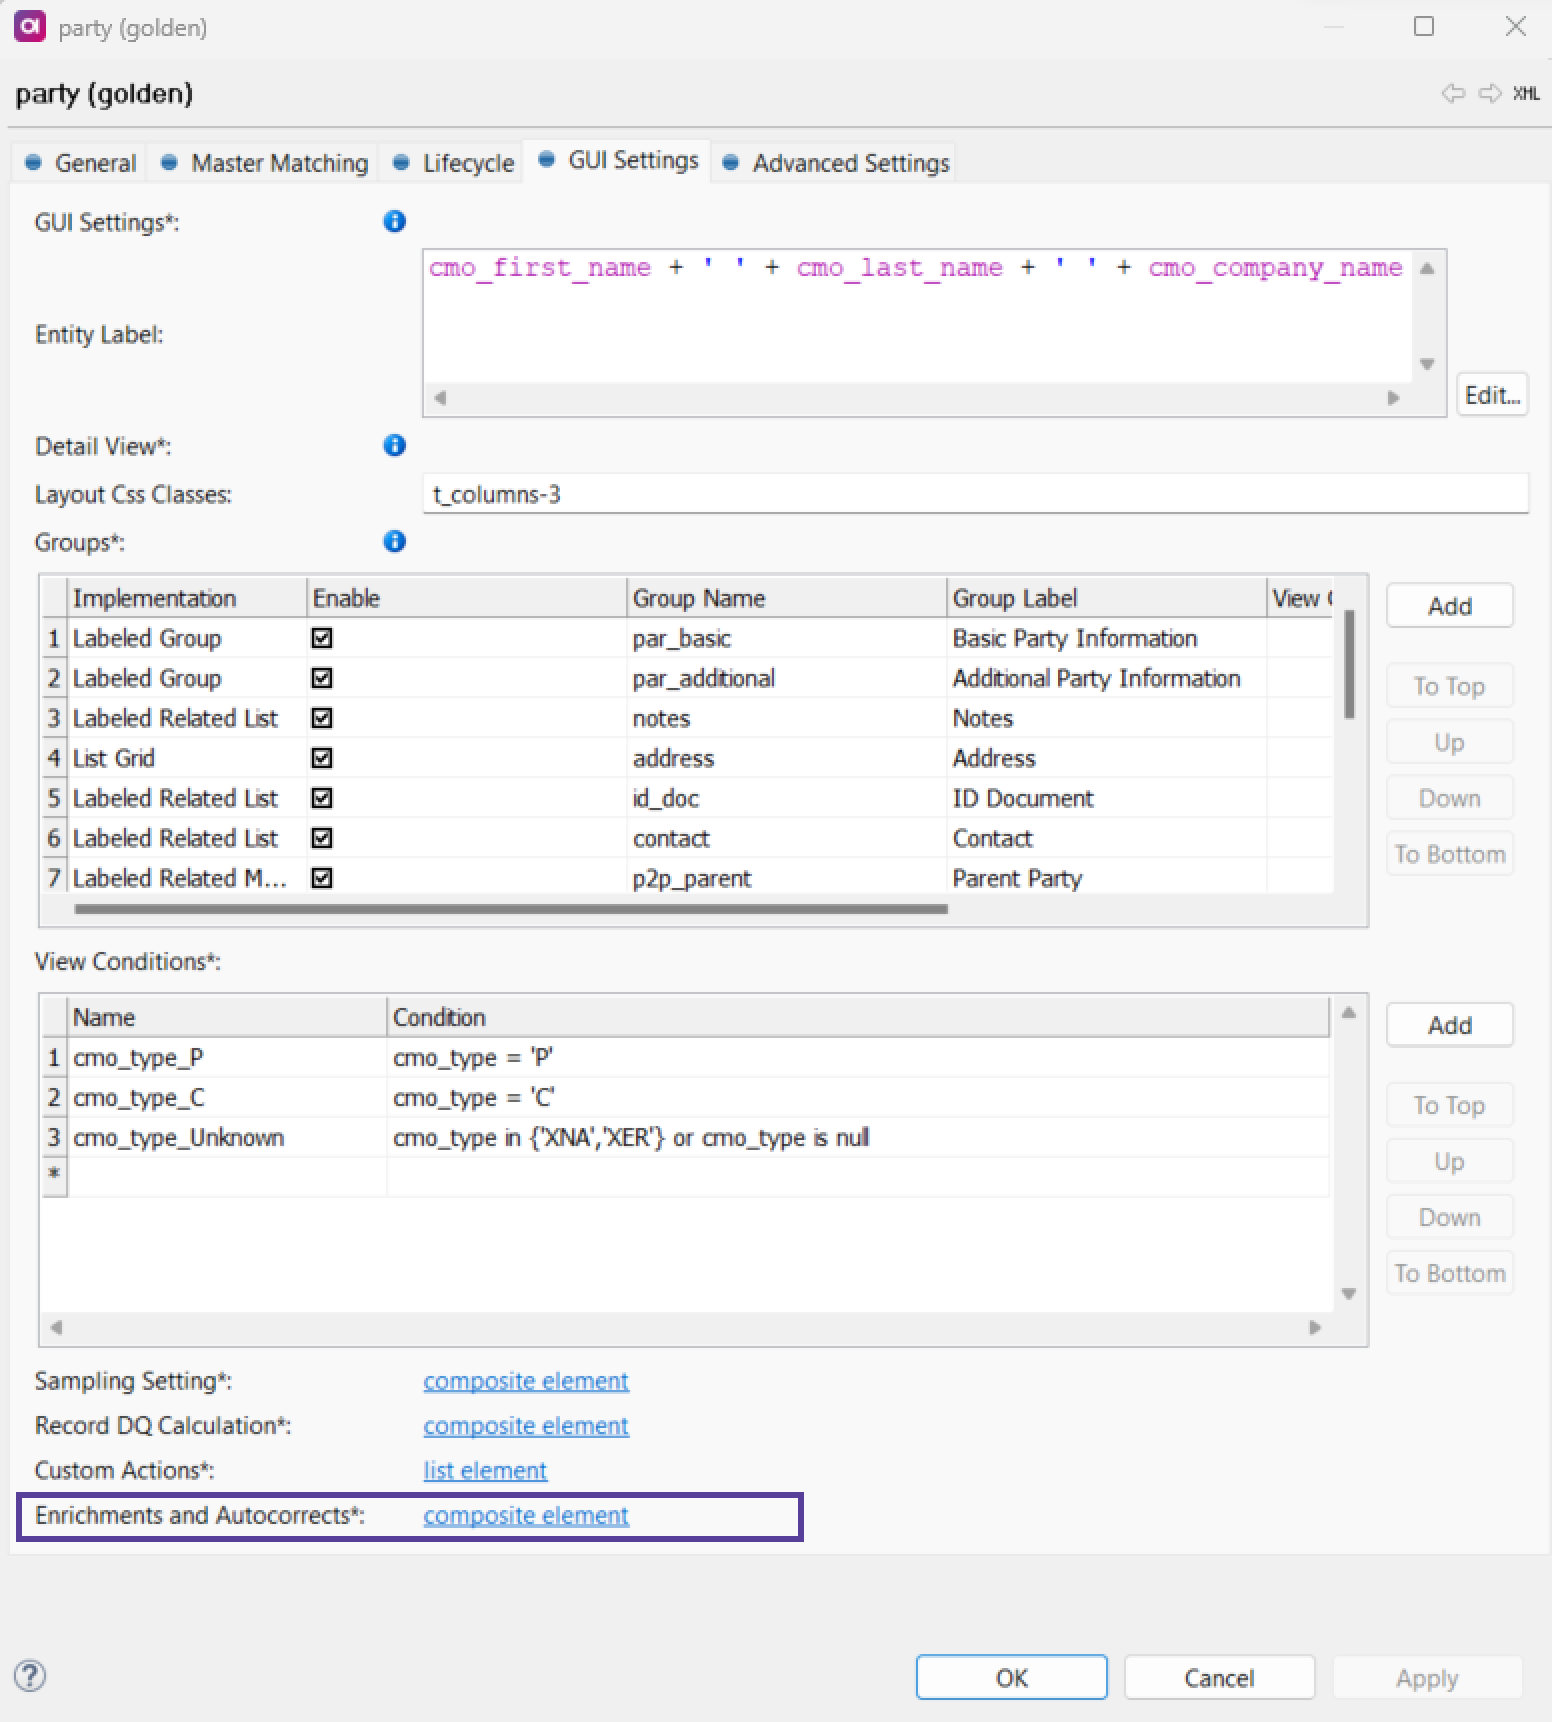
You can define enrichments in GUI Configuration on the Enrichments and Autocorrects tab.
To define an enrichment:
-
Under GUI Configuration > Enrichments and Autocorrects > Enrichments, select Add to add a row. Alternatively, double-click the asterisk (
*).
-
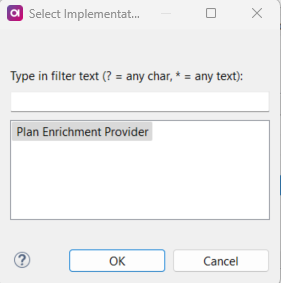
Choose the enrichment provider type. Currently, only Plan Enrichment Provider is available.
-
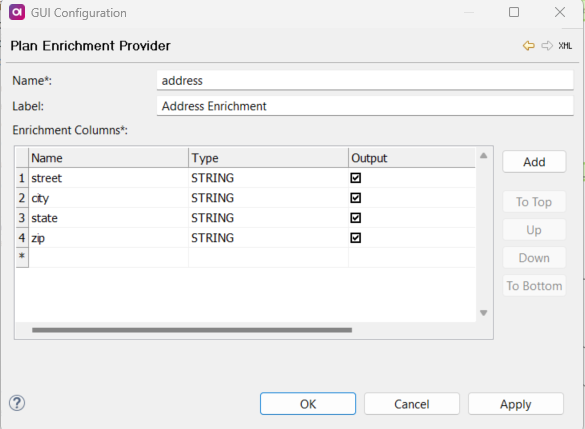
A new row is now added. Double-click the number of the row and specify the following parameters:
-
Name: Unique name of the enrichment.
-
Label: Technical name that will be used for localization purposes and generated to the
mda-label.gen.propertiesfile when set. -
Enrichment Columns: One or more columns used for the defined enrichment.
-
Name: Column mapping name.
-
Type: Enrichment output data type. Possible values are
BOOLEAN,STRING,DAY,DATETIME,FLOAT,INTEGER,LONG. -
Output: When selected, the column is generated to the Integration Output step and can be replaced by the selected value in MDM Web App. You need to select at least one column.
-
-
-
Confirm your choice by selecting OK. Repeat steps 1-3 for all enrichments needed.
-
Once the list is complete, confirm by selecting OK on the Enrichments and Autocorrects tab.
-
Right-click GUI Configuration and select Generate. This updates the
nme-enrichments.gen.xmlfile with the new configuration and generates the plans.
Configure an enrichment plan
After you define an enrichment, you now need to configure an enrichment plan.
To do so:
-
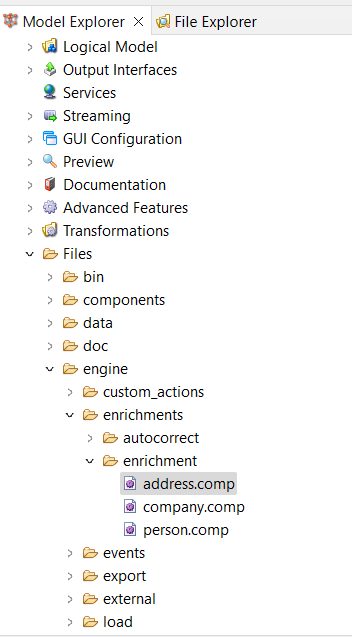
Under Files > engine > enrichments > enrichment, double-click the name of the plan you defined in the previous step.
-
Complete the plan by adding steps as needed. For example, a completed
addressplan might look as follows: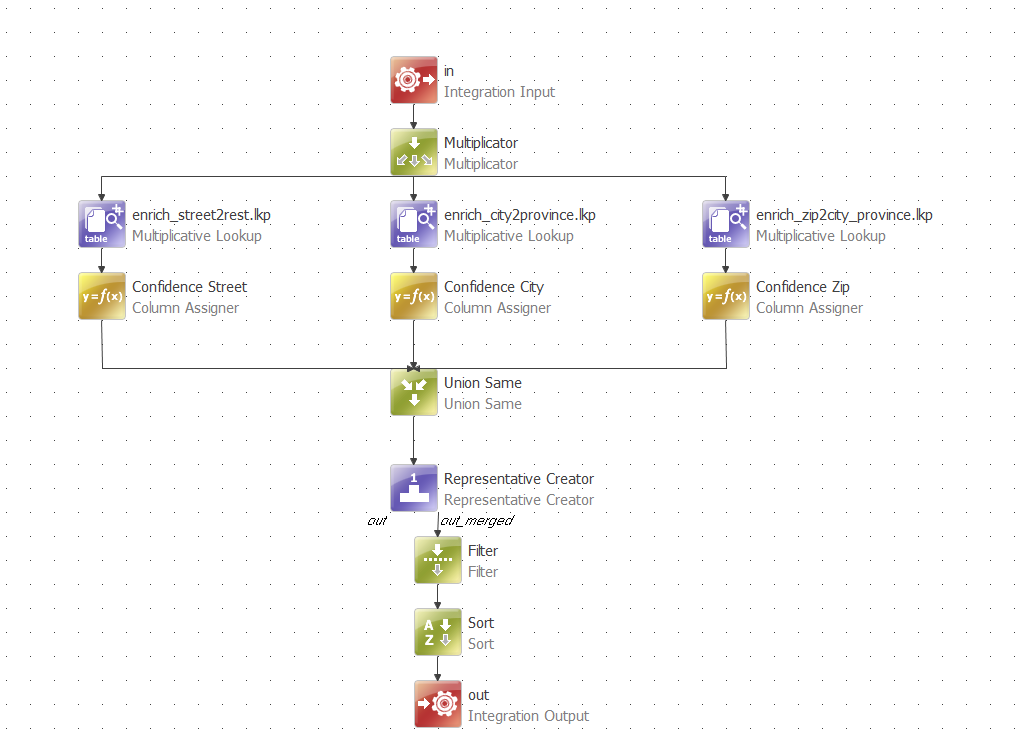
|
The Integration Output step has a confidence column predefined. You can specify how the confidence score is calculated by adding an expression while configuring steps. For example, an expression for calculating confidence for street values might look as follows: 
|
Map enrichment to columns
To map the defined enrichment to a specific column:
-
In the Logical model, select the entity.
Each enrichment can be mapped only once per entity. -
On the GUI Settings tab, select Enrichments and Autocorrects composite element.
-
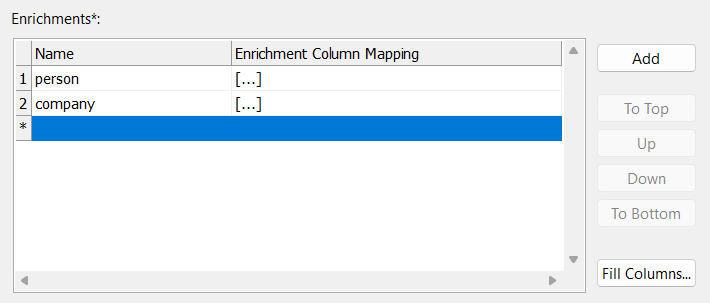
In the tab that opens, under Enrichments, select Add to add a new row. Alternatively, double-click the asterisk (
*).
-
Double-click the number of the row. In the window that opens, specify the following:
-
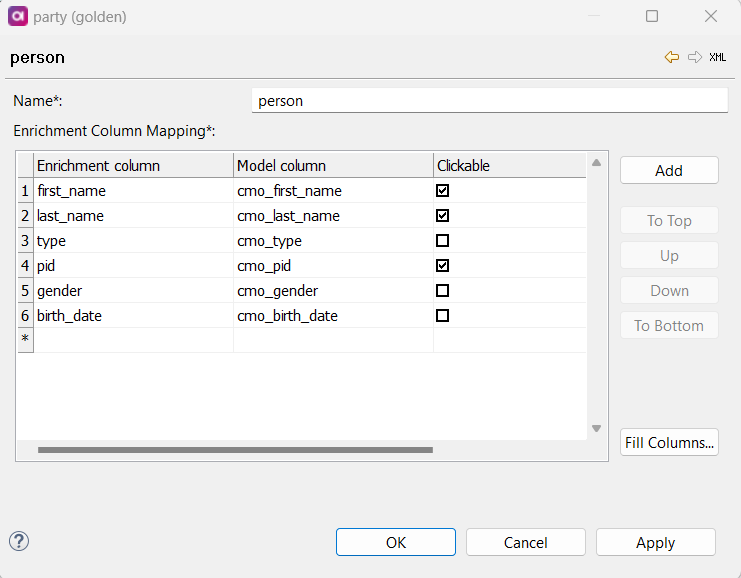
Name: Name of the enrichment. It is prefilled with the name defined in the first step of the enrichment configuration.
-
Enrichment Column Mapping:
-
Enrichment column: Name of the enrichment column.
-
Model column: Name of the model column to which the enrichment is mapped. All enrichment columns need to be mapped to model columns.
-
Clickable: Specifies if the value from this column is displayed in MDM Web App as an enrichment suggestion and can be selected. Only numeric (
integer,long,float) andstringvalues can be clickable. At least one column needs to be clickable.A column with defined reference data (lookup) cannot be configured as clickable.
-
-
Was this page useful?