Accessing Tasks
The following article provides more information about how to access and filter tasks.
Tasks listing
Depending on your permissions, you can either see all tasks, including those assigned to you, or only your tasks.
Access tasks listing
You can access the tasks assigned to you:
-
From the Dashboard: On the Dashboard page, select My tasks.
-
From the Navigation panel: On the Navigation panel, scroll down and select My tasks.
To access the tab with all tasks:
-
From the Dashboard: On the Dashboard page, select All Tasks.
-
From the Navigation panel: On the Navigation panel, scroll down and select Tasks.
Tasks listing overview
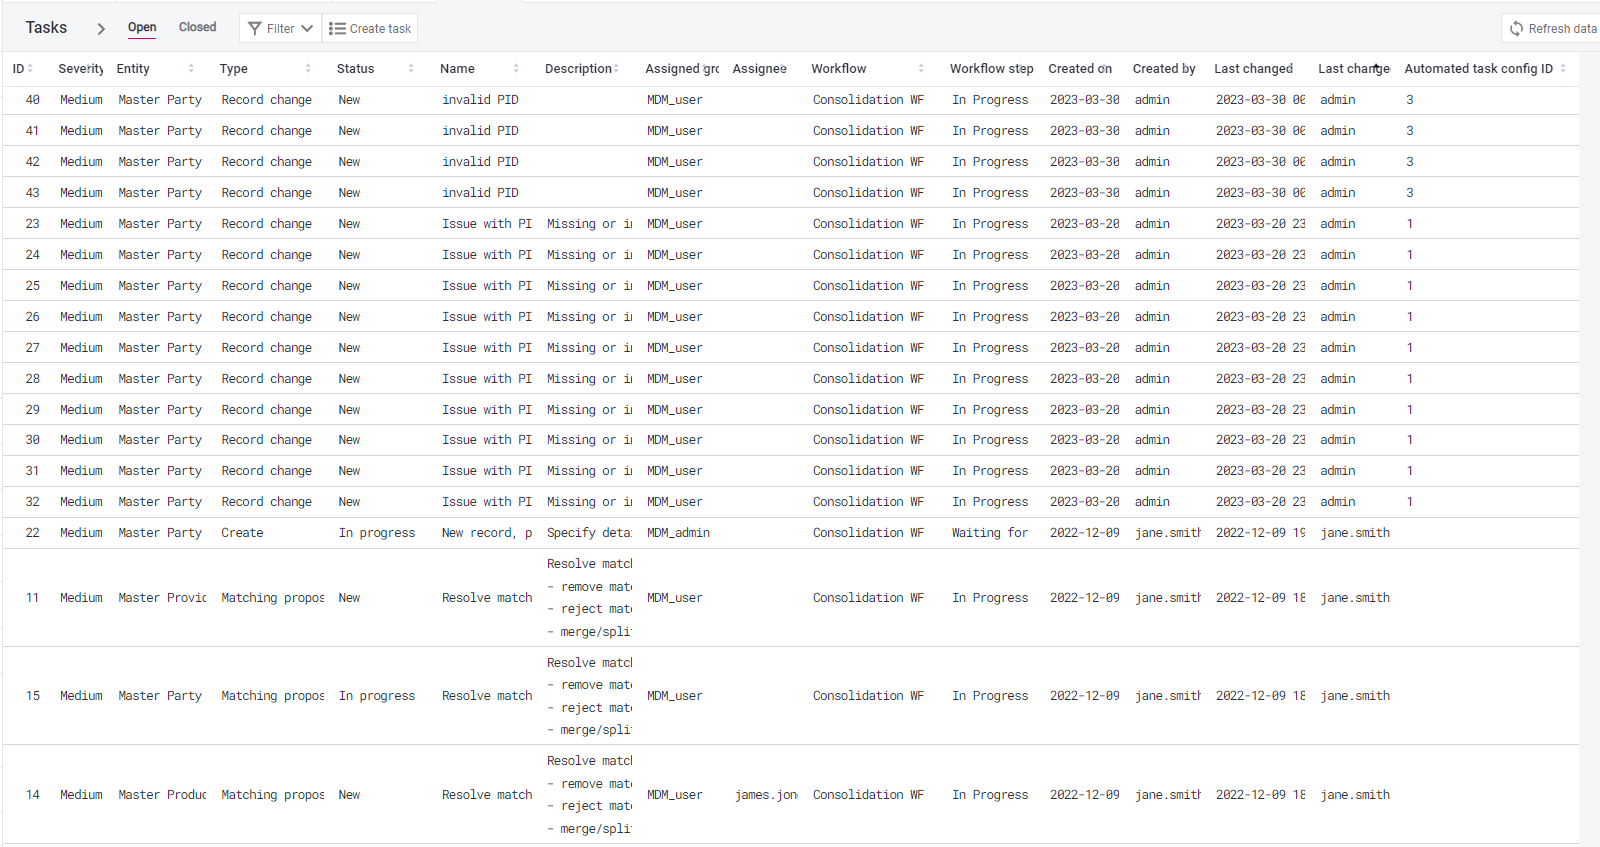
Both these options open the tasks menu, where you can view current tasks and access individual task records.
The task listing contains a table displaying information about your tasks, such as the task identifier, type, name, description, assignee, and automated task ID, in case the task was created automatically.
Hover over the description to view the whole text. You can search within the description using Ctrl+F.
The Open task listing shows unresolved tasks.

The Closed tasks listing contains information about resolved tasks.

Taskbar
The taskbar is displayed when there is a task in progress. The taskbar opens automatically if you start editing a record and is the quickest way to edit your data.
For more information about editing, see Editing Values.

The taskbar contains the following information and options:
-
Task ID and Task name: Task identifier and name. Depending on your permissions, you might be able to change the task name from the taskbar.
-
Task detail: Select to open the task details.
-
State of changes: Shows whether all changes have been saved.
-
Options button: Specifies actions that move the task to other workflow steps.
Depending on your permissions and the workflow configuration, the available options might vary. Possible variants are, for example:
-
Resolve and publish: Publish all drafts connected to the task and move the task to Closed.
-
Submit for Approval: Send the task for review and approval.
-
Resolve and Discard: Delete all the changes made within the task and move the task to Closed.
For more information about the task states, see Publishing Workflow.
-
-
Stop editing: Serves as the exit button for the taskbar. When you select Stop editing, all changes are saved and you are redirected to the task detail page.
To resume editing, select Resume draft in the Task detail view, section Drafts. For more information about drafts, see Working with Drafts.
-
Actions: Specifies the actions that can be performed on the task.
These vary depending on your permissions. Possible variants are, for example, Add comment, Reassign task, Delete task.
Task details
Access task detail
To access the task detail view, choose one of the following options:
-
Select Task Detail in the taskbar.
-
Choose the task from the My tasks or Tasks tab.
In case that the task has already been worked on and has an active draft, you can also access the task detail view from the following places:
-
Record listing
-
Record detail
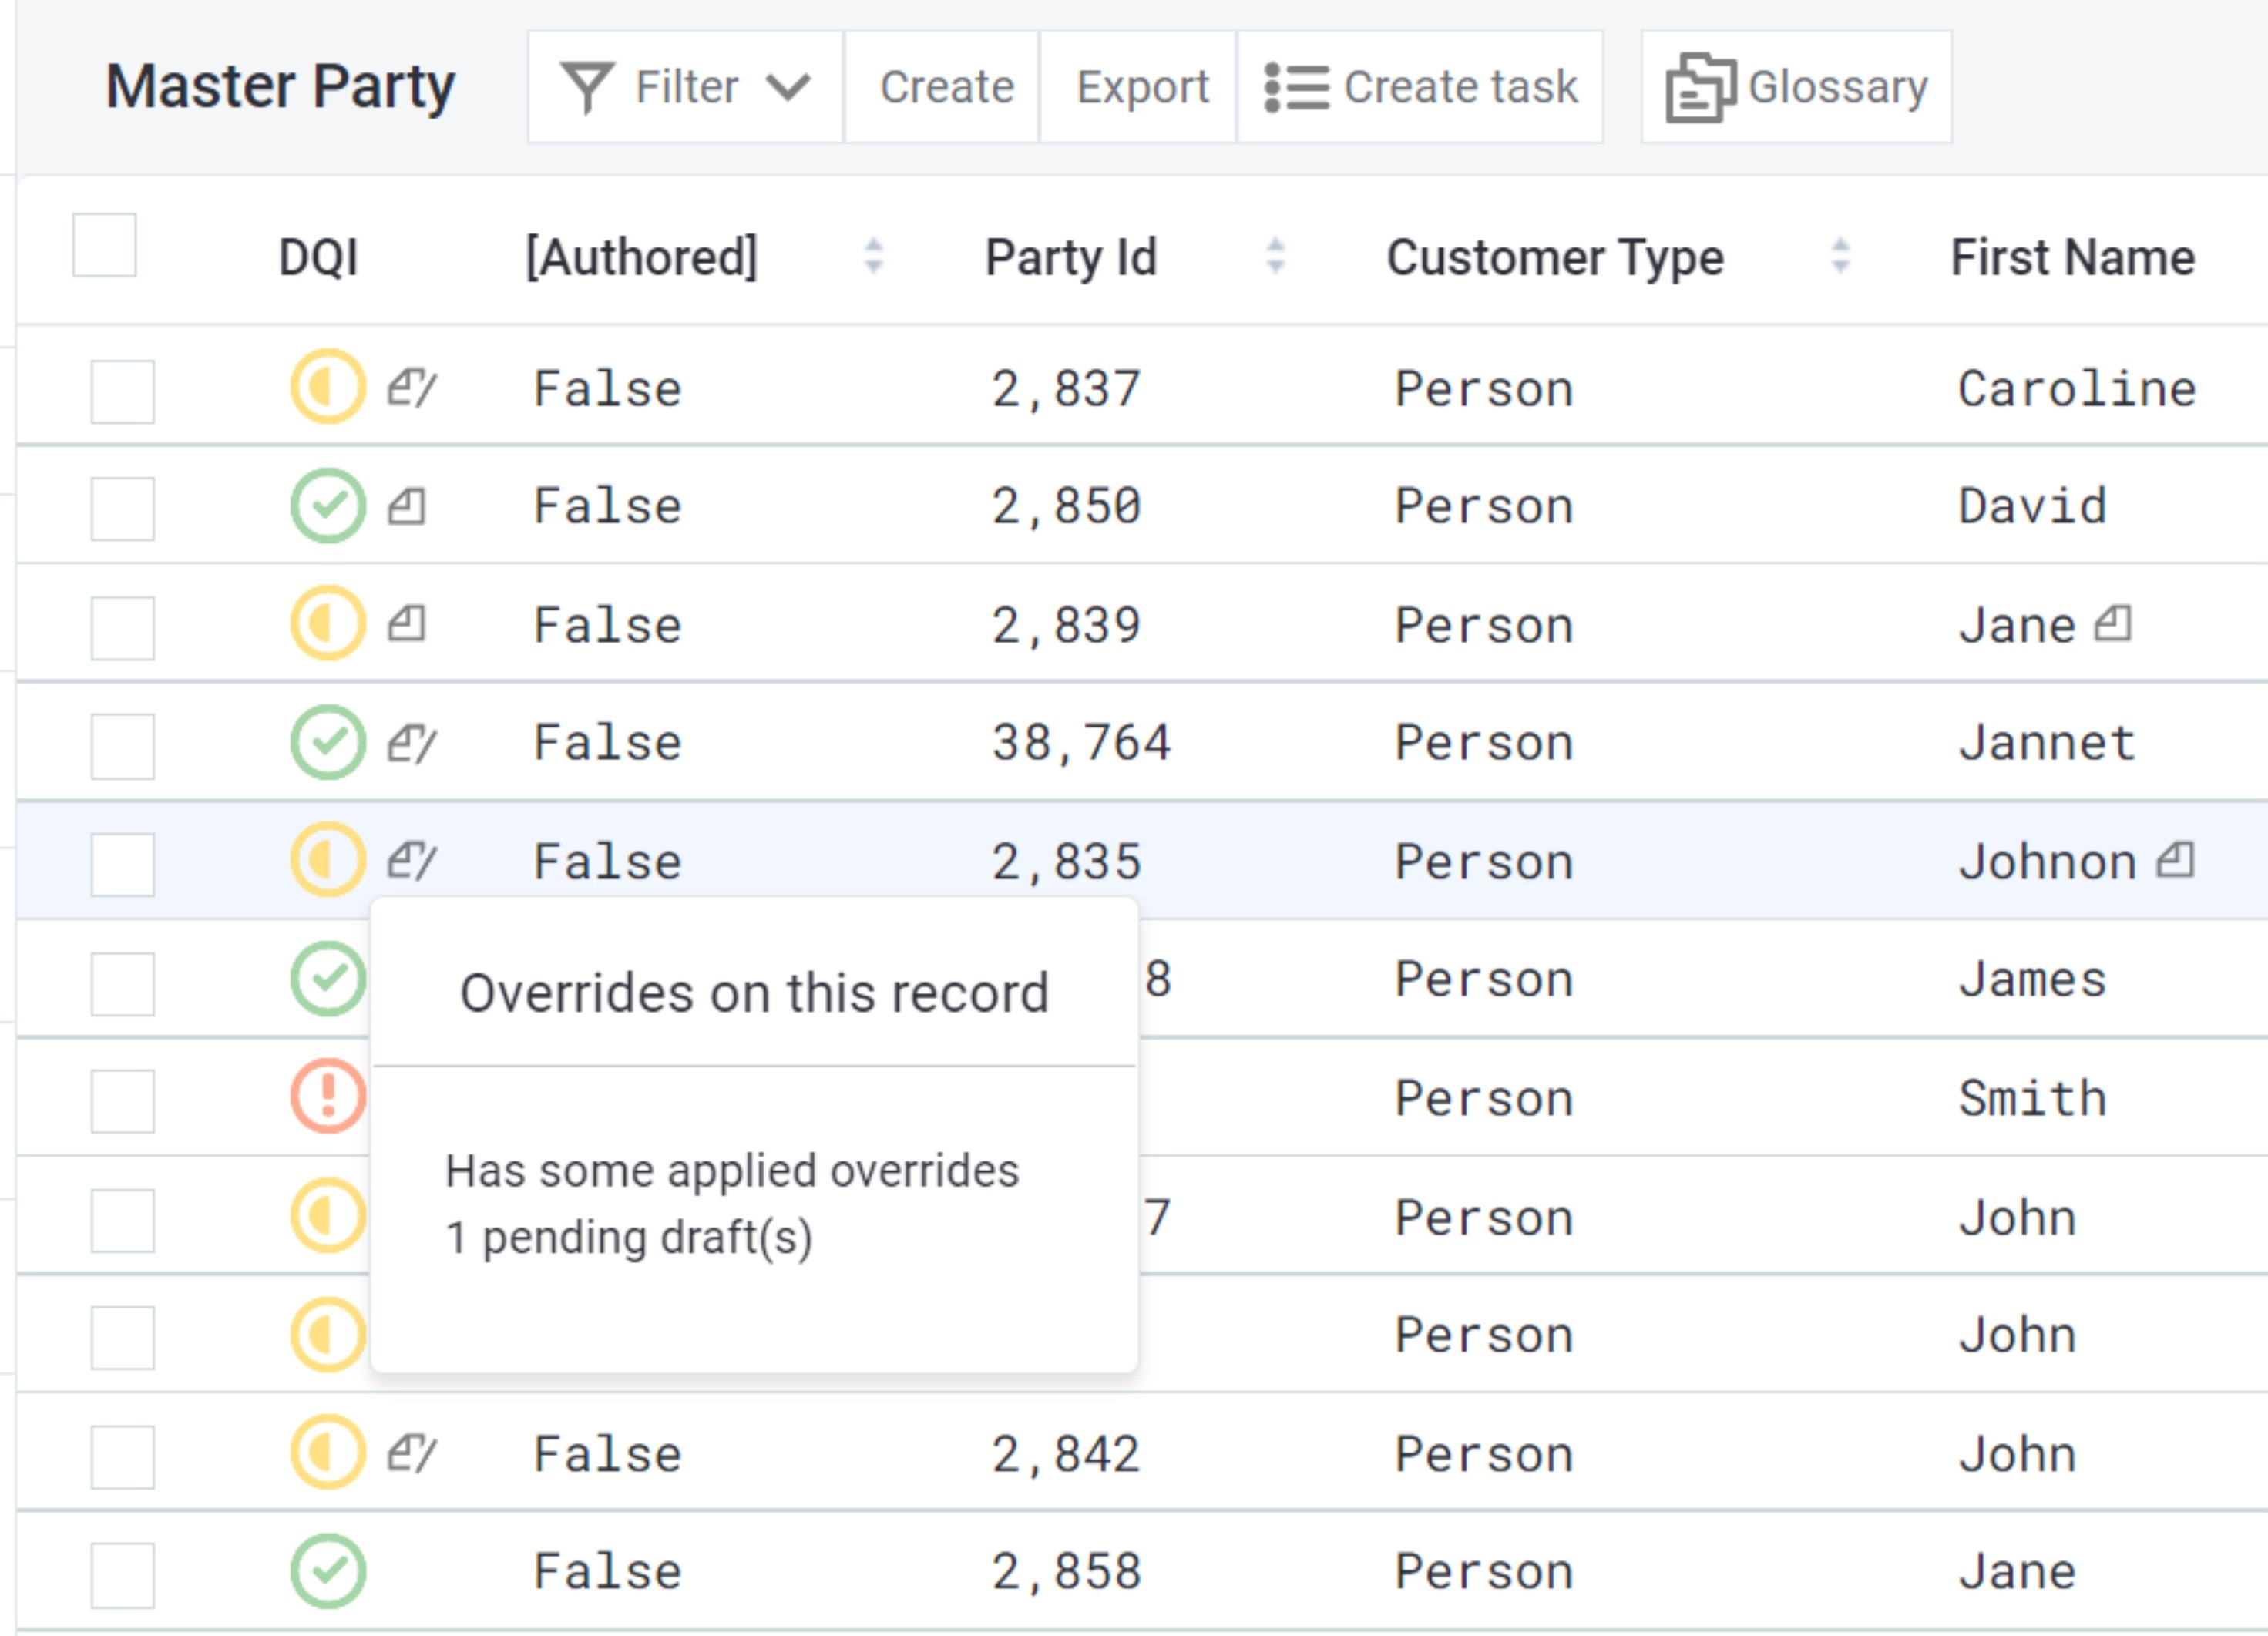
In the listing, records with active drafts (which means that they are linked to tasks) are marked by a draft icon (a page with a folded corner and a pen). Hover over the icon to see the number of pending drafts for the entry.

To access the task detail from the record listing:
-
Select the entry with a draft icon from the listing. This takes you first to the record detail.
-
Next, select the pencil icon with a number near it, which specifies the number of unpublished drafts.

-
You can now see the drafts for that record. Select the draft to open the task detail.
If some drafts were published or discarded as part of the task, but the task is still open, you can also access the open task by selecting the history drafts icon (clock with a pen).
Task detail overview
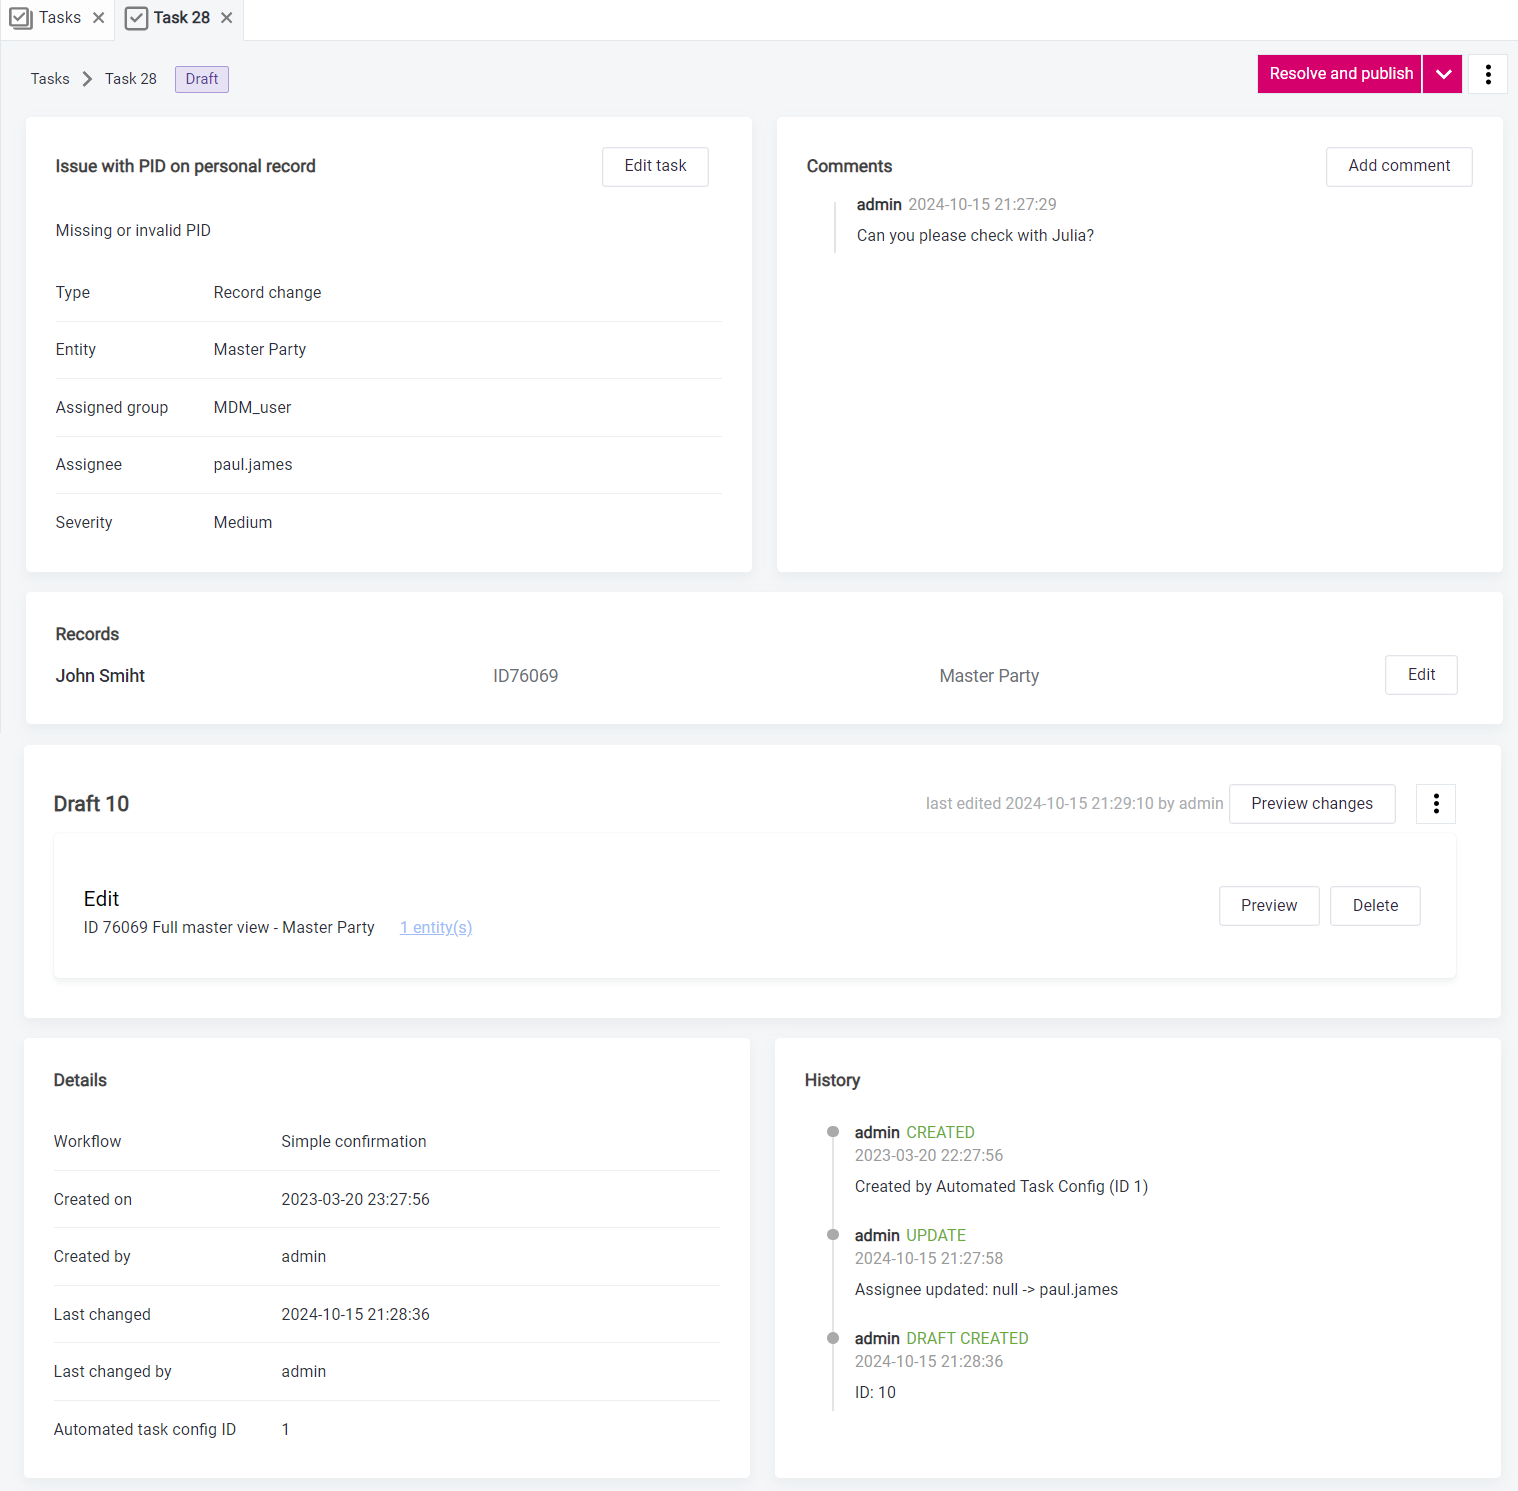
The task detail view is the main space for managing data changes. It contains the task toolbar with a list of available operations and several sections displaying information about the task: description, affected records, comments, history.
The sections shown and their contents vary depending on the task type.

-
Status indicator: Shows the current task status. Possible options are: New, In progress, Resolution failed, Resolved, Discarded. To provide more information about the state of the task, the current workflow step is displayed instead of In progress task status.
If the default workflow is used, possible options are In progress and Waiting for approval. In case of a customized workflow, labels corresponding to In progress and Waiting for approval steps are shown instead.
For more information about workflows, see Publishing Workflow.
-
Resolve and publish: Allows to publish the task. It might require special permissions.
-
Drop down button: Allows to move the task to the next workflow step. The options vary depending on the workflow state and your permissions. For more information, see Publishing Workflow and Resolving Tasks.
-
Three dots actions button: Shows the options available for the current workflow step. Some of the possible actions are: Add comment, Reassign task, Delete task. The options vary depending on the workflow state and your permissions.
-
Task description: Provides detailed information about the draft: the name and description of the task, task type, assigned users, severity.
When configured (see MDM Server Application Properties, section Task configuration), a clickable link to additional relevant information is also displayed.
Select Edit task to modify the task name, description, assignee, assignee group, or severity. It might require special permissions.
-
Comments: Contains all the comments made about the task.
-
Records: Lists all the records affected by the task.
In the task detail, you can view the list of records or matching proposals originally linked to the task. In case you added or modified records later while working on the task, these are only shown in the draft section. This section is not displayed in case the task does not contain any linked records (generic or create task type).
-
Draft: Displays the list of changes related to the task, provides information about each change, and allows you to perform operations on drafts.
The draft can include changes from any record or matching proposal, even if they were not part of the initial list of records or proposals defined when the task was first created.
For more information about working with drafts, see Working with Drafts.
Possible draft state indicator values are, for example, Discarded, Published, Publish failed, In use.
-
Details: Provides other information (for example, what workflow is used or when it was last changed).
-
History: Shows all the actions performed on the task workflow starting from the creation. For each action, additional info is provided (for example, the number of the draft created, the assigned group and assigned user after reassigning the task).
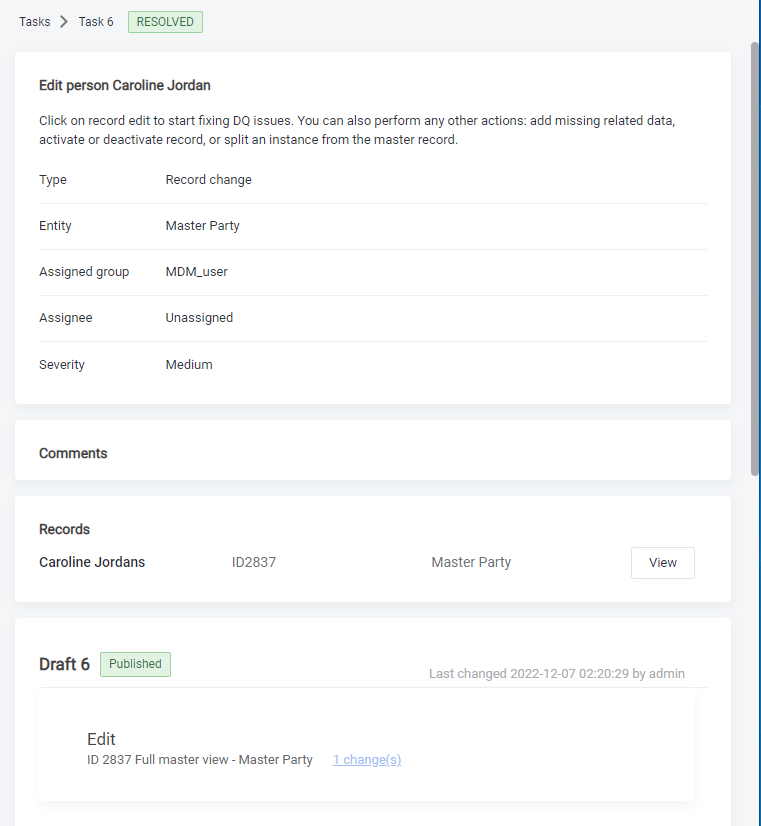
It is also possible to see resolved task details. To do so, select the row in the Closed tab under Tasks.
To go to the linked records detail, select View in the Records section. The View option is only shown in case the records still exist.

Search for tasks
MDM Web App lets you filter tasks the same way you filter data.

To filter tasks:
-
In the Navigation panel, select Tasks or My Tasks. Alternatively, select All tasks or My tasks from the Dashboard.
-
Select Filter for the filtering pane to open.
-
Select Add condition to add the first attribute into your search definition.
-
Choose the parameter you want to use for filtering from the dropdown list (for example,
created_byorlast_edited). -
Select the search operator from the dropdown list (for example,
=orcontains). -
Change case sensitivity if necessary.
-
If you want to search by more than one attribute, select Add condition again.
-
If you defined more than one condition, you can change the AND/OR operator between conditions if necessary.
-
Select Apply. The record listing changes to reflect the filter conditions.
If the basic filter is not enough, you can search using the Advanced filter. For more information about how to use the advanced filter, see Searching for Data.
Was this page useful?
