
Creating an Instance Layer Model
The Instance Layer is usually used as a canonical interface for all connected systems. Batch load operations need to map data from connected systems to this model and RW services interfaces are derived from the Instance model.
For general advice about the modeling approach and model importing, see Creating a Logical Model.
To create an instance model from scratch, you need to:
-
Add and configure instance entities.
-
Add and configure relationships between instance entities.
Add an instance entity
The following steps describe how to add an instance entity:
-
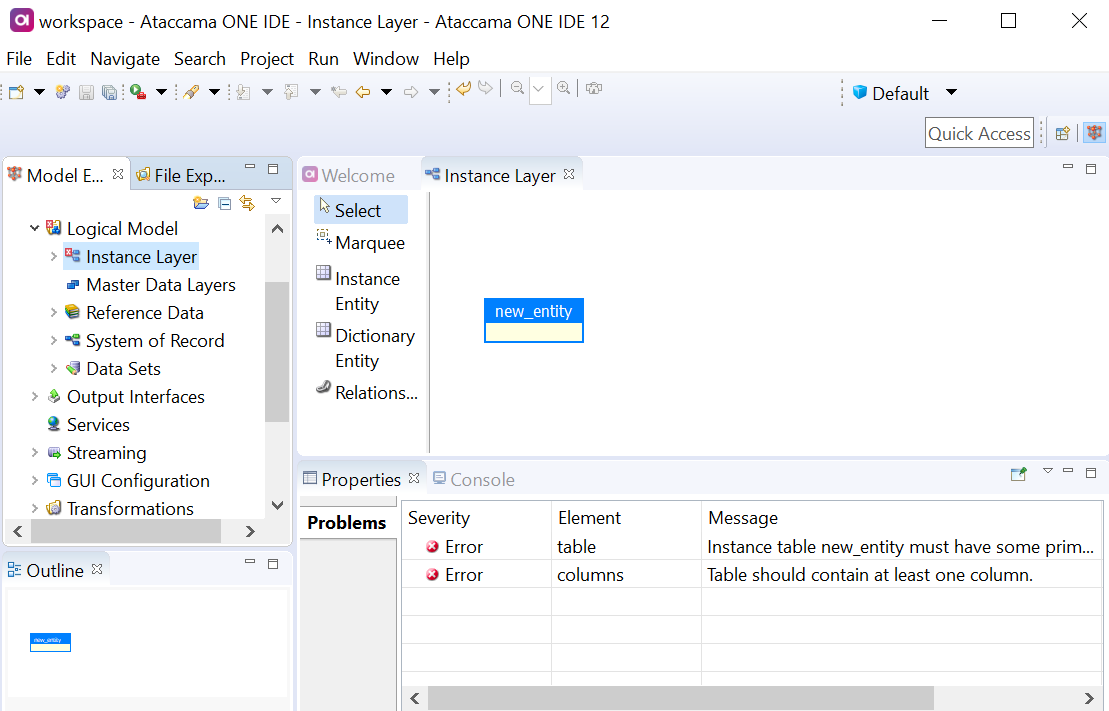
Open Logical Model > Instance Layer (double-click) to access the modeling canvas.
-
Select Instance Entity in the navigation panel and then click the canvas: a new entity is added. Take note of any validation errors.
-
Double-click the new entity.
-
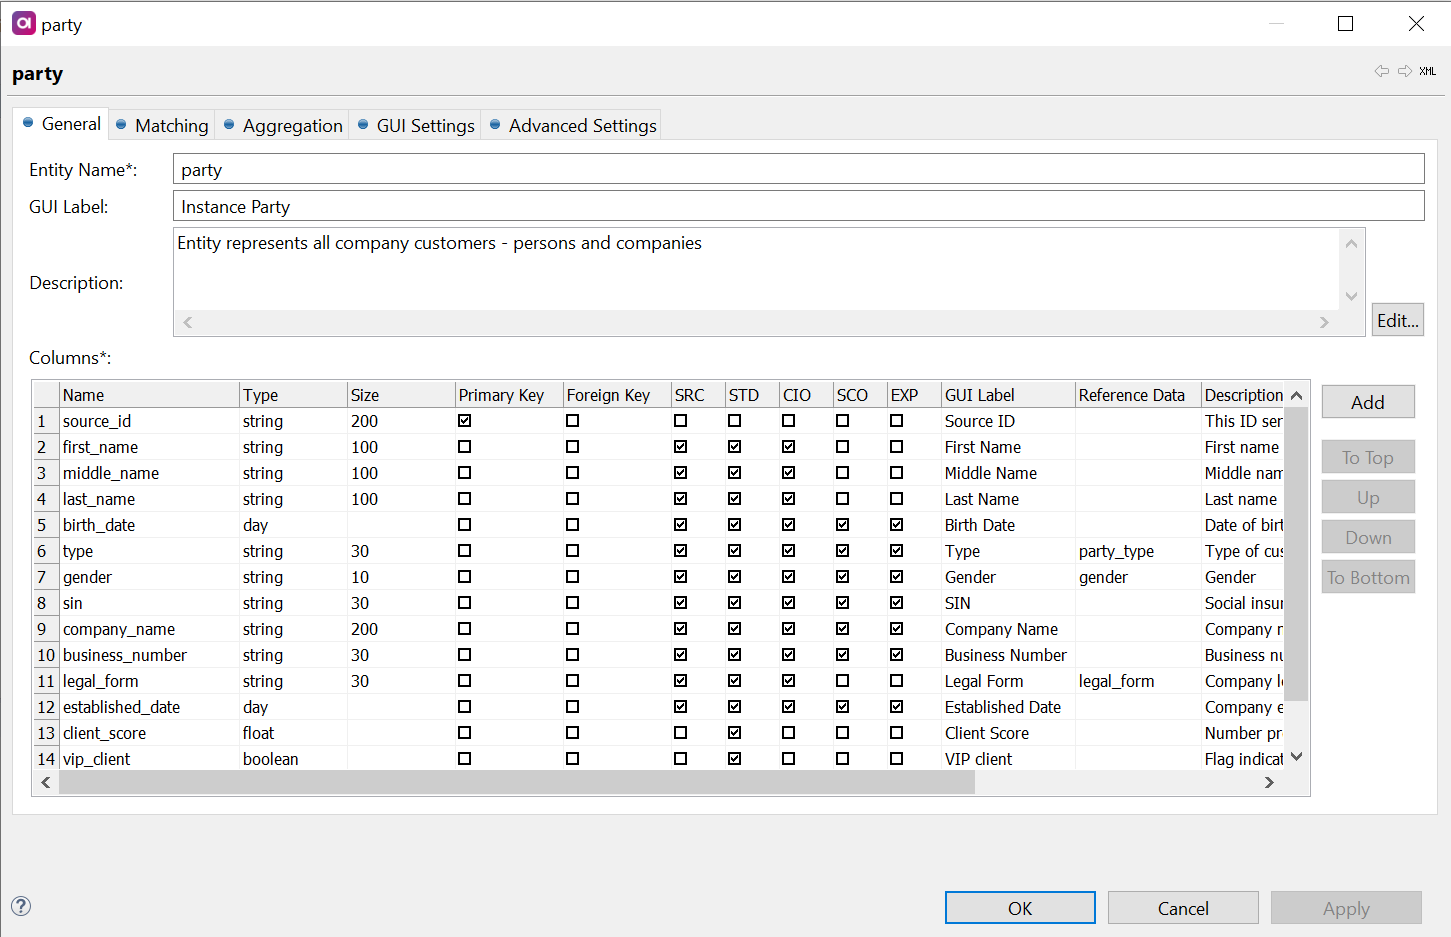
Fill in the name and a description for the entity.
-
Add some attributes (Columns) and check what types (SRC, STD, CIO, SCO, EXP) should be pre-generated for cleansing in the MDM Hub. For more details about standard cleansing prefixes, see Column Naming Conventions.
Use only lowercase for column and entity Name. -
Specify the GUI Label for each attribute. These are used in the MDM application for data browsing (if the label is empty, the attribute name is used instead).
-
Link your Reference Data to the attributes you want to check. Read more in Working with Reference Data.
-
-
(Optional) If you are going to match and master this entity, configure the Matching tab and other relevant settings as described in Configure Instance Layer Matching.
-
(Optional) If you wish to calculate some values related to your matching groups (for example, number of records within each matching group), switch to the Aggregation tab.
Enable the aggregation layer and select a column used for record grouping (typically, it is the matching group ID column, for example, master_id). In the grid, define new columns that will be used in the aggregation transformation plan to store the aggregation results.
-
(Optional) Switch to the Advanced Settings tab to define:
-
Special Columns: Used to create a specific column into a specific MDM Hub layer (Create into column).
Special columns allow to add technical columns (not necessarily part of the data model) and are not influenced by model importing (in case of continuous or multiple iterations). -
Previous Distinct Values: Keep a distinct list of all previous values of any source column. These values are persisted in the MDM Hub.
For example, if cio_last_name was [Johnson, Johnson, White] in the last three processing events, then the column defined for keeping previous values (for example, prev_last_name) will contain [Johnson, White]. You can define any separator for the values. -
Old Value Columns: Not persisted in MDM. These contain values that are computed dynamically on batch load and can be used for further processing, for example, you can get a previous value of an attribute.
In contrast to Previous Distinct Values, Old Value Columns keep only the most recent previous value. Using the same example, the available value here will be 'Johnson'. -
Overrides Settings: Enable or disable overrides for individual entities.

-
Enable Data Overrides: Clear to hide the Edit button on the entity detail screen in MDM Web App.
-
Enable Matching Overrides: Clear to hide the following buttons: Merge Preview in master records comparison, Merge Instances in instance records comparison, and Rematch in instance detail actions.
-
Enable Activity Overrides: Clear to hide the Activate/Deactivate override action on the record detail screen.
-
Overrides on Columns: Select individual columns on which overrides are turned off.
-
-
-
Select OK to save your changes and return to the modeling canvas.
Add a relationship between instance entities
To add a relationship between instance entities:
-
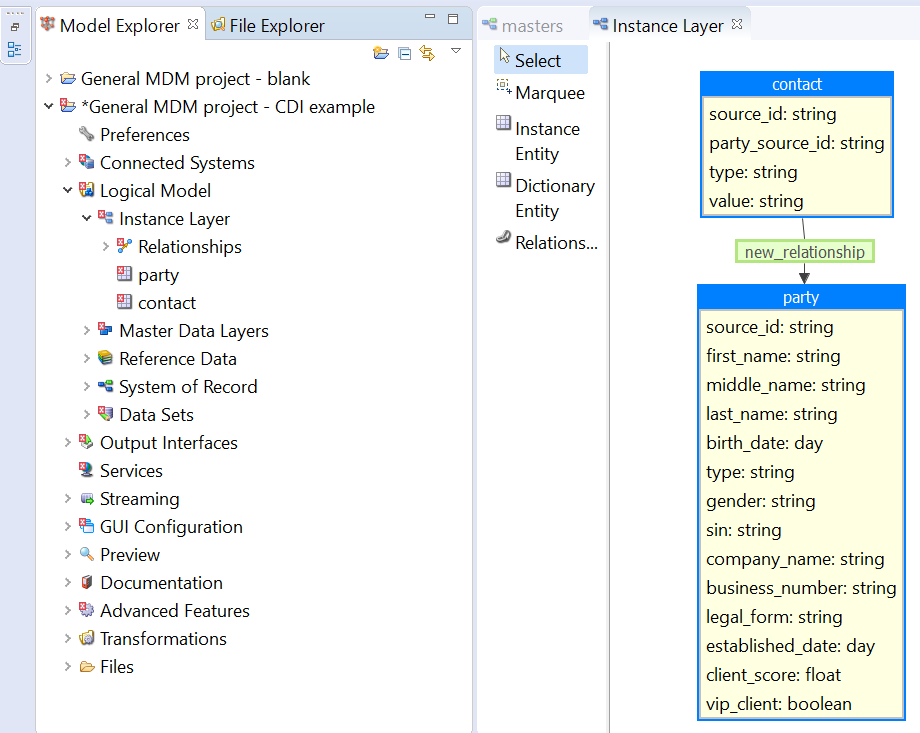
Select Relationship in the navigation panel. Then click one entity and drag the relationship to another entity (for example, contact to party).
-
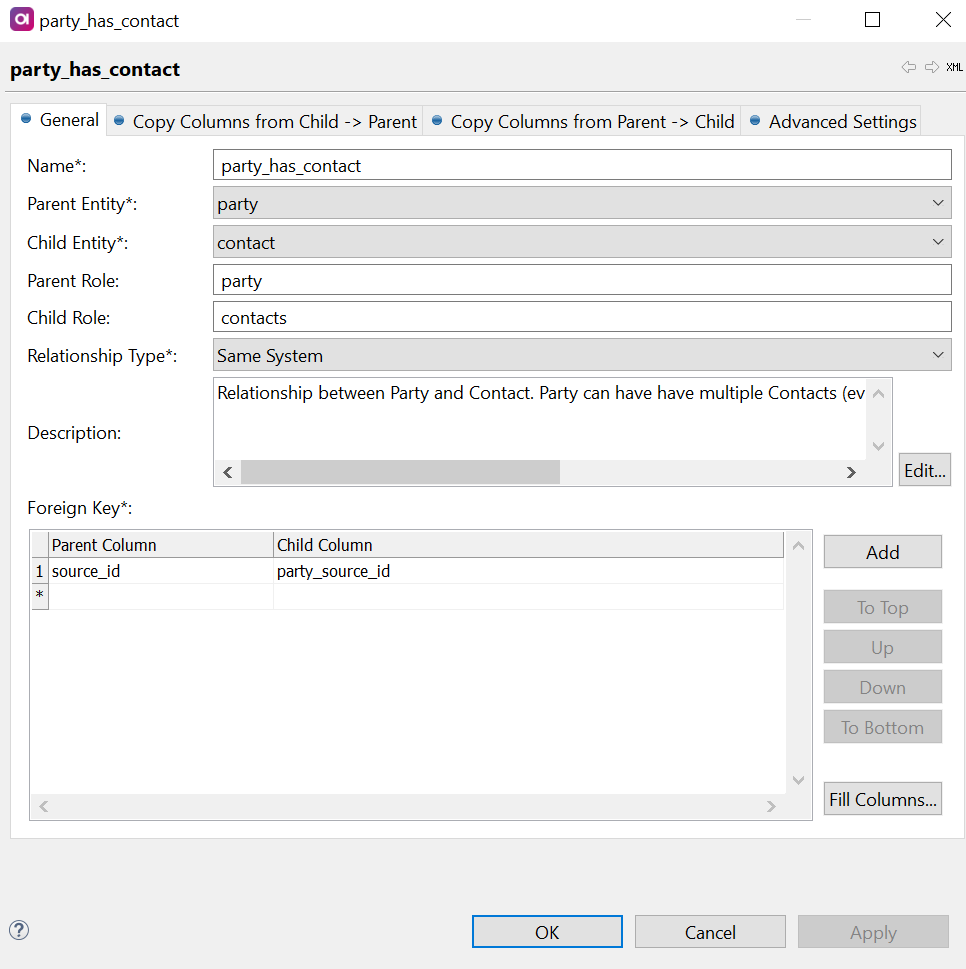
Fill in the relationship Name and check the other parameters:
-
Parent Role and Child Role are used as aliases in web services for model traversing (instead of using the relationship name and its reverse name).
-
Parent Table indicates the independent entity in the relationship; the relationship arrow points from the dependent entity (Child Table) towards the independent.
-
Same System Relationship Type is defined within the same Connected System: Use this option to separate the same records (same source_id) from different systems. This typically covers most use cases.
-
-
Define Foreign Keys for the relationship (content assist is available).
-
Define attributes you wish to copy from one entity to another (for example, for matching or mastering reasons).
Open the Copy Columns from Parent → Child and Copy Columns from Child → Parent tabs to set up columns (view tooltips as needed by hovering over attributes). Always consider filtering out records that match a given condition in order to reduce the copied data volume.
On the Advanced Settings tab, you can define special settings like Extended Same System relationship behavior or Compound Foreign Keys.
| For master matching to work on related entities, it is necessary to define Copy Columns using expressions. |
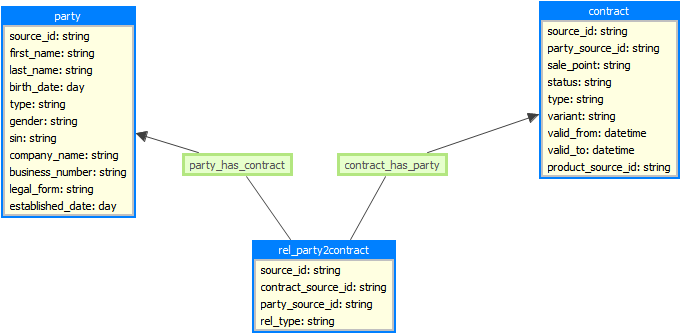
Associative tables
An associative table and two 1:N relations has to be defined every time you need to express an M:N relationship between two entities.
An M:N relationship is shown here on the example of the party and contract entities connected with the rel_party2contract associative table.
| Avoid using the same name for Child Role in both relationships. If the same name is used for Child Role in multiple relationships, it can cause navigation issues in MDM Web App. |
Was this page useful?