
Configure Advanced Matching
This article describes how to configure advanced matching scenarios, including multiple matching operations and specialized matching configurations that go beyond the standard matching setup.
Before you start
Advanced matching configuration is used when you need more sophisticated matching logic than the standard single matching operation provides, such as:
-
Multiple matching operations on the same entity (for example, matching unique people vs unique households).
-
Custom matching step configurations with specialized rules.
-
Complex rematch conditions and matching override scenarios.
Before configuring advanced matching, ensure you understand:
-
Basic matching concepts - See Matching, Working with Matching, and How the Matching Step Works.
-
Standard matching configuration on entities - See Configure Instance Layer Matching or Configure Master Layer Matching.
-
How a matching plan works - See Configure Matching Plan and Step.
How to configure advanced matching
To configure advanced matching, you can:
- Use the default Matching step and an additional matching configuration
-
This allows you to add custom matching logic while saving time by reusing preset attributes, making it suitable for most use cases.
To set it up:
-
Configure advanced matching on entity.
-
Configure rematch conditions using Single Matching step rematch configuration.
-
-
- Use multiple custom Matching steps
-
This turns off default matching entirely, giving you complete control including custom naming conventions.
However, such level of granularity is rarely needed. Instead, consider configuring a custom Matching step in addition to the default one.
To set it up:
-
Configure advanced matching on entity.
-
Configure rematch conditions using Global rematch configuration.
-
-
Configure advanced matching on entity
In ONE Desktop, open your MDM project and navigate to Logical Model > Instance Layer. Find and double-click your entity.
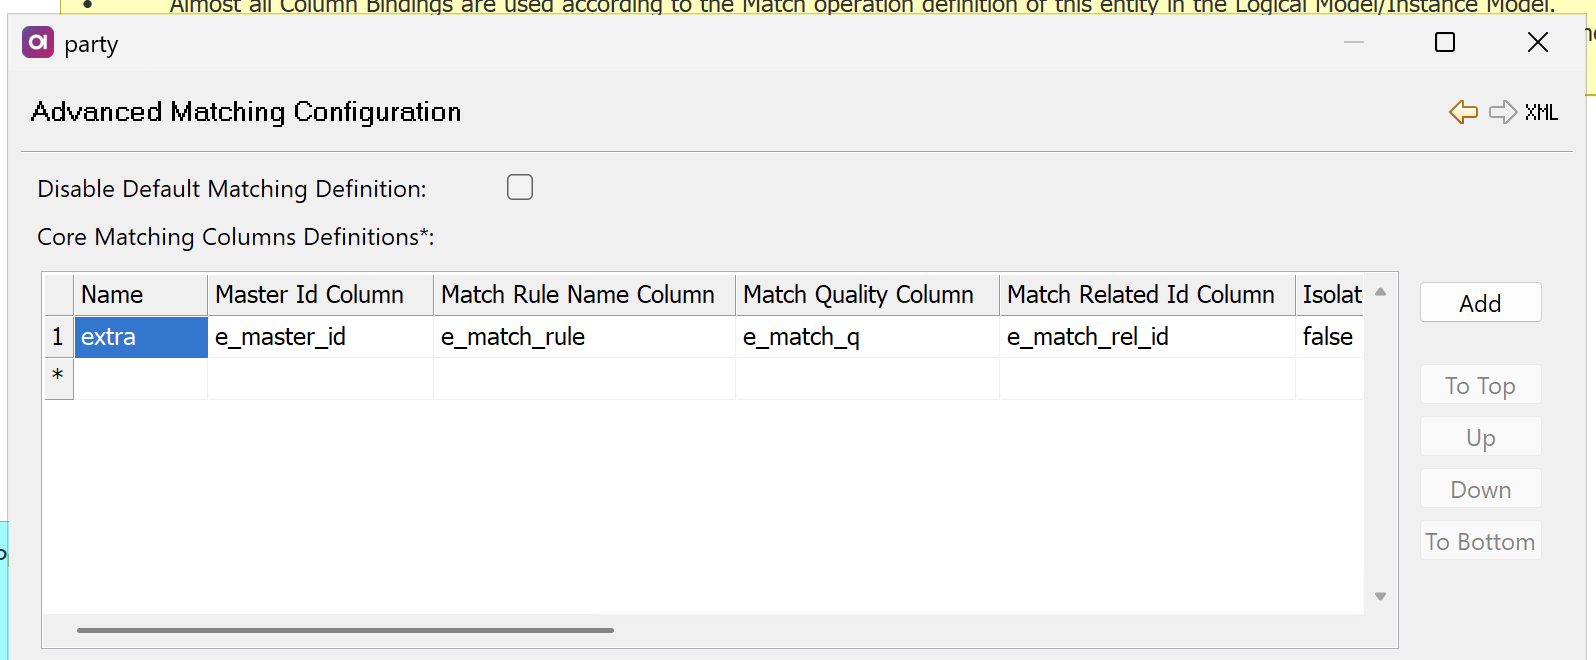
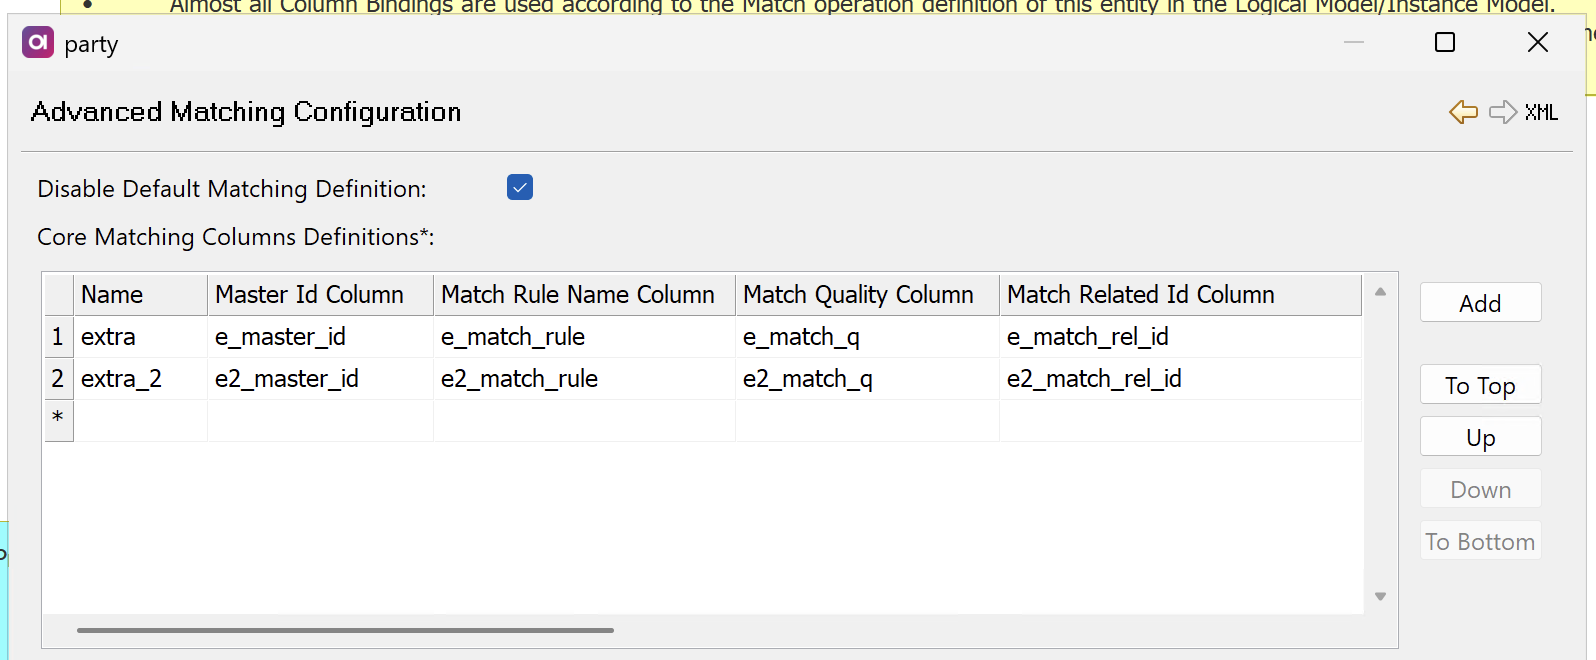
In the entity properties, switch to the Matching tab. Scroll down to Advanced Matching Configuration and select composite element next to it.
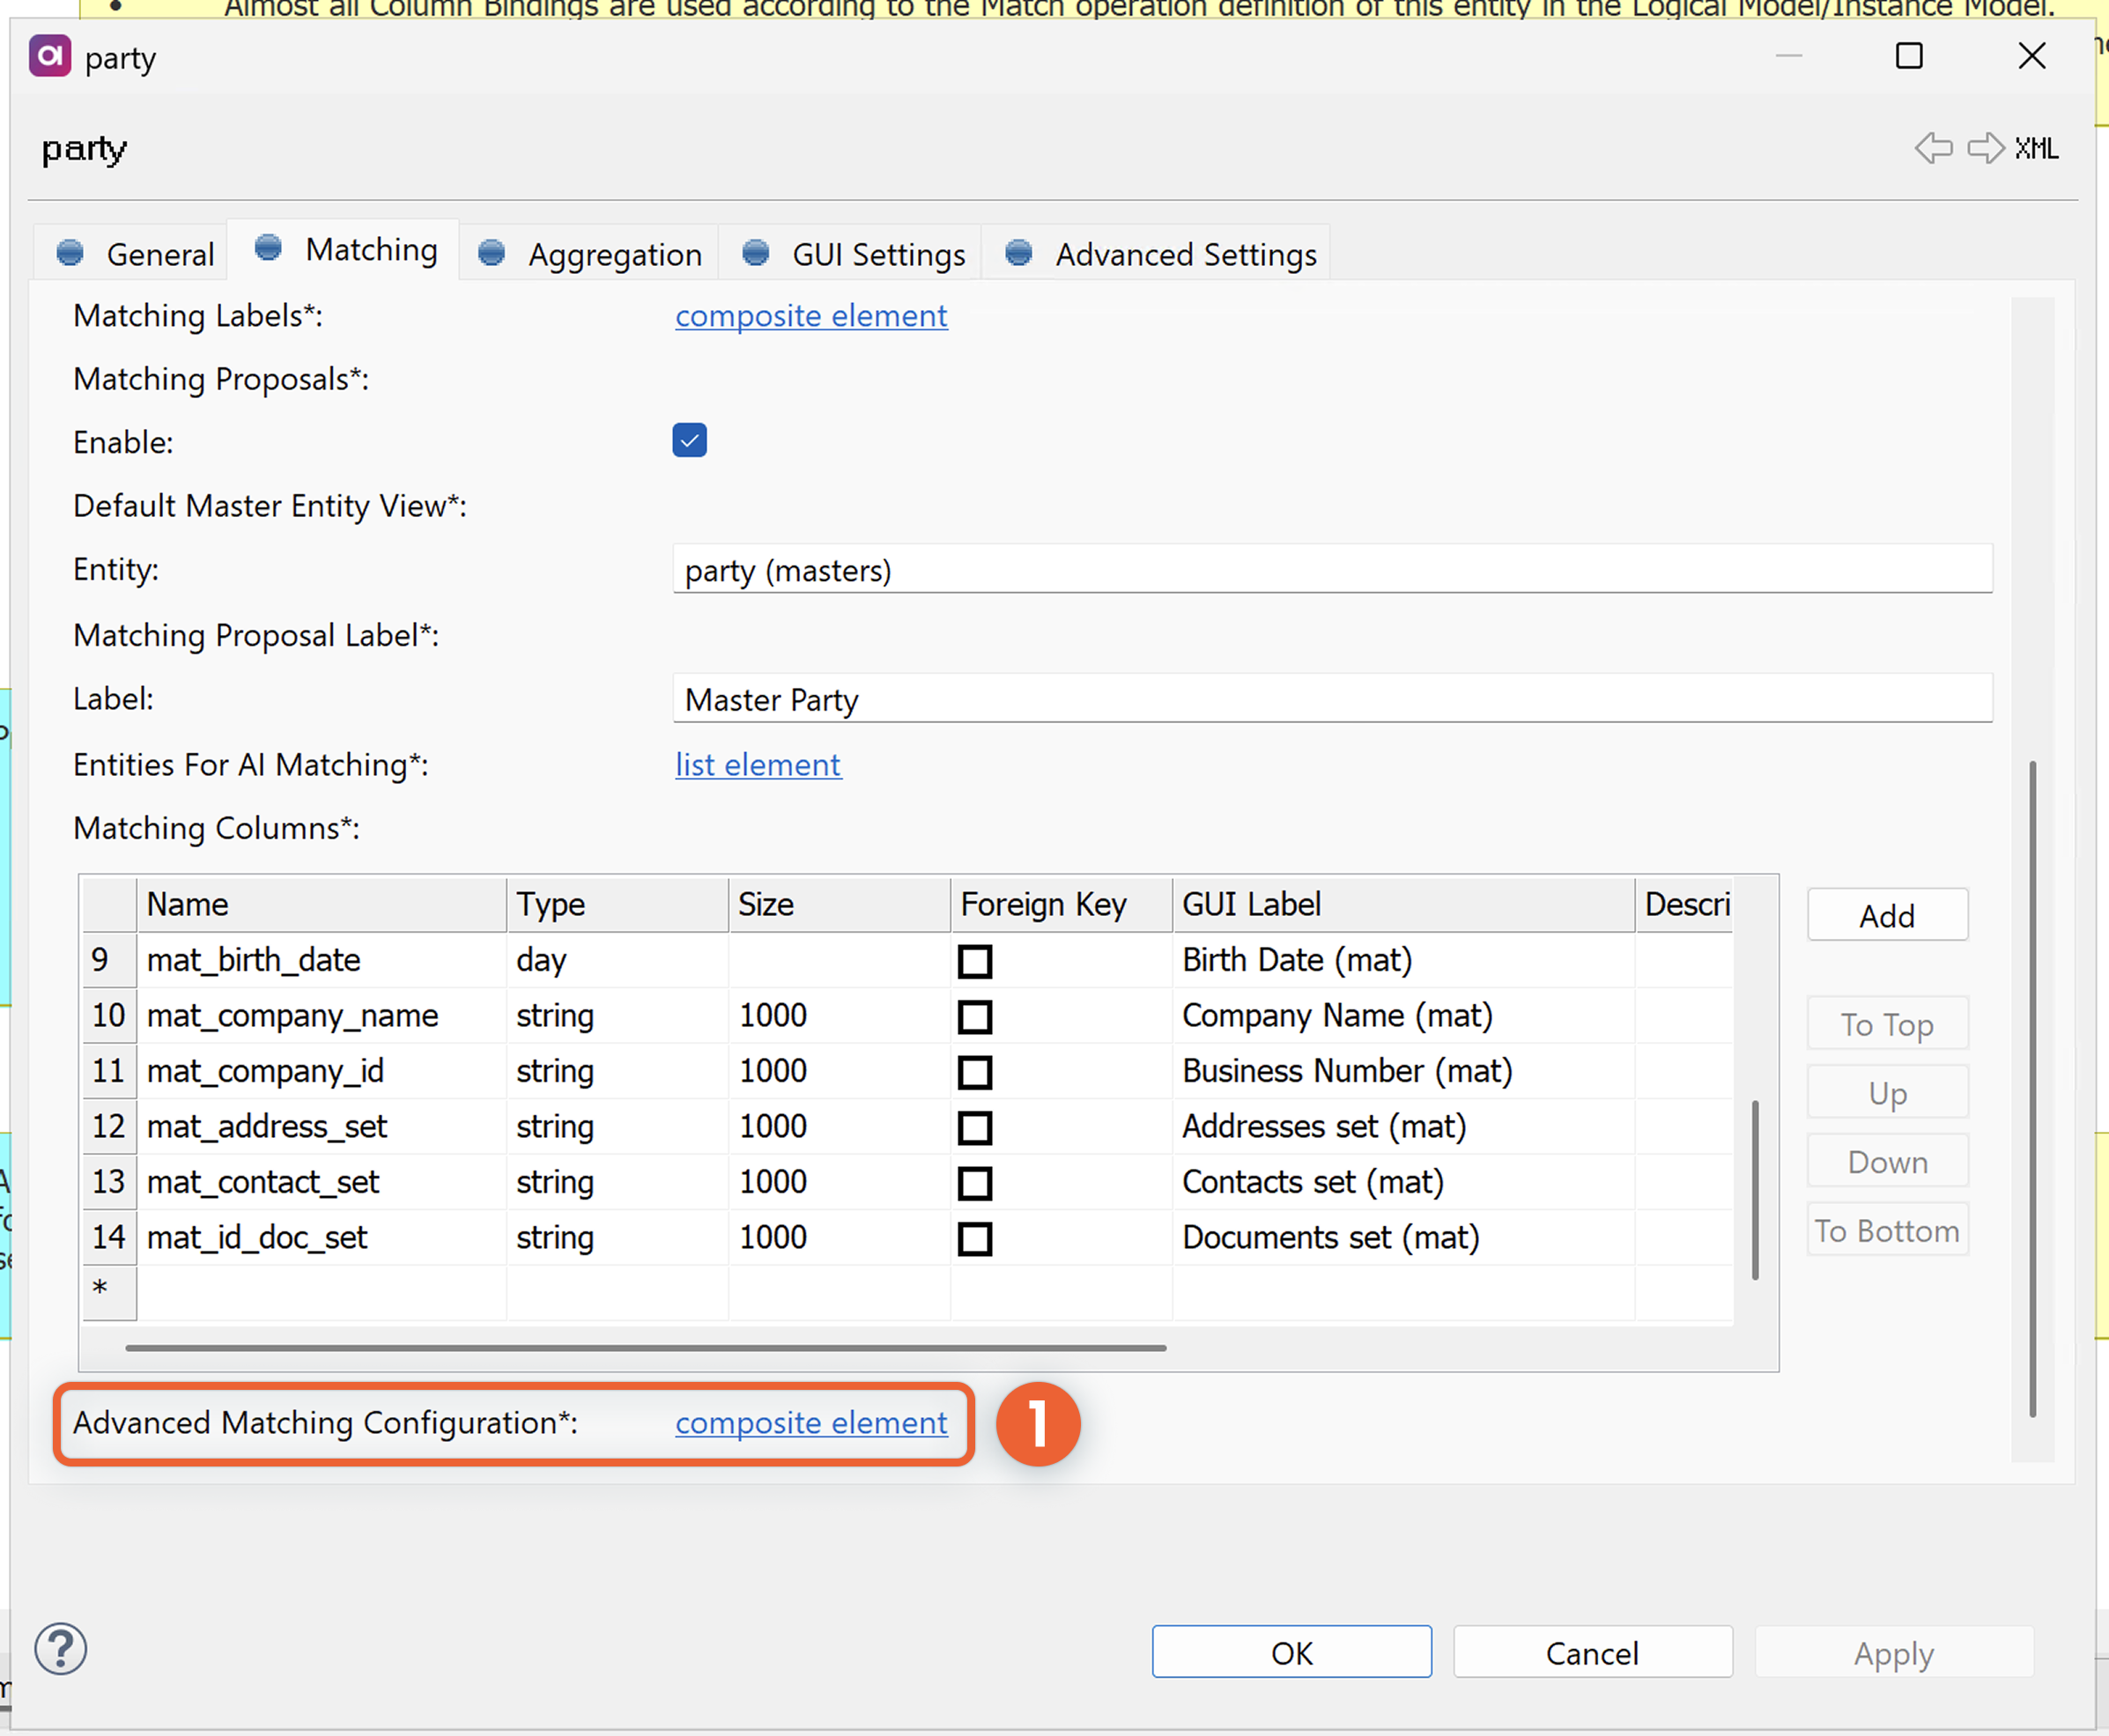
In Core Matching Columns Definition, define the columns for your additional matching operation.
-
Name: The name of the Matching step.
-
Master Id Column: The ID for matching groups.
-
Match Rule Name Column: The name of the first successful matching rule.
-
Match Quality Column: The strength of the match, expressed as a number between 0 and 1, where 0 is a perfect match.
-
Match Related Id Column: The ID of the record to which another record was matched to.
-
Isolate Flag Column: The Boolean value for isolate. Records with the isolate flag set to
trueare excluded from matching. -
Rematch Type Column: Which rematch configuration is used. Possible values:
-
NOMATCH: These records are excluded from the next rematch operation. -
REMATCH: These records are included in the next rematch operation. -
PROPOSAL: The record is evaluated against matching rules, but instead of being rematched, any potential matches are captured as matching proposals. See Configure proposal conditions.
-
-
Proposals (Boolean): If enabled, the MDM Engine generates another Integration Output in the matching plan to accept the pairs of proposed records (based on the defined rules).
-
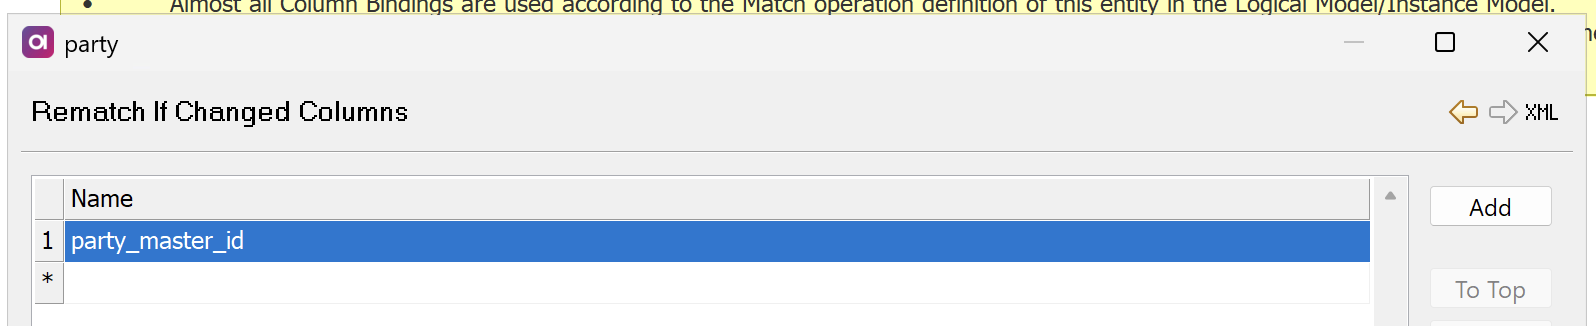
Rematch If Changed Columns: See Configure rematch conditions.
Turn off default matching (optional)
If you want to use only custom Matching steps, select Disable Default Matching Definition in the Advanced Matching Configuration.
This is typically used when you need complete control over the matching process or when default matching doesn’t meet your requirements.
Configure rematch conditions
| For a refresher on the basics of and different approaches to rematching, see Rematching. |
Rematch conditions define when records should be re-evaluated for matching based on data changes.
If any attribute in the column changes, the Rematch Type Column for that matching will be set to REMATCH.
For example, if you have a golden entity 'party' and silver entity 'address' (that is, matching of 'address' is done by party_master_id), a change of master_id on 'party' will not be propagated to the relevant address records.
To ensure it is propagated, you need to define rematch conditions for each new Matching step.
For the default Matching step, rematch conditions are already predefined, although you can add additional conditions if needed. See Configure additional rematch conditions for the default Matching step.
Only columns of origin source, clean, copy_source, and copy_clean can be used to trigger rematch.
|
These conditions can be configured in one of two ways:
-
If you’re using the default Matching step: By defining Core Matching Columns Definition in the entity Advanced Matching Configuration.
-
If you’re using multiple Matching steps: By defining Rematch If Changed Section in the entity Advanced Matching Configuration. This determines columns in which changes will trigger rematch in all or selected Matching steps.
Single Matching step rematch configuration
For individual Matching step configurations:
-
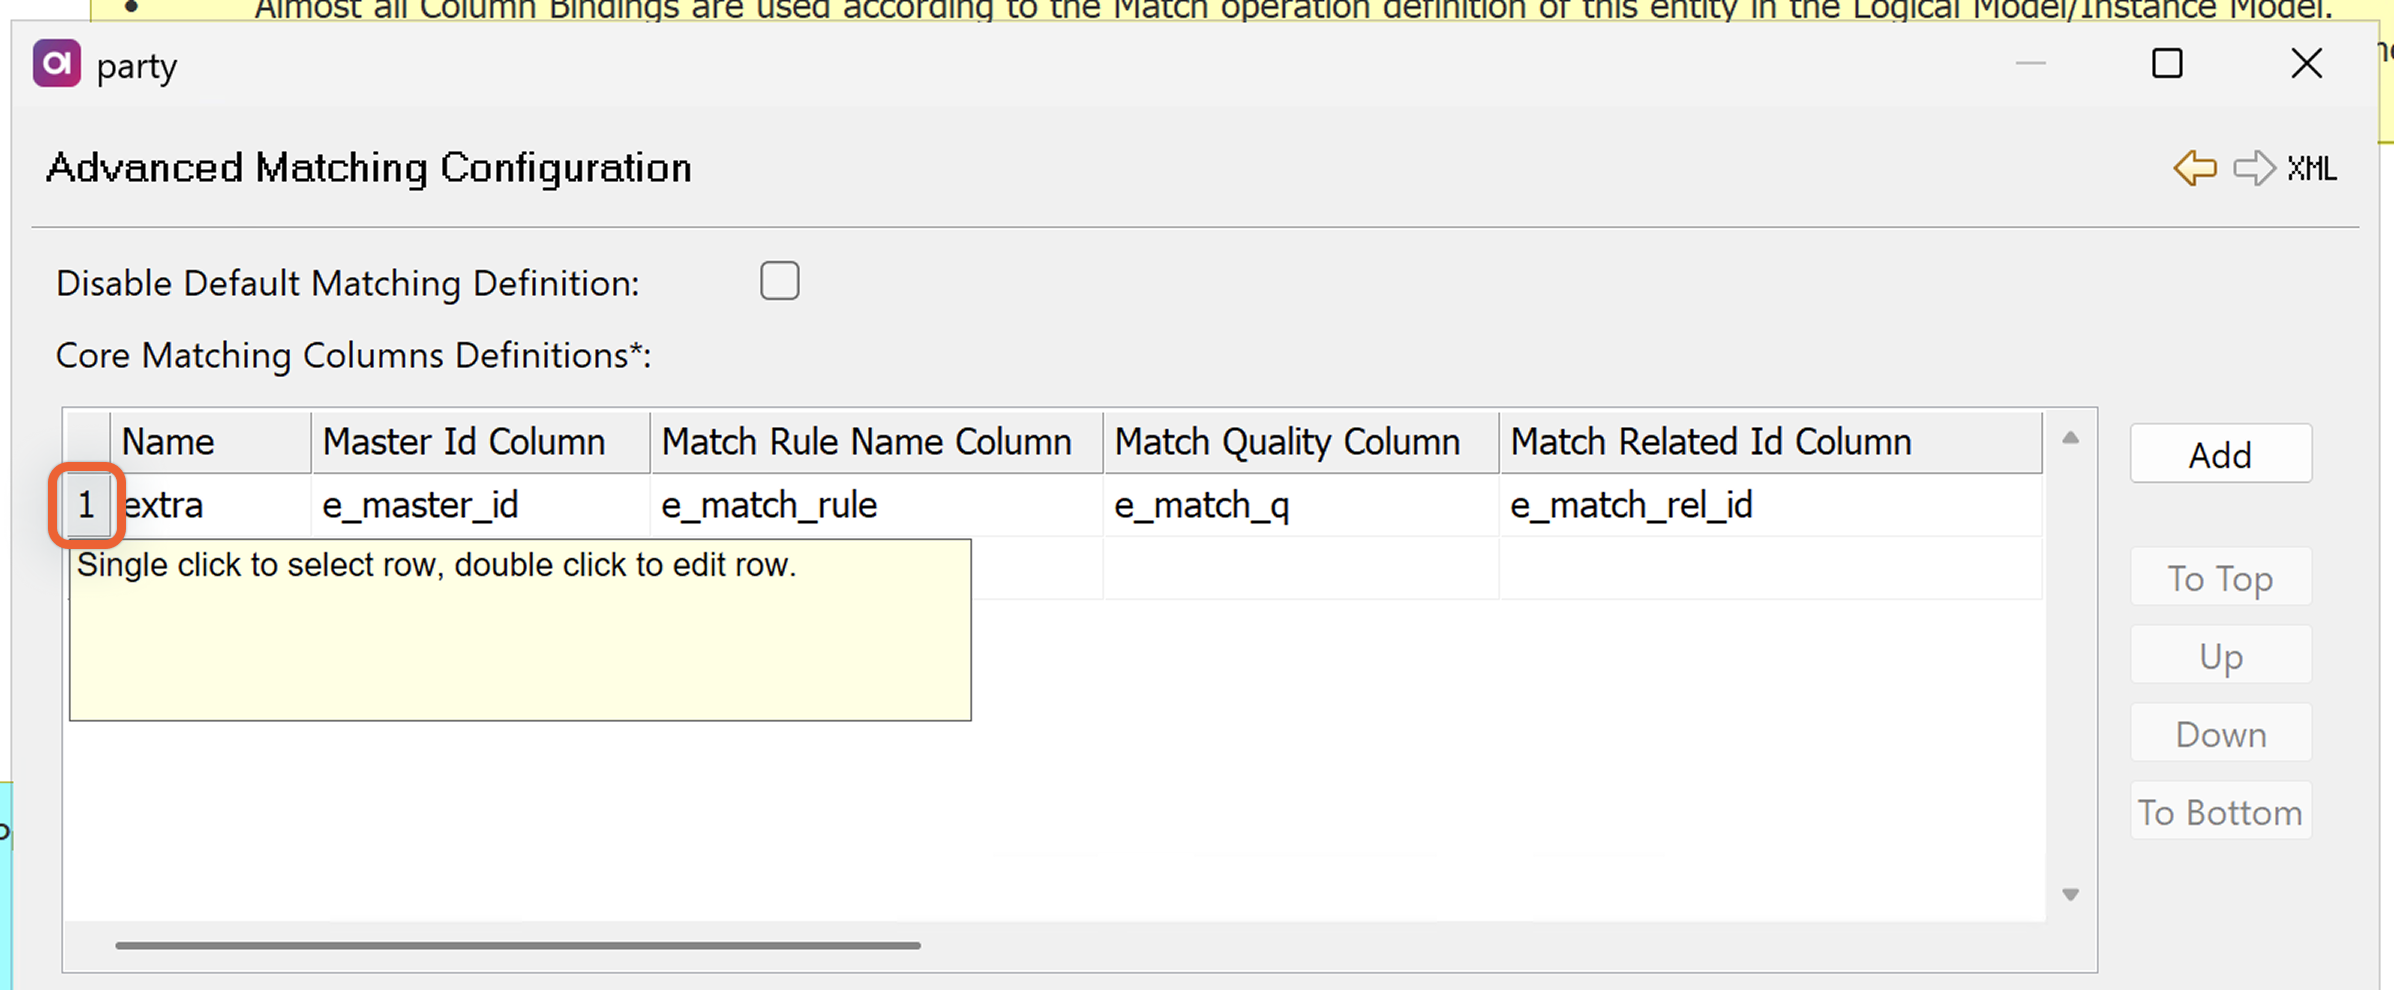
In the entity Advanced Matching Configuration, in Core Matching Columns Definitions, double-click the corresponding row number. This opens the advanced Matching step properties.
-
Find Rematch If Changed Columns and select list element next to it.
-
Define the column names where changes should trigger rematch.
| To define rematch conditions for the 'party' entity, use Global rematch configuration instead. |
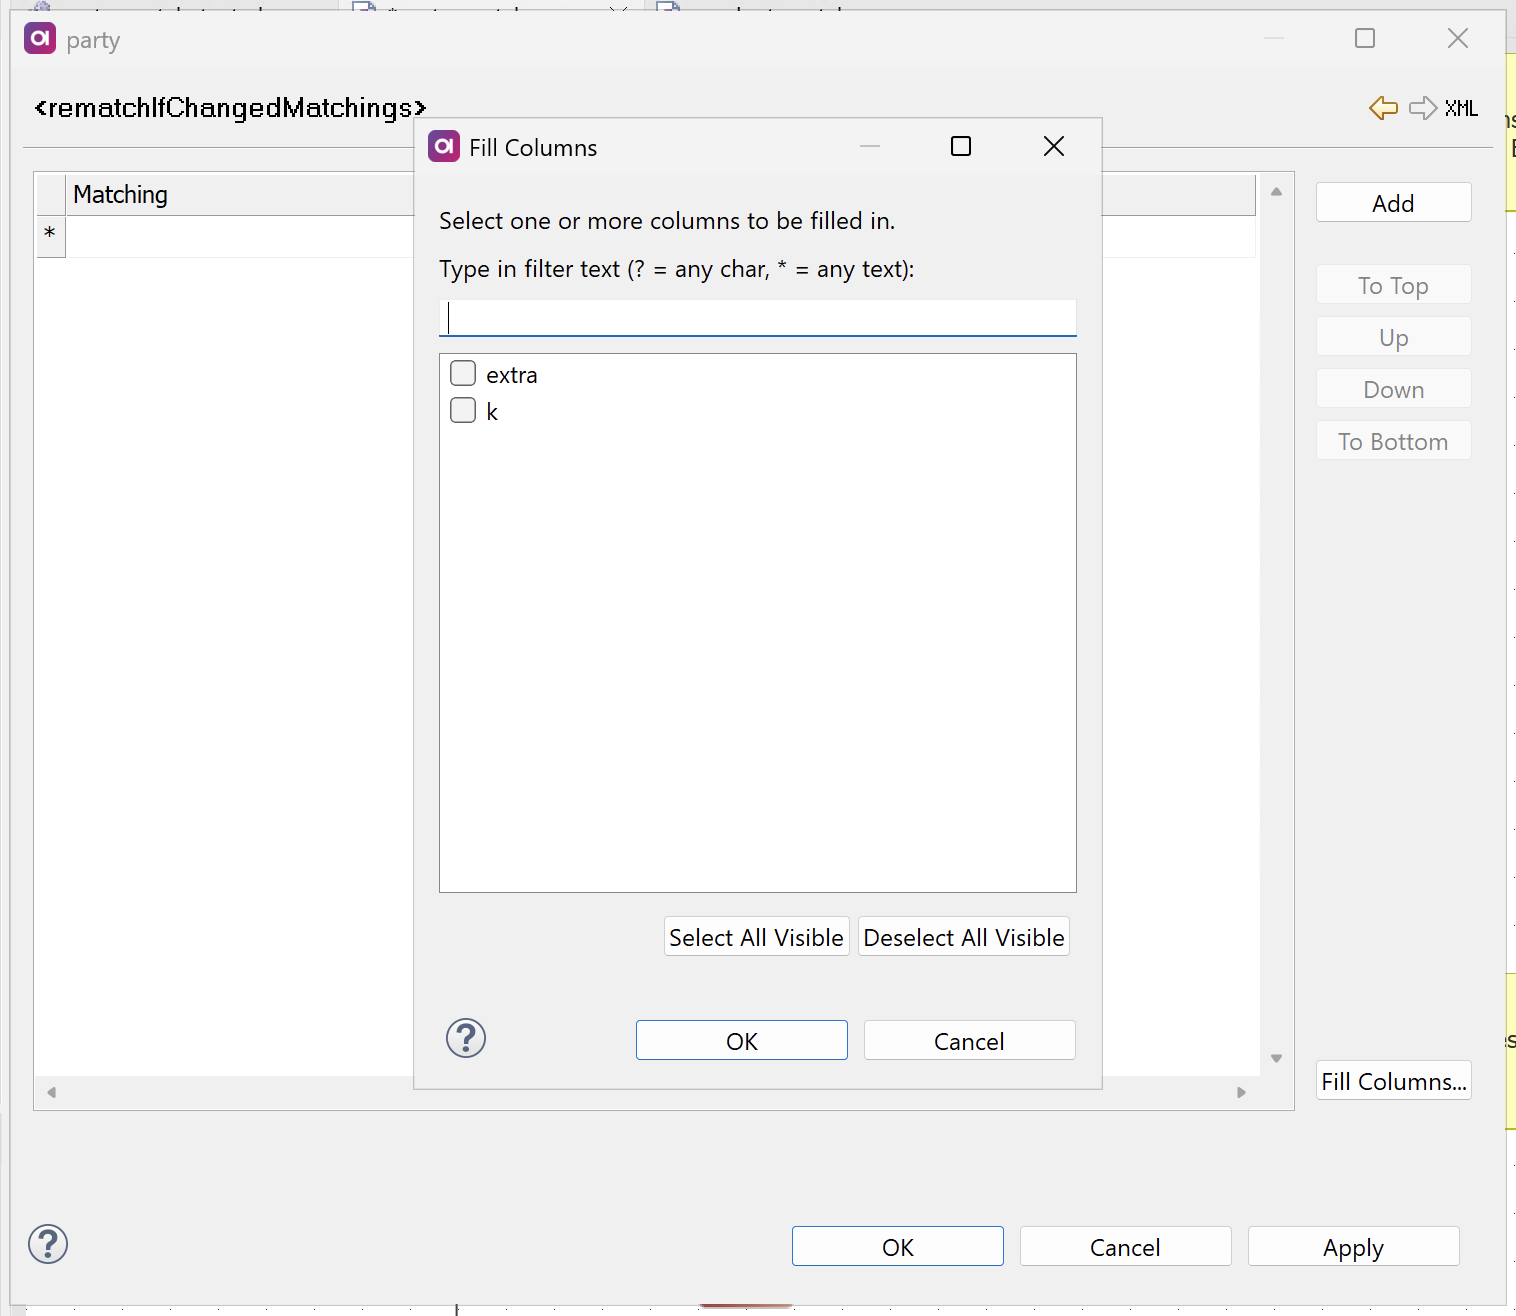
Global rematch configuration
To define rematch columns for multiple Matching steps:
-
In the entity Advanced Matching Configuration, in Rematch If Changed Section, define the desired columns.
-
Define where you want these conditions to be applied:
-
In all configured Matching steps: Use for All Matchings is selected by default. To turn off this option, clear the field.
-
In selected Matching steps:
-
Double-click Use for Selected Matchings and then select edit element to expand.

-
Select Fill Columns and choose from the available Matching steps.
-
-
Configure additional rematch conditions for the default Matching step
Using the same configuration options as described in Global rematch configuration, you can also define additional rematch conditions for default matching.
For example, default matching on the address entity has party_master_id predefined in Rematch If Changed Columns on the entity Matching tab.
To add additional columns for rematch, define these columns in Advanced Matching Configuration > Rematch If Changed Section.
For each column, in Rematch If Changed Matchings Node, make sure to select the repository k.
Configure proposal conditions
Proposal conditions define columns whose changes should generate a matching proposal for additional review, without changing the record’s current master_id.
If any attribute in the listed columns changes, the matching rules are evaluated and any potential matches are captured as matching proposals.
For example, for the entity 'party', you can configure last_name and national_id as proposal conditions: a change to either column does not automatically re-group the record but notifies you to review whether the record still belongs in its current matching group.
Use proposal conditions for business-meaningful attributes where a change should be carefully reviewed rather than acted upon automatically. For technical attributes such as foreign keys, use rematch conditions instead.
Only columns of origin source, clean, copy_source, and copy_clean can be used to create a proposal.
|
|
This configuration generates only merge proposals. If a change to a configured column would result in the record no longer belonging to any existing matching group (a split), no proposal is created. |
Proposals must be enabled in the matching configuration for proposal conditions to take effect. See Configure advanced matching on entity and enable the Proposals option.
To configure proposal conditions:
-
In the entity Advanced Matching Configuration, in Core Matching Columns Definitions, double-click the corresponding row number to open the advanced Matching step properties.
-
Find Create Proposal If Changed Columns and select list element next to it.
-
Define the column names where changes should generate a proposal.
The same column cannot be configured in both Rematch If Changed and Create Proposal If Changed sections. Choose one strategy per attribute. 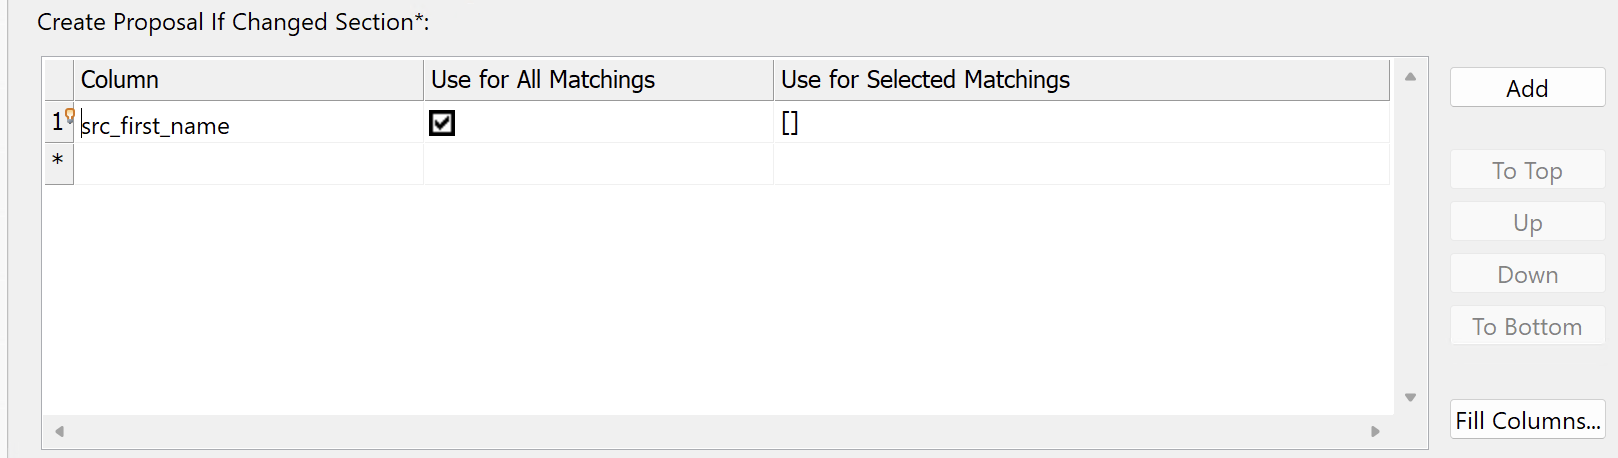
-
Define where you want these conditions to be applied:
-
In all configured Matching steps: Use for All Matchings is selected by default. To turn off this option, clear the field.
-
In selected Matching steps:
-
Double-click Use for Selected Matchings and then select edit element to expand.
-
Select Fill Columns and choose from the available Matching steps.
-
-
Apply advanced matching to entities
After configuring advanced matching on the entity level, you need to make sure it’s used during processing.
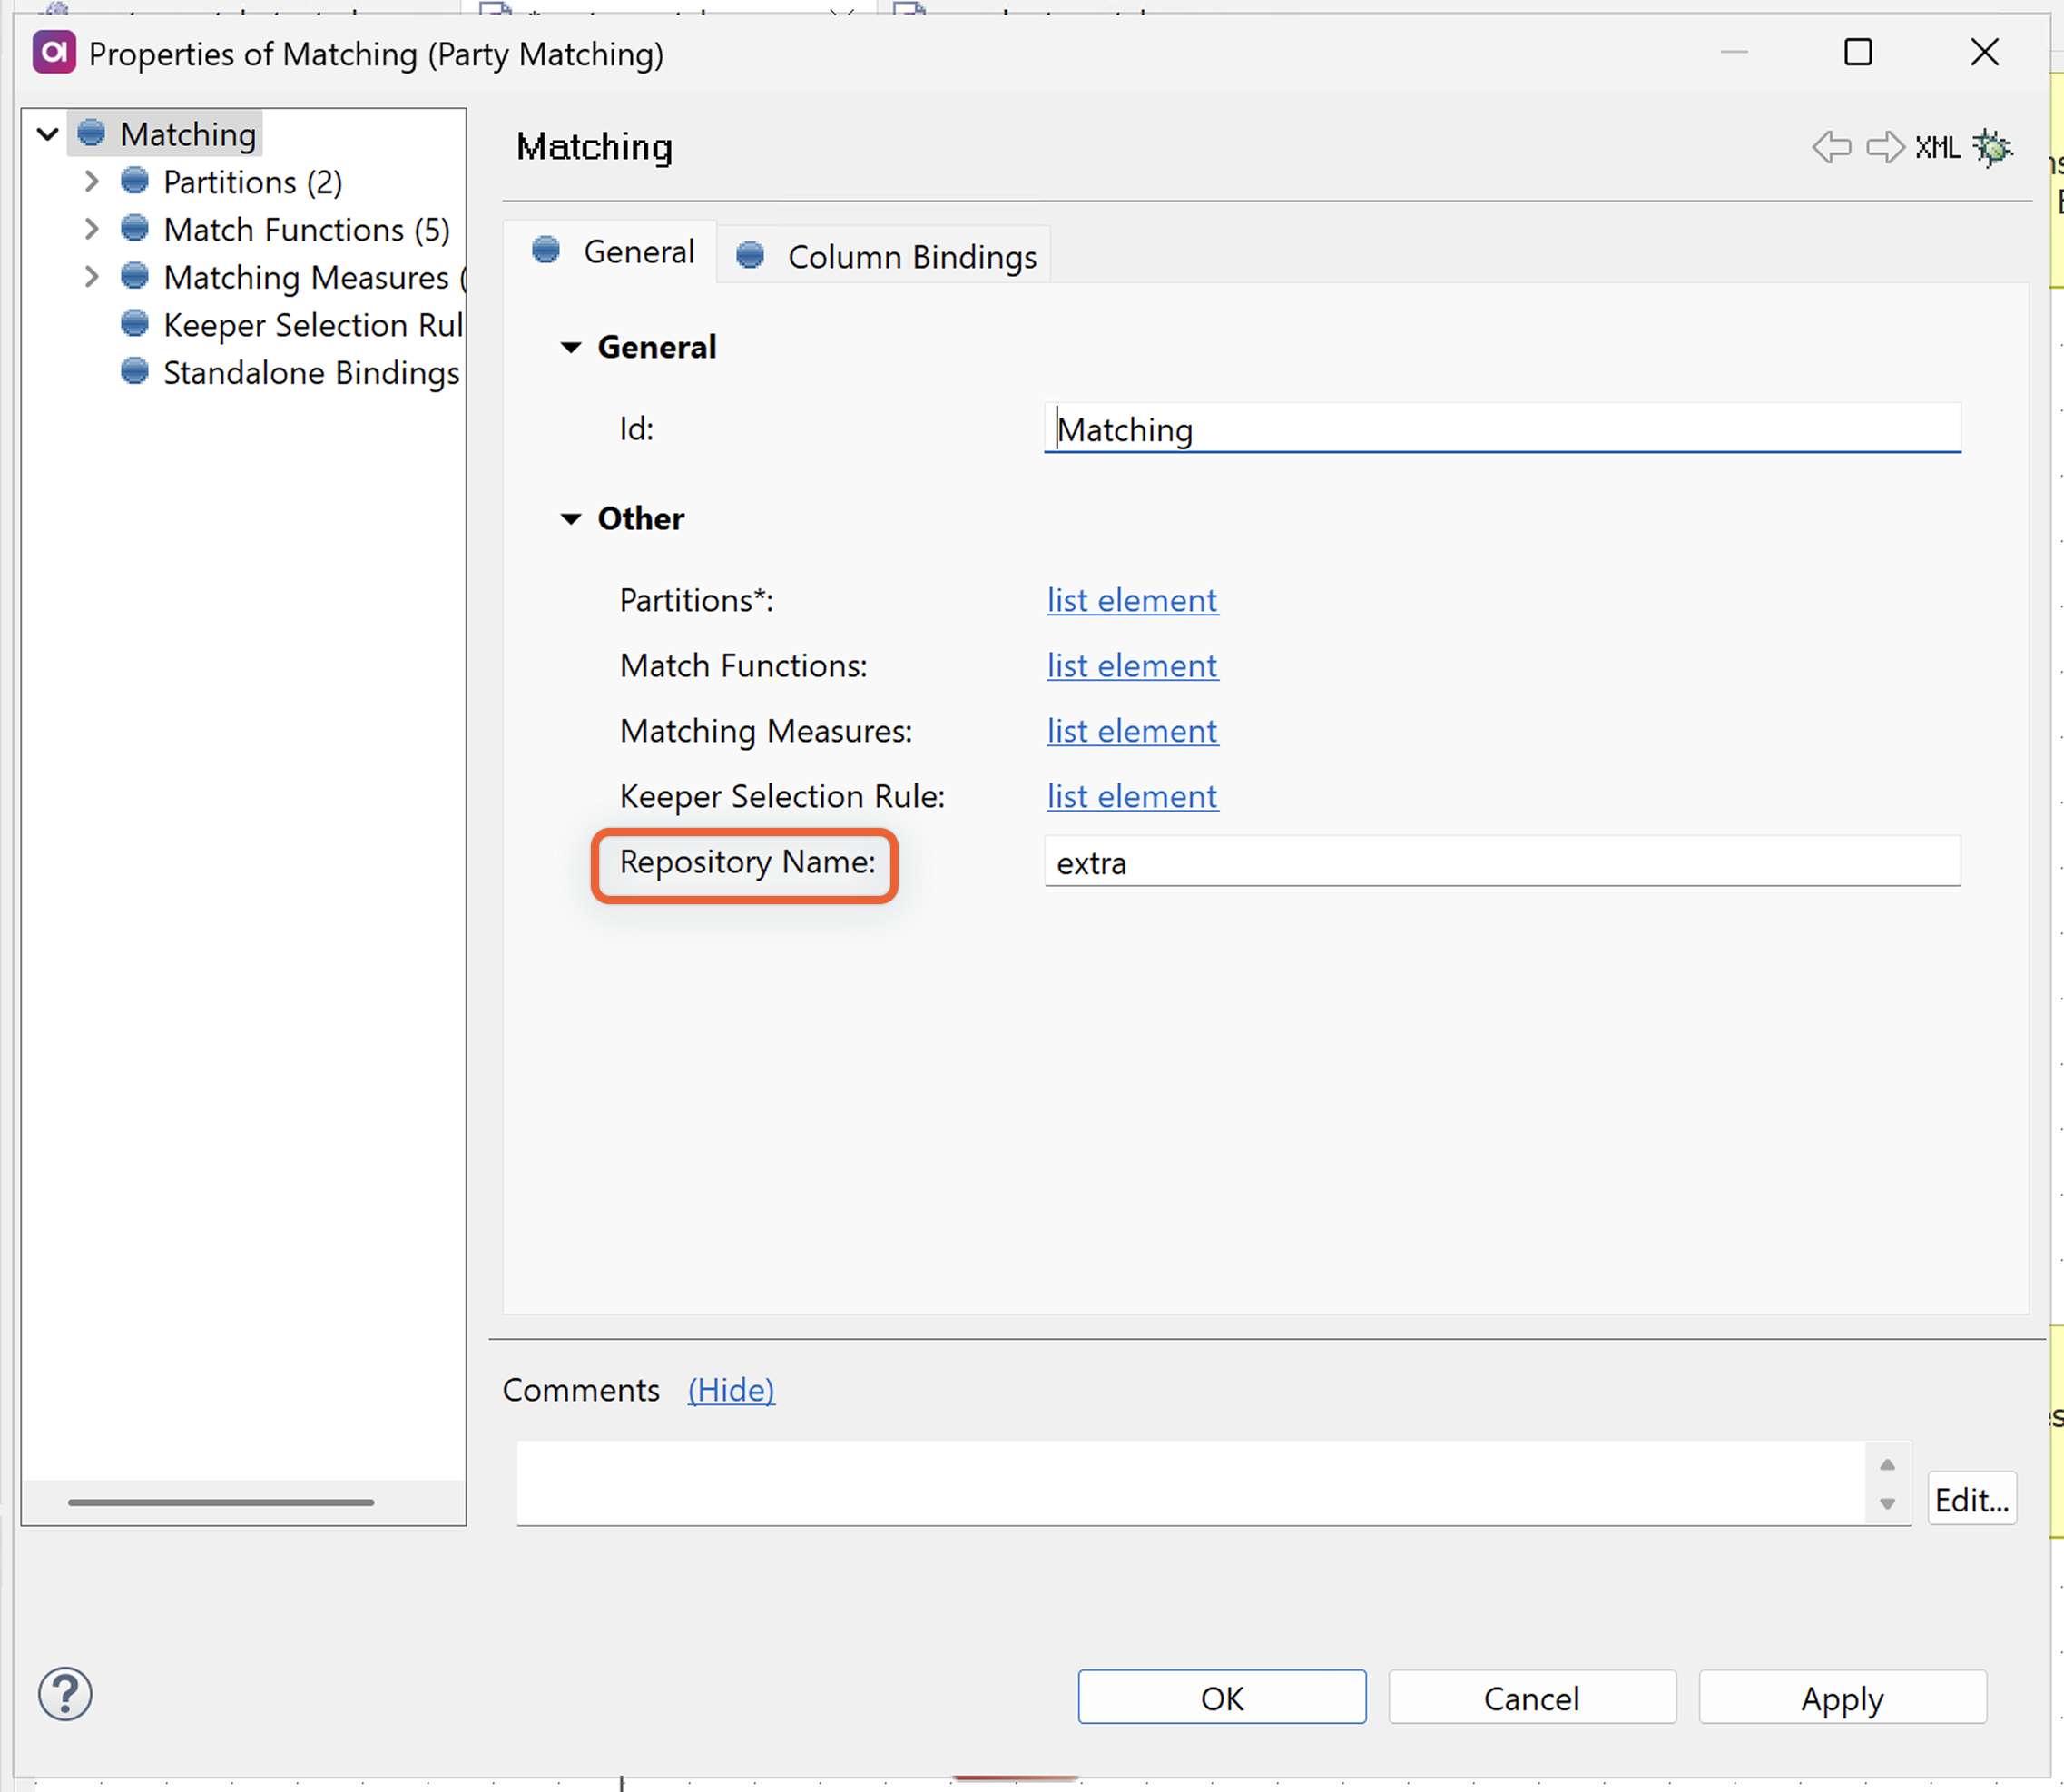
Configure repository names
Open your matching plan and double-click the Matching step.
On the General tab, enter a Repository Name:
-
For default Matching step: Always use
k. -
For custom Matching steps: The matching name defined in Name in the entity Advanced Matching Configuration.
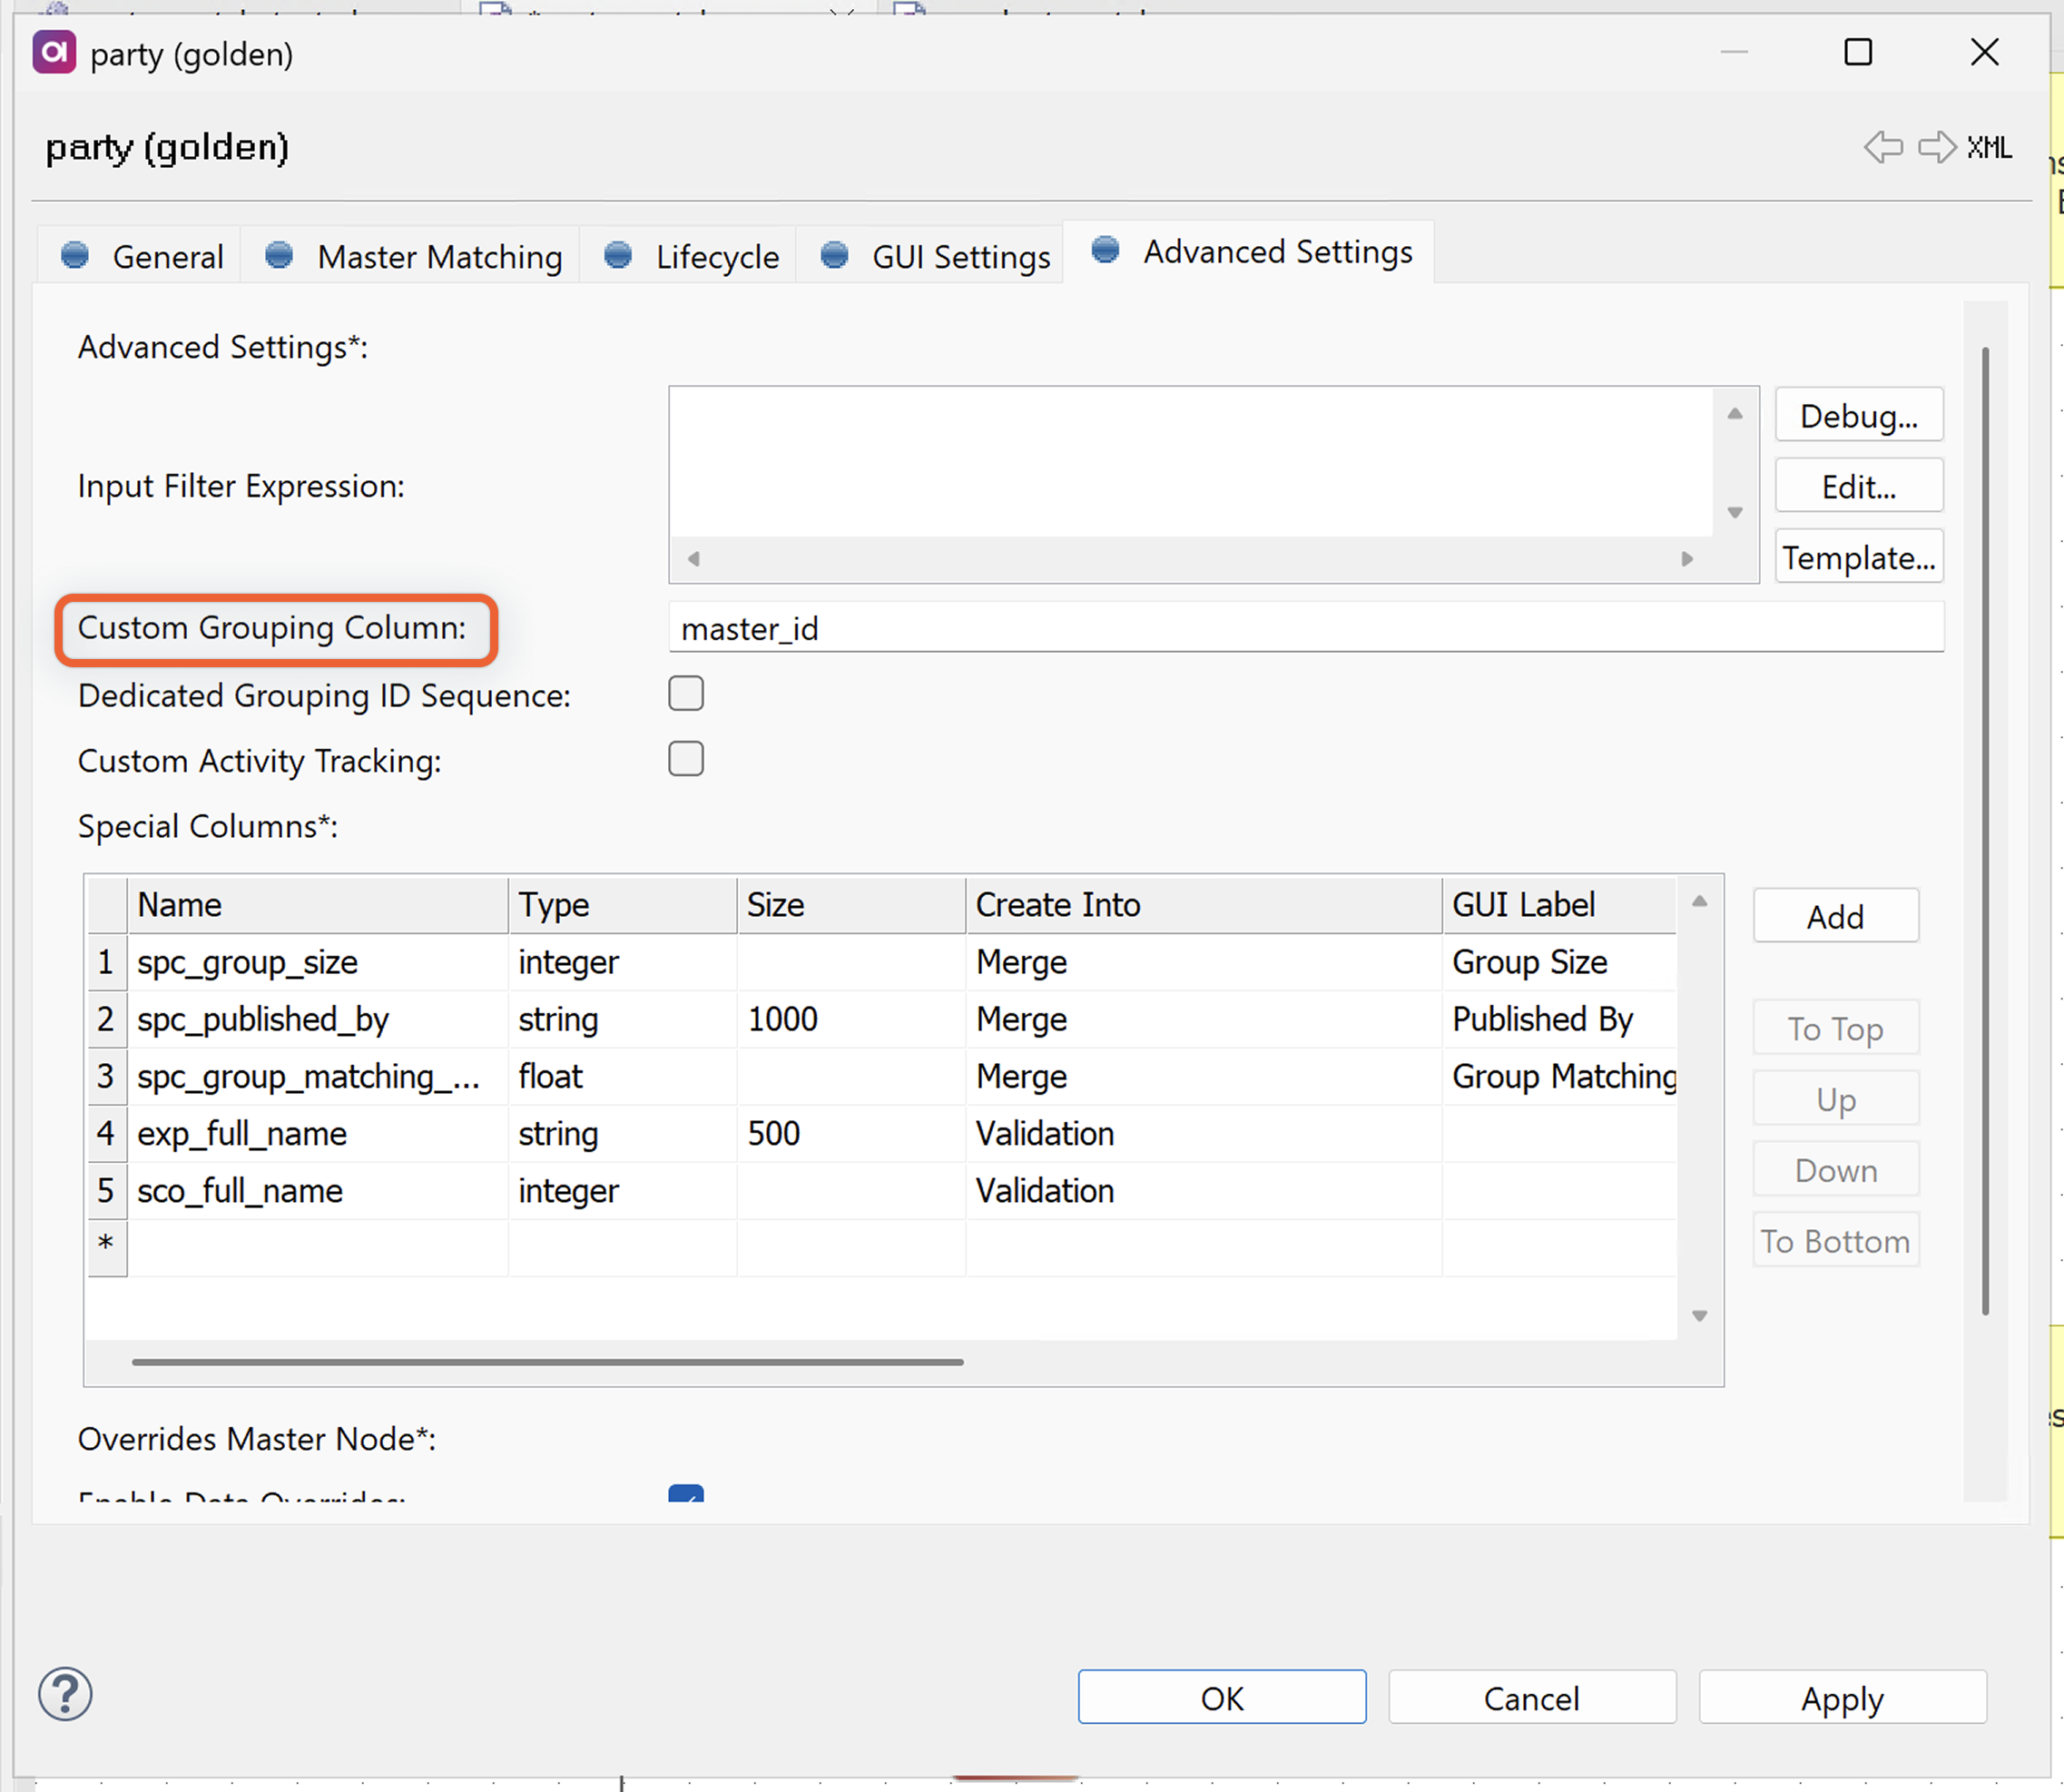
Configure custom grouping
In your MDM project, navigate to Logical Model > Master Data Layers. Find and double-click your golden entity.
On the Advanced Settings tab, set Custom Grouping Column:
-
For default Matching step: Must be
master_id. -
For custom Matching steps: The column defined in Master Id Column in the entity Advanced Matching Configuration. See Configure advanced matching on entity.
Next steps
After configuring advanced matching:
-
Test your configuration - Run matching with sample data to verify behavior.
-
Monitor performance - See Matching Performance Best Practices for optimization guidance.
-
Plan maintenance - See Impact of Matching Configuration Changes for managing configuration changes.
Was this page useful?