
Set Up the MDM MCP Server
This article describes how to enable and configure the MDM MCP Server, an experimental feature that exposes MDM metadata, records, and tasks to AI agents through the Model Context Protocol (MCP).
For an overview of the server, its tools, and how to use them, see MCP Server in MDM.
Prerequisites
-
A running MDM instance.
-
Administrator access to your MDM Keycloak realm.
-
An MCP-capable client, such as Claude Code, Cursor, or OpenCode.
Setup overview
Complete the following steps in order.
-
Configure Keycloak: Create the
mcpclient scope, add an audience mapper, and register the public client used by MCP clients. -
Configure the MCP Server: Enable the server and set the authentication properties in the MDM Server application properties.
-
Configure the MDM model: Add entity and column descriptions so agents can reason about your model.
-
Connect a client: Register the MCP Server in your AI client.
Step 1: Configure Keycloak
The MCP Server acts as an OAuth 2.0 protected resource and relies on Keycloak for identity and token issuing. In your Keycloak realm, configure the following.
Create the MCP client scope
-
In the Keycloak Admin Console, go to Client scopes.
-
Select Create client scope.
-
Configure the scope as follows:
-
Name:
mcp -
Description:
MCP Server access -
Type:
None -
Protocol:
OpenID Connect -
Include in token scope: Enable. This distinguishes MCP tokens from those of other clients.
-
Display on consent screen: Enable.
-
Consent screen text:
Access MDM MCP Server.
-
-
Add an audience mapper
To ensure tokens carry the correct audience claim, add an audience mapper to the mcp scope.
-
In the Keycloak Admin Console, go to Client scopes.
-
Select the
mcpscope. -
On the Mappers tab, select Configure a new mapper and choose Audience.
-
Configure the mapper as follows:
-
Name:
mcp-audience -
Included Custom Audience:
urn:ataccama:mdm:mcp-server.Must match the value of
ataccama.one.mdm.mcp.server.audiencein the MDM Server application properties. -
Add to ID token: Disable.
-
Add to access token: Enable.
-
Register the client
Register a public OpenID Connect client (for example, mdm-mcp-client) that MCP clients use to authenticate.
This gives you strict control over which redirect URIs are approved.
-
In the Keycloak Admin Console, go to Clients.
-
Select Create client.
-
Configure the client as follows:
-
Client type:
OpenID Connect. -
Client ID:
mdm-mcp-client. -
Client authentication: Disable (public client).
-
Authentication flow:
-
Standard flow (Authorization Code): Enable.
-
Direct access grants: Disable.
-
Implicit flow: Disable.
-
-
-
Set Valid redirect URIs to match your client callback paths:
-
Local clients:
http://127.0.0.1/. Keycloak accepts any port for loopback addresses per RFC 8252, andmatches any callback path. -
Remote web-based clients: Use an exact HTTPS callback, for example
https://mcp-client.example.com/oauth/callback.
-
-
Set Valid post logout redirect URIs to
+(same as redirect URIs). -
Set Web origins to
+. Required for browser-integrated clients such as Cursor. -
On the Advanced tab, set Proof Key for Code Exchange Code Challenge Method (PKCE) to
S256. -
On the Client scopes tab, select Add client scope, choose
mcp, and set the type to Default.Setting the scope to Default ensures the
mcpaudience is always issued, providing defense in depth if a client does not request the scope explicitly.
Token and session lifetimes
By default, a Keycloak realm session expires after 30 minutes of inactivity (SSO Session Idle), which forces re-authentication. For smoother CLI and IDE use, you can increase the relevant lifetimes on the pre-registered client:
-
Access Token Lifetime: 8h.
-
Offline Session Idle: 7 days, in addition to enabling
offline_accesson the client and advertising it viaataccama.one.mdm.mcp.server.scopes=offline_access.
Step 2: Configure the MCP Server
Enable and configure the server using the MDM Server application properties.
# Enable the MDM MCP Server endpoint
ataccama.one.mdm.mcp.server.enabled=true
# Keycloak issuer URI used for JWT validation
ataccama.one.mdm.mcp.server.issuer-uri=${spring.security.oauth2.resourceserver.jwt.issuer-uri}
# Audience claim required in the client access token
ataccama.one.mdm.mcp.server.audience=urn:ataccama:mdm:mcp-server
# Optional scopes advertised to clients (for example, offline access). Turned off by default
# ataccama.one.mdm.mcp.server.scopes=offline_access
# Name of the MCP Server used during client discovery
spring.ai.mcp.server.name=mdm-mcp
# Endpoint path for streamable HTTP messages
spring.ai.mcp.server.streamable-http.mcp-endpoint=/mcp
The audience value must match the audience mapper you configured in Keycloak.
Step 3: Configure the MDM model (nme-model.xml)
For an AI agent to navigate and query your MDM model reliably, your entities and columns must be well documented. Agents have no implicit knowledge of your custom schema or technical abbreviations, so the descriptions you maintain in the model are the agent’s primary source of semantic context.
When an agent calls the getEntity tool, the server retrieves the labels and descriptions you configured for each entity and column and includes them in the response.
You maintain these descriptions in the Model Explorer in ONE Desktop. We recommend using clear, specific text. For example, "The 10-digit National Provider Identifier (NPI) of the facility". This lets the agent select the correct fields for filters and output mapping, which significantly reduces reasoning errors and improves query accuracy.
| Treat model documentation as part of enabling the MCP Server. The richer your entity and column descriptions, the more accurately agents resolve natural language questions to the correct columns. |
Step 4: Connect a client
Once the MCP server is running, clients connect to its /mcp transport endpoint and authenticate against Keycloak using the pre-registered client ID (for example, mdm-mcp-client).
The MCP endpoint is on the MDM Server port, not the MDM Web Application one.
-
Local testing deployments: By default, the MCP URL is
http://localhost:8051/mcp. -
Cloud and self-managed deployments: Use the MDM server host, for example
mdm-server-<host>>/mcpormdm-server.<host>>/mcp.
|
To quickly find the server URL without leaving the web application, open the Swagger UI from the MDM Web App Admin Console. Copy the Swagger UI URL and keep only the base, removing 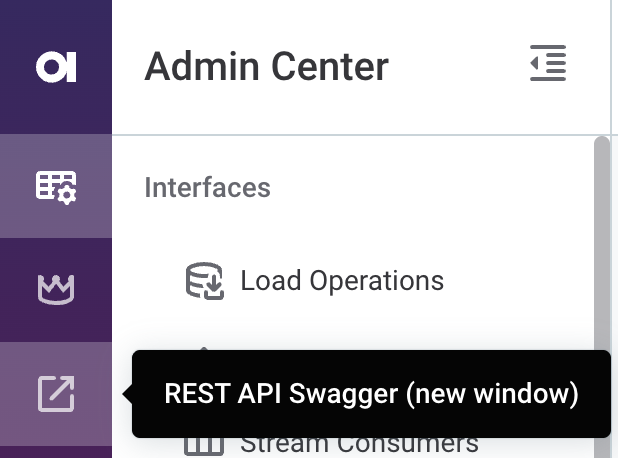
|
The following examples use the default local deployment URL as a placeholder. Replace it with the URL of your MDM server as needed.
claude mcp add --transport http --client-id mdm-mcp-client mdm-mcp http://localhost:8051/mcp.cursor/mcp.json){
"mcpServers": {
"mdm-mcp": {
"url": "http://localhost:8051/mcp",
"auth": {
"CLIENT_ID": "mdm-mcp-client"
}
}
}
}opencode.json){
"mcp": {
"mdm-mcp": {
"type": "remote",
"url": "http://localhost:8051/mcp",
"oauth": {
"clientId": "mdm-mcp-client"
}
}
}
}After you add the server, the client opens a browser to complete authorization:
-
If you’re already logged in: Confirm access to the MCP Server.
-
If you’re not logged in: Log in with your MDM credentials.
The MCP Server is then ready to use.
Was this page useful?