
Register an Ataccama-Managed Edge on AWS
This guide describes how to deploy an Ataccama edge instance in a customer-owned AWS account.
See Edge Processing for background on edge processing and how responsibilities are split between Ataccama and your organization.
Prerequisites
Complete Prepare AWS Infrastructure before starting. You’ll need the following values from it:
-
AWS account ID
-
AWS Region
-
VPC ID
-
Private and public subnet IDs
-
S3 bucket name and Region
-
IAM role ARN
Ensure you have access to the Ataccama Cloud Portal.
Deployment overview
With the AWS infrastructure in place, two steps remain:
-
Step 1: Configure edge in Cloud Portal: Register the AWS account and deploy the edge instance.
-
Step 2: Configure data sources to use the edge: Point your data source connections at the new edge.
Step 1: Configure edge in Cloud Portal
Connect your AWS account
-
Go to the Ataccama Cloud Portal.
-
Open your environment and select the Settings tab.
-
In the Edge section, select Connect AWS account.
-
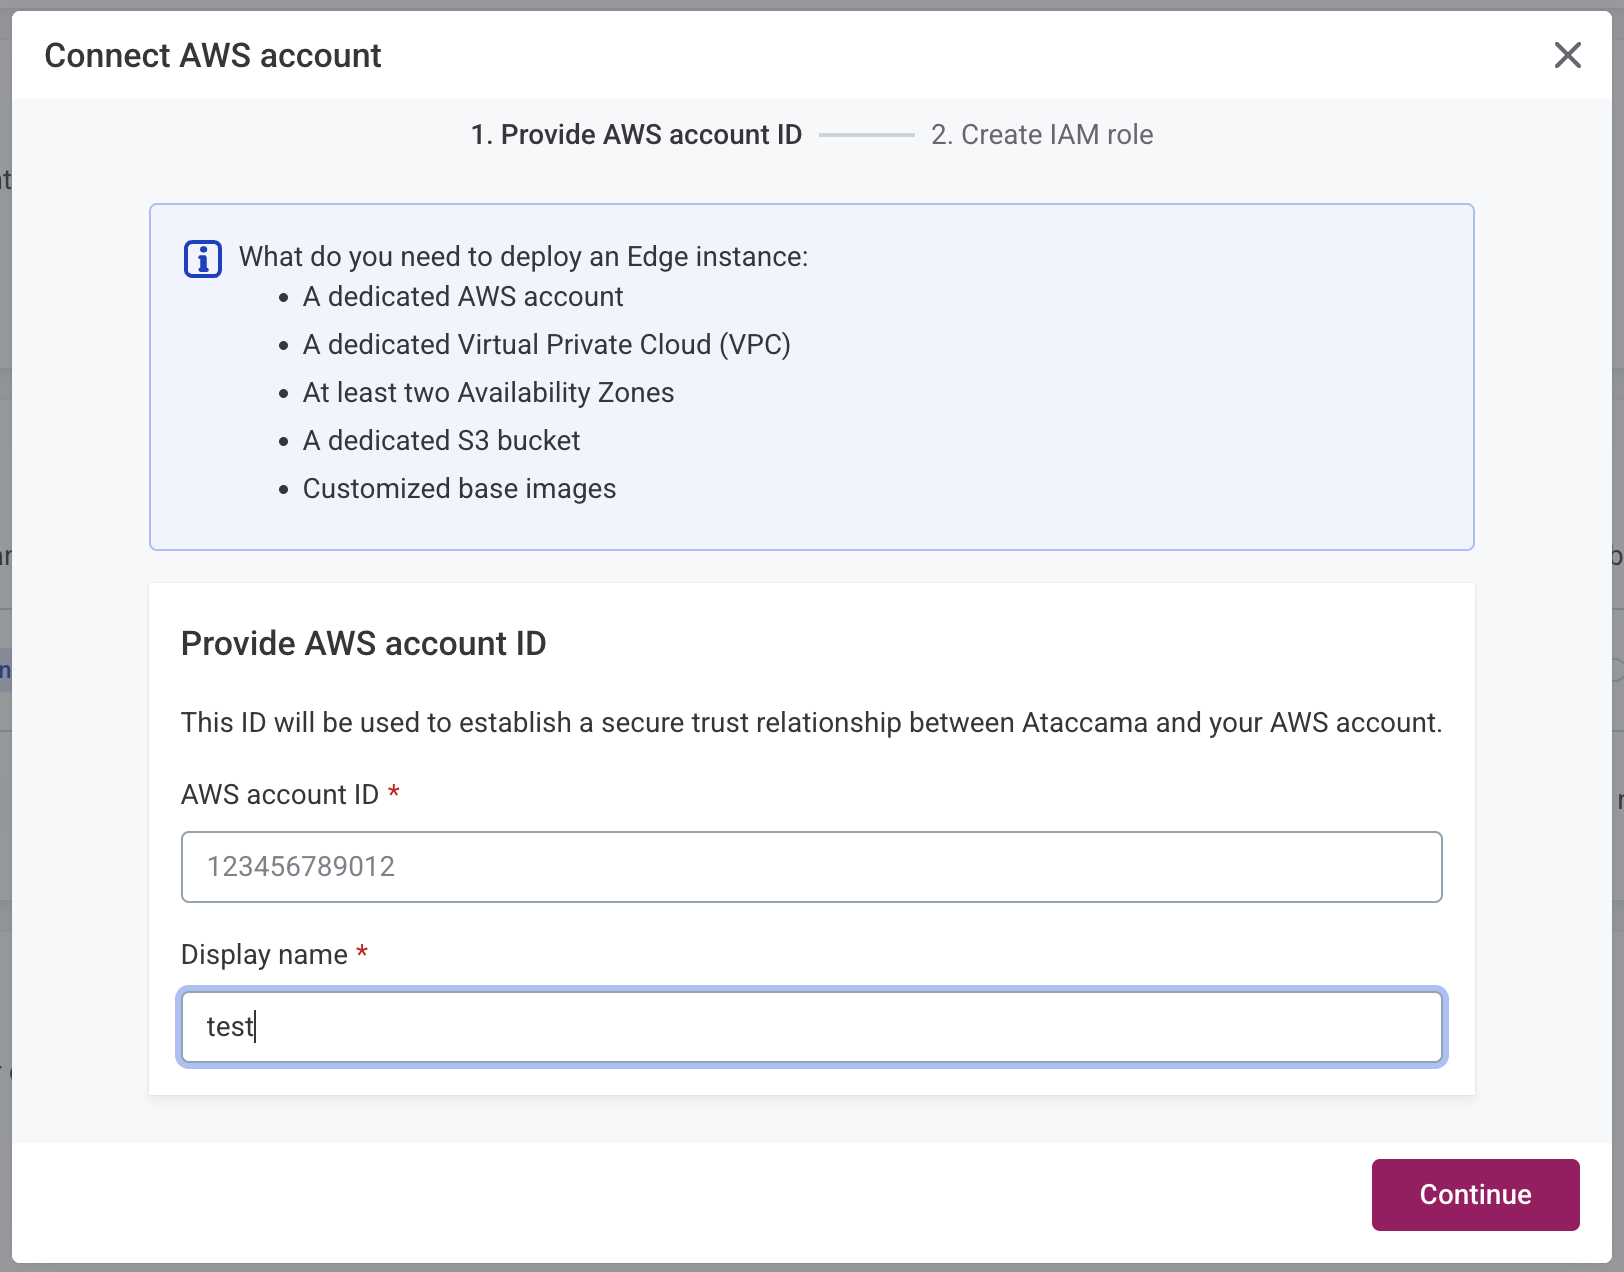
Fill in the following:
-
AWS account ID: Your 12-digit account ID.
-
Display name: A descriptive name for this account.
-
-
Select Continue.
Apply the CloudFormation template
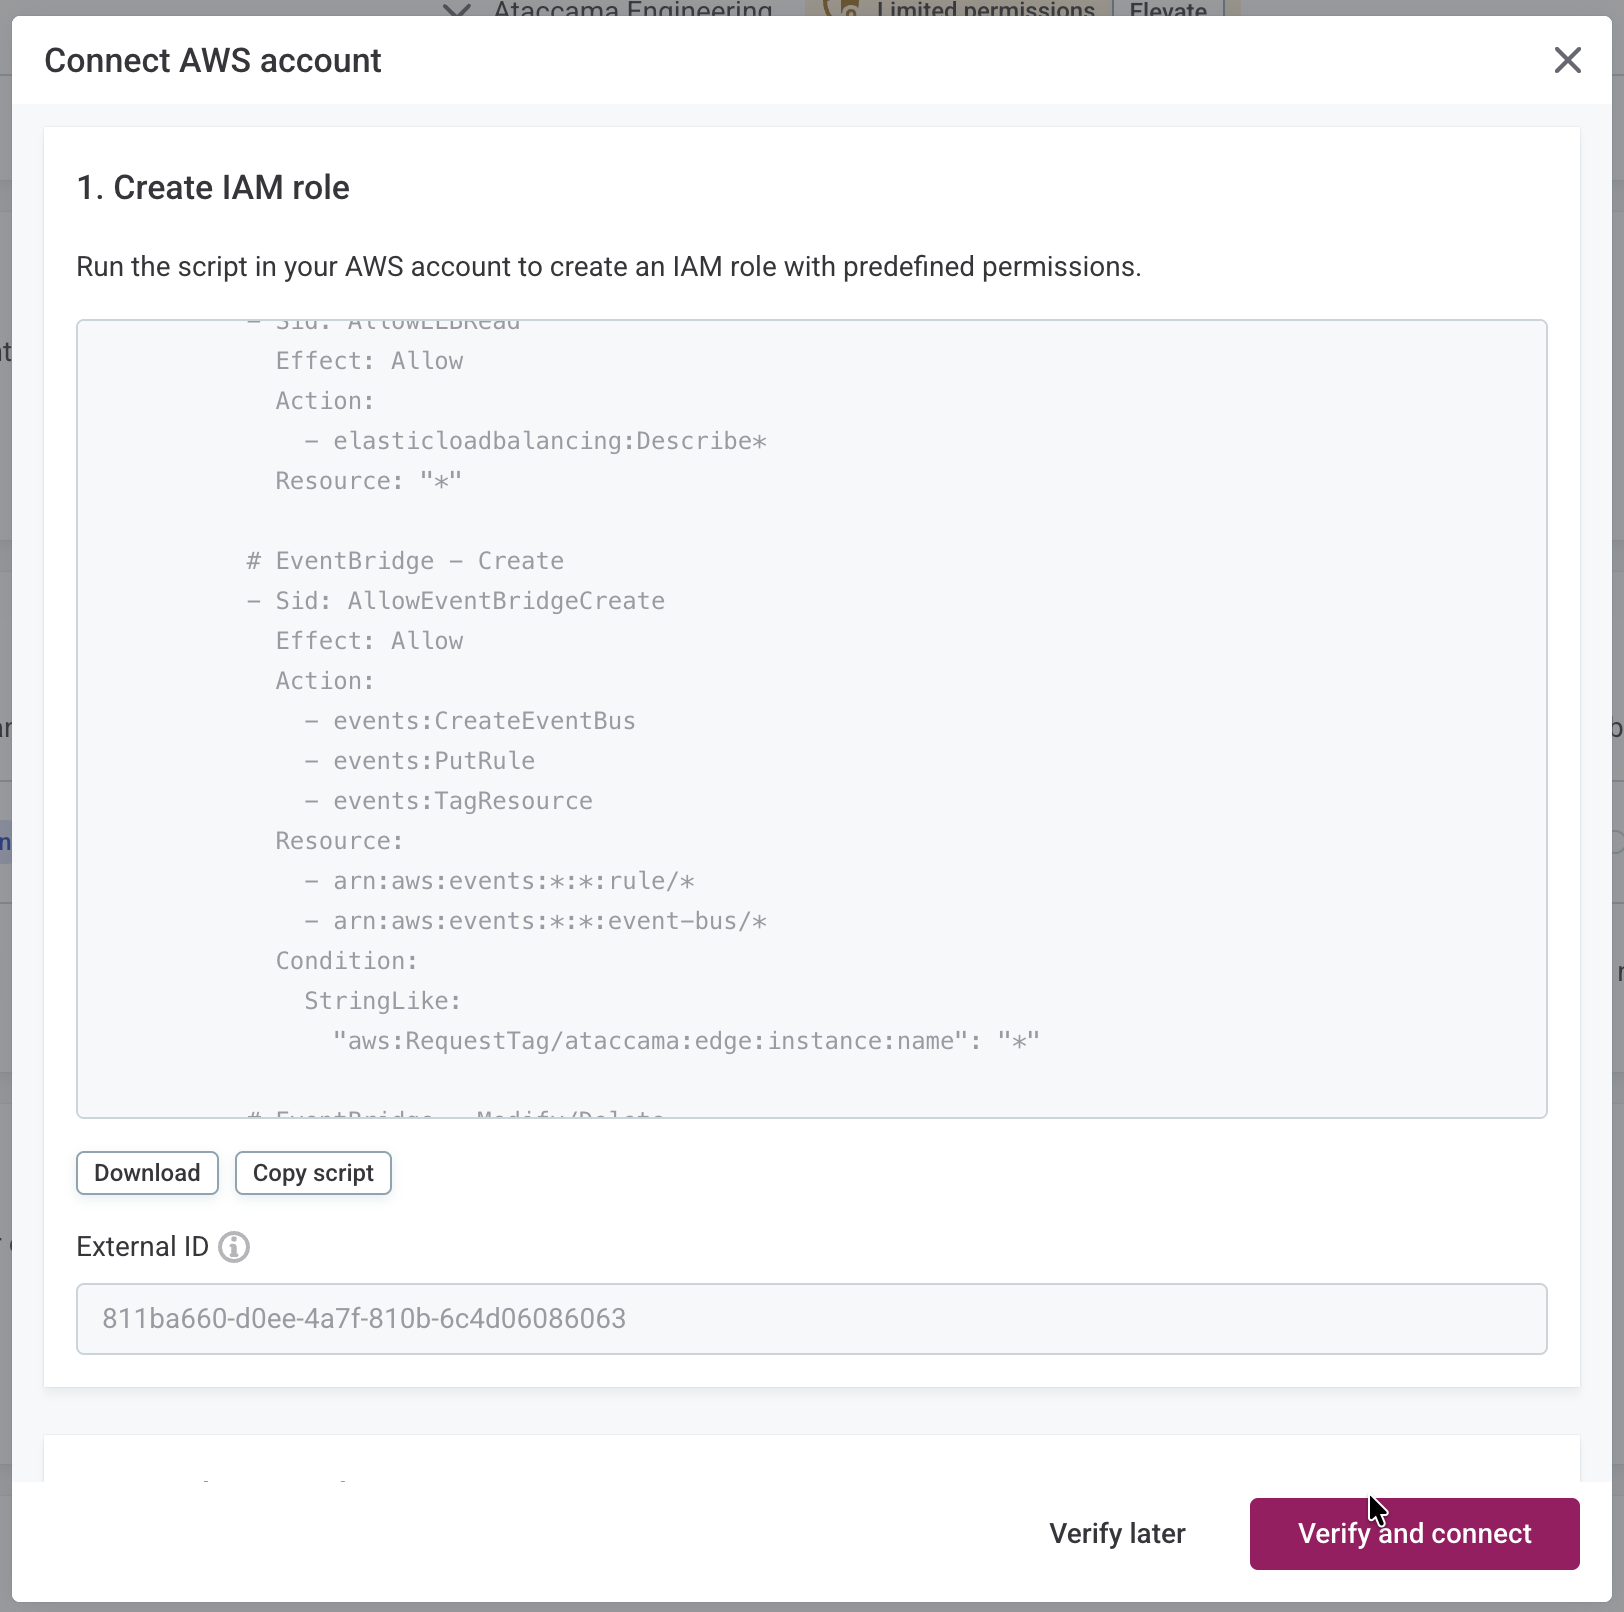
The Cloud Portal provides a CloudFormation template that creates the IAM role Ataccama uses to manage the edge in your account.
-
In the Cloud Portal, download or copy the template and note the External ID parameter.
-
In AWS, create a CloudFormation stack from the template, setting the External ID parameter when prompted.
-
Copy the resulting IAM Role ARN.
|
To delegate this task, select Verify later. When ready, return to the same section in your environment Settings. |
Verify the connection
-
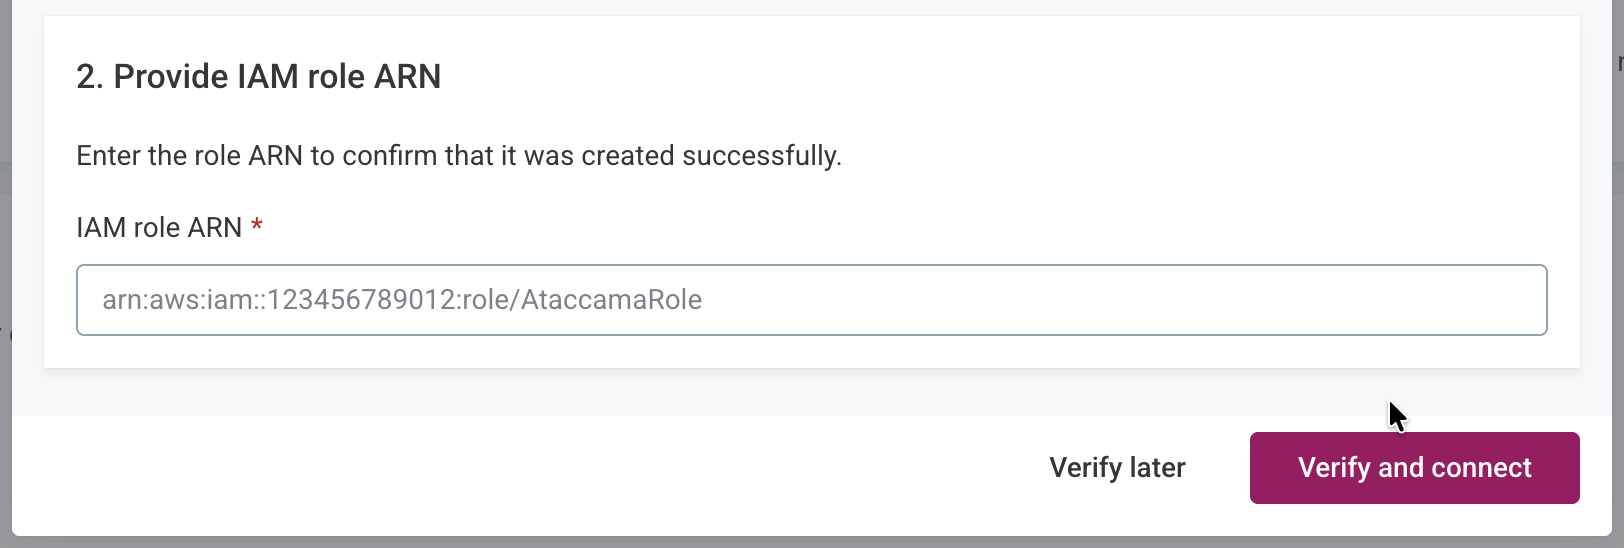
In the Cloud Portal, in your environment Settings, enter the IAM Role ARN.
-
Select Verify and connect.
Once verification completes, the account shows a Verified status.
Deploy the edge instance
-
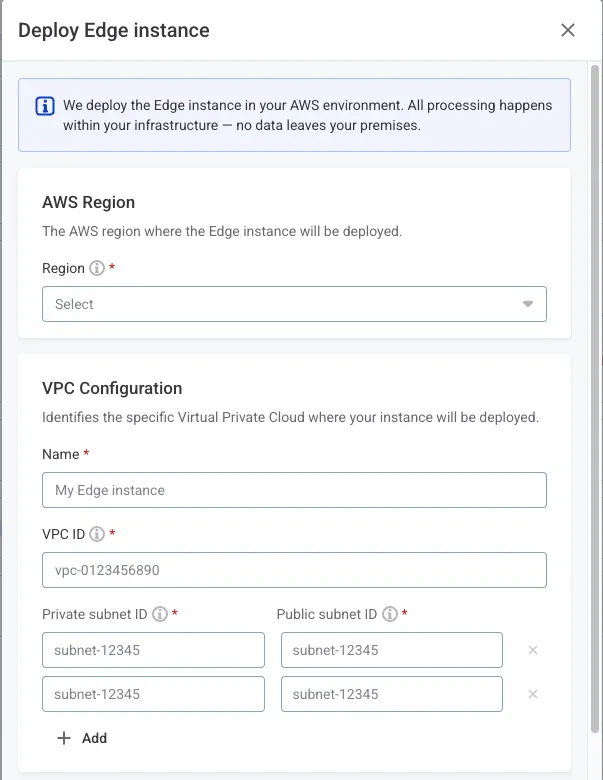
Select Deploy edge instance.
-
Configure the deployment:
-
Region and VPC:
-
AWS Region: The AWS Region where your VPC is located.
-
VPC Name: A descriptive name for the edge instance.
-
VPC ID: Your VPC identifier.
-
Private subnet IDs: All three private subnet IDs.
-
Public subnet IDs: All three public subnet IDs.
-
-
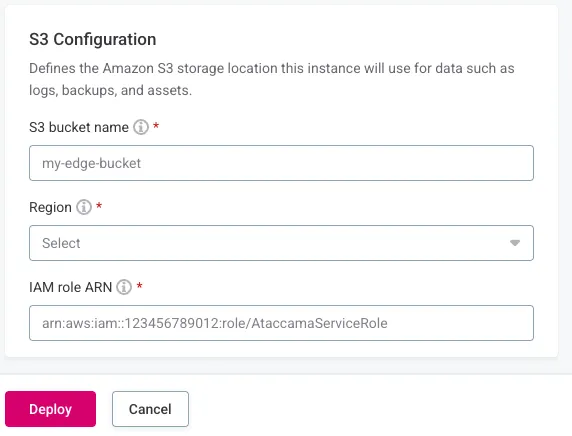
S3 configuration:
-
S3 bucket name: The bucket you created.
-
Region: The bucket’s Region.
-
IAM role ARN: The role ARN. See Prepare AWS Infrastructure.
-
-
Upgrades:
-
Upgrade automatically to the latest version: Select to automatically upgrade when a new version is available.
-
Upgrade manually: Select to upgrade at your own convenience and specify the initial version to deploy. When a new version is available, the edge instance listing displays Upgrade available under Version.
-
-
-
Select Deploy and wait for the Running status to appear.
|
To receive email notifications when a new edge version is released, select Notify me when new Edge version is available (Settings > Edge). Admins receive these notifications by default. |
|
Troubleshooting
If deployment fails, check that:
If issues persist, contact Ataccama Support. |
Step 2: Configure data sources to use the edge
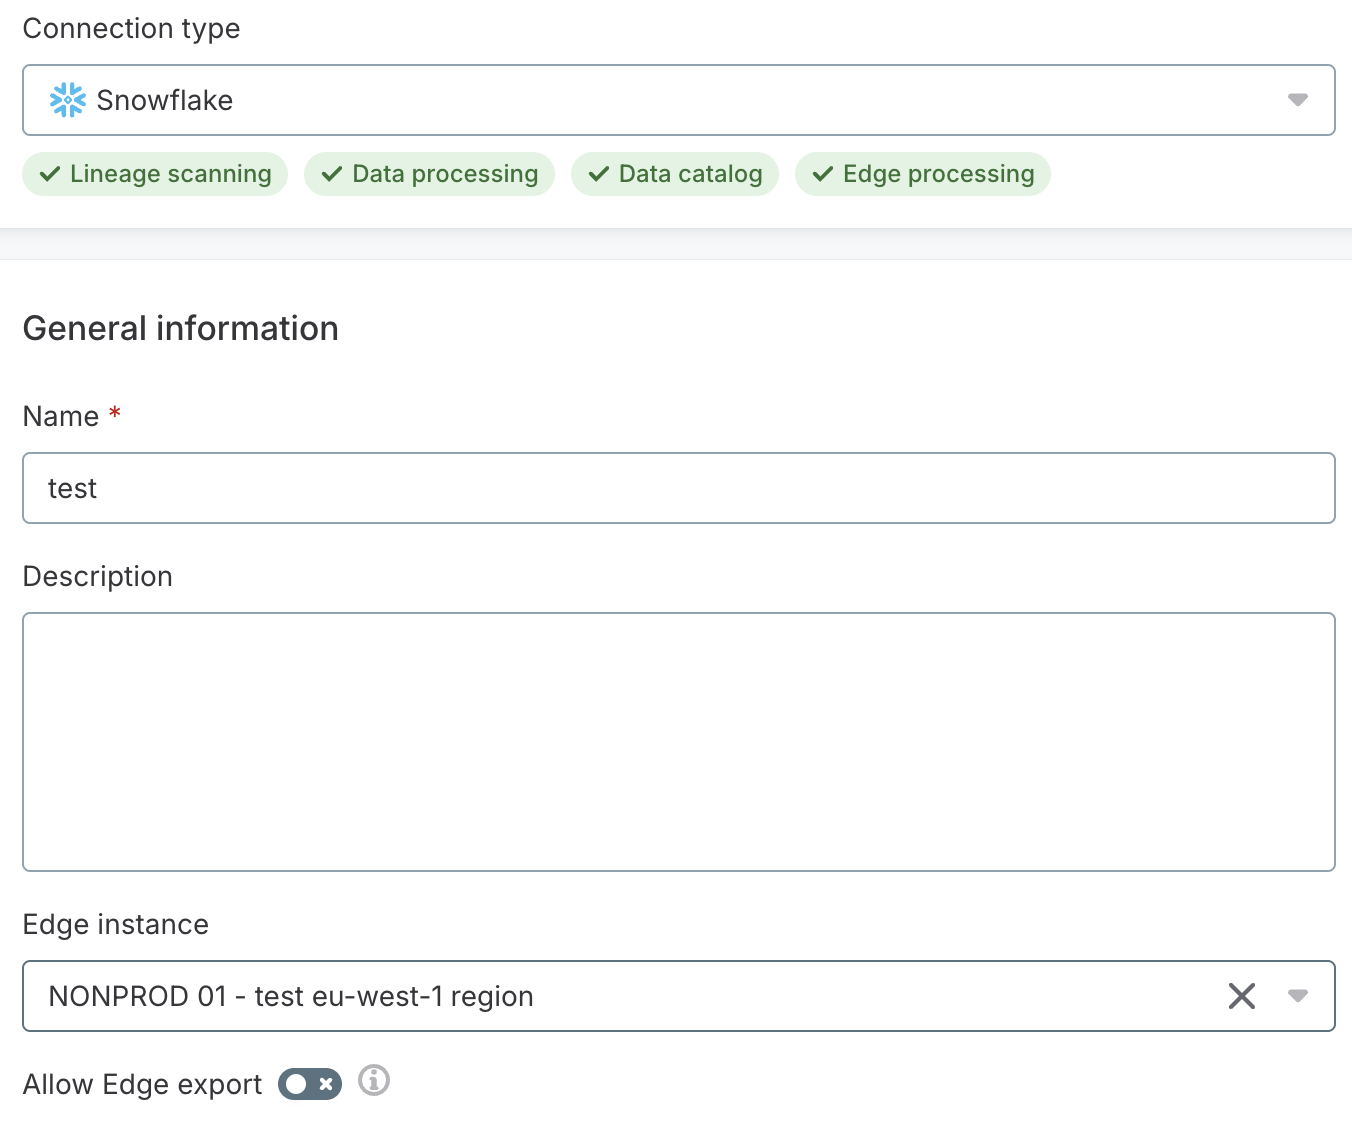
When creating or editing your data source connection, select the edge instance you want to use. All edge instances available for your environment appear in this list.
Select Allow edge export if you want to load data processed on this connection’s edge to Reference Data. If it isn’t selected, edge-processed data remains within the edge boundary. For details, see Allow edge export.
| Ensure there is network connectivity between your edge VPC and data sources you’re connecting to. |
Test and save the connection. Then browse and import metadata for a schema, table, or file of your choosing. As a result, a new catalog item appears in your Catalog.
For detailed instructions, see Sources and Import Metadata.
If any step results in an error, contact Ataccama Support.
Was this page useful?