
Connect to ServiceNow
Connect Ataccama ONE to ServiceNow to track and resolve data quality alerts in your existing workflows. Once connected, you can escalate alerts to ServiceNow manually or automatically using escalation policies.
Before you begin
-
You must have Admin permission in the Alerts & data observability permissions model. See Manage Alert Permissions for details.
-
You need credentials for your ServiceNow instance. The credentials required depend on the authentication type you choose.
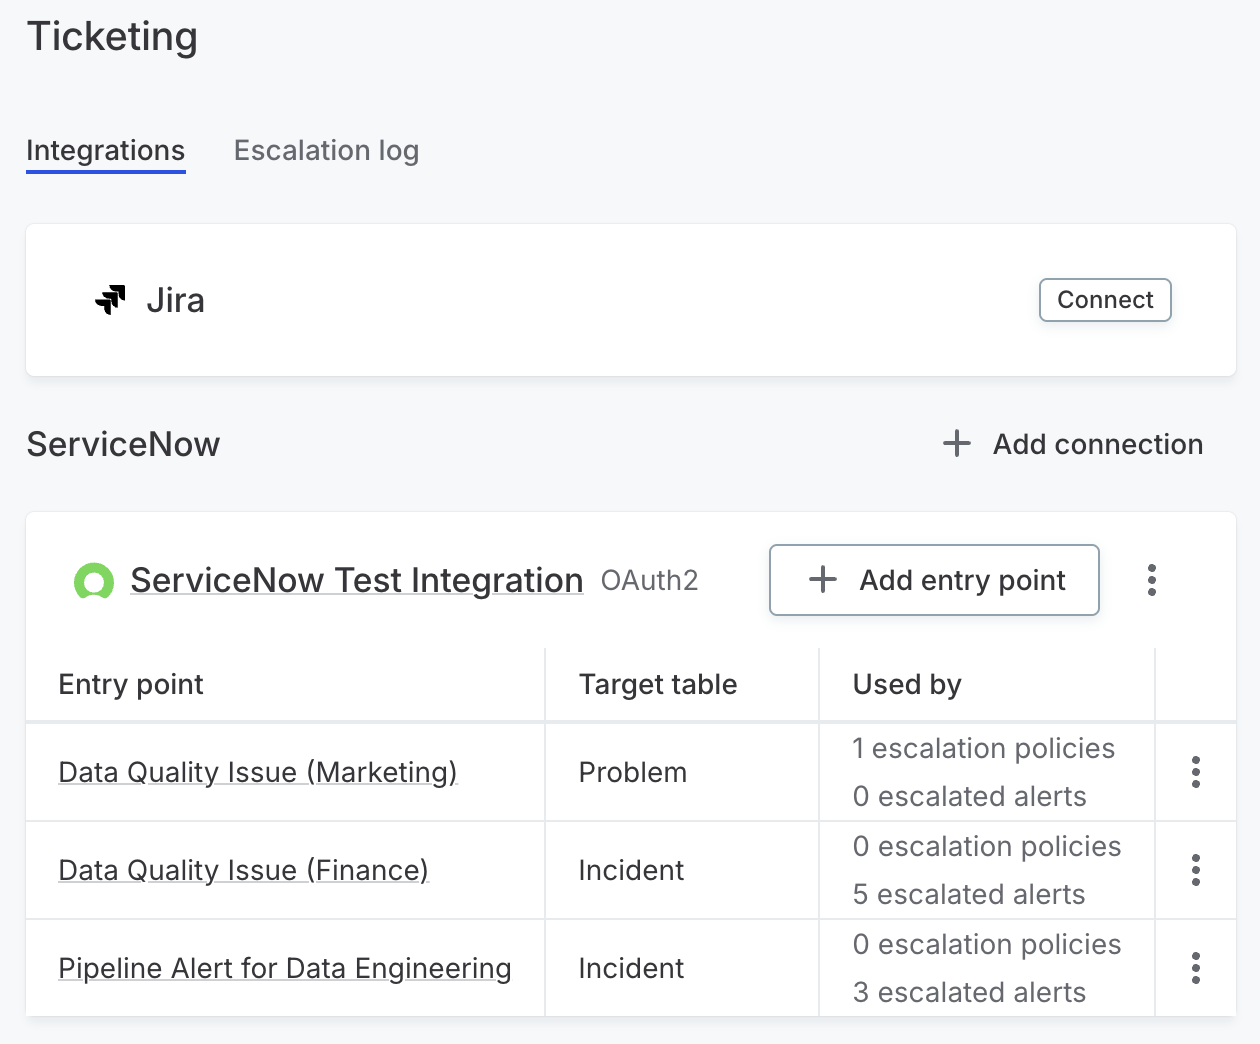
Add a ServiceNow connection
-
Go to Global settings > Alerting > Ticketing.
To access Global settings, select the Ataccama logo. -
Under ServiceNow, select Add connection.
-
In the Connect ServiceNow dialog, enter a Connection name.
-
Enter the Instance URL for your ServiceNow instance.
-
Select an Authentication type and provide the required credentials:
-
OAuth2 (recommended): Enter the Client ID and Client Secret. Obtain these from System OAuth > Application Registry in your ServiceNow instance.
-
API Key: Enter your API Key.
-
Basic: Enter your Username and Password.
Basic authentication ties the connection to one person’s credentials. If their password changes or their account is deactivated, the connection breaks. For production use, OAuth2 with a dedicated service account is recommended.
-
-
Select Test connection to verify the credentials.
-
Select Add connection.
Add an entry point
An entry point defines how ONE creates tickets in ServiceNow — which ServiceNow table to target and how alert fields map to ServiceNow fields. You must add at least one entry point before users can escalate alerts.
-
Under your ServiceNow connection, select Add entry point.
-
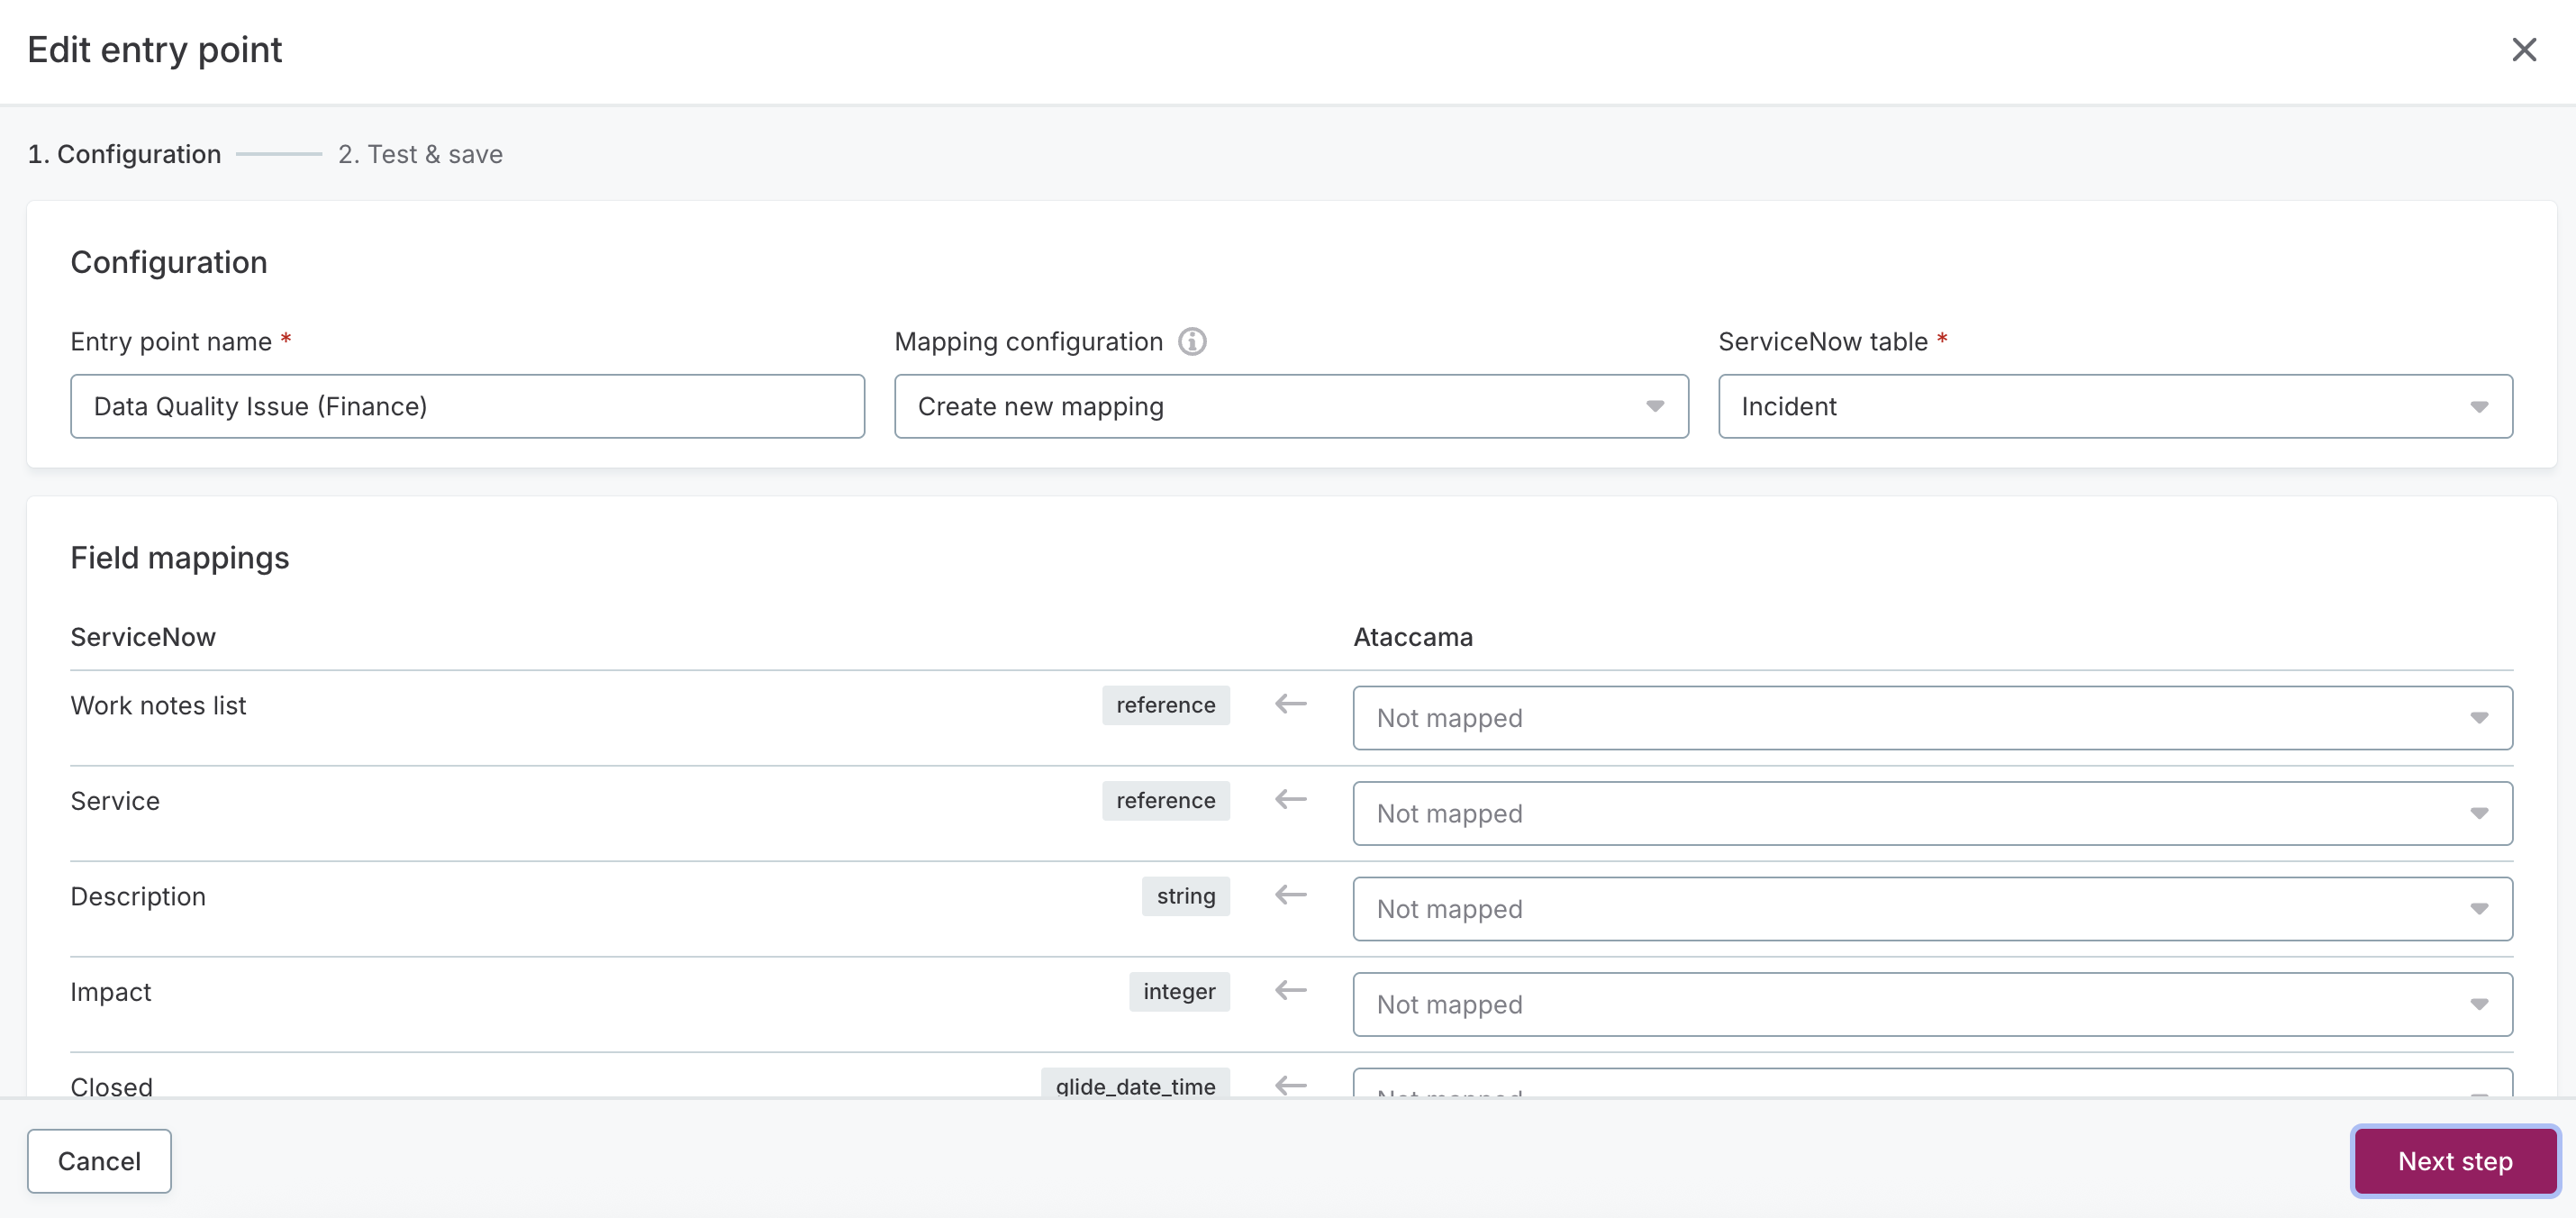
In the Add entry point dialog, complete the Configuration step:
-
Enter an Entry point name.
-
In the Pre-fill from dropdown, optionally select a saved entry point to copy its ServiceNow table and field mappings as a starting point. Leave it set to None to start from scratch.
-
Select a ServiceNow table.
This determines the ticket type created, for example Incident or Problem. If you pre-filled from a saved entry point, the table is already set.
-
-
In the Field mappings section, define what populates each ServiceNow field. Each ServiceNow field shows its data type, such as string, integer, or reference. To remove a mapping, select the clear icon next to it. In the Ataccama column, map each field to either:
-
An Ataccama field: The ServiceNow field takes its value from the alert. For example, map the ServiceNow Urgency field to the Ataccama Severity field.
-
A fixed value: The ServiceNow field is always set to the same value. For example, set State to Resolved. For ServiceNow fields that have predefined options, select from the list of available values.
-
-
Select Next step.
-
On the Test & save step, review the configuration.
-
Select Save.
The entry point appears in the list under your connection, showing the target table and how many escalation policies and alerts are using it. To view an entry point’s configuration, select its name. The detail page shows the connection, target table, and field mappings.
View the escalation log
The Escalation log tab on the Ticketing page lists every alert that has been escalated to a ticketing system. For each escalation, the log shows the Ticket ID, the Entry point used, and when it was Escalated at. Use the Status filter to narrow the list.
Select a Ticket ID to open the ticket in your ticketing system. To learn more about an escalation, select its row to open the Escalation details panel. The panel shows the escalated alert’s name, the ticketing system and connection, the entry point, who escalated the alert, and the date and time.
Next steps
-
Escalate Alerts — Learn how to escalate alerts to ServiceNow manually or automatically using escalation policies.
Was this page useful?