
Set Up AWS OIDC Provider
This article describes how to grant Ataccama ONE access to S3 buckets in your Amazon Web Services (AWS) account using OpenID Connect (OIDC) federation with the Ataccama identity provider (IDP).
Instead of sharing static AWS access keys, Ataccama presents a signed JSON Web Token (JWT) to AWS Security Token Service (STS) and receives temporary credentials scoped to an IAM role you define, via sts:AssumeRoleWithWebIdentity.
No long-lived AWS secrets are stored or transmitted.
| Set up a separate OIDC provider and IAM role for each Ataccama environment (for example, DEV, TEST, PROD). Each environment has its own isolated identity in the Ataccama IDP, so credentials and trust policies cannot be shared across environments. |
When to use AWS Assume Role
AWS Assume Role with OIDC is the recommended option for:
-
No long-lived keys. Your security policy prohibits long-lived AWS access keys, or rotating them is operationally costly. AWS STS issues credentials that are valid for one hour by default.
-
Fine-grained, revocable control. You want to manage Ataccama’s access entirely through IAM in your AWS account.
-
Detailed audit trails. CloudTrail logs every credential issuance and S3 access with the session name, source IP, and OIDC subject.
This option requires that you can register an OIDC identity provider and create IAM roles in your AWS account.
Consider AWS Access Key authentication instead when:
-
You don’t have permissions to manage IAM identity providers or roles.
-
You’re setting up a quick proof-of-concept and don’t need the additional controls AWS Assume Role offers.
Prerequisites
-
An AWS account with permissions to manage IAM identity providers and roles.
-
Access to the Ataccama Cloud Portal to retrieve your environment details.
Setup overview
Follow the AWS documentation to complete these steps, using the values from Configuration values where required:
-
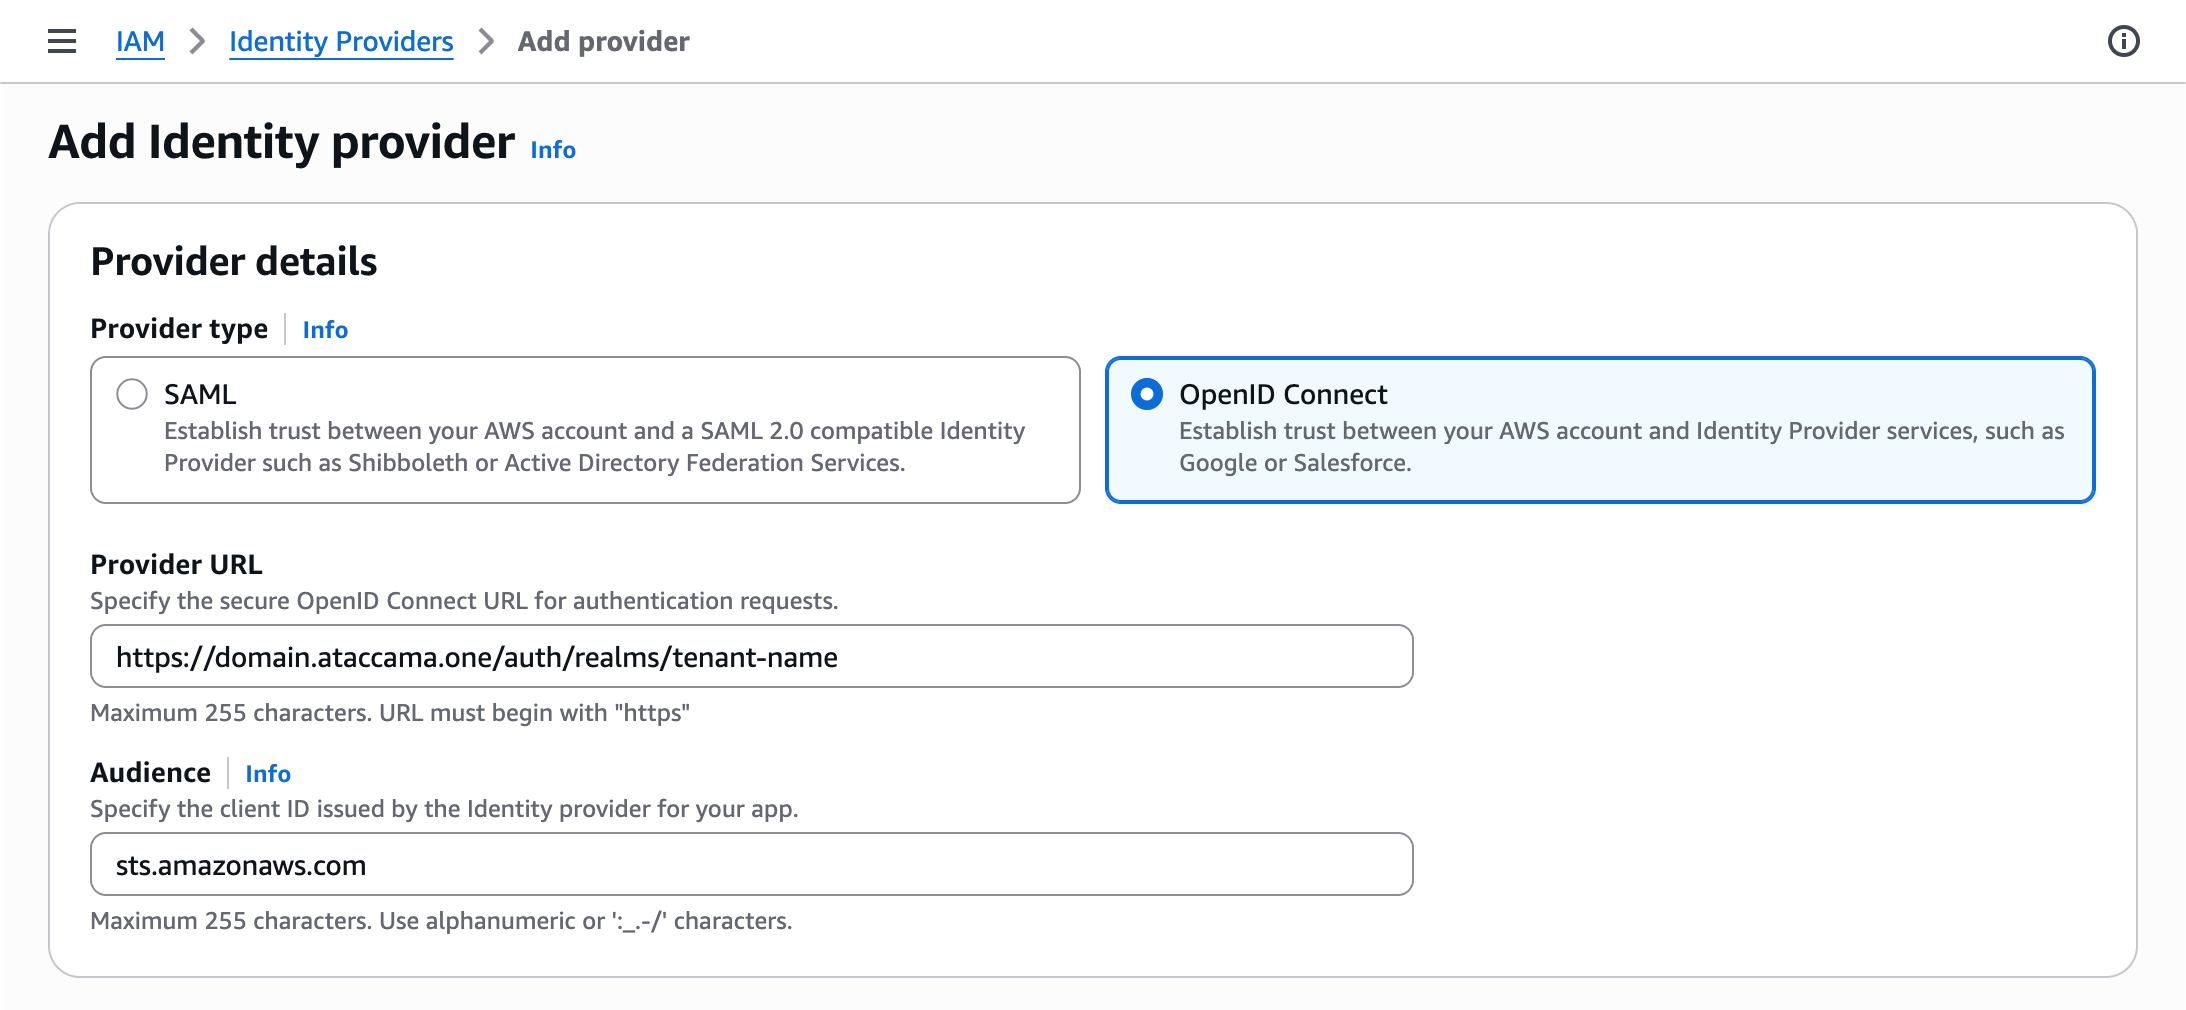
Register the Ataccama IDP as an OIDC identity provider in IAM. See OIDC discovery URL to construct the provider URL.
For the TLS thumbprint, see Obtaining the thumbprint for an OpenID Connect identity provider.
If using the AWS CLI:
aws iam create-open-id-connect-provider \ --url "<oidc-discovery-url>" \ --client-id-list "sts.amazonaws.com" \ --thumbprint-list "<tls-thumbprint>" -
Create an IAM role for OIDC federation and attach a permissions policy granting only the S3 actions Ataccama needs. See S3 permissions policy for an example.
-
Configure a trust policy on the role that allows only Ataccama’s identity to assume it. See Trust policy for the required structure.
Configuration values
The following values are specific to your Ataccama environment. Use them when completing the previous steps.
OIDC discovery URL
The issuer URL for your environment, used when registering the OIDC provider.
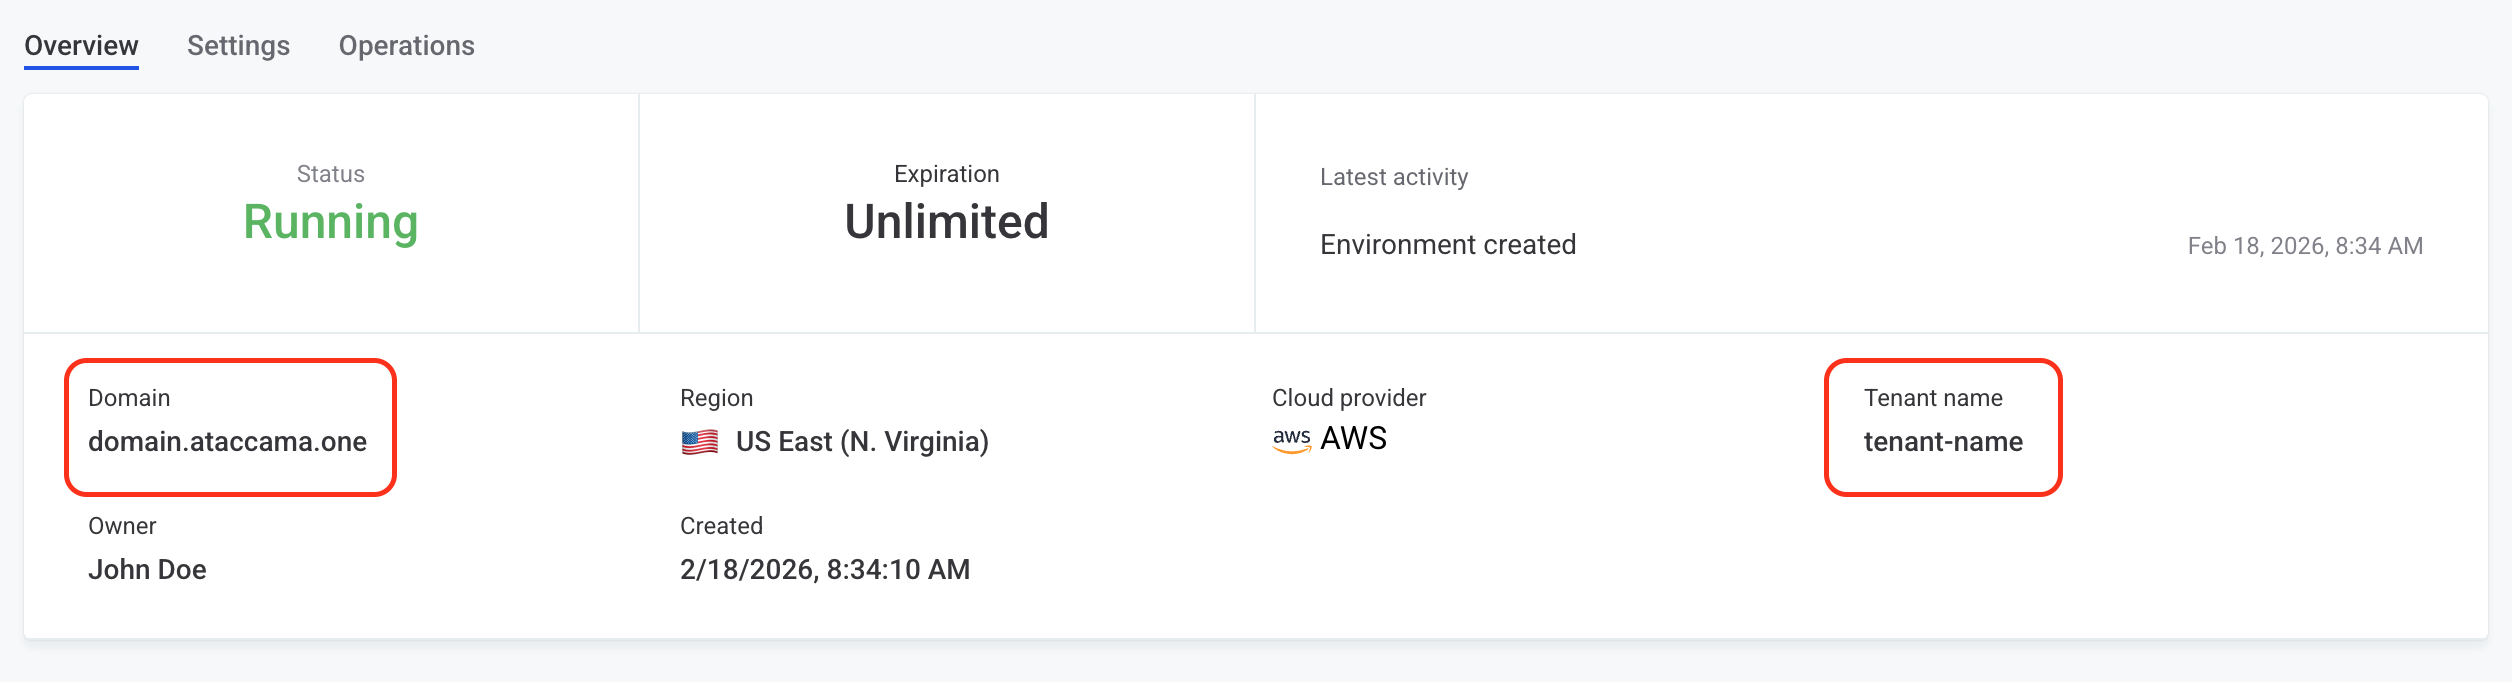
Construct the URL using the format: https://<your-domain>/auth/realms/<your-tenant-name>.
To find the Domain and Tenant Name, go to the Ataccama Cloud Portal and select your Environment. The fields are displayed on the Overview tab.
After registration, copy the Provider name from the AWS Console (always <your-domain>/auth/realms/<your-tenant-name>).
The provider name is used in Trust policy.
S3 permissions policy
Scope permissions to only the buckets and prefixes Ataccama needs.
Avoid s3:* and Resource: "*".
Use separate roles for buckets with different sensitivity levels.
{
  "Version": "2012-10-17",
  "Statement": [
    {
      "Effect": "Allow",
      "Action": [
        "s3:GetObject",
        "s3:ListBucket",
        "s3:PutObject"
      ],
      "Resource": [
        "arn:aws:s3:::<your-bucket>",
        "arn:aws:s3:::<your-bucket>/*"
      ]
    }
  ]
}
Trust policy
Attach the following trust policy to the IAM role:
{
  "Version": "2012-10-17",
  "Statement": [
    {
      "Effect": "Allow",
      "Principal": {
        "Federated": "arn:aws:iam::<your-account-id>:oidc-provider/<your-provider-name>"
      },
      "Action": "sts:AssumeRoleWithWebIdentity",
      "Condition": {
        "StringEquals": {
          "<your-provider-name>:aud": "sts.amazonaws.com",
          "<your-provider-name>:sub": "tenant:<your-tenant-name>:aws-cloud-identity"
        }
      }
    }
  ]
}
Replace <your-provider-name> with the Provider name obtained after registering OIDC discovery URL (without https://).
The condition keys must exactly match the issuer URL used during registration.
The sub value identifies the Ataccama service identity for your environment; keep the aws-cloud-identity suffix as-is and substitute only <your-tenant-name>.
|
Overly permissive trust policy
Always constrain both If you omit the |
Next steps
In ONE, configure the connection to S3 using the AWS Assume Role credentials with the role ARN. See Amazon S3 Connection.
Was this page useful?