
Set Up Entra ID SSO
This article describes how to integrate Microsoft Entra ID (formerly Azure Active Directory) with Ataccama ONE Agentic Data Trust Platform using SAML 2.0 federation.
How sign-in works
When Entra ID SSO is configured, Ataccama acts as the SAML Service Provider (SP), and Entra ID acts as the Identity Provider (IdP). On sign-in, you are redirected to Entra ID for authentication (using your corporate credentials), and Entra ID returns a signed SAML assertion to Ataccama.
On first sign-in, Ataccama creates your user account automatically from the assertion attributes (username, email, first name, last name); on subsequent sign-ins, your profile attributes are refreshed from Entra ID.
|
Configure a separate identity provider for each Ataccama environment (for example, DEV, TEST, PROD). Each environment has its own realm and redirect URI, so the configuration cannot be shared across environments. |
Prerequisites
-
Access to the Entra admin center with permissions to manage enterprise applications.
-
Environment admin access to the Ataccama Cloud Portal.
-
You have created the necessary Entra ID security groups associated with your enterprise application, with the appropriate users assigned.
-
To send group display names (see Configure Entra ID, step 4), one of the following roles is required: Application Administrator, Cloud Application Administrator, or Global Administrator.
Setup overview
Complete the following steps in order. Some values are generated in one step and reused in another, so keep both the Entra admin center and the Cloud Portal open throughout.
-
Get the redirect URI from Cloud Portal to use as the Entra ID Identifier and Reply URL.
-
Configure Entra ID: Create the enterprise application, set up SAML SSO, define the attribute and group claims, and assign users.
-
Complete the Cloud Portal configuration: Enter the SAML metadata, map user attributes, and, optionally, import groups.
Get the redirect URI from Cloud Portal
-
In the Ataccama Cloud Portal, go to <your environment> > Settings.
-
Under Identity Provider (SSO), select Add.
-
In the Add Identity Provider dialog, switch to the SAML tab.
-
Note the Redirect URI shown. The URI is auto-generated for your environment realm and is read-only.
Example:
https://<your-domain>.ataccama.one/auth/realms/<tenant-name>/broker/saml/endpoint.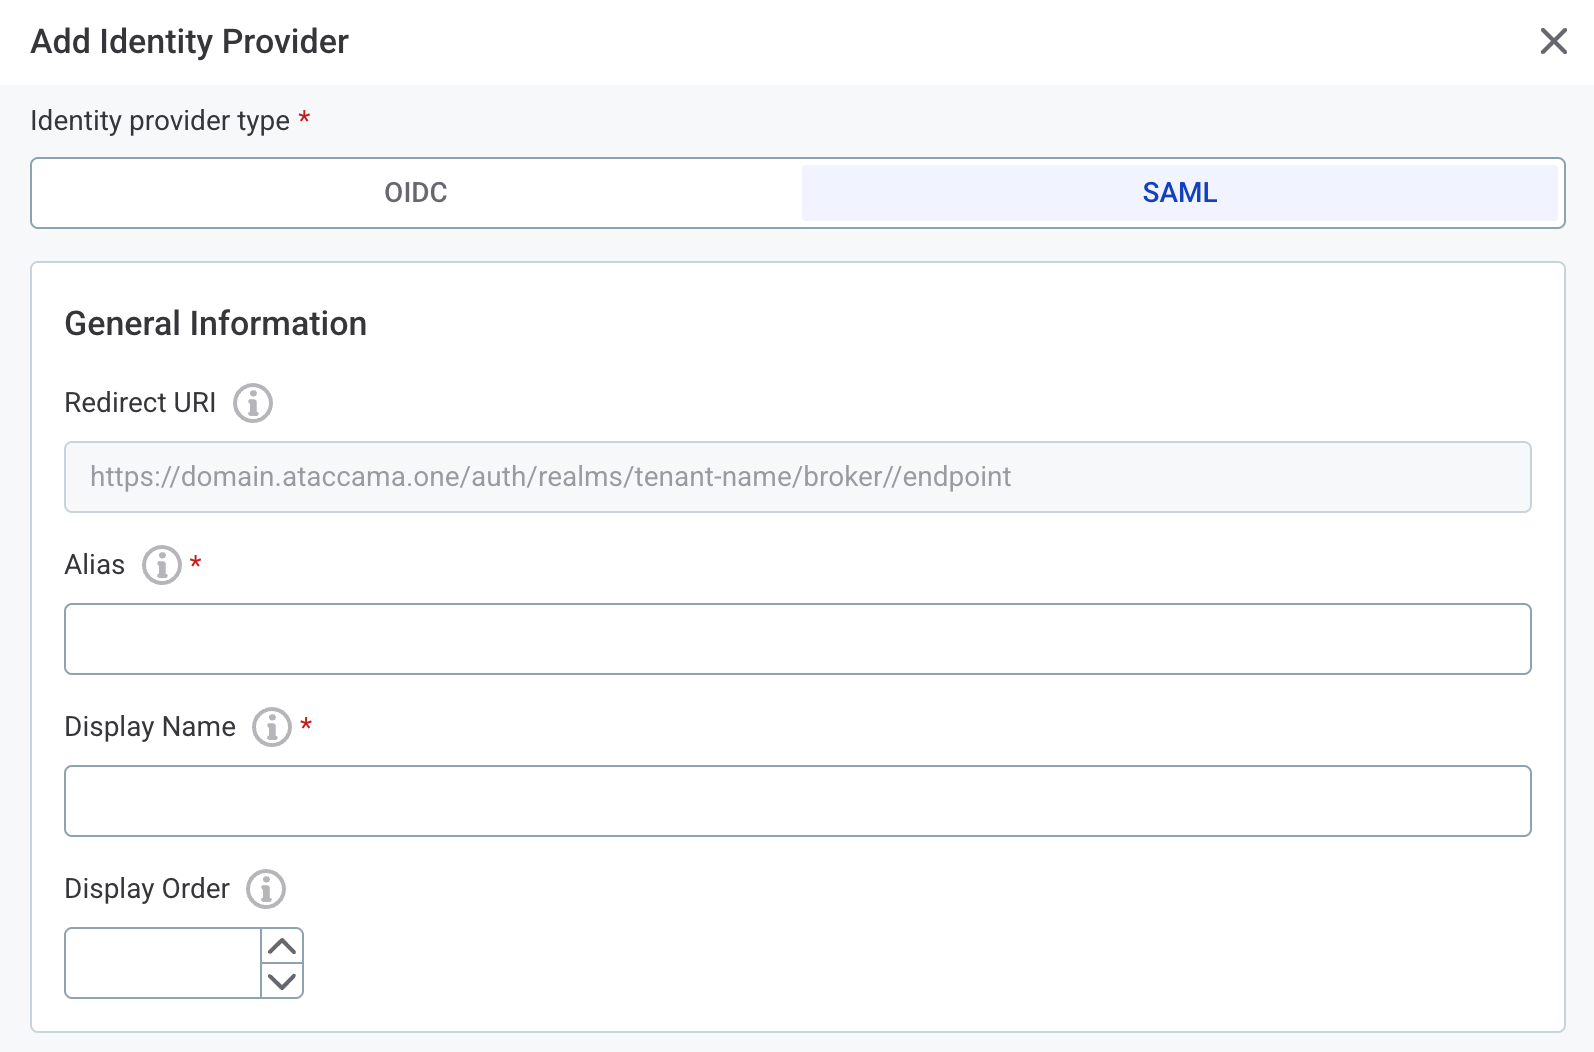
|
Keep this dialog open. You return to it in Complete the Cloud Portal configuration. |
Configure Entra ID
Follow the Microsoft documentation to complete these steps:
-
Create an enterprise application. When prompted to choose an application, select Create your own application > Integrate any other application you don’t find in the gallery (Non-gallery).
-
Enable SAML single sign-on on your application. When configuring Basic SAML Configuration, set the following:
-
Identifier (Entity ID): The redirect URI from Cloud Portal.
-
Reply URL (ACS URL): The redirect URI from Cloud Portal.
-
Sign-on URL: Leave blank.
-
Relay State: Leave blank.
-
-
Configure attribute claims in the SAML token. The following claims must be present; add any that are missing.
-
schemas.xmlsoap.org/ws/2005/05/identity/claims/name:user.userprincipalname -
schemas.xmlsoap.org/ws/2005/05/identity/claims/emailaddress:user.mail -
schemas.xmlsoap.org/ws/2005/05/identity/claims/givenname:user.givenname -
schemas.xmlsoap.org/ws/2005/05/identity/claims/surname:user.surname
-
-
Configure group claims if you want to use group-based role mapping in ONE. Under Select group types to include, select Groups assigned to the application, and leave the default claim name. Entra ID emits the claim as
schemas.microsoft.com/ws/2008/06/identity/claims/groups.By default, Entra emits each group as its object ID (GUID), which is not human-readable and makes role mapping in Group import difficult. To send group display names instead, edit the application registration manifest and add
"cloud_displayname"toadditionalPropertiesof thegroupsclaim, under thesaml2Tokenentry ofoptionalClaims:Note that group display names are not guaranteed to be unique or stable: two groups can share a name, and renaming a group in Entra changes the value sent to ONE. Because Group import matches on the value in the claim, a renamed group can break existing role mappings until the Group name in the Cloud Portal is updated to match.
The following applies only to cloud-only Entra groups. Groups synchronized from on-premises Active Directory use a different mechanism (source attributes such as
sAMAccountName)."optionalClaims": { "idToken": [], "accessToken": [], "saml2Token": [ { "name": "groups", "source": null, "essential": false, "additionalProperties": ["cloud_displayname"] } ] }The group claim must be set to Groups assigned to the application. If it is configured for Security groups or All groups, the cloud_displaynameproperty is ignored and the assertion continues to contain group object IDs (GUIDs). -
Assign users and groups to your enterprise application that should have access to ONE.
If you configured the group claim as Groups assigned to the application (step 4), only the groups you assign here are sent to ONE. Assigning groups also keeps the claim within size limits: an unassigned broad claim can exceed the limit for users in many groups, in which case Entra omits the groups and sends a Graph link instead.
If Properties > Assignment required is set to Yes on the enterprise application, only users who are direct or transitive members of an assigned group can sign in to ONE.
After you configure Entra ID, copy the App Federation Metadata URL (recommended for autocompleting SAML settings) and complete the Cloud Portal configuration. Alternatively, you can use the Microsoft Entra Identifier and Login URL values, which have to be entered manually.
Complete the Cloud Portal configuration
Return to the Add Identity Provider dialog in the Cloud Portal and fill in the following.
General information
-
Alias: A short unique identifier. Leave the default (
saml) or enter your own (for example,entra-saml). -
Display Name: The label shown on the login screen (for example,
Entra). -
Display Order: Optional. Sets the order of this provider when multiple identity providers are configured.
SAML settings
-
Use discovery endpoint: Select this and paste the App Federation Metadata URL to automatically fill in the following fields.
-
Identity Provider Entity ID: The Microsoft Entra Identifier (for example,
https://sts.windows.net/<tenant-id>/). -
Single Sign-On Service URL: The Login URL from Entra ID.
-
Single Logout Service URL: Optional.
-
Name ID Policy Format:
Email. -
Want Assertions Signed: Enabled (recommended).
-
Validate Signature: Enabled (recommended).
You can leave all other SAML settings as default.
User attribute settings
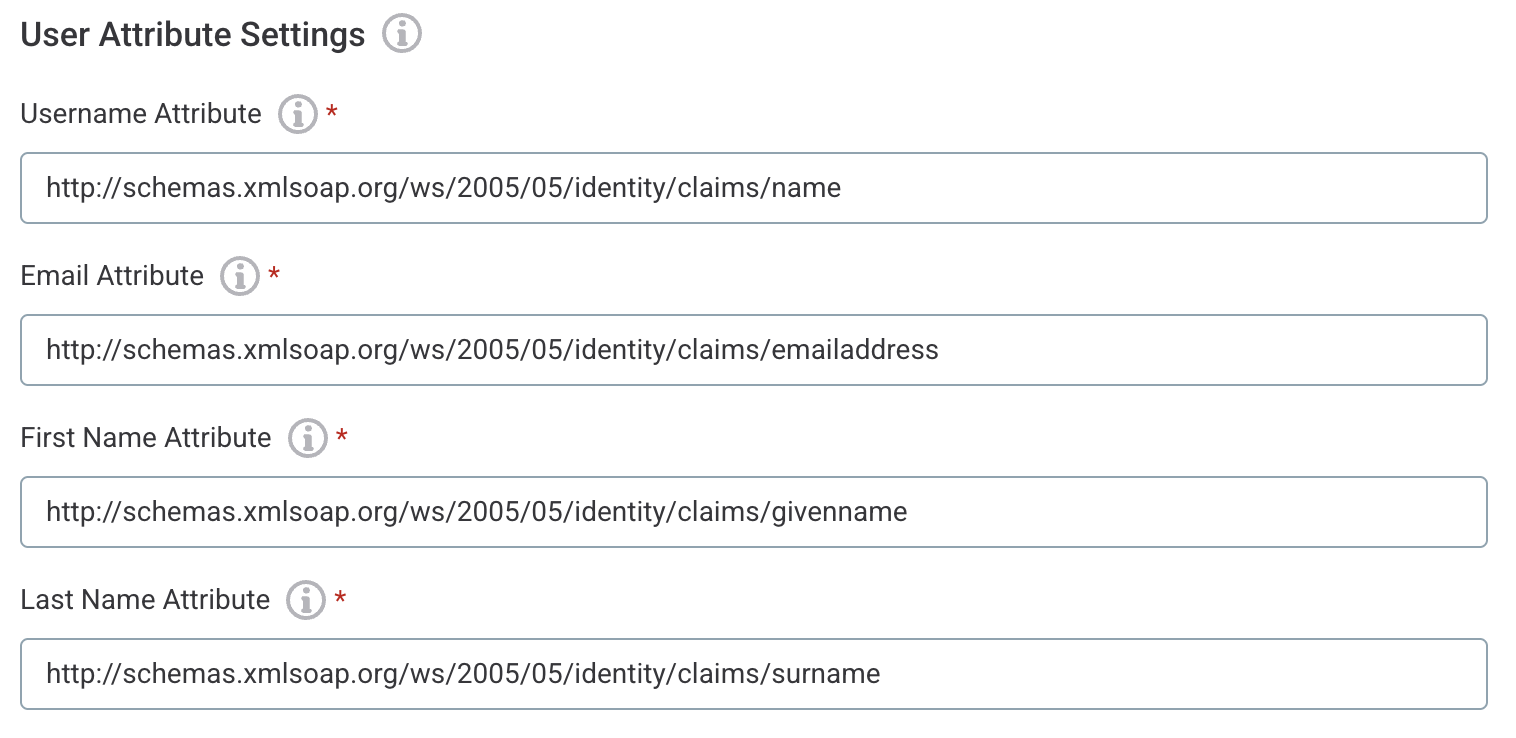
Select Pre-fill for Microsoft Entra to populate all four attribute fields with the default Entra ID claim URIs (and the Mapping attribute name in Group import (optional)). The pre-filled values are:
-
Username Attribute:
http://schemas.xmlsoap.org/ws/2005/05/identity/claims/name -
Email Attribute:
http://schemas.xmlsoap.org/ws/2005/05/identity/claims/emailaddress -
First Name Attribute:
http://schemas.xmlsoap.org/ws/2005/05/identity/claims/givenname -
Last Name Attribute:
http://schemas.xmlsoap.org/ws/2005/05/identity/claims/surname
These values must exactly match the claim names sent in the SAML assertion. If you changed the claim names in Entra ID, edit the attribute values after pre-filling.
Group import (optional)
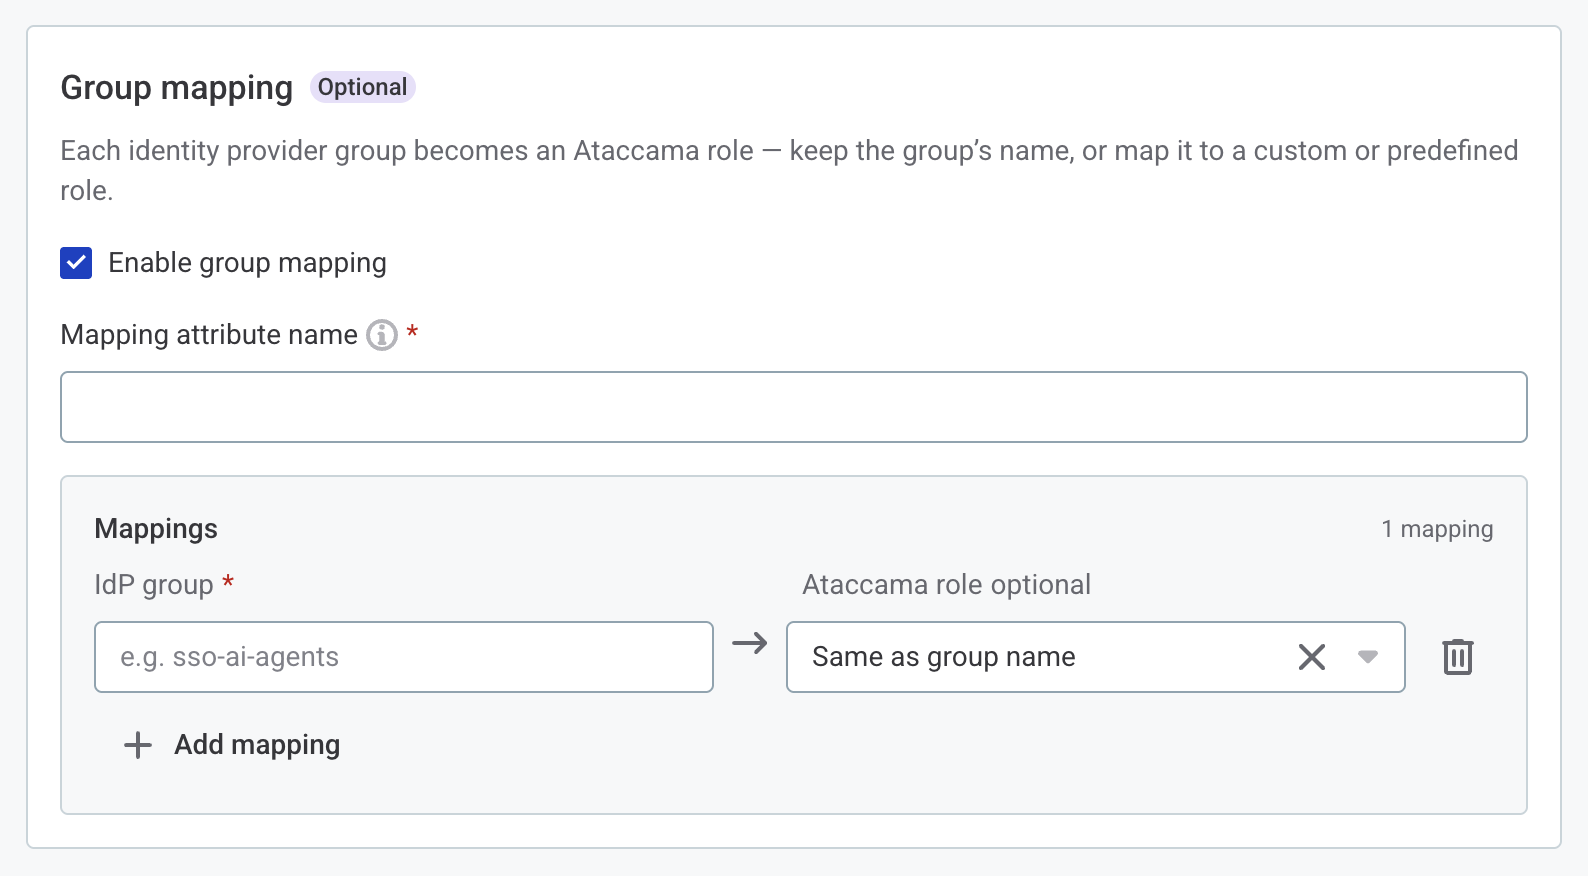
To import Entra ID groups for role assignment in ONE:
-
Select Enable group mapping.
-
In Mapping attribute name, enter
http://schemas.microsoft.com/ws/2008/06/identity/claims/groups(pre-filled if you used Pre-fill for Microsoft Entra). -
Add one mapping per group. For each mapping, provide:
-
IdP group: The Entra ID security group name, as configured in the Entra admin center.
If groups appear in ONE as GUIDs rather than names, the group claim in Entra is configured to emit object IDs. To send display names, edit the application registration manifest as described in step 4 of Configure Entra ID, and confirm the group claim is set to Groups assigned to the application. -
Ataccama role (optional): The ONE role granted to members of the group.
-
If you provide only the IdP group name, the group is recognized in ONE under that same name (Same as group name).
Since organizations often follow their own group naming conventions, you can instead map a group to a different, human-readable role name that is more meaningful within ONE. You can also map a group to a well-known Ataccama role, such as an administrator or AI agent role. For the full list of predefined roles, see Reserved identity provider roles.
You can add or update mappings at any point after the initial configuration.
Troubleshooting
Login fails after configuration
-
Verify that the Reply URL (ACS URL) in Entra ID exactly matches the Redirect URI from the Cloud Portal.
-
Verify that the Entity ID and SSO URL in the Cloud Portal match the values from Entra ID.
User profile attributes are missing or incorrect
-
Confirm that all four attribute claims are configured in Entra ID.
-
Inspect the SAML assertion that Entra ID is sending (see Debug the SAML assertion).
Group memberships are not reflected
-
Verify that the group claim is enabled in Entra ID and that the user’s groups are assigned to the enterprise application.
-
Confirm that the group names in the Cloud Portal Group import exactly match the group names in your directory.
-
If a user belongs to a large number of groups, confirm the limit has not been exceeded. Entra caps group claims at 150 groups for SAML assertions; beyond this, the groups claim is omitted and replaced with a link to the Microsoft Graph endpoint.
Groups appear as GUIDs instead of names
-
Confirm the user has signed out and signed in again after the manifest change; existing sessions cache the previous assertion.
-
Verify the group claim is set to Groups assigned to the application. With Security groups or All groups, the
cloud_displaynameproperty is ignored. -
Re-open the application registration manifest and verify that
additionalPropertiesstill contains"cloud_displayname"undersaml2Token. Some operations in the App Registration can reset the manifest.
Debug the SAML assertion
To inspect what Entra ID is actually sending:
-
Open an incognito browser window and go to Developer Tools > Network tab with Preserve log enabled.
-
Attempt to sign in using the SSO option.
-
Find the POST request that contains
SAMLResponse. -
Copy the value and decode it with a SAML decoder, for example, SAMLTool.
-
Verify that all expected attributes (
name,emailaddress,givenname,surname,groups) are present in<AttributeStatement>.
Was this page useful?