Import Data from a File
Importing data to ONE Data means making the data discoverable in the application. Once your data is loaded, you can enhance it by adding or removing attributes or modifying the table values.
In addition to creating a table from scratch or importing an existing catalog item from the Knowledge Catalog, you can upload a local file from your machine. Currently, you can import files in CSV, TSV, XLS, and XLSX formats.
|
ONE Data is a type of data source in ONE and you can access the metadata of each ONE Data table in the Knowledge Catalog as well. These tables are labeled as ONE Data catalog items. To easily navigate to ONE Data from the Knowledge Catalog, when viewing the table in the Knowledge Catalog, go to Data > Open in ONE Data. |
| You can import tables of up to 50k rows and 200 columns at once. Importing larger datasets is not supported. |
Upload a file
|
The maximum upload size is limited as follows:
|
To import a local file, follow these steps.
-
In ONE Data, select Import > File.
-
Drag and drop a file or select Browse files. You can import only one file at a time.
The following formats are supported: CSV, TSV, XLS, and XLSX.
A validation check is performed before any data is loaded, preventing you from importing files with incorrect formatting. If the file upload fails, check the file structure for validity issues in another text editor. Keep in mind that importing large Excel files (with tens of thousands of records or more) will temporarily affect the application performance. We therefore recommend working primarily with files with a lower number of records. -
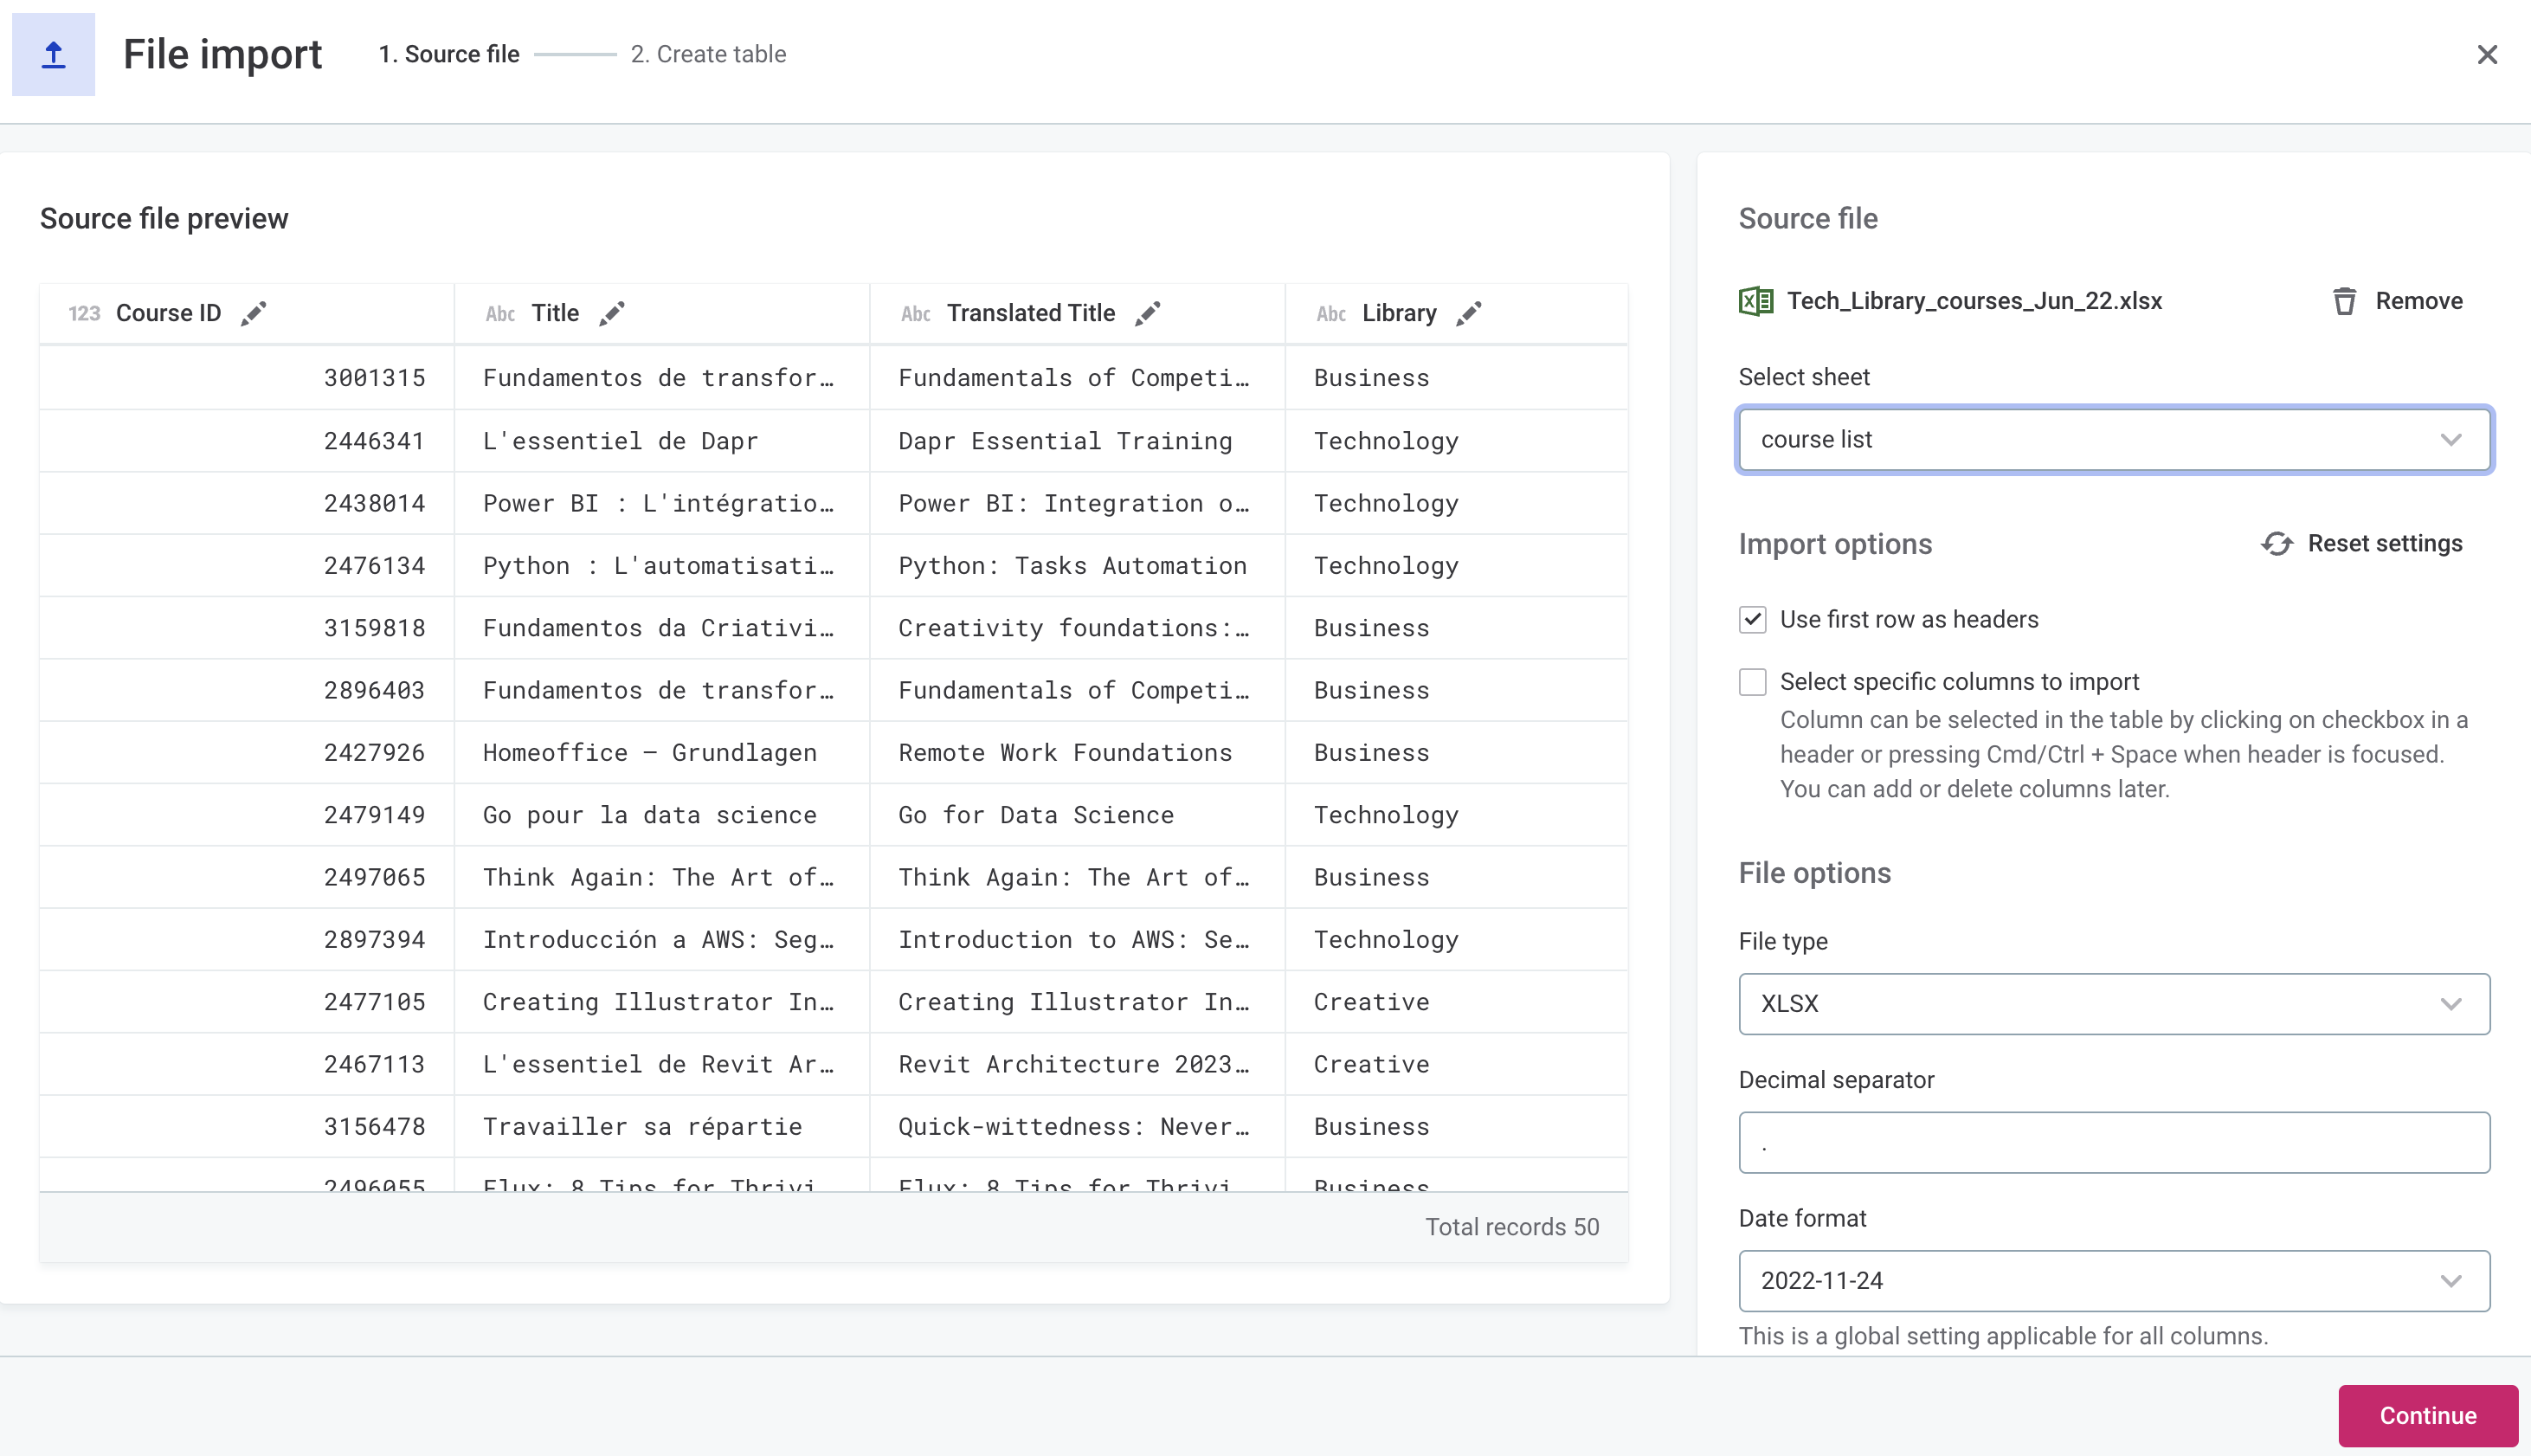
Check the file preview to make sure the data was read correctly. The first valid 50 records are displayed; any invalid records are hidden from the preview and not imported.
-
To edit the attribute name and data type: Double-click the column header and change the values as needed, then select Confirm.
Keep in mind that while you can select any data type for any attribute, records will be labeled as invalid and omitted during the import if the parsing results don’t match what you selected.
The attribute name must be unique. Therefore, you cannot rename an attribute to any of the reserved keywords that are used for technical attributes in ONE Data ( dmm_record_idordmm_rank). -
To change the automatically detected file options: As needed, modify the detected file format, value and decimal separators, date and date time formats, and file encoding.
-
To use the first row as the header: Select Use first row as headers.
-
To import a selection of columns: By default, all columns are selected for import. To enable this option, click Select specific columns to import (or use the keyboard shortcut) and make your selection.
-
To import a specific Microsoft Excel sheet: If you are importing a Microsoft Excel file with more than one sheet, choose the one you want to use in Select sheet. Otherwise, the first sheet in the file is selected.
While preparing the file for upload, you can also remove it and upload another one instead. If you prefer to go back to the default settings, select Reset settings. 
-
-
Once you’re happy with your choice, select Continue.
-
Enter a unique name for the table and optionally a description.
-
Select Create ONE Data table. Depending on the size of your file, it might take a few minutes to get everything ready.
To continue working with the platform in the meantime, select Run in background. This redirects you to the ONE Data Tables tab.
Alternatively, remain on the same page until your ONE Data table is created. A notification lets you know when the import is finished.
-
Your table is now ready for use. See the Next steps section for more tips about how to proceed.
Next steps
Once you have successfully created a ONE Data table, start exploring what ONE Data and ONE can offer you.
-
Change the structure or the contents of your table at any point from the Data tab of your table, as explained in Get Started with ONE Data, sections Edit table model and Edit data inline.
-
Check the data quality of your table (dq-evaluation-in-on-data.adoc) or learn how to use it in a rule (Validate Data using ONE Data Tables).
-
If you imported invalid records, learn how to use ONE Data to resolve your data quality issues (Data Remediation with ONE Data).
-
If you want to export the data back to the origin data source, see Get Started with ONE Data, section Export data to another data source.
-
Or, share the table with your team members and collaborate with them using tasks and comments. See Get Started with ONE Data, sections Permissions and access and Tasks and comments.
Was this page useful?
