Get Started with Data Quality
Welcome to Ataccama ONE Data Quality. Here we’ll guide you through the key features of Ataccama ONE Data Quality and help you gain a basic understanding of the application.
Once you learn your way around the platform, start using it for your own projects or explore other topics in more depth.
|
How to use the guide?
You can follow the steps one by one, in the order in which they’re given, or choose the topic you’re most interested in and revisit other sections later. Don’t hesitate to make adjustments to the steps along the way. This will give you a better idea of the actual workflow as the process is often not linear and consists of multiple iterations. This guide assumes some initial data (Demo content pack) is already available in the application. |
Before you start
We recommend you begin with Get Started with Catalog and Glossary as this guide builds on the concepts described there. However, you’ll be able to follow this tutorial without completing all the steps related to Catalog and Glossary.
Throughout this guide, you’ll mainly be working with the following areas of the application: Data Quality and Business Glossary:
-
Data Quality is your hub for data quality monitoring and developing your library of DQ and other rules. It consists of several sections: Rules, Components, Monitoring Project, Lookups.
-
Business Glossary is the centralized storage for business terms.
Next, let’s define the data quality concepts we’ll be working with.
-
Rules help you validate your data based on a defined set of conditions. They are split into two categories:
-
DQ evaluation rules evaluate the quality of catalog items and their attributes during DQ evaluation. As a result, DQ metrics are available on catalog item, attribute, and term level.
-
Detection rules identify business domains. As a result, appropriate business terms are applied to attributes.
Rules don’t apply directly to catalog item attributes but rather to terms that are assigned to those attributes. This is why mapping rules to terms is a crucial step when configuring automatic term detection or DQ evaluation.
-
-
DQ dimensions classify rules based on the implemented logic type, with each rule belonging only to one DQ dimension. The Overall Quality metric found in DQ results represents the aggregated score of contributing DQ dimensions.
-
Monitoring projects evaluate the data quality of selected catalog items and monitor it over time. Data is evaluated using the following:
-
DQ checks are what DQ rules are called within monitoring projects. The main difference here is that DQ checks apply directly to data instead of business terms.
-
Structure checks allow you to keep track of missing attributes or changes in the attribute data type.
-
Anomaly detection is powered by AI and it alerts you of possible inconsistencies in your data. Confirming or dismissing the findings helps improve the accuracy over time.
-
|
Recommended resources
|
Search for data assets
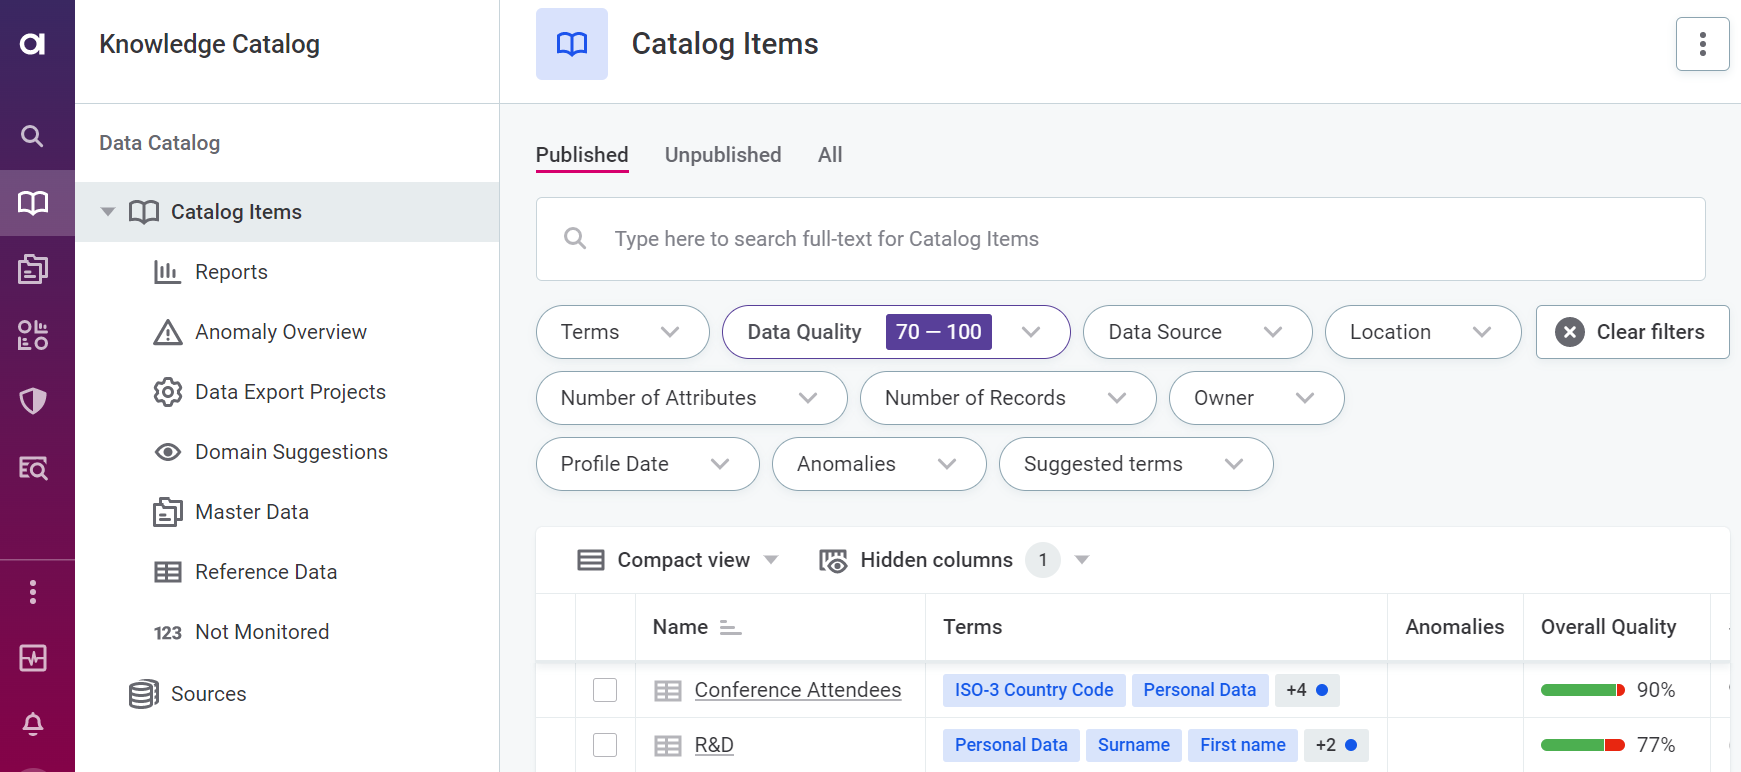
To find the data asset you want to work with, use the full-text search, filters, or a combination of both. When DQ evaluation results are available, you can include these in your search criteria to quickly find assets with data issues.
Try using the Data Quality filter to locate all data assets with overall quality higher than 70%.
|
Recommended resources
|
Check DQ insights
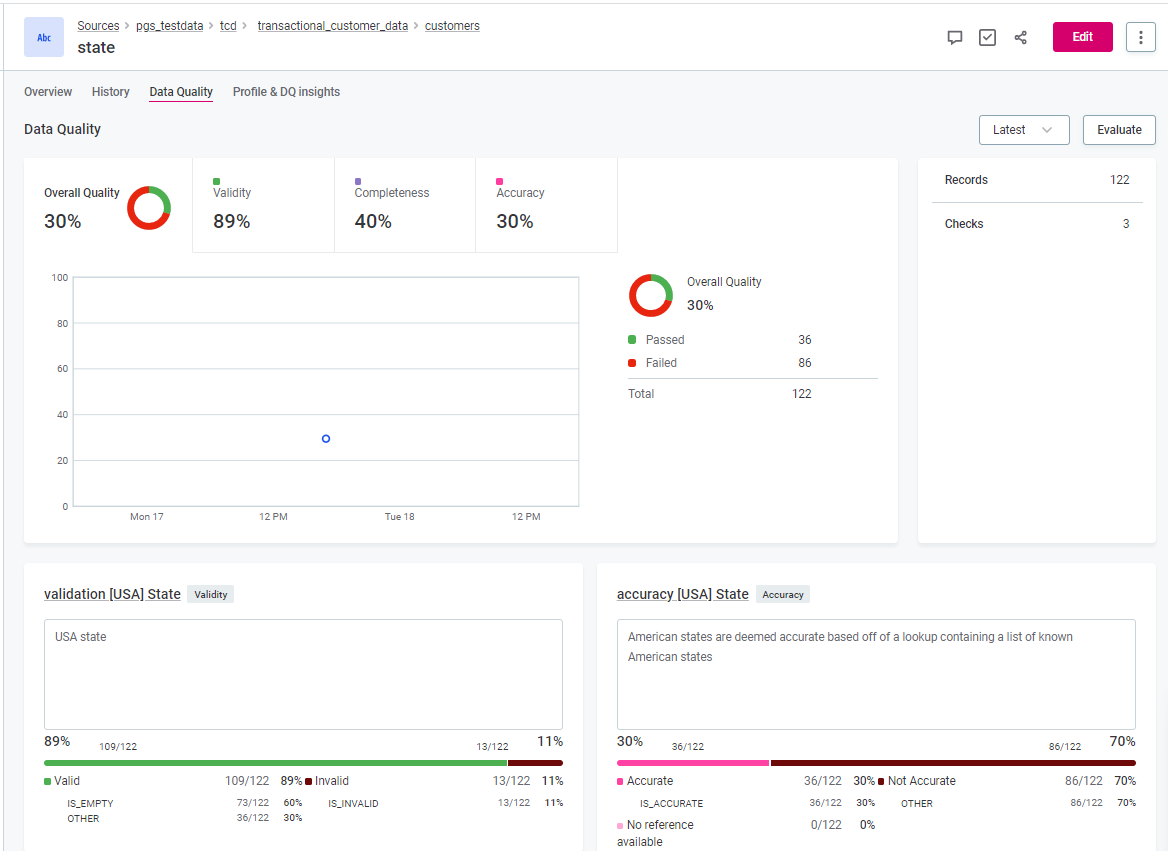
DQ insights tell you about the quality of your data and how it measures against the defined rules. The key metric here is Overall Quality, which aggregates results from all globally configured DQ dimensions. Think of DQ dimensions as different aspects of the data, such as validity, accuracy, uniqueness, or completeness.
DQ insights are available from the Knowledge Catalog screen as well as throughout the platform, on the Data Quality tab of catalog items, attributes, or business terms.
When viewing catalog item DQ results (Catalog Item > Data Quality), select a specific attribute to quickly access detailed DQ results.
|
Recommended resources
|
Configure term detection
Data categorization is one of the first steps towards knowing your data better. You can manually assign new terms to data assets or automate the process using detection rules.
| For a summary of how to add terms manually, see Get Started with Catalog and Glossary, section Assign business terms. |
Detection rules function independently from AI-powered term detection, which generates term suggestions. These rules let you define a stricter set of conditions for recognizing business domains, so you can verify the value format, look for values from a reference list, and so on. We’ll go over how to create a detection rule in the following section.
Whether a term is assigned to catalog item attributes based on a detection rule depends on two factors:
-
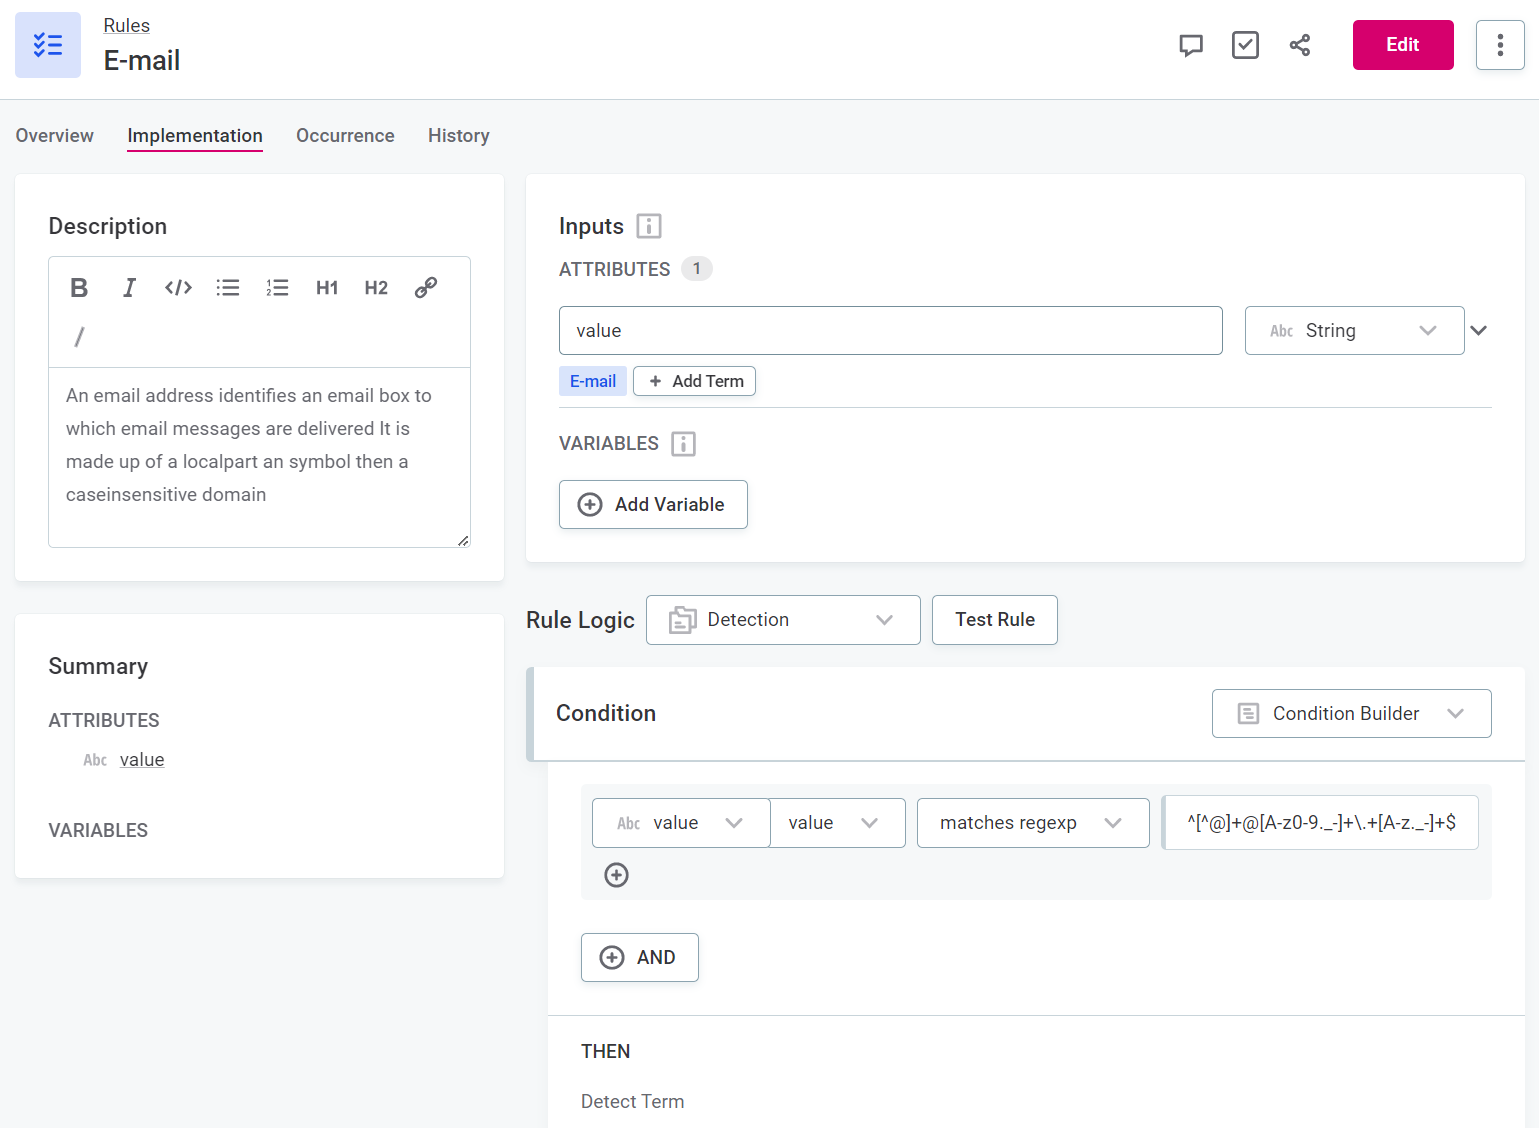
The rule logic: This is how the application identifies the attributes to which a term should be applied.
-
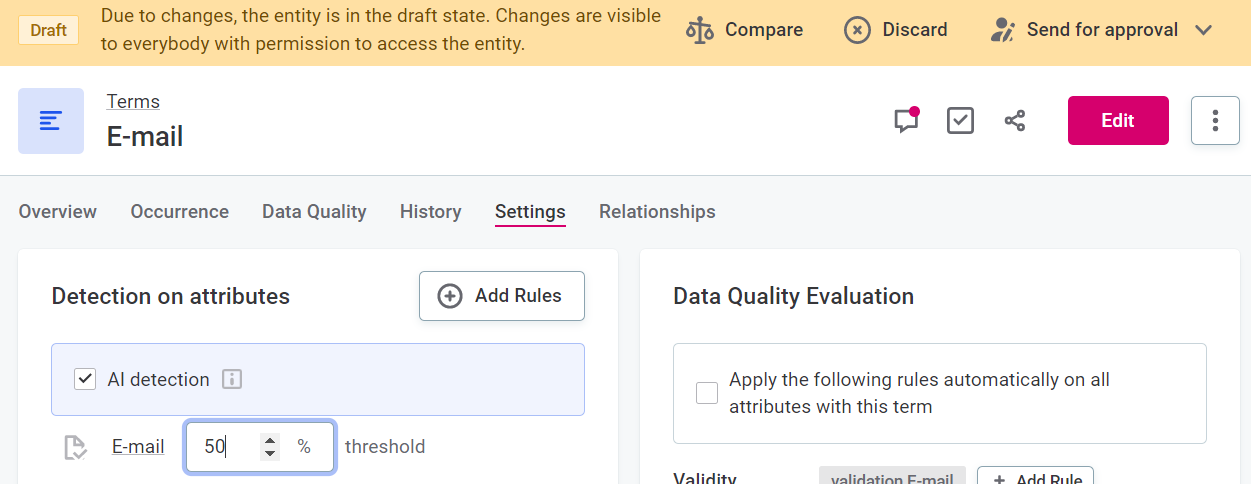
The detection threshold: For each rule, you specify the percentage of values in the attribute that must fulfill the rule conditions. If this threshold is not met, the term is not assigned.
|
Term suggestions are always a result of AI detection. If this is enabled for a term (the default setting), the platform proposes this term to be assigned to data assets based on similarities with other assets with assigned terms. In other words, if catalog item attributes with already assigned business terms are found to be similar enough to attributes in another data asset, then these same terms appear as term suggestions on those attributes. You then determine how accurate the suggestions are by approving or rejecting them, as described in the section Resolve term suggestions in Get Started with Catalog and Glossary. |
|
Recommended resources
|
Create a detection rule
Defining automatic term detection for a specific term consists of several steps:
-
Create a rule and define the rule implementation logic, that is, the conditions that the records are evaluated against.
-
Test the rule.
-
Map the rule to the term.
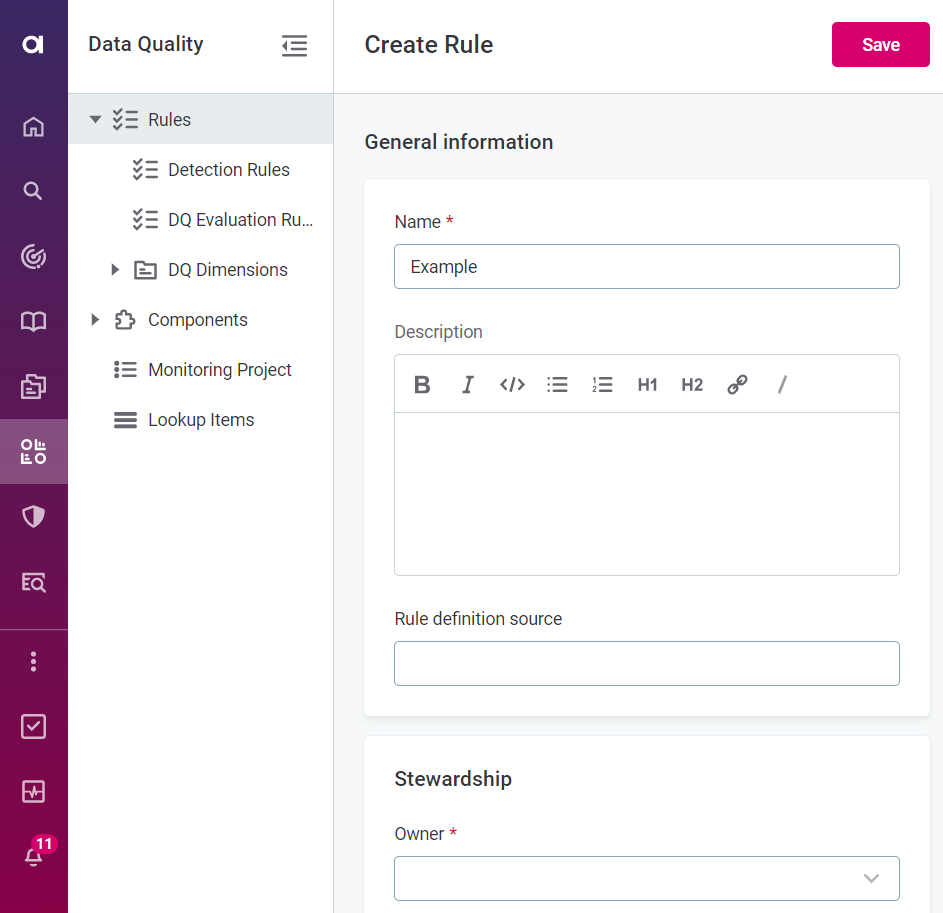
To start, go to Data Quality and on the Rules tab, select Create.

Enter a rule name, provide a description, and specify the owner of the rule.
|
Use an existing detection rule as a template for your custom rule definition. In Detection rules, choose a rule you want to work with and using the three dots menu select Duplicate. Modify the information as needed and save your changes. 
|
Configure detection logic
Configure or edit the logic of your rule from the rule Implementation tab. If you’re creating a rule from scratch, select Detection as Rule Logic.
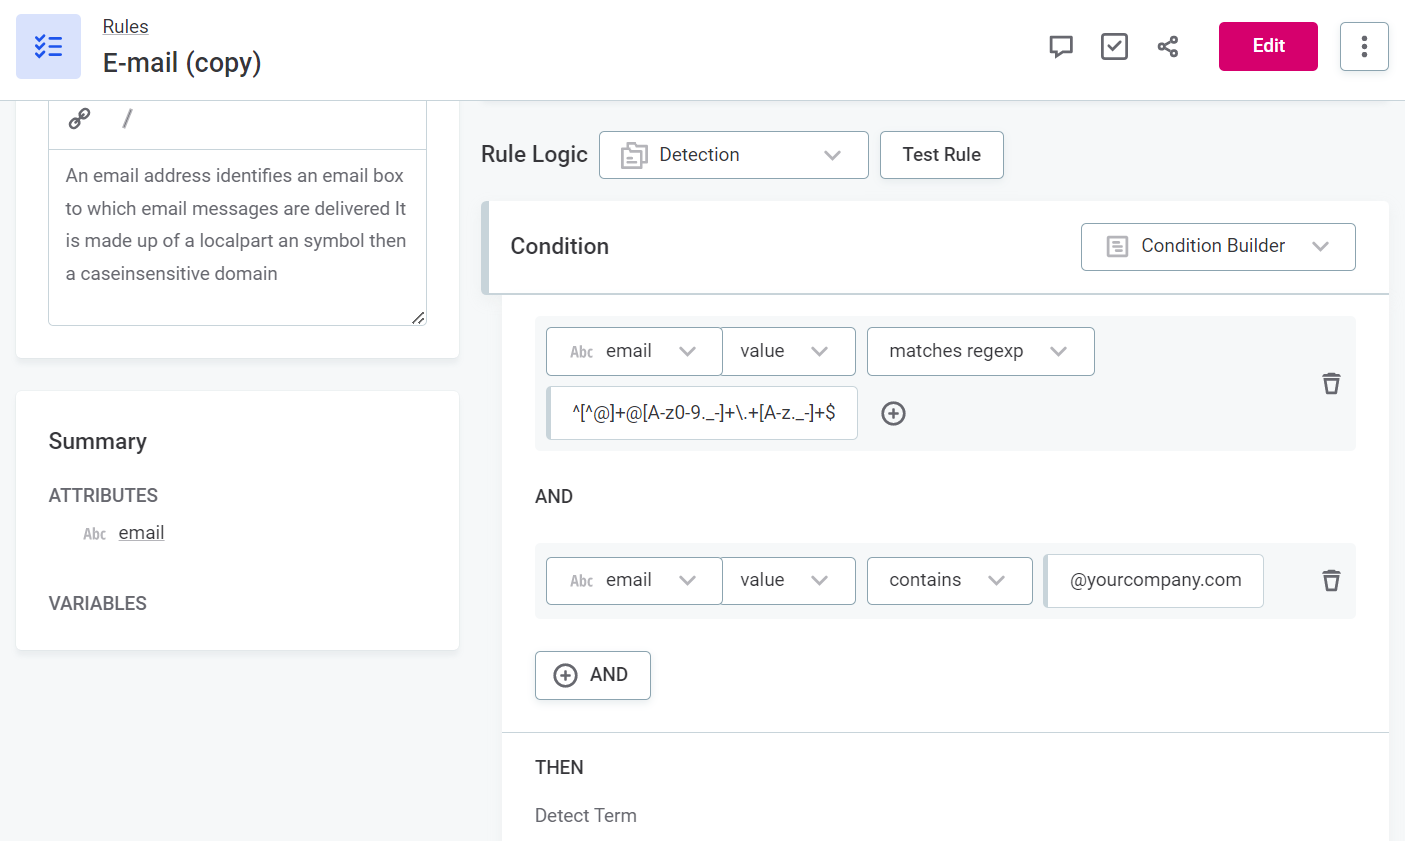
You can add as many conditions as needed. Keep in mind that if you’re using the Condition Builder to define the rule logic, a record must pass all the conditions to be labeled as valid (the default logical operator between conditions is AND).
For example, create a copy of the E-mail rule and add a condition to check whether the email belongs to your company’s domain.
| If your detection rule should be less strict and use the logical operator OR, try the Advanced Expression mode. |
| Take a moment to explore what other conditions you can use in your detection logic. |
|
Use the attribute Pattern Analysis results to create a detection rule in a few clicks. Let’s see how this would work for the catalog item customers. Navigate to the catalog item and open the Profile & DQ Insights tab. Select the email attribute and check the Pattern Analysis results. In the three dots menu, select Use results in rule. Choose all patterns that apply and finish creating the rule. The rule type should be Detection. 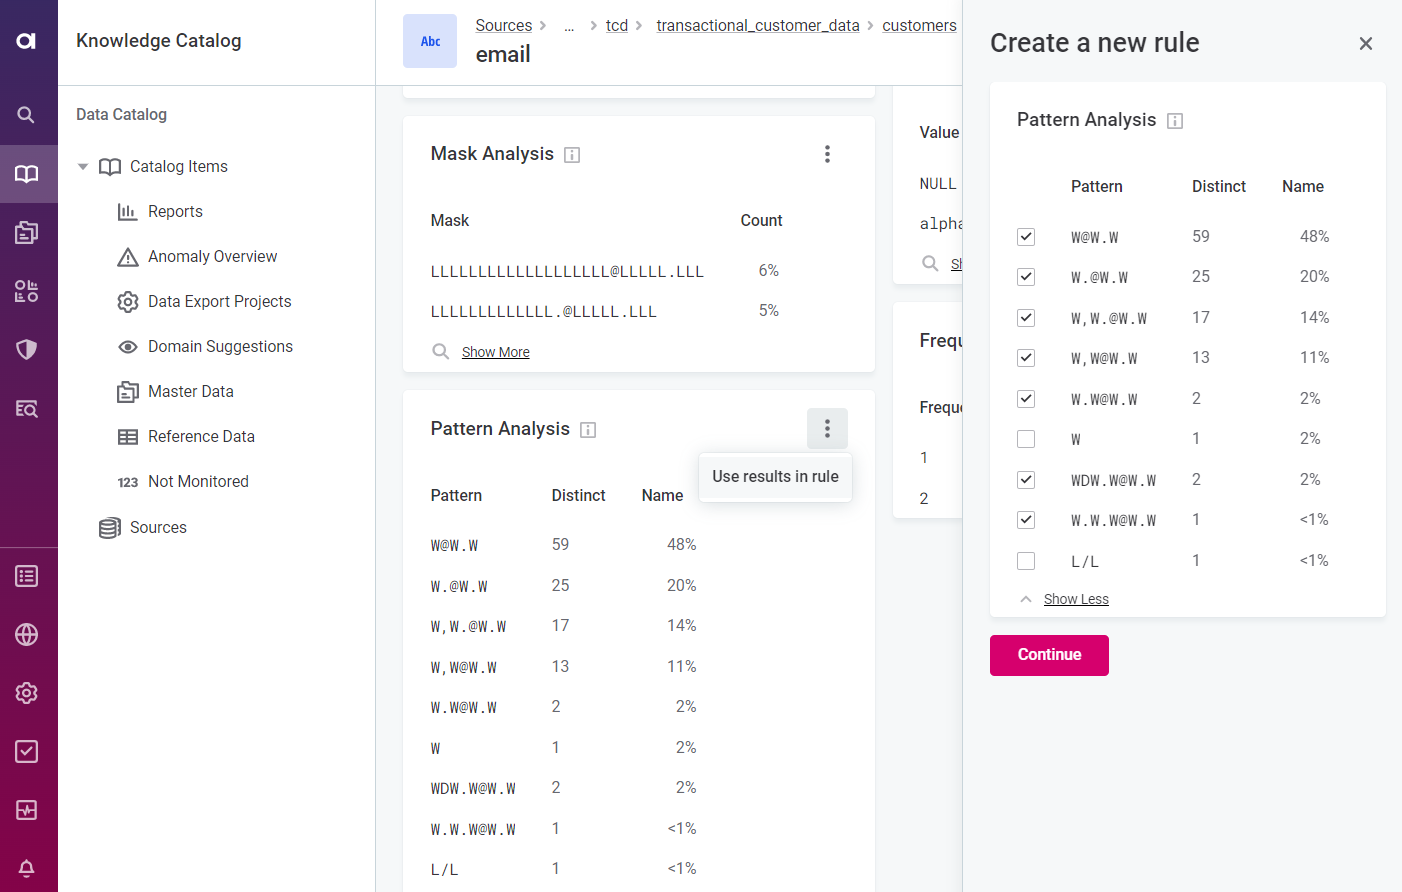
Save your changes. Test your rule first before sharing it with other users. 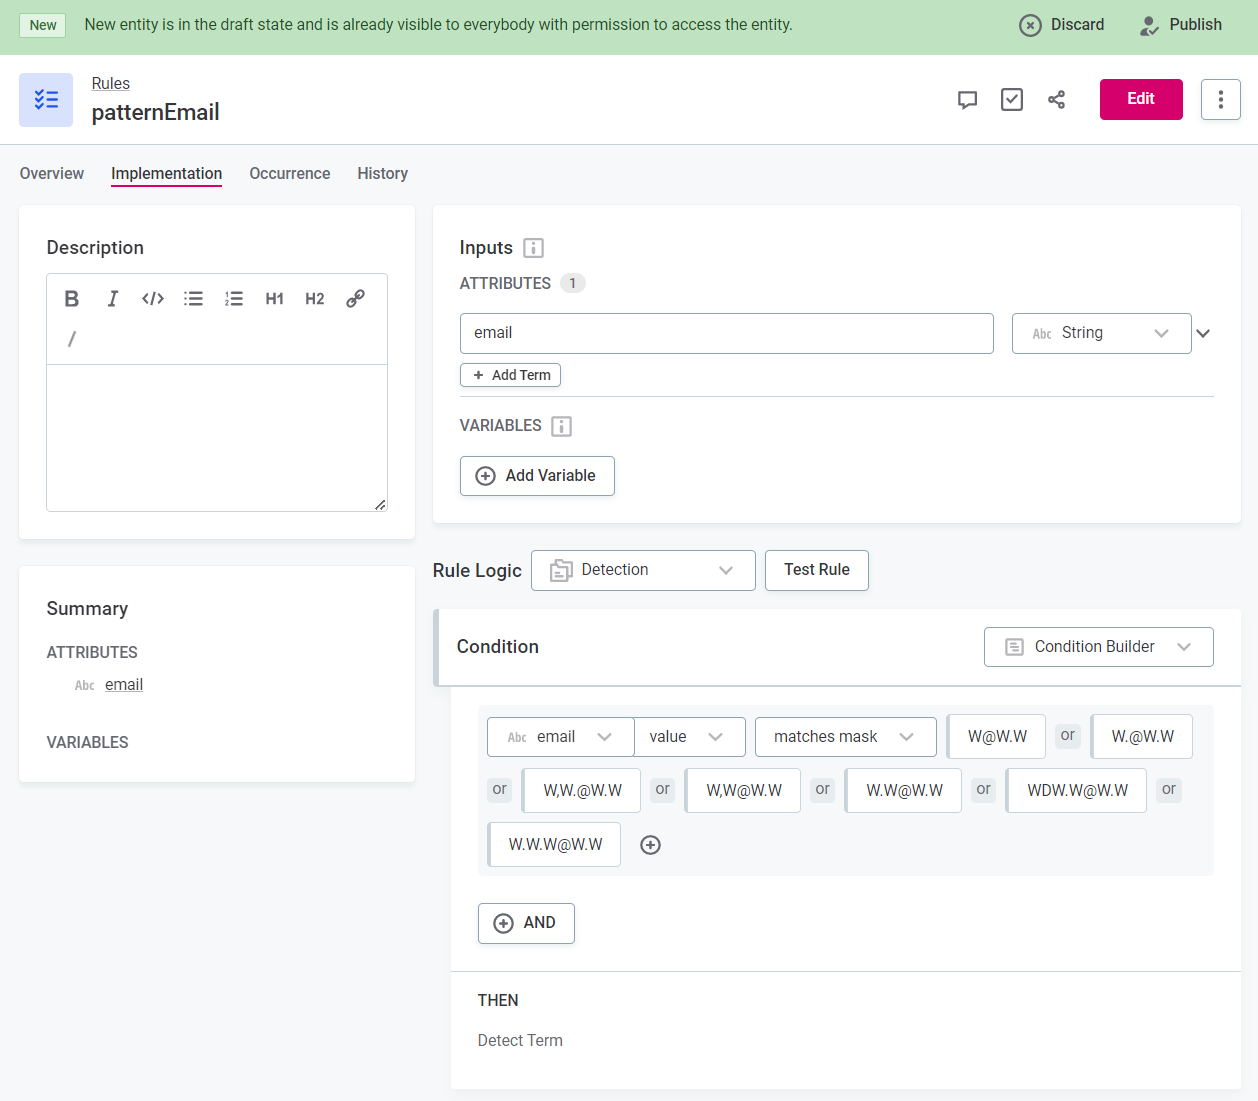
|
Test detection rule
Use the Test Rule function to verify your rule works as intended before making it available to other users.

Ideally, test it out on multiple values, both those that are expected to pass the rule as well as those that should fail.
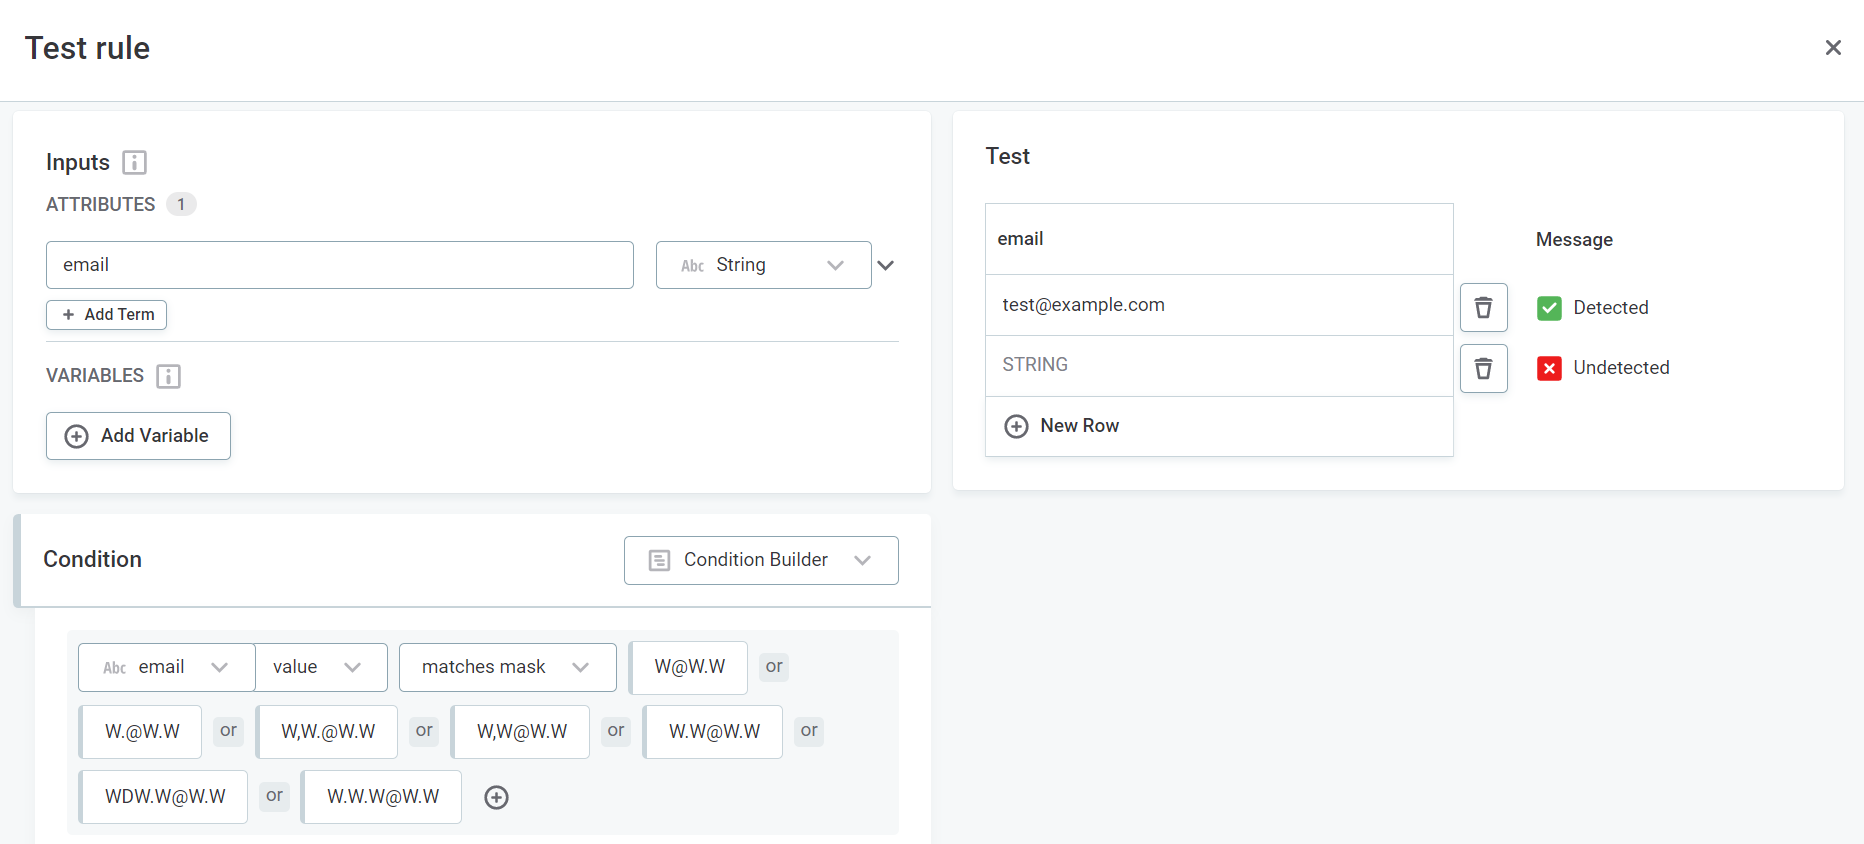
When the detection rule is ready for use, finalize your changes by publishing it. Not all users have the necessary permissions for this. If that is the case, submit your draft for publishing instead.
To share your rule with other users, use the Share option (see the section Share access to data assets in Get Started with Catalog and Glossary).
| For a refresher, see the section Publish your changes in Get Started with Catalog and Glossary. |
Map detection rule to business term
Once your new detection rule is published, you can now map the rule to the term so that it is used automatically during term detection. As a result, the term will be assigned to all matching attributes that meet the detection threshold.
In Business Glossary, find and open the term for which you configured the detection rule. On the Settings tab, in Detection on attributes, add the rule and set a detection threshold. This is the percentage of attribute records that must pass the rule in order for the business term to be assigned.
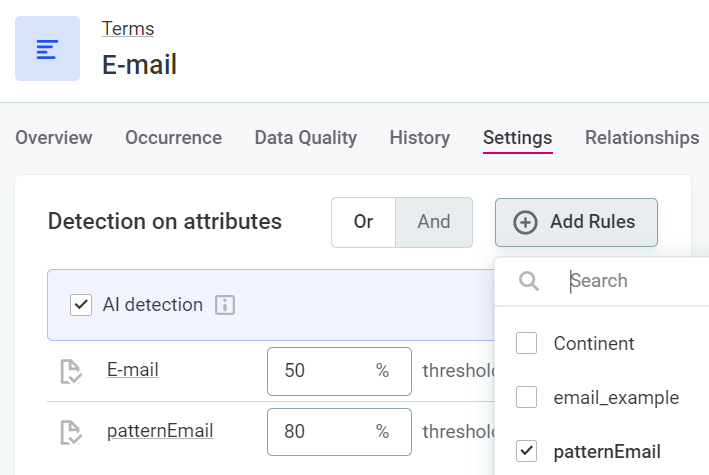
You can add as many detection rules with different thresholds as needed. However, one detection rule is enough in most cases.
Once you’re happy with the changes, don’t forget to get them published.
|
Recommended resources
|
Define automated DQ evaluation
Let’s take a deeper dive into DQ evaluation. Here we’ll look into how DQ insights are calculated and what business terms have to do with data quality.
As we explained previously, business terms are the basis for data categorization and they make automated DQ evaluation possible. That’s why term detection is so important: it helps us make sure the data is correctly categorized and can be further processed.
DQ evaluation also works primarily with terms and rules. We map domain-specific DQ rules to a particular term; in other words, we provide instructions about how to validate data.
Then, when you run DQ evaluation, DQ rules are applied to attributes to which the given term was assigned. After the data quality is calculated, validation results are shown on attributes, representing the number of records that passed all validations and those that failed a particular rule condition (see Configure validation logic).
Each rule evaluates one DQ dimension, that is, one aspect of the data, such as validity, accuracy, uniqueness, and/or completeness. However, one term can have multiple rules for each dimension.
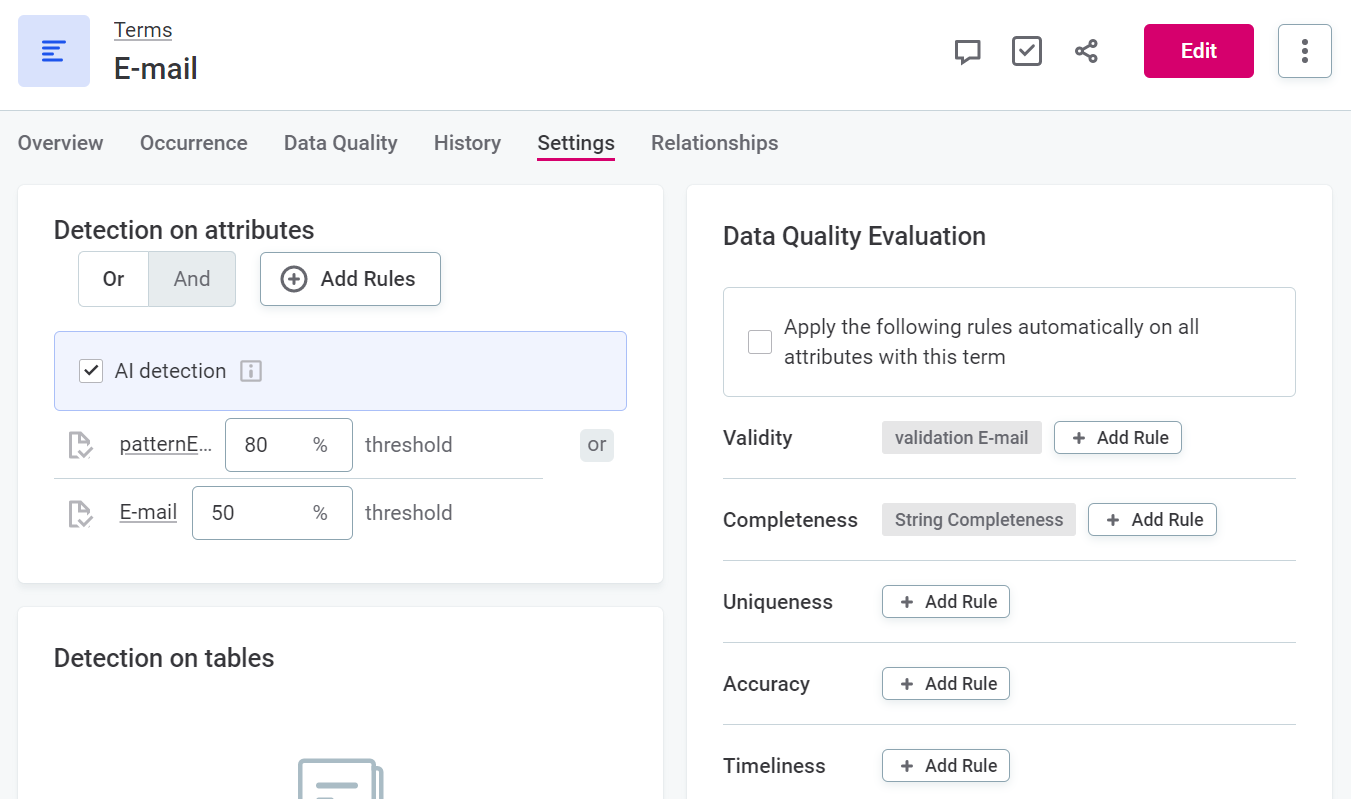
For example, when checking the data quality of an attribute containing email addresses of your customers, you might be interested in knowing whether there are any empty values, whether all values are valid email addresses, whether the same email has been used more than once, and so on. In this case, you would have a separate DQ rule for each of these points.
| For general validation, use the Validity dimension. |
|
Recommended resources
|
Create a DQ rule
To set up automated DQ evaluation, we need to do the following:
-
Create a rule and define the rule implementation logic, that is, the conditions that the records are evaluated against.
-
Test the rule.
-
Map the rule to the term.
Creating DQ rules is similar to creating detection rules. However, DQ rules typically have more complex implementation logic, composed of multiple conditions.
To start, go to Data Quality and on the Rules tab, select Create.

Enter a rule name, provide a description, and specify the owner of the rule.

|
Use an existing DQ rule as a template for your custom rule definition. In Detection rules, choose a rule you want to work with and using the three dots menu select Duplicate. Modify the information as needed and save your changes. |
Configure validation logic
Configure or edit the logic of your rule from the rule Implementation tab. If you’re creating a rule from scratch, select the appropriate rule dimension as Rule Logic.
Rule logic includes the following: inputs, variables, conditions.
Inputs
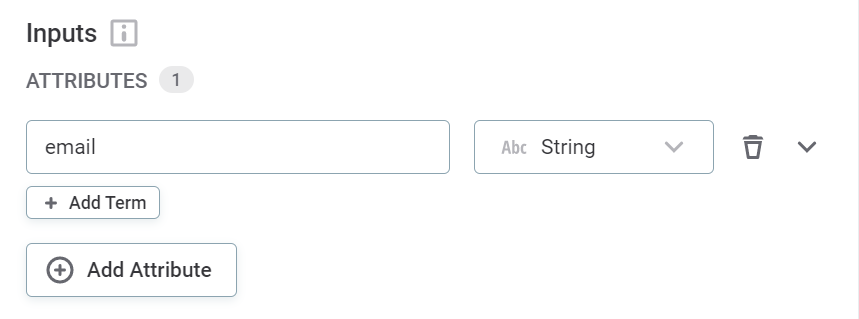
This is where you define placeholders for one or more input attributes of specific types that will be used in the validation logic.
For domain-based validation, you should have only one input. While you can leave the default value here, we recommend renaming it to something more meaningful as that helps keep the rule logic easy to understand for other users too.
Multiple inputs are required if you want to check the data from one attribute based on the values from another attribute or when you need to check the combination of values from several attributes. In this case, create as many inputs as there are attributes you will be validating. Rules with multiple inputs are used for data quality validation and monitoring in monitoring projects.
Variables
Variables store transformed input data. If your input need to be transformed in some simple way before it is validated (for example, maybe you want to remove all digits or change the data type to string), create a variable and then use it in rule conditions instead of the input attribute.

Conditions
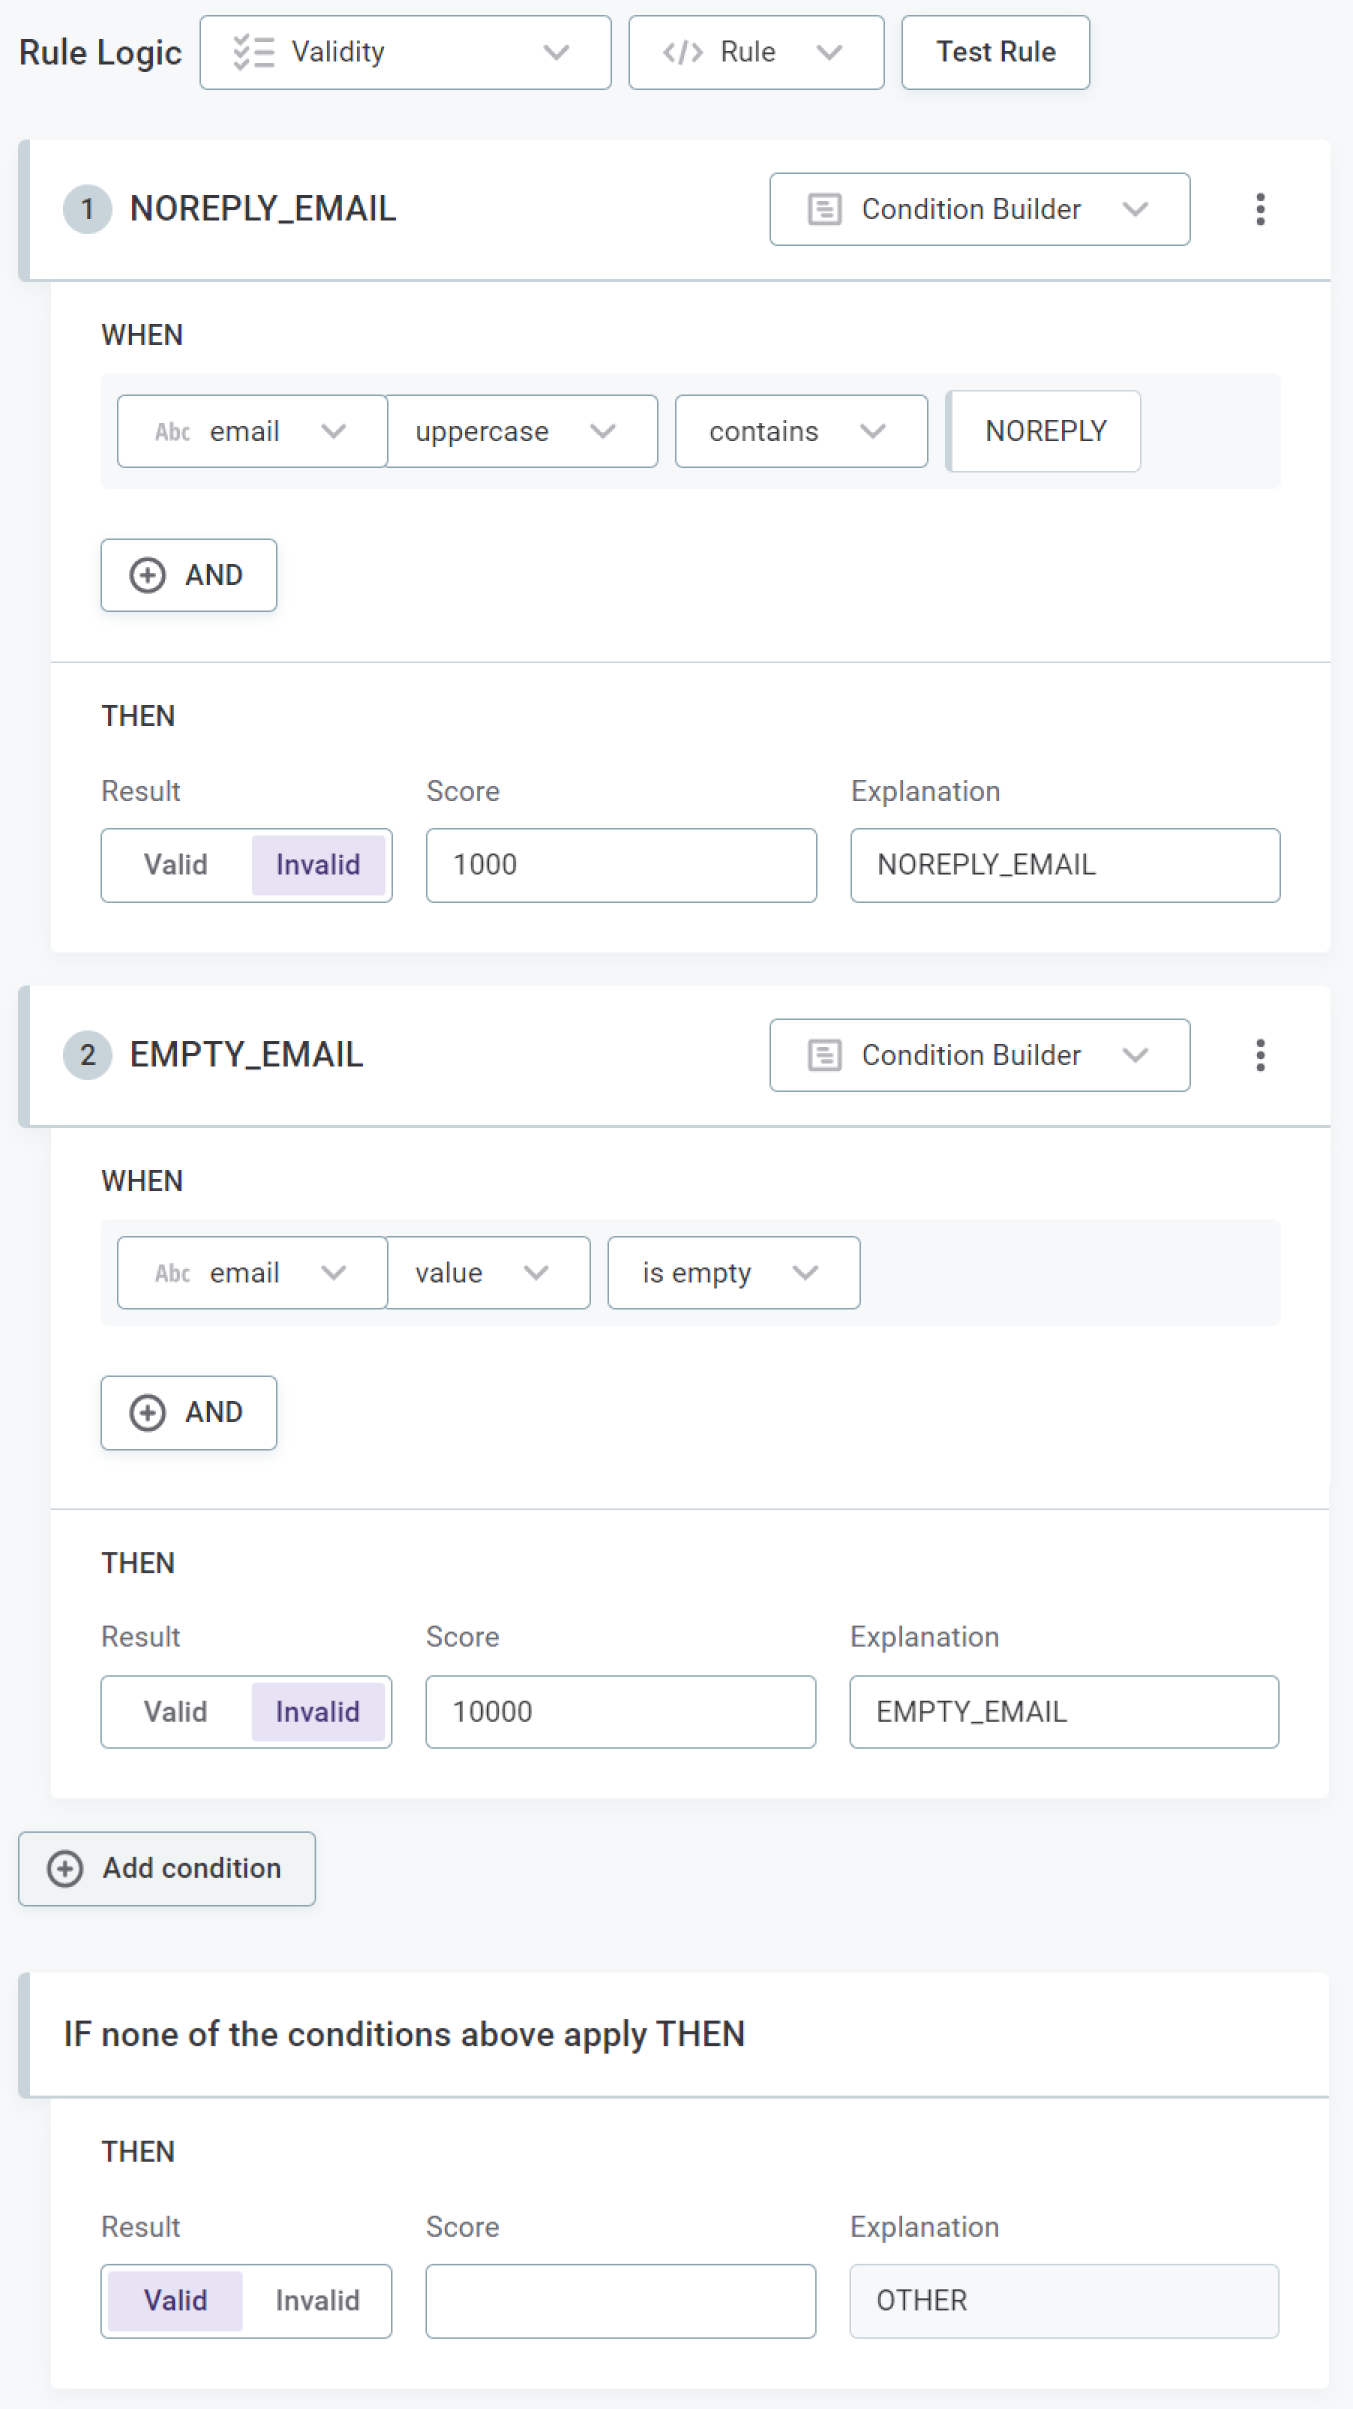
Here you define your validation logic. You can add as many conditions as needed.
When defining rule results, specify an explanation that would make sense to you when further analyzing data quality results.
The convention is to use uppercase characters with underscores as word separators.
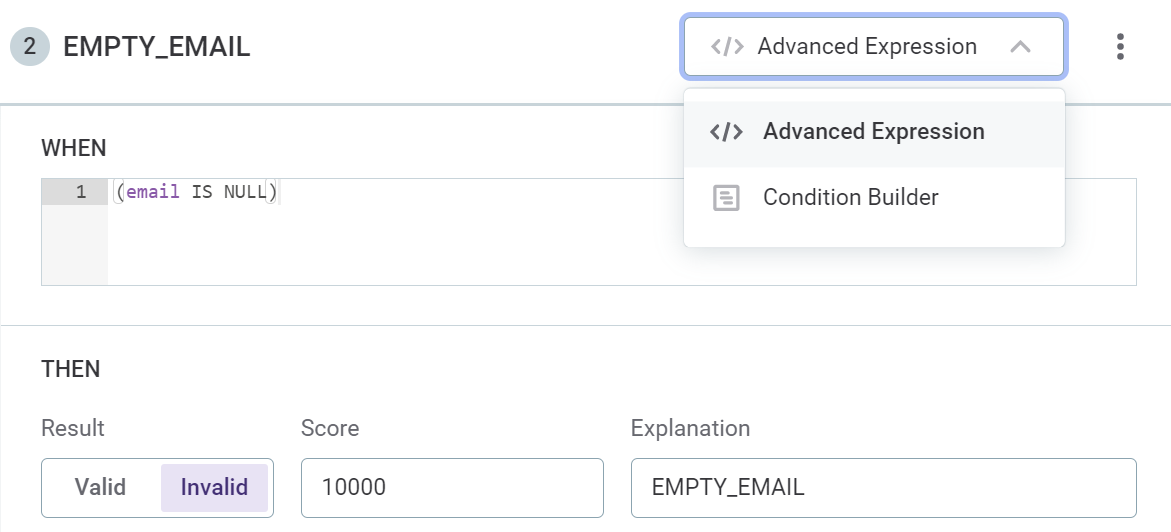
For example: NOT_IN_LOOKUP, INVALID_FORMAT, IS_EMPTY.
| Find more details about how to configure rule logic in Create DQ Evaluation Rule. |
| Take a moment to explore what other conditions you can use in your validation logic. |
|
Looking for something more advanced? Try this:
|
|
Use the attribute Pattern Analysis results to create a DQ rule in a few clicks. Let’s see how this would work for the catalog item customers. Navigate to the catalog item and open the Profile & DQ Insights tab. Select the email attribute and check the Pattern Analysis results. In the three dots menu, select Use results in rule. Choose all patterns that apply and finish creating the rule. The rule type should be Data Quality. 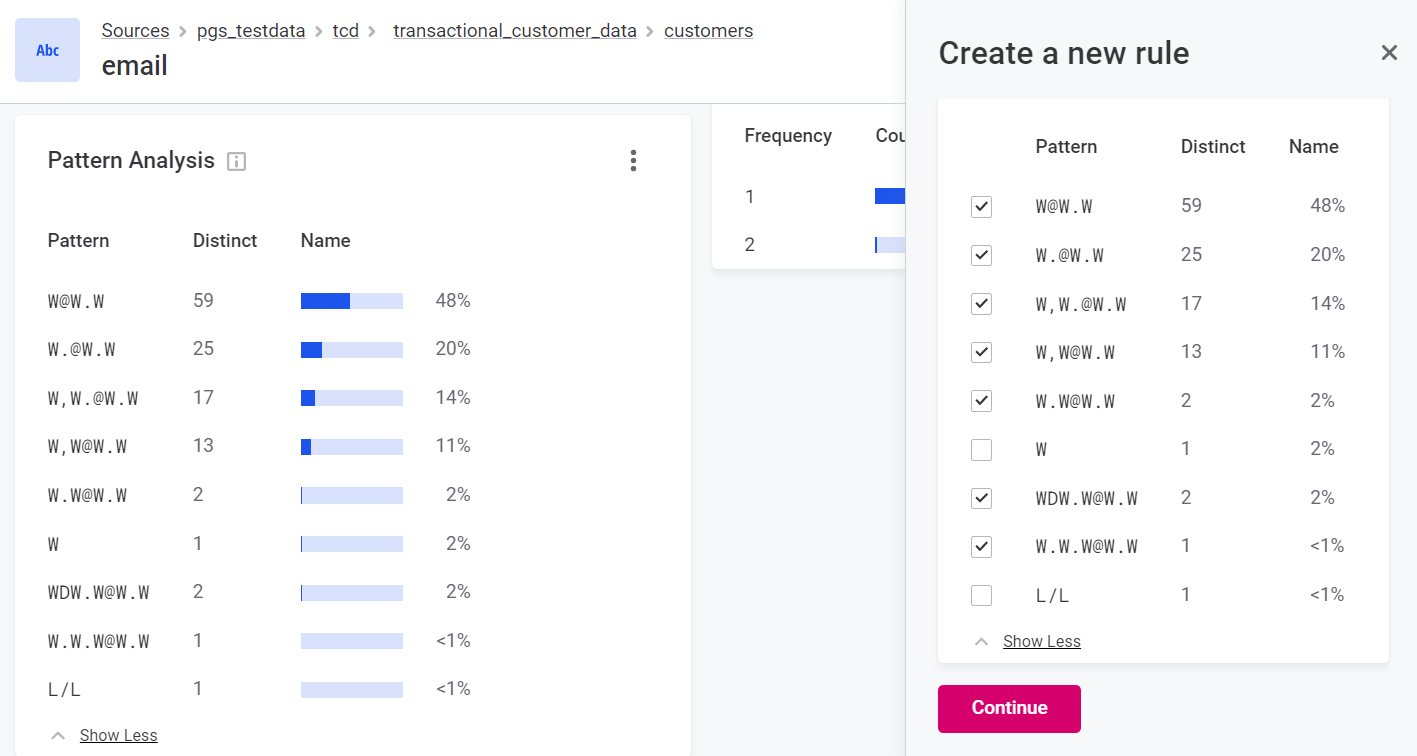
Save your changes. xref:Test your rule first before sharing it with other users. 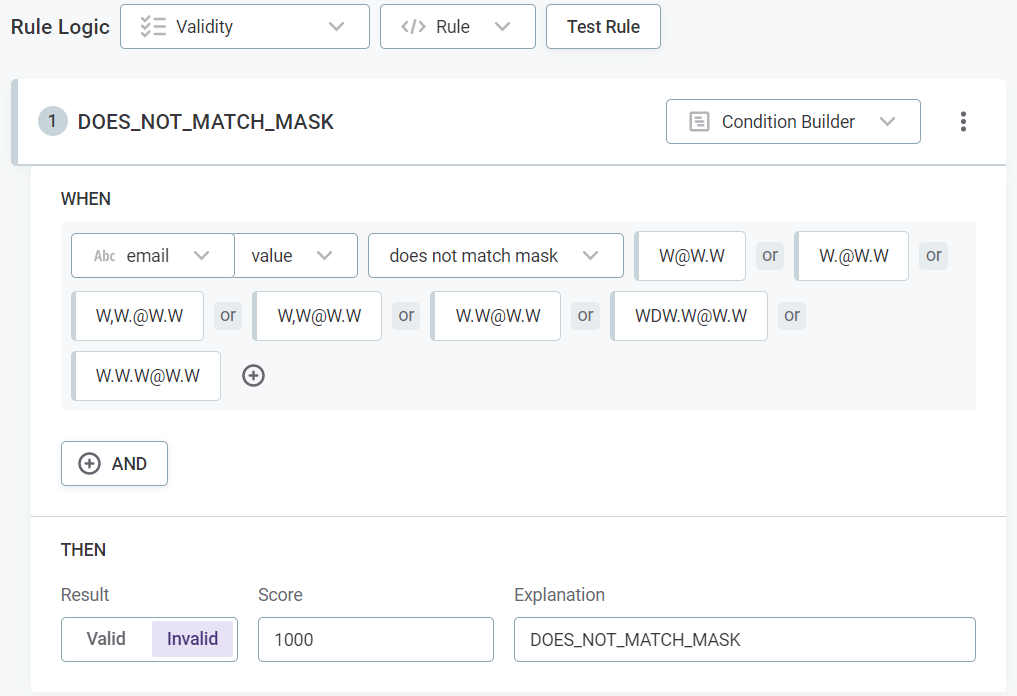
|
Test DQ rule
Use the Test Rule function to verify your rule works as intended before making it available to other users. Ideally, test it out on multiple values, both those that are expected to pass the rule as well as those that should fail.
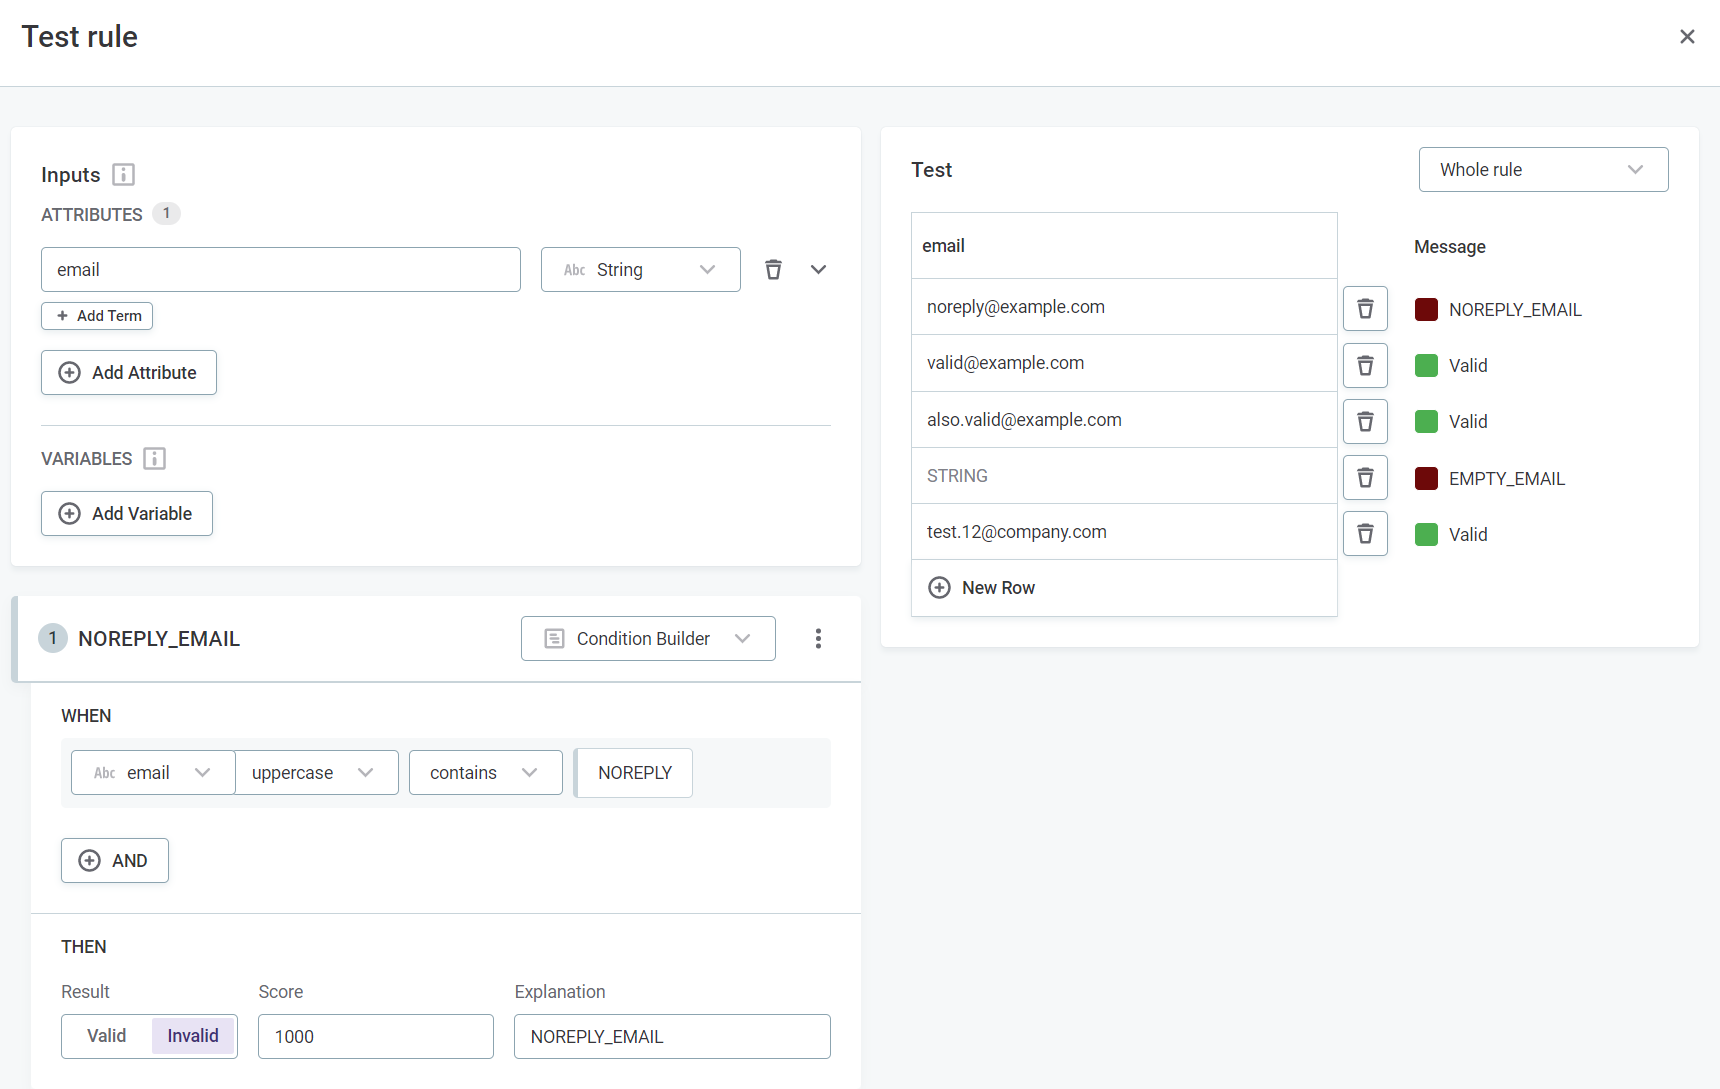
When the DQ rule is ready for use, finalize your changes by publishing it. Not all users have the necessary permissions for this. If that is the case, submit your draft for publishing instead.
To share your rule with other users, use the Share option (see the section Share access to data assets in Get Started with Catalog and Glossary).
| For a refresher, see the section Publish your changes in Get Started with Catalog and Glossary. |
Map DQ rule to business term
Once your new detection rule is published, you can now map the rule to the term so that it is used automatically during DQ evaluation. As a result, this rule will be used when calculating the data quality of attributes with this term assigned and records will be labeled as valid or invalid accordingly.
In Business Glossary, find and open the term that you want to work with. On the Settings tab, in Data Quality Evaluation, add the rule to the appropriate DQ dimension. For general validation, use the Validity dimension.
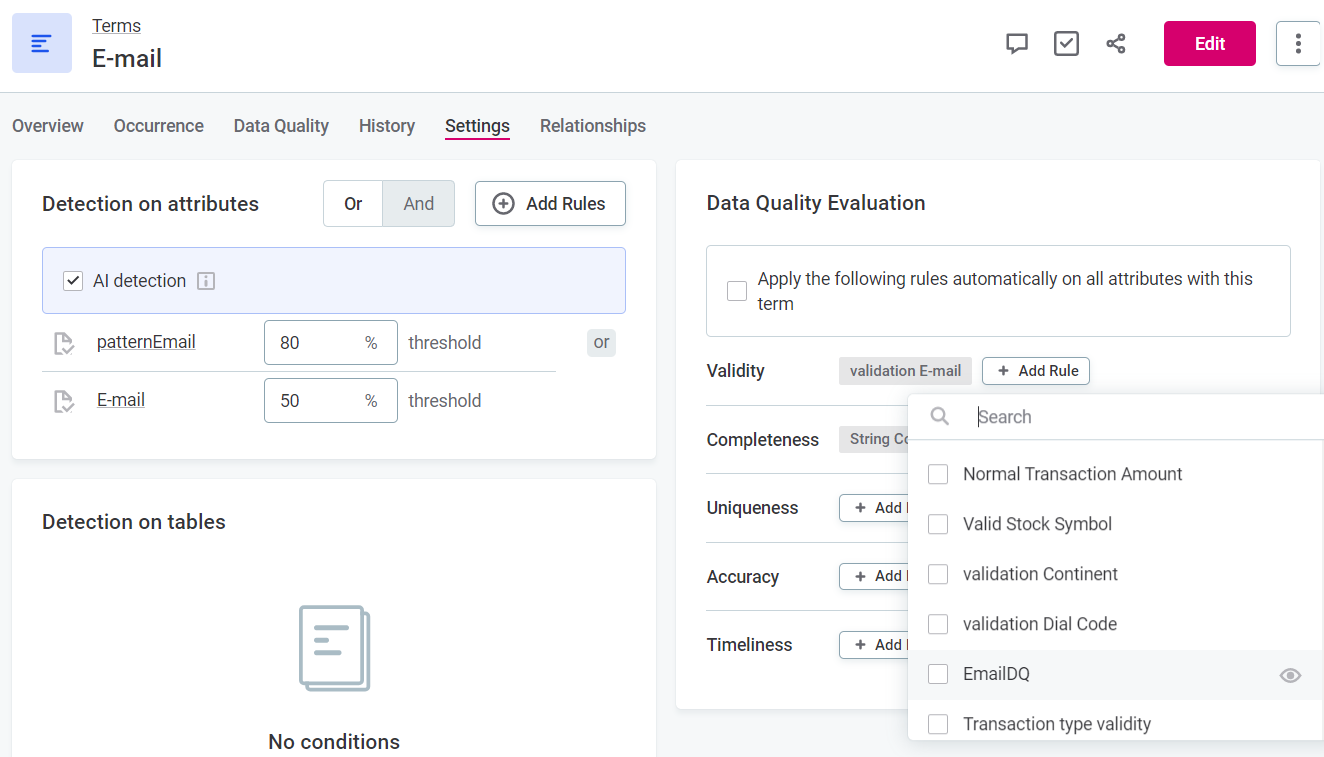
You can add as many validation rules as needed.
Once you’re happy with the changes, don’t forget to get them published.
|
Recommended resources
|
Monitor data quality
In addition to DQ evaluation that you run ad hoc, ONE also lets you track the most important metrics in catalog items over time. This way, you’re alerted about potential issues in your data in real-time.
You can create as many monitoring projects as needed.
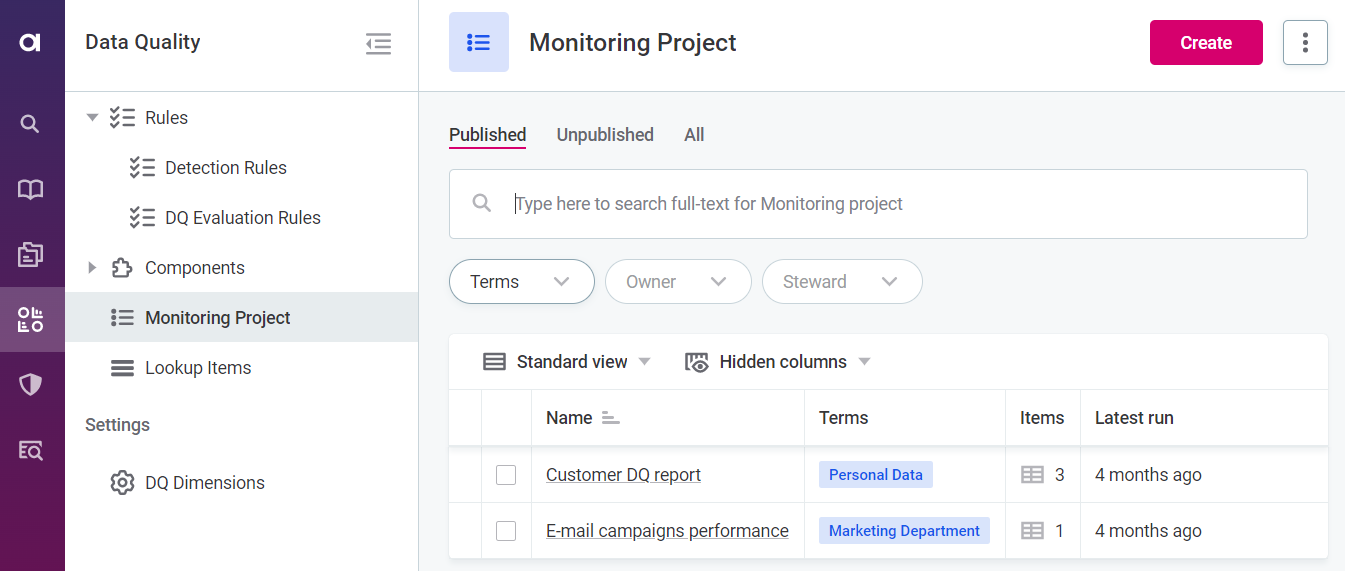
Create a monitoring project
To create a new monitoring project, go to Data Quality > Monitoring Project and select Create. Next, enter a name and description.
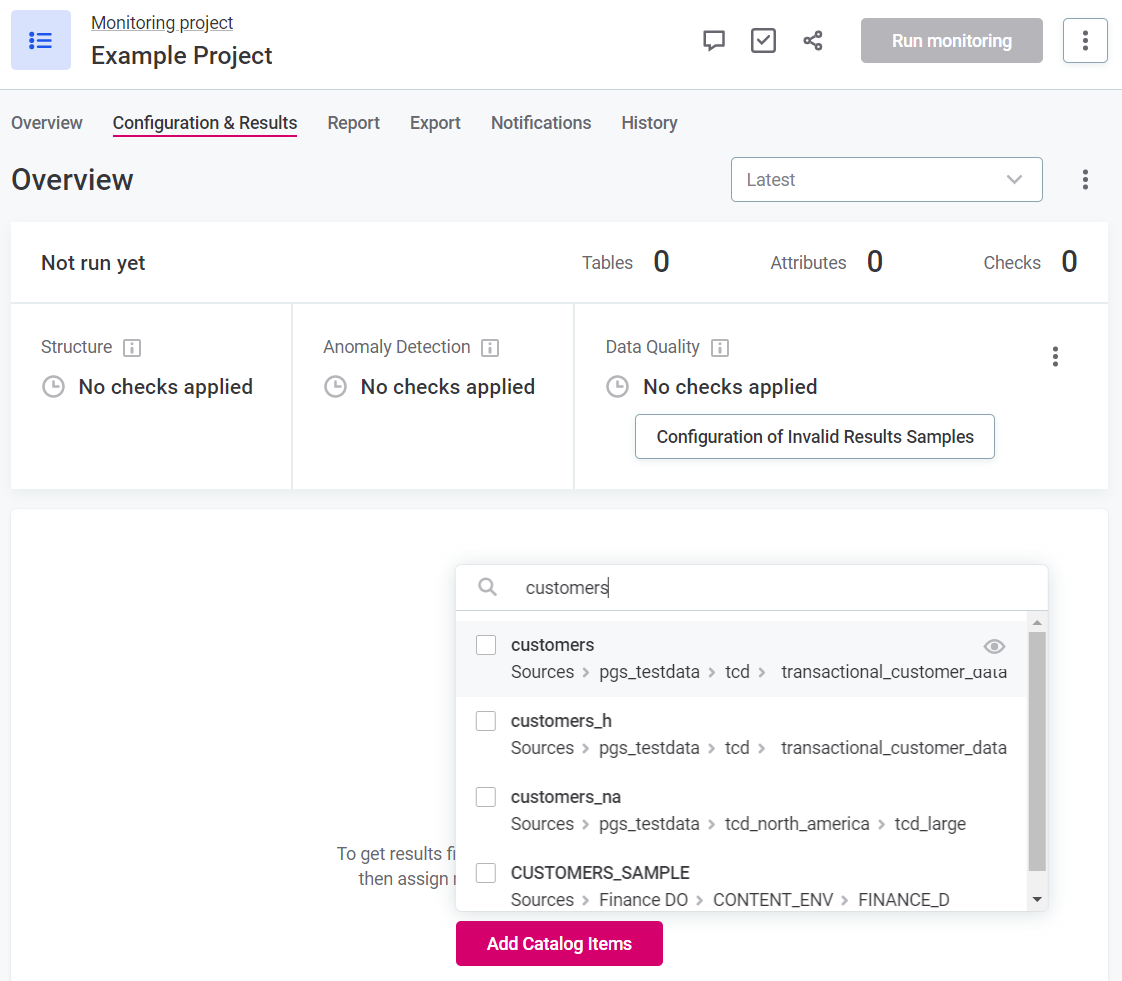
On the Configuration & Results tab, find and select one or more catalog items that you want to check. Within one project, you can monitor as many catalog items as you want as long as the overall data quality makes sense for your organization.
We’ll set up a monitoring project for the catalog item customers.
| If you would rather learn by taking apart an existing project, use the Customer DQ report monitoring project (available with the Demo content pack). |
|
For each monitoring project, you can also customize which DQ dimensions are contributing to the overall data quality. Look for Overall Quality contribution on the project Overview tab. 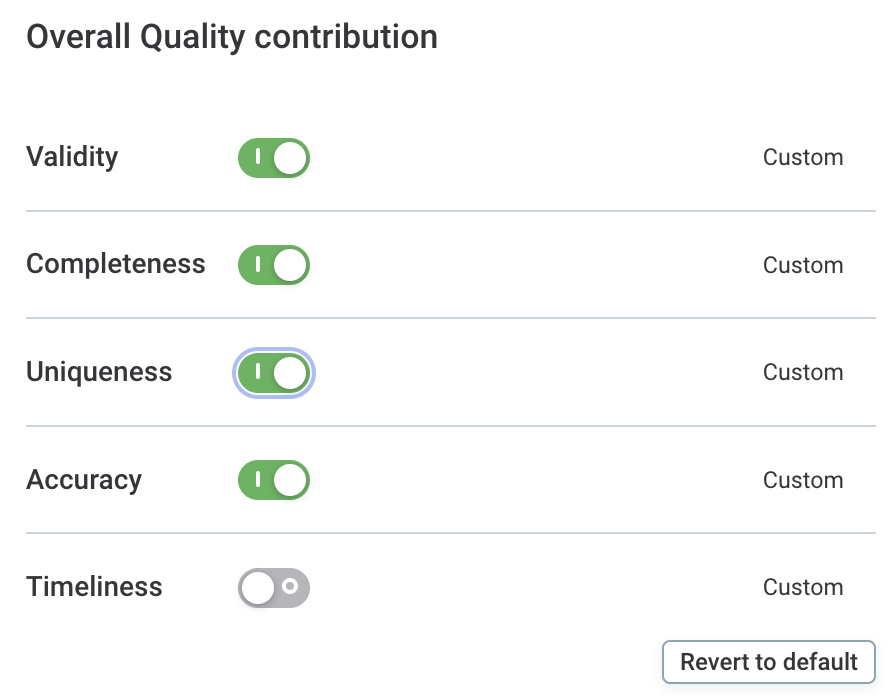
|
Apply DQ checks to your catalog items
Once you have selected all catalog items you want to work with, define which rules should be applied to them. In monitoring projects, such rules are called DQ checks.
If you chose to work with the catalog item customers, notice there are some suggested rules in the DQ Checks column. The tool leverages the data asset metadata, namely assigned business terms, to determine which basic rules are applicable to the asset.
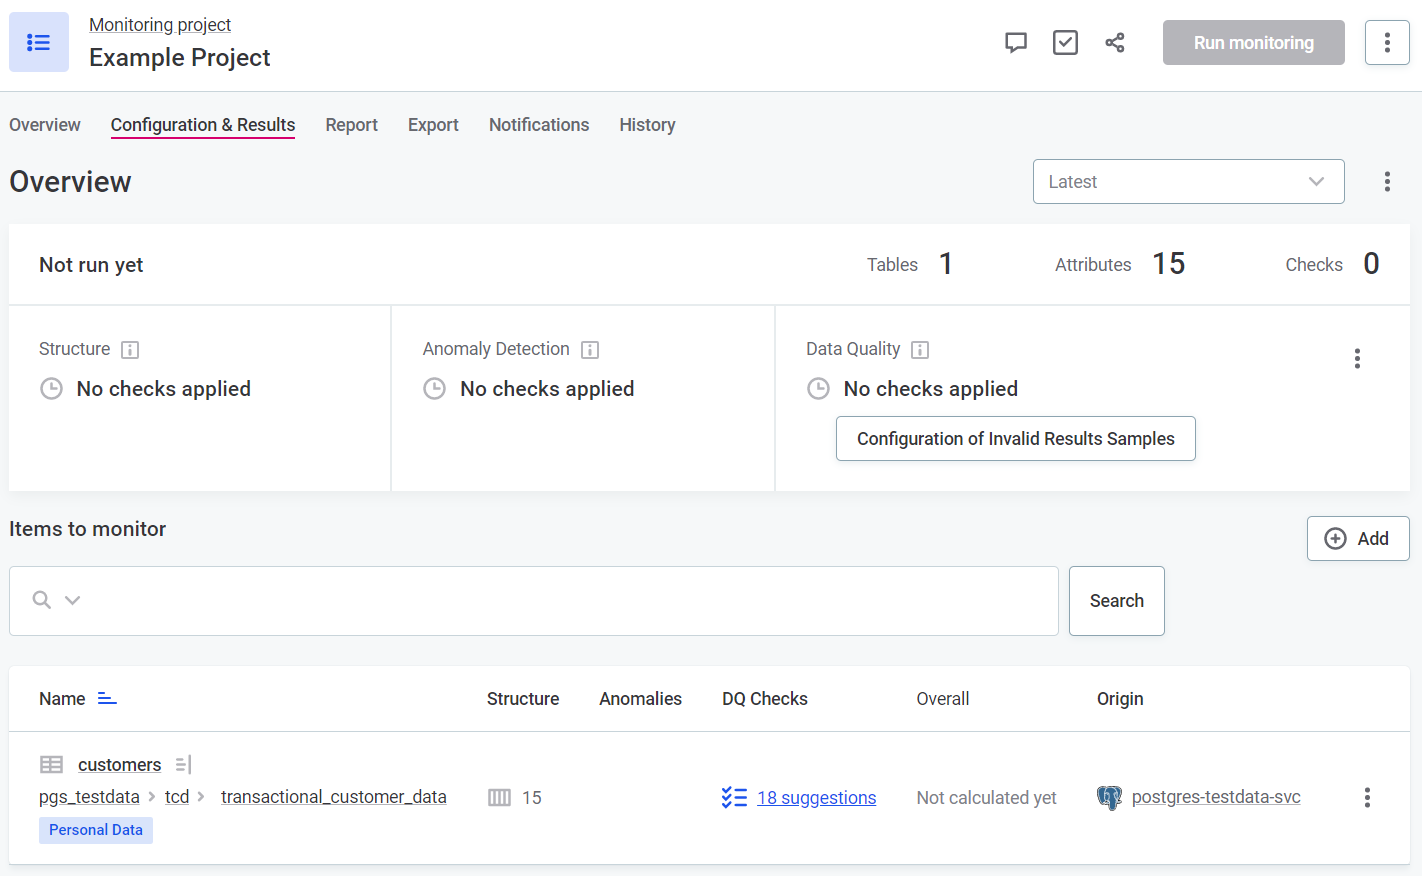
|
Review the suggested rules and apply them in bulk using the option Accept all suggestions for [customers]. 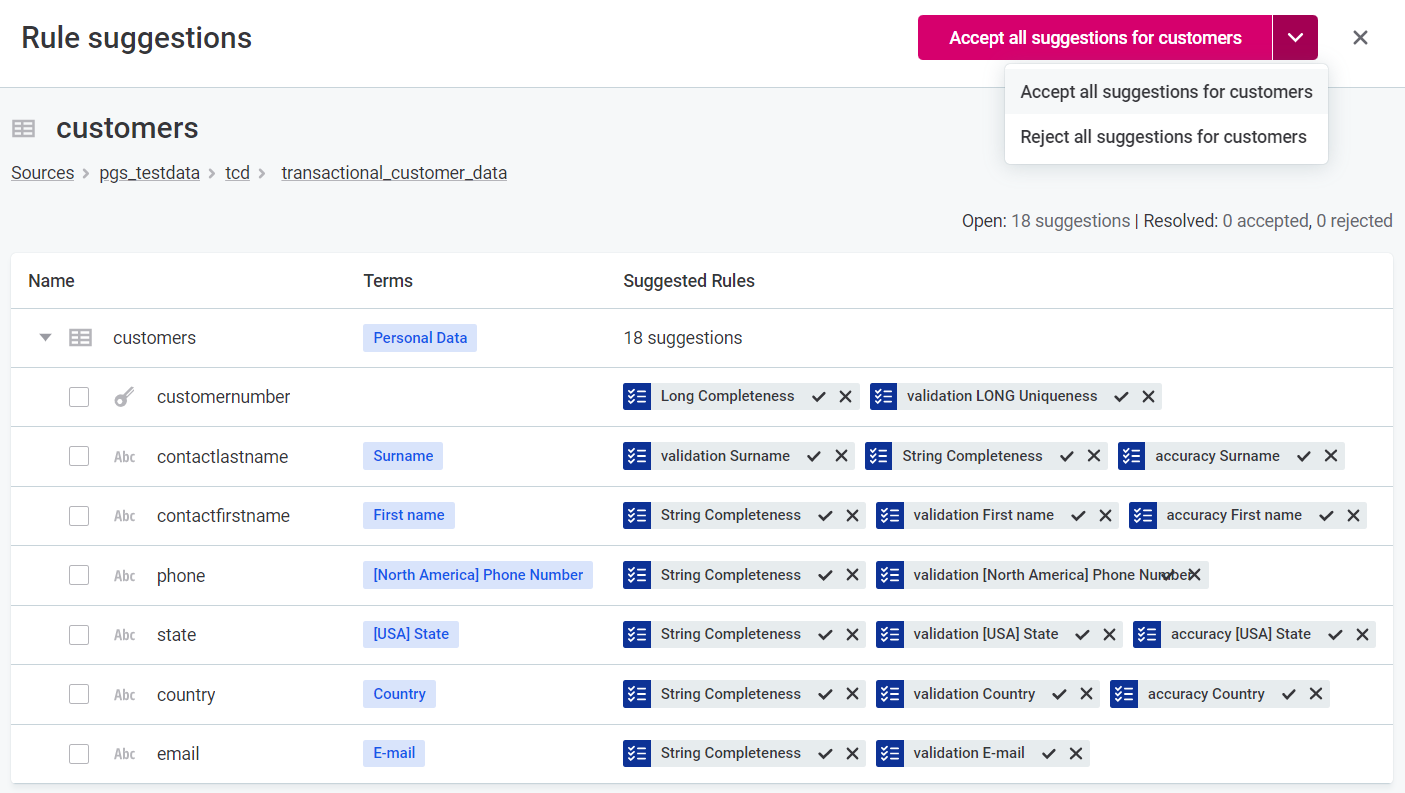
|
You can also assign any other DQ check manually through the Applied DQ checks column, which appears after you accept or reject rule suggestions and have the changes published.
Which rules are available depends on the data type of the attribute you want to apply them to: you are only shown rules with the matching input data type.
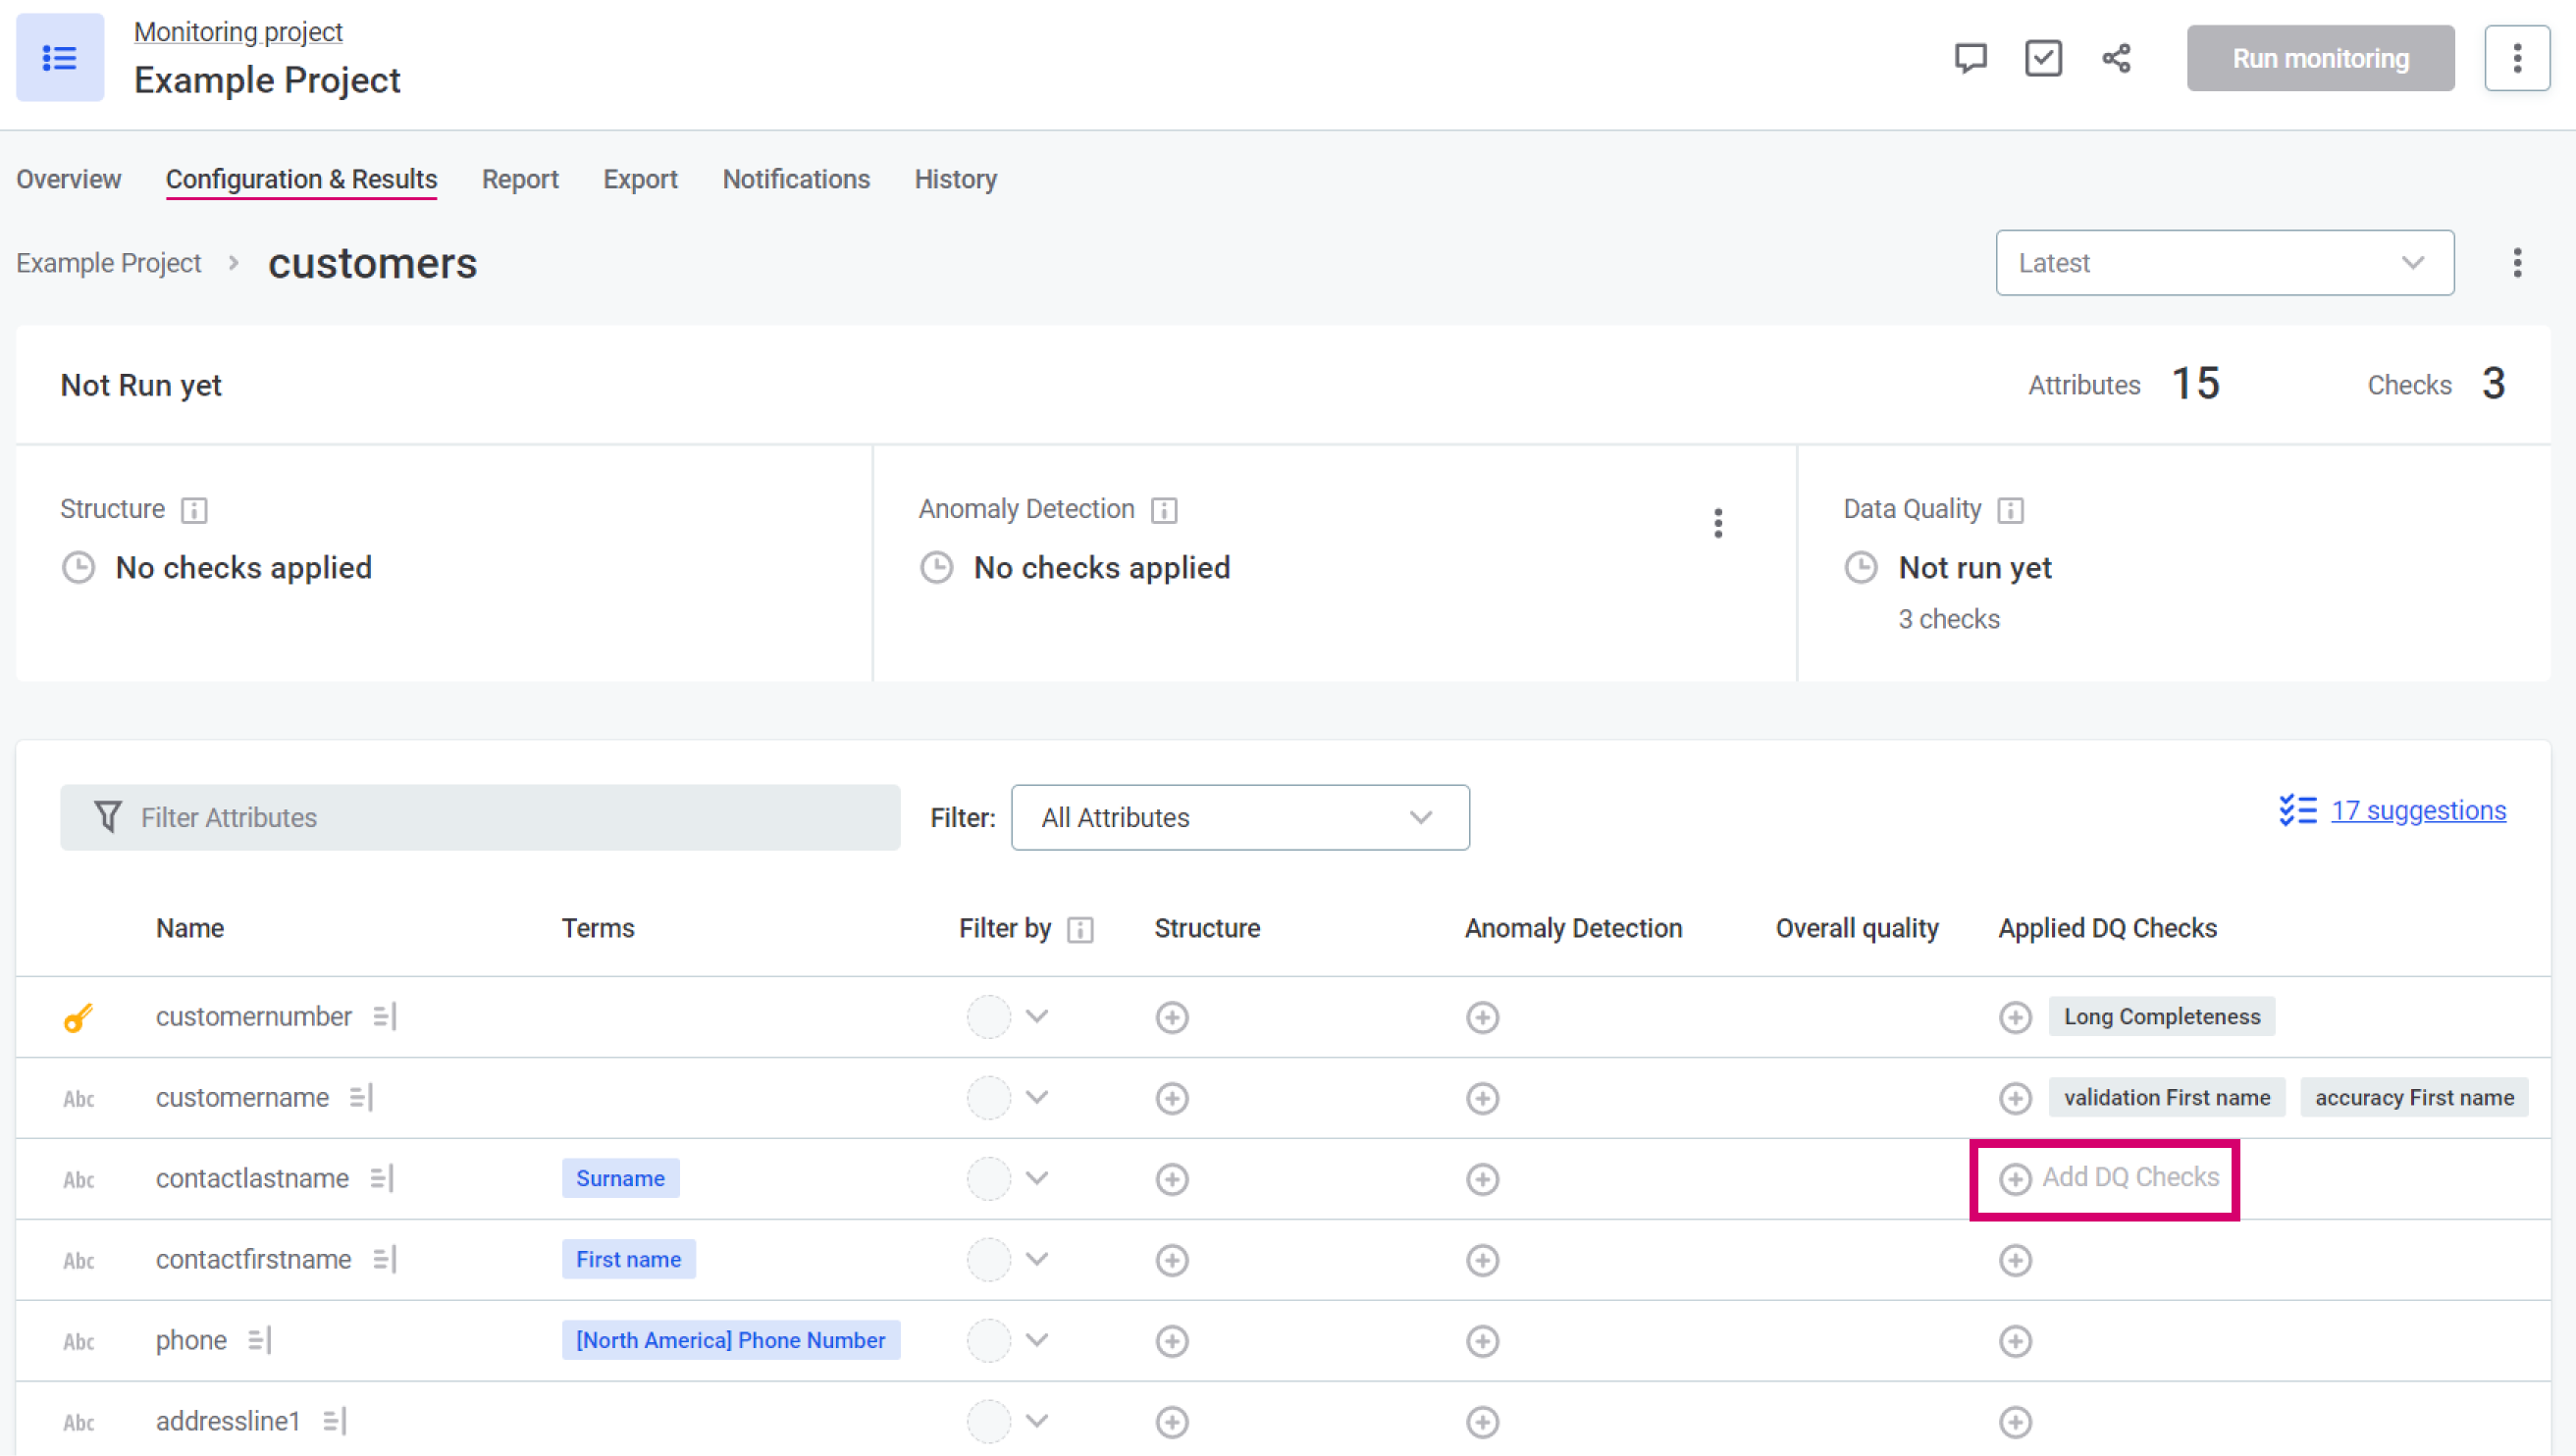
Select Add DQ Checks and find the appropriate rules, then select Add Check for all that apply. Depending on the rule configuration, the same validation rules can be applied to one or more attributes.
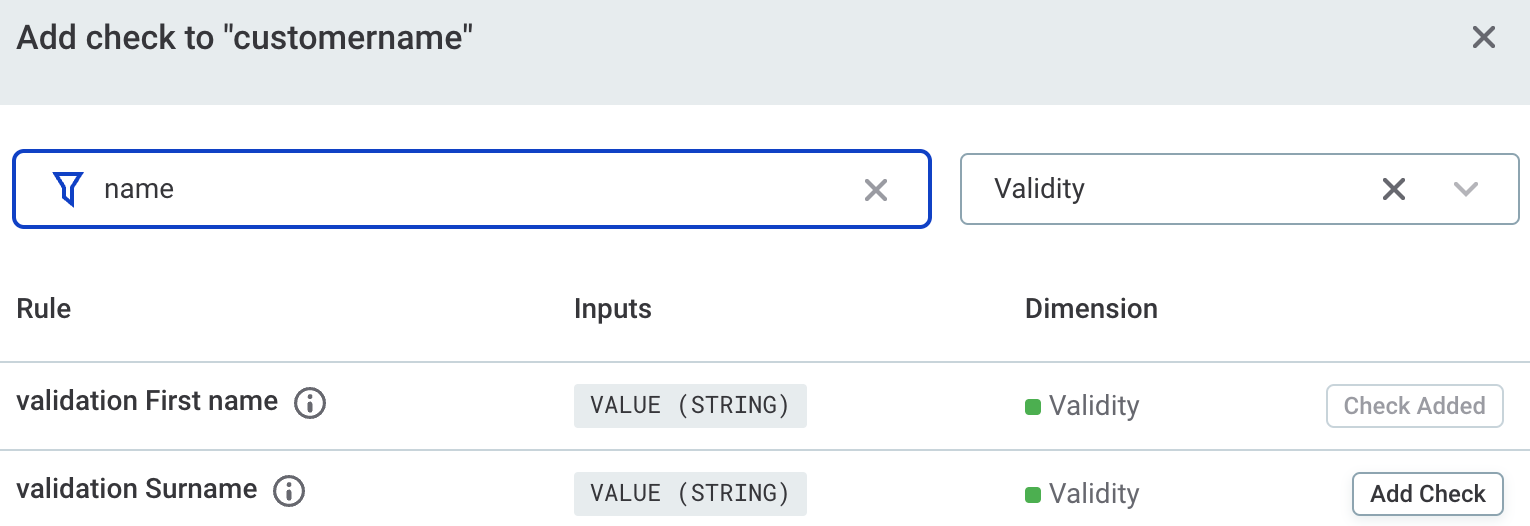
|
Make the most out of rule reusability.
You can apply the same rules to different sets of attributes that should be validated against the same logic.
The However, you can’t reuse the same completeness rule for all attributes: you need one for each data type (such as long, date, and so on). To see this in action, try applying one rule to multiple attributes and compare the validation results. |
|
Recommended resources
|
Run data quality monitoring
When your monitoring project is ready for use, finalize your changes by publishing it. Not all users have the necessary permissions for this. If that is the case, submit your draft for publishing instead.
To share your project with other users, use the Share option (see the section Share access to data assets in Get Started with Catalog and Glossary).
| For a refresher, see the section Publish your changes in Get Started with Catalog and Glossary. |
Open your project and select Run monitoring to validate your data. When the results are ready, look at the overall quality, individual scores for DQ dimensions, and any reported issues.
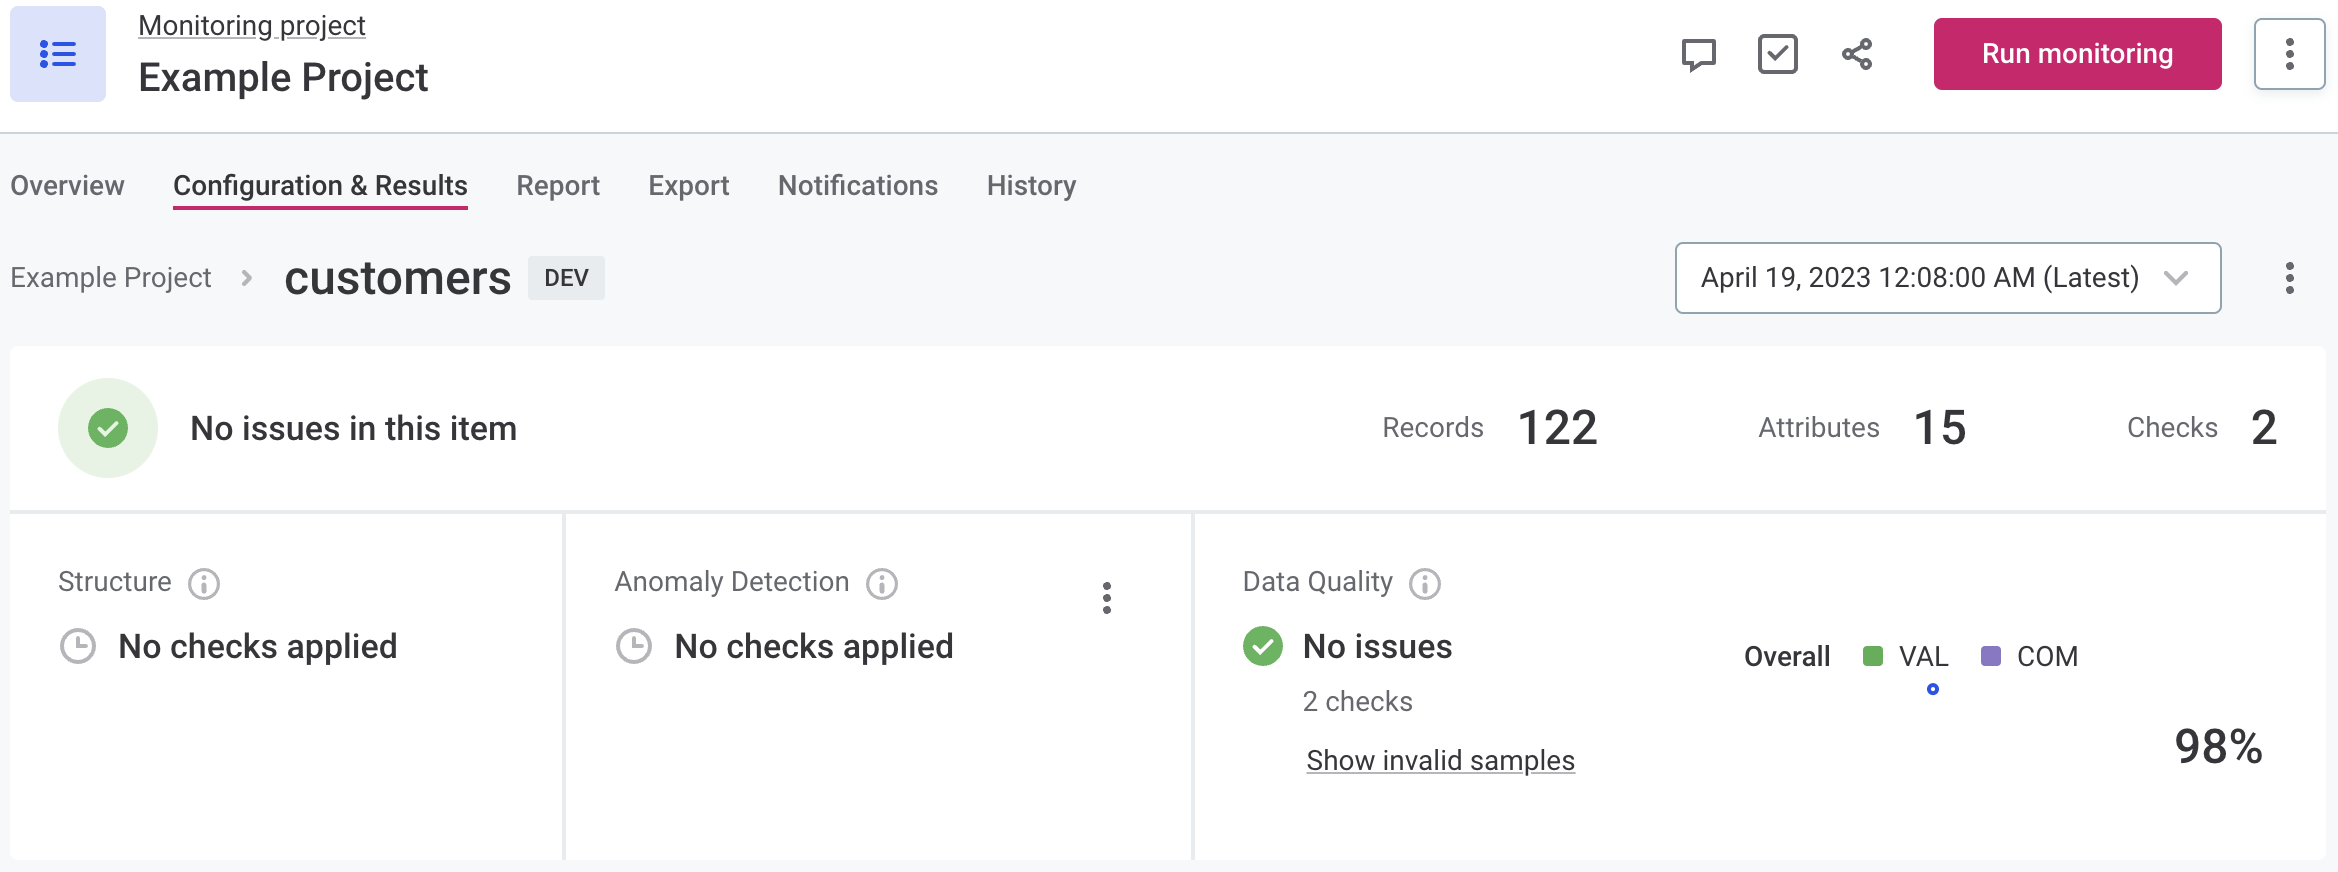
Issue alerts
Let’s take a closer look at data quality issues. In the previous step, notice that there are no issues reported, yet the overall quality is at 98%. The reason for this is that what is identified as a data quality issue depends on the rule configuration and the alert threshold.
To get a better idea about how and why this happens, from the monitoring project Configuration & Results tab, open the catalog item you’re working with and find the attribute where DQ results are available.
Next, in Applied DQ checks, select a check for which you want to view the alert configuration.
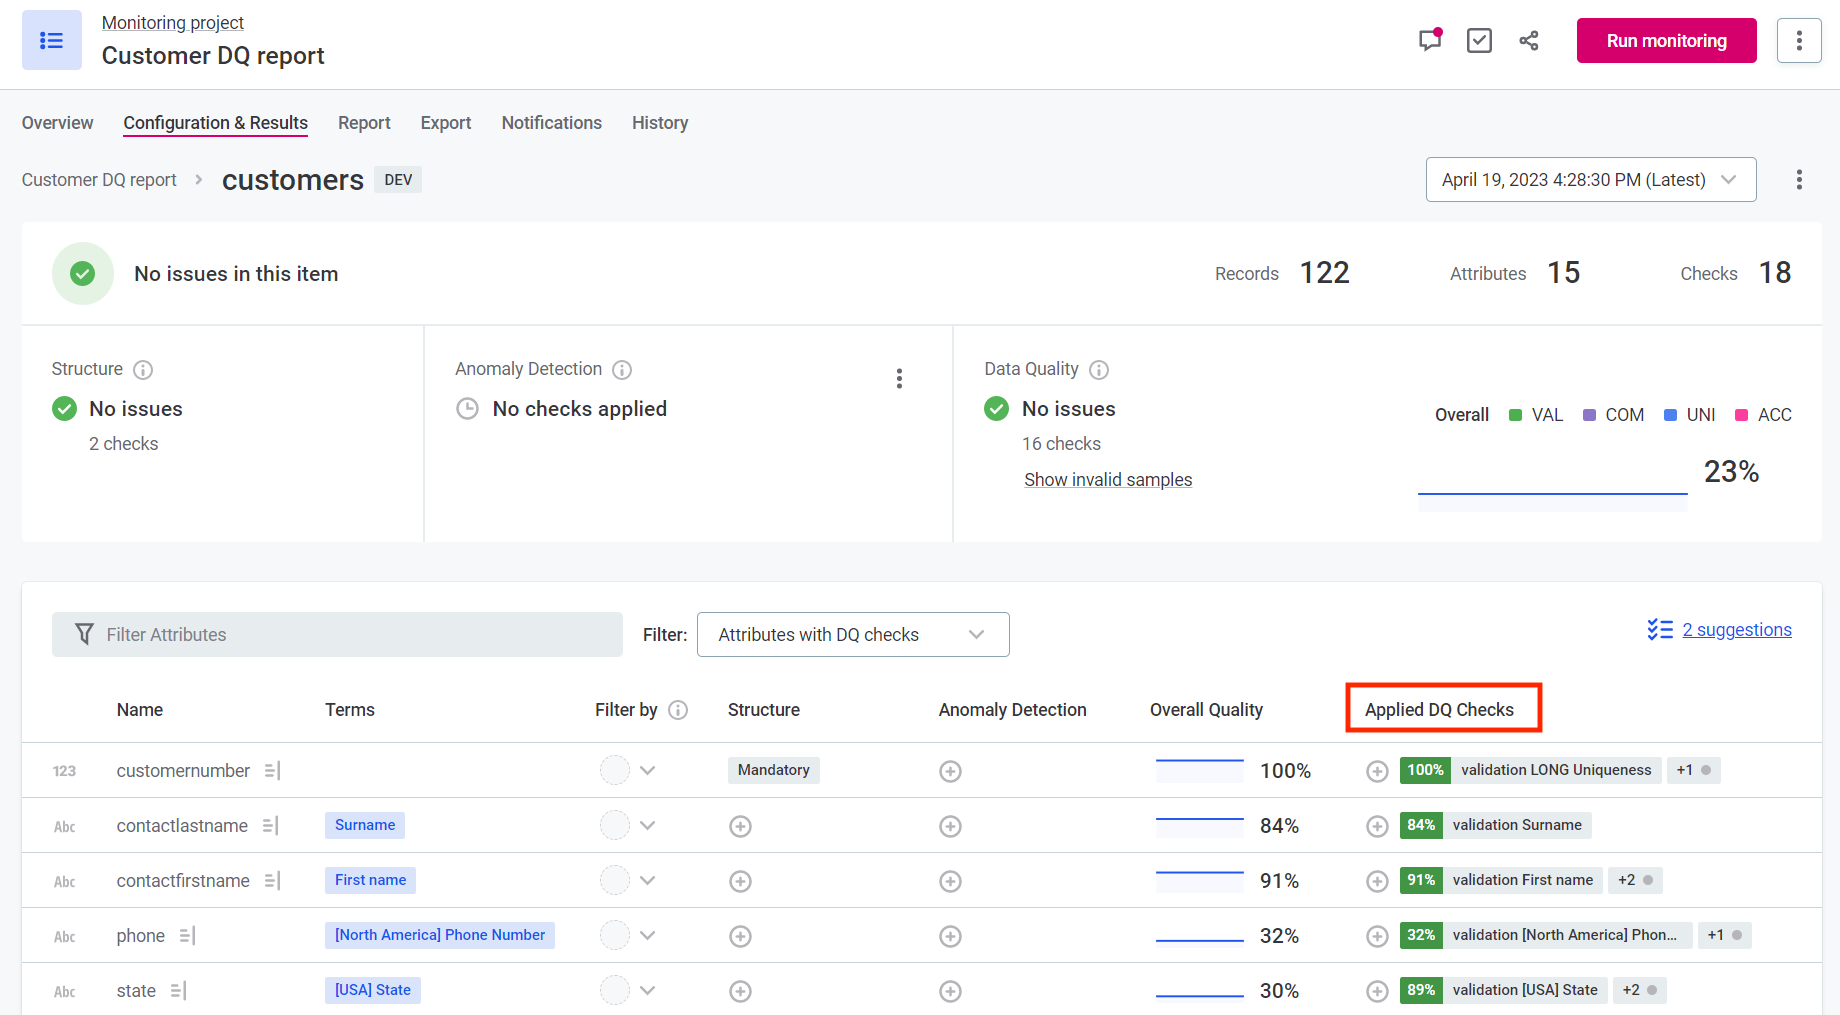
In Alerts Settings, we see that the alert threshold is set to 70%, which means that an issue is only reported if the result drops to or below that number.
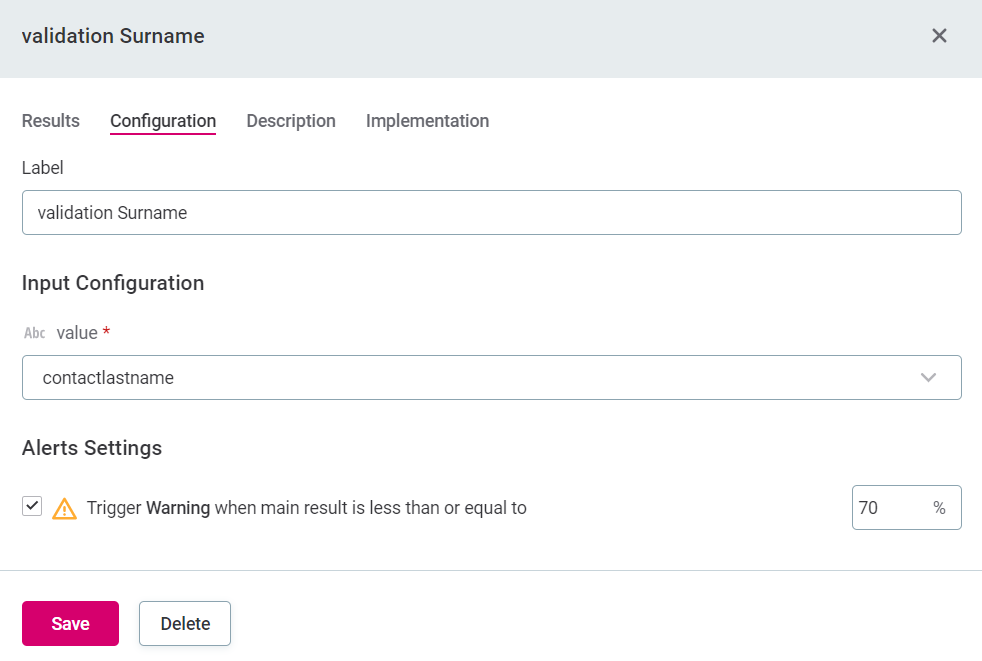
|
To see this in action, increase the alert threshold to the current result of your attribute. Save and publish your changes, then run monitoring again. This time, there will be data quality issues reported, and you will be alerted on the Configuration & Results tab. 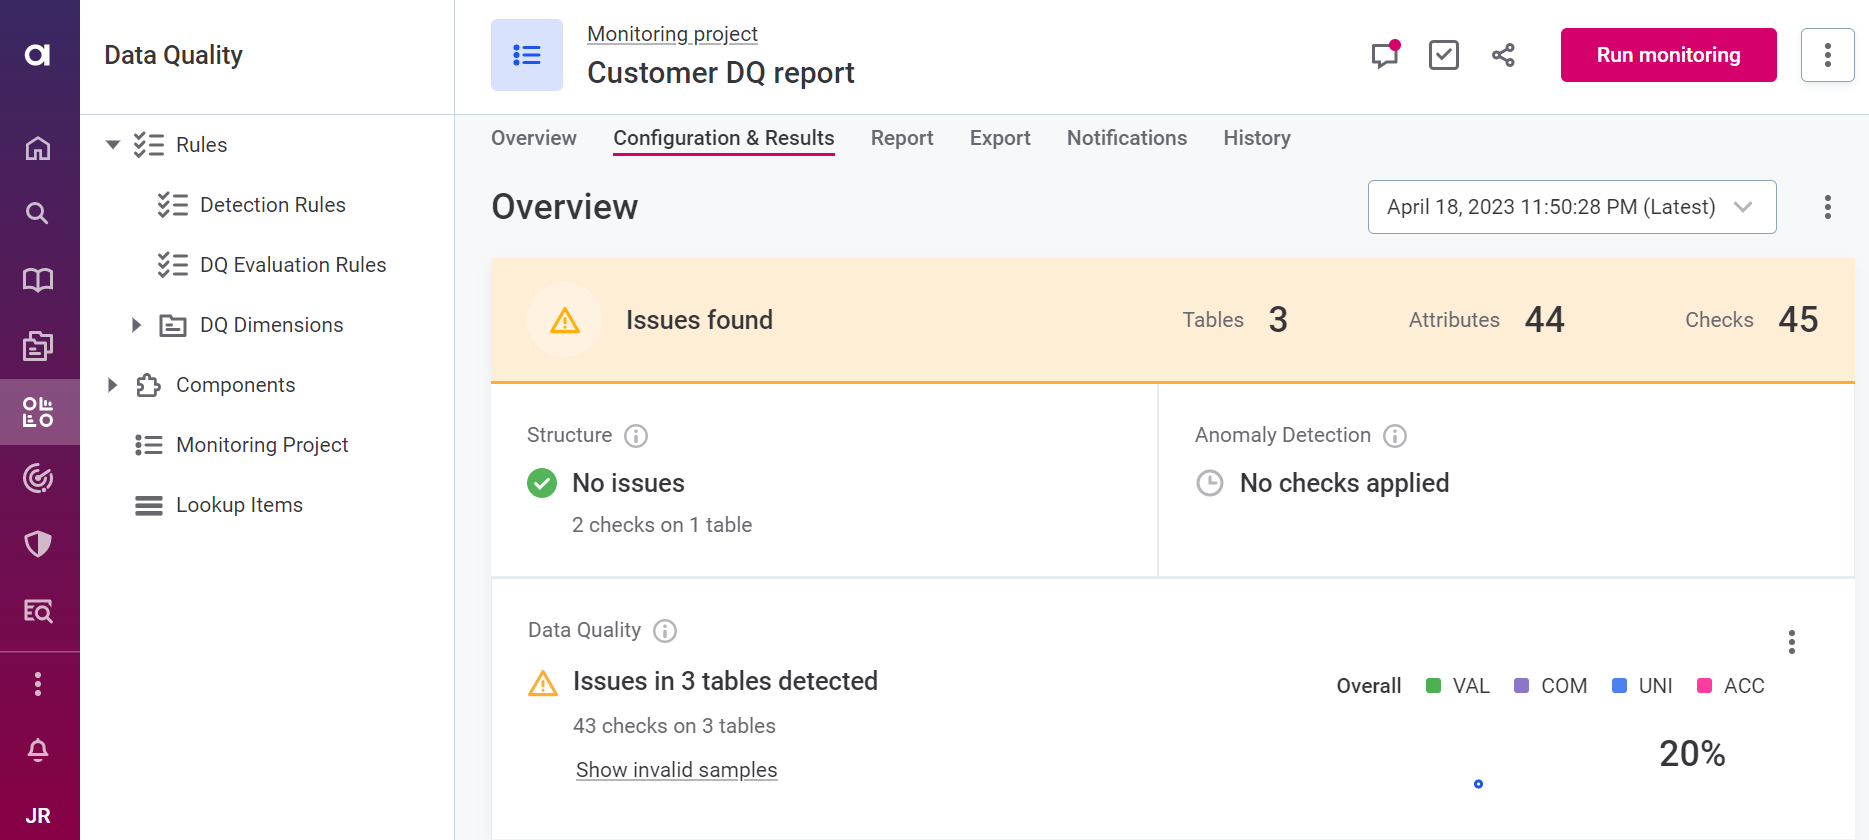
|
Invalid samples
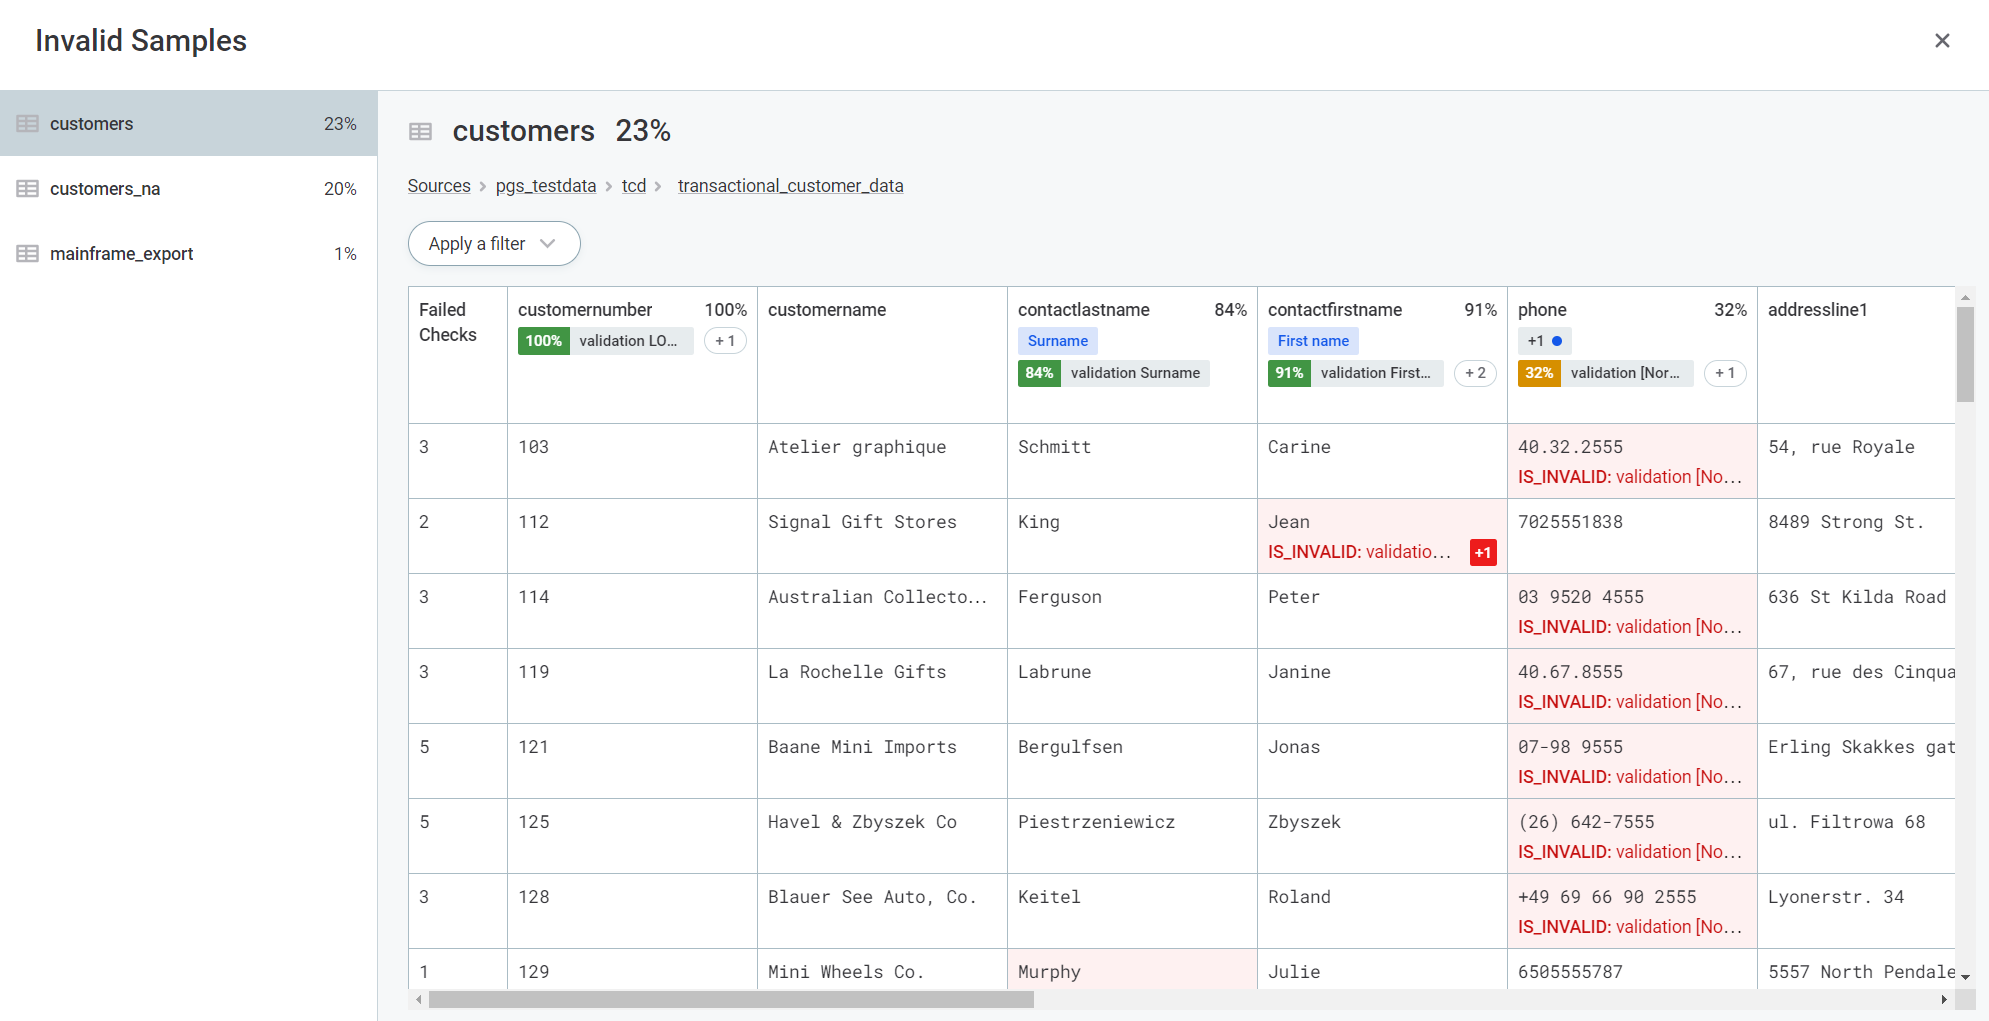
When there are issues detected in your monitoring project, investigating a sample of records that failed the assigned DQ checks will give you a clearer idea of the issue at hand. To do this, on the Configuration & Results tab, select Show invalid samples.
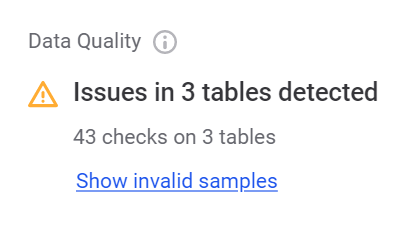
Compare the values in flagged records against the rules applied. Switch between monitored catalog items to see whether they are all affected.
|
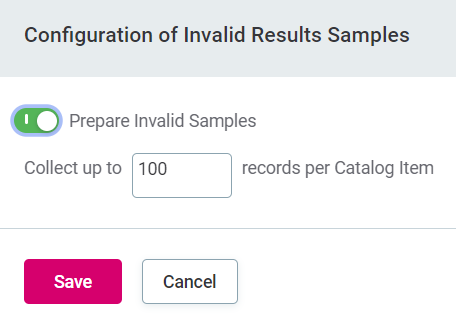
You can configure how many invalid results are included in the sample or turn off this option completely. To access the configuration, on the Configuration & Results tab, expand the Data Quality three dots menu and select Configuration of Invalid Results Samples. 
|
Reports
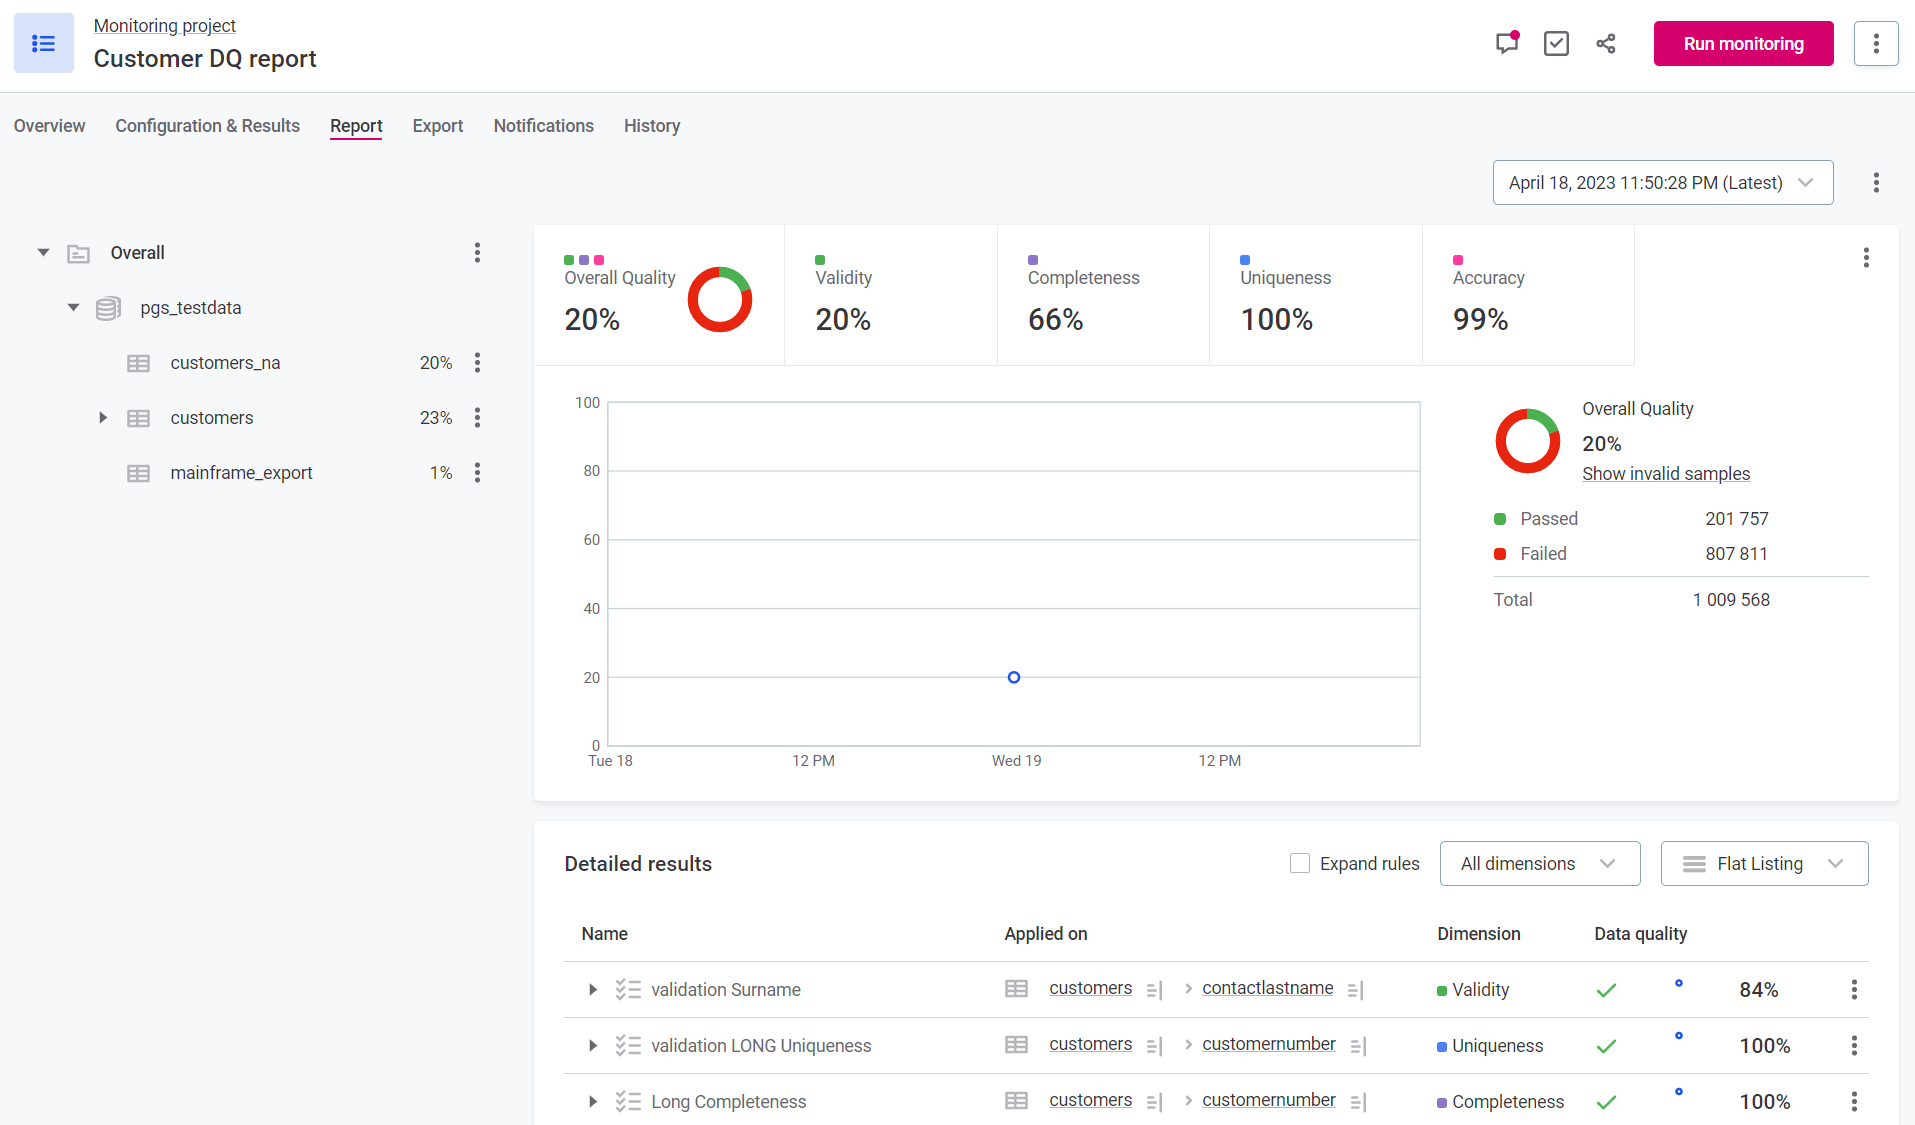
For an aggregated view of DQ results and detected anomalies over time for all monitoring runs, go to the Report tab.
In addition to viewing changes in data quality for the whole project, you can observe what occurred on more granular levels by selecting a catalog item, specific DQ dimension, or specific checks assigned to attributes. You can also explore any of the identified issues in more detail.
|
Recommended resources
|
Was this page useful?

