
How to Deploy an RDM Web App Configuration
After defining the RDM model for the first time or making changes to the existing one, deploy the model configuration to the RDM web application.
| For compatibility reasons, RDM initially loads with a default, empty configuration that must be replaced by following these steps. |
Before you start
When deploying a new configuration:
-
The RDM web application becomes unavailable.
-
RDM runs all configured validations on all data in the tables that changed since the last configuration.
-
RDM checks the structure of the RDM repository against the model being deployed.
How long the deployment takes depends on the following factors:
-
Application and database server hardware and memory.
-
Network capacity and availability.
-
The number of records, columns, relationships, and mn-references.
-
The relationship depth (parent > child 1 > child 2 >…).
-
The number and complexity of validations. SQL validations are generally faster than online validations (ONE plans or components).
How to deploy
-
In ONE Desktop, right-click the App Configuration node and select Generate.
-
Keep the Default location selected (points to the
etcfolder) and select Generate. AconfigurationFiles.zipfile is generated. -
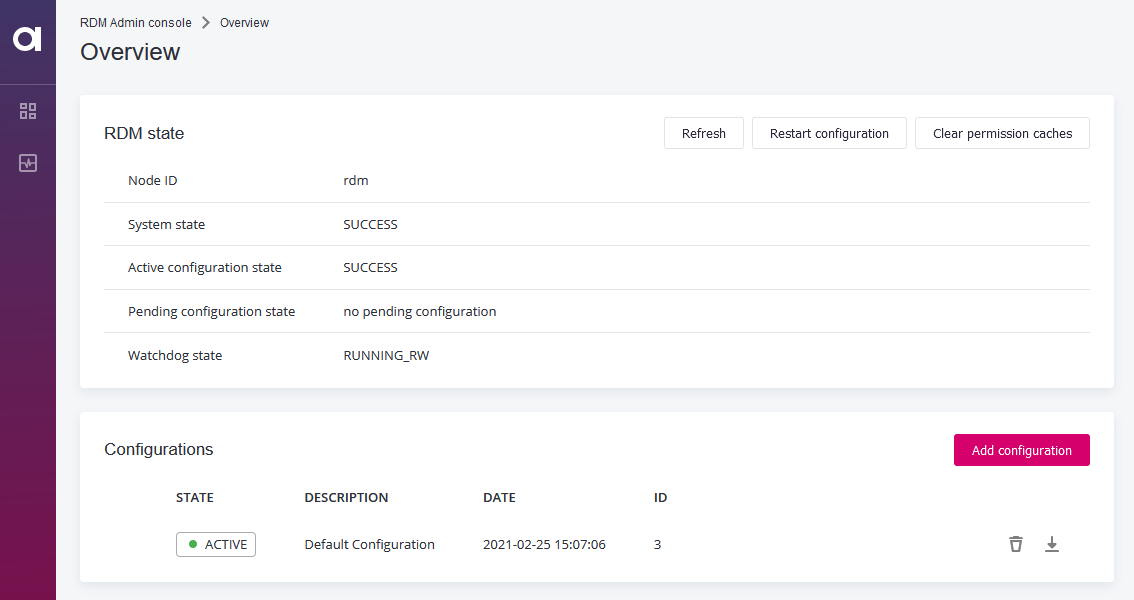
In your web browser, open the RDM Admin console:
http://{rdm_url}:8060/admin.Do not delete the active configuration: it is needed when deploying a new configuration in the following steps.
Even after a configuration is no longer active, we recommend keeping previous configurations as fallbacks in case of deployment errors.
-
Select Add configuration.
-
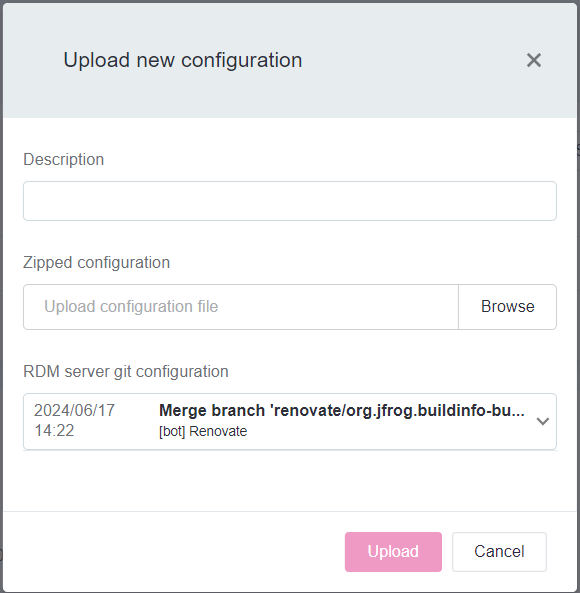
In the Upload new Configuration dialog:
-
Enter a description.
-
Select the
configurationFiles.ziparchive. -
(Optional) Select the preferred RDM server git configuration. This is available for Cloud deployments only.
The field shows the Git commit with the currently applied server configuration. Keeping the same commit selected prevents server restart as there are no changes to the configuration. Switching to a different commit applies the new server configuration and restarts the server.
See RDM Deployment Guide.
-
Select Upload.
-
-
Select Apply configuration and confirm.
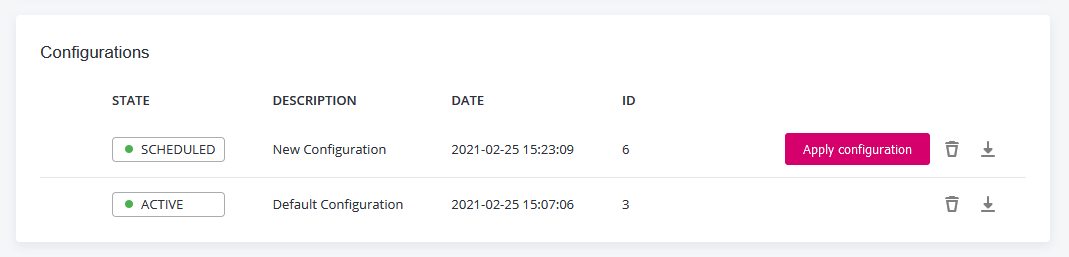
The configuration restarts and the old (active) and new (scheduled) configurations are compared.
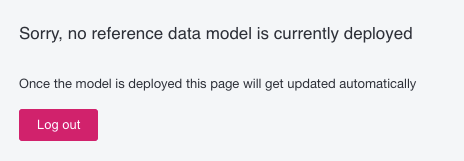
Accessing RDM during this process displays an error:
-
Select Review proposed configuration to view the comparison.
-
Review model changes and select Accept configuration proposal.
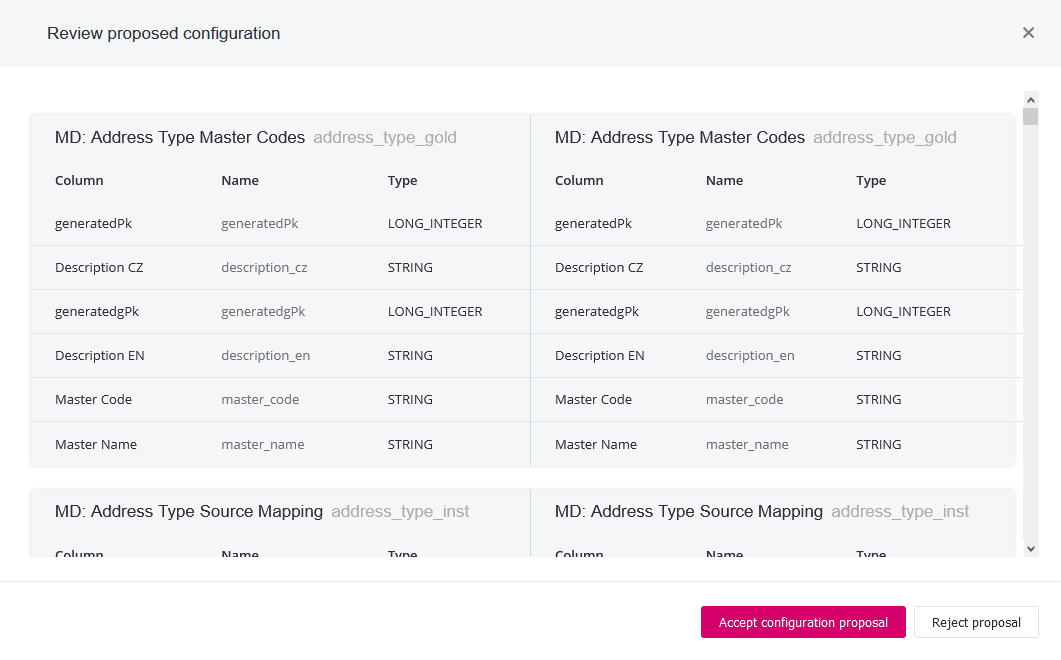
If the new configuration is unsuitable, the Reject proposal option is the last chance to safely delete it and restart the process. In that case, the last previously used configuration is reapplied.
Once accepted and active, we strongly advise against deleting configurations. This can cause critical validation errors and prevent application startup.
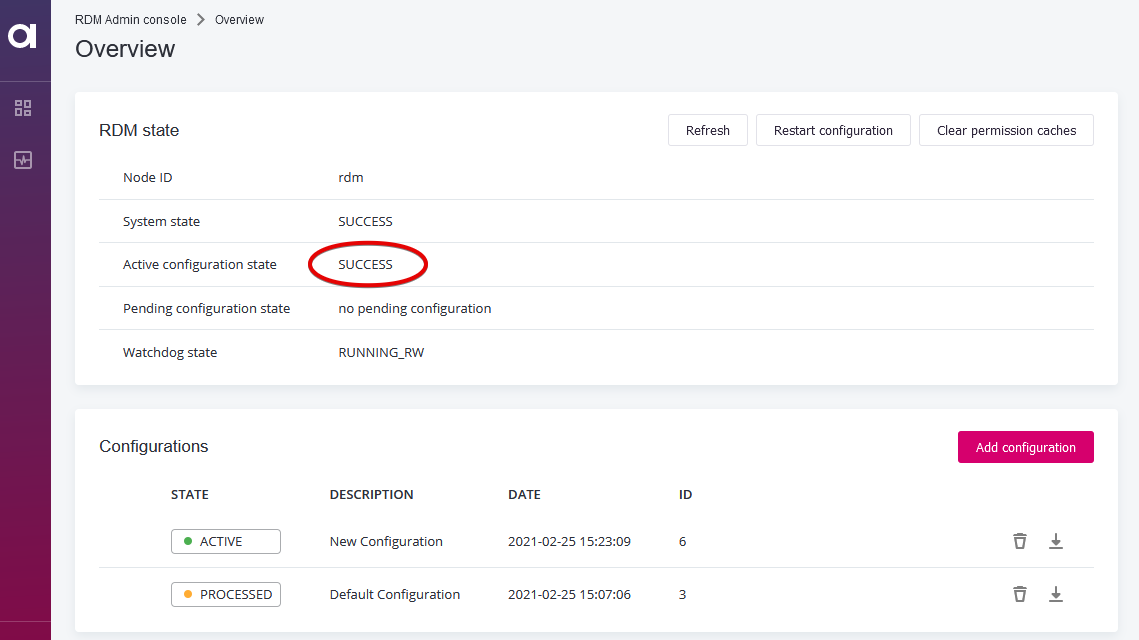
After it is successfully applied, the Active configuration state section now shows Success on the Overview screen, indicating the application is ready.
Advanced troubleshooting
The following information is for expert users dealing with failed configuration uploads.
RDM configuration concepts
When troubleshooting RDM configurations, keep the following principles in mind:
-
When deployed without errors or when using the default configuration, the active configuration matches the database structure. In other words, this means that what is defined in the configuration exists in the database.
-
Uploading and accepting a new configuration alters the database structure accordingly. Changes required are computed against the previously active configuration and applied together with the new model.
-
If there are no previous active configurations, the new configuration is accepted without altering the database.
-
Uploading a new configuration can result in one of the following outcomes:
-
Success: The database structure is successfully altered and matches the now active model.
-
Failure: The database structure could not be altered and is inconsistent with the configuration.
-
-
Data is protected during configuration uploads. Even if applying a new configuration fails, data, the database structure, and the previous configuration are preserved.
Failed configurations are marked as
SCHEDULEDin RDM Admin Console and, if needed, can be safely deleted. -
You cannot upload a new model if the current active model isn’t working correctly and RDM cannot fully start. RDM detects the active configuration doesn’t match the database structure and cannot safely compute structure alterations.
RDM cannot start with active configuration
When RDM fails to start with an active, previously accepted configuration, validation errors in the database structure are usually the cause.
There are two possible approaches:
-
Use the Switch to repairing mode: The Switch to repairing action in the RDM Admin Console lets you start RDM despite validation errors. In this mode, only system users can log in and fix reported errors to make data consistent with the configuration.
After resolving errors, select Resume repairing mode to restart RDM.
-
Fix the configuration ZIP and upload as the only configuration: Delete all previous configurations including the default one first. This forces RDM to accept the configuration since there’s no other configuration to compute database structure alterations against.
Was this page useful?