
RDM Ataccama Cloud Deployment
|
This article is applicable to Ataccama Cloud deployments only. |
RDM can be deployed as an Ataccama Cloud application.
Configuration summary
The following steps must be completed to run RDM in Ataccama Cloud:
-
Deploy an RDM environment to the Ataccama Cloud configuration interface (Cloud Portal).
-
Download and configure a corresponding version of ONE Desktop.
-
Push an RDM server configuration to a Git server.
-
Deploy a valid configuration from the RDM Admin Console. For more information, see How to Deploy an RDM Web App Configuration and RDM Admin Console.
| We recommend you test RDM server configurations locally. For more information, see RDM Project Local Server Configuration Testing. |
Download ONE Desktop
You can download the needed version of ONE Desktop from the Support Service Desk.
Create a new project
-
Launch ONE Desktop.
-
Switch to the Model Explorer view and select the New Model Project icon. Give the project a name, keep the Use template option as Reference Data Manager, and select Finish.
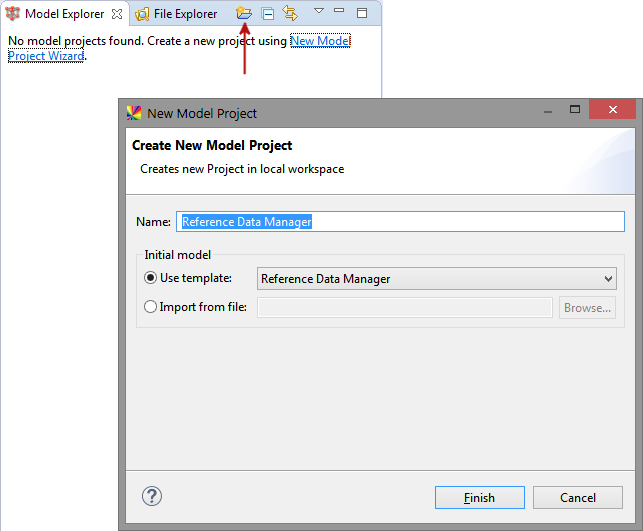
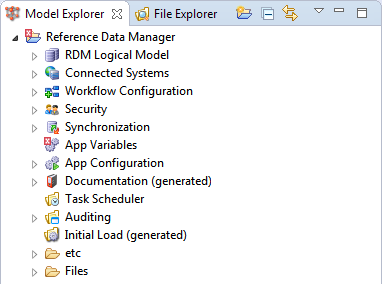
A new RDM project is created:
Configure your RDM project
See Building the RDM Solution from Scratch, section Configure your RDM project.
Connect Git with ONE Desktop and your cloud environment
RDM server configurations must be stored in a Git server. The connection to this server must first be configured in ONE Desktop and the Ataccama Cloud configuration interface (Cloud Portal).
For information about how to work with Git in ONE Desktop, see Git.
The root of your Git repository must contain the following folders:
-
rdm-
runtime -
Files
-
To ensure the correct structure and that all necessary files are present, you can copy the folders and their content from the RDM project created in the Create a new project step.
|
Your Ataccama Cloud deployment should also contain a There are additional files that enable you to deploy alternative server configurations. However, these are not necessary to run the default configuration. For more information, see RDM Project Local Server Configuration Testing. |
We recommend creating different branches for development, testing, and production purposes and connecting them to equivalent Ataccama Cloud environments.
|
Your Git project should have the following branches:
To help distinguish which branch is being used and the purpose of the environment, we recommend you also add |
To connect your cloud environment to the Git server:
-
Go to Ataccama Cloud Portal, that is, your configuration interface.
-
Select an environment from the list of environments.
-
Go to the Services tab.
-
In the Reference Data Management section, find the RDM Server and select Settings.
-
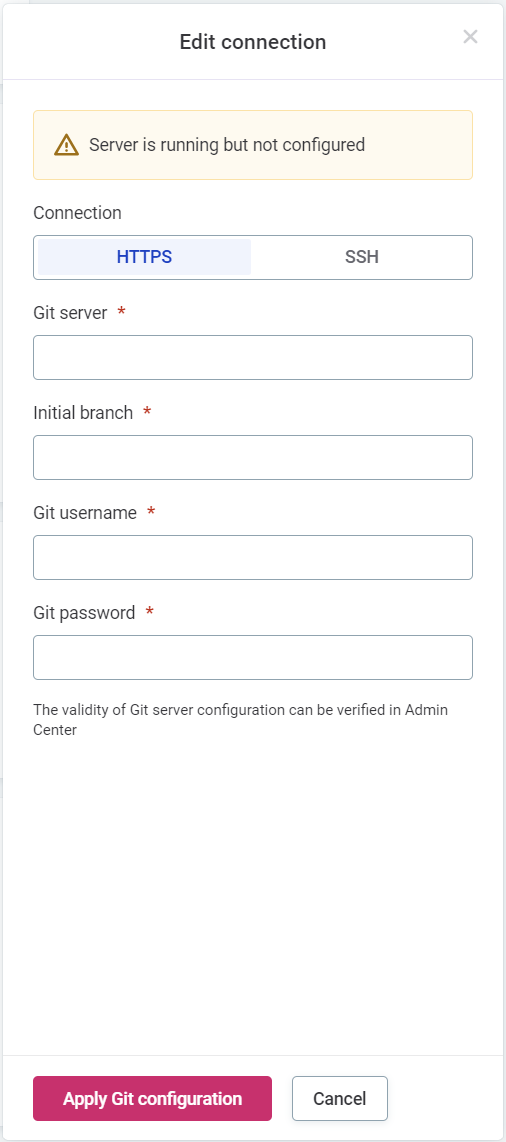
In Edit connection, complete the information as follows:
-
Connection: Choose between
HTTPSandSSHconnection type. -
Git server: Provide the Git server URL.
-
Initial branch: Specify the initial branch to be used.
-
Provide authentication credentials depending on the chosen connection type.
-
For
HTTPSconnection provide the following:-
Git username.
-
Git password.
-
-
For
SSHconnection upload a Private SSH key.
-
-
The validity of the Git server configuration can later be verified in the RDM Admin Console.
You can now make changes to the configuration and push these changes to your cloud environment. You can manage these configurations from the RDM Admin Console. For more information, see RDM Admin Console.
Edit path variables
To be able to access the necessary resources for running your project, the path variables must be configured using the values given here.
This is done in the pathvariables.xml file in the runtime folder.
If default paths are used, the necessary resources cannot be accessed.
<pathVariable name="DATA" value="/srv/conf/server/rdm/Files/data"/>
<pathVariable name="DOCUMENTATION" value="/srv/conf/server/rdm/doc"/>
Deploy web application configuration
After setting up everything needed for you RDM solution, you need to generate XML configuration files (packed into a ZIP archive) and deploy them to the RDM Web Application. See How to Deploy an RDM Web App Configuration.
| You need to perform this step every time you make changes to your project. |
Was this page useful?