Setting Permissions in RDM
Permissions in RDM define what data-editing actions users have and are defined on the table and column basis. Permissions are defined not only for tables but also views and data sets (see Data Tab Overview).
Permissions can be edited only by users with system permissions (set up on the RDM backend).
Permissions configuration
To access permissions, open the Permissions tab in the left-hand navigation.
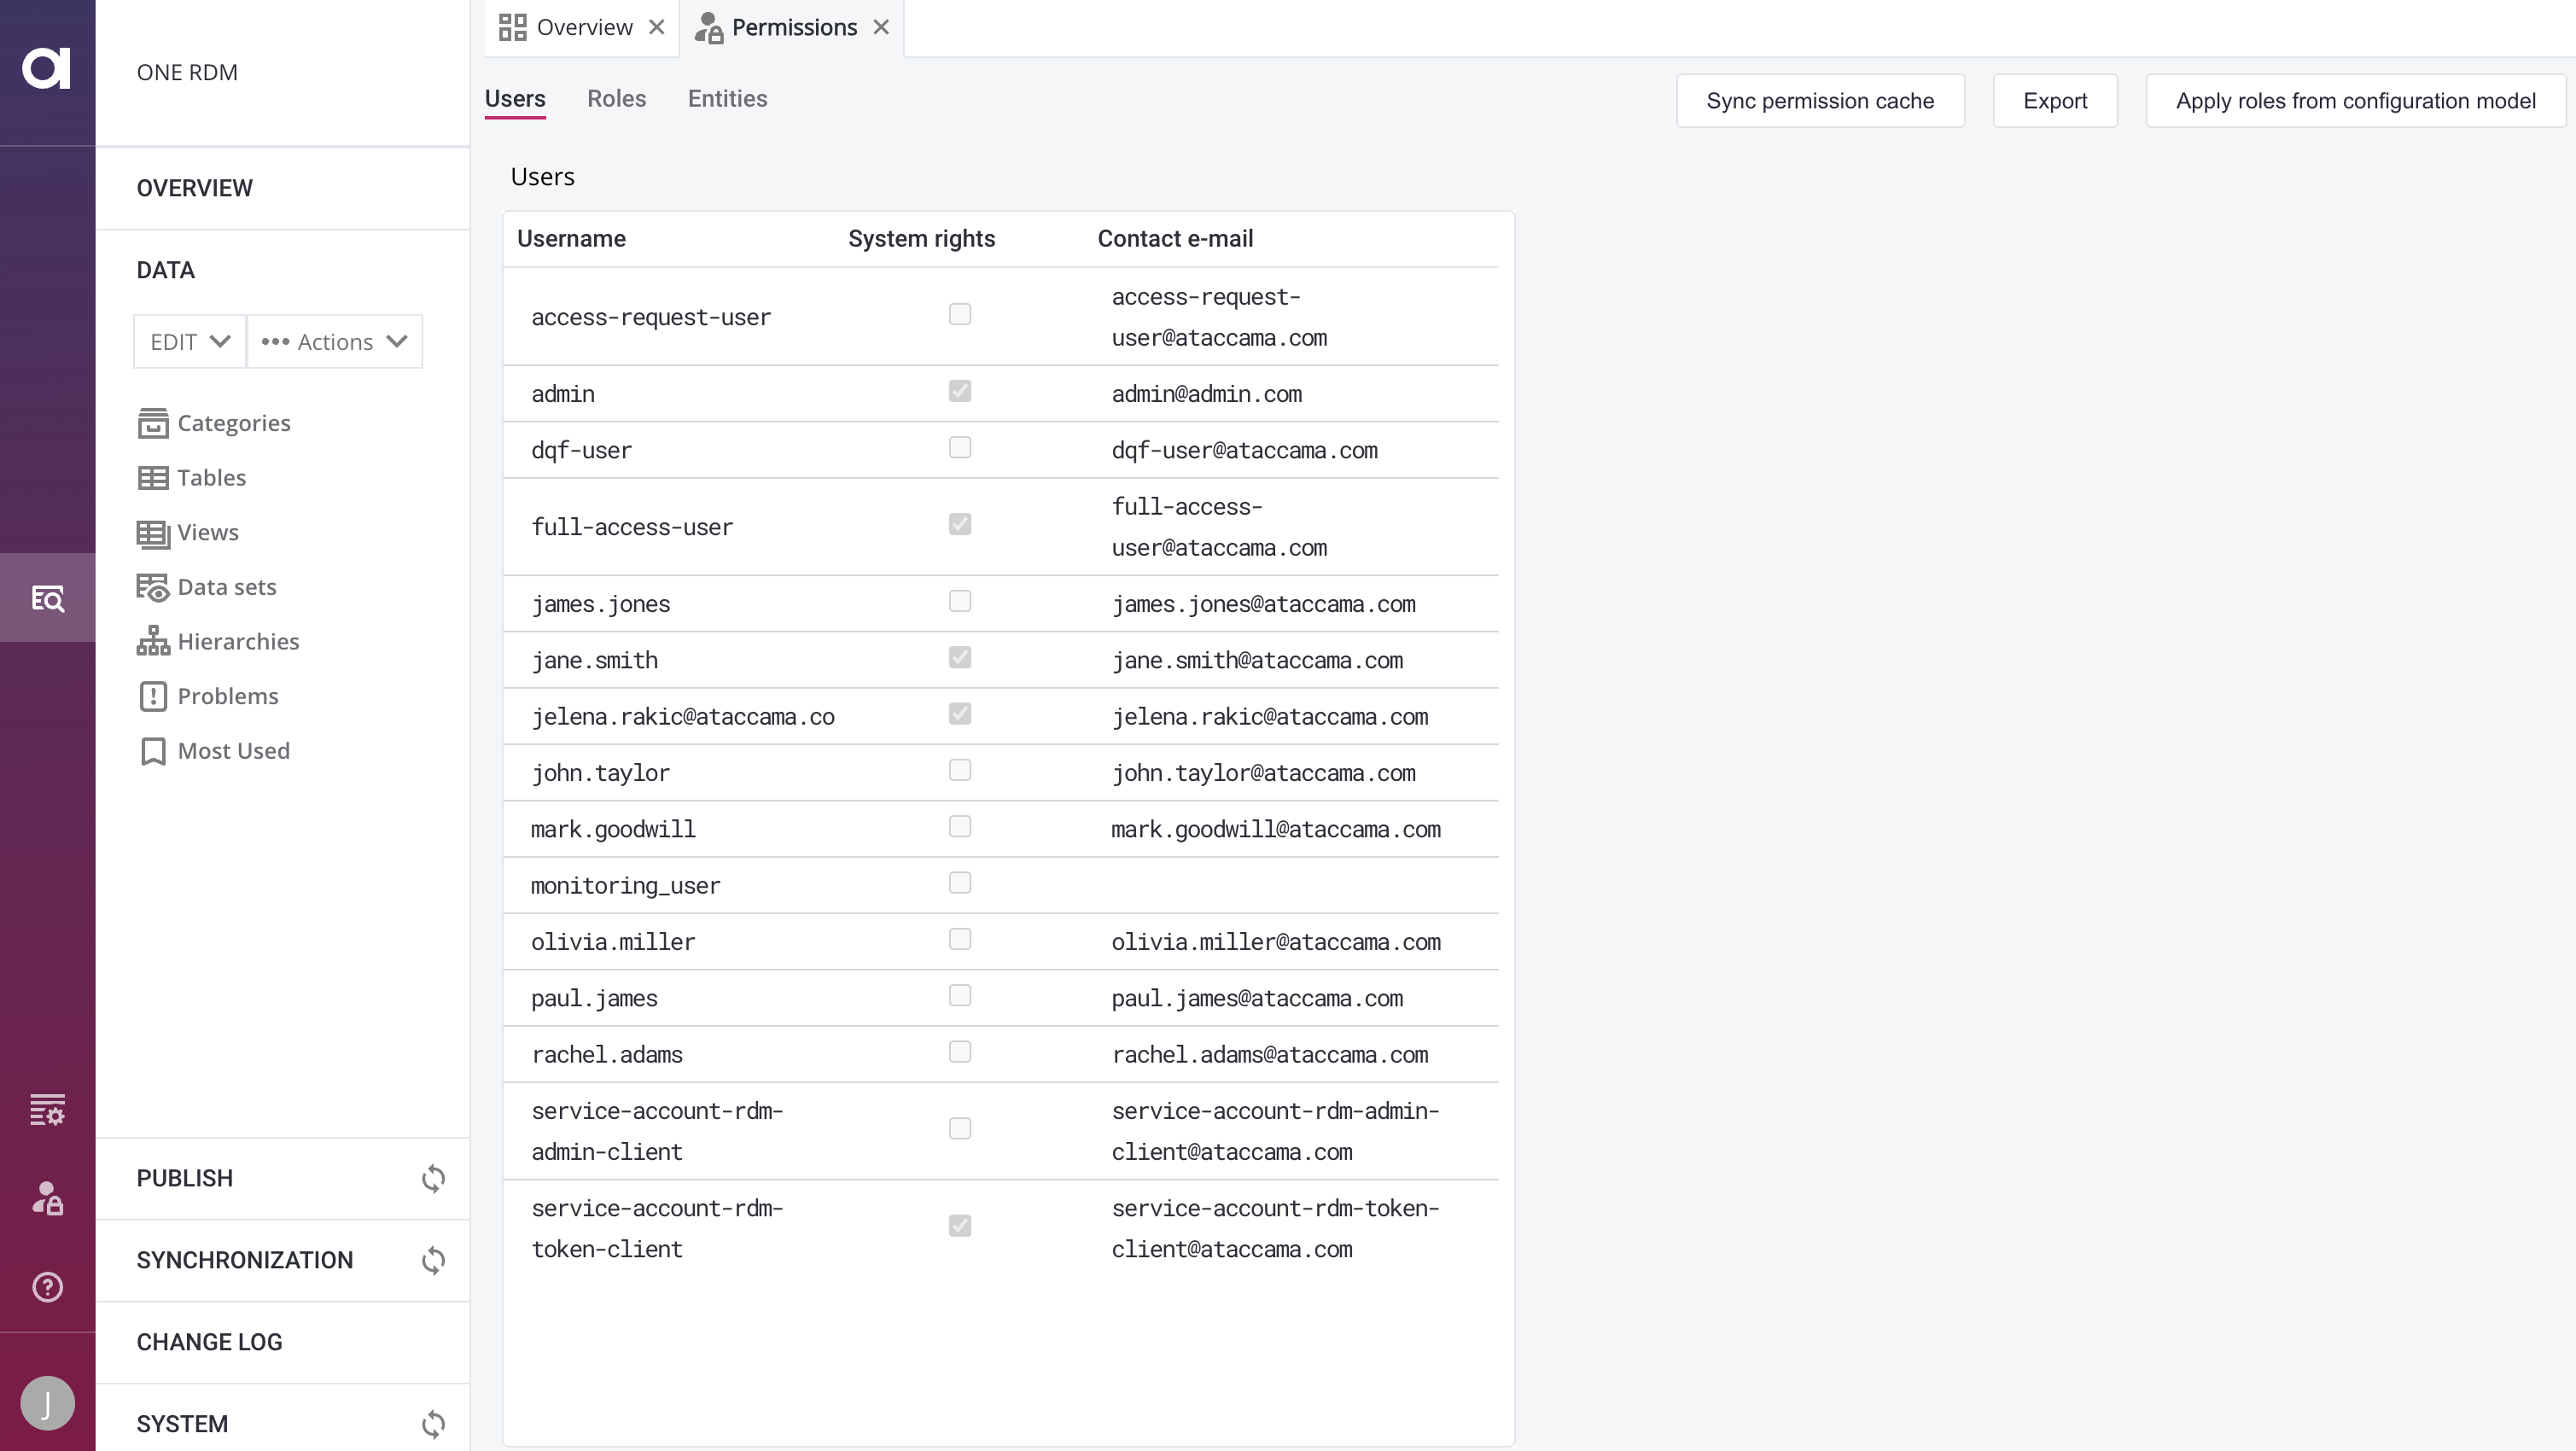
The permissions configuration dialog has three tabs: Users, Roles, and Entities. By default, you land on the Users tab, which provides an overview of the currently configured users.
If the System rights column is selected, it means the user sees the Permissions link. Select any user to see what roles they have.
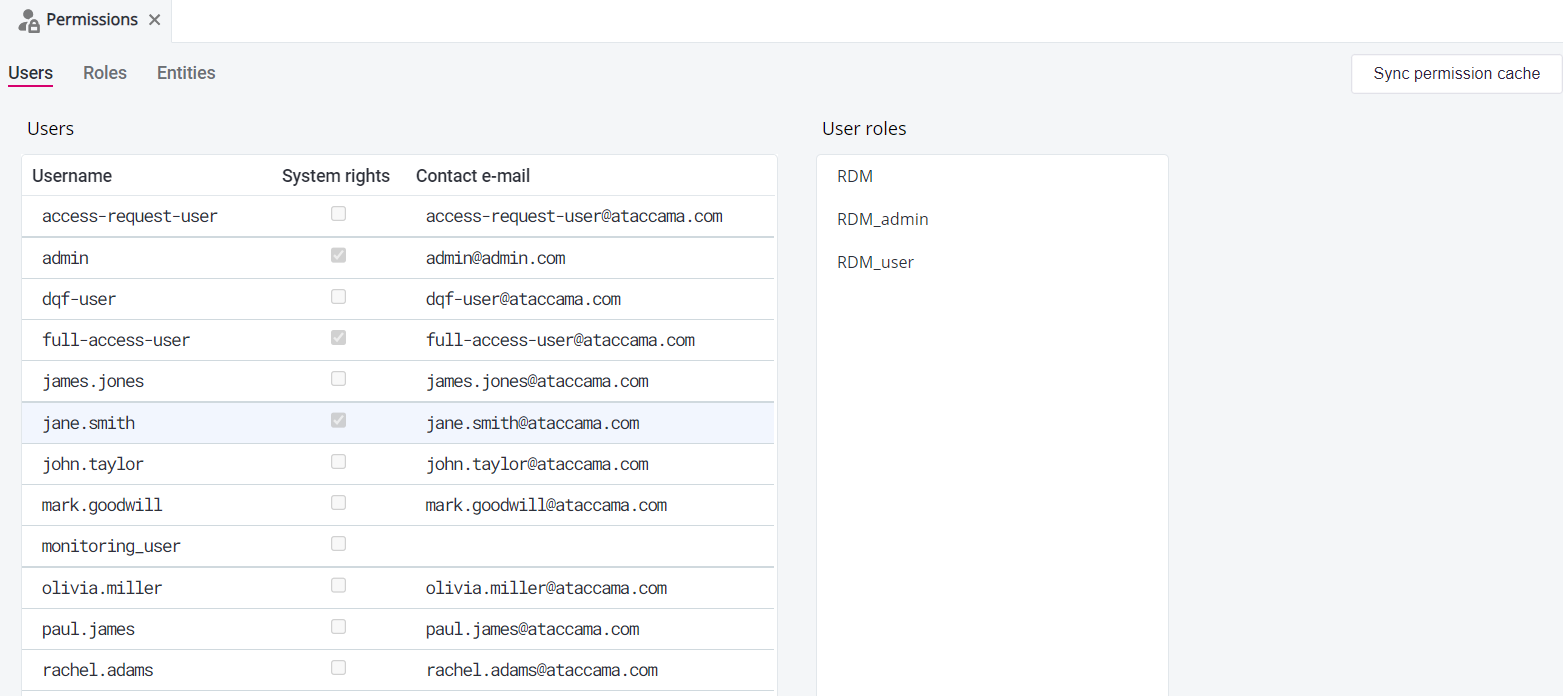
Synchronize user and role mapping
Users and roles are synchronized with Keycloak as follows:
-
Automatically, on user login.
-
Manually, after you select Sync permissions cache on the Permissions tab.
The Sync permission cache option clears the cache immediately and no users can perform any action in the application until the cache is rebuilt. This typically takes several seconds, however, if you have hundreds of users and roles, it can take tens of seconds instead. 
-
Periodically, following the schedule defined using the property
ataccama.one.rdm.user-synchronization-scheduleinapplication.properties. See RDM Application Properties.
| It is not possible to add users directly in the RDM web application. The users in RDM correspond to the users configured in Keycloak. For more information, see Mapping Roles and Users. |
Export permissions
You can export the configured permissions and roles from the web application to an XML file, which you can then import and further edit in ONE Desktop before importing it back to RDM. To do this, use the Export option available on the Permisisons tab.
By default, the exported file is called rdm_permissions.xml and it contains the specific permissions each role has on a particular entity.

Import roles and permissions to ONE Desktop
To work with the exported permissions in ONE Desktop:
-
Once you have generated the XML file, open your RDM project in ONE Desktop.
-
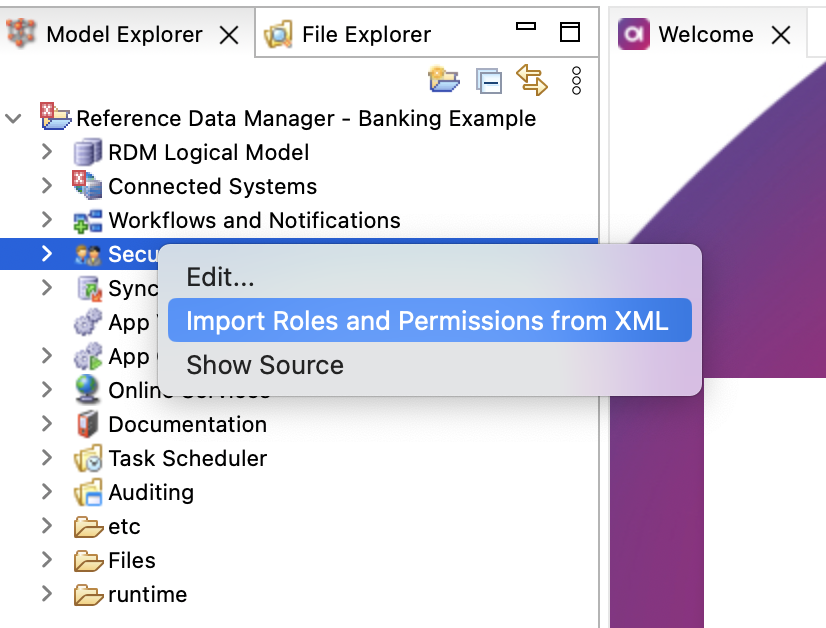
Right-click the Security node and select Import Roles and Permissions from XML.
-
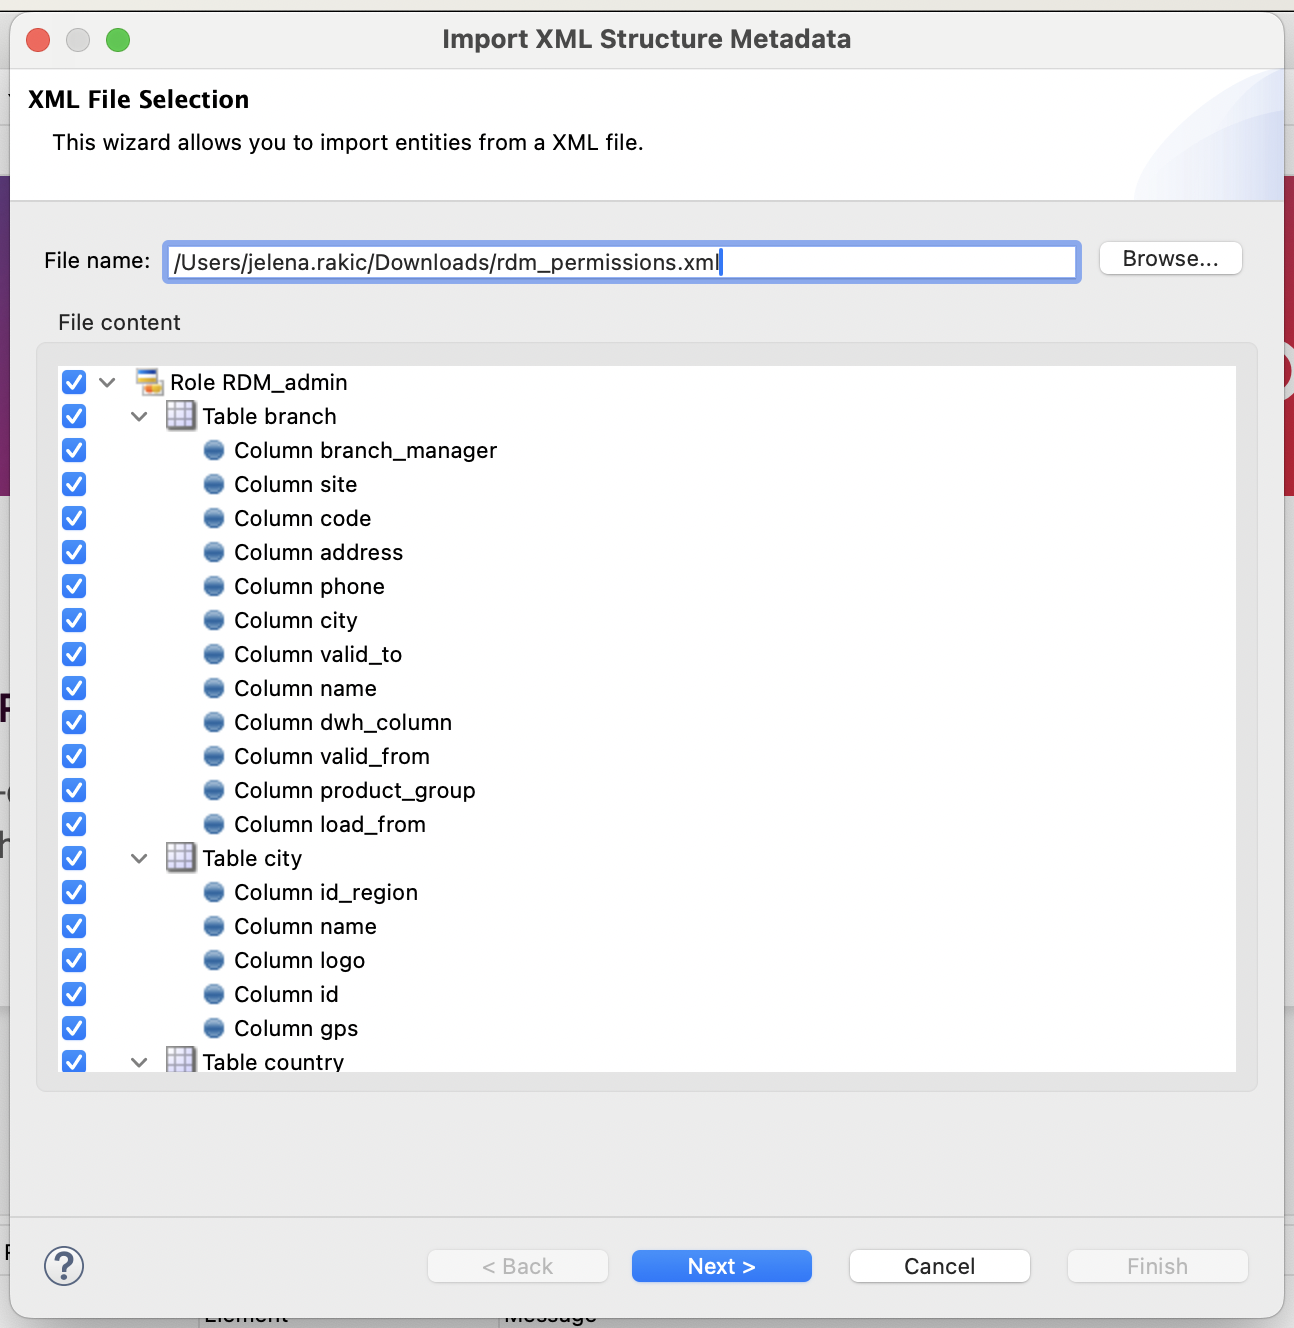
Locate and select the exported file. If needed, choose which elements you want to import and then select Next.
-
Review the metadata you are importing. If no changes are required, select Finish.
-
To change any permissions:
-
Navigate to the role and locate the entity whose permissions you want to modify.
-
Double-click it and select those that apply.
-
Select OK to confirm.
-
Import permissions to RDM
Once you have finished editing the permissions, generate the configuration again to update the roles.xml file based on the changes made.
After this, you can load the new configuration to RDM.
For details, see How to Deploy an RDM Web App Configuration.
Assign roles to users and managing roles
Permissions in RDM are managed per role, not per specific user. Therefore, for a user to have a specific set of permissions, they should have a specific role assigned.
Role assignment and management is handled in Keycloak. see Mapping Roles and Users.
Assign permissions to roles
| In case you are using Keycloak with fixed permissions enabled, once you edit permissions in RDM, this custom configuration is applied instead of the roles defined in the configuration model. For details, see Managing permissions when fixed permissions option is selected. |
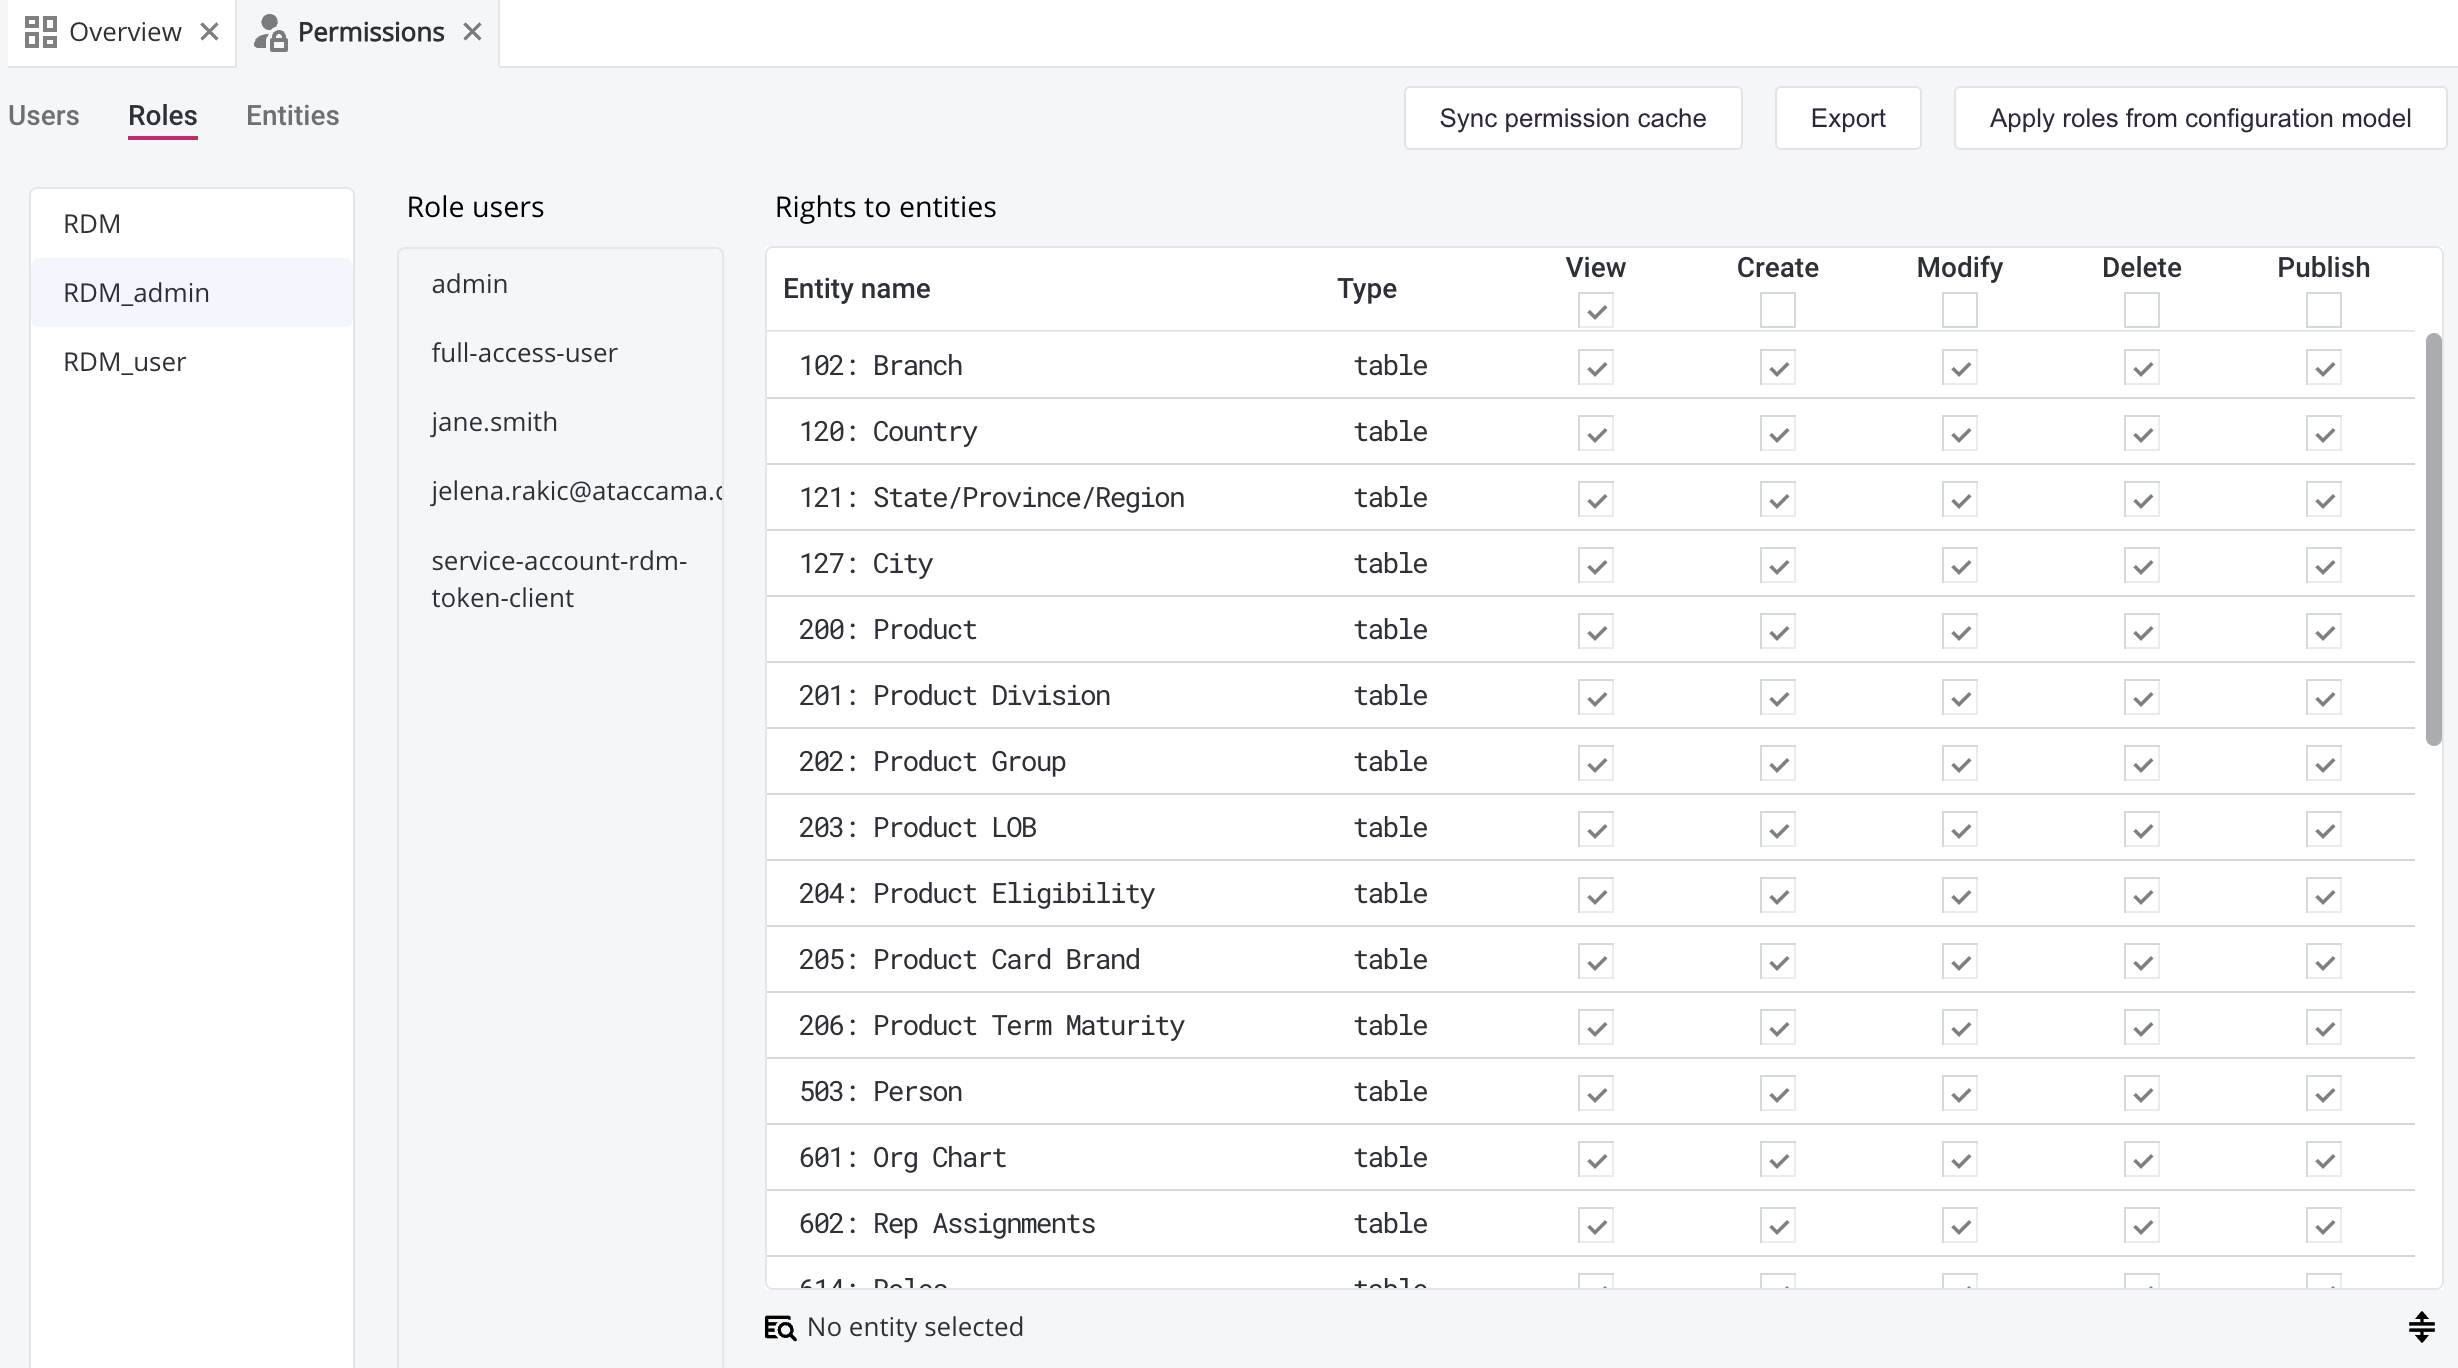
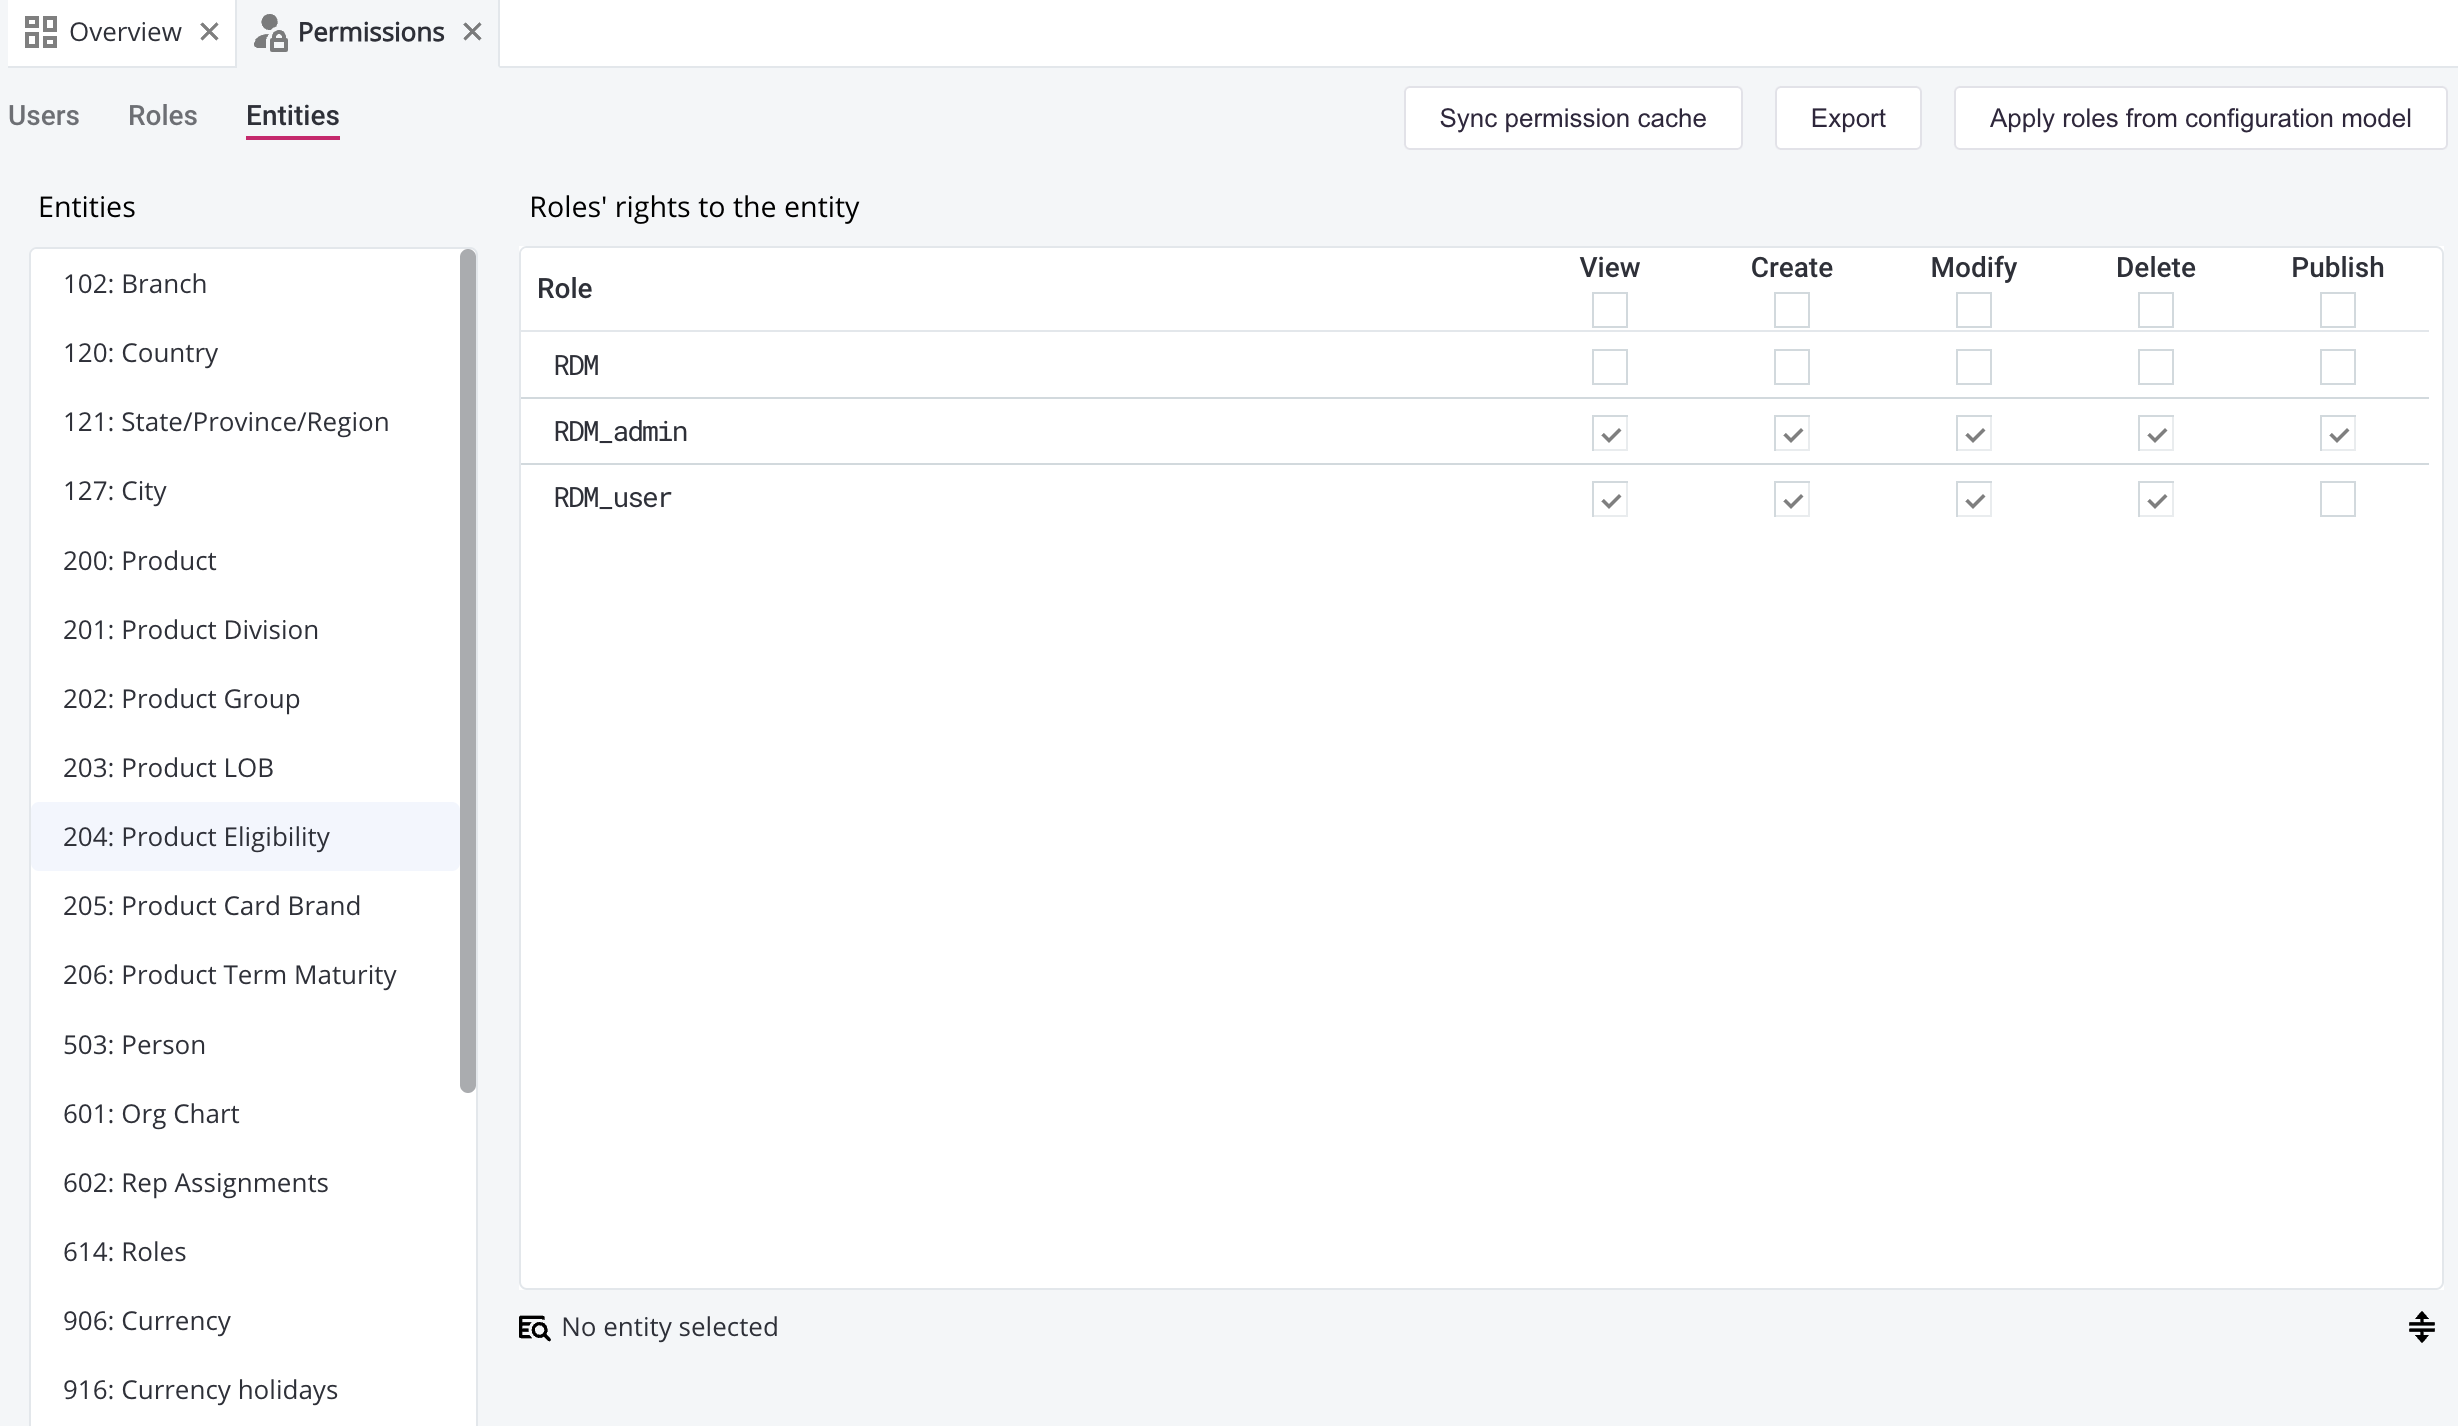
Permissions in RDM can be configured in two places: the Roles tab and the Entities tab. The difference between the two tabs is that in Roles, permissions are assigned per role for any selected table while in Entities, permissions are configured per table for any selected role. Both can be useful depending on the current need, for example, in the first case, when configuring permissions for a newly added role, while in the second case, when configuring permissions for a newly added table.
The Roles tab looks as follows:
The Entities tab looks as follows:
Managing permissions when fixed permissions option is selected
If your MDM project in ONE Desktop is configured to use fixed permissions, this means that the roles and permissions are loaded from the roles.xml file in the active configuration model.
The same mapping can be edited from the RDM Web Application, as explained in the previous section.
However, once you make changes to roles and permissions in the web application, RDM starts using this new mapping as the only source of configuration and no longer checks for changes in the roles.xml file, even after a new configuration model is applied.
To switch back to loading permissions from the roles.xml file, you can use the Apply roles from configuration model option, available on the Permissions tab in the RDM Web Application.
Once the mapping is reverted to roles.xml, it stays in effect as long as there are no manual changes to permissions in the web application.
| Selecting Apply roles from configuration model removes all edits applied to permissions using the web application. Use only when you are certain no changes will be lost. |
If the fixed permissions option is not turned on, roles and permissions can only be edited from the RDM Web Application and selecting Apply roles from configuration model has no effect.
Understanding RDM permissions
Each role can be fully configured with five possible permissions for each table, which can be set on the table level and the column level.
|
Given the descriptions of permissions on the table and column level, when setting permissions for a given table, consider its parent and child tables and set the permissions on the table and column level for the related tables accordingly. Related tables can be viewed on the Relationships tab of the Table description dialog. For more information, see Viewing Data in RDM, section Viewing table details. |
- Permissions on the table level
-
-
View: Can see the table in the Navigation Panel.
If no columns are selected with the View permissions, the user only sees the default columns. See Getting Started with RDM, section Default columns. -
Create: The Create option is available in the Features Bar of the opened table and Record detail dialog.
-
Modify: The Edit option is available in the Features Bar of the opened table and Record detail dialog.
For Create and Modify permissions, users with the selected role can access the Create detail or Edit detail dialog, but the available fields depend on the Modify permissions defined for each specific column. -
Delete: Can delete records in the selected table.
-
Publish: Can publish records of the selected table. The table appear in the Publish node of the Navigation Panel.
-
- Permissions on the column level
-
-
View:
-
Can see a given column in the table.
-
Can see a given column in the lookup search or combo box when creating or editing a child record.
-
Can see a child record when using the Show children option from the Features Bar of the opened table and Records detail.
-
-
Modify: Can modify this attribute in the Create detail or Edit detail dialog.
-
Row filters
| By default, row filters cannot be edited. If required, permissions for admins can be turned on during configuration. |
If permissions have been enabled for admins, in addition to setting which tables and attributes can be viewed or edited, it is also possible to set what kind of data they can see, edit, and publish.
The row filter restrictions are:
-
View rows filter: The condition limits the visibility of rows for the selected table and role.
-
Edit rows filter: The condition limits editing of rows for the selected table and role.
-
Publish rows filter: The condition limits publishing of rows for the selected table and role.
| As opposed to expert conditions of data-viewing filters, view, edit, and publish row filters require using database column names, not their labels. Database column names can be found on the Columns tab of table details (Name column). |
Set conditions that restrict the count of rows from the child table to a subset of the table.
Each user can view applicable restrictions on the Row restrictions tab of the Table detail dialog (see Viewing Data in RDM, section Viewing table details).
Was this page useful?
