
Working with Records in RDM
This article describes how to make changes to data in RDM.
The options described are available when you open a table in the EDIT mode.
| Changes must be published to take effect. |
Create records
To add a new record to a table:
-
Select Create in the toolbar.
To create a record duplicating attributes of an existing record, go to Tables, select the record, then Create. This copies all attribute values to the new record, which you can then modify as needed. -
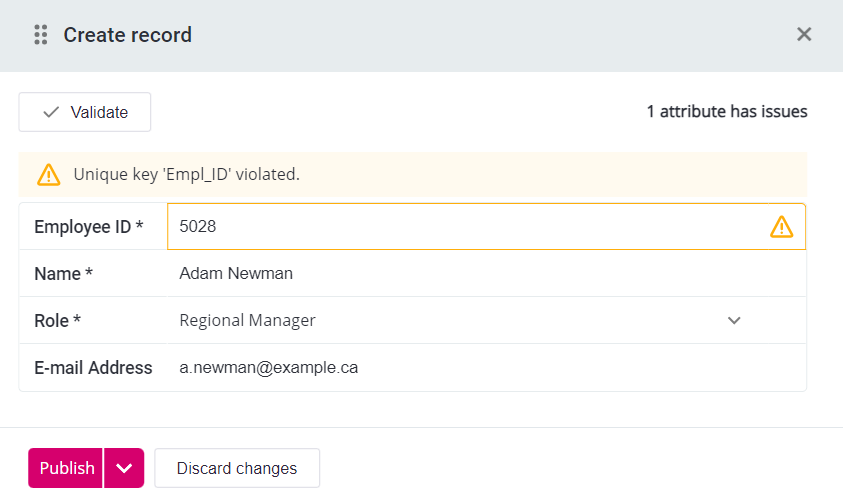
Fill in the record information. If an issue is reported, check the validation messages for solutions.
Row-level validation errors appear in a banner at the top of the record detail screen. For attribute-level errors, hover over the warning or error icon.
Fix errors before moving to the next step as otherwise changes cannot be saved.
See also Boolean attributes and Datetime attributes. -
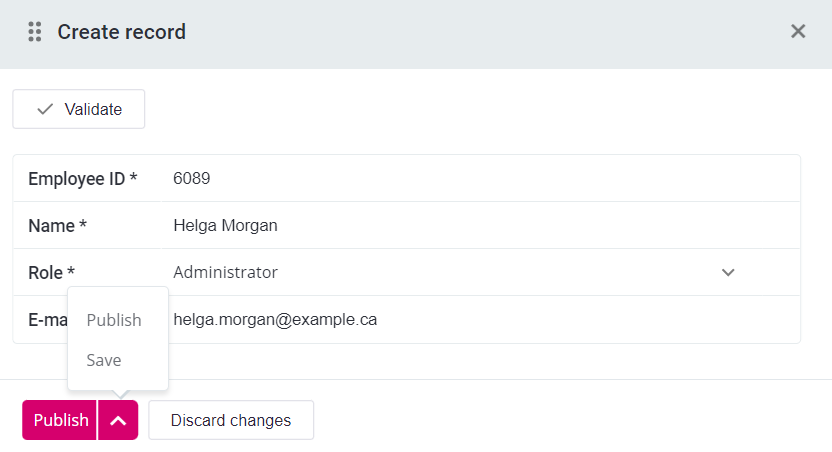
To save the record for publishing, select Save from the actions menu. To publish immediately, select Publish or choose Publish from the actions menu.
-
If you saved your changes, send the record to publishing.
A green dot at the beginning of the row indicates new records.
Boolean attributes
Boolean attribute fields are empty by default.

Click once to set the value to true, then switch between true or false as needed.
Clear the field to leave it empty (select X).

If your RDM instance uses checkboxes for Boolean values instead, select or clear the checkbox accordingly.
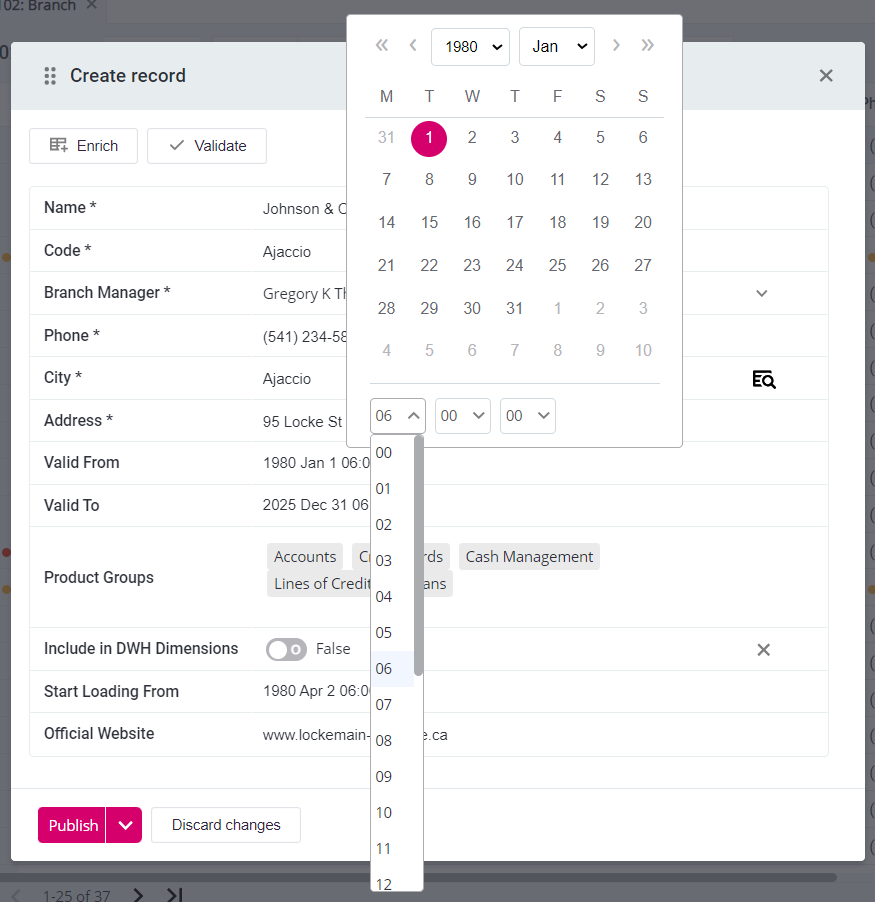
Datetime attributes
Datetime attributes support:
-
Hours (12-hour or 24-hour clock)
-
Minutes
-
Seconds
-
AM/PM switch: Displayed if the datetime pattern in the domain configuration uses one of these characters:
a,h,K(as defined in the GWT datetime pattern documentation).
The 12-hour clock supports digits 1-12.
For example, you can combine this with the AM/PM switch to display midnight as 12:00 AM and noon as 12:00 PM.
If K is used to define the datetime pattern (in the domain configuration), the AM/PM switch is displayed but the value is converted from the 0-11 range to 1-12.
|
You cannot edit milliseconds using the time picker. To modify them, directly edit the relevant part of the datetime value (for example, |
Record validation
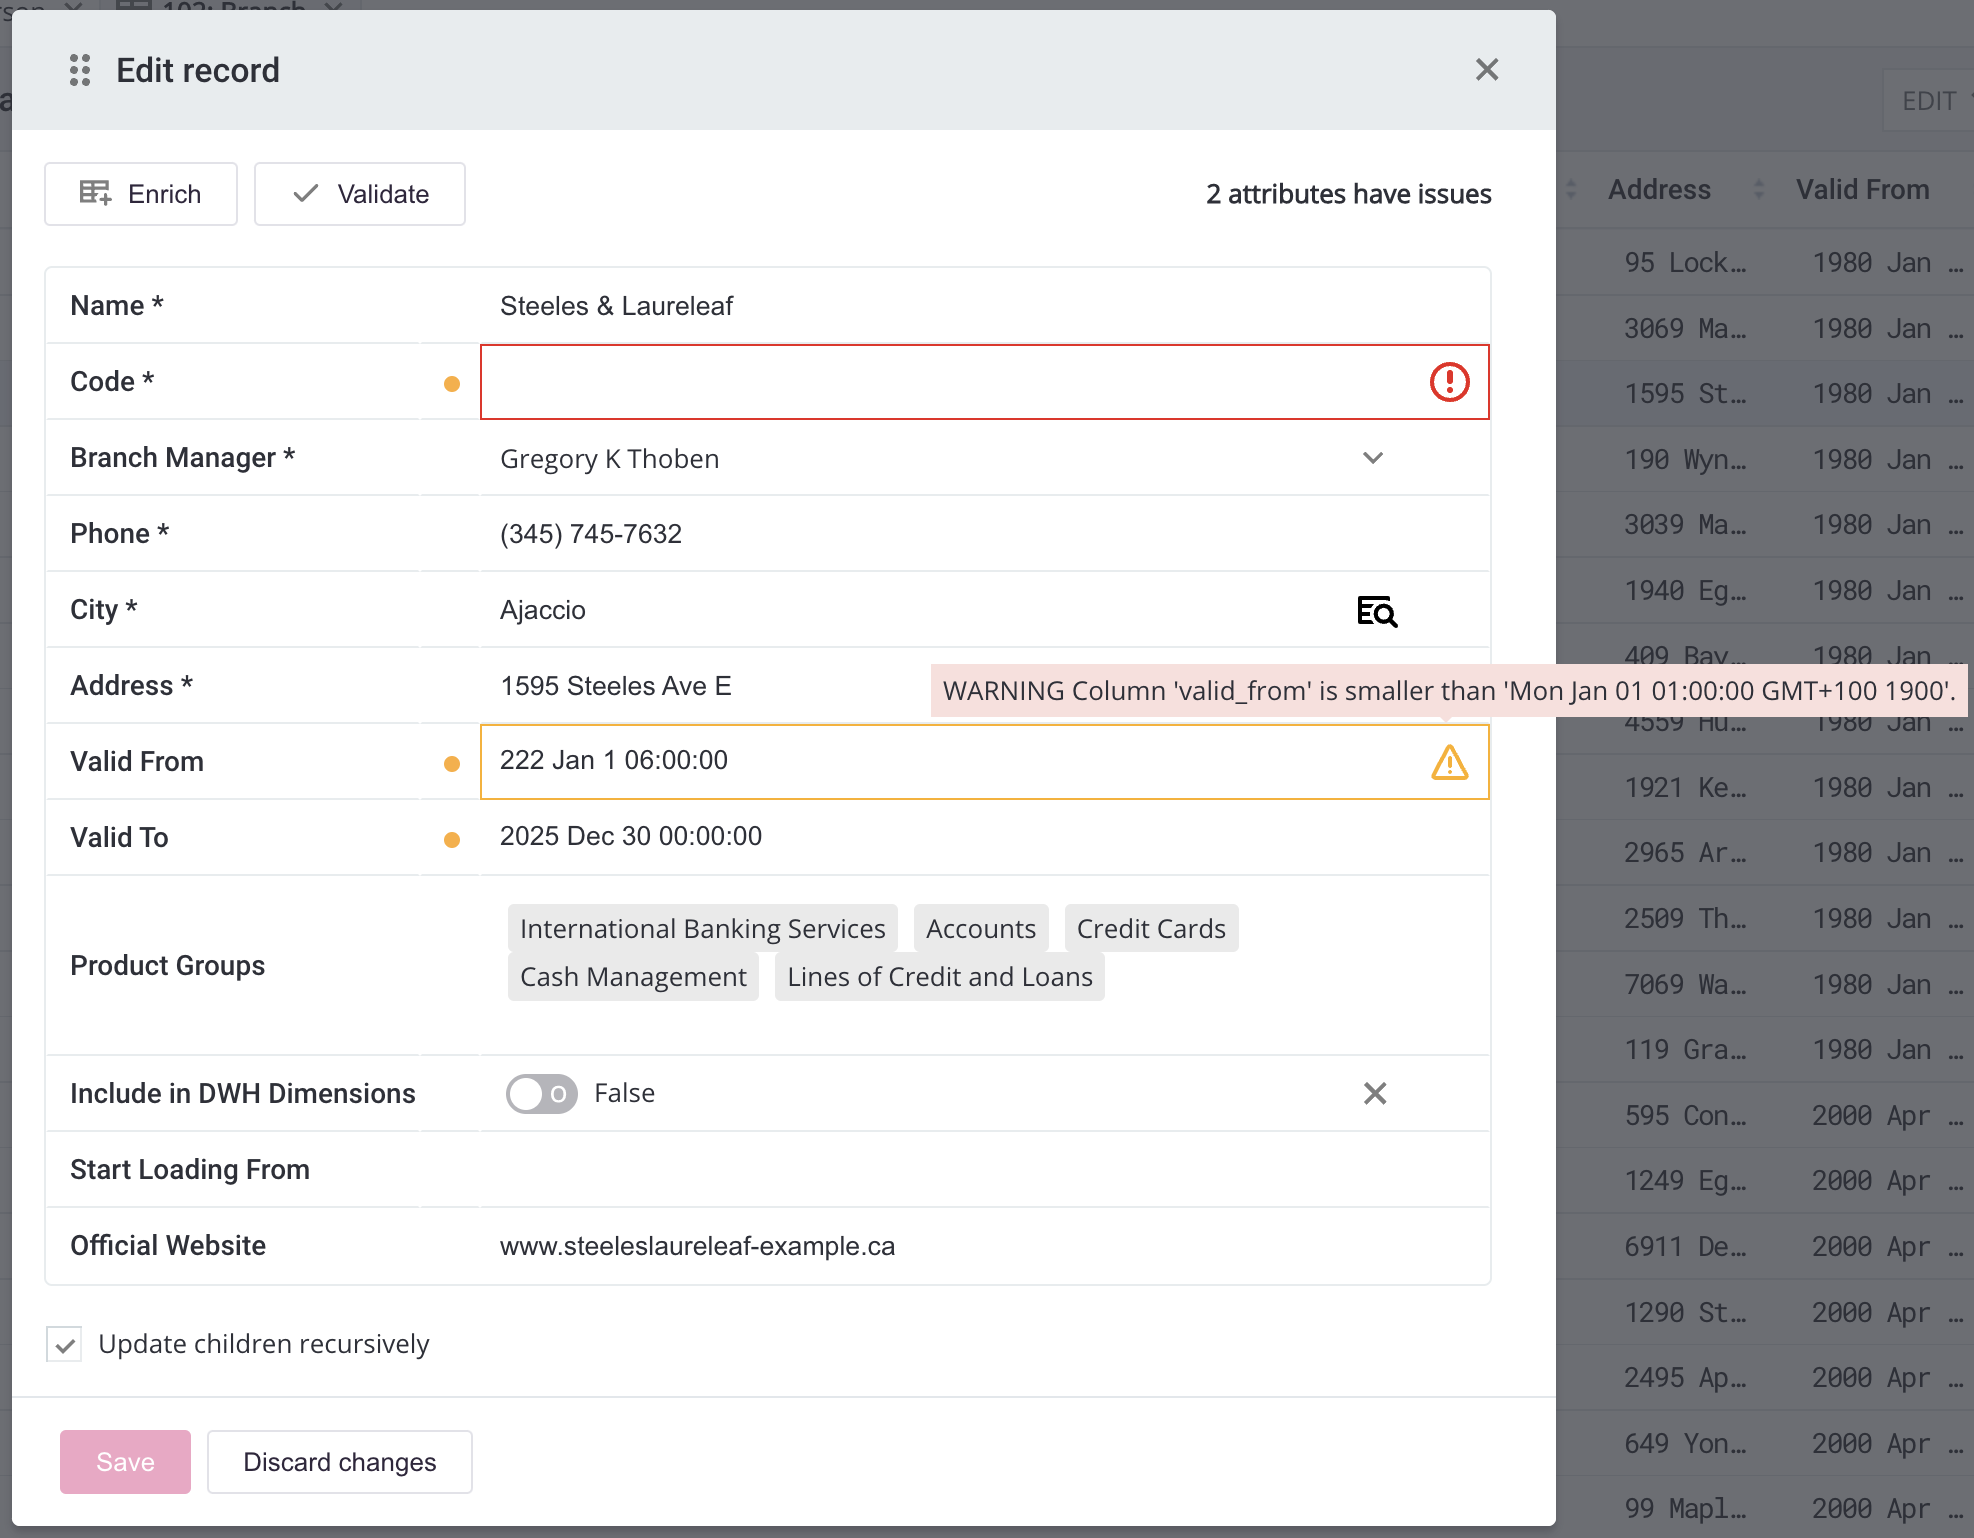
When viewing record details, detected issues are directly displayed on fields:
-
Error: The attribute doesn’t comply with validation parameters and, if applicable, the online validation. You cannot save your changes while the error is present.
-
Warning: The attribute complies with validation parameters but doesn’t pass online validation. These records can be saved but cannot be published (or moved to publish) until validation issues are resolved.
Hover over the issue icon to find out more about what caused the issue and how to fix it. No issues reported means the attribute passed all applied validations.
Records are validated in real time as you update an attribute value. However, if needed, the validation mode can be changed to manual only for a particular table. See Record validity.
Lookups
Some attributes are filled from parent tables using lookups. There are three possible types of lookup display:
-
Window lookup - Opens the parent table displaying all database attributes (excluding RDM default columns); allows choosing one value.
Alternatively, start typing into the field to display values containing the input expression.
-
Combo-box lookup - Choose one parent attribute from the list without showing additional attributes.
-
Multi-value lookup - Choose several parent attributes from a parent table, similar to the window lookup. The options work as follows:
-
Plus icon - Opens a dialog for adding parent attribute values.
-
Minus icon - Opens a dialog for removing parent attribute values.
-
X icon - Removes all added parent attribute values.
-
Enrich and validate
When configured, Enrich fills in one or several attributes based on one of several attribute values. For example, in the previous image (section Record validation), the Code field can be filled by the Enrich functionality based on the Name field and the number of semicolon-separated values in the Product Groups field.
Other cases might use lookups for filling in information based on a code. The Enrich functionality is configured in the RDM backend.
When configured, Validate performs complex online validations of applicable fields. See Record validity.
| Records are validated immediately after a value is changed. However, you can also manually validate data at any point. |
Editing records
|
Table and record locking
When making changes to data, RDM locks the table you’re working with as well as any tables with a relationship to it. The same applies to records: if someone else is editing a record, it is locked for other users. However, if you have Edit permissions and want to edit the record, you can override this. Select the record and choose Action > Assign to me from the toolbar. You can now edit the record. |
To edit a record:
-
Open the table.
-
Choose a record and select Edit from the toolbar.
-
Fill in the attribute in the Edit detail dialog.
-
Select the Update children recursively option. See Option Update children recursively.
-
Select Publish > Save to save changes and display record detail, or select Publish to publish the changes immediately.
-
If you saved your changes, send the record to publishing.
An orange dot indicates edited records and attributes. It is displayed at the beginning of the row for records and next to modified attributes on the record detail screen.
For more detailed instructions about the Edit detail dialog, see Create records.
Option Update children recursively
The option must be selected when the edited record has child records.
Otherwise, editing records results in an Inconsistent column value with parent error with child tables, making the affected records invalid and changes unpublishable.
Note that you must have Edit permissions on the table. Without them, the edited record remains unpublishable due to the same error.
To view child records, select Show children in the record detail. See Show children.
Edit several records
Edit several records simultaneously using Multi edit. This is useful when several records need one or several attributes changed to the same value.
|
Available only in Tables. Expert usage: Multi-edit also works for bulk updates of foreign key values; however, this only applies to relationships without a filter using child values (for example, |
To edit several records:
-
Open the table.
-
Select records for editing:
-
Select manually.
-
Apply a filter.
-
-
Select Action > Multi edit from the toolbar.
-
In the Edit more rows dialog, select either Use selected rows or Use all rows currently filtered depending on your selection method.
-
Select Add columns in the next dialog.
-
In the Add columns dialog, select the columns to edit and then Select.
-
Fill in details for the selected rows. Add and remove attributes using Add columns and Delete columns options (select columns to be deleted first).
-
Select OK to finish.
-
An orange dot indicates edited records and attributes. It is displayed at the beginning of the row for records and next to modified attributes on the record detail screen.
Delete records
To delete one or several records:
-
Open the table.
-
Select records for deleting:
-
Select records manually.
-
Apply a filter.
-
-
Select Action > Delete from the toolbar.
-
In the confirmation dialog, select either Use selected rows or Use all rows currently filtered depending on your selection method.
-
Select Recursively if you are deleting rows with parent attributes.
-
Select OK to confirm.
-
A red dot at the beginning of the row indicates deleted records.
Option Recursively
The option must be selected when deleting records with attributes used directly in child tables.
Otherwise, deleting results in a Rows with non-existing parents error with the child tables, making the affected records invalid and changes unpublishable.
Note that you must have Delete permissions on the table. Without them, the deleted record remains unpublishable due to the same error.
Undo changes
Revert single record change
Undo a change made to a specific attribute value and restore the edited value to the last published state.
| Available only for attributes that don’t compose the foreign key of the record. |
To revert:
-
Open the table.
-
Select the record for which you need to revert changes.
-
Select Edit in the toolbar.
-
In the Edit dialog, select the orange dot to see the current and the published value.

-
Select Revert to published.
Revert all record changes
To quickly cancel all changes made to a record, use the Restore option.
| Available only for records in the Edited state and only for the user who performed the operation. Records moved further down the workflow must first be returned to the edit state. |
| Restore completely removes newly created records that weren’t published. |
To undo changes:
-
Select records whose changes should be discarded:
-
Select records manually.
-
Apply a filter.
-
-
Select Action > Restore from the toolbar.
-
In the Restore dialog, select either Use selected rows or Use all rows currently filtered depending on your selection method.
-
Select OK to finish.
Mark records for later use
To mark certain records for further work or publishing (for example, to prevent publishing records edited by someone else), add them to the Cart.
Add records to the cart
In the opened table:
-
Select the records.
-
Select Action > Add to cart. Records now have a cart icon in the corresponding column.
To view the records you’ve added to the cart, switch from the editing mode to CART.
Move to publish
| Changes can be moved to publish only if the record passes all applied validations. |
Before a record can be published by users with corresponding permissions, changes made to it (create, edit, or delete) must first be saved as final by the user who authored them. This is done using the Move to publish option.
To send a record to publishing:
-
Open the table.
-
Select records:
-
Select records manually.
-
Apply a filter.
-
-
Select Move to publish in the Features Bar.
-
In the Move to publish dialog, select Use selected rows or Use all rows currently filtered depending on your selection method.
-
Select OK to finish.
Outcome
After sending records to publishing, the record state (displayed in the [ State ] column) changes either to Waiting for publishing (ready for publishing) or to the next workflow state if a workflow is defined for the table. In the latter case, the record isn’t available for publishing until it passes all necessary workflow states.
| If you have Publish permissions, you can publish changes directly from the Create or Edit dialog. See Publishing Changes in RDM. |
Return to edit
The Return to Edit option reverts the record to the Edited workflow state after it was moved to publish.
| Available if you have Publish permissions. |
To return one or several records to the Edited state:
-
Open the table.
-
Select records:
-
Select records manually.
-
Apply a filter.
-
-
Select Action > Return to edit from the toolbar.
-
In the Return to edit state dialog, select Use selected rows or Use all rows currently filtered depending on your selection method.
-
Select OK to finish.
Records participated in bulk operation
When performing some actions in RDM, you might encounter the following message: Records participated in bulk operation. Should I apply action to whole bulk operation?.
This means that the record you’re trying to undo, return to edit, or move to publish was edited or deleted recursively, affecting child records. You’re asked whether to perform the current action on the affected child records as well (that is, recursively).
In most cases, confirm this action. For details, see Option Update children recursively and Option Recursively.
Was this page useful?