
Configuring Initial Loads to RDM Tables
When the RDM logical model is created and deployed for the first time, tables created in the web application are empty. To fill an empty table with data, you can either perform a bulk import from a text file in the web application (see Importing and Exporting Data in RDM) or configure a plan, which can load data from any number of sources, transform and join them in any required way, and then populate the chosen RDM table.
It is also possible to generate a plan that imports records together with their editing history: a separate plan is generated for this case.
To configure an initial load plan for a table:
-
Make sure the Initial load or Initial load - history option or both are selected for the table that needs to be populated: expand RDM Logical Model > Tables and then double-click [your table]. See Tables for details.
When Initial load - history is selected, a separate plan with the _historysuffix is generated. -
Right-click the table and select Generate initial load plan(s). Plans are generated to Files > plans > batchLoadPlans.
To generate plans for all tables, right-click the Tables node and select Generate. -
Right-click the table and select Open initial load plan or Open initial load history plan.
-
Configure your plan:
-
If you are configuring a simple load plan (no history), then the configuration is very similar or the same as the one described in Configuring Tasks for Importing Data from Text Files.
-
If you are configuring a load plan with history (suffixed with
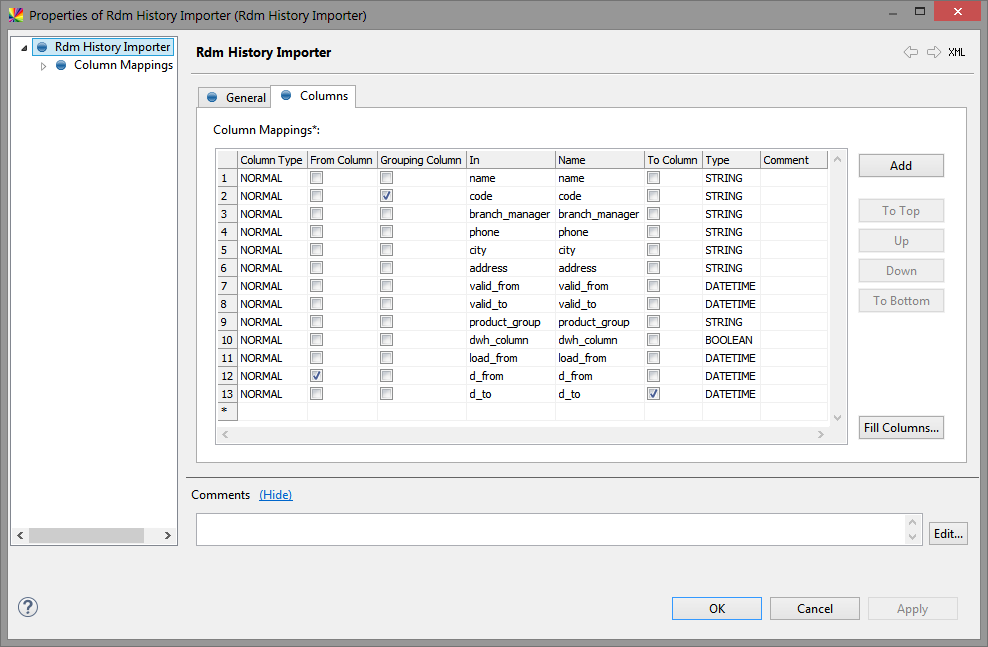
_history), the general logic is the same, but a different RDM step is used—RDM History Importer—which has a slightly different Columns tab configuration:-
Two columns are required and automatically generated here:
d_fromandd_to, which define the beginning and end of validity for a particular edit of any given record. These columns have From Column and To Column marked, respectively. Make sure your source data has columns containing this data. -
You need to mark one or several columns as Grouping Column: these act like a primary key.
The following is a sample configuration:
-
-
-
Save your project and reload metadata.
After you run a plan that contains the History Importer step, you need to restart the RDM web application configuration to ensure the changes are correctly synchronized. For details, see How to Deploy an RDM Web App Configuration.
Was this page useful?