Tasks
Use tasks to track your work and organize the workload into a kanban board. The kanban board helps you visualize your workload and effectively manage its progress.
On the board, you can manage task priorities, change progress status, and leave comments. Users with different roles can collaborate on the same task.
With tasks you can:
-
Create and manage tasks and their subtasks.
-
Assign tasks to others.
-
Ask coworkers for assistance.
-
Send a request for change, for example, creating a new entity.
-
Manage access request workflow tasks.
-
Review and manage approval workflow tasks.
How to access tasks
To view tasks and their subtasks, go to the Tasks tab from the navigation menu. Select a task to see the details in a sidebar.
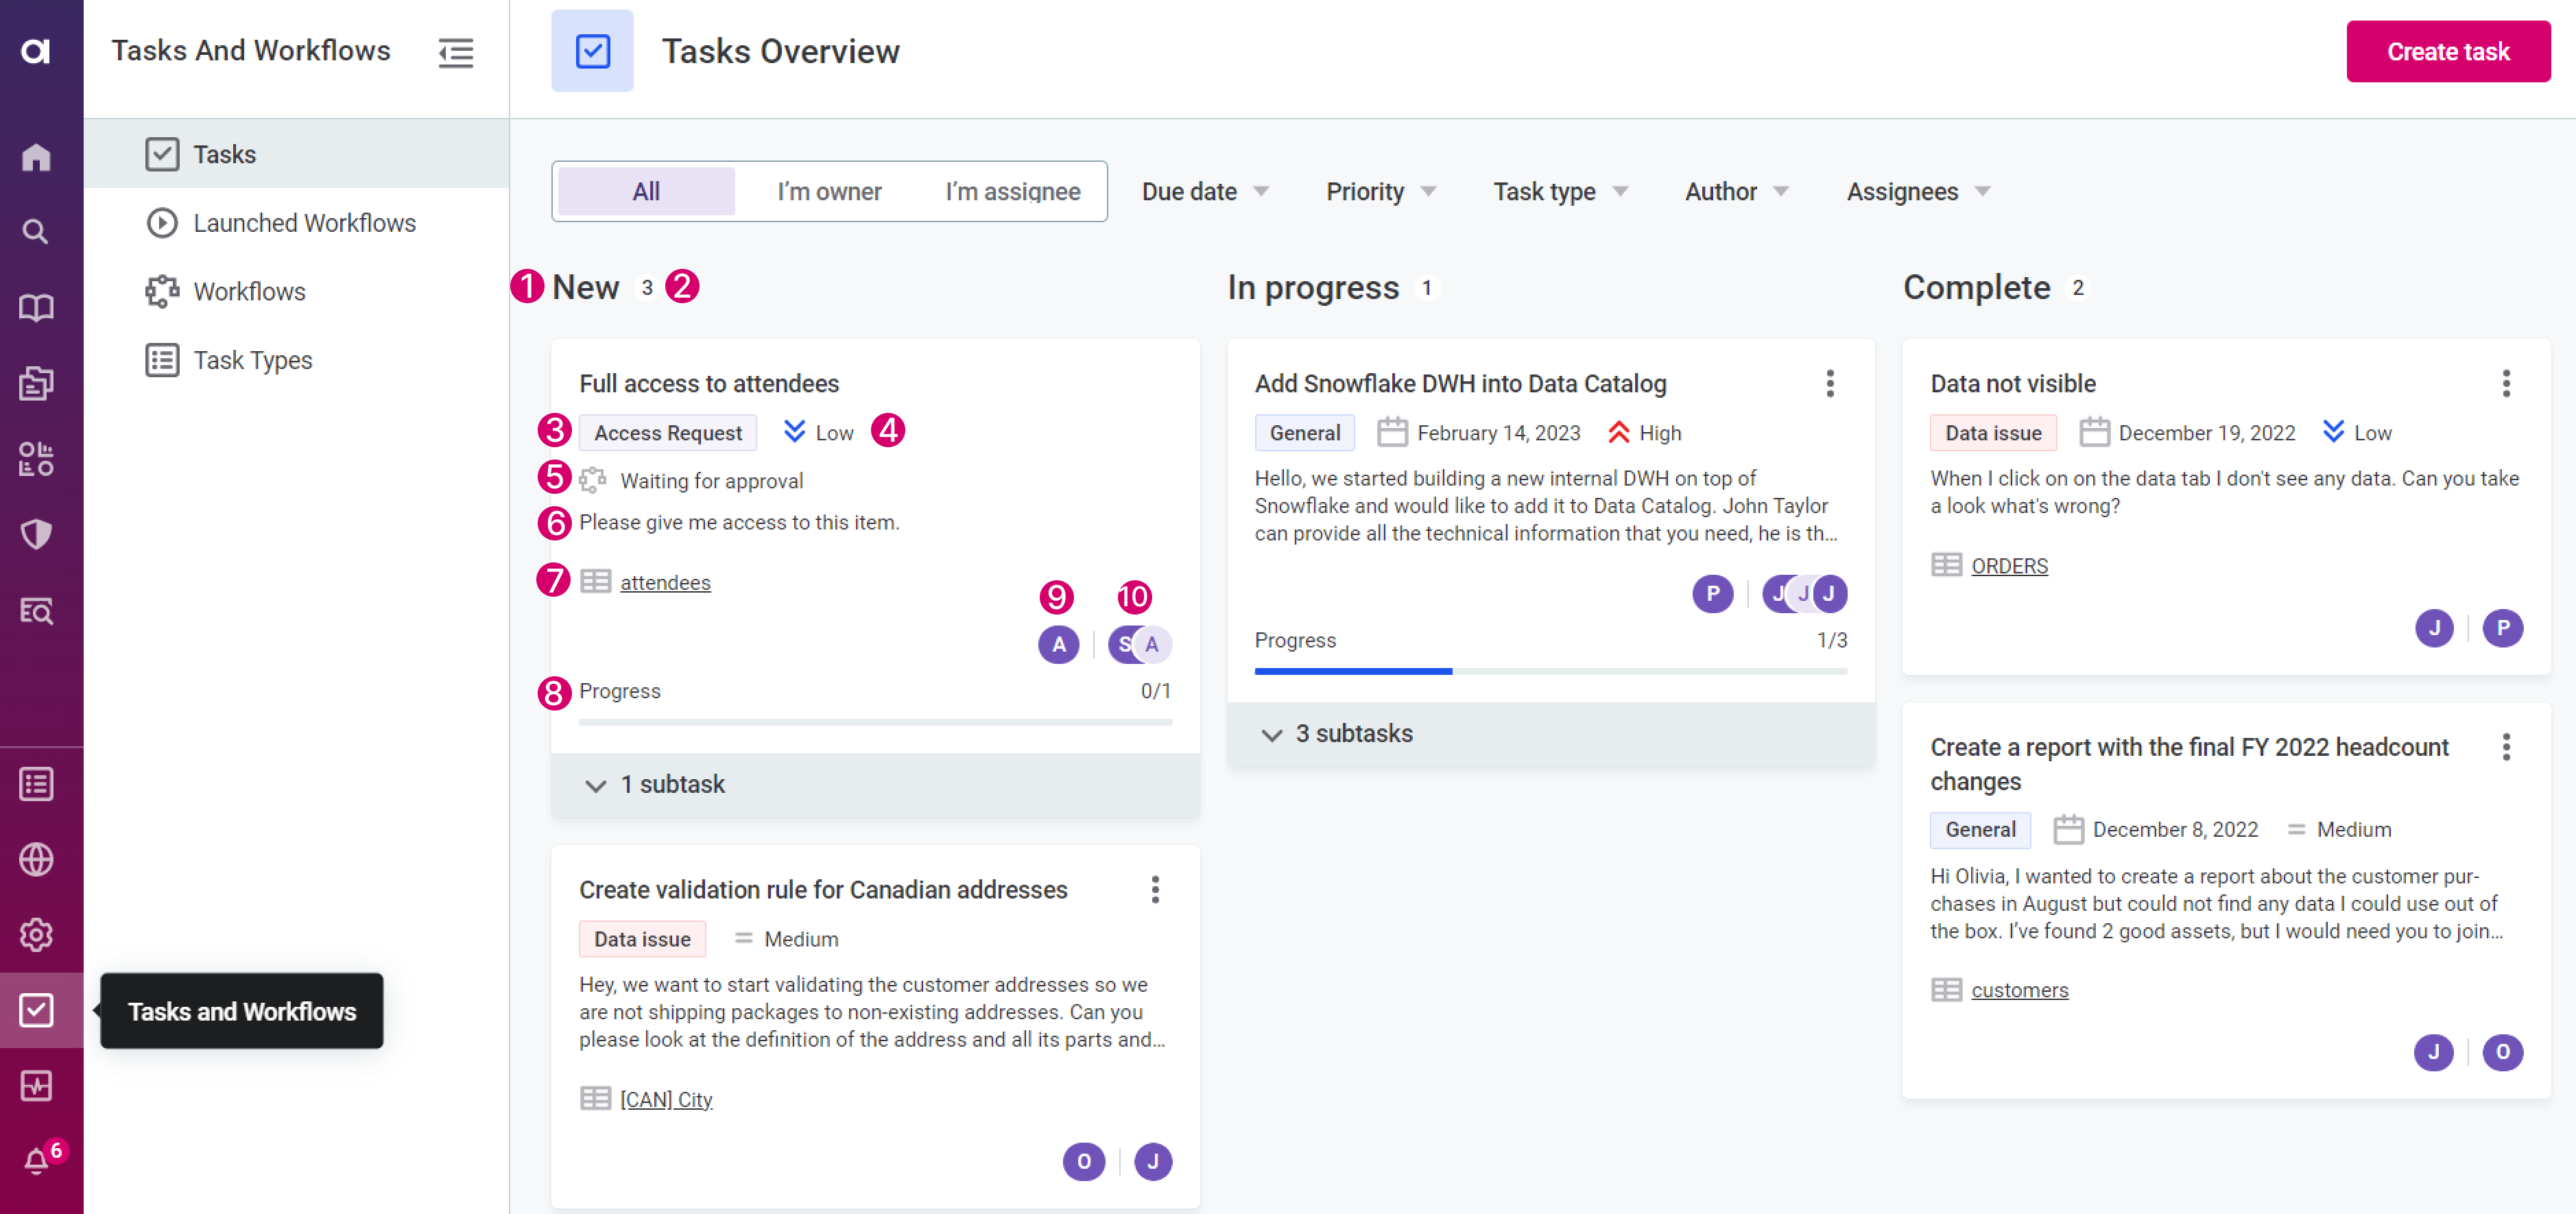
The tasks are organized on the board by their statuses in the following columns (see 1 in the image):
-
New: Includes all newly created tasks.
-
In progress: Tasks that have been started.
-
Complete: All complete tasks.
There are two ways you can move tasks on the board:
-
Select a task, and then change the status of the task in the task details panel. See Change task status.
-
Drag and drop a task the needed column. This changes the status of the task automatically.
Take note of the following:
-
The status of the main task does not depend on the status of related subtasks. For example, all subtasks can be Complete while the main task still has an In progress status.
Similarly, the main task can be placed in the Complete column, while the subtasks can still have other statuses.
-
The status of workflow tasks cannot be updated manually. For other details, see Workflow tasks.
-
Tasks in all columns are sorted from the most recent, according to the creation date.
-
Each column shows how many tasks are in that state (2) and for each task you can see the following:
-
Task name.
-
Task type (3).
Workflow task types cannot be edited. For other details, see Workflow tasks. -
Task priority (4): Low, Medium, or High.
-
Task state (5): Displays the state for workflow tasks (
Access RequestandReview Requesttask types).-
Possible states for access request tasks: Started, Waiting for approval, Approved, Permission Granted, Permission Declined.
-
Possible states for review request tasks: Started, In Progress (Waiting for complete configuration, Approved, Waiting for review), Resolved (Published, Publish rejected, Canceled).
In case you see a Waiting for complete configuration state on review request tasks, it means that the Approval Workflow migration was not completed during the upgrade of ONE.
Before this is done, you cannot proceed with the review and publishing of request tasks. For more information, see the ONE Gen2 Upgrade Guide.
-
-
Task description (6).
-
The entity to which a task refers to (7).
-
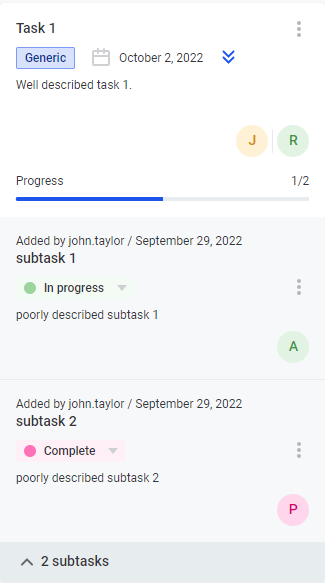
The Progress line indicates the number of complete subtasks (8). You can expand the subtasks and see their details as well. If there is no subtasks, the progress is not shown.
-
Author of the task (9).
-
Assignees of the task (10).
Filters
There are two filters that can help you search for tasks on the board:
-
Ownership filters:

-
All : Shows both the tasks you created and the tasks assigned to you.
-
I’m owner : Shows the tasks you created.
-
I’m assignee : Shows the tasks that you were assigned to by yourself or other users.
-
-
If All tasks are displayed, you can filter by the task parameters:

-
Due date: Select the date by which the task must be completed.
-
Priority: Specify the priority of the task.
-
Task type: Specify the type.
-
Author: Select a user from the list, which includes all authors that have assigned the tasks to you, including yourself.
-
Assignee: Select a user from the list, which includes all assignees that you have assigned tasks to, including yourself.
| The filtering is performed with the AND operator between selected filters. |
| To clear the filter, click X inside the filter field. To clear all filters, select Clear filters. |
View task details and comments
Besides admins, both authors and assignees can view the task details and leave comments on tasks.
-
To view the task details, select a task from the board.
-
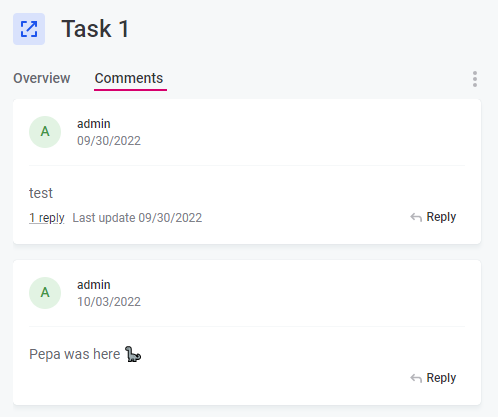
To view the comments, open the Comments tab:
|
By default, replies are not shown in the comment tree. Expand the replies to see the comment thread. For more information, see Comments |
Workflow tasks
Workflow tasks (Access Request and Review Request task types) are a particular subset of tasks that are created automatically when a user submits an access or review request.
As such, some actions available for other task types cannot be performed on these tasks:
-
The status of workflow tasks cannot be updated manually by moving the task on the board.
-
You cannot create new workflow tasks manually, this only happens automatically after an access or review request is submitted.
-
You cannot manage the
Access Requesttype from the board (edit task details, change the task status, and so on). -
You cannot edit or delete these task types nor set them as inactive.
Create task
By default, tasks can be created for the following entities:
-
Catalog item
-
Attribute
-
Catalog item profile
-
Term
-
Rule
-
Monitoring project
-
Monitoring project processing
To be able to create tasks from custom entities, add the task:ableToCreateTask trait to those entities in the metadata model.
For more information, see Traits
In addition, you cannot create workflow tasks from the board. For other details, see Workflow tasks.
To create a new task:
-
You can create a new task in one of the following ways:
-
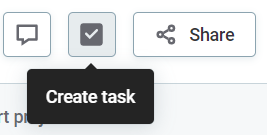
From a specific entity, by selecting Create task:
-
From the Task and Workflows tab. Go to Task and Workflows > Tasks and select Create task.

-
-
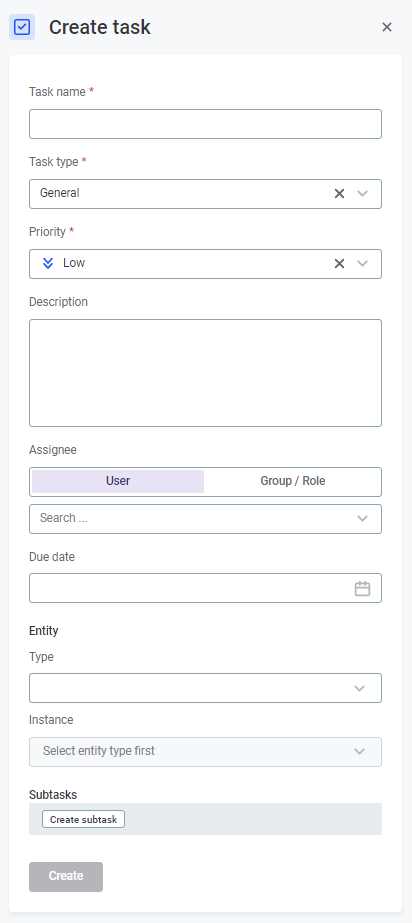
Provide the necessary information:
-
Task name: The name of the task.
-
Task type: The task type:
-
General: The default, preselected task type that refers to a generic unstructured task that does not belong to any other categories.
-
Your custom task type. For more information, see Create task type.
-
-
Priority: Low, Medium, or High.
-
Description: What the task should achieve or other useful information.
-
Assignee: Select User if you want to assign the task for a particular user, or Group/Role if you want to assign this task to a group and a specific governance role within this group. Then expand the list and select an assignee.
After submitting the new task, the task appears on the assignee’s kanban board too. If it is assigned to a group or a particular role within this group, all users who are part of this group or role get this task on their kanban board. If no assignee is selected, the task is left unassigned and only visible to its author.
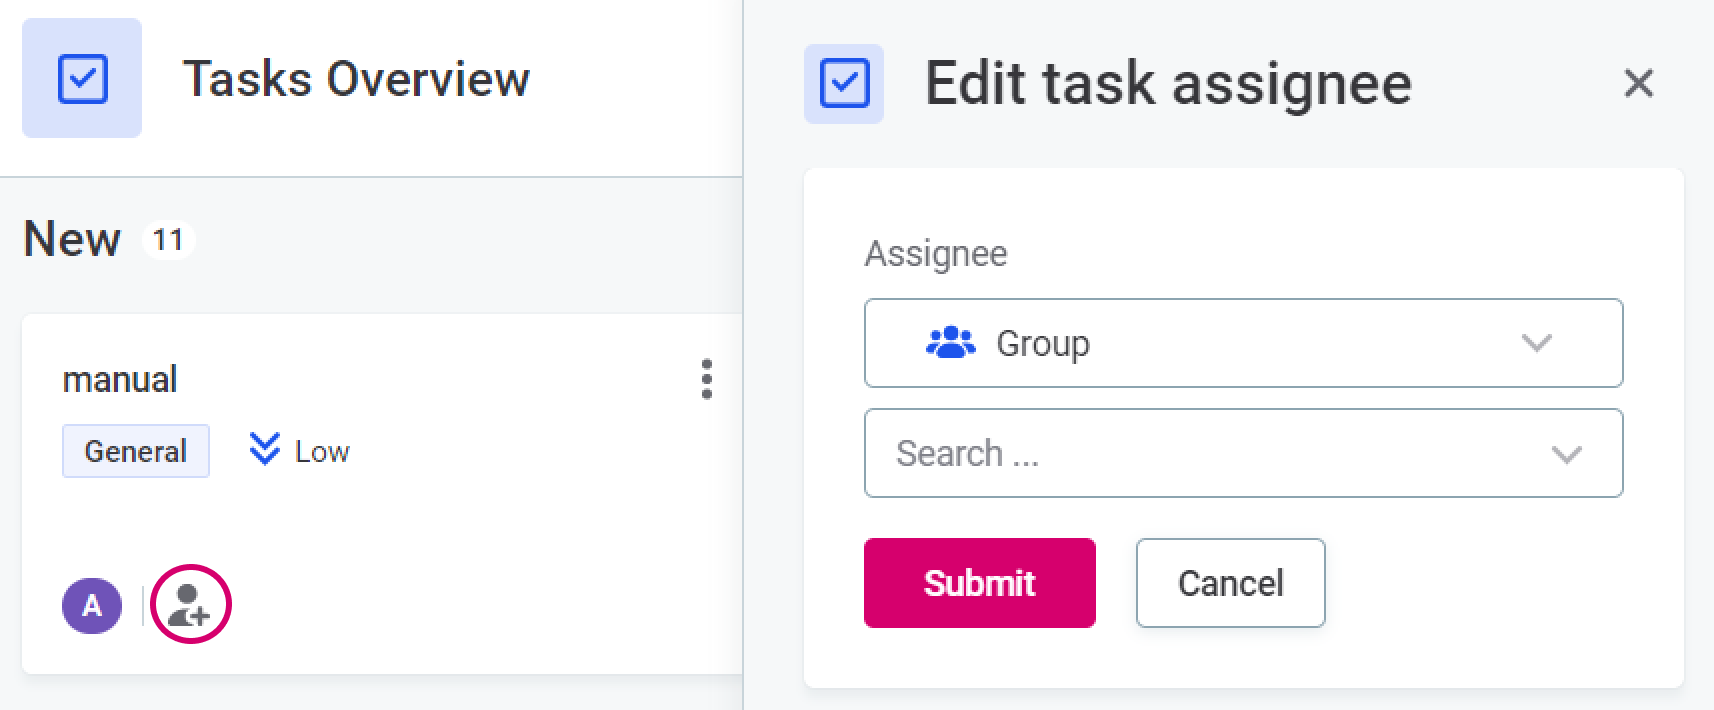
If you assigned the task to a group, you can then add a Keycloak role or user from that group as an assignee by clicking the add user icon from the task card on the board and searching for a user or identity provider role.

Currently, there can be only one assignee per task. However, if you want to assign more people to one task at the same time, you can create subtasks for each required assignee.
The assignee of the main task can manage both the main task and subtasks. The assignee of the subtask can manage this subtask and view all related tasks.
There is no notification for the user who has been added as an assignee to the task.
-
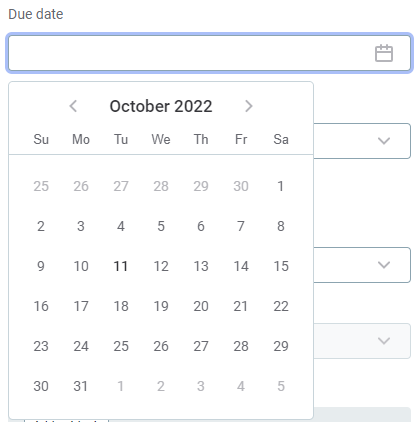
Due date: Optionally, specify a deadline for the task by selecting a date from the calendar.
-
Entity type: Optionally, select the type of the entity you are referring to in the task: Catalog item, Attribute, Catalog item profile, Term, Rule, Monitoring project, Monitoring project processing.
-
Instance: Select the specific entity instance. For example, if you have selected the entity type
term, you see the list of terms in the instances list.
-
-
Optionally, you can create one or more subtasks at the same time. This can help you split the main task into smaller ones, or assign the task to more than one person at once. See Create subtask.
-
Select Create. Your task appears on the kanban board in the New tasks column.
| To be able to submit the main task, all subtasks must be submitted first. |
Edit task
To edit the task detail, do the following:
-
In the three dots menu of the task, select Edit.

-
Make your changes. See Create task, step 2.
-
Select Save.
Edit assignee
You can add and delete assignees of the task directly from the board.
The subtask assignees view the whole tree of tasks but can manage only the subtask.
| To edit the assigned group or role on the main task or add an assignee to a subtask for the first time, you need to edit this task or subtask detail respectively. |
To manage the task assignee:
-
To add, select the assignee icon and start typing a user name. New assignees get notifications about the changes.
-
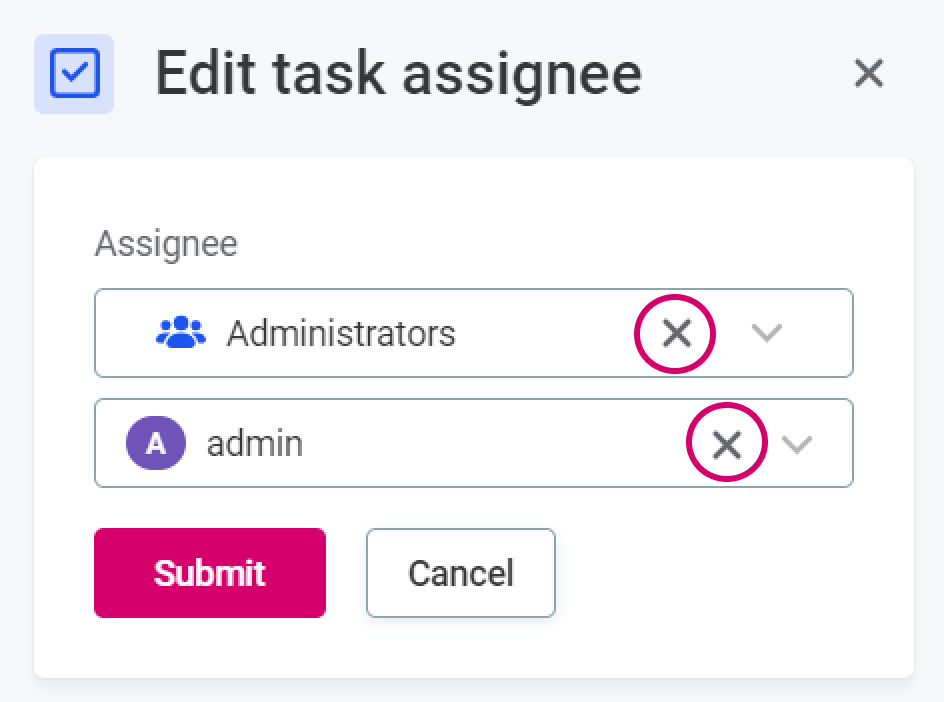
To delete, select the X icon next to the group or user name. You can then add a new task assignee or leave it unassigned.
To change the assignee of a subtask:
-
Select Reassign from the task detail view.

-
Select the Group or User to whom you want to reassign the subtask.
Change task status
Only the task author can change the task status.
To change the status of the task:
-
Open the task detail.
-
In Status, expand the list and choose a new status.
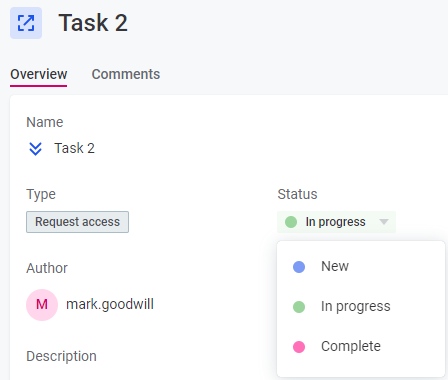
The status of subtasks is updated the same way. You can change the status from the main task detail view, or expand the subtasks of the main task on the board and change the status there.
Create subtask
To add a subtask:
-
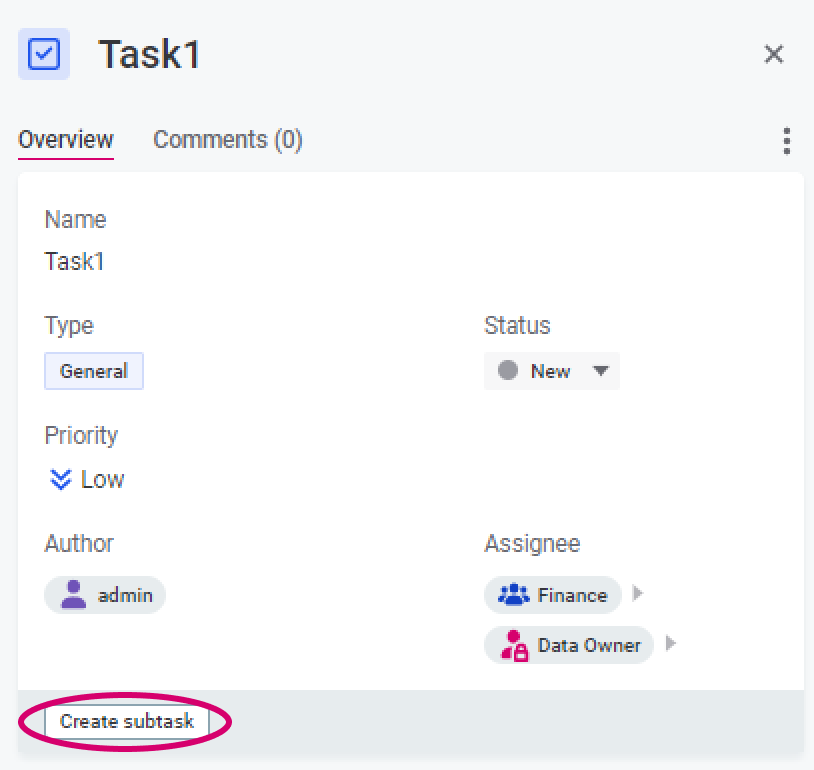
Select Create subtasks from one of the following locations:
-
Expand the main task detail view on the board.
-
Edit the main task screen.
-
-
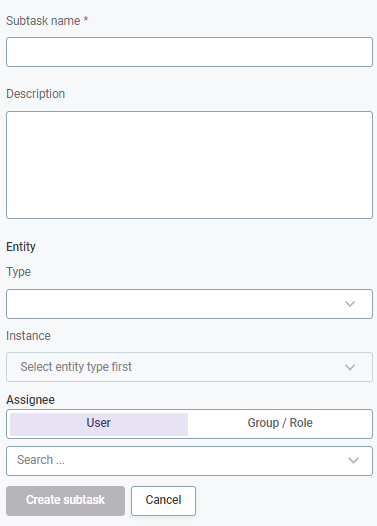
Provide the following information:
-
Subtask name: The name of the subtask.
-
Description: What the subtask should achieve or other useful information.
-
Entity type: The type of entity you are referring to in the task from the entity types list.
-
Instance: The specific entity you are referring to in the task from the entity type instances.
-
Assignee: Select User if you want to assign the task for a particular user, or Group/Role if you want to assign this task to a group and a specific governance role within this group.
Then expand the list of users or groups and roles, and select an assignee. Otherwise, it is left unassigned.
-
-
Select Submit.
Comment
You can leave comments on each task to keep a clear history of the discussions about requests and issues.
To comment on the task:
-
Open the Comments tab or the comments thread.
Or, start the comments thread by selecting Reply (see View task details and comments).
-
Write your comment.

-
Select Post.
Delete task
Only the task author can delete the task.
| When deleting a task, all related subtasks and comments are deleted as well. You can delete subtasks and comments separately one by one. |
To delete a task:
-
In the three dots menu of the task, select Delete.

-
Confirm the removal.
Create task type
To create a new task type:
-
Navigate to Tasks and Workflows > Task Types.

-
Select Create and provide the following information:
-
Task type name: The name of the task type.
-
Description: What the subtask should achieve or other useful information.
-
Color of tag: The color of the task type.
-
-
Check the preview and, if everything is fine, select Save.
The task type is added as active and can be used immediately.
Edit task type
You can make a task type unavalaible for new tasks by moving it to the inactive state in the Active column. To revert this, change the status to active again.
This is particularly useful if you don’t want to delete all tasks of this type.
To edit task types:, expand the more options menu from the list of task types, and select one of the following:
-
Navigate to Tasks and Workflows > Task Types.
-
In the three dots menu of the task type, select one of the following:
-
Edit to change the task type information.
-
Delete to instantly delete a task type.
-
|
When you delete a task type, all tasks of this type are automatically deleted from the board. To avoid this, we recommend making the task type inactive instead. |
Was this page useful?
