
Create Hierarchies
Visualize and manage hierarchical relationships in your reference data to support reporting, standardization, and organizational structures.
Overview
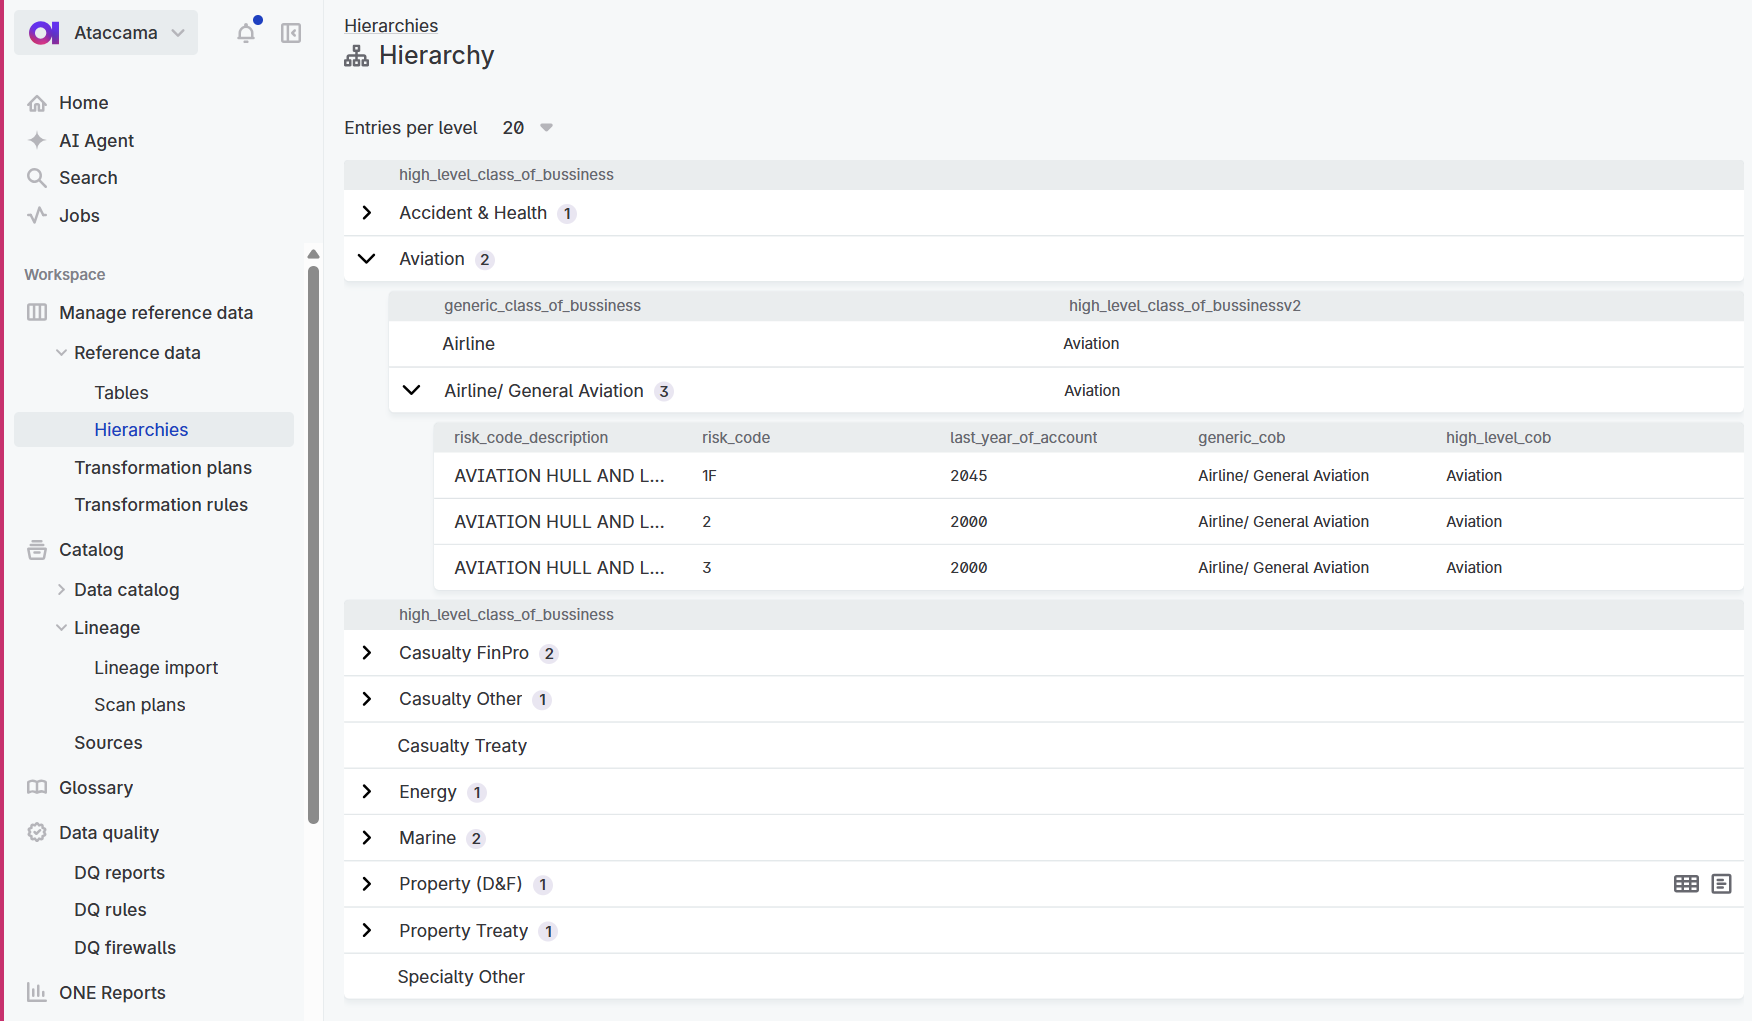
Hierarchies let you create tree-like visualizations of your reference data based on existing relationships between tables. This feature is particularly valuable for industry-standard reporting structures used in insurance, banking, and other regulated industries.
Common use cases
Organizational structures: Visualize reporting relationships, department hierarchies, and management chains for HR and compliance reporting.
Geographic hierarchies: Organize location data from global regions down to specific cities for territory management and regional analysis.
Product classifications: Manage industry-standard taxonomies like class of business hierarchies for insurance reporting or chart of accounts for financial compliance.
Regulatory reporting: Structure reference data according to industry standards for periodic compliance reporting.
How hierarchies work
Hierarchies are built on top of existing relationships between your reference data tables:
-
The hierarchy visualization displays data from published tables only.
-
Each level in the hierarchy corresponds to a table that connects to the preceding level via its attributes.
-
You can configure which attributes from each table appear in the tree view.
-
Multiple hierarchy views can use the same tables.
-
You can navigate from the hierarchy view to individual tables to edit data.
|
Hierarchies require existing connections between tables. If you need to connect tables, see Connect Tables first. |
Create a hierarchy view
Create a hierarchical view of your reference data by configuring tables, relationships, and display attributes.
-
Published reference data tables with attributes connected from other tables.
-
You must have appropriate access level to the tables.
-
Go to Manage reference data > Reference data > Hierarchies.
-
Select Create hierarchy.
-
In the Hierarchy name field, enter a descriptive name for your hierarchy (for example, "Geographic Hierarchy" or "Organizational Structure").
-
Configure the hierarchy structure:
-
In Root table, select the top-level table (for example, "Continents" or "Departments").
-
Select at least one Attribute to display in each hierarchy level.
-
For each subsequent level, select Add child and choose the related table.
-
If multiple connected tables exist, choose the table you want to use.
-
-
Select Create hierarchy.
Result: Your hierarchy view appears in the reference data section and displays the tree structure based on your configuration.
Work with hierarchy views
Once created, you can interact with your hierarchy views in several ways:
Navigate the tree structure
Explore your hierarchical data using the interactive tree view:
-
Expand/collapse levels: Click the arrow icons to show or hide levels.
-
Go to source data: Point to an item in the hierarchy and click the Show table icon to go to the corresponding table.
-
View hierarchy metadata: Point to an item in the hierarchy and click the View record details icon to access additional information about each item in the hierarchy.
Modify hierarchy configuration
Update your hierarchy view to reflect changing business needs:
-
Select the hierarchy view you want to modify.
-
Select Edit.
-
Make your changes:
-
Add or remove levels.
-
Modify display attributes for each level.
-
Update the hierarchy name.
-
-
Select Save.
Handle data changes
When data in the underlying tables changes, the hierarchy view reflects these updates:
-
Automatic synchronization: Published changes to reference data automatically appear in the hierarchy view.
-
Missing relationships: If a root record is deleted, child records appear as orphaned nodes.
-
Data validation: The system prevents invalid relationships that would break the hierarchy structure.
Best practices
Follow these recommendations when creating and managing hierarchies:
Plan your structure: Design your table connections and hierarchy levels before creating the view. Consider how the hierarchy will be used for reporting and analysis.
Use meaningful labels: Select display attributes that provide clear, recognizable labels for each node. Include both codes and names when available.
Validate data quality: Ensure your reference data is clean and connections are properly defined before creating hierarchies. Missing or incorrect relationships affect the entire visualization.
Document purpose: Use clear names that explain the hierarchy’s business purpose and intended use.
Regular maintenance: Review hierarchies periodically to ensure they still reflect current business structures and requirements.
Troubleshooting
Hierarchy view appears empty
Cause: The underlying tables contain no published data or relationships are not properly configured.
Solution: Verify that all tables in the hierarchy contain published data and relationships are correctly defined.
Cannot select a table for hierarchy level
Cause: No relationship exists between the tables or the target table is not published.
Solution: Ensure relationships are created between tables and all tables are published. See Connect Tables for guidance.
Next steps
Continue building your reference data solution:
-
Connect Tables - Create relationships between tables
-
Work with Records - Edit data that appears in hierarchies
-
Export Tables - Export hierarchical data for downstream systems
-
Best Practices - Learn advanced reference data management techniques
Was this page useful?