
Create Detection Rule
Detection rules automate the process of applying terms to your data catalog. They define the conditions that determine when specific terms should be applied to attributes. This guide walks you through creating and configuring detection rules.
Before you begin, decide whether your rule should be based on metadata (like attribute names) or data values (like content patterns). This choice affects how you’ll configure the rule logic.
Create rule
Start by setting up the basic rule configuration.
-
Navigate to Glossary > Detection rules.
-
Select Create.
-
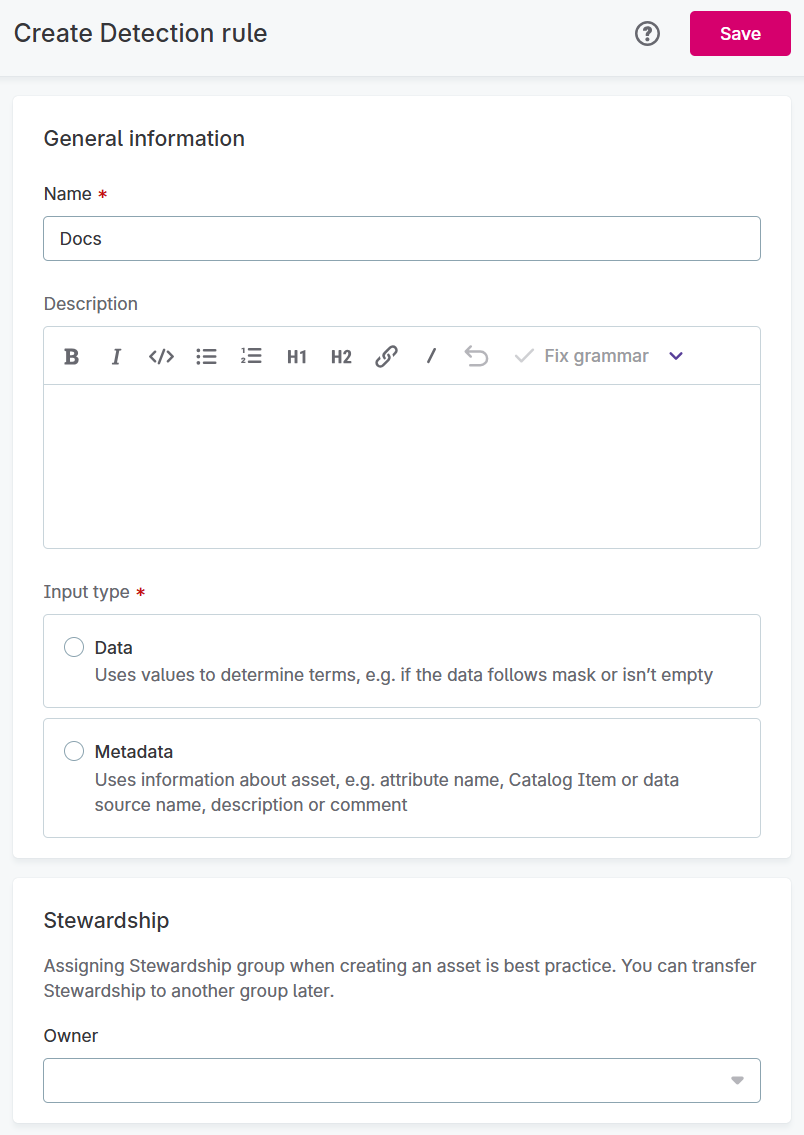
On the Create Rule screen, provide the following information:
-
Name: Choose a descriptive name that explains what the rule detects.
-
Description (optional): Explain what the rule does and when it should be used. This helps other team members understand the rule’s purpose.
-
Input type: Choose the detection approach:
-
Select Data to evaluate actual data values. Use this when you want to detect patterns, formats, or content within the data itself.
-
Select Metadata to evaluate catalog information like attribute names, descriptions, or source details. Use this when the attribute name or location indicates the term that should be applied.
-
-
Stewardship (recommended): Select the user group responsible for maintaining this rule. After selecting a group, you’ll see the users assigned to governance roles within that group.
-
-
Select Save to create the rule draft.
-
Before you can publish the rule, you need to define the detection logic. Continue to Define rule implementation.
|
You cannot change the input type after creating the rule. If you select the wrong type, delete the rule and create a new one. |
Define rule implementation
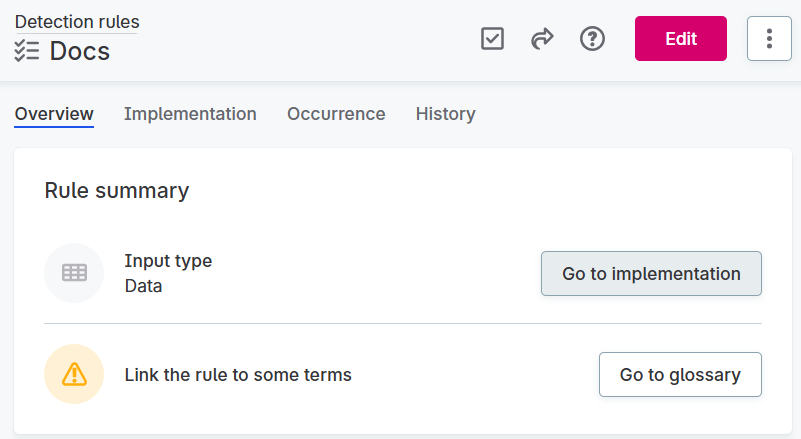
After saving your rule draft, you’ll be redirected to the Overview tab. Select Go to implementation to configure the rule logic.
The implementation process varies depending on your input type:
-
Data rules require you to specify input attributes, create variables (optional), and define conditions
-
Metadata rules work directly with catalog metadata and skip the input attribute selection
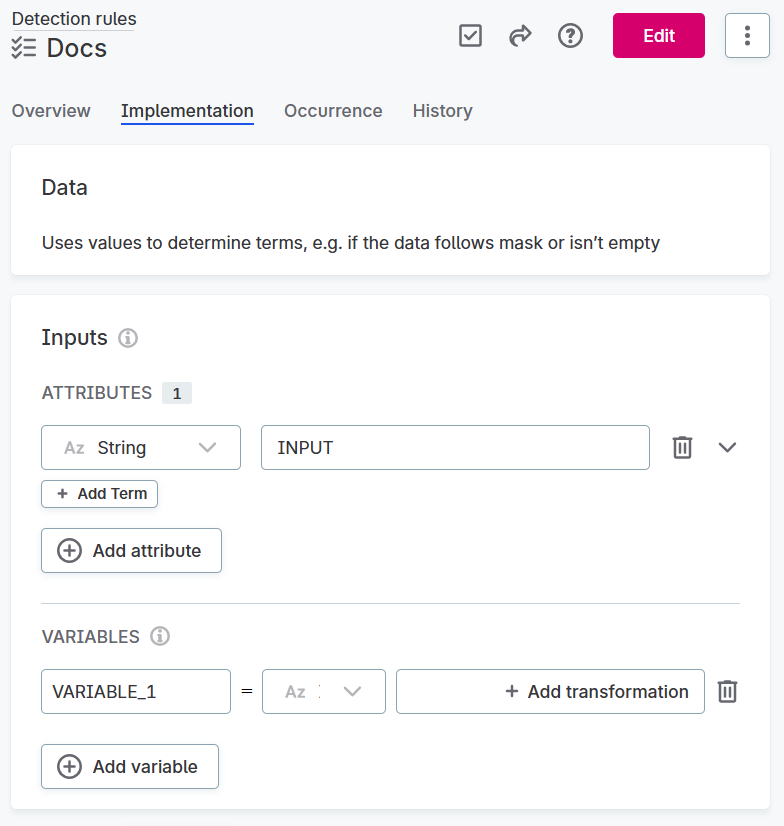
Input attributes (data rules only)
If you created a data rule, start by defining the input attributes that the rule will evaluate.
-
Select the attributes you want the rule to analyze (at least one is required).
-
Optionally add variables to transform the data before evaluation.
The inputs you define become available for building conditions in the Rule logic section.
Variables (Optional)
Variables let you transform your input data before applying rule conditions. This is useful when you need to clean or modify data for more accurate detection.
For example, you might create a variable that trims whitespace from string attributes, then apply your rule conditions only to the trimmed version.
To create variables:
-
Choose a descriptive name for your variable. Select Add variable if you need additional variables.
-
Select the input attributes you want to transform. Use the dropdown to choose from your defined input attributes.
For advanced users: select Advanced Expression from the dropdown to define transformations using ONE expression language.
-
Add transformations using Add transformation. Available transformations depend on the attribute’s data type.
Available transformations
The transformations you can use depend on your data type:
Data type transformations
| Data Type | Available Transformations | Description |
|---|---|---|
|
|
Converts string to float. |
|
Converts string to integer. |
|
|
Converts string to long. |
|
|
Converts all characters to uppercase. |
|
|
Converts all characters to lowercase. |
|
|
Removes spaces from both ends. |
|
|
Removes extra spaces and trims whitespace. |
|
|
Keeps only digit characters. |
|
|
Keeps only letter characters. |
|
|
|
Converts integer to float. |
|
Converts integer to date. |
|
|
Converts integer to long. |
|
|
|
Converts Boolean to string. |
|
|
Converts date to datetime. |
|
Converts date to string. |
|
|
|
Converts datetime to date. |
|
Converts datetime to string. |
|
|
|
Converts long to float. |
|
Converts long to string. |
|
|
Converts long to date. |
|
|
Converts long to datetime. |
|
|
|
Converts float to string. |
|
Rounds down to nearest integer. |
|
|
Rounds up to nearest integer. |
|
|
Rounds to nearest integer. |
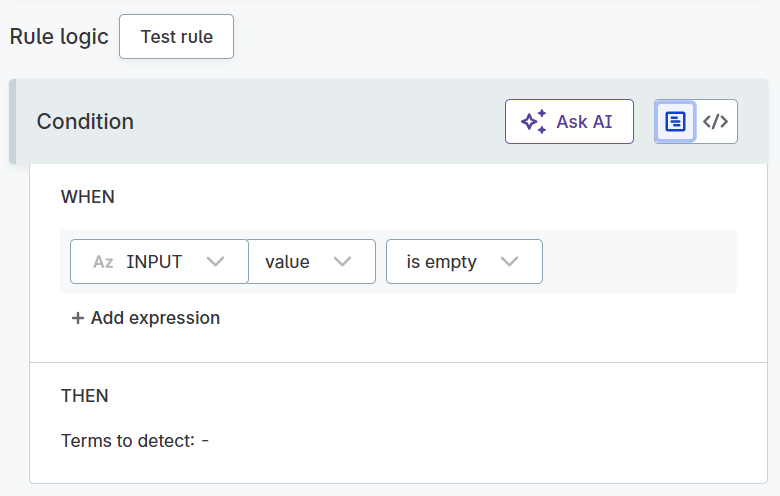
Rule logic
This is where you define the conditions that determine when the rule should apply a term to a data asset. You have two options for creating these conditions.
Choose your approach
- Condition builder
-
Use predefined options and dropdown menus to build your logic. This approach is easier for most users and covers common scenarios.
- Advanced expression
-
Write custom logic using ONE expression language. This gives you maximum flexibility but requires technical expertise.
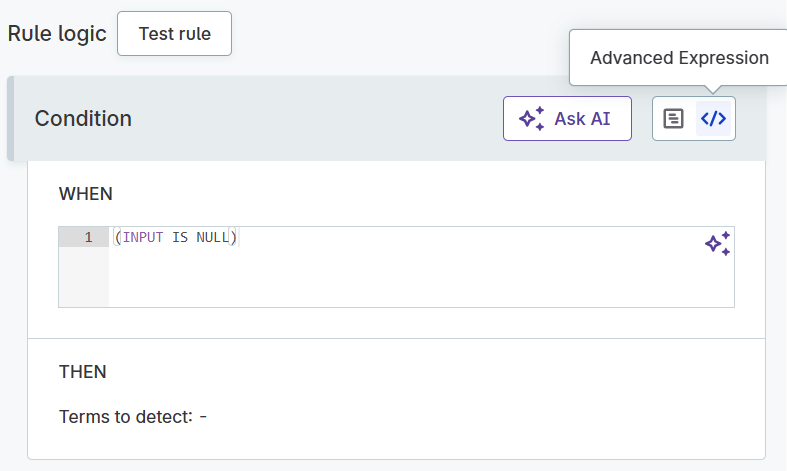
Using Advanced Expression
If you choose Advanced Expression:
-
Write your detection logic using ONE expression language syntax.
-
Test your expression to ensure it works correctly.
-
Proceed to Test Rule.
Using Condition Builder
If you choose Condition Builder:
-
Select what you want to evaluate:
-
For data rules: Choose an input attribute or variable you created
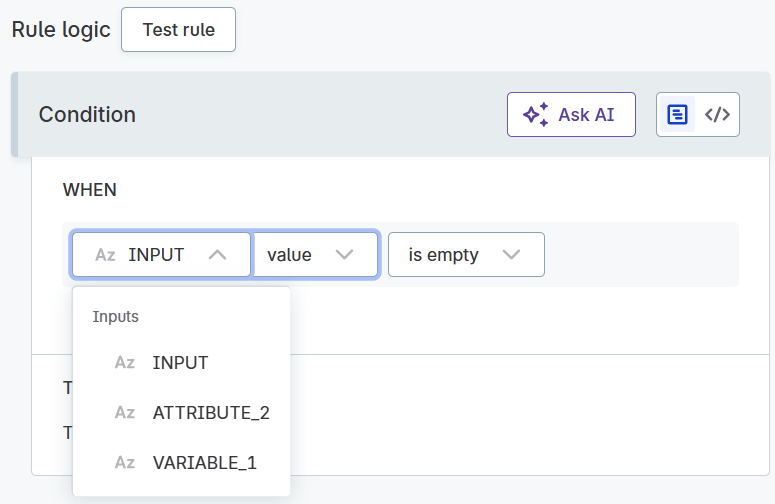
-
For metadata rules: Choose metadata fields like
attribute_name,source_name, orcatalogItem_description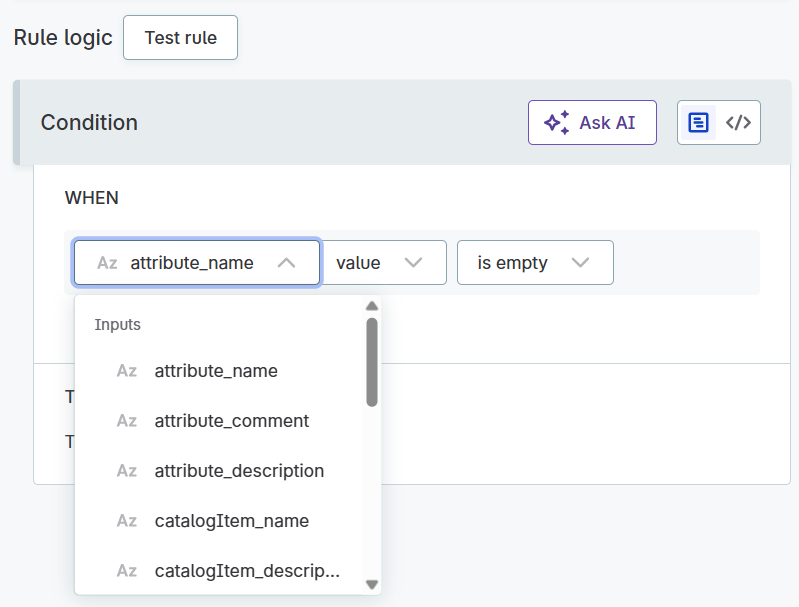
-
-
Apply modifiers if needed (like
TrimorRound). Available modifiers depend on your input data type.Metadata rules only support string modifiers since metadata is typically text-based.
Available Modifiers
Modifier Description ValueUses the original value without changes.
UppercaseConverts text to uppercase.
LowercaseConverts text to lowercase.
TrimRemoves whitespace from both ends.
Trim leftRemoves leading whitespace.
Trim rightRemoves trailing whitespace.
SquaredSquares numeric values.
RoundRounds to nearest whole number.
AverageCalculates average (for grouped data).
MinFinds minimum value (for grouped data).
MaxFinds maximum value (for grouped data).
SumCalculates sum (for grouped data).
-
Choose a condition that defines when the rule should result in terms being applied. Available conditions depend on your data type.
Available Conditions
Condition Description Is emptyWhen the field contains no data.
This doesn’t detect common "empty" values like
NULL,N/A,-, etc. Those are treated as actual content.Is not emptyWhen the field contains any data.
Is the same asWhen the value exactly matches your specified text.
Is the same as attributeWhen the value matches the attribute you select.
Is not the same asWhen the value doesn’t match your specified text.
Is not the same as attributeWhen the value doesn’t match the attribute you select.
Is from the following listWhen the value appears in your predefined list.
Is not from the following listWhen the value doesn’t appear in your predefined list.
Has length ofWhen the text has a specific character count.
ContainsWhen the value includes your specified substring.
Is from catalog itemWhen the value exists in a reference dataset.
Select ON DATA CHANGE in Data updates to keep the rule current with reference data changes. This option isn’t available for non-Reference Data catalog items.
Is not from catalog itemWhen the value doesn’t exist in a reference dataset.
Matches maskWhen the value follows your specified pattern (like phone number format).
Does not match maskWhen the value doesn’t follow your specified pattern.
Matches regexpWhen the value matches your regular expression.
Does not match regexpWhen the value doesn’t match your regular expression.
Is trueWhen a Boolean field is true.
Is falseWhen a Boolean field is false.
Test Rule
Before publishing, test your rule to ensure it works as expected.
-
Select Test Rule to open the testing interface.
-
Enter sample data that represents what your rule should evaluate.
-
Review the results shown in the Message column next to each test input.
-
Adjust your rule logic if the results don’t match your expectations.
Testing helps you catch logic errors and confirms that your rule will work correctly on real data.
Publish Rule
After testing and verifying your rule works correctly:
-
Review all your settings one final time.
-
Select Publish to make the rule active.
-
The rule is now available to apply to terms and will begin detecting matches when term detection runs.
Once published, you can apply this rule to terms in your glossary to automate term assignment across your data catalog.
Was this page useful?