
Create Reference Data Tables
Reference data tables represent data you have stored in ONE. This guide shows you how to create tables using different methods based on your data source.
Next steps: After creating your first table, continue with Set Up Access and Governance to control who can access and modify your data.
Create tables
|
You can access the metadata of each reference data table in the Data Catalog as well (Catalog > Data Catalog > Published Reference Data). These tables appear as reference data catalog items. |
You can create tables in one of the following ways:
-
Import data from a catalog item - either from Reference Data or directly from catalog items
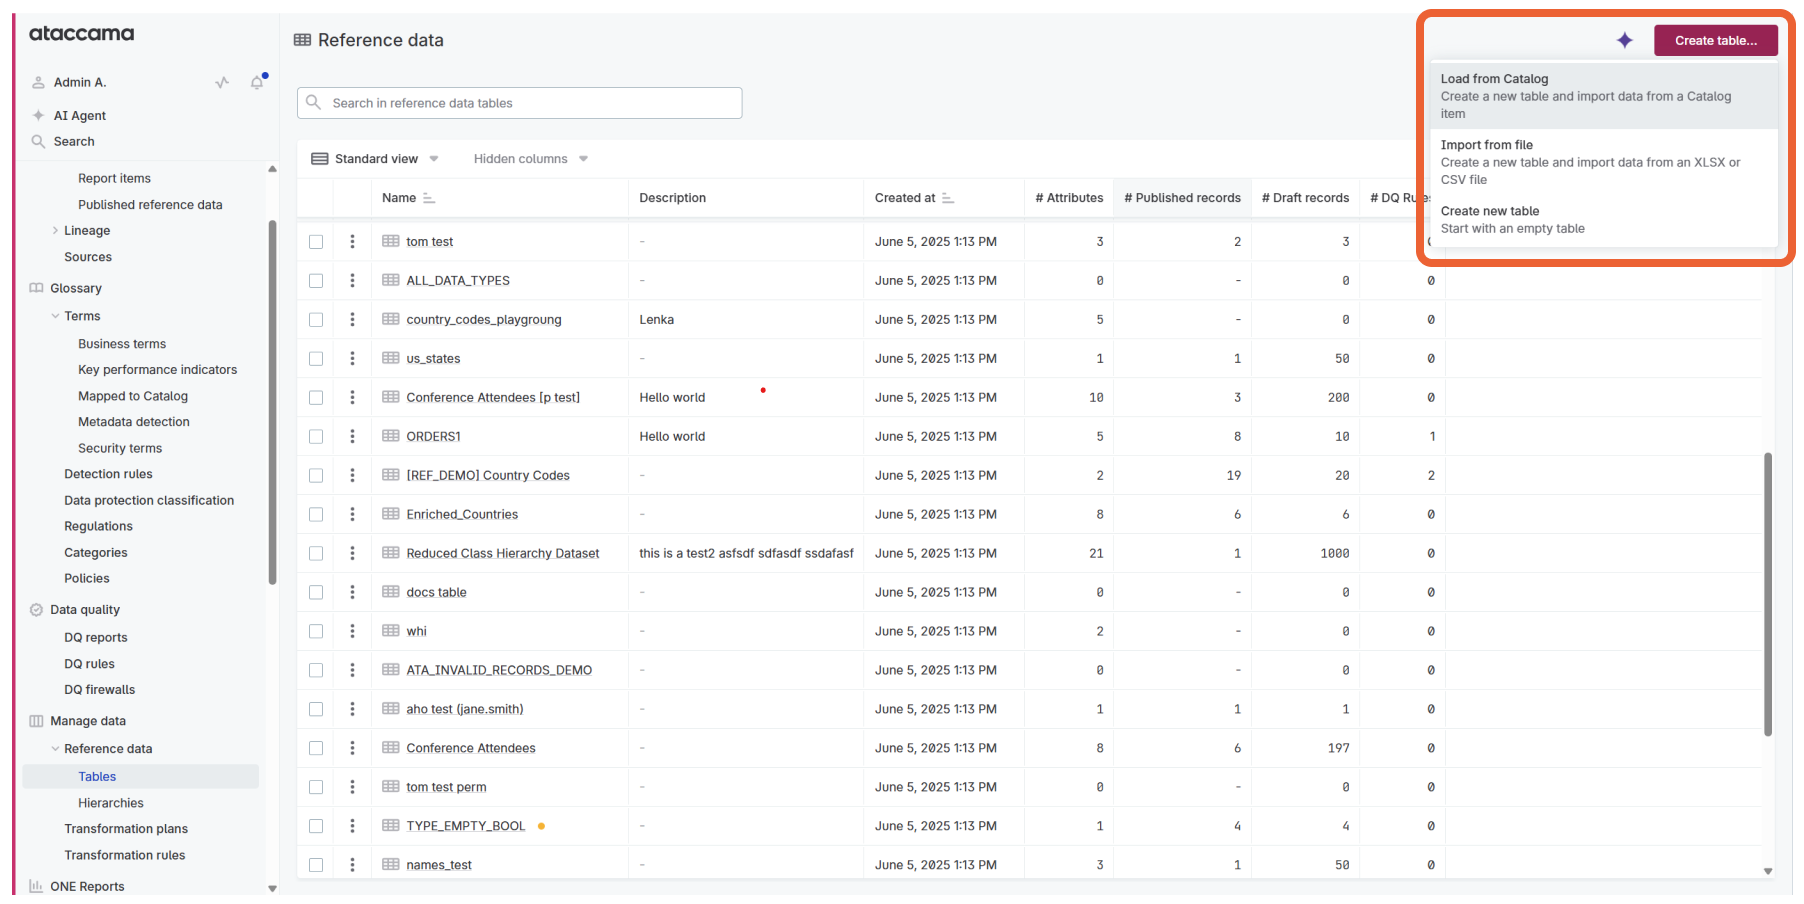
Create an empty table
You can create an empty table and fill in attributes and records manually.
To create an empty table:
-
Go to Manage reference data > Reference data > Tables.
-
Select Create table.
-
Select Create new table.
-
Enter a Table name.
-
Select Confirm.
After creating the empty table, it opens on the Data structure tab where you can continue with defining the table structure and adding records.
For next steps, see:
Import data from a catalog item
You can load data from an existing catalog item to a new reference data table. This feature lets you to select specific columns and apply data transformations for advanced data preparation use cases.
|
Permissions: You need to have Full or Editing access to Data Transformation plans to create reference data from catalog items. |
|
Limitations:
|
Load from Reference Data section
To import data from the Reference Data section:
-
Go to Manage reference data > Reference data > Tables.
-
Select Create table.
-
Select Load from Catalog.
-
Select a catalog item to load into a new reference data table from the list.
You can search and filter the list to find the item you need. -
Select Next.
-
Configure Source and Target settings:
-
Source:
-
Selected Catalog item: Shows the catalog item selected for import.
-
Import: Select whether to import all attributes or selected attributes only.
-
-
Target:
-
Enter new table name: Enter a name for your table.
-
Open the dataset in data transformations to prepare it before loading: Prepare the data using data transformations.
-
-
-
Select Next.
-
(Optional) If you decided to import selected attributes, select attributes you want to load from the list.
-
Select Load data
Your table and its records are now added.
Load directly from catalog items
You can also create reference data directly from catalog items without going through Reference Data.
To create reference data directly from a catalog item:
-
Go to Catalog.
-
Navigate to the catalog item you want to use as reference data.
-
Select the Create reference data option from the catalog item actions three dots menu.
-
Configure the same Source and Target settings as described in the previous section.
-
Complete the loading process as described above.
This approach provides a more direct workflow when you’re already working with catalog items and want to quickly convert them to reference data.
Import data from a file
You can create new tables by importing XLSX and CSV files.
To import data from a file:
-
Go to Manage reference data > Reference data > Tables.
-
Select Create table.
-
Select Import from file.
-
Select file. Choose a source file to import in one of the following ways:
-
Drag and drop your file in the Source file section.
-
Select Browse files and open your file in your systems file browser.
-
-
Configure import settings:
Import options are auto-detected, which means you can usually leave them as is, unless you encounter issues. -
In the Source file section, you have the following options:
-
Remove: Removes source file and returns you to the beginning of the import flow.
-
Reset settings: Resets changed settings to the auto-detected defaults.
-
Use first row as header: Select this if the first row of your table is a header row.
-
File encoding: Select the encoding type of your file.
-
Value separator: Enter the symbol that separates values in your table.
-
In Source file preview, you can change the labels of the header rows as needed.
-
-
-
Select Next.
-
Configure table settings:
-
Provide the following information:
-
Name: Enter a name for your table.
-
-
To finish the import, select Finish and import.
This adds the table to ONE. The imported records are in draft state and have to be applied to the schema.
-
Apply the schema change.
-
Select Preview & Decide.
-
On the Schema changes preview screen, select Apply.
Your table and its records are now added.
-
Generate table descriptions
After creating your table, you can automatically generate comprehensive descriptions using AI. The AI analyzes your table structure and sample data to create meaningful, contextual descriptions that help users understand the purpose and content of each table.
AI generation options
The AI assistant provides multiple generation options:
-
Generate complete descriptions from scratch - Creates new descriptions based on table structure and data.
-
Fix grammar and improve existing descriptions - Enhances existing descriptions with better grammar and clarity.
-
Improve writing style and word choice - Refines the language and style of existing descriptions.
Generate a table description
To generate an AI-powered table description:
-
The table should contain some data records for better AI analysis.
-
You must have Editor or Owner permissions for the table.
-
Go to Manage reference data > Reference data.
-
Select the table you want to add a description to.
-
In the table overview, select the AI description generator button.
-
Choose your preferred generation option:
-
Generate from scratch for new descriptions
-
Fix grammar to improve existing content
-
Improve style to enhance writing quality
-
-
Review the generated description.
-
Select Apply to use the generated description, or Regenerate to create a new version.
The AI-generated description will be added to your table metadata and will be visible to all users who have access to the table.
You can also access the AI description generator during the file import process to add descriptions as you create tables.
Best practices
-
Ensure your table contains representative data before generating descriptions.
-
Review and customize AI-generated descriptions to match your organization’s terminology.
-
Use the "Fix grammar" option to improve existing descriptions written by team members.
-
Consider regenerating descriptions when your table structure or data significantly changes.
Next steps
After creating your table, you can continue with other Get Started topics:
-
Set up governance: Set Up Access and Governance - Control who can access and modify your data.
-
Publish your data: Publish Your Data - Make your reference data available across the platform.
-
Use your data: Work with Published Reference Data - Access your published data throughout ONE.
For advanced scenarios, explore:
-
Advanced Workflows: Complete end-to-end scenarios for exporting to databases, creating validation rules, or deduplicating data.
Was this page useful?