
DQ Firewalls
DQ Firewalls allow you to apply DQ rules to your data in real-time, ensuring only data that meets quality standards can enter or flow through a system. DQ rules are applied to data using API calls.
In DQ Firewalls, the rule assignment and data quality evaluation is on the attribute level.
When to use DQ Firewalls
DQ Firewalls are often used in environments where maintaining high-quality data is crucial, such as in analytics, machine learning, and reporting.
The firewalls are useful in the following scenarios:
-
In a filtering pipeline.
For example, if you have an ETL pipeline in Python that processes data and you want to ensure it filters out records that fail DQ rules:
-
Define the DQ rules in ONE and configure a DQ Firewall.
-
The pipeline calls the DQ Firewall for each batch of records during processing.
-
The firewall evaluates the records and returns a response showing whether each record passed or failed.
-
The records are then split based on the response.
-
-
For writing failed data into a table.
What’s supported
-
By default, up to 10 000 records can be processed in a single request.
-
Requests up till size of 20 MB.
Limitations
-
Because no data is persisted, aggregation rules aggregate across only a single batch, that is, a single request, not on the whole dataset.
That means that if you are, for example, testing a uniqueness rule and send a request with only one record, the result will always be unique, even if the values are not unique in the dataset.
Set up firewall
Create firewall
There are two ways how to create a DQ firewall:
-
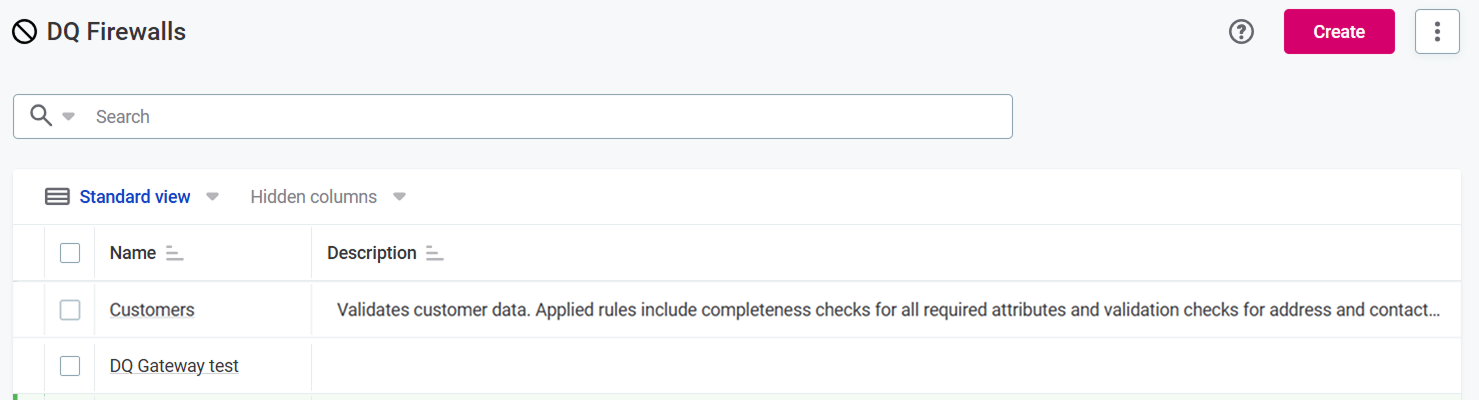
Create DQ Firewall from the DQ Firewalls screen:
-
Go to Data Quality > DQ Firewalls and select Create.
-
Provide a name and a description (optional) and select Save.
-
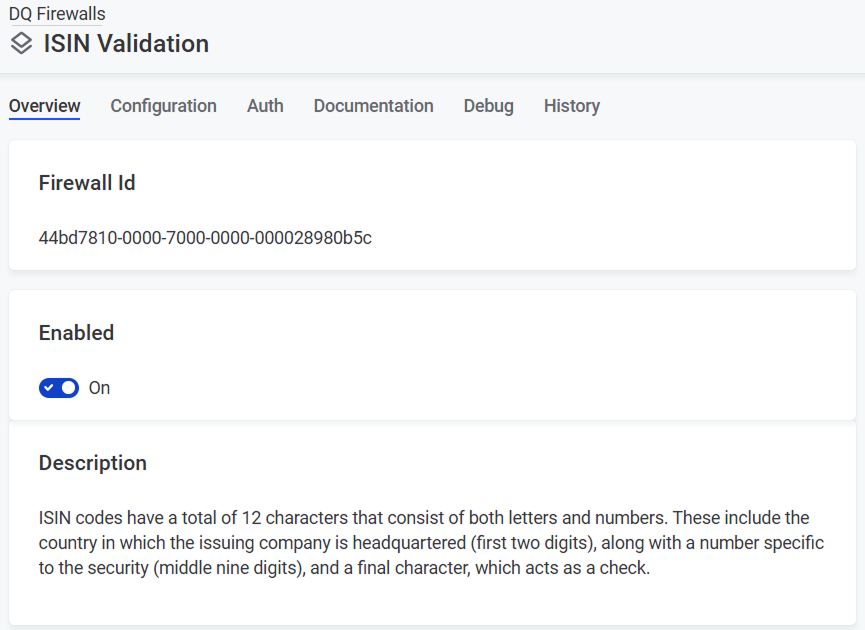
Enable the firewall if you want it to be available after publishing.
A unique Firewall Id is automatically generated for every new firewall, this is not editable.
-
-
Create DQ Firewall directly from rules, catalog items and attributes:
-
Select Create DQ Firewall from the three dots menu for the rule, catalog item, or attribute.
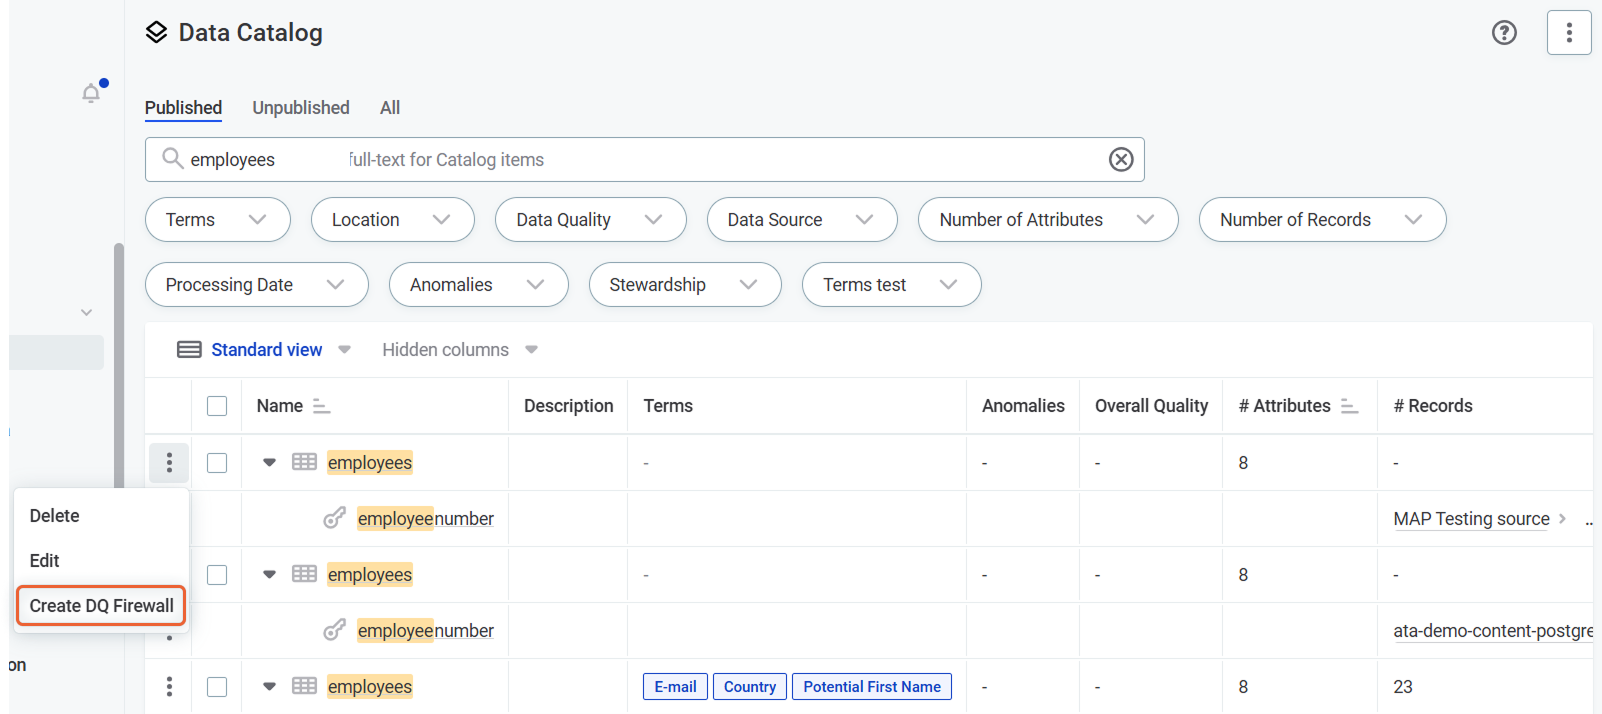
The input attributes and applied rules are populated automatically and you can continue to Define authentication methods.
-
Configure firewall
To configure a DQ Firewall, you need to define input attributes and map rules to those attributes.
| It is not possible to publish a firewall without any rules applied. |
-
Define what the data that will be sent to the firewall for evaluation should look like; this is similar to defining input attributes in rules:
-
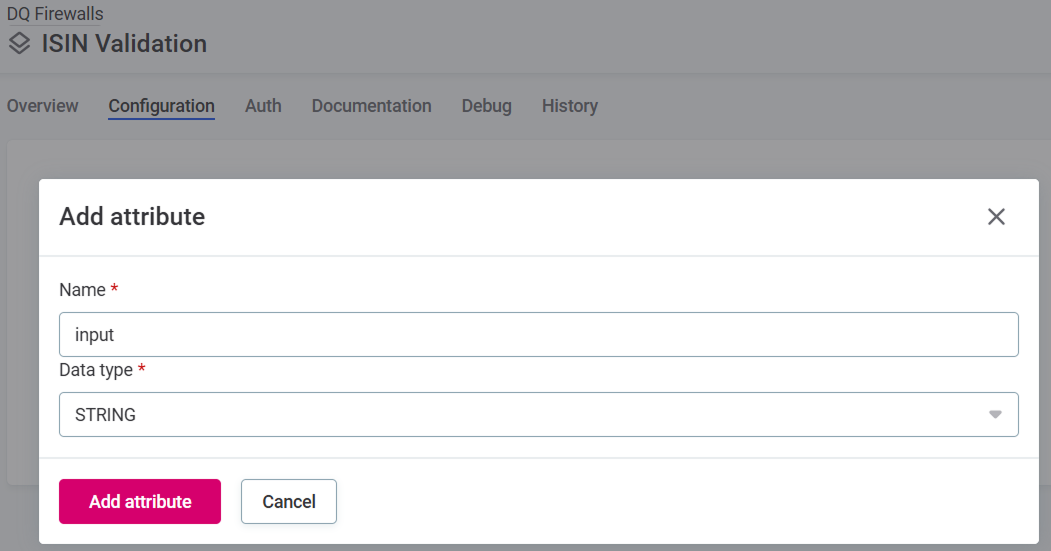
Go to the firewall Configuration tab and select Add attribute.
-
Specify the input attribute Name (arbitrary, for user reference only) and Data type. Data sent to the firewall must match the input types defined here for successful evaluation.
-
Select Save to confirm.
-
Repeat as required.
-
-
Map rules to the input attributes:
-
If the rule you need does not exist, create it according to instructions at Create DQ Rule in the Rule Library
-
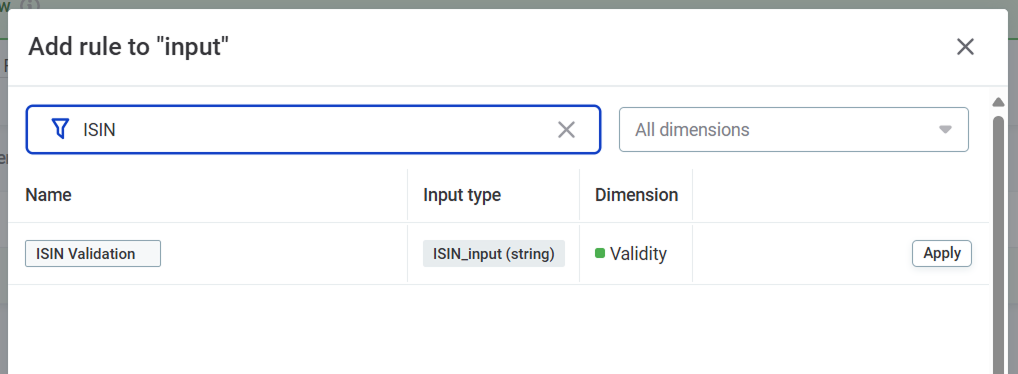
Select Add in the Applied rules column and apply rules from the list available:
-
Select Apply to add rules with one input:
-
To add multi-input rules, search for the rule and then select Configure to map the firewall attributes to the rule attributes.
If you need to edit the rule while adding it to firewall, follow instructions in Edit rules.
-
-
Repeat as required.
-
Edit rules
While adding rules to the firewall in the Add rule dialog, you may need to edit some of them:
-
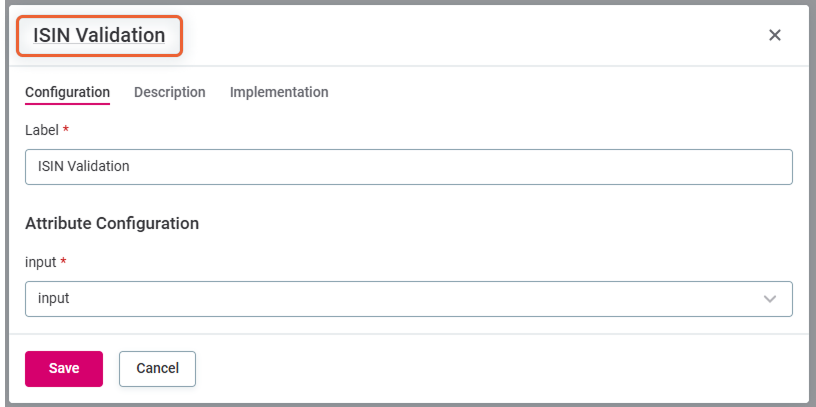
Select the rule name in the dialog heading to be directed to the rule page, where it is possible to edit the rule implementation. The Implementation tab in the Add rule dialog opens a read-only view.
-
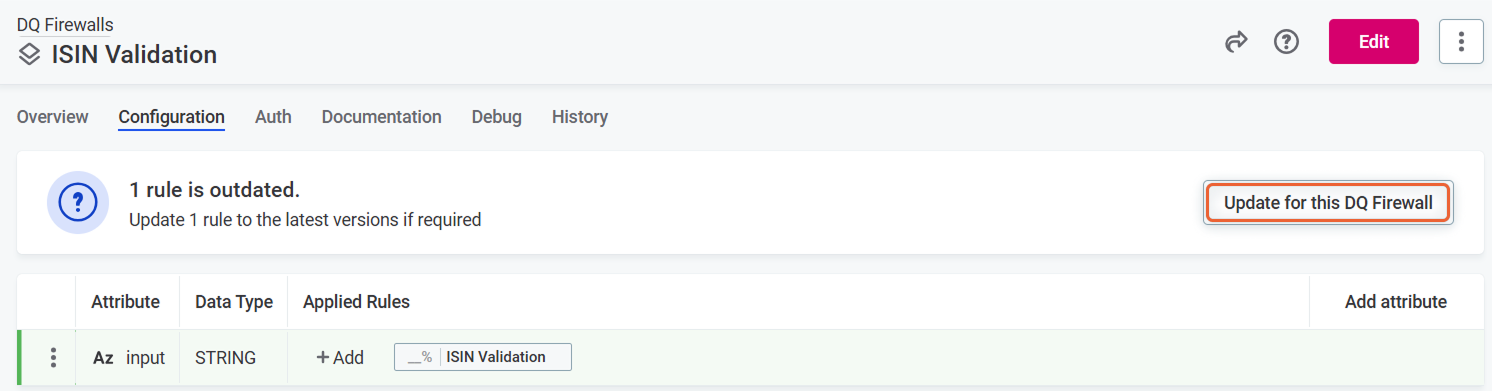
After you edit the rule implementation and return to the firewall, you are notified of the outdated rule and have the option to update it.
-
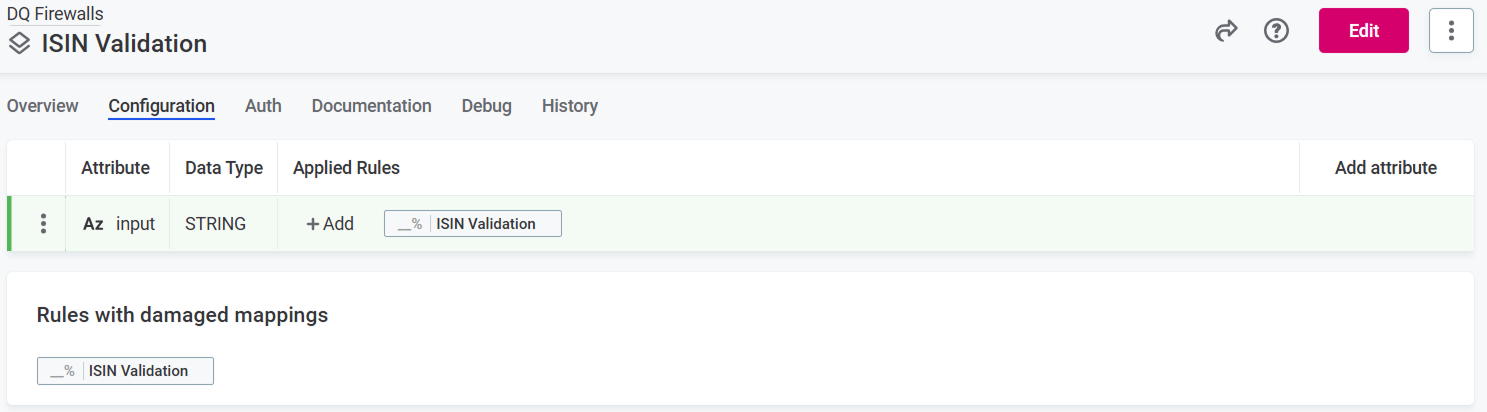
If you make breaking changes to the rule, for example, delete attributes or change data types, it is necessary to remap the rule attributes and firewall attributes.
In this case, after selecting Update for this DQ Firewall, you see Rules with damaged mappings. Select the rule name and remap the attributes.
Define authentication methods
Define authentication methods to ensure that only authorized users can interact with the DQ Firewall.
You can set authentication methods specifically for each firewall, or set them globally and then enable them for individual firewalls. If both methods are enabled on a firewall, users listed in either configuration can access it.
There are two ways to define who can invoke each DQ Firewall API:
-
Persons: Any selected user can invoke the service.
-
Roles: Any user who has at least one of the specified roles can invoke the service.
To learn how to apply these authorization methods when calling API, see Authenticate.
DQ Firewall authentication
To add authentication methods for a DQ Firewall:
-
Go to the firewall Auth tab and select Add authentication method.
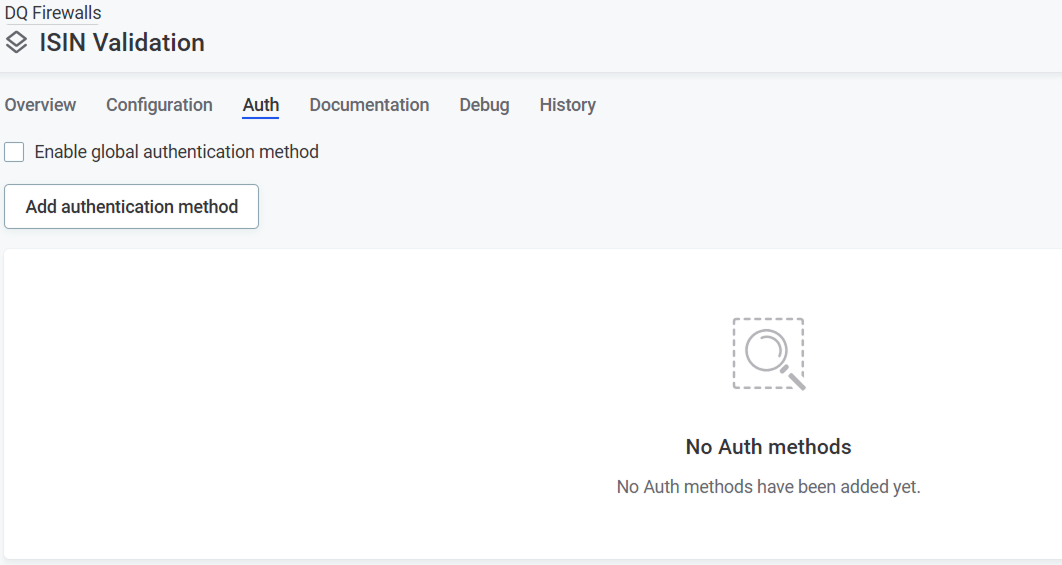
-
Choose from the following authentication methods:
-
Persons: Assign permissions based on users of the application.
Name the method, select one or more persons (users) from the list and Save.
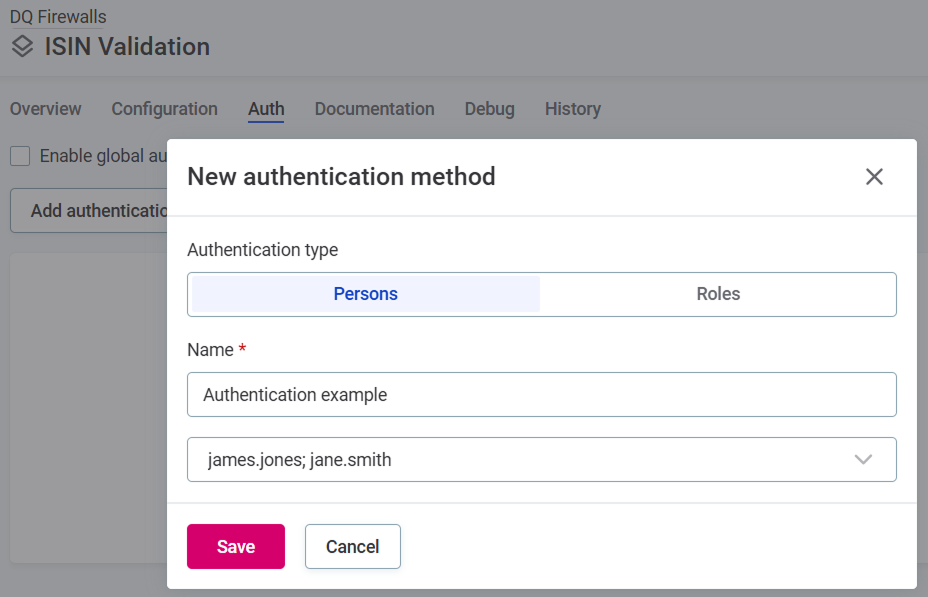
-
Roles: Assign permissions to groups based on Keycloak roles.
Name the method, select one or more roles from the list and Save.
-
-
If needed, add another authentication method.
Global authentication
If global authentication methods are added, you can enable them within the firewall by selecting Enable global authentication method.
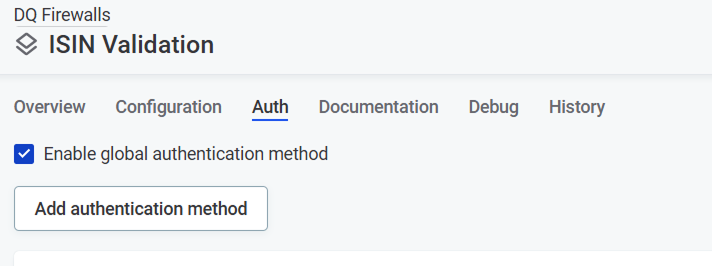
Even when global authentication is enabled, the methods themselves aren’t visible on the Auth tab for individual firewalls. To view details, select Settings > DQ settings > DQ Firewall Authentication.
Test firewall rules
Use the Debug tab to test different input values for the firewall attributes and see if your DQ rules work correctly.
Rule debug tests all rules included in your firewall simultaneously:
-
Result: Shows overall result of DQ evaluation. All rules of DQ dimensions that contribute to overall quality must pass for the result to be Passed.
-
Score: Combined score for results.
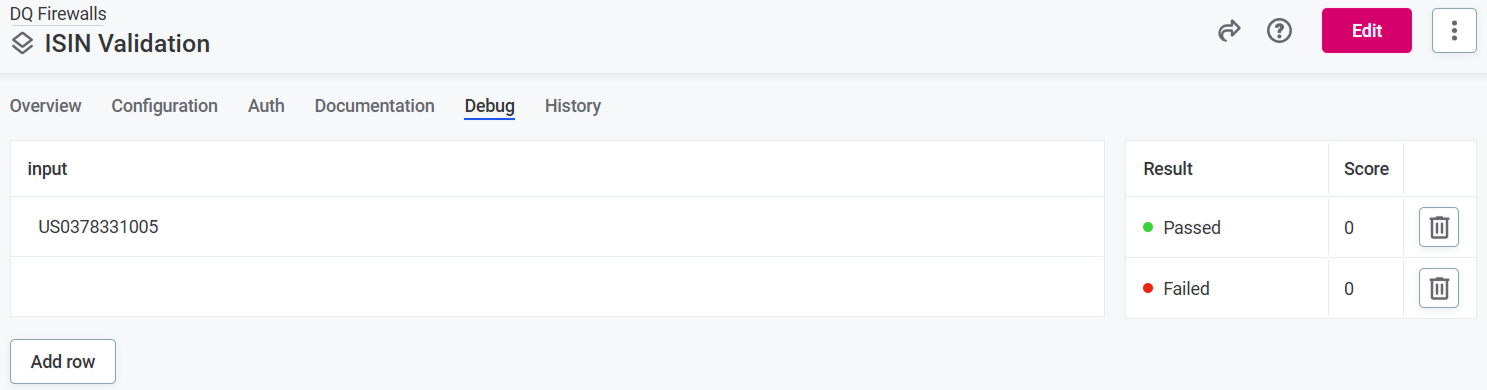
To see results for individual rules, select a result in the Results column to open sidebar with the information.

Make API calls to DQ Firewalls
Communication with DQ Firewalls is done via API calls that require proper authentication and formatting.
Find API documentation
API documentation is found on the firewall Documentation tab. The tab contains:
-
Complete API documentation
-
Example requests and responses
-
Request structure that you can copy to use in your API calls.
Authenticate
Each request sent to the firewall API must include an authentication header.
Two authentication methods are supported:
-
OpenID Connect (recommended)
OpenID Connect
Authorization uses the format: Bearer <OpenID Connect JWT> (Bearer <access_token>).
To use OpenID Connect:
-
Obtain a JWT Access token from the identity provider (Keycloak).
-
Include this token in your requests.
The token contains information about the username and roles assigned to the user. ONE checks this information against the firewall configuration during authorization.
Get the access token
To acquire the token, you need to know the Keycloak client credentials and realm.
The client has to be OpenID Connect type and must have Direct access grants enabled.
| The access token has usually an expiration period. Expired tokens are rejected, so refresh tokens periodically. |
Get the access_token using the POST request below.
POST requestcurl --request POST \
--url https://<KEYCLOAK_HOST>/auth/realms/<MY_REALM>/protocol/openid-connect/token \
--header 'Content-Type: application/x-www-form-urlencoded' \
--data grant_type=password \
--data username=my_user \
--data password=my_user_password \
--data client_id=my-keycloak-client \
--data client_secret=my-keycloak-client-secret{
"access_token": "eyJhbGciOiJSUzI1NiIsInR5cCI...truncated...gOjnHf3E5GvmmlIhBNHW7Zrax31iFDY0-TzA",
"expires_in": 300,
"refresh_expires_in": 1800,
"refresh_token": "eyJhbGciOiJIUzI1NiIsI...truncated...rOxikwdtQZHgGp5pnSuCv0GzeXWWcH-E",
"token_type": "Bearer",
"not-before-policy": 0,
"session_state": "cce33257-d3a4-4900-8db1-d508f8c4106d",
"scope": "profile email"
}Use the token for authorization
Use the access_token value from the response in your authorization header.
In this example, you would use the following for authorization: Bearer eyJhbGciOiJSUzI1NiIsInR5cCI…truncated…gOjnHf3E5GvmmlIhBNHW7Zrax31iFDY0-TzA.
For more details see Keycloak documentation and OpenID Connect specification.
Basic authentication
| Not recommended for production use due to performance and security concerns. |
Call the API using user credentials. During authorization, ONE requests the client access token from the identity provider (Keycloak) and uses the included claims to check if the client is allowed to call the service.
Authorization uses the format: Basic <base64 encoded username:password>.
Example: Authorization: Basic ZHFmOnNlY3JldA==.
Limitations
-
Performance issues: Each request requires verification via the identity provider (Keycloak). This adds round-trip delay to each request and puts a lot of load on the identity provider itself.
-
Security concerns:
-
Requires direct access to user credentials.
-
Credentials are only encoded (not encrypted) in requests. Using TLS is mandatory.
-
A credentials leak can compromise other systems.
-
Make GraphQL API calls
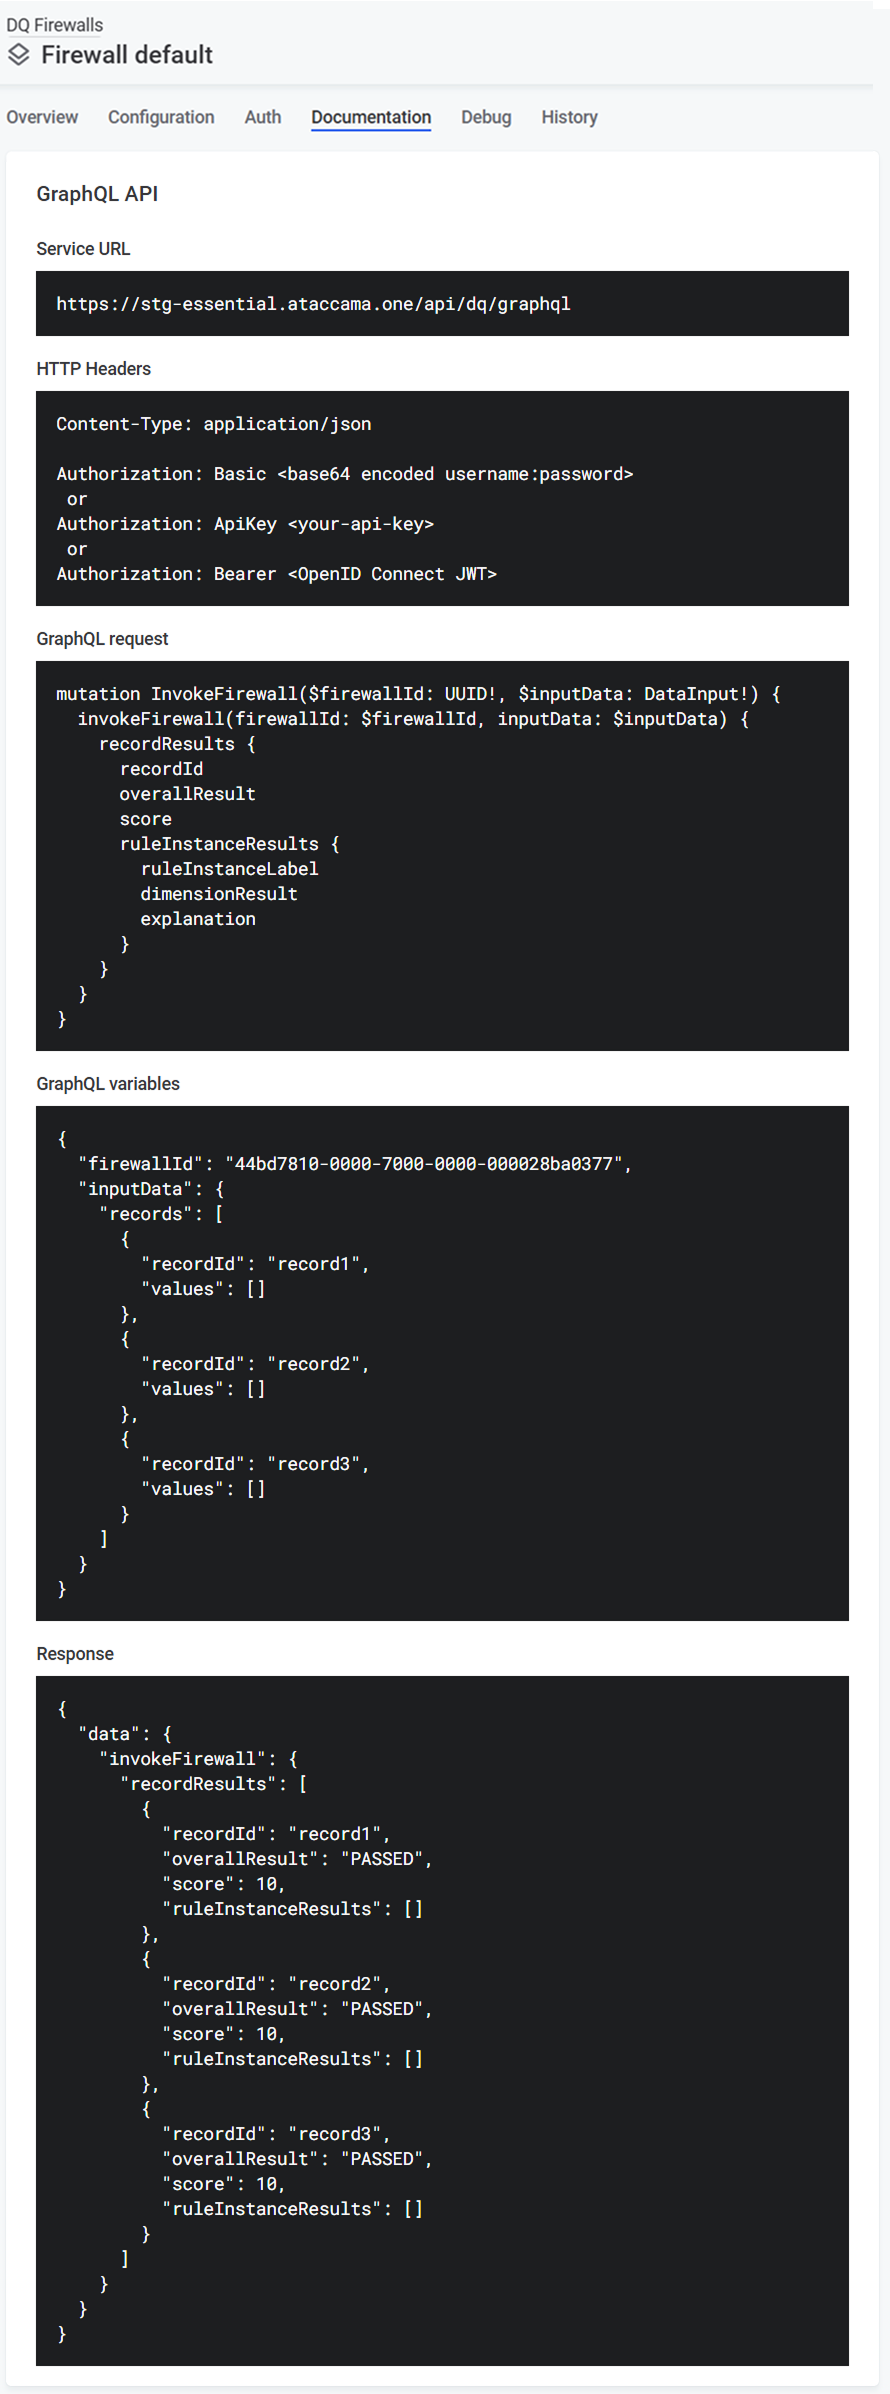
The format of the GraphQL request elements expected by the firewall and the sample response is provided on the firewall Documentation tab:
-
Service URL: The URL which can be used to invoke the actual API of the service. This includes the Service id generated when you create the firewall.
-
HTTP headers: Template headers to be used in your API call according to your chosen authentication method.
-
GraphQL request: Example request which you can copy to use in your API call to evaluate data quality according to your configured DQ Firewall.
-
GraphQL variables: Example GraphQL variables which you can copy to use in your API call to evaluate data quality according to your configured DQ Firewall. It contains list of records sent to the firewall:
-
recordId(optional): A record identifier used for easier pairing with responses. -
values: List of placeholders for input values.The placeholders are generated based on the number and data type of the input attributes specified on the firewall Configuration tab. For example, for a firewall containing two input attributes of the STRING and DATE data type, the list of values looks as follows:
"values": [
            "String input attribute example value",
            "2025-04-08"
          ]
Replace the placeholders with the actual values, in the correct order and correct formats. See Value formats for API requests.
-
-
Response: Example of the response structure. The response structure is generated based on the DQ rules applied to input attributes on the firewall Configuration tab.
Value formats for API requests
When making API requests, provide values in the value field in the correct format based on the input attribute data type:
-
String:
"string" -
Date:
"2023-08-23" -
Integer:
"12345" -
Boolean:
"true" -
Datetime:
"2023-08-23T12:11:48.865Z" -
Long:
"12345" -
Float:
"123.456"
The correct order is shown in the Request format on the Documentation tab.
Results
Results are available in the API response only. No results or any of the actual data are being retained by ONE.
You can see statistics, such as the number of records that passed and failed the firewall, on the Overview tab.
What do results include
The results include the following information for each record:
-
recordId: Record identifier as specified in the request. -
overallResult: Overall result of DQ evaluation (PASSEDorFAILED).The result is PASSEDonly if the record passes all DQ rules applied to it. -
score: Score shows the combined score for allruleInstanceResults. -
ruleInstanceResults: Results of all DQ rules applied to the record attributes:-
ruleInstanceLabel: Rule label, as defined when applying the rule to the attribute. -
overallResult: Rule result (PASSEDorFAILED). -
dimensionResult: Rule dimension result. The result depends on the dimension to which the rule belongs. -
explanation: Rule explanation, as defined in the rule implementation.
-
{
  "data": {
    "invokeFirewall": {
      "recordResults": [
        {
          "recordId": "record1",
          "overallResult": "PASSED",
          "score": 10,
          "ruleInstanceResults": [
            {
              "ruleInstanceLabel": "AI Rule Positive Integer",
              "overallResult": "PASSED",
              "dimensionResult": "VALID",
              "explanation": "explanation"
            },
            {
              "ruleInstanceLabel": "Non-empty string field",
              "overallResult": "PASSED",
              "dimensionResult": "NOT COMPLETE",
              "explanation": "explanation"
            }
          ]
        },
      ]
    }
  }
}
Was this page useful?