
Microsoft OneDrive Storage Connection
To connect to Microsoft OneDrive Storage, you must register ONE in the Microsoft Azure Portal as a web application and create a client secret. For more information about how to do this, refer to the official Microsoft documentation, article Register an Application. Currently, you can only use a Microsoft OneDrive Storage connection to work with CSV and Microsoft Excel files.
| You can follow this guide to connect to Microsoft SharePoint as well. |
Prerequisites
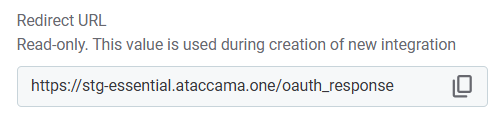
To set up the connection in Microsoft Azure Portal, you need to provide the redirect URL for ONE. The value you need to use can be found in the Redirect URL field when configuring the connection Credentials in ONE.
Create a source
To connect to Microsoft OneDrive:
-
Navigate to Catalog > Sources.
-
Select Create.
-
Provide the following:
-
Name: The source name.
-
Description: A description of the source.
-
Deployment (Optional): Choose the deployment type.
You can add new values if needed. -
Stewardship: The source owner and roles. For more information, see Stewardship.
-
-
Save your changes to proceed.
| You do not always need to create a new data source. You can also add connections to existing sources. |
Add a connection
-
Select Add Connection.
-
In Select connection type, choose File system > OneDrive Storage.
-
Provide the following:
-
Name: A meaningful name for your connection. This is used to indicate the location of catalog items.
-
Description (Optional): A short description of the connection.
-
Drive ID (Optional): If you have multiple drives and you want to limit the connection to a specific drive, enter the ID of the drive you want to connect to.
-
Add credentials
| Only OAuth Credentials are supported. |
-
Select Add Credentials.
-
Provide the following:
-
Name (Optional): A name for this set of credentials.
-
Description (Optional): A description for this set of credentials.
-
Redirect URL: This is required in Microsoft Azure Portal, as explained in Prerequisites. This field is provided for informational purposes only.
-
Client ID: The
Application (client) ID. You can find it on the Overview pane of your registered app in Azure.For more information, see the official Microsoft documentation, Register an application.
-
Client secret: The
client secret.For information about how to add and access the
client secretfor this connection, see the official Microsoft documentation, Add a client secret. -
Tenant ID: The unique identifier (GUID) for your Microsoft Azure Active Directory (AAD) tenant. Only users from a specific Azure AD tenant can sign in to the application.
-
Refresh token valid till (Optional): Manually specify the token validity period.
-
Refresh token: The OAuth 2.0 refresh token. If provided, the application can authenticate after the access token has expired without having to prompt the user for credentials.
Select Generate to create a new token.
This opens a Microsoft login screen in your browser. Log in to your Microsoft Account and confirm access. Once you do this, the expiration date of the refresh token is updated in Refresh token valid till.
-
-
Set the credentials to be used as default (Set as default).
One set of credentials must be set as default for each connection. Otherwise, DQ evaluation fails and previewing data in the catalog is not possible.
Add write credentials
Write credentials are required if you want to export data to this source.
To configure these, in Write credentials, select Add Credentials and follow the corresponding step depending on the chosen authentication method (see Add credentials).
| Make sure to set one set of write credentials as default. Otherwise, this connection isn’t shown when configuring data export. |
Test the connection
To test and verify whether the data source connection has been correctly configured, select Test Connection.
If the connection is successful, continue with the following step. Otherwise, verify that your configuration is correct and that the data source is running.
Save and publish
Once you have configured your connection, save and publish your changes. If you provided all the required information, the connection is now available for other users in the application.
In case your configuration is missing required fields, you can view a list of detected errors instead. Review your configuration and resolve the issues before continuing.
Next steps
You can now browse and profile assets from your Microsoft OneDrive connection.
In Catalog > Sources, find and open the source you just configured. Switch to the Connections tab and select Import or run Term detection.
Or, to import or profile only some assets, select Browse on the Connections tab. Choose the assets you want to analyze and then the appropriate profiling option.
Was this page useful?