
Work with Reference Data Records
Daily operations for adding, editing, filtering, and viewing reference data records.
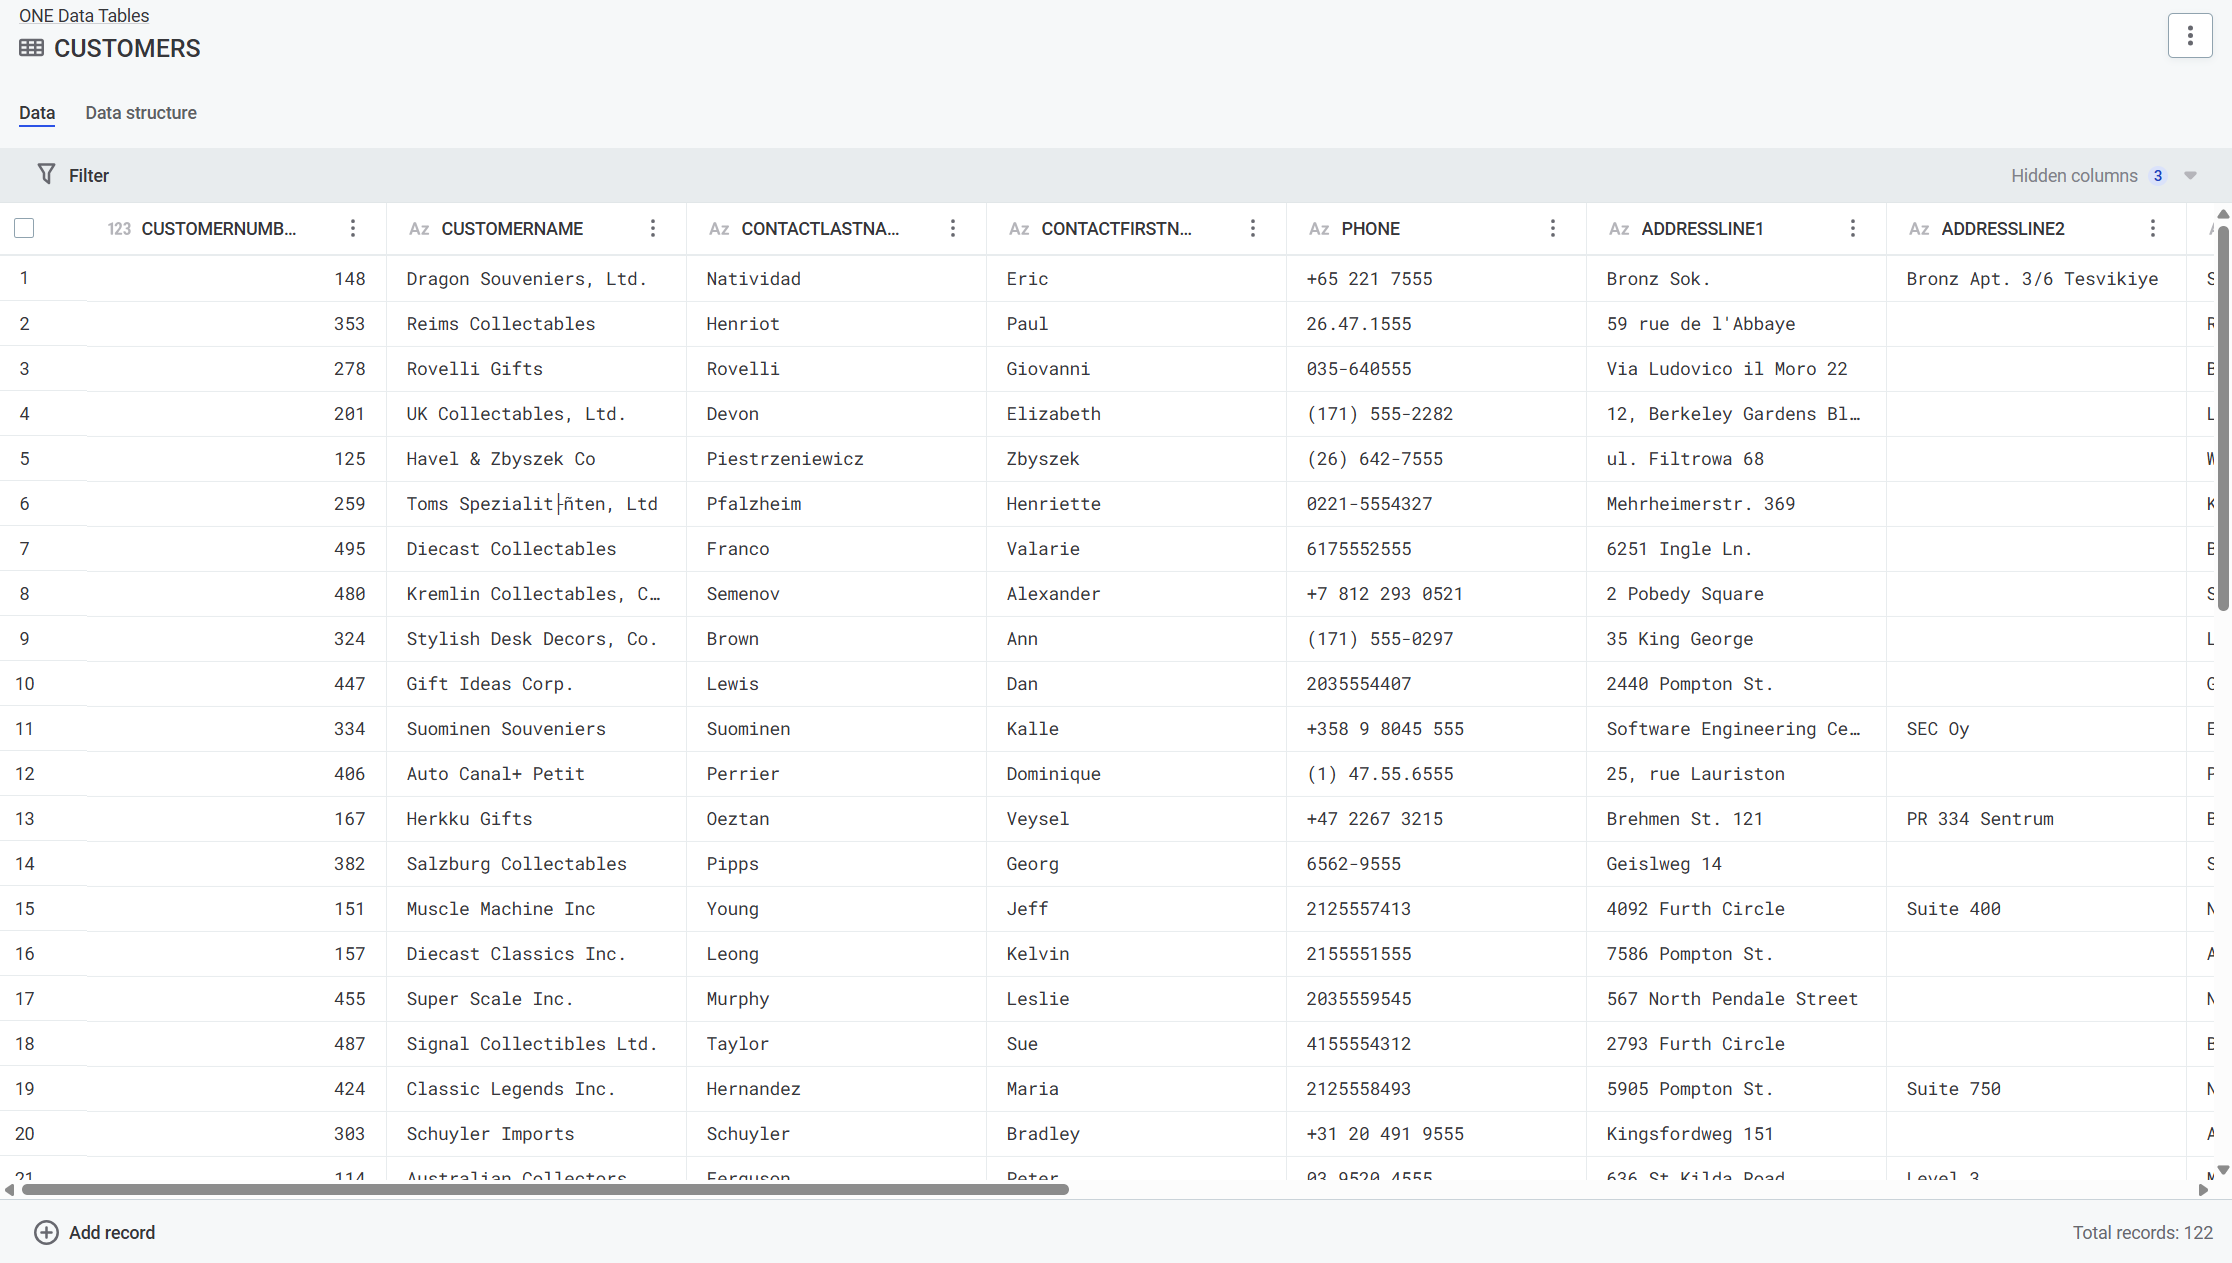
Add records
-
Open your table > Data tab.
-
Select Add record.
-
Provide information in the available columns.
-
Press Enter.
Result: New record added in New draft state, ready for publishing.
Edit records
-
Select the field you want to change.
-
Enter the new value.
-
Press Enter.
Result: Record switches to Changed draft state, ready for publishing.
Copy and paste data
Streamline data entry with enhanced copy-paste capabilities. You can copy values from external sources like spreadsheets and paste them directly into table cells, significantly reducing manual data entry effort.
Copy and paste single values
-
Copy a value from an external source (Excel, text editor, etc.).
-
Select the target cell in your reference data table.
-
Paste the value using Ctrl+V or right-click > Paste.
-
Press Enter to confirm the change.
Copy and paste multiple values
-
Select and copy multiple cells or rows from an external application like Excel.
-
Select the starting cell in your reference data table where you want to paste the data.
-
Paste the values using Ctrl+V.
-
The system automatically populates the adjacent cells with the copied data.
-
Press Enter to confirm all changes.
Supported features
The enhanced copy-paste functionality supports:
-
Single and multiple cell operations - Paste individual values or entire data ranges.
-
Data from external applications - Works with Excel, Google Sheets, text editors, and other applications.
-
Automatic data type handling - The system automatically converts and validates data types during paste operations.
-
Batch operations - Paste multiple rows of data at once for faster data entry.
Note: If pasted data doesn’t match the expected data type for a column, the system will show validation errors that you can correct before saving.
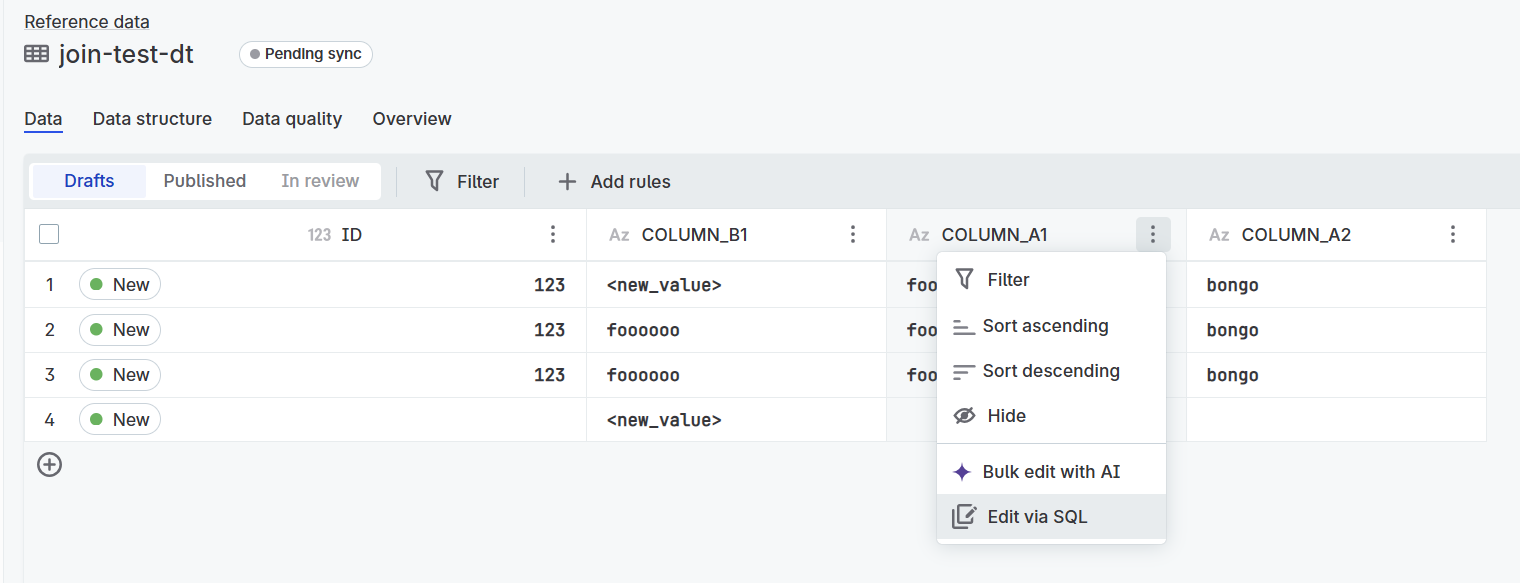
Edit columns with SQL
For advanced users comfortable with SQL syntax, you can perform bulk column updates using SQL statements directly in the interface.
Access SQL column editing
-
In the Data tab, right-click on any column header or select the three-dot menu for the column.
-
Select Edit via SQL from the context menu.
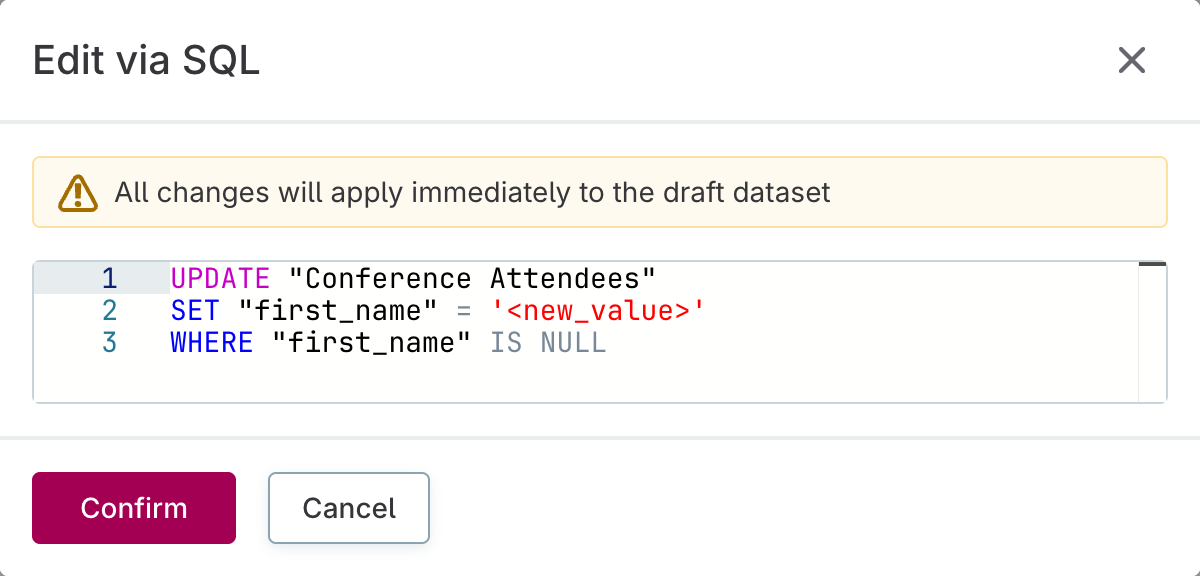
Use the SQL editor
-
Modify the SQL statement according to your requirements.
-
Review the warning that all changes will apply immediately to the draft dataset.
-
Select Confirm to execute the SQL statement or Cancel to discard changes.
| All SQL changes apply immediately to the draft dataset. Make sure to review your SQL statement carefully before confirming the execution. |
Delete records
-
Point to the record header row.
-
Select three dots menu > Delete.
Result: Record marked as To be deleted, ready for publishing.
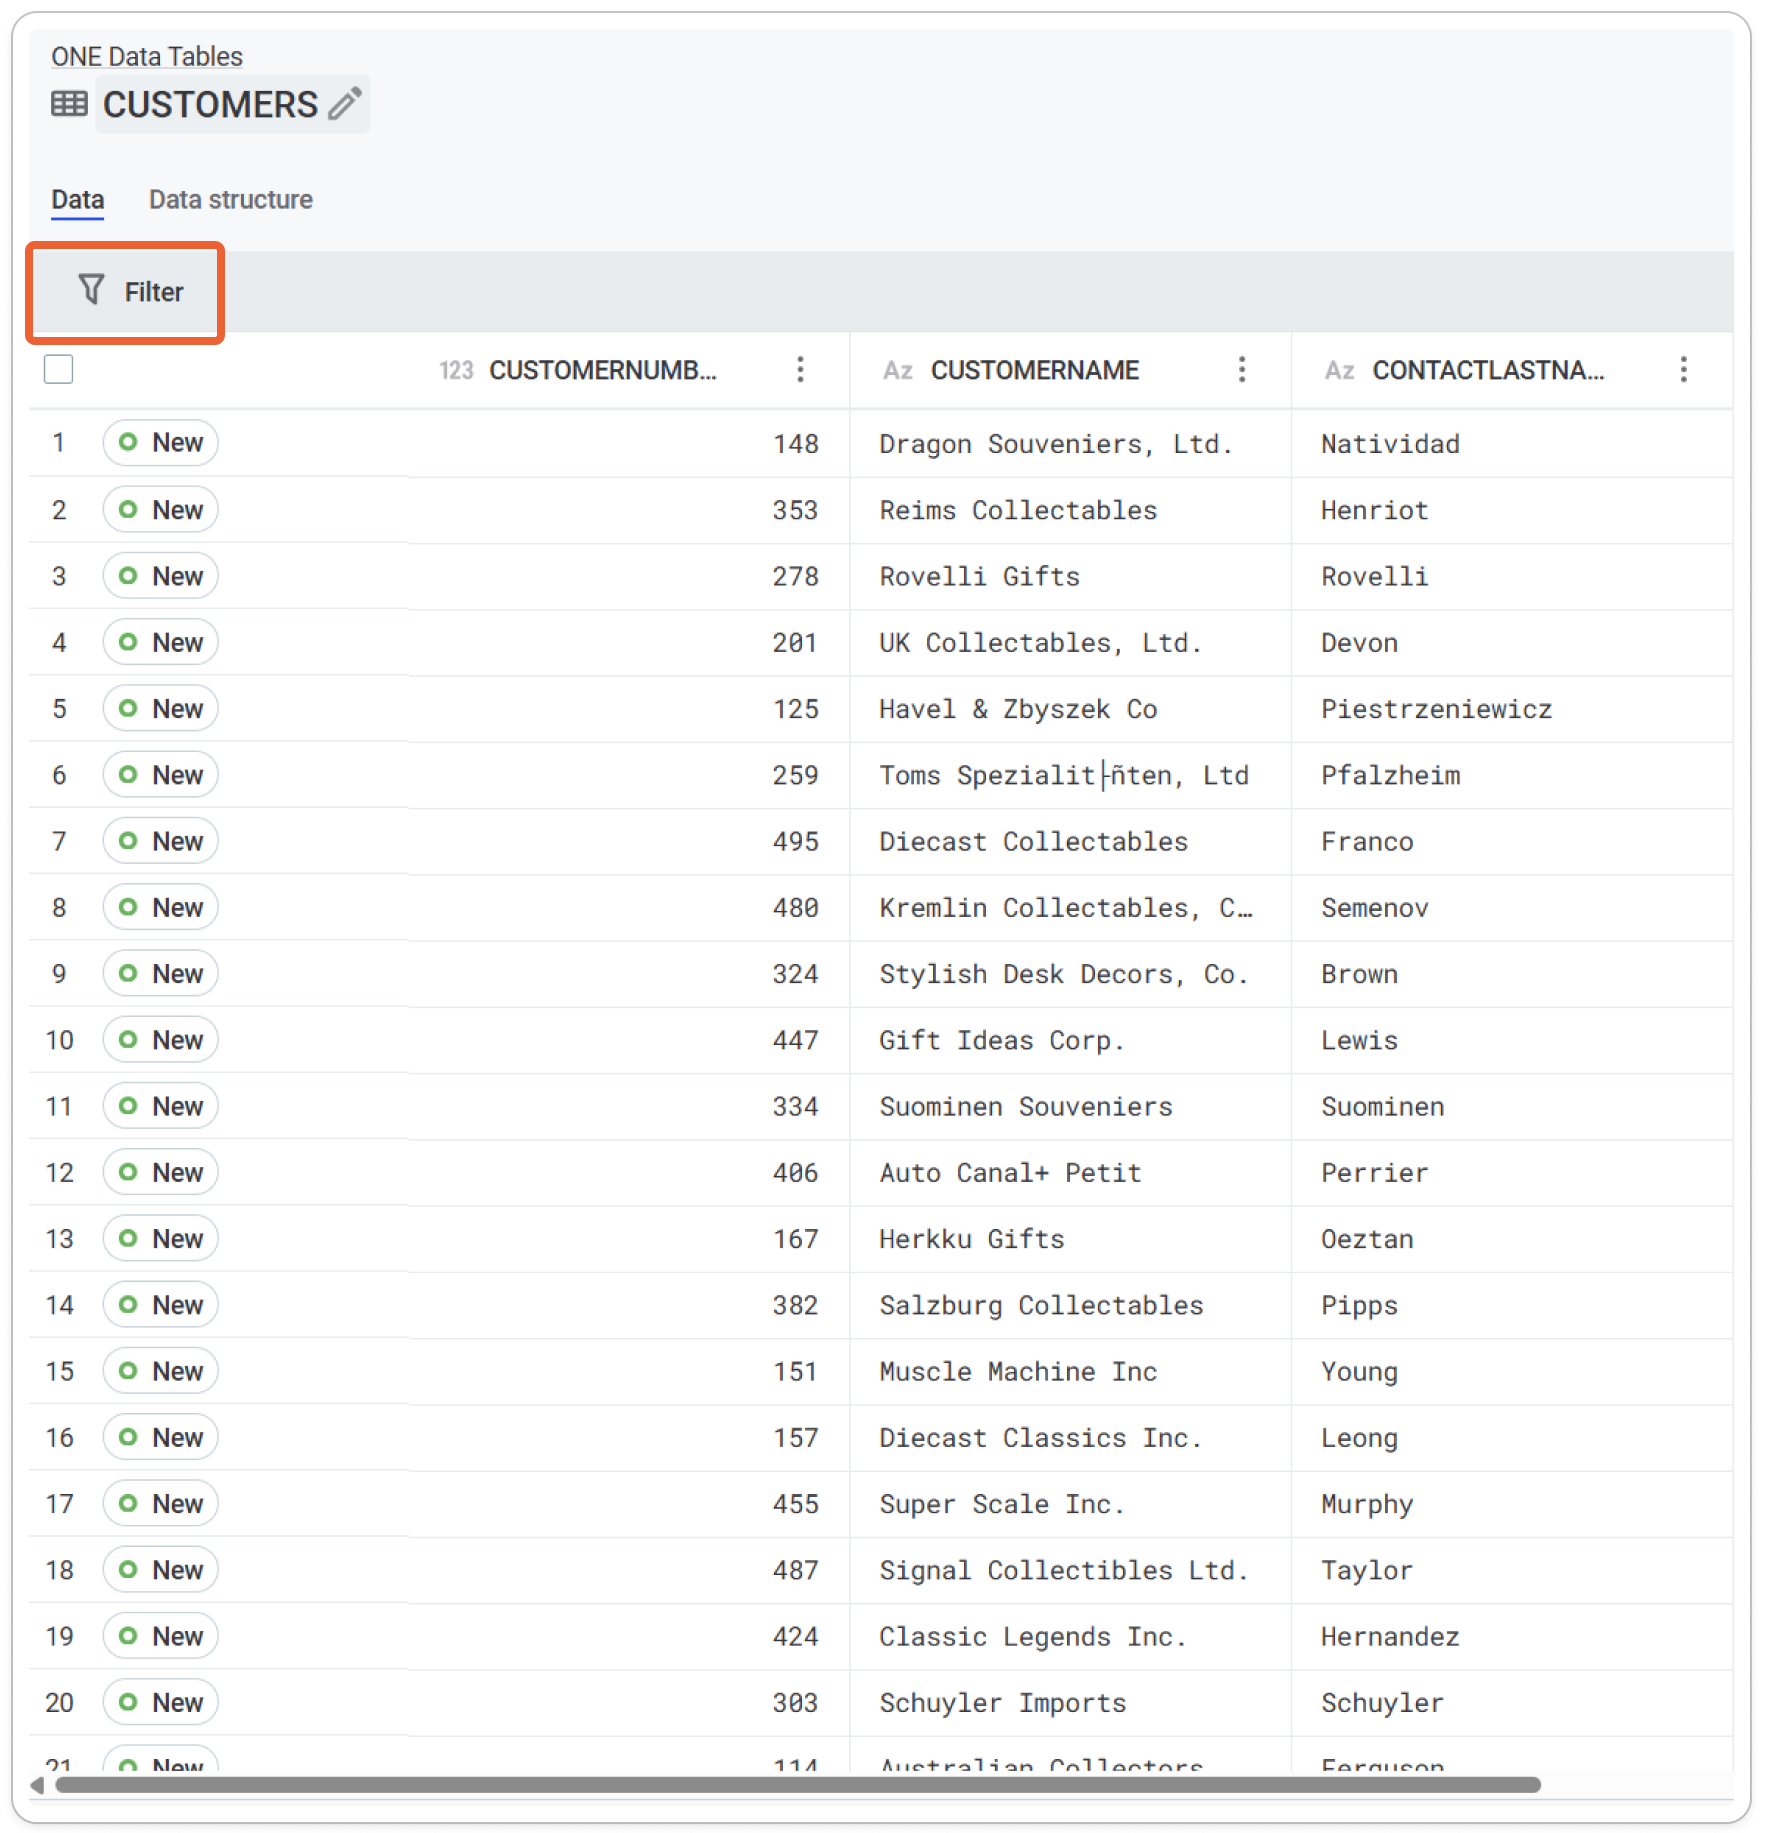
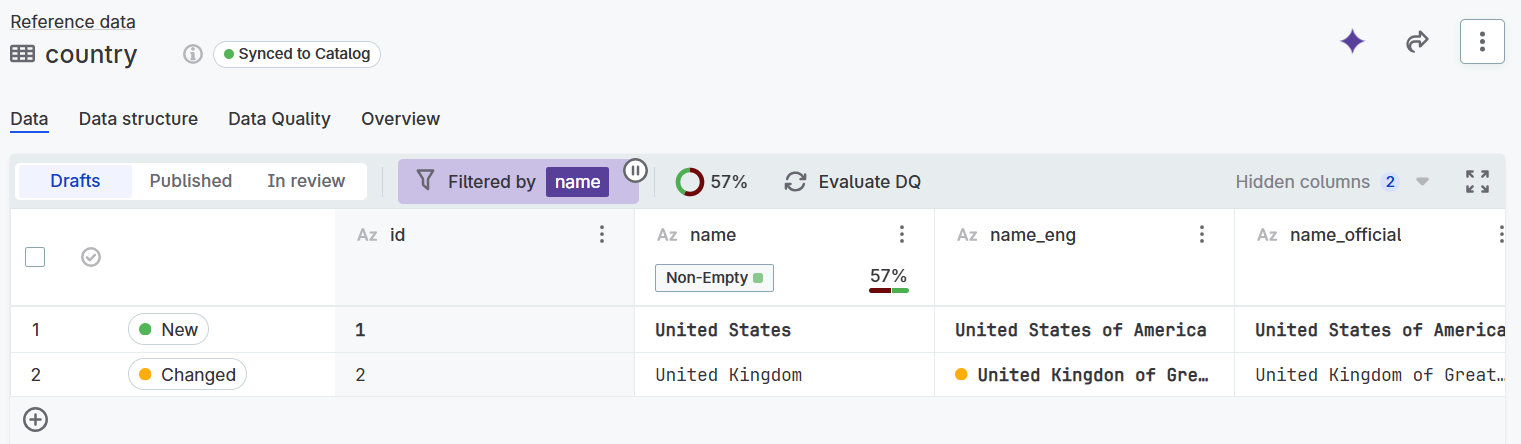
Filter records
You can filter your data to find, analyze, and edit needed records.
Quick filter: - Right-click any column header > Filter (preselects that attribute)
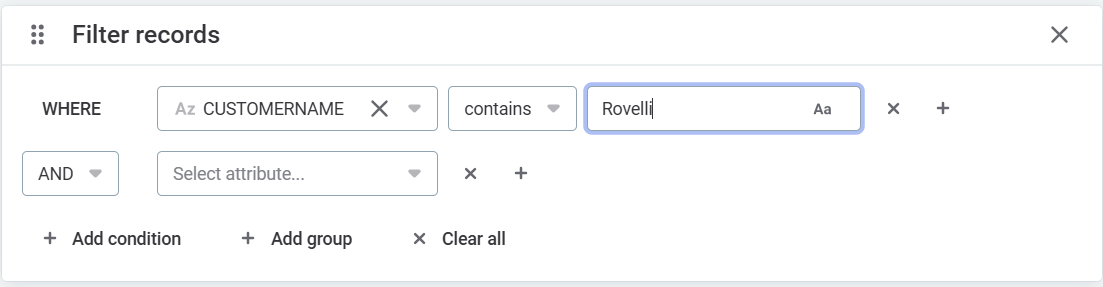
Advanced filter:
-
Select Filter on the Data tab
-
In the Filter records dialog, define the conditions of your filter:
-
Attribute: Select the attribute name.
-
Condition: Select the condition. The options available depend on the data type of the input attribute. Here are some of the most common ones:
-
String:
contains,begins with,ends with,is empty,is not empty,equal to,not equal to. -
Integer:
=,>,<,>=,⇐,!=,is empty,is not empty. -
Date:
equal to,not equal to,after,before,after or same as,before or same as,is empty,is not empty. -
Boolean:
is,is empty,is not empty. -
Expression: Enter the value against which the condition is checked.
-
-
Filters are applied as soon as you define the first condition. You can keep adding conditions (Add condition or the Plus option in the condition row) until you get the records you’re looking for.
Make sure you select the correct operator between conditions: AND or OR.
For more complex queries, you can aggregate several conditions into one to further refine the search results (Add group).
You can also clear all filters with Clear all.
Applied filters are listed above the table in the Filtered by section. You can select this to add or remove filters.
Select the Filter off (Pause) icon for an unfiltered view of the data. To resume, select the Filter on (Play) icon.
View record detail
You can view detailed information about a record, including an editable list of all attributes, record history, and state overview.
To view record details:
-
Point to a record in the header row.
-
In the three dots menu, select Detail.
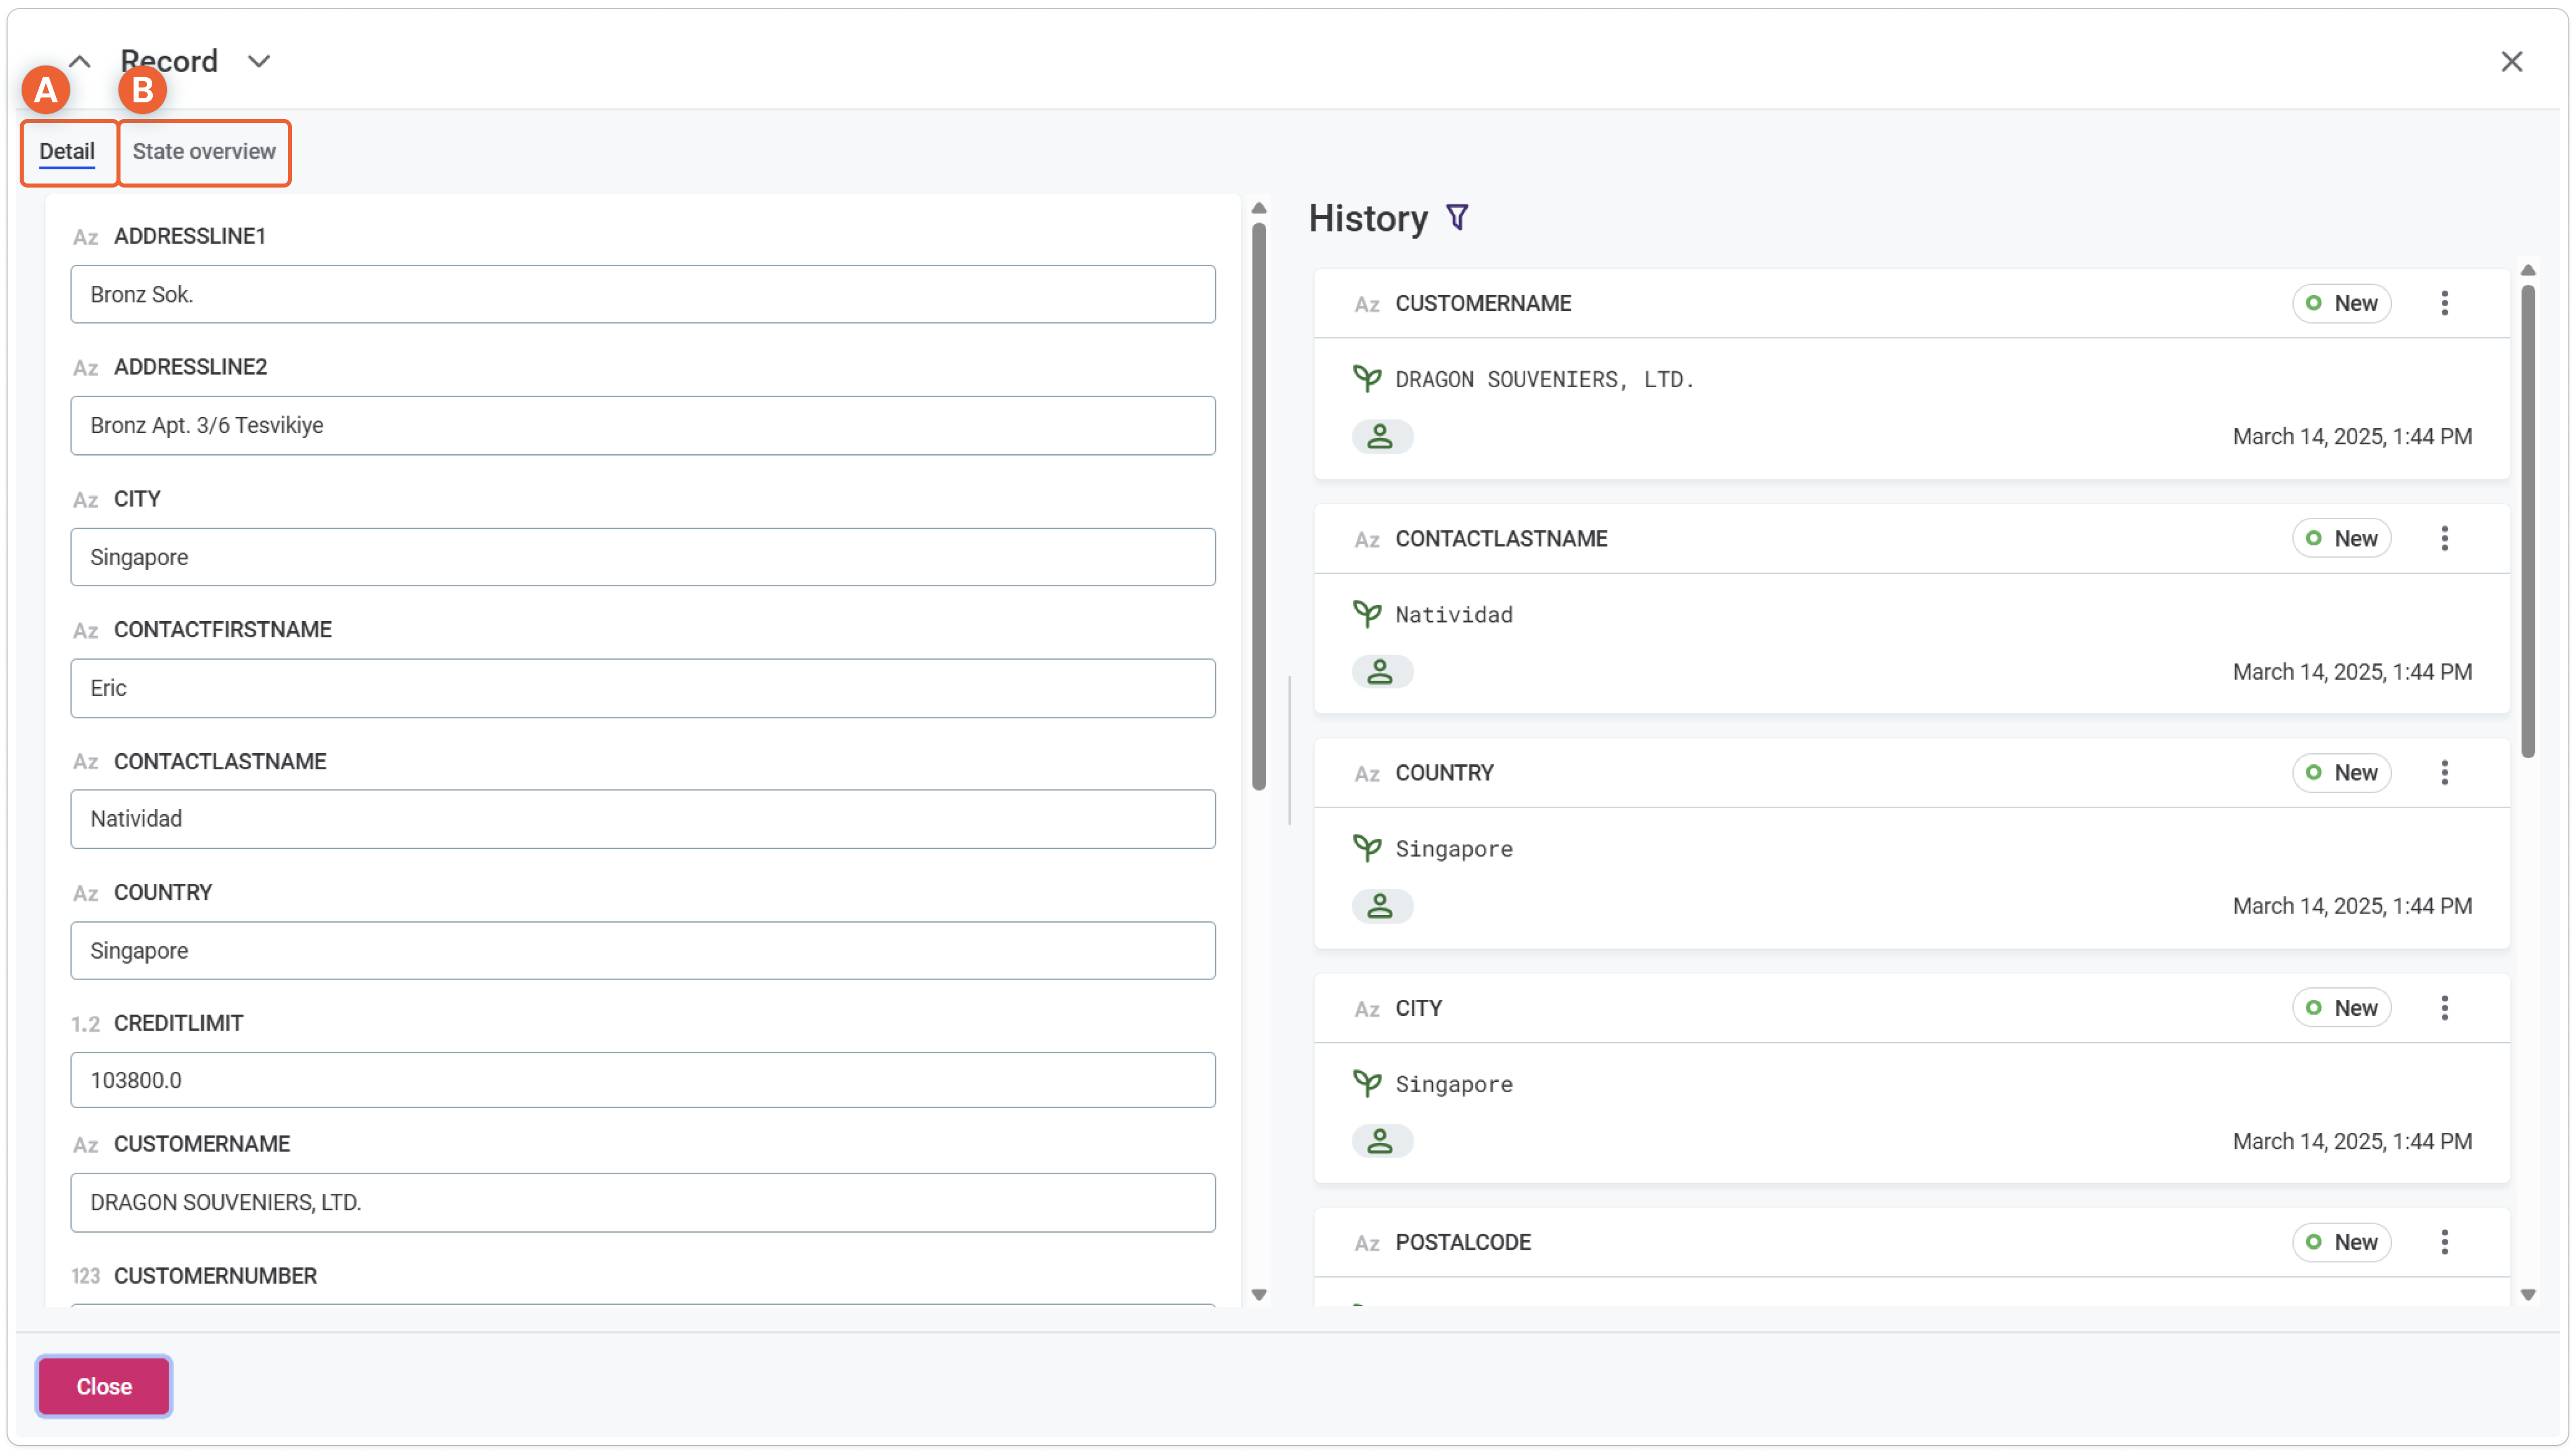
The Detail tab provides the following options:
-
Editable list of all attributes.
-
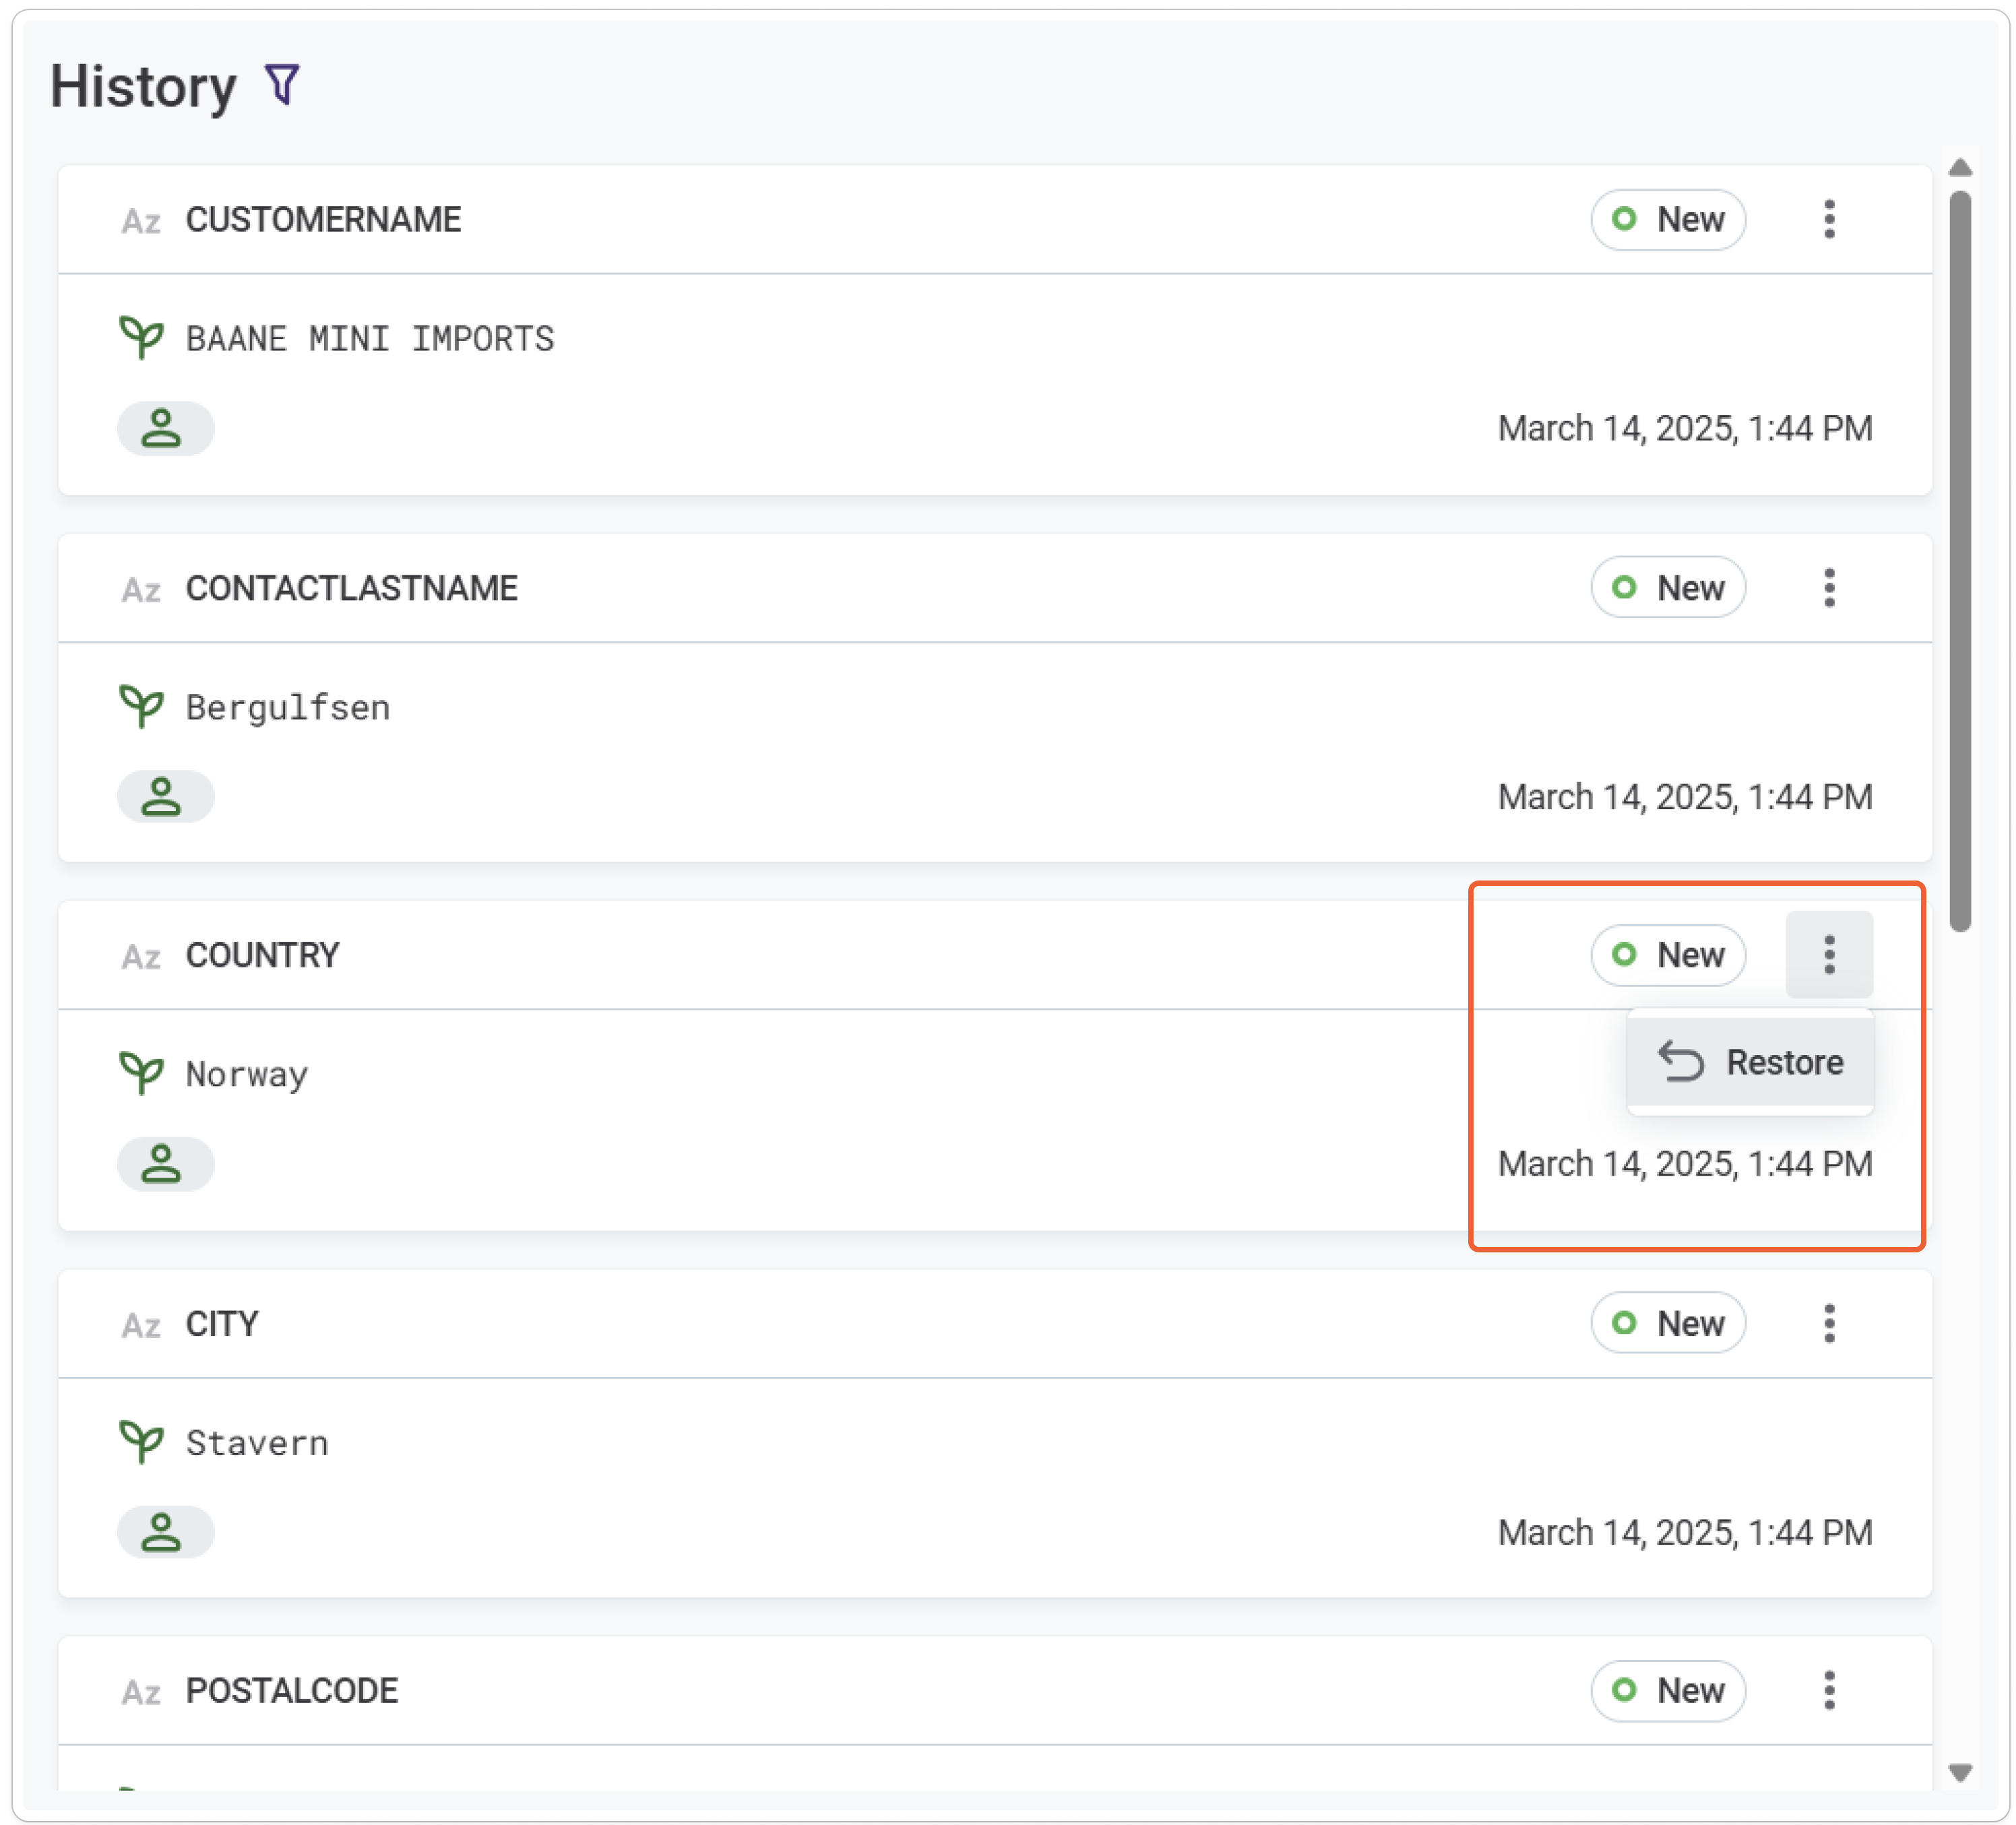
History: List of historical versions of the record.
To restore an older version of the record, select Restore from the three dots menu on the record version in the History list.
-
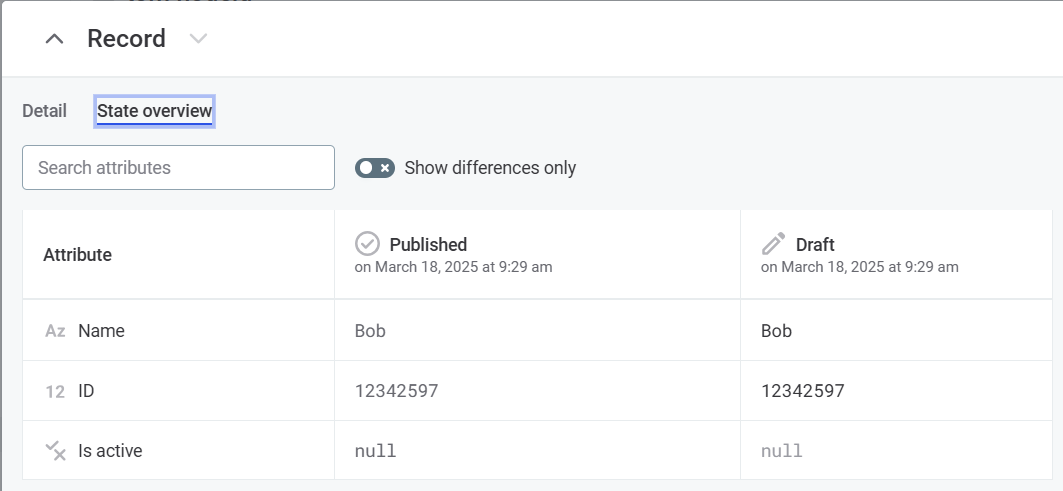
State overview tab.
Here you can find information about the state of record attributes.
Select Show differences only to only show attributes that are different in the published and draft versions.
+
Next steps
After making record changes:
-
Publish changes: Publish Your Data.
-
Export data to CSV: Export Reference Data Tables.
-
Use across platform: Work with Published Reference Data.
Was this page useful?